buttons JEEP GRAND CHEROKEE 2015 WK2 / 4.G User Guide
[x] Cancel search | Manufacturer: JEEP, Model Year: 2015, Model line: GRAND CHEROKEE, Model: JEEP GRAND CHEROKEE 2015 WK2 / 4.GPages: 717, PDF Size: 18.54 MB
Page 176 of 717
Battery Saver
To protect the life of your vehicle’s battery, load shedding
is provided for both the interior and exterior lights.
If the ignition is OFF and any door is left ajar for 10
minutes or the dimmer control is rotated all the way up
to the dome ON position for 10 minutes, the interior
lights will automatically turn off.
NOTE:Battery saver mode is cancelled if the ignition is
ON.
If the headlights remain on while the ignition is cycled
OFF, the exterior lights will automatically turn off after
eight minutes. If the headlights are turned on and left on
for eight minutes while the ignition is OFF, the exterior
lights will automatically turn off.
Front Map/Reading Lights — If Equipped
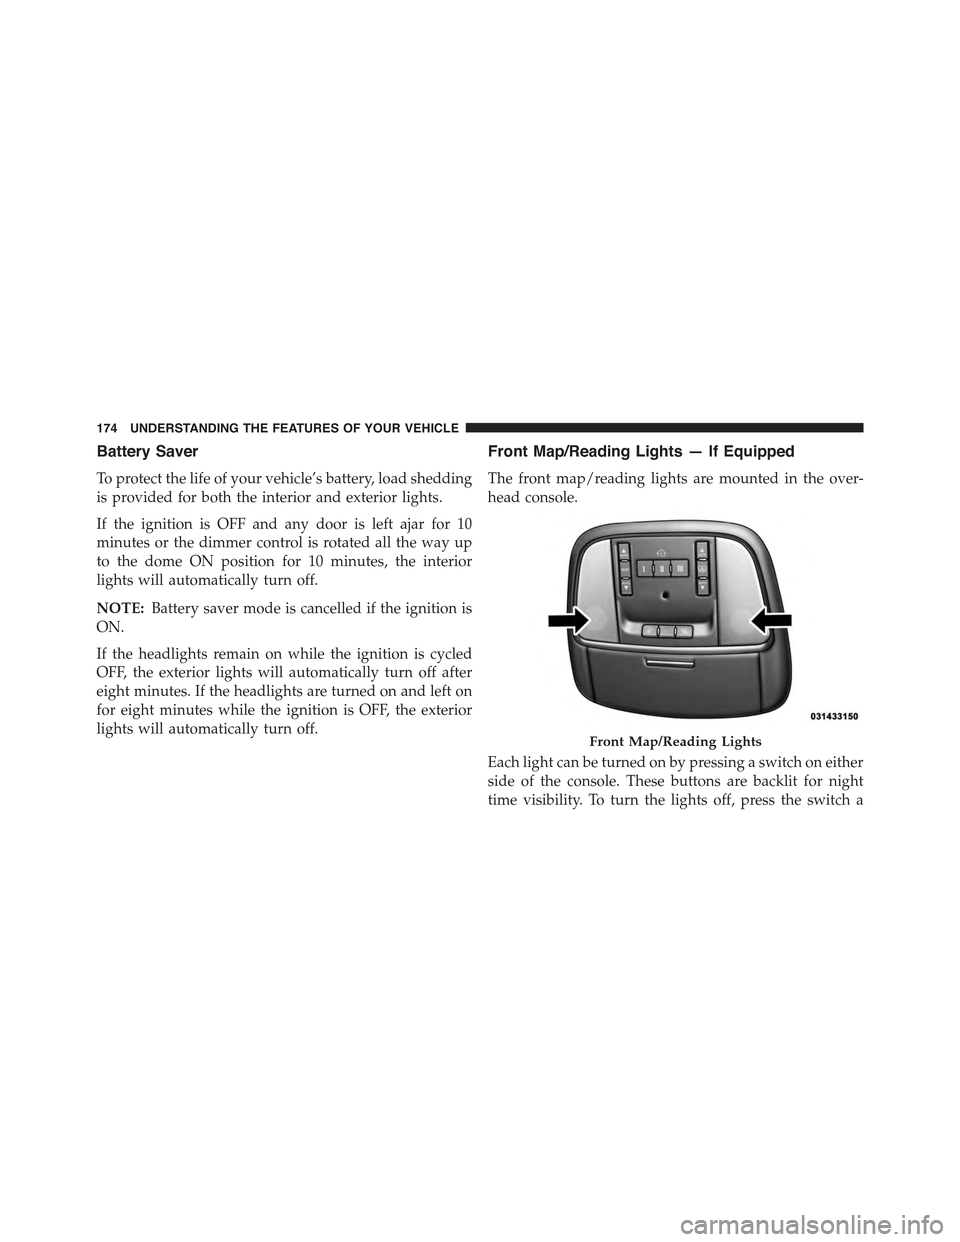
The front map/reading lights are mounted in the over-
head console.
Each light can be turned on by pressing a switch on either
side of the console. These buttons are backlit for night
time visibility. To turn the lights off, press the switch a
Front Map/Reading Lights
174 UNDERSTANDING THE FEATURES OF YOUR VEHICLE
Page 190 of 717
ELECTRONIC SPEED CONTROL — IF EQUIPPED
When engaged, the Electronic Speed Control takes over
accelerator operations at speeds greater than 25 mph
(40 km/h).
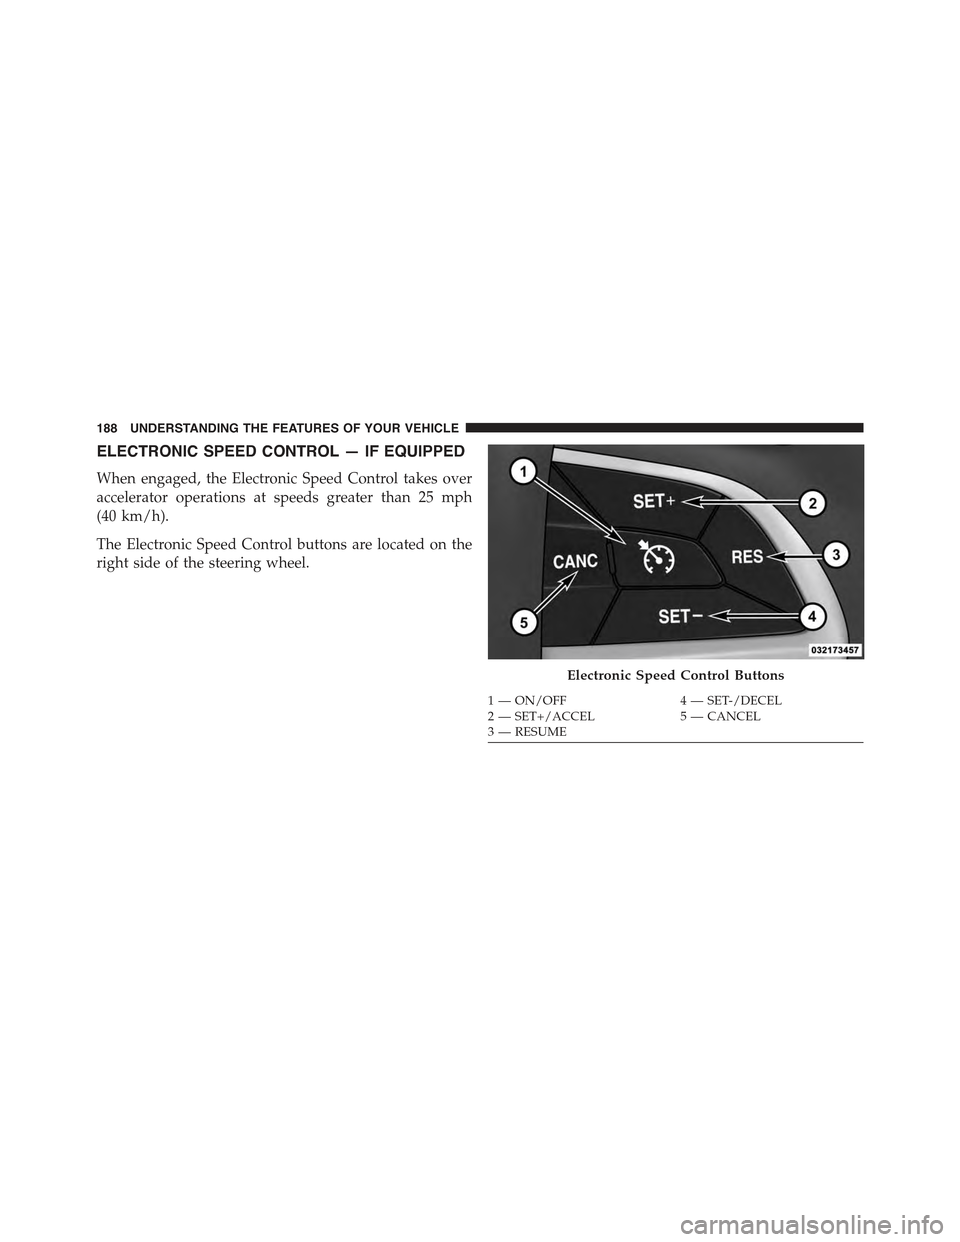
The Electronic Speed Control buttons are located on the
right side of the steering wheel.
Electronic Speed Control Buttons
1—ON/OFF4—SET-/DECEL2—SET+/ACCEL5—CANCEL3—RESUME
188 UNDERSTANDING THE FEATURES OF YOUR VEHICLE
Page 196 of 717
WARNING!(Continued)
You should switch off the ACC system:
When driving in fog, heavy rain, heavy snow, sleet,
heavy traffic, and complex driving situations (i.e., in
highway construction zones).
When entering a turn lane or highway off ramp;
when driving on roads that are winding, icy, snow-
covered, slippery, or have steep uphill or downhill
slopes.
When towing a trailer up or down steep slopes.
When circumstances do not allow safe driving at a
constant speed.
The Cruise Control system has two control modes:
•Adaptive Cruise Control mode for maintaining an
appropriate distance between vehicles.
•Normal (fixed speed) electronic speed control mode
for cruising at a constant preset speed. For additional
information, refer to “Normal (Fixed Speed) Cruise
Control Mode” in this section.
NOTE:Normal (fixed speed) electronic speed control
will not react to preceding vehicles. Always be aware of
the mode selected.
You can change the mode by using the Cruise Control
buttons. The two control modes function differently.
Always confirm which mode is selected.
194 UNDERSTANDING THE FEATURES OF YOUR VEHICLE
Page 197 of 717
Adaptive Cruise Control (ACC) Operation
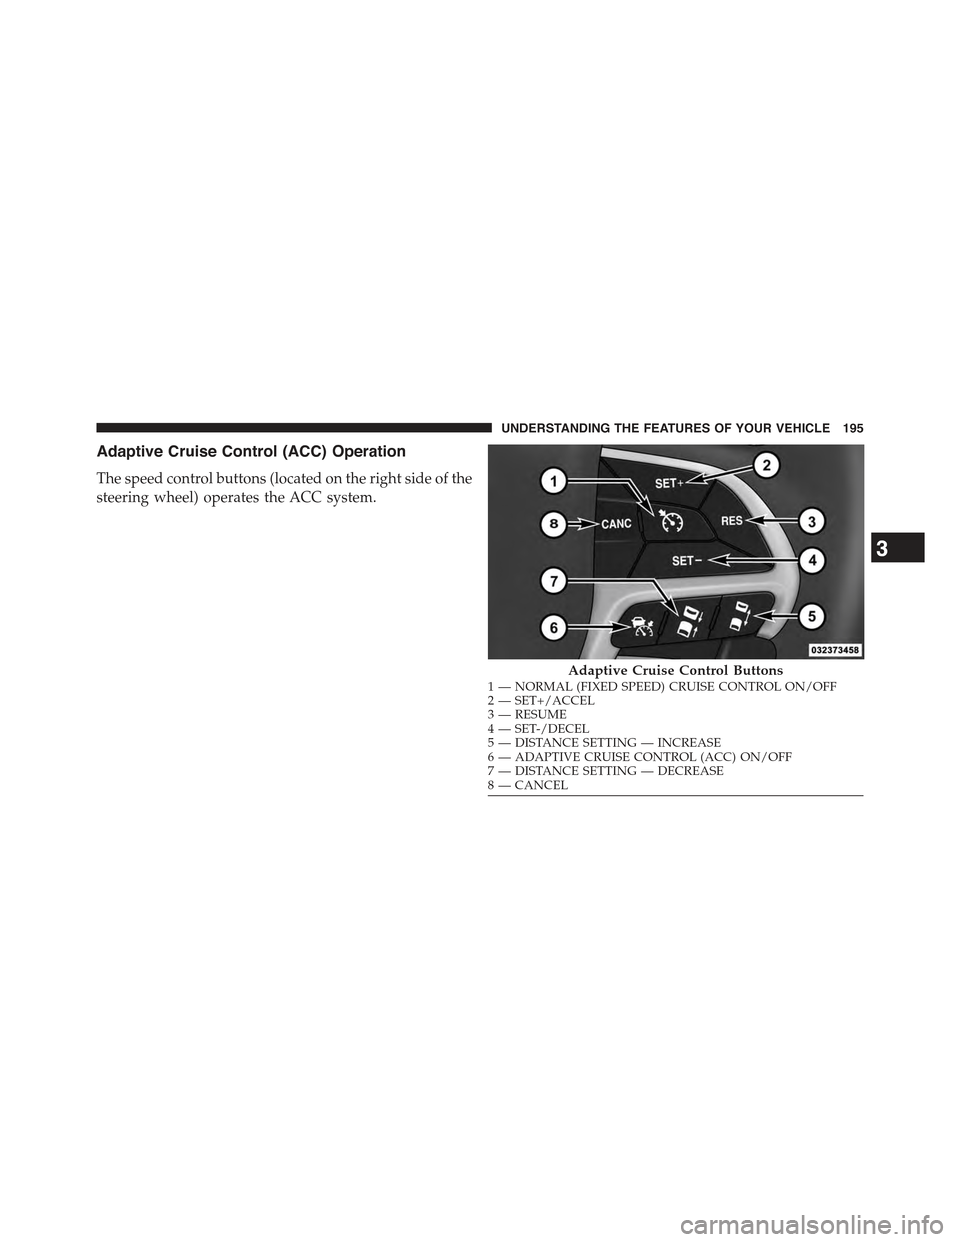
The speed control buttons (located on the right side of the
steering wheel) operates the ACC system.
Adaptive Cruise Control Buttons1—NORMAL(FIXEDSPEED)CRUISECONTROLON/OFF2—SET+/ACCEL3—RESUME4—SET-/DECEL5—DISTANCESETTING—INCREASE6—ADAPTIVECRUISECONTROL(ACC)ON/OFF7—DISTANCESETTING—DECREASE8—CANCEL
3
UNDERSTANDING THE FEATURES OF YOUR VEHICLE 195
Page 203 of 717
To Decrease Speed
While ACC is set, the set speed can be decreased by
pressing the SET-button.
The speed decrement shown is dependant on the chosen
speed unit of U.S. (mph) or Metric (km/h):
U.S. Speed (mph)
•Pressing the SET-button once will result ina1mph
decrease in set speed. Each subsequent tap of the
button results in a decrease of 1 mph.
•If the button is continually pressed, the set speed will
continue to decrease in 5 mph increments until the
button is released. The decrease in set speed is re-
flected in the DID.
Metric Speed (km/h)
•Pressing the SET-button once will result in a 1 km/h
decrease in set speed. Each subsequent tap of the
button results in a decrease of 1 km/h.
•If the button is continually pressed, the set speed will
continue to decrease in 10 km/h increments until the
button is released. The decrease in set speed is re-
flected in the DID.
NOTE:
•When you override and push the SET+button or
SET-buttons, the new Set Speed will be the current
speed of the vehicle.
•When you use the SET-button to decelerate, if the
engine’s braking power does not slow the vehicle
sufficiently to reach the set speed, the brake system
will automatically slow the vehicle.
3
UNDERSTANDING THE FEATURES OF YOUR VEHICLE 201
Page 248 of 717
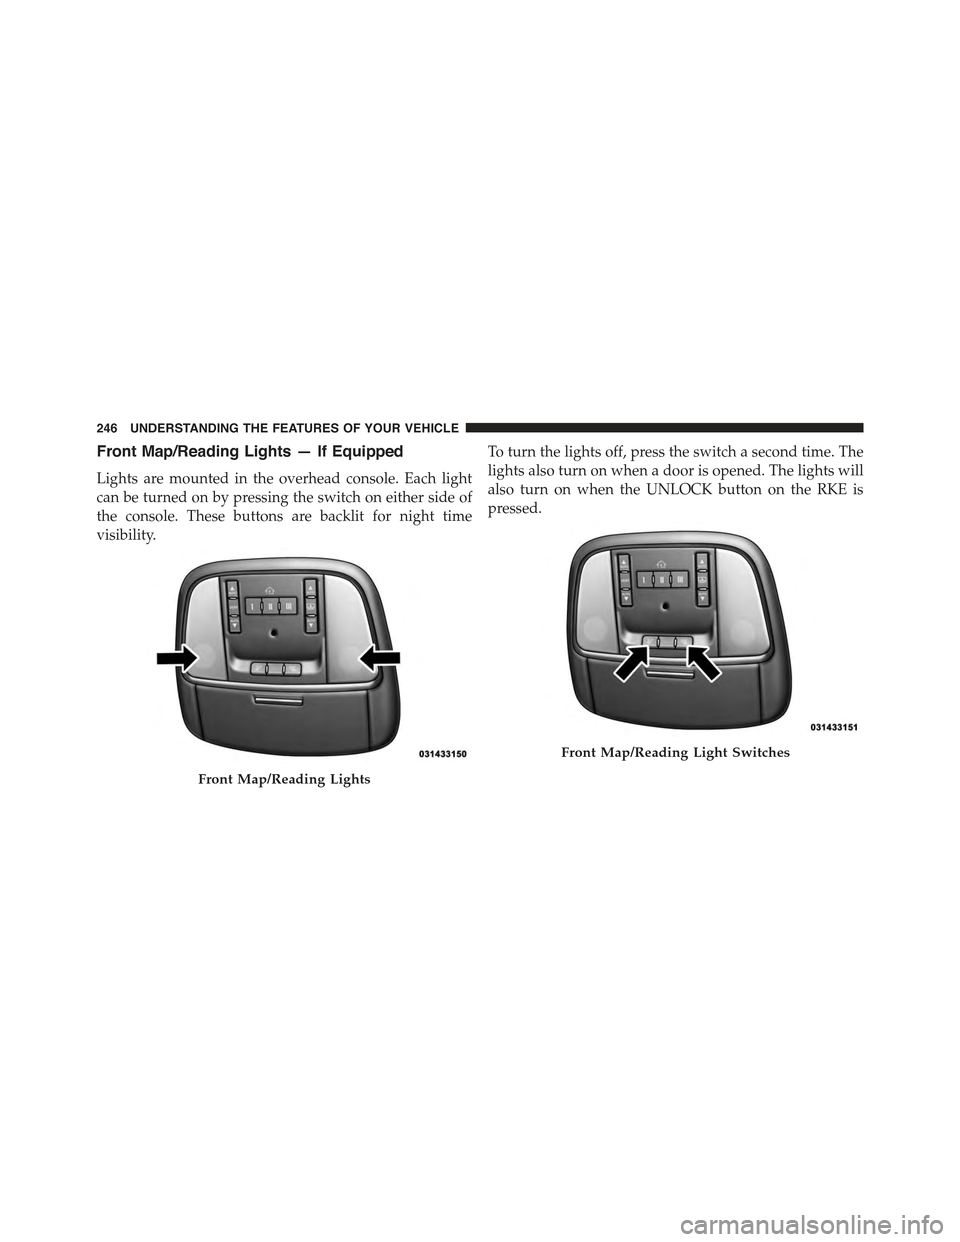
Front Map/Reading Lights — If Equipped
Lights are mounted in the overhead console. Each light
can be turned on by pressing the switch on either side of
the console. These buttons are backlit for night time
visibility.
To turn the lights off, press the switch a second time. The
lights also turn on when a door is opened. The lights will
also turn on when the UNLOCK button on the RKE is
pressed.
Front Map/Reading Lights
Front Map/Reading Light Switches
246 UNDERSTANDING THE FEATURES OF YOUR VEHICLE
Page 250 of 717
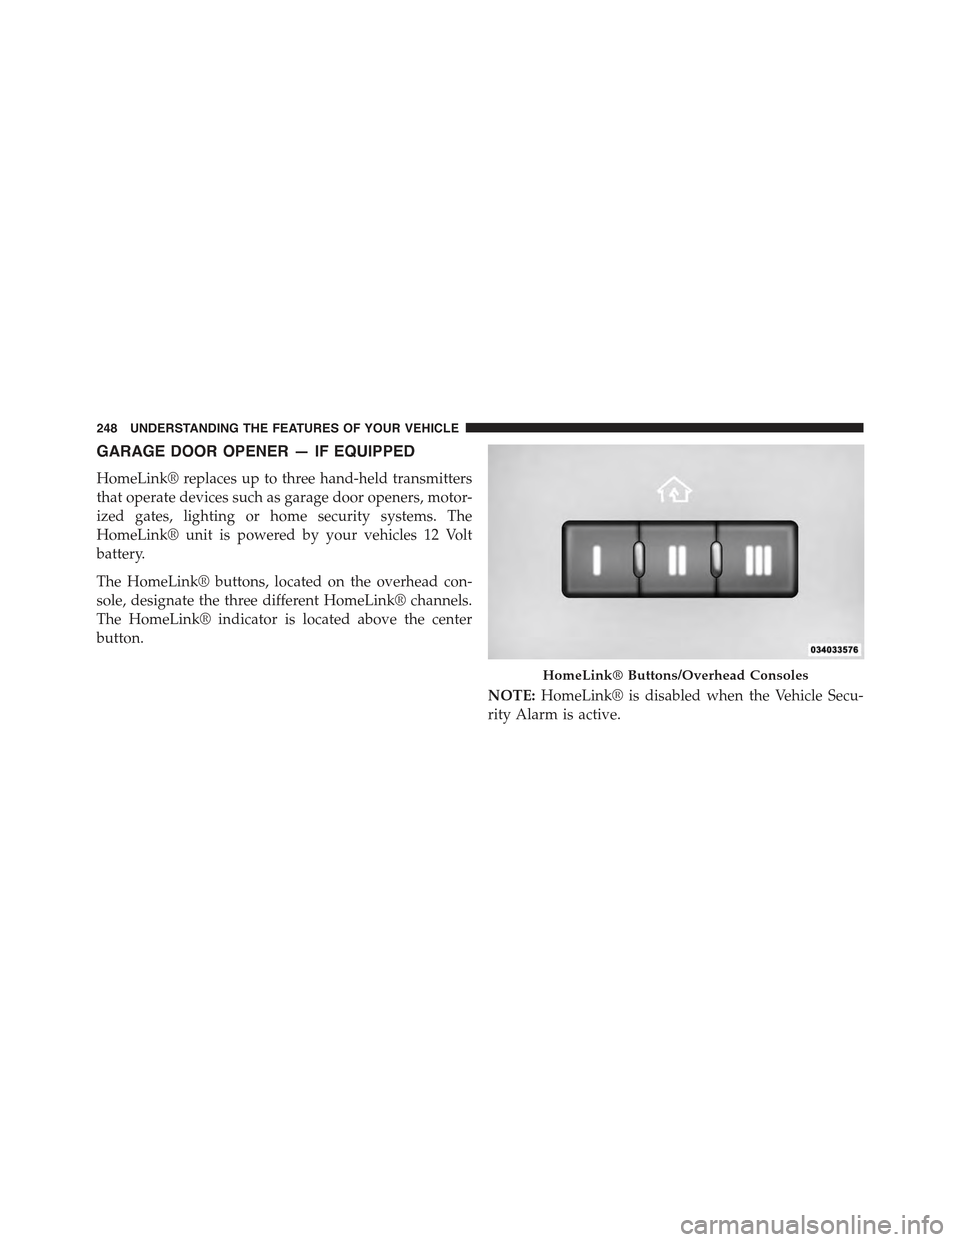
GARAGE DOOR OPENER — IF EQUIPPED
HomeLink® replaces up to three hand-held transmitters
that operate devices such as garage door openers, motor-
ized gates, lighting or home security systems. The
HomeLink® unit is powered by your vehicles 12 Volt
battery.
The HomeLink® buttons, located on the overhead con-
sole, designate the three different HomeLink® channels.
The HomeLink® indicator is located above the center
button.
NOTE:HomeLink® is disabled when the Vehicle Secu-
rity Alarm is active.
HomeLink® Buttons/Overhead Consoles
248 UNDERSTANDING THE FEATURES OF YOUR VEHICLE
Page 251 of 717
Before You Begin Programming HomeLink®
Be sure that your vehicle is parked outside of the garage
before you begin programming.
For more efficient programming and accurate transmis-
sion of the radio-frequency signal it is recommended that
a new battery be placed in the hand-held transmitter of
the device that is being programmed to the HomeLink®
system.
To erase the channels place the ignition in the ON/RUN
position and push and hold the two outside HomeLink®
buttons (I and III) for up 20 seconds or until the red
indicator flashes.
NOTE:
•Erasing all channels should only be performed when
programming HomeLink® for the first time. Do not
erase channels when programming additional buttons.
•If you have any problems, or require assistance, please
call toll-free 1-800-355-3515 or, on the Internet at
HomeLink.com for information or assistance.
Programming A Rolling Code
For programming garage door openers that were manu-
factured after 1995. These garage door openers can be
identified by the “LEARN” or “TRAIN” button located
where the hanging antenna is attached to the garage door
opener. It is NOT the button that is normally used to
open and close the door. The name and color of the
button may vary by manufacturer.
3
UNDERSTANDING THE FEATURES OF YOUR VEHICLE 249
Page 252 of 717
1. Cycle the ignition to the ON/RUN position.
2. Place the hand-held transmitter 1 to 3 in (3 to 8 cm)
away from the HomeLink® button you wish to pro-
gram while keeping the HomeLink® indicator light in
view.
3. Push and hold the HomeLink® button you want to
program while you push and hold the hand-held
transmitter button.
4. Continue to hold both buttons and observe the indi-
cator light. The HomeLink® indicator will flash slowly
and then rapidly after HomeLink® has received the
frequency signal from the hand-held transmitter. Re-
lease both buttons after the indicator light changes
from slow to rapid.
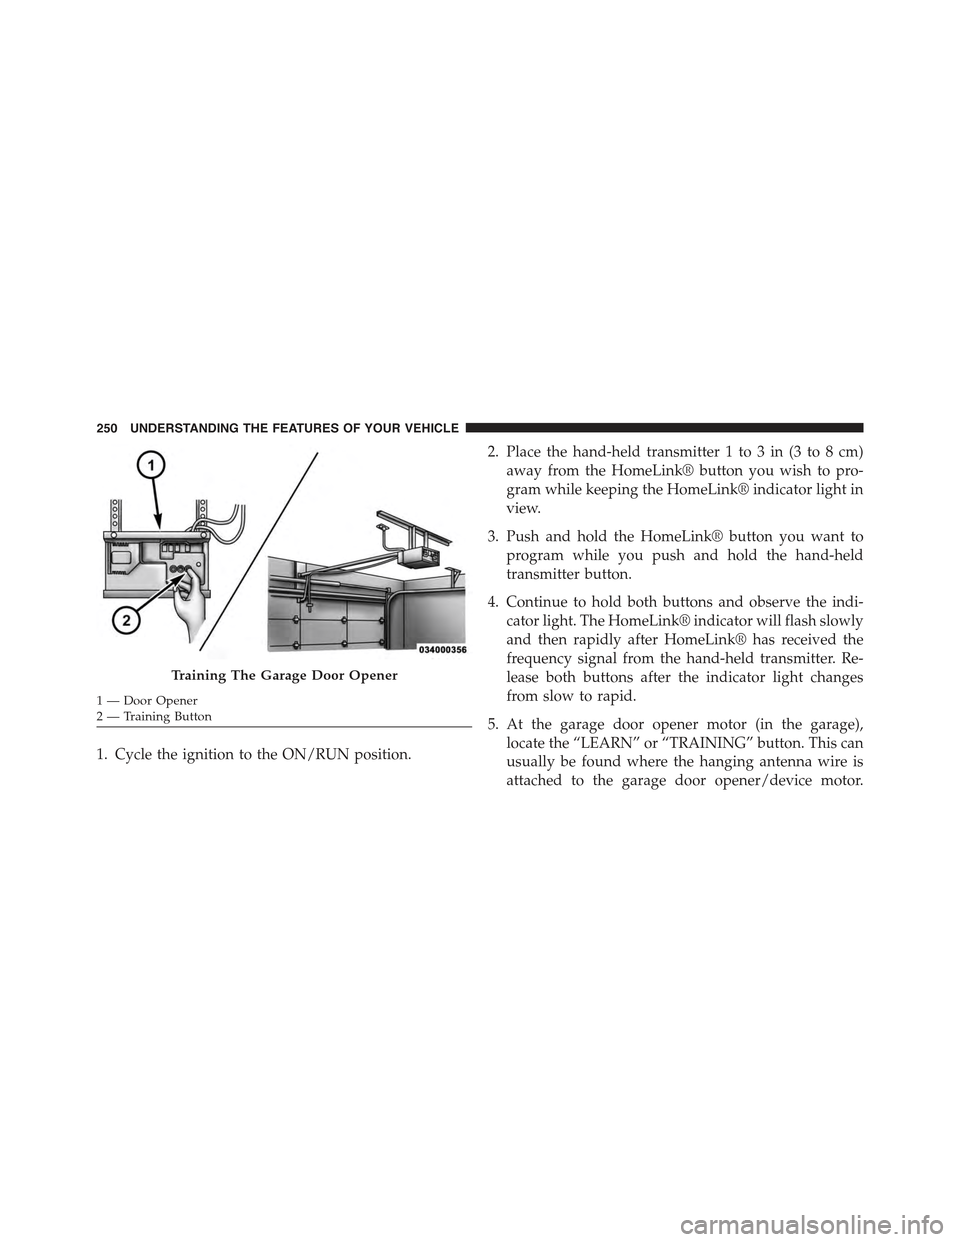
5. At the garage door opener motor (in the garage),
locate the “LEARN” or “TRAINING” button. This can
usually be found where the hanging antenna wire is
attached to the garage door opener/device motor.
Training The Garage Door Opener
1—DoorOpener2—TrainingButton
250 UNDERSTANDING THE FEATURES OF YOUR VEHICLE
Page 253 of 717
Firmly push and release the “LEARN” or “TRAIN-
ING” button. On some garage door openers/devices
there may be a light that blinks when the garage door
opener/device is in the LEARN/TRAIN mode.
NOTE:You have 30 seconds in which to initiate the next
step after the LEARN button has been pushed.
6. Return to the vehicle and push the programmed
HomeLink® button twice (holding the button for two
seconds each time). If the garage door opener/device
activates, programming is complete.
NOTE:If the garage door opener/device does not acti-
vate, push the button a third time (for two seconds) to
complete the training.
To program the remaining two HomeLink® buttons,
repeat each step for each remaining button. DO NOT
erase the channels.
Reprogramming A Single HomeLink® Button
(Rolling Code)
To reprogram a channel that has been previously trained,
follow these steps:
1. Cycle the ignition to the ON/RUN position.
2. Push and hold the desired HomeLink® button until
the indicator light begins to flash after 20 seconds.Do
not release the button.
3.Without releasing the buttonproceed with “Program-
ming A Rolling Code” step 2 and follow all remaining
steps.
Programming A Non-Rolling Code
For programming Garage Door Openers manufactured
before 1995.
1. Turn the ignition switch to the ON/RUN position.
3
UNDERSTANDING THE FEATURES OF YOUR VEHICLE 251