remote start JEEP GRAND CHEROKEE 2016 WK2 / 4.G User Guide
[x] Cancel search | Manufacturer: JEEP, Model Year: 2016, Model line: GRAND CHEROKEE, Model: JEEP GRAND CHEROKEE 2016 WK2 / 4.GPages: 276, PDF Size: 10.84 MB
Page 3 of 276
INTRODUCTION/WELCOME
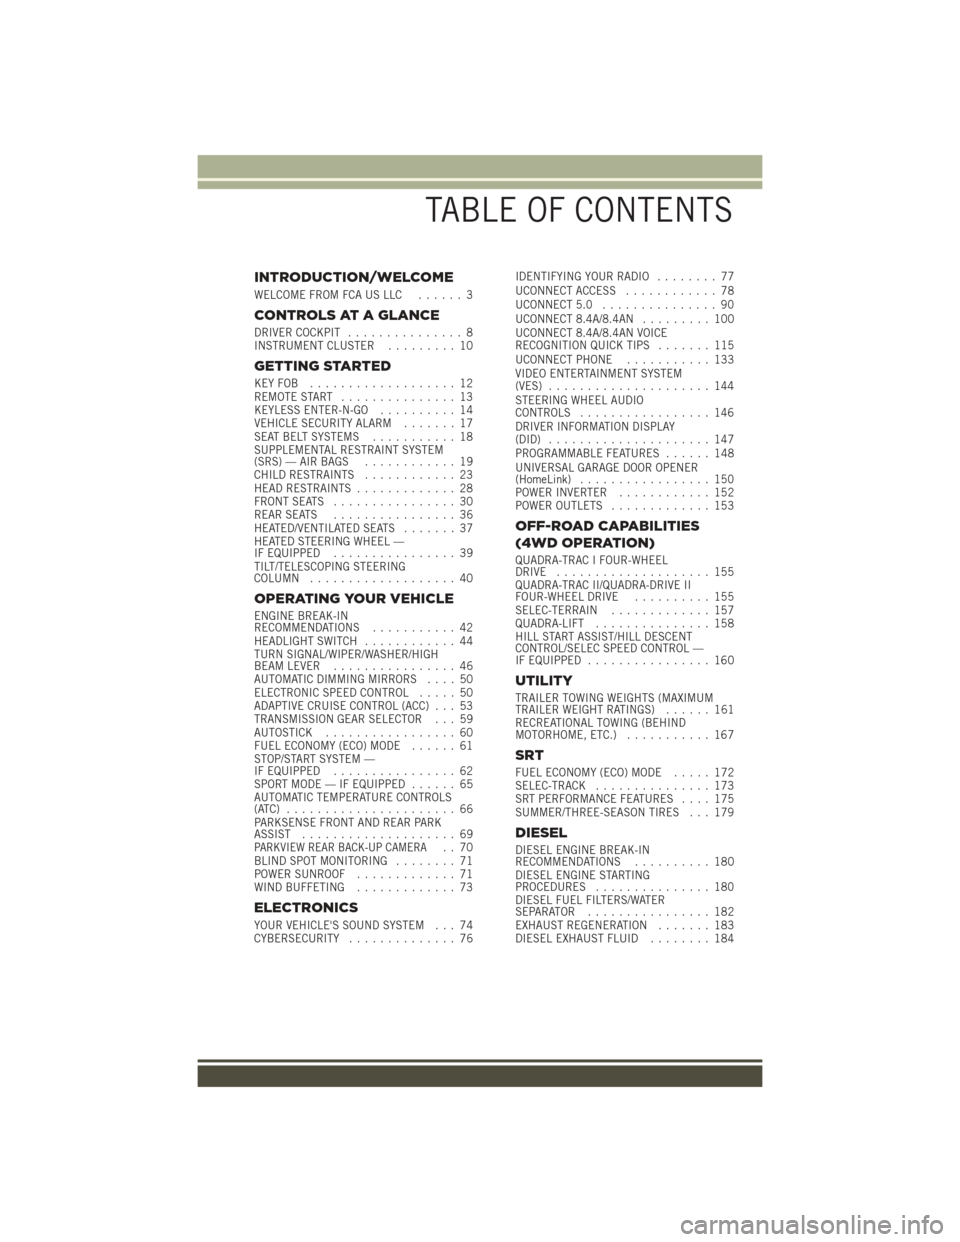
WELCOME FROM FCA US LLC...... 3
CONTROLS AT A GLANCE
DRIVER COCKPIT............... 8
INSTRUMENT CLUSTER ......... 10
GETTING STARTED
KEYFOB ................... 12
REMOTE START............... 13
KEYLESS ENTER-N-GO .......... 14
VEHICLE SECURITY ALARM ....... 17
SEAT BELT SYSTEMS ........... 18
SUPPLEMENTAL RESTRAINT SYSTEM
(SRS) — AIR BAGS ............ 19
CHILD RESTRAINTS ............ 23
HEAD RESTRAINTS ............. 28
FRONT SEATS ................ 30
REAR SEATS ................ 36
HEATED/VENTILATED SEATS ....... 37
HEATED STEERING WHEEL —
IF EQUIPPED ................ 39
TILT/TELESCOPING STEERING
COLUMN ................... 40
OPERATING YOUR VEHICLE
ENGINE BREAK-IN
RECOMMENDATIONS ........... 42
HEADLIGHT SWITCH ............ 44
TURN SIGNAL/WIPER/WASHER/HIGH
BEAM LEVER ................ 46
AUTOMATIC DIMMING MIRRORS .... 50
ELECTRONIC SPEED CONTROL ..... 50
ADAPTIVE CRUISE CONTROL (ACC) . . . 53
TRANSMISSION GEAR SELECTOR . . . 59
AUTOSTICK ................. 60
FUEL ECONOMY (ECO) MODE ...... 61
STOP/START SYSTEM —
IF EQUIPPED ................ 62
SPORT MODE — IF EQUIPPED ...... 65
AUTOMATIC TEMPERATURE CONTROLS
(ATC) ...................... 66
PARKSENSE FRONT AND REAR PARK
ASSIST .................... 69
PARKVIEW REAR BACK-UP CAMERA.. 70
BLIND SPOT MONITORING ........ 71
POWER SUNROOF ............. 71
WIND BUFFETING ............. 73
ELECTRONICS
YOUR VEHICLE'S SOUND SYSTEM . . . 74
CYBERSECURITY.............. 76 IDENTIFYING YOUR RADIO
........ 77
UCONNECT ACCESS ............ 78
UCONNECT 5.0 ............... 90
UCONNECT 8.4A/8.4AN ......... 100
UCONNECT 8.4A/8.4AN VOICE
RECOGNITION QUICK TIPS ....... 115
UCONNECT PHONE ........... 133
VIDEO ENTERTAINMENT SYSTEM
(VES) ..................... 144
STEERING WHEEL AUDIO
CONTROLS ................. 146
DRIVER INFORMATION DISPLAY
(DID) ..................... 147
PROGRAMMABLE FEATURES ...... 148
UNIVERSAL GARAGE DOOR OPENER
(HomeLink) ................. 150
POWER INVERTER ............ 152
POWER OUTLETS ............. 153
OFF-ROAD CAPABILITIES
(4WD OPERATION)
QUADRA-TRAC I FOUR-WHEEL
DRIVE .................... 155
QUADRA-TRAC II/QUADRA-DRIVE II
FOUR-WHEEL DRIVE .......... 155
SELEC-TERRAIN ............. 157
QUADRA-LIFT ............... 158
HILL START ASSIST/HILL DESCENT
CONTROL/SELEC SPEED CONTROL —
IF EQUIPPED ................ 160
UTILITY
TRAILER TOWING WEIGHTS (MAXIMUM
TRAILER WEIGHT RATINGS) ...... 161
RECREATIONAL TOWING (BEHIND
MOTORHOME, ETC.) ........... 167
SRT
FUEL ECONOMY (ECO) MODE ..... 172
SELEC-TRACK ............... 173
SRT PERFORMANCE FEATURES .... 175
SUMMER/THREE-SEASON TIRES . . . 179
DIESEL
DIESEL ENGINE BREAK-IN
RECOMMENDATIONS .......... 180
DIESEL ENGINE STARTING
PROCEDURES ............... 180
DIESEL FUEL FILTERS/WATER
SEPARATOR ................ 182
EXHAUST REGENERATION ....... 183
DIESEL EXHAUST FLUID ........ 184
TABLE OF CONTENTS
Page 9 of 276
USE OF AFTERMARKET PRODUCTS (ELECTRONICS)
The use of aftermarket devices including cell phones, MP3 players, GPS systems, or
chargers may affect the performance of on-board wireless features including Keyless
Enter-N-Go and Remote Start range. If you are experiencing difficulties with any of
your wireless features, try disconnecting your aftermarket devices to see if the
situation improves. If your symptoms persist, please see an authorized dealer.
When it comes to service, remember that your authorized dealer knows your Jeep
®
vehicle best, has factory-trained technicians and genuine MOPAR®parts, and cares
about your satisfaction.
INTRODUCTION/WELCOME
7
Page 14 of 276
KEY FOB
Locking And Unlocking The
Doors/Liftgate
Push the LOCK button once to lock all the
doors and the liftgate.
Push the UNLOCK button once to unlock
the driver’s door only and twice within
five seconds to unlock all the doors and
liftgate.
All doors can be programmed to unlock
on the first push of the UNLOCK button.
Refer to “Programmable Features” in the
“Electronics” section of this guide.
Power Liftgate
Push the LIFTGATE button on the Key
Fob twice within five seconds to power
open/close the Power Liftgate. If the but-
ton is pushed while the liftgate is being
power closed, the liftgate will reverse to
the full open position.
Also, the power liftgate may be closed by pushing the LIFTGATE switch located on
the left rear trim panel, near the liftgate opening. Pushing the switch once will only
close the liftgate. This button cannot be used to open the liftgate.
Panic Alarm
1. Push the PANIC button once to turn the panic alarm on.
2. Wait approximately three seconds and push button a second time to turn thepanic alarm off.
Key Fob
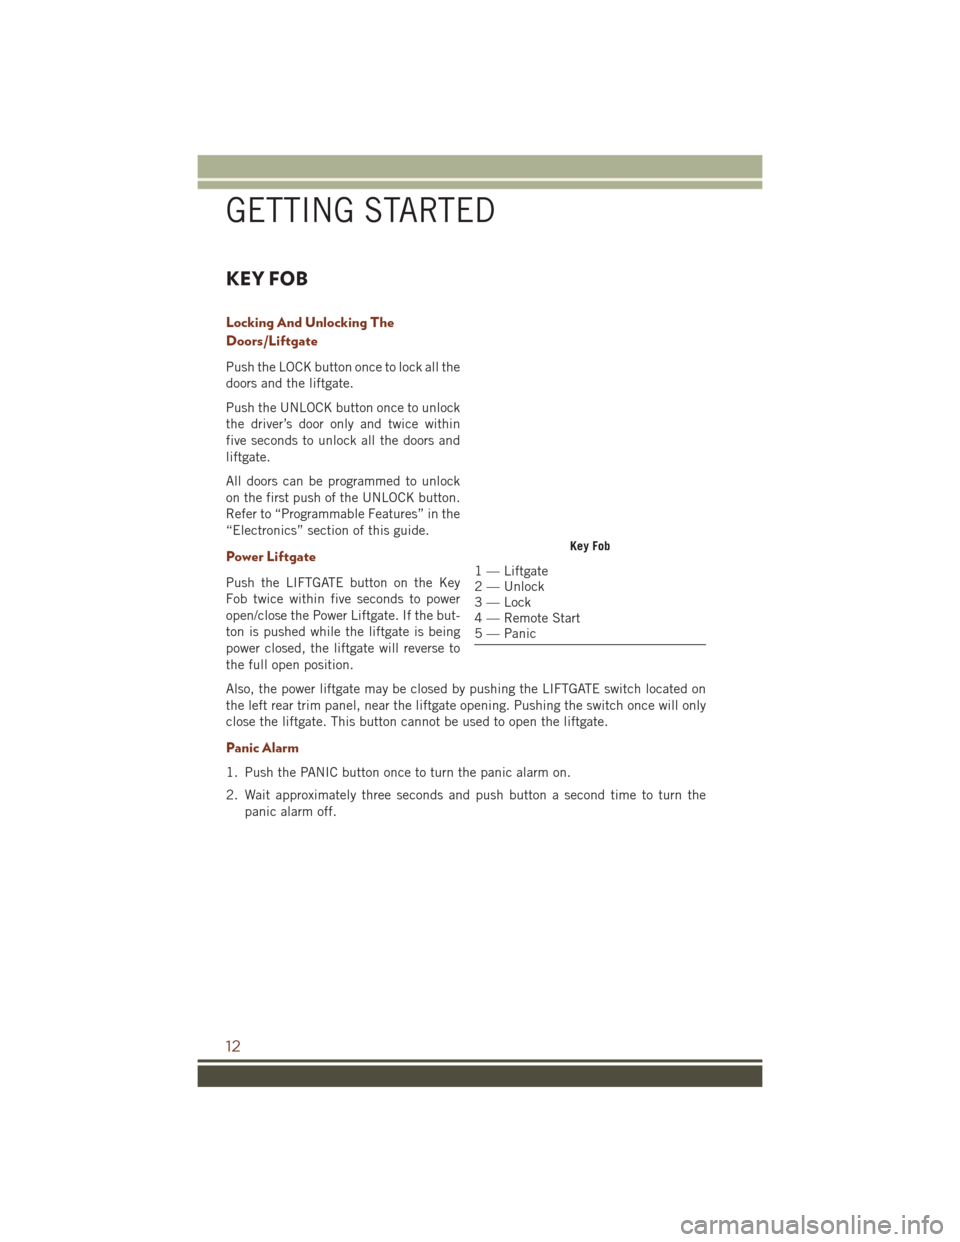
1 — Liftgate
2 — Unlock
3 — Lock
4 — Remote Start
5 — Panic
GETTING STARTED
12
Page 15 of 276
REMOTE START
Push the REMOTE START buttonon the Key Fob twice within five seconds.
Pushing the REMOTE START button a third time shuts the engine off.
To drive the vehicle, with a valid Keyless Enter-N-Go Key Fob within 5 ft (1.5m) of the
driver's side of the vehicle, grab the front driver door handle to unlock the driver's
door automatically, then push the START/STOP button.
With Remote Start, the engine will only run for 15 minutes (timeout) unless the
ignition is placed in the ON/RUN position.
The vehicle must be started with the ENGINE START/STOP button after two
consecutive timeouts.
NOTE:
For 3.0L Diesel Engine, please refer to “Things To Know Before Starting Your
Vehicle” located in your Diesel Supplement.
WARNING!
• Do not start or run an engine in a closed garage or confined area. Exhaust gas contains Carbon Monoxide (CO) which is odorless and colorless. Carbon
Monoxide is poisonous and can cause you or others to be severely injured or
killed when inhaled.
• Keep Key Fob transmitters away from children. Operation of the Remote Start
System, windows, door locks or other controls could cause you and others to be
severely injured or killed.
GETTING STARTED
13
Page 16 of 276
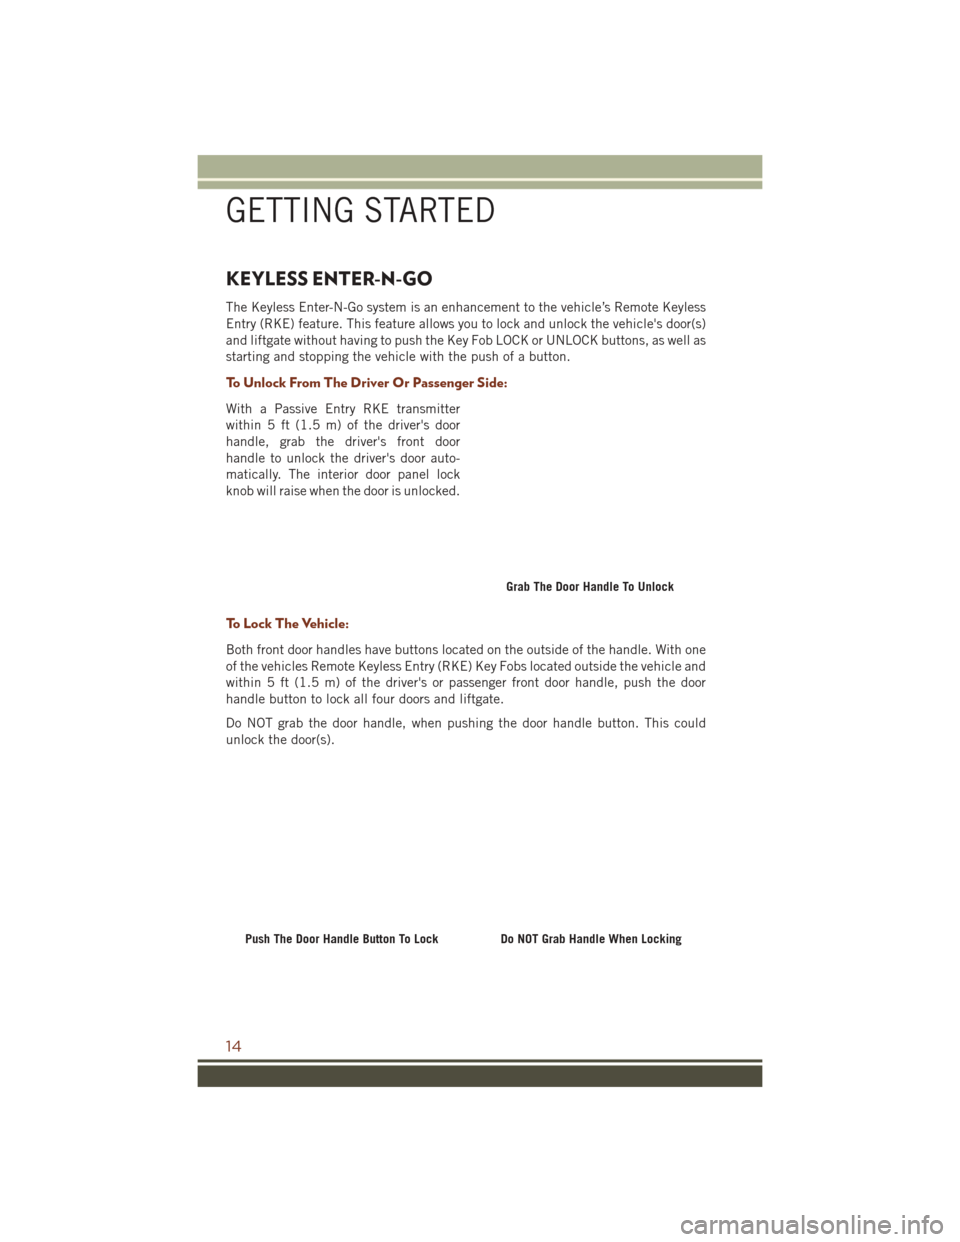
KEYLESS ENTER-N-GO
The Keyless Enter-N-Go system is an enhancement to the vehicle’s Remote Keyless
Entry (RKE) feature. This feature allows you to lock and unlock the vehicle's door(s)
and liftgate without having to push the Key Fob LOCK or UNLOCK buttons, as well as
starting and stopping the vehicle with the push of a button.
To Unlock From The Driver Or Passenger Side:
With a Passive Entry RKE transmitter
within 5 ft (1.5 m) of the driver's door
handle, grab the driver's front door
handle to unlock the driver's door auto-
matically. The interior door panel lock
knob will raise when the door is unlocked.
To Lock The Vehicle:
Both front door handles have buttons located on the outside of the handle. With one
of the vehicles Remote Keyless Entry (RKE) Key Fobs located outside the vehicle and
within 5 ft (1.5 m) of the driver's or passenger front door handle, push the door
handle button to lock all four doors and liftgate.
Do NOT grab the door handle, when pushing the door handle button. This could
unlock the door(s).
Grab The Door Handle To Unlock
Push The Door Handle Button To LockDo NOT Grab Handle When Locking
GETTING STARTED
14
Page 17 of 276
NOTE:
• If “Unlock All Doors 1st Press” is programmed all doors will unlock when you grabhold of the front driver's door handle. To select between “Unlock Driver Door 1st
Press” and “Unlock All Doors 1st Press,” refer to the “Uconnect SETTINGS” in
“Getting To Know Your Instrument Panel” in the Owner's Manual on the DVD or
“Programmable Features” in this guide for further information.
•
If “Unlock All Doors 1st Press” is programmed all doors and liftgate will unlock when
you push the liftgate button. If “Unlock Driver Door 1st Press” is programmed only
the liftgate will unlock when you push the liftgate button. To select between “Unlock
Driver Door 1st Press” and “Unlock All Doors 1st Press,” refer to the “Uconnect
SETTINGS” in “Getting To Know Your Instrument Panel” in the Owner's Manual on
the DVD or “Programmable Features” in this guide for further information.
• If a Key Fob is detected in the vehicle when locking the vehicle using the power door lock switch, the doors and liftgate will unlock and the horn will chirp three
times. On the third attempt, your Key Fob can be locked inside the vehicle.
• After pushing the RKE LOCK button, you must wait two seconds before you can lock or unlock the vehicle using the door handle. This is done to allow you to check
if the vehicle is locked by pulling on the door handle without the vehicle reacting
and unlocking.
• If a Keyless Enter-N-Go door handle has not been used for 72 hours, the Keyless Enter-N-Go feature for that handle may time out. Pulling the deactivated front door
handle will reactivate the door handle's Keyless Enter-N-Go feature.
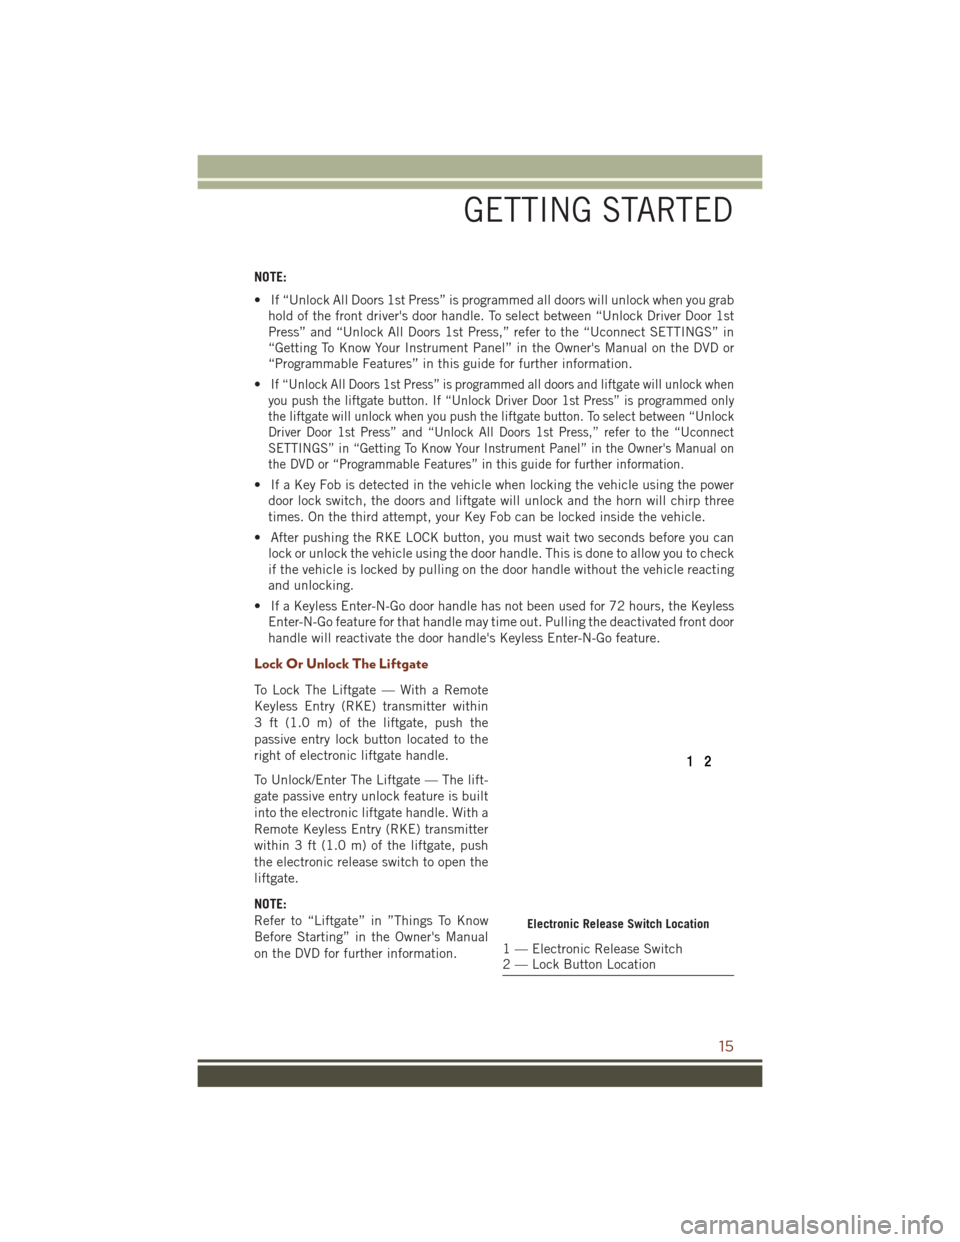
Lock Or Unlock The Liftgate
To Lock The Liftgate — With a Remote
Keyless Entry (RKE) transmitter within
3 ft (1.0 m) of the liftgate, push the
passive entry lock button located to the
right of electronic liftgate handle.
To Unlock/Enter The Liftgate — The lift-
gate passive entry unlock feature is built
into the electronic liftgate handle. With a
Remote Keyless Entry (RKE) transmitter
within 3 ft (1.0 m) of the liftgate, push
the electronic release switch to open the
liftgate.
NOTE:
Refer to “Liftgate” in ”Things To Know
Before Starting” in the Owner's Manual
on the DVD for further information.
Electronic Release Switch Location
1 — Electronic Release Switch
2 — Lock Button Location
GETTING STARTED
15
Page 18 of 276
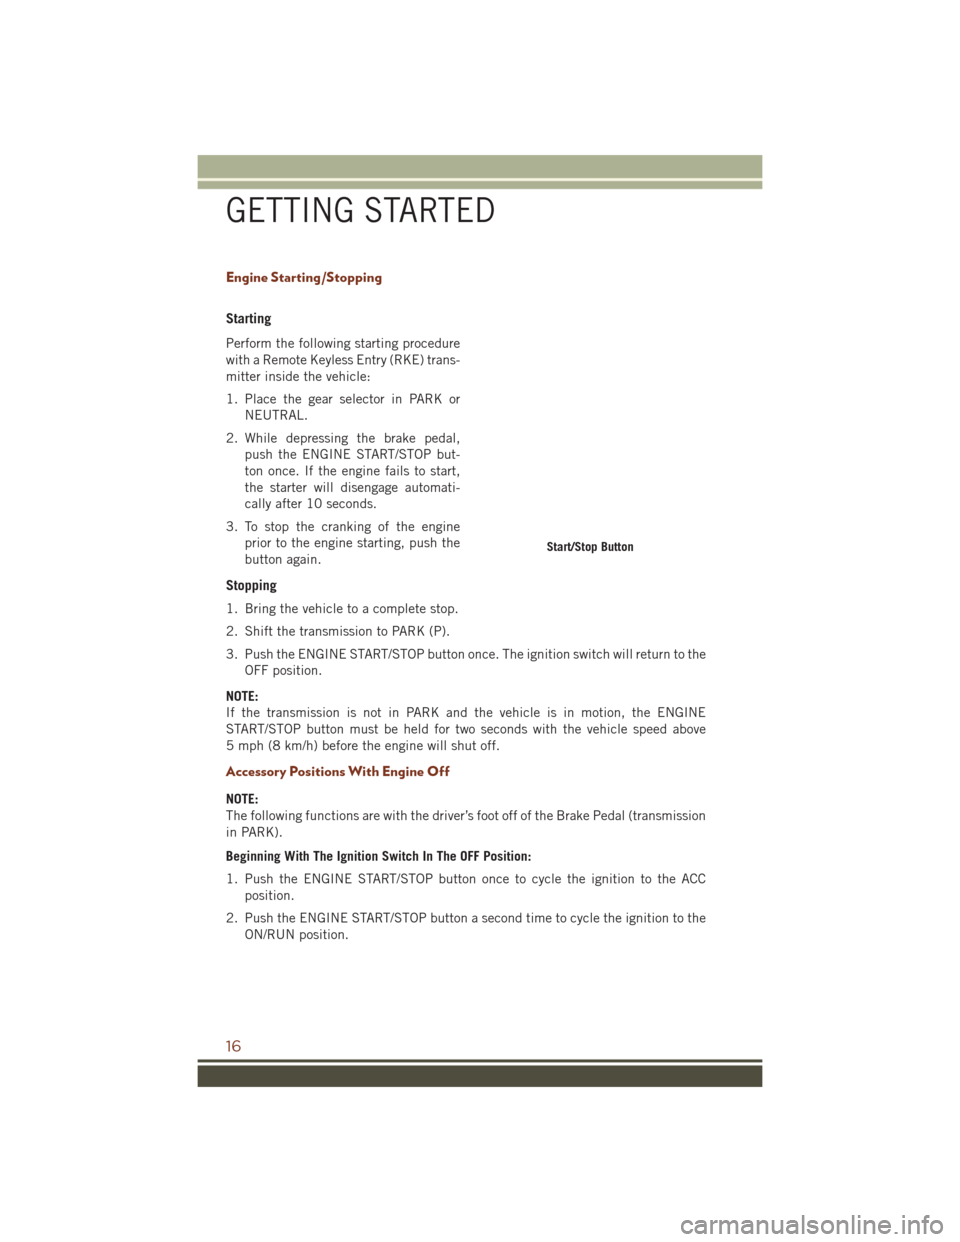
Engine Starting/Stopping
Starting
Perform the following starting procedure
with a Remote Keyless Entry (RKE) trans-
mitter inside the vehicle:
1. Place the gear selector in PARK orNEUTRAL.
2. While depressing the brake pedal, push the ENGINE START/STOP but-
ton once. If the engine fails to start,
the starter will disengage automati-
cally after 10 seconds.
3. To stop the cranking of the engine prior to the engine starting, push the
button again.
Stopping
1. Bring the vehicle to a complete stop.
2. Shift the transmission to PARK (P).
3. Push the ENGINE START/STOP button once. The ignition switch will return to theOFF position.
NOTE:
If the transmission is not in PARK and the vehicle is in motion, the ENGINE
START/STOP button must be held for two seconds with the vehicle speed above
5 mph (8 km/h) before the engine will shut off.
Accessory Positions With Engine Off
NOTE:
The following functions are with the driver’s foot off of the Brake Pedal (transmission
in PARK).
Beginning With The Ignition Switch In The OFF Position:
1. Push the ENGINE START/STOP button once to cycle the ignition to the ACC position.
2. Push the ENGINE START/STOP button a second time to cycle the ignition to the ON/RUN position.
Start/Stop Button
GETTING STARTED
16
Page 33 of 276
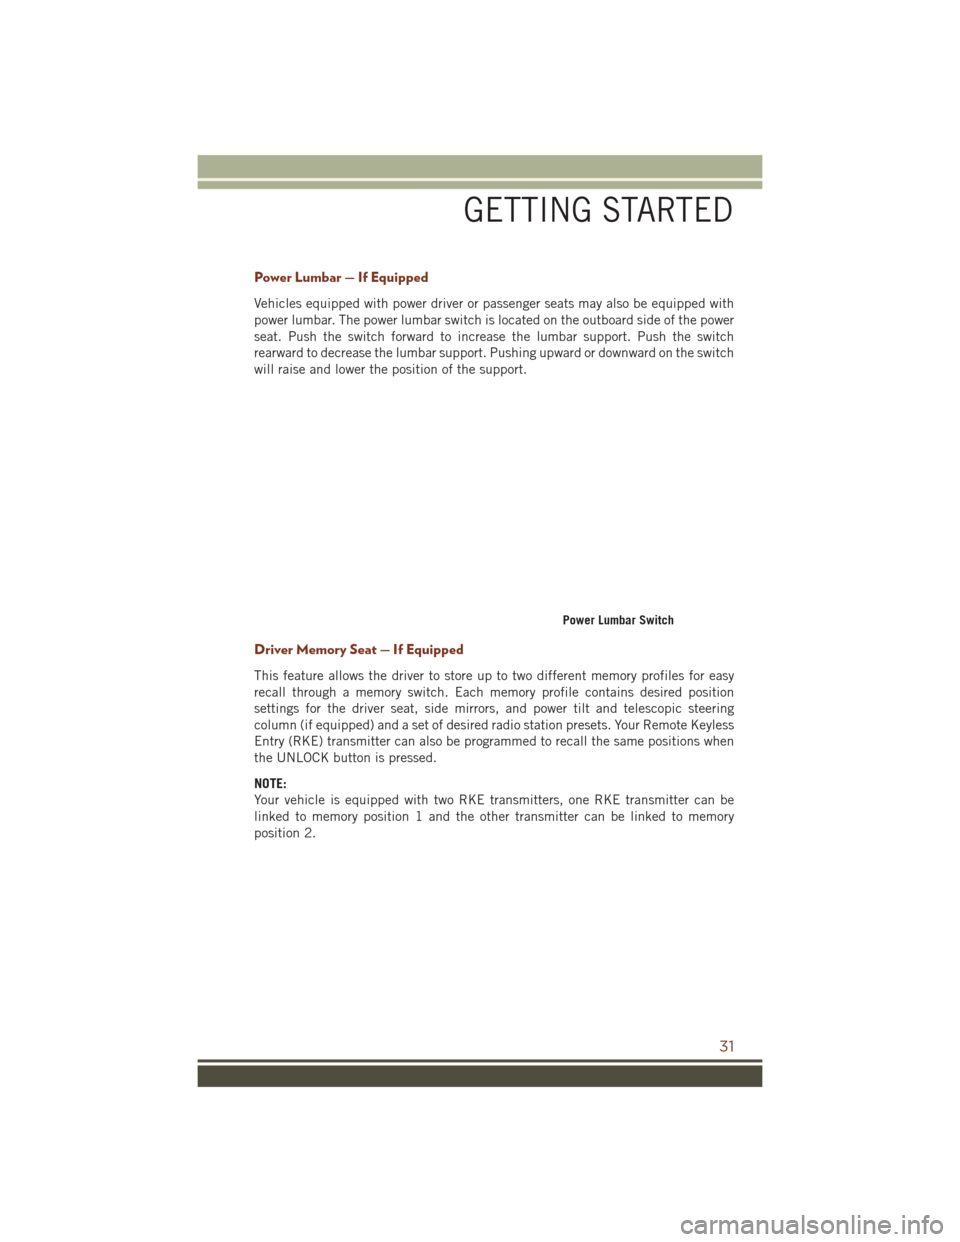
Power Lumbar — If Equipped
Vehicles equipped with power driver or passenger seats may also be equipped with
power lumbar. The power lumbar switch is located on the outboard side of the power
seat. Push the switch forward to increase the lumbar support. Push the switch
rearward to decrease the lumbar support. Pushing upward or downward on the switch
will raise and lower the position of the support.
Driver Memory Seat — If Equipped
This feature allows the driver to store up to two different memory profiles for easy
recall through a memory switch. Each memory profile contains desired position
settings for the driver seat, side mirrors, and power tilt and telescopic steering
column (if equipped) and a set of desired radio station presets. Your Remote Keyless
Entry (RKE) transmitter can also be programmed to recall the same positions when
the UNLOCK button is pressed.
NOTE:
Your vehicle is equipped with two RKE transmitters, one RKE transmitter can be
linked to memory position 1 and the other transmitter can be linked to memory
position 2.
Power Lumbar Switch
GETTING STARTED
31
Page 34 of 276
The memory seat switch is located on the driver’s door trim panel. The switch
consists of three buttons:
• The (S) button, which is used to activate the memory save function.
• The (1) and (2) buttons which are used to recall either of two pre-programmedmemory profiles.
Programming The Memory Feature
NOTE:
To create a new memory profile, perform
the following:
1. Cycle the vehicles ignition to the ON/ RUN position (Do not start the en-
gine).
2. Adjust all memory profile settings to desired preferences (i.e., seat, side
mirror, power tilt and telescopic steer-
ing column [if equipped], and radio
station presets).
3. Push and release the S (Set) button on the memory switch.
4. Within five seconds, push and release either of the memory buttons (1) or (2). The Driver Information Display (DID) will display which memory position has been set.
NOTE:
• Memory profiles can be set without the vehicle in PARK, but the vehicle must be in PARK to recall a memory profile.
• To set a memory profile to your RKE transmitter, refer to “Linking And Unlinking The Remote Keyless Entry Transmitter To Memory” in this section.
Linking And Unlinking The Remote Keyless Entry Transmitter To Memory
Your RKE transmitters can be programmed to recall one of two pre-programmed
memory profiles by pushing the UNLOCK button on the RKE transmitter.
NOTE:
Before programming your RKE transmitters you must select the “Memory To FOB”
feature through the Uconnect system screen. Refer to “Uconnect Settings ” in
“Understanding Your Instrument Panel” in the Owners Manual on the DVD for further
information.
To program your RKE transmitters, perform the following:
1. Cycle the vehicles ignition to the OFF position.
2. Select a desired memory profile (1) or (2).
Memory Seat Buttons
GETTING STARTED
32
Page 40 of 276
Vehicles Equipped With Remote Start
On models that are equipped with remote start, the heated seats can be programmed
to come on during a remote start.
This feature can be programmed through the Uconnect system. Refer to “Uconnect
Settings” in “Understanding Your Instrument Panel” in the Owner's Manual on the
DVD.
WARNING!
• Persons who are unable to feel pain to the skin because of advanced age,chronic illness, diabetes, spinal cord injury, medication, alcohol use, exhaus-
tion or other physical condition must exercise care when using the seat heater.
It may cause burns even at low temperatures, especially if used for long periods
of time.
• Do not place anything on the seat or seatback that insulates against heat, such
as a blanket or cushion. This may cause the seat heater to overheat. Sitting in
a seat that has been overheated could cause serious burns due to the increased
surface temperature of the seat.
Rear Heated Seats
On some models, the two outboard seats are equipped with heated seats. The heated
seat switches for these seats are located on the rear of the center console. There are
two heated seat switches
that allow the rear passengers to operate the seats
independently.
You can choose from HI, LO or OFF heat settings. The indicator lights in each switch
indicate the level of heat in use. Two indicator lights will illuminate for HI, one for LO
and none for OFF.
• Push the heated seat button
once to select HI-level heating.
• Push the heated seat button
a second time to select LO-level heating.
• Push the heated seat button
a third time to turn the heating elements OFF.
NOTE:
• Once a heat setting is selected, heat will be felt within two to five minutes.
• The engine must be running for the heated seats to operate.
If the HI-level setting is selected, the system will automatically switch to LO-level
after approximately 60 minutes of continuous operation. At that time, the number of
illuminated LEDs changes from two to one, indicating the change. The LO-level
setting will turn OFF automatically after approximately 45 minutes.
GETTING STARTED
38