rear view mirror JEEP GRAND CHEROKEE 2016 WK2 / 4.G User Guide
[x] Cancel search | Manufacturer: JEEP, Model Year: 2016, Model line: GRAND CHEROKEE, Model: JEEP GRAND CHEROKEE 2016 WK2 / 4.GPages: 276, PDF Size: 10.84 MB
Page 3 of 276
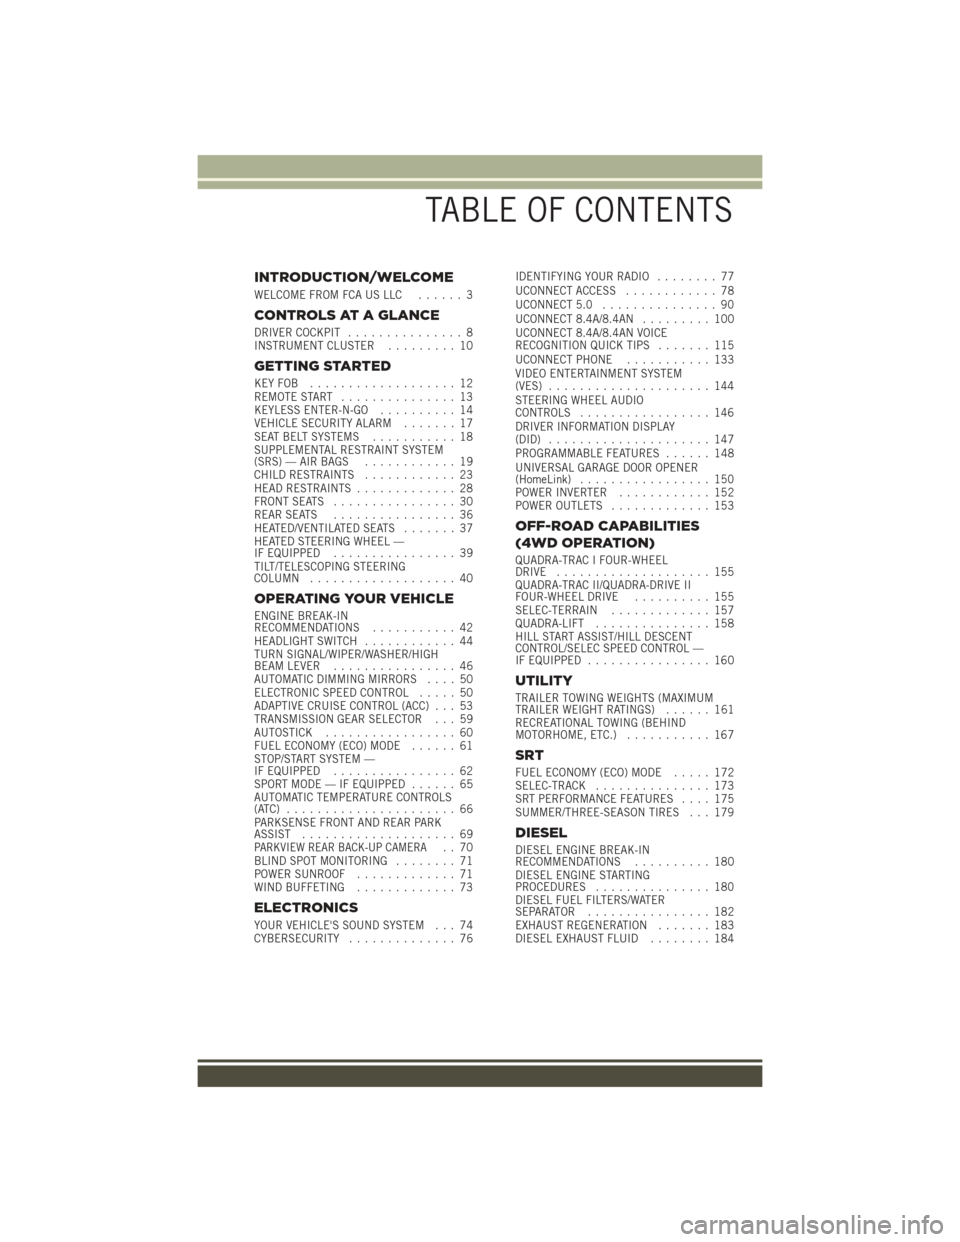
INTRODUCTION/WELCOME
WELCOME FROM FCA US LLC...... 3
CONTROLS AT A GLANCE
DRIVER COCKPIT............... 8
INSTRUMENT CLUSTER ......... 10
GETTING STARTED
KEYFOB ................... 12
REMOTE START............... 13
KEYLESS ENTER-N-GO .......... 14
VEHICLE SECURITY ALARM ....... 17
SEAT BELT SYSTEMS ........... 18
SUPPLEMENTAL RESTRAINT SYSTEM
(SRS) — AIR BAGS ............ 19
CHILD RESTRAINTS ............ 23
HEAD RESTRAINTS ............. 28
FRONT SEATS ................ 30
REAR SEATS ................ 36
HEATED/VENTILATED SEATS ....... 37
HEATED STEERING WHEEL —
IF EQUIPPED ................ 39
TILT/TELESCOPING STEERING
COLUMN ................... 40
OPERATING YOUR VEHICLE
ENGINE BREAK-IN
RECOMMENDATIONS ........... 42
HEADLIGHT SWITCH ............ 44
TURN SIGNAL/WIPER/WASHER/HIGH
BEAM LEVER ................ 46
AUTOMATIC DIMMING MIRRORS .... 50
ELECTRONIC SPEED CONTROL ..... 50
ADAPTIVE CRUISE CONTROL (ACC) . . . 53
TRANSMISSION GEAR SELECTOR . . . 59
AUTOSTICK ................. 60
FUEL ECONOMY (ECO) MODE ...... 61
STOP/START SYSTEM —
IF EQUIPPED ................ 62
SPORT MODE — IF EQUIPPED ...... 65
AUTOMATIC TEMPERATURE CONTROLS
(ATC) ...................... 66
PARKSENSE FRONT AND REAR PARK
ASSIST .................... 69
PARKVIEW REAR BACK-UP CAMERA.. 70
BLIND SPOT MONITORING ........ 71
POWER SUNROOF ............. 71
WIND BUFFETING ............. 73
ELECTRONICS
YOUR VEHICLE'S SOUND SYSTEM . . . 74
CYBERSECURITY.............. 76 IDENTIFYING YOUR RADIO
........ 77
UCONNECT ACCESS ............ 78
UCONNECT 5.0 ............... 90
UCONNECT 8.4A/8.4AN ......... 100
UCONNECT 8.4A/8.4AN VOICE
RECOGNITION QUICK TIPS ....... 115
UCONNECT PHONE ........... 133
VIDEO ENTERTAINMENT SYSTEM
(VES) ..................... 144
STEERING WHEEL AUDIO
CONTROLS ................. 146
DRIVER INFORMATION DISPLAY
(DID) ..................... 147
PROGRAMMABLE FEATURES ...... 148
UNIVERSAL GARAGE DOOR OPENER
(HomeLink) ................. 150
POWER INVERTER ............ 152
POWER OUTLETS ............. 153
OFF-ROAD CAPABILITIES
(4WD OPERATION)
QUADRA-TRAC I FOUR-WHEEL
DRIVE .................... 155
QUADRA-TRAC II/QUADRA-DRIVE II
FOUR-WHEEL DRIVE .......... 155
SELEC-TERRAIN ............. 157
QUADRA-LIFT ............... 158
HILL START ASSIST/HILL DESCENT
CONTROL/SELEC SPEED CONTROL —
IF EQUIPPED ................ 160
UTILITY
TRAILER TOWING WEIGHTS (MAXIMUM
TRAILER WEIGHT RATINGS) ...... 161
RECREATIONAL TOWING (BEHIND
MOTORHOME, ETC.) ........... 167
SRT
FUEL ECONOMY (ECO) MODE ..... 172
SELEC-TRACK ............... 173
SRT PERFORMANCE FEATURES .... 175
SUMMER/THREE-SEASON TIRES . . . 179
DIESEL
DIESEL ENGINE BREAK-IN
RECOMMENDATIONS .......... 180
DIESEL ENGINE STARTING
PROCEDURES ............... 180
DIESEL FUEL FILTERS/WATER
SEPARATOR ................ 182
EXHAUST REGENERATION ....... 183
DIESEL EXHAUST FLUID ........ 184
TABLE OF CONTENTS
Page 47 of 276
Automatic Headlights — If Equipped
This system automatically turns the headlights on or off according to ambient light
levels. To turn the system on, rotate the headlight switch to the A (AUTO) position.
When the system is on, the Headlight Delay feature is also on. This means the
headlights will stay on for up to 90 seconds after you turn the ignition switch to the
OFF position. To turn the automatic headlights off, turn the headlight switch out of
the AUTO position.
NOTE:
The engine must be running before the headlights will turn on in the Automatic
Mode.
Automatic High Beam — If Equipped
The Automatic High Beam Headlamp Control system provides increased forward
lighting at night by automating high beam control through the use of a digital camera
mounted on the inside rearview mirror. This camera detects vehicle specific light and
automatically switches from high beams to low beams until the approaching vehicle
is out of view.
NOTE:
• The Automatic High Beam Headlamp Control can be turned on or off using theUconnect System. Refer to “Uconnect Settings” in “Understanding Your Instru-
ment Panel” in the Owner’s Manual on the DVD for further information.
• Broken, muddy, or obstructed headlights and taillights of vehicles in the field of view will cause headlights to remain on longer (closer to the vehicle). Also, dirt,
film, and other obstructions on the windshield or camera lens will cause the
system to function improperly.
• To opt out of the Advanced Auto High-Beam Sensitivity Control (default) and enter Reduced High-Beam Sensitivity Control (not recommended), toggle highbeam
lever 6 full on/off cycles within 10 seconds of ignition ON. System will return to
default setting upon ignition off.
If the windshield or Automatic High Beam Headlamp Control mirror is replaced, the
mirror must be re-aimed to ensure proper performance. See your local authorized
dealer.
Interior Lights
Courtesy and dome lights are turned on when the front doors are opened or when the
dimmer control (rotating wheel on the right side of the headlight switch) is rotated to
its farthest upward position. If your vehicle is equipped with Remote Keyless Entry
(RKE) and the UNLOCK button is pressed on the RKE transmitter the courtesy and
dome lights will turn on. When a door is open and the interior lights are on, rotating
the dimmer control all the way down, to the OFF detent, will cause all the interior
lights to go out. This is also known as the “Party” mode because it allows the doors
to stay open for extended periods of time without discharging the vehicle’s battery.
OPERATING YOUR VEHICLE
45
Page 52 of 276
AUTOMATIC DIMMING MIRRORS
The rearview and driver side exterior mirror automatically adjusts for headlight glare
from vehicles behind you.
ELECTRONIC SPEED CONTROL
When engaged, the Electronic Speed Control takes over accelerator operations at
speeds greater than 25 mph (40 km/h).
The Electronic Speed Control buttons are located on the right side of the steering
wheel.
NOTE:
In order to ensure proper operation, the
Electronic Speed Control System has
been designed to shut down if multiple
Speed Control functions are operated at
the same time. If this occurs, the Elec-
tronic Speed Control System can be re-
activated by pushing the Electronic
Speed Control ON/OFF button and reset-
ting the desired vehicle set speed.
To Activate
Push the ON/OFF button to activate the
electronic speed control. CRUISE CON-
TROL READY will appear on the instru-
ment cluster to indicate the electronic
speed control is on. To turn the system
off, push the ON/OFF button a second
time. CRUISE CONTROL OFF will appear
on the instrument cluster to indicate the
electronic speed control is off. The sys-
tem should be turned off when not in use.
WARNING!
Leaving the Electronic Speed Control system on when not in use is dangerous. You
could accidentally set the system or cause it to go faster than you want. You could
lose control and have an accident. Always leave the system OFF when you are not
using it.
Electronic Speed Control Switches
1 — Push Cancel
2 — Push Set+/Accel
3 — Push Resume
4 — Push On/Off
5 — Push Set-/Decel
OPERATING YOUR VEHICLE
50
Page 71 of 276
• Press and release to toggle between MAX A/C and the prior settings. The button onthe touchscreen illuminates when MAX A/C is ON.
• In MAX A/C, the blower level and mode position can be adjusted to desired user settings. Pushing other settings will cause the MAX A/C operation to switch to the
prior settings and the MAX A/C indicator will turn off.
SYNC Temperature Button
• Press the “SYNC” button on the touchscreen to control the driver and passengertemperatures simultaneously. Press the “SYNC” button on the touchscreen a
second time to control the temperatures individually.
Air Recirculation
• Use Recirculation for maximum A/C operation.
• For window defogging, turn the recirculation button off.
• If the recirculation button is pushed while in the AUTO mode, the indicator lightmay flash three times to indicate the cabin air is being controlled automatically.
Heated Mirrors
The mirrors are heated to melt frost or ice. This feature is activated whenever you turn
on the rear window defroster.
PARKSENSE FRONT AND REAR PARK ASSIST
ParkSense can be enabled and disabled by pushing the ParkSense switch located
below the climate controls, on the switch panel.
The four ParkSense sensors, located in the rear fascia/bumper, monitor the area
behind the vehicle that is within the sensors field of view. The sensors can detect
obstacles from approximately 12 inches (30 cm) up to 79 inches (200 cm) from the
rear fascia/bumper in the horizontal direction, depending on the location, type and
orientation of the obstacle.
The six ParkSense sensors, located in the front fascia/bumper, monitor the area in
front of the vehicle that is within the sensors’ field of view. The sensors can detect
obstacles from approximately 12 inches (30 cm) up to 47 inches (120 cm) from the
front fascia/bumper in the horizontal direction, depending on the location, type and
orientation of the obstacle.
When an object is detected within 79 inches (200 cm) behind the rear bumper while
the vehicle is in REVERSE, a warning will display in the Driver Information Display
(DID). In addition a chime will sound (when Sound and Display is selected from the
Customer Programmable Features section of the Uconnect System screen). As the
vehicle moves closer to the object, the chime rate will change from single 1/2 second
tone (for rear only), to slow (for rear only), to fast, to continuous.
Refer to your Owner's Manual on the DVD for further details.
OPERATING YOUR VEHICLE
69
Page 81 of 276
Uconnect Access enhances your ownership and driving experience by connecting
your vehicle to an operable 1X (voice/data) or 3G (data) network. When connected to
an operable 1X (voice/data) or 3G (data) network, you can:
• Place a call to a local 9-1-1 Operator for emergency assistance.
• Remotely lock/unlock your doors and start your vehicle from virtually anywhere,using the Uconnect Access App from your device. You can also do so by logging
into Mopar Owner Connect, or by calling Uconnect Care when your vehicle has an
operable 1X (voice/data) or 3G (data) network connection. Services can only be
used where coverage is available; see coverage map for details.
• Turn your vehicle into a WiFi Hotspot and connect your devices to the internet.
• Receive text or email notifications if your vehicle's theft alarm goes off.
• Receive stolen vehicle assistance, using GPS technology to help authorities locate your vehicle if it is stolen.
• Listen to your text messages or send free-form text messages with your voice while keeping your hands on the wheel, using the Voice Texting feature. Requires a
device that supports Bluetooth Message Access Profile (MAP).
• Search for places to eat, shop, relax and play with Yelp, using your voice or on-screen menu. Then navigate to them (navigation standard on Uconnect 8.4AN,
optional on Uconnect 8.4A).
• Get operator assistance using the ASSIST button on your interior rearview mirror.
Before you drive, familiarize yourself with the easy-to-use Uconnect Access.
1. The ASSIST and 9-1-1 buttons are located on your rearview mirror. The ASSIST button is used for contacting Roadside Assistance, Vehicle Care and Uconnect
Care. The 9-1-1 button connects you to emergency services.
NOTE:
Vehicles sold in Canada and Mexico DO NOT have 9-1-1 call system capabilities.
9-1-1 or other emergency line operators in Canada and Mexico may not answer or
respond to 9-1-1 system calls.
2. The Uconnect “Apps
” button in the center of the menu bar of the radio
touchscreen. This is where you can begin your registration process, manage your
Apps and purchase WiFi on demand.
3. The Uconnect Voice Command and Uconnect Phone buttons are located on the left side of your steering wheel. These buttons let you use your voice to give
commands, make phone calls, send and receive text messages hands-free, enter
navigation destinations, and control your radio and media devices.
Included Trial Period For New Vehicles
Your new vehicle may come with an included trial period for use of the Uconnect
Access Services starting at the date of vehicle purchase (date based on vehicle sales
notification from your dealer). To activate the trial, you must first register with Uconnect
Access. After the trial period, if you wish to continue your Uconnect Access Services
you can choose to purchase a subscription.
ELECTRONICS
79
Page 82 of 276
Features And Packages
• After the trial period, you can subscribe to continue your service by visiting theUconnect Store located within the Mopar Owner Connect website
moparownerconnect.com. If you need assistance, U.S. residents can call
Uconnect Care at 1-855-792-4241 .
• For the latest information on packages and pricing information: U.S. residents visit DriveUconnect.com.
Uconnect Access Registration (Uconnect 8.4A/8.4AN, U.S. 48 Contiguous
States, Alaska And Hawaii)
To unlock the full potential of Uconnect Access in your vehicle, you first need to
register with Uconnect Access.
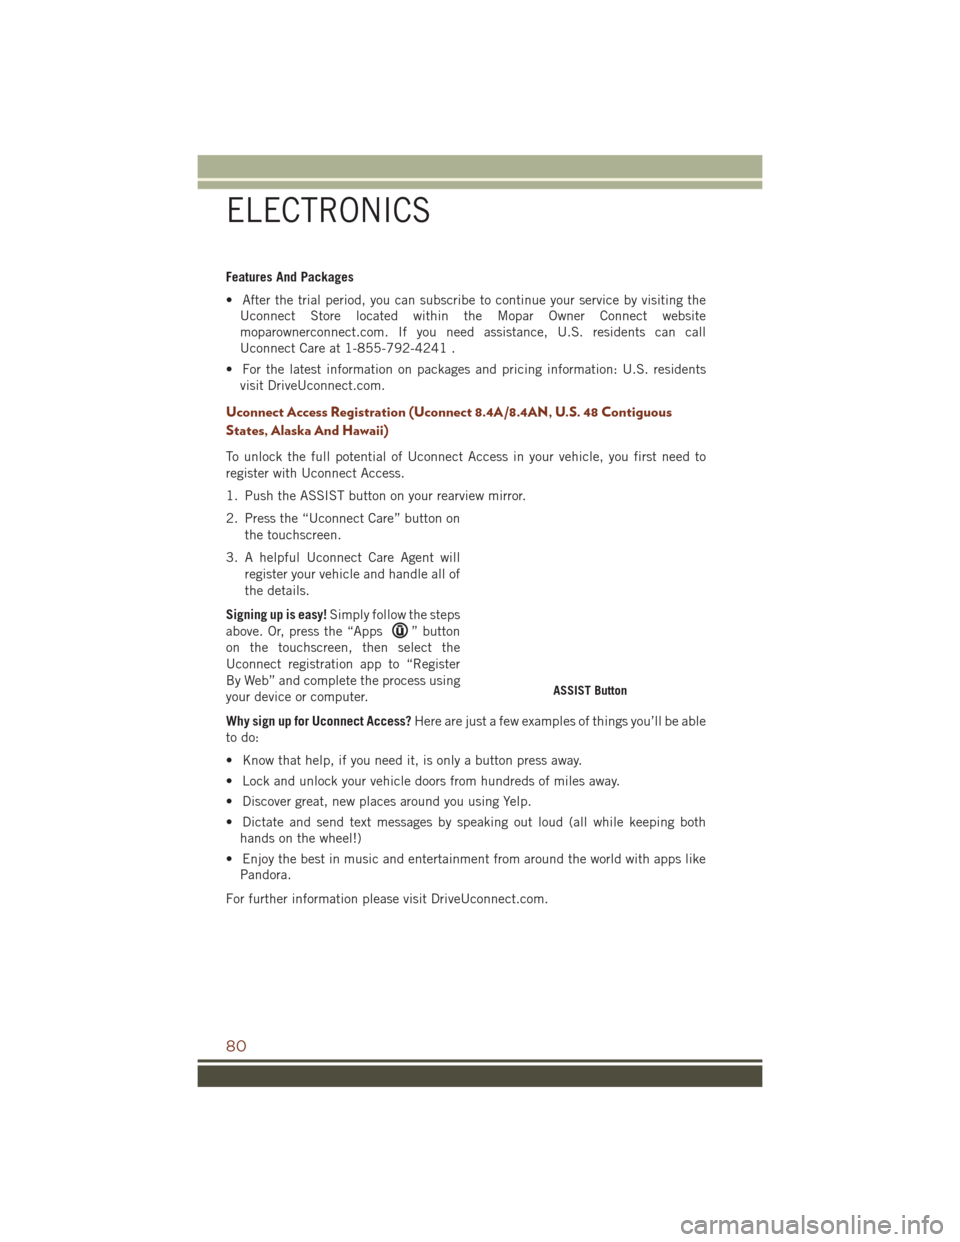
1. Push the ASSIST button on your rearview mirror.
2. Press the “Uconnect Care” button on
the touchscreen.
3. A helpful Uconnect Care Agent will register your vehicle and handle all of
the details.
Signing up is easy! Simply follow the steps
above. Or, press the “Apps
” button
on the touchscreen, then select the
Uconnect registration app to “Register
By Web” and complete the process using
your device or computer.
Why sign up for Uconnect Access? Here are just a few examples of things you’ll be able
to do:
• Know that help, if you need it, is only a button press away.
• Lock and unlock your vehicle doors from hundreds of miles away.
• Discover great, new places around you using Yelp.
• Dictate and send text messages by speaking out loud (all while keeping both hands on the wheel!)
• Enjoy the best in music and entertainment from around the world with apps like Pandora.
For further information please visit DriveUconnect.com.
ASSIST Button
ELECTRONICS
80
Page 84 of 276
•Slacker Radio — Enjoy millions of songs and hundreds of handcrafted stations.
NOTE:
For detailed information on how to use Via
Mobile apps visit the Mopar Owner Con-
nect website
moparownerconnect.com
and log in using the username and pass-
word you set up when registering for
Uconnect Access.
Renewing Subscriptions And Purchasing WiFi Hotspot (Uconnect 8.4A/8.4AN,
U.S. 48 Contiguous States, Alaska And Hawaii)
Subscriptions, and WiFi Hotspot, can be purchased from the Uconnect Store within your
vehicle, and online at Mopar Owner Connect. If you need help push the ASSIST button
on the rearview mirror, then select Uconnect Care (or dial 1-855-792-4241 ).
NOTE:
You must set up a Uconnect Access Payment Account online (log in to
moparownerconnect.com, go to Edit Profile, then Uconnect Payment Account, to set
up and manage your Payment Account).
Getting Started With Apps
Applications (Apps for short) in your Uconnect Access system are designed to deliver
the features and services that you want. There are two basic categories:
1. Built-In Features — use the 1X (voice/data) or 3G (data) network on your Uconnect
8.4A or 8.4AN radio.
2. Uconnect Access Via Mobile — use the Uconnect Access App and your device's
data plan to access your personal Pandora, iHeartRadio, Aha and Slacker
accounts from the vehicle and control them using the touchscreen. Customer's
data plan charges will apply. Available on Uconnect 8.4A and 8.4AN Radios (if
equipped).
Via Mobile
ELECTRONICS
82
Page 86 of 276
Maintaining Your Uconnect Access Account
Selling Your Vehicle
When you sell your vehicle, we recommend that you remove your Uconnect Access
Account information from the vehicle. You can do this on the Mopar Owner Connect
website moparownerconnect.com. Removing your account information cancels your
subscription and makes your vehicle factory-ready for a new owner/subscriber.
For additional information on Uconnect, visit DriveUconnect.com or call
1-877-855-8400 .
Built-In Features
WARNING!
• ALWAYS obey traffic laws and pay attention to the road. Some UconnectAccess services, including 9-1-1 and Assist, will NOT work without an operable
1X (voice/data) or 3G (data) network connection.
• ALWAYS drive safely with your hands on the steering wheel. You have full
responsibility and assume all risks related to the use of the Uconnect features
and applications in this vehicle. Only use Uconnect when it is safe to do so.
Failure to do so may result in an accident involving serious injury or death.
• Ignoring the rearview mirror light could mean you may not have 9-1-1 Call
service if needed. If the rearview mirror light is illuminated, have an authorized
dealer service the 9-1-1 Call system immediately.
• The Occupant Restraint Controller (ORC) turns on the Air Bag Warning Light on
the instrument panel if a malfunction is detected in any part of the airbag
system. If the Air Bag Warning Light is illuminated, the air bag system may not
be working properly and the 9-1-1 system may not send a signal to a 9-1-1
operator if an air bag is deployed. If the Air Bag Warning Light is illuminated,
have an authorized dealer service your vehicle immediately.
• If anyone in the vehicle could be in danger (e.g., fire or smoke is visible,
dangerous road conditions or location), do not wait for voice contact from a
9-1-1 operator. All occupants should exit the vehicle immediately and move to
a safe location.
• The 9-1-1 Call system is embedded into the vehicle’s electrical system. Do not
add aftermarket electrical equipment to the vehicle’s electrical system. This
may prevent your vehicle from sending a signal to initiate an emergency call. To
avoid interference that can cause the 9-1-1 Call system to fail, never add
aftermarket equipment (e.g., two-way mobile radio, CB radio, data recorder,
etc.) to your vehicle’s electrical system or modify the antennas on your vehicle.
• IF YOUR VEHICLE LOSES BATTERY POWER FOR ANY REASON (INCLUDING
DURING OR AFTER AN ACCIDENT), the Uconnect features, apps and ser-
vices, among others, will not operate.
ELECTRONICS
84
Page 87 of 276
NOTE:
Your vehicle may be transmitting data as authorized by the subscriber.
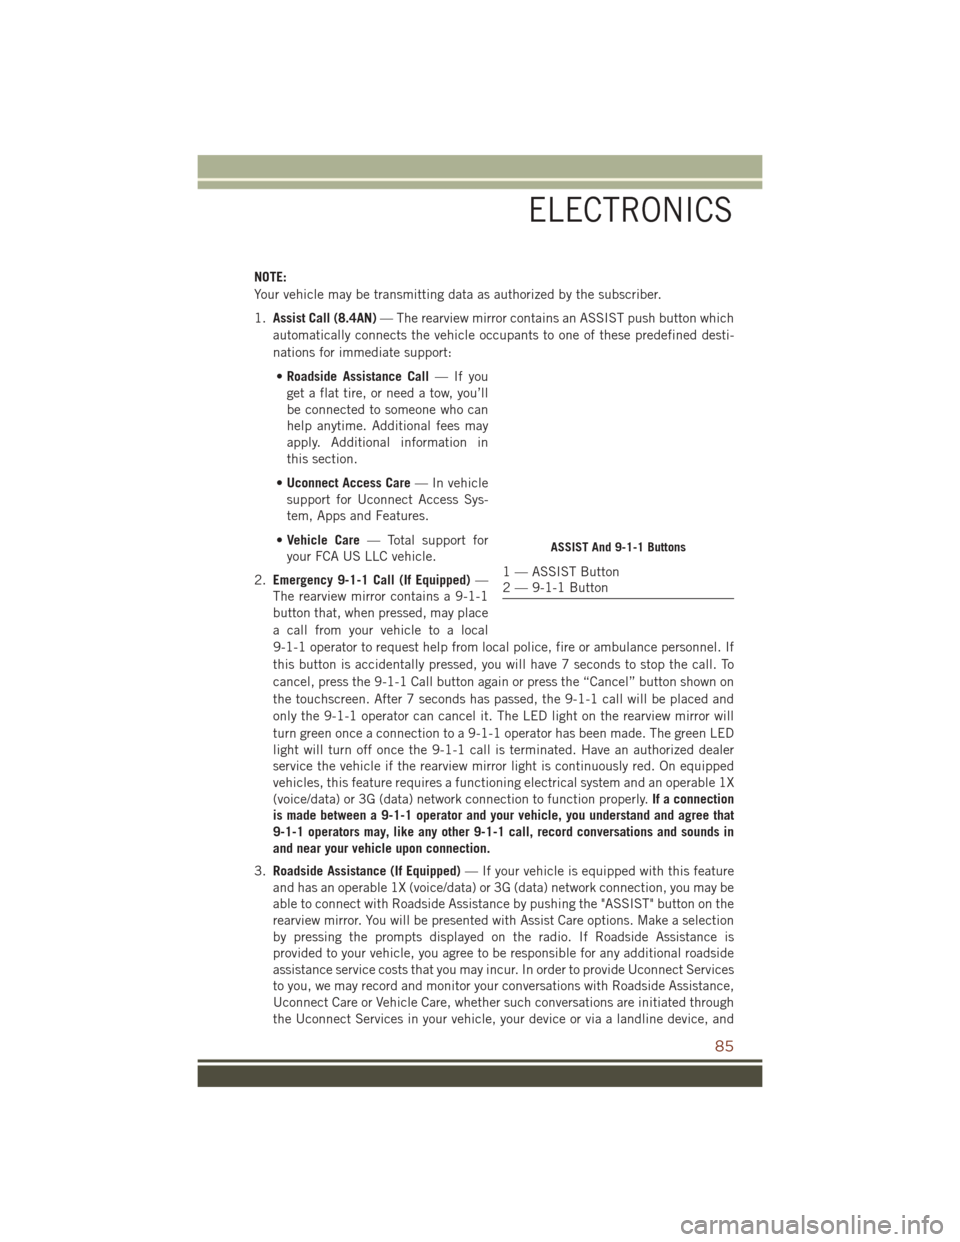
1.Assist Call (8.4AN) — The rearview mirror contains an ASSIST push button which
automatically connects the vehicle occupants to one of these predefined desti-
nations for immediate support:
• Roadside Assistance Call —Ifyou
get a flat tire, or need a tow, you’ll
be connected to someone who can
help anytime. Additional fees may
apply. Additional information in
this section.
• Uconnect Access Care — In vehicle
support for Uconnect Access Sys-
tem, Apps and Features.
• Vehicle Care — Total support for
your FCA US LLC vehicle.
2. Emergency 9-1-1 Call (If Equipped) —
The rearview mirror contains a 9-1-1
button that, when pressed, may place
a call from your vehicle to a local
9-1-1 operator to request help from local police, fire or ambulance personnel. If
this button is accidentally pressed, you will have 7 seconds to stop the call. To
cancel, press the 9-1-1 Call button again or press the “Cancel” button shown on
the touchscreen. After 7 seconds has passed, the 9-1-1 call will be placed and
only the 9-1-1 operator can cancel it. The LED light on the rearview mirror will
turn green once a connection to a 9-1-1 operator has been made. The green LED
light will turn off once the 9-1-1 call is terminated. Have an authorized dealer
service the vehicle if the rearview mirror light is continuously red. On equipped
vehicles, this feature requires a functioning electrical system and an operable 1X
(voice/data) or 3G (data) network connection to function properly. If a connection
is made between a 9-1-1 operator and your vehicle, you understand and agree that
9-1-1 operators may, like any other 9-1-1 call, record conversations and sounds in
and near your vehicle upon connection.
3. Roadside Assistance (If Equipped) — If your vehicle is equipped with this feature
and has an operable 1X (voice/data) or 3G (data) network connection, you may be
able to connect with Roadside Assistance by pushing the "ASSIST" button on the
rearview mirror. You will be presented with Assist Care options. Make a selection
by pressing the prompts displayed on the radio. If Roadside Assistance is
provided to your vehicle, you agree to be responsible for any additional roadside
assistance service costs that you may incur. In order to provide Uconnect Services
to you, we may record and monitor your conversations with Roadside Assistance,
Uconnect Care or Vehicle Care, whether such conversations are initiated through
the Uconnect Services in your vehicle, your device or via a landline device, and
ASSIST And 9-1-1 Buttons
1 — ASSIST Button
2 — 9-1-1 Button
ELECTRONICS
85
Page 97 of 276
Get Started
1. VisitUconnectPhone.com to check mobile device and feature compatibility and to
find phone pairing instructions.
2. Reduce background noise. Wind and passenger conversations are examples of noise that may impact recognition.
3. Speak clearly at a normal pace and volume while facing straight ahead. The microphone is positioned on the rearview mirror and aimed at the driver.
4. Each time you give a Voice Command, you must first push either the VR or Phone button, wait until afterthe beep, then say your Voice Command.
5. You can interrupt the help message or system prompts by pushing the VR or Phone button and saying a Voice Command from current category.
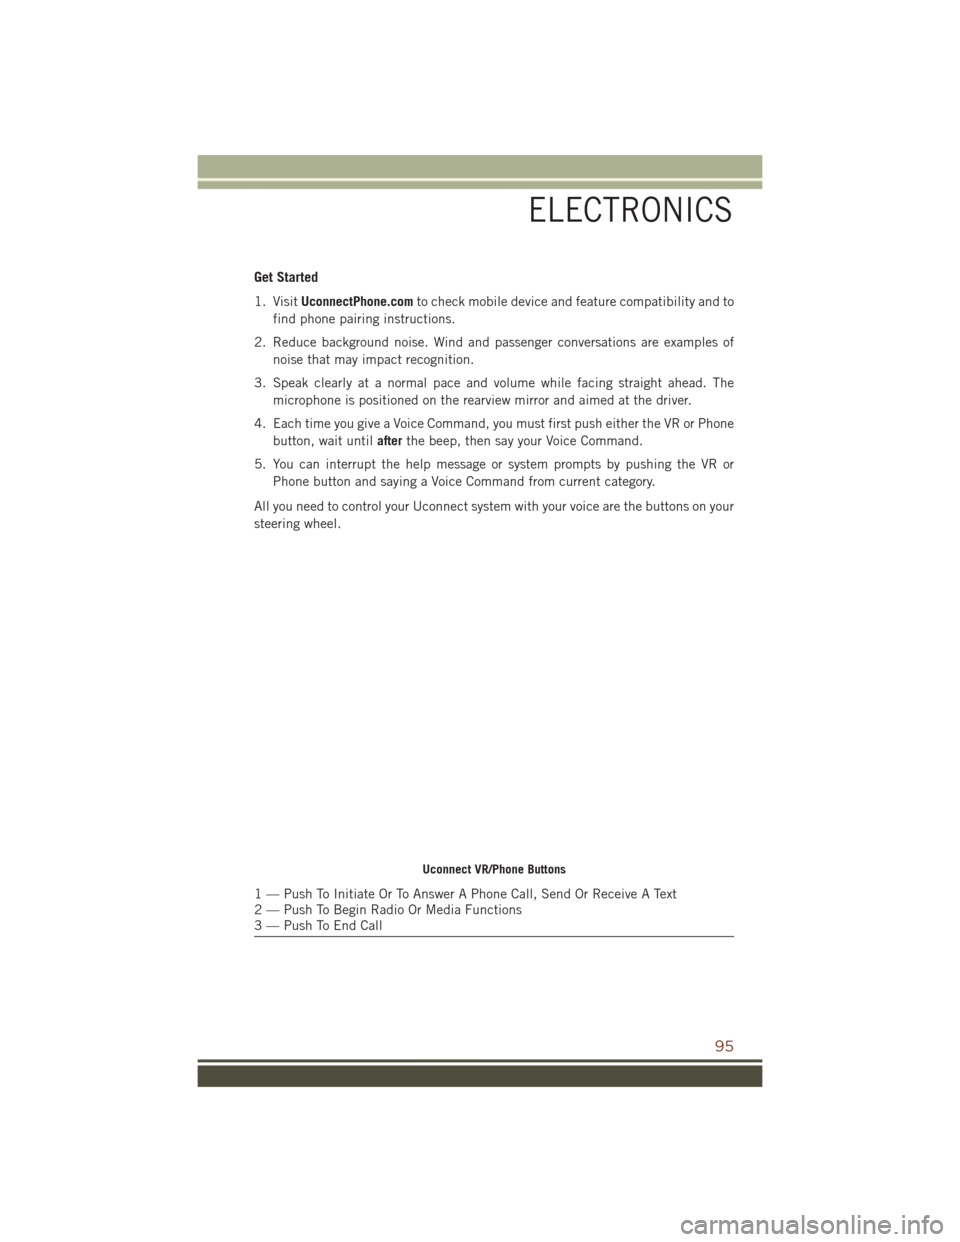
All you need to control your Uconnect system with your voice are the buttons on your
steering wheel.
Uconnect VR/Phone Buttons
1 — Push To Initiate Or To Answer A Phone Call, Send Or Receive A Text
2 — Push To Begin Radio Or Media Functions
3 — Push To End Call
ELECTRONICS
95