battery JEEP GRAND CHEROKEE 2016 WK2 / 4.G Owner's Manual
[x] Cancel search | Manufacturer: JEEP, Model Year: 2016, Model line: GRAND CHEROKEE, Model: JEEP GRAND CHEROKEE 2016 WK2 / 4.GPages: 276, PDF Size: 10.84 MB
Page 155 of 276
WARNING!
To Avoid Serious Injury or Death DO NOT:
• insert any objects into the receptacles
• touch with wet hands
Close the lid when not in use. If this outlet is mishandled, it may cause an electric
shock and failure.
POWER OUTLETS
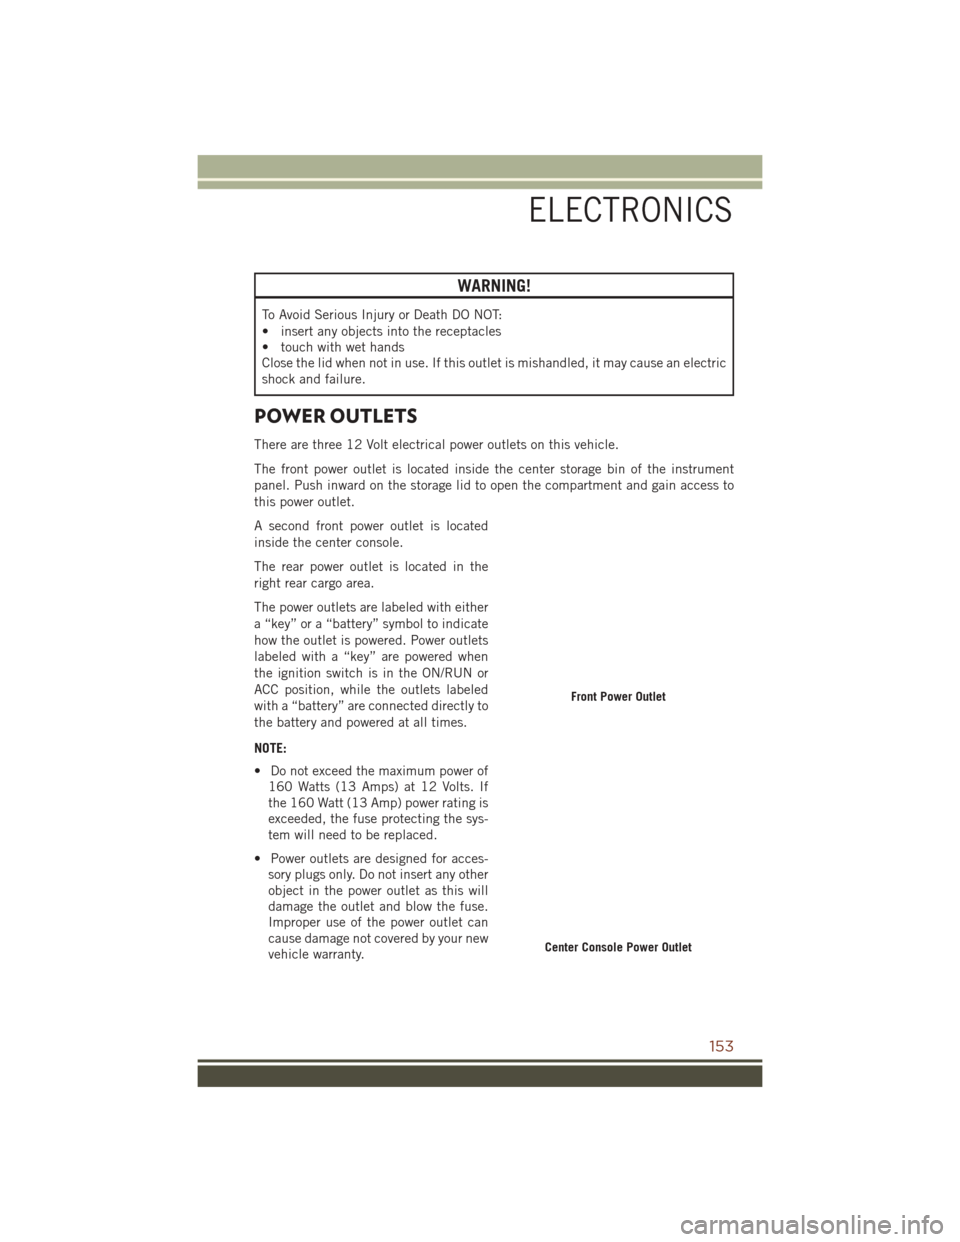
There are three 12 Volt electrical power outlets on this vehicle.
The front power outlet is located inside the center storage bin of the instrument
panel. Push inward on the storage lid to open the compartment and gain access to
this power outlet.
A second front power outlet is located
inside the center console.
The rear power outlet is located in the
right rear cargo area.
The power outlets are labeled with either
a “key” or a “battery” symbol to indicate
how the outlet is powered. Power outlets
labeled with a “key” are powered when
the ignition switch is in the ON/RUN or
ACC position, while the outlets labeled
with a “battery” are connected directly to
the battery and powered at all times.
NOTE:
• Do not exceed the maximum power of160 Watts (13 Amps) at 12 Volts. If
the 160 Watt (13 Amp) power rating is
exceeded, the fuse protecting the sys-
tem will need to be replaced.
• Power outlets are designed for acces- sory plugs only. Do not insert any other
object in the power outlet as this will
damage the outlet and blow the fuse.
Improper use of the power outlet can
cause damage not covered by your new
vehicle warranty.
Front Power Outlet
Center Console Power Outlet
ELECTRONICS
153
Page 156 of 276
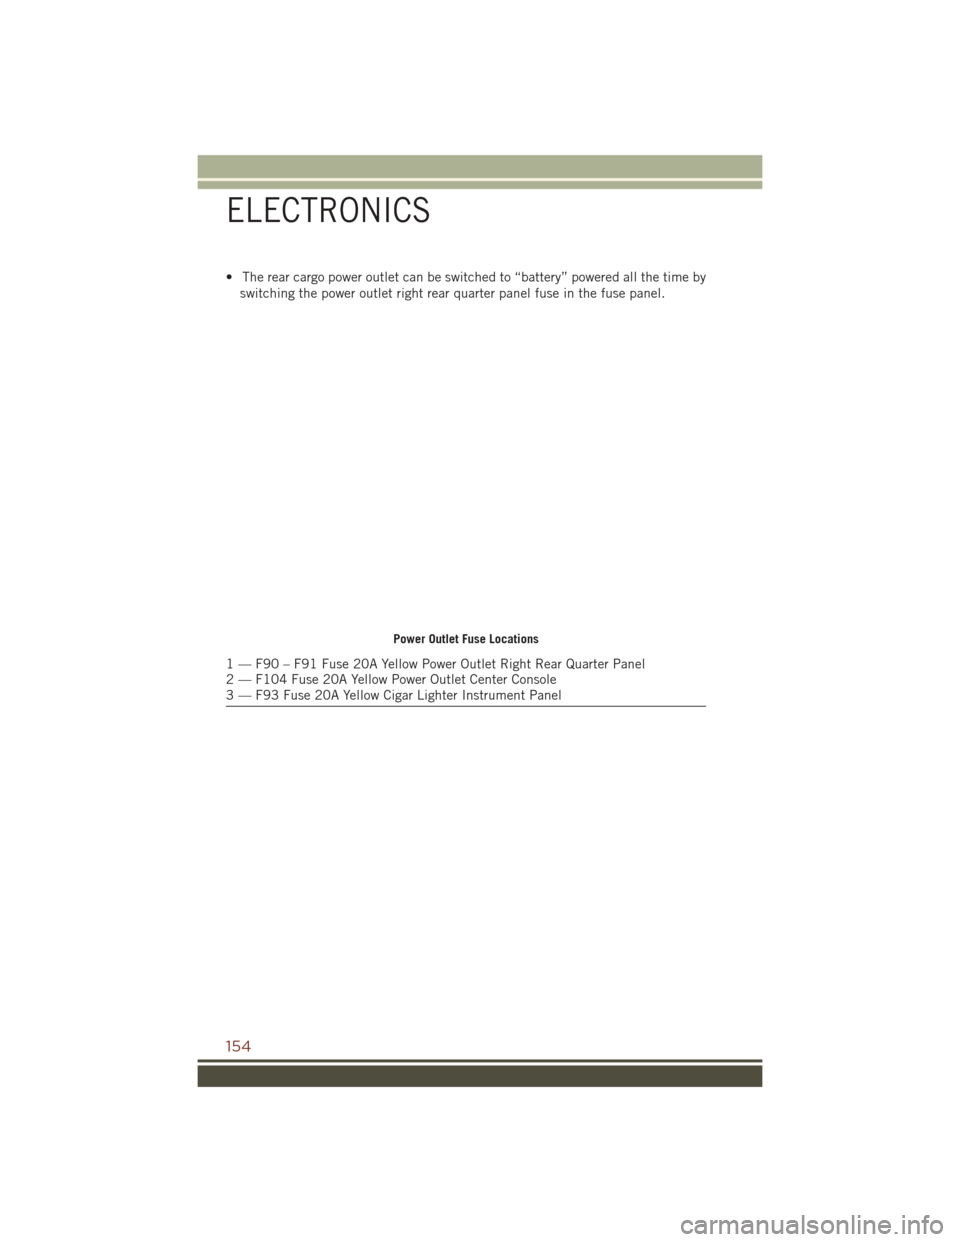
• The rear cargo power outlet can be switched to “battery” powered all the time byswitching the power outlet right rear quarter panel fuse in the fuse panel.
Power Outlet Fuse Locations
1 — F90 – F91 Fuse 20A Yellow Power Outlet Right Rear Quarter Panel
2 — F104 Fuse 20A Yellow Power Outlet Center Console
3 — F93 Fuse 20A Yellow Cigar Lighter Instrument Panel
ELECTRONICS
154
Page 180 of 276
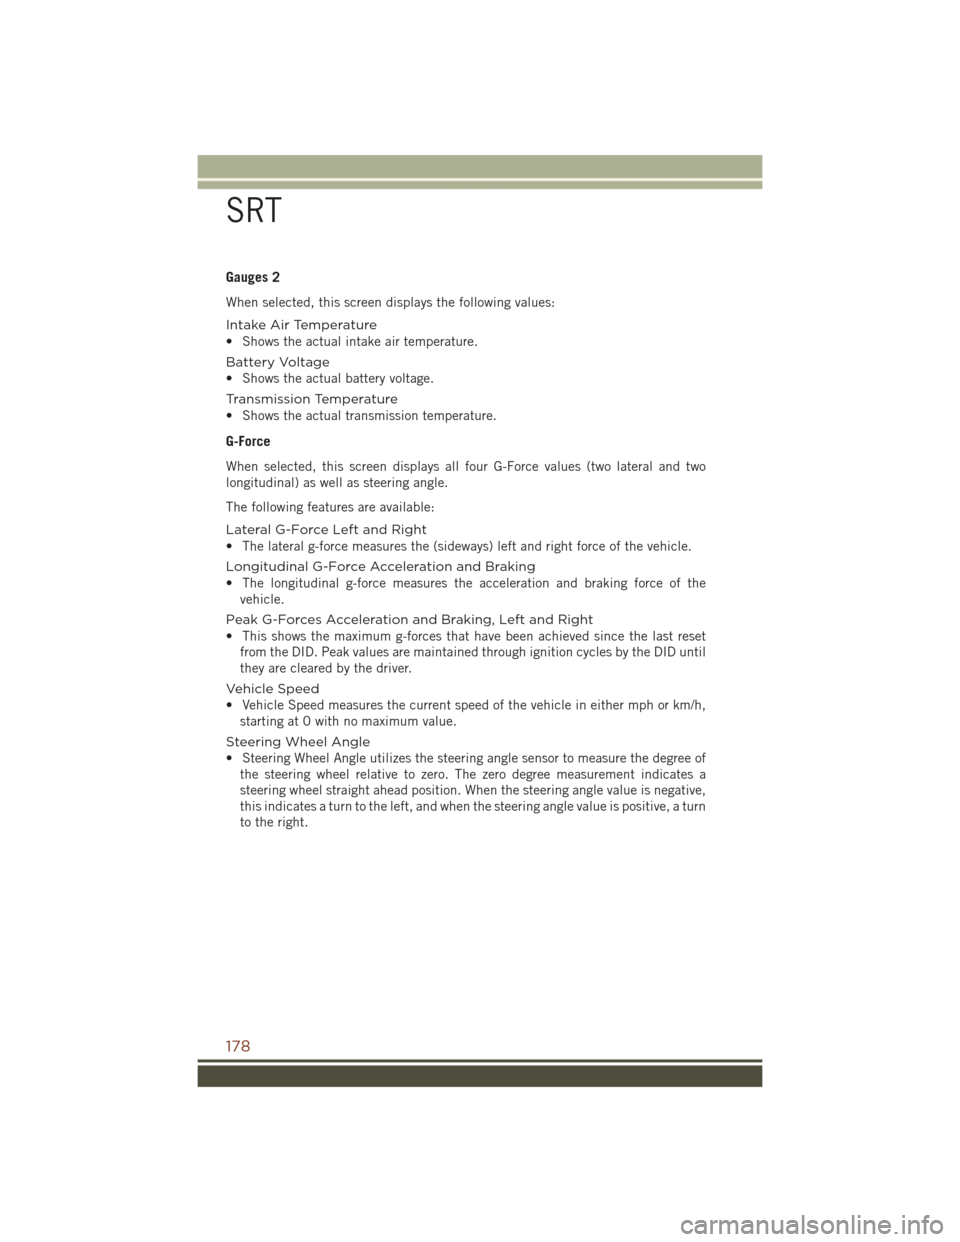
Gauges 2
When selected, this screen displays the following values:
Intake Air Temperature
• Shows the actual intake air temperature.
Battery Voltage
• Shows the actual battery voltage.
Transmission Temperature
• Shows the actual transmission temperature.
G-Force
When selected, this screen displays all four G-Force values (two lateral and two
longitudinal) as well as steering angle.
The following features are available:
Lateral G-Force Left and Right
• The lateral g-force measures the (sideways) left and right force of the vehicle.
Longitudinal G-Force Acceleration and Braking
• The longitudinal g-force measures the acceleration and braking force of thevehicle.
Peak G-Forces Acceleration and Braking, Left and Right
• This shows the maximum g-forces that have been achieved since the last reset from the DID. Peak values are maintained through ignition cycles by the DID until
they are cleared by the driver.
Vehicle Speed
• Vehicle Speed measures the current speed of the vehicle in either mph or km/h, starting at 0 with no maximum value.
Steering Wheel Angle
• Steering Wheel Angle utilizes the steering angle sensor to measure the degree of the steering wheel relative to zero. The zero degree measurement indicates a
steering wheel straight ahead position. When the steering angle value is negative,
this indicates a turn to the left, and when the steering angle value is positive, a turn
to the right.
SRT
178
Page 191 of 276
ROADSIDE ASSISTANCE
Dial toll-free 1-800-521-2779 for U.S. Residents or 1-800-363-4869 for Canadian
Residents.
• Provide your name, vehicle identification number, license plate number, and yourlocation, including the telephone number from which you are calling.
• Briefly describe the nature of the problem and answer a few simple questions.
• You will be given the name of the service provider and an estimated time of arrival. If you feel you are in an “unsafe situation”, please let us know. With your consent,
we will contact local police or safety authorities.
INSTRUMENT CLUSTER WARNING LIGHTS
– Battery Charge Warning Light
This light illuminates when the battery is not charging properly. If the battery charge
warning light remains on, it means that the vehicle is experiencing a problem with the
charging system.
We recommend you do not continue driving if it is on. Have the vehicle serviced
immediately.
– Oil Pressure Warning Light
This light indicates low engine oil pressure. If the light turns on while driving, stop
the vehicle and shut off the engine as soon as possible. A chime will sound for four
minutes when this light turns on.
We recommend you do not operate the vehicle or engine damage will occur. Have the
vehicle serviced immediately.
– Engine Temperature Warning Light
This light warns of an overheated engine condition.
If the light turns on and a warning chime sounds while driving, safely pull over and
stop the vehicle. If the A/C system is on, turn it off. Also, shift the transmission into
NEUTRAL and idle the vehicle. If the temperature reading does not return to normal,
turn the engine off immediately.
We recommend that you do not operate the vehicle or engine damage will occur. Have
the vehicle serviced immediately.
WARNING!
A hot engine cooling system is dangerous. You or others could be badly burned by
steam or boiling coolant.
WHAT TO DO IN EMERGENCIES
189
Page 208 of 276
JUMP-STARTING
If your vehicle has a discharged battery it can be jump-started using a set of jumper
cables and a battery in another vehicle or by using a portable battery booster pack.
Jump-starting can be dangerous if done improperly so please follow the procedures
in this section carefully.
WARNING!
Do not attempt jump-starting if the battery is frozen. It could rupture or explode
and cause personal injury.
CAUTION!
Do not use a portable battery booster pack or any other booster source with a
system voltage greater than 12 Volts or damage to the battery, starter motor,
alternator or electrical system may occur.
NOTE:
When using a portable battery booster pack follow the manufacturer's operating
instructions and precautions.
WHAT TO DO IN EMERGENCIES
206
Page 209 of 276
Preparations For Jump-Start
The battery in your vehicle is located under the passenger's front seat. There are
remote locations located under the hood to assist in jump-starting.
WARNING!
• Take care to avoid the radiator cooling fan whenever the hood is raised. It canstart anytime the ignition switch is ON. You can be injured by moving fan
blades.
• Remove any metal jewelry such as rings, watch bands and bracelets that could
make an inadvertent electrical contact. You could be seriously injured.
• Batteries contain sulfuric acid that can burn your skin or eyes and generate
hydrogen gas which is flammable and explosive. Keep open flames or sparks
away from the battery.
NOTE:
Be sure that the disconnected ends of the cables do not touch while still connected
to the either vehicle.
1. Set the parking brake, shift the automatic transmission into PARK and turn the ignition to LOCK.
2. Turn off the heater, radio, and all unnecessary electrical accessories.
3. Remove the protective cover over the remote positive (+)battery post. Pull upward
on the cover to remove it.
4. If using another vehicle to jump-start the battery, park the vehicle within the jumper cables reach, set the parking brake and make sure the ignition is OFF.
Remote Battery Posts
1 — Remote Positive (+)Post
2 — Remote Negative (-)Post
WHAT TO DO IN EMERGENCIES
207
Page 210 of 276
WARNING!
Do not allow vehicles to touch each other as this could establish a ground
connection and personal injury could result.
Jump-Starting Procedure
WARNING!
Failure to follow this jump-starting procedure could result in personal injury or
property damage due to battery explosion.
CAUTION!
Failure to follow these procedures could result in damage to the charging system
of the booster vehicle or the discharged vehicle.
NOTE:
Make sure at all times that unused ends of jumper cables are not contacting each
other or either vehicle while making connections.
Connecting The Jumper Cables
1. Connect the positive (+)end of the jumper cable to the remote positive (+)post
of the discharged vehicle.
2. Connect the opposite end of the positive (+)jumper cable to the positive (+)post
of the booster battery.
3. Connect the negative end (-)of the jumper cable to the negative (-)post of the
booster battery.
4. Connect the opposite end of the negative (-)jumper cable to the remote negative
(-) post of the vehicle with the discharged battery.
WARNING!
Do not connect the jumper cable to the negative (-)post of the discharged battery.
The resulting electrical spark could cause the battery to explode and could result
in personal injury. Only use the specific ground point, do not use any other exposed
metal parts.
5. Start the engine in the vehicle that has the booster battery, let the engine idle a few minutes, and then start the engine in the vehicle with the discharged battery.
WHAT TO DO IN EMERGENCIES
208
Page 211 of 276
CAUTION!
Do not run the booster vehicle engine above 2000 rpm since it provides no
charging benefit, wastes fuel and can damage booster vehicle engine.
6. Once the engine is started, remove the jumper cables in the reverse sequence:
Disconnecting The Jumper Cables
1. Disconnect the negative (-)end of the jumper cable from the remote negative (-)
post of the discharged vehicle.
2. Disconnect the opposite end of the negative (-)jumper cable from the negative (-)
post of the booster battery.
3. Disconnect the positive (+)end of the jumper cable from the positive (+)post of
the booster battery.
4. Disconnect the opposite end of the positive (+)jumper cable from the remote
positive (+)post of the discharged vehicle.
5. Reinstall the protective cover over the remote positive (+)post of the discharged
vehicle.
If frequent jump-starting is required to start your vehicle you should have the battery
and charging system tested at your authorized dealer.
CAUTION!
Accessories plugged into the vehicle power outlets draw power from the vehicle’s
battery, even when not in use (i.e., cellular devices, etc.). Eventually, if plugged in
long enough without engine operation, the vehicle’s battery will discharge suffi-
ciently to degrade battery life and/or prevent the engine from starting.
EMERGENCY TOW HOOKS — IF EQUIPPED
If your vehicle is equipped with tow hooks, there will be one in the rear and two
mounted on the front of the vehicle. The rear hook will be located on the driver's side
of the vehicle.
NOTE:
For off-road recovery, it is recommended to use both of the front tow hooks to
minimize the risk of damage to the vehicle.
WARNING!
• Do not use a chain for freeing a stuck vehicle. Chains may break, causing serious injury or death.
• Stand clear of vehicles when pulling with tow hooks. Tow straps may become
disengaged, causing serious injury.
WHAT TO DO IN EMERGENCIES
209
Page 212 of 276
CAUTION!
Tow hooks are for emergency use only, to rescue a vehicle stranded off road. Do not
use tow hooks for tow truck hookup or highway towing. You could damage your
vehicle.
MANUAL PARK RELEASE
WARNING!
Always secure your vehicle by fully applying the parking brake, before activating
the Manual Park Release. Activating the Manual Park Release will allow your
vehicle to roll away if it is not secured by the parking brake or by proper connection
to a tow vehicle. Activating the Manual Park Release on an unsecured vehicle
could lead to serious injury or death for those in or around the vehicle.
In order to move the vehicle in cases where the transmission will not shift out of
PARK (such as a dead battery), a Manual Park Release is available.
Follow these steps to use the Manual Park Release:
1. Firmly apply the parking brake.
2. Open the center console and locate the Manual Park Release cover, remove it by snapping the cover away from the console hinges.
3. Using a screwdriver or similar tool, push the metal latch in towards the
tether strap.
Manual Park Release Cover Removed
WHAT TO DO IN EMERGENCIES
210
Page 215 of 276
If you must use the accessories (wipers, defrosters, etc.) while being towed, the
ignition must be in the ON/RUN position, not the ACC position.
If the key fob is unavailable, or the vehicle's battery is discharged, refer to “Manual
Park Release” in this section for instructions on shifting the transmission out of
PARK for towing.
CAUTION!
• Do not use sling type equipment when towing. Vehicle damage may occur.
• When securing the vehicle to a flat bed truck, do not attach to front or rearsuspension components. Damage to your vehicle may result from improper
towing.
Two-Wheel Drive Models
The manufacturer recommends towing your vehicle with all four wheels OFFthe
ground using a flatbed.
If flatbed equipment is not available, and the transmission is operable, the vehicle
may be towed (with rear wheels on the ground) under the following conditions:
• The transmission must be in NEUTRAL. Refer to "Manual Park Release" in this section for instructions on shifting the transmission to NEUTRAL when the engine
is off.
• The towing speed must not exceed 30 mph (48 km/h).
• The towing distance must not exceed 30 miles (48 km).
If the transmission is not operable, or the vehicle must be towed faster than 30 mph
(48 km/h) or farther than 30 miles (48 km), tow with the rear wheels OFFthe ground.
Acceptable methods are to tow the vehicle on a flatbed, or with the front wheels
raised and the rear wheels on a towing dolly, or (when using a suitable steering wheel
stabilizer to hold the front wheels in the straight position) with the rear wheels raised
and the front wheels on the ground.
CAUTION!
Towing faster than 30 mph (48 km/h) or farther than 30 miles (48 km) with rear
wheels on the ground can cause severe transmission damage. Damage from
improper towing is not covered under the New Vehicle Limited Warranty.
WHAT TO DO IN EMERGENCIES
213