check engine light JEEP GRAND CHEROKEE 2017 WK2 / 4.G Owner's Manual
[x] Cancel search | Manufacturer: JEEP, Model Year: 2017, Model line: GRAND CHEROKEE, Model: JEEP GRAND CHEROKEE 2017 WK2 / 4.GPages: 372
Page 234 of 372
SCHEDULED SERVICING
NON-SRT
Your vehicle is equipped with an automatic
oil change indicator system. The oil change
indicator system will remind you that it is
time to take your vehicle in for scheduled
maintenance.
Based on engine operation conditions, the oil
change indicator message will illuminate.
This means that service is required for your
vehicle. Operating conditions such as fre-
quent short-trips, trailer tow, extremely hot or
cold ambient temperatures, and E85 fuel
usage will influence when the “Oil Change
Required” message is displayed. Severe op-erating conditions can cause the change oil
message to illuminate as early as
3,500 miles (5,600 km) since last reset.
Have your vehicle serviced as soon as pos-
sible, within the next 500 miles (805 km).
Your authorized dealer will reset the oil
change indicator message after completing
the scheduled oil change.
NOTE:
Under no circumstances should oil change
intervals exceed 10,000 miles (16,000 km),
twelve months or 350 hours of engine run
time, whichever comes first. The 350 hours
of engine run or idle time is generally only a
concern for fleet customers. Once A Month Or Before A Long Trip:
• Check engine oil level.
• Check windshield washer fluid level.
• Check the tire inflation pressures and look
for unusual wear or damage.
• Check the fluid levels of the coolant reser- voir, brake master cylinder and fill as
needed.
• Check function of all interior and exterior lights
Required Maintenance
Refer to the Maintenance Schedules on the
following pages for required maintenance.
At Every Oil Change Interval As Indicated By Oil Change Indicator System:
• Change oil and filter.
• Rotate the tires. Rotate at the first sign of irregular wear, even if it occurs before the oil indicator system turns on.
• Inspect battery and clean and tighten terminals as required.
• Inspect brake pads, shoes, rotors, drums, hoses and park brake.
• Inspect engine cooling system protection and hoses.
• Inspect exhaust system.
• Inspect engine air cleaner if using in dusty or off-road conditions.SERVICING AND MAINTENANCE
232
Page 237 of 372
SCHEDULED SERVICING –
SRT
The Scheduled Maintenance services listed in
this manual must be done at the times or mile-
ages specified to protect your vehicle warranty
and ensure the best vehicle performance and
reliability. More frequent maintenance may be
needed for vehicles in severe operating condi-
tions, such as dusty areas and very short trip
driving. Inspection and service should also be
done anytime a malfunction is suspected.
The oil change indicator system will remind
you that it is time to take your vehicle in for
scheduled maintenance.
The Instrument Cluster Display will display
an “Oil Change Required” message and a
single chime will sound, indicating that an oil
change is necessary.
Based on engine operation conditions, the oil
change indicator message will illuminate. This
means that service is required for your vehicle.
Have your vehicle serviced as soon as possible,
within the next 500 miles (805 km).
NOTE:
• The oil change indicator message will notmonitor the time since the last oil change.
Change your vehicle's oil if it has been six
months since your last oil change, even if
the oil change indicator message is NOT
illuminated.
• Change your engine oil more often if you drive your vehicle off-road for an extended
period of time.
•
Under no circumstances should oil change
intervals exceed 6,000 miles (10,000 km) or
six months, whichever comes first.
Your authorized dealer will reset the oil change
indicator message after completing the sched-
uled oil change. If a scheduled oil change is
performed by someone other than your autho-
rized dealer, the message can be reset by
referring to the steps described under “Instru-
ment Cluster Display” in “Getting To Know
Your Instrument Panel” in this guide.
At Each Stop For Fuel
• Check the engine oil level. Refer to “En- gine Compartment” in this section for fur-
ther information. • Check the windshield washer solvent and
add if required.
Once A Month
• Check tire pressure and look for unusual wear or damage.
• Inspect the battery, and clean and tighten the terminals as required.
• Check the fluid levels of the coolant reser- voir, engine oil, brake master cylinder, and
add as needed.
• Check all lights and other electrical items for correct operation.
At Each Oil Change
• Change the engine oil filter.
• Inspect the brake hoses and lines.
CAUTION!
Failure to perform the required mainte-
nance items may result in damage to the
vehicle.
235
Page 241 of 372
SCHEDULED SERVICING —
DIESEL ENGINE
Your vehicle is equipped with an automatic
oil change indicator system. The oil change
indicator system will remind you that it is
time to take your vehicle in for scheduled
maintenance.
Based on engine operation conditions, the oil
change indicator message will illuminate.
This means that service is required for your
vehicle. Operating conditions such as fre-
quent short-trips, trailer tow, extremely hot or
cold ambient temperatures will influence
when the “Oil Change Required” message is
displayed. Severe Operating Conditions can
cause the change oil message to illuminate
as early as 3,500 miles (5,600 km) since last
reset. Have your vehicle serviced as soon as
possible, within the next 500 miles
(805 km).Your authorized dealer will reset the oil
change indicator message after completing
the scheduled oil change. If a scheduled oil
change is performed by someone other than
your authorized dealer, the message can be
reset by referring to the steps described un-
der “Instrument Cluster Display” in “Getting
To Know Your Instrument Panel” in this
guide.
NOTE:
Under no circumstances should oil change
intervals exceed 10,000 miles (16,000 km)
or twelve months, whichever comes first.
Engine Oil Filter Replacement
Residual oil in the housing may spill from the
housing when the new filter is installed if the
residual oil is not either removed from the
housing or enough time has not elapsed to
allow the oil to drain back into the engine.
When servicing the oil filter on this engine,carefully remove the filter and use a suction
gun to remove any residual oil left in the
housing or wait about 30 minutes for the oil
to drain back into the engine.
Once A Month Or Before A Long Trip:
• Check engine oil level
• Check windshield washer fluid level
• Check the tire inflation pressures and look
for unusual wear or damage
• Check the fluid levels of the coolant reser- voir, brake master cylinder, and fill as
needed
• Check function of all interior and exterior lights
239
Page 250 of 372
Checking Oil Level — Gasoline Engine
To assure proper lubrication of your vehicle’s
engine, the engine oil must be maintained at
the correct level. Check the oil level at regular
intervals, such as every fuel stop. The best
time to check the engine oil level is about five
minutes after a fully warmed up engine is
shut off.
Checking the oil while the vehicle is on level
ground will improve the accuracy of the oil
level readings. Always maintain the oil level
within the SAFE zone on the dipstick. Adding
one quart of oil when the reading is at the
bottom of the SAFE zone will result in a
reading at the top of the safe zone on these
engines.
CAUTION!
Overfilling or underfilling the crankcase
will cause aeration or loss of oil pressure.
This could damage your engine.
Checking Oil Level — Diesel Engine
To assure proper lubrication of your vehicle's
engine, the engine oil must be maintained at
the correct level. Check the oil level at regular
intervals. The best time to check the oil level
is before starting the engine after it has been
parked overnight. When checking oil after
operating the engine, first ensure the engine
is at full operating temperature, then wait for
five minutes after engine shutdown to check
the oil.
Checking the oil while the vehicle is on level
ground will improve the accuracy of the oil
level readings. Add oil only when the level on
the dipstick is below the “MIN” mark. The
total capacity from the MIN mark to the MAX
mark is 1.7 qts (1.6L).
CAUTION!
Overfilling or underfilling the crankcase
will cause oil aeration or loss of oil pres-
sure. This could damage your engine.NOTE:
It is possible for your oil level to be slightly
higher than a previous check. This would be
due to diesel fuel that may temporarily be in
the crankcase due to operation of the diesel
particulate filter regeneration strategy. This
fuel will evaporate out under normal opera-
tion.
Never operate the engine with oil level below
the “MIN” mark or above the upper “MAX”
mark.
Adding Washer Fluid
The instrument cluster display will indicate
when the washer fluid level is low. When the
sensor detects a low fluid level, the wind-
shield will light on the vehicle graphic outline
and the “WASHER FLUID LOW” message
will be displayed.
The fluid reservoir for the windshield washers
and the rear window washer is shared. The
fluid reservoir is located in the engine com-
partment, be sure to check the fluid level at
regular intervals. Fill the reservoir with wind-
shield washer solvent only (not radiator anti-
freeze). When refilling the washer fluid reser-
SERVICING AND MAINTENANCE
248
Page 269 of 372
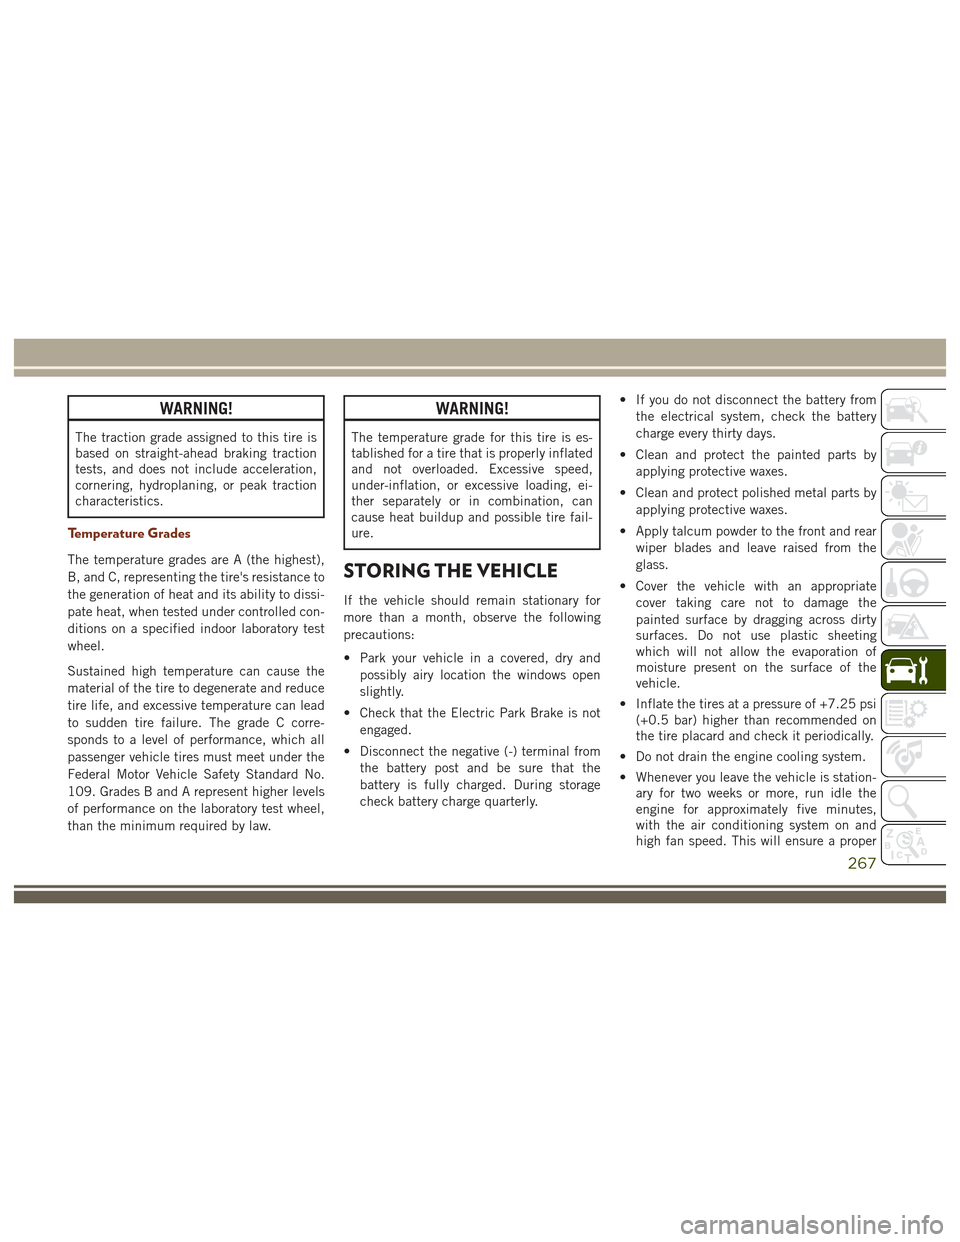
WARNING!
The traction grade assigned to this tire is
based on straight-ahead braking traction
tests, and does not include acceleration,
cornering, hydroplaning, or peak traction
characteristics.
Temperature Grades
The temperature grades are A (the highest),
B, and C, representing the tire's resistance to
the generation of heat and its ability to dissi-
pate heat, when tested under controlled con-
ditions on a specified indoor laboratory test
wheel.
Sustained high temperature can cause the
material of the tire to degenerate and reduce
tire life, and excessive temperature can lead
to sudden tire failure. The grade C corre-
sponds to a level of performance, which all
passenger vehicle tires must meet under the
Federal Motor Vehicle Safety Standard No.
109. Grades B and A represent higher levels
of performance on the laboratory test wheel,
than the minimum required by law.
WARNING!
The temperature grade for this tire is es-
tablished for a tire that is properly inflated
and not overloaded. Excessive speed,
under-inflation, or excessive loading, ei-
ther separately or in combination, can
cause heat buildup and possible tire fail-
ure.
STORING THE VEHICLE
If the vehicle should remain stationary for
more than a month, observe the following
precautions:
• Park your vehicle in a covered, dry andpossibly airy location the windows open
slightly.
• Check that the Electric Park Brake is not engaged.
• Disconnect the negative (-) terminal from the battery post and be sure that the
battery is fully charged. During storage
check battery charge quarterly. • If you do not disconnect the battery from
the electrical system, check the battery
charge every thirty days.
• Clean and protect the painted parts by applying protective waxes.
• Clean and protect polished metal parts by applying protective waxes.
• Apply talcum powder to the front and rear wiper blades and leave raised from the
glass.
• Cover the vehicle with an appropriate cover taking care not to damage the
painted surface by dragging across dirty
surfaces. Do not use plastic sheeting
which will not allow the evaporation of
moisture present on the surface of the
vehicle.
• Inflate the tires at a pressure of +7.25 psi (+0.5 bar) higher than recommended on
the tire placard and check it periodically.
• Do not drain the engine cooling system.
• Whenever you leave the vehicle is station- ary for two weeks or more, run idle the
engine for approximately five minutes,
with the air conditioning system on and
high fan speed. This will ensure a proper
267
Page 275 of 372
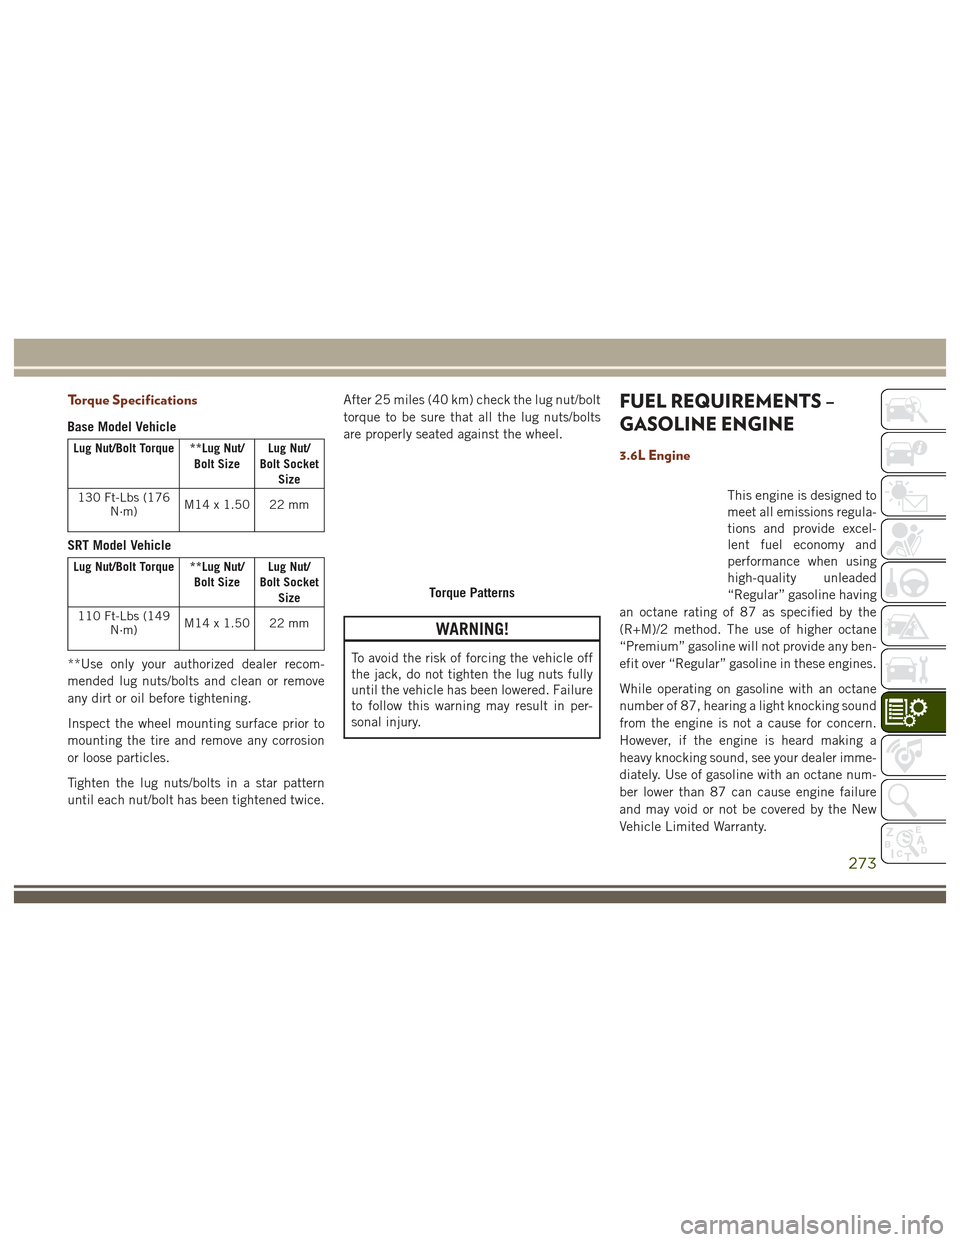
Torque Specifications
Base Model Vehicle
Lug Nut/Bolt Torque **Lug Nut/Bolt SizeLug Nut/
Bolt Socket Size
130 Ft-Lbs (176 N·m) M14x1.50 22mm
SRT Model Vehicle
Lug Nut/Bolt Torque **Lug Nut/
Bolt SizeLug Nut/
Bolt Socket Size
110 Ft-Lbs (149 N·m) M14x1.50 22mm
**Use only your authorized dealer recom-
mended lug nuts/bolts and clean or remove
any dirt or oil before tightening.
Inspect the wheel mounting surface prior to
mounting the tire and remove any corrosion
or loose particles.
Tighten the lug nuts/bolts in a star pattern
until each nut/bolt has been tightened twice. After 25 miles (40 km) check the lug nut/bolt
torque to be sure that all the lug nuts/bolts
are properly seated against the wheel.
WARNING!
To avoid the risk of forcing the vehicle off
the jack, do not tighten the lug nuts fully
until the vehicle has been lowered. Failure
to follow this warning may result in per-
sonal injury.
FUEL REQUIREMENTS –
GASOLINE ENGINE
3.6L Engine
This engine is designed to
meet all emissions regula-
tions and provide excel-
lent fuel economy and
performance when using
high-quality unleaded
“Regular” gasoline having
an octane rating of 87 as specified by the
(R+M)/2 method. The use of higher octane
“Premium” gasoline will not provide any ben-
efit over “Regular” gasoline in these engines.
While operating on gasoline with an octane
number of 87, hearing a light knocking sound
from the engine is not a cause for concern.
However, if the engine is heard making a
heavy knocking sound, see your dealer imme-
diately. Use of gasoline with an octane num-
ber lower than 87 can cause engine failure
and may void or not be covered by the New
Vehicle Limited Warranty.
Torque Patterns
273
Page 324 of 372
our satellite service area and in AK and HI.
©2016 Sirius XM Radio Inc. Sirius, XM
and all related marks and logos are trade-
marks of Sirius XM Radio Inc.
UCONNECT TOUCH
SETTINGS
The Uconnect system allows you to access
Customer Programmable feature settings
such as Display, Voice, Clock, Safety & Driv-
ing Assistance, Lights, Doors & Locks,
Auto-On Comfort & Remote Start, Engine Off
Options, Compass Settings, Audio, Phone/
Bluetooth, Suspension, SiriusXM Setup, Re-
store Settings, Clear Personal Data, and Sys-
tem Information through buttons on the
touchscreen.
Push the SETTINGS button (Uconnect 5.0),
or press the “Apps” button (Uconnect 8.4)
located near the bottom of the touchscreen,
then press the “Settings” button on the
touchscreen to access the Settings screen.
When making a selection, scroll up or down
until the preferred setting is highlighted,
then press the preferred setting until a check-mark appears next to the setting, showing
that setting has been selected. The following
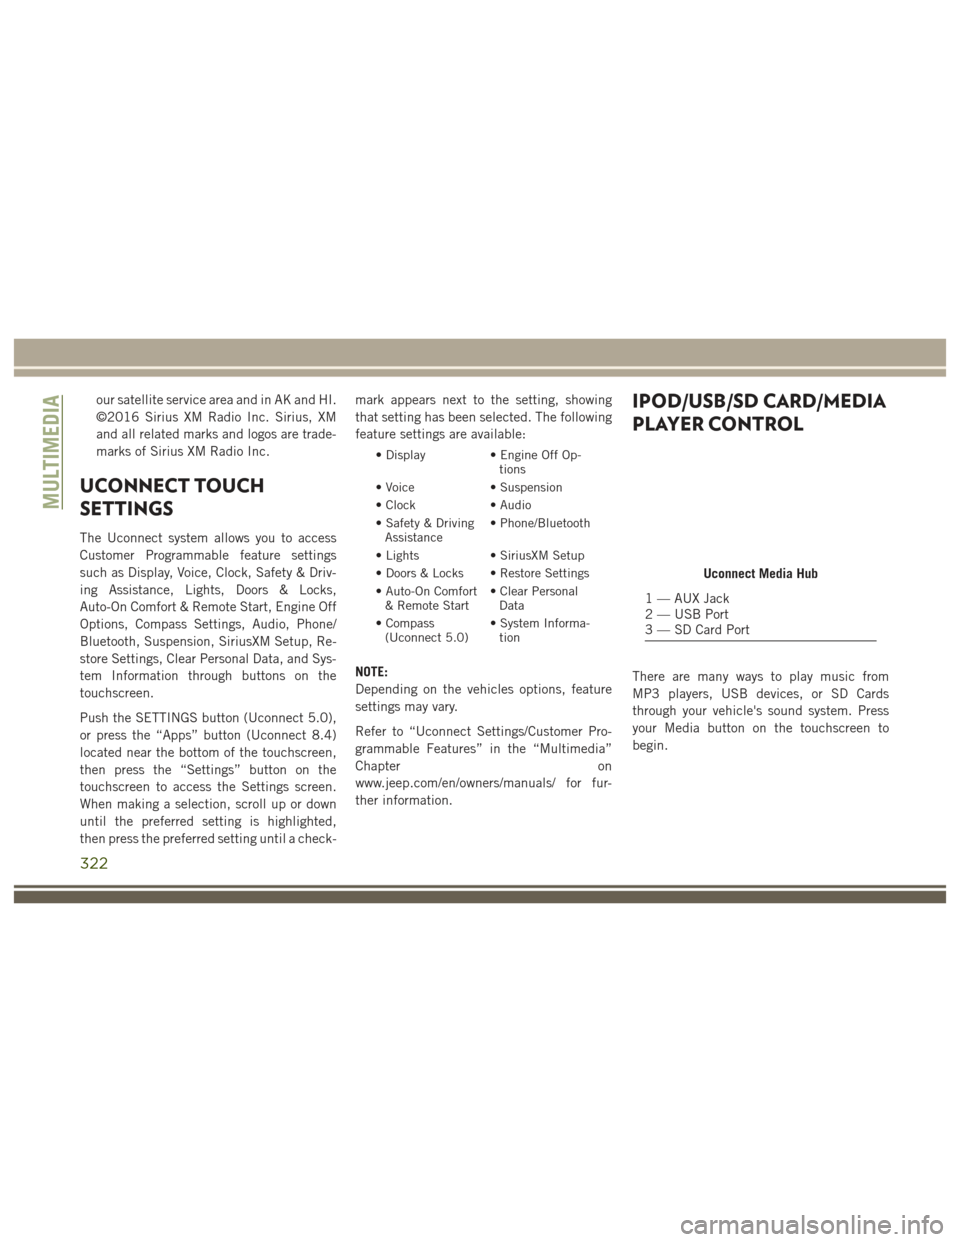
feature settings are available:
• Display
• Engine Off Op-
tions
• Voice • Suspension
• Clock • Audio
• Safety & Driving Assistance • Phone/Bluetooth
• Lights • SiriusXM Setup
• Doors & Locks • Restore Settings
• Auto-On Comfort & Remote Start • Clear Personal
Data
• Compass (Uconnect 5.0) • System Informa-
tion
NOTE:
Depending on the vehicles options, feature
settings may vary.
Refer to “Uconnect Settings/Customer Pro-
grammable Features” in the “Multimedia”
Chapter on
www.jeep.com/en/owners/manuals/ for fur-
ther information.
IPOD/USB/SD CARD/MEDIA
PLAYER CONTROL
There are many ways to play music from
MP3 players, USB devices, or SD Cards
through your vehicle's sound system. Press
your Media button on the touchscreen to
begin.
Uconnect Media Hub
1 — AUX Jack
2 — USB Port
3 — SD Card Port
MULTIMEDIA
322
Page 361 of 372
AccessUconnect ..........291, 293, 298
Accessories ..................283
Mopar ...................283
Adaptive Cruise Control (ACC) Off .................175, 177
On..................175, 177
Adaptive Cruise Control (ACC) (Cruise Control) ..................174
Adding Fuel ..............186, 188
Additives, Fuel ................274
AirBag ....................122 Air Bag Operation ............124
Air Bag Warning Light .........121
Driver Knee Air Bag ...........124
Enhanced Accident Response .128, 229
Event Data Recorder (EDR) ......229
Front Air Bag ..............122
If A Deployment Occurs ........128
Knee Impact Bolsters .........124
Maintaining Your Air Bag System . .129
Redundant Air Bag Warning Light . .122
Side Air Bags ..............125
Transporting Pets ............142
Air Bag Light ...........80, 121, 144 Air Bag Maintenance
............129
Air Conditioner Maintenance .......251
Air Conditioning Filter .........51, 252
Air Conditioning, Operating Tips ......51
Air Conditioning Refrigerant ........251
Air Conditioning System .......50, 251
Alarm Arm The System .............18
Disarm The System ............18
Alarm (Security Alarm) .........17, 81
Alarm System (Security Alarm) .......17
Antifreeze (Engine Coolant) ........276
Capacities ................277
Anti-Lock Brake System (ABS) .......92
Anti-Lock Warning Light ...........86
APP Uconnect Access ............293
Arming System (Security Alarm) ......17
Assist, Hill Start ................94
Audio
Jack ..................322
Auto Down Power Windows .........53
Automatic Door Locks ............23
Automatic High Beams ...........38
Automatic Temperature Control (ATC) . . .50
Automatic Transmission ..........159 Adding Fluid
...........279, 281
Fluid Level Check ...........250
Fluid Type .........279, 281, 283
Auto Up Power Windows ...........53
Axle Fluid ...................283
Axle Lubrication ...........279, 281
Background Themes Uconnect 8.4N .............341
Back-Up Camera ..............185
Battery ..................82, 250
Charging System Light .........82
Belts, Seat ..................143
Blind Spot Monitoring ...........103
B-Pillar Location ..............261
Brake Assist System .............93
Brake Control System, Electronic .....93
Brake Fluid .......249, 279, 281, 283
Brake System ................249
Fluid Check ........249, 279, 281
Master Cylinder .............249
Warning Light ...............80
Brake/Transmission Interlock .......158
Break-In Recommendations, New Vehicle ...................155
INDEX
359
Page 362 of 372
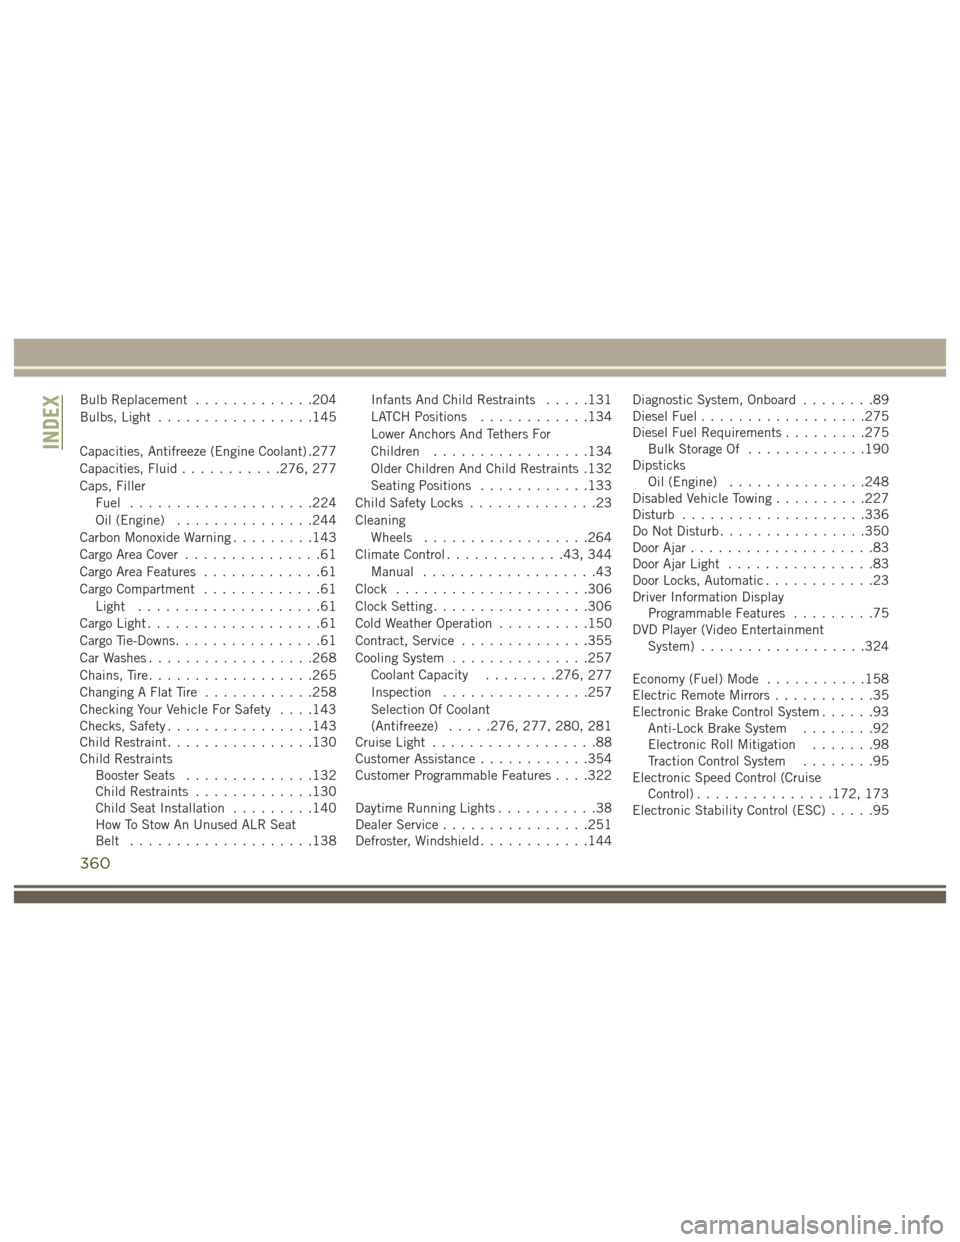
Bulb Replacement.............204
Bulbs, Light .................145
Capacities, Antifreeze (Engine Coolant) .277
Capacities, Fluid ...........276, 277
Caps, Filler Fuel ....................224
Oil (Engine) ...............244
Carbon Monoxide Warning .........143
Cargo Area Cover ...............61
Cargo Area Features .............61
Cargo Compartment .............61
Light ....................61
Cargo Light ...................61
Cargo Tie-Downs ................61
Car Washes ..................268
Chains, Tire ..................265
Changing A Flat Tire ............258
Checking Your Vehicle For Safety . . . .143
Checks, Safety ................143
Child Restraint ................130
Child Restraints Booster Seats ..............132
Child Restraints .............130
Child Seat Installation .........140
How To Stow An Unused ALR Seat
Belt ....................138 Infants And Child Restraints
.....131
LATCH Positions ............134
Lower Anchors And Tethers For
Children .................134
Older Children And Child Restraints .132
Seating Positions ............133
Child Safety Locks ..............23
Cleaning Wheels ..................264
Climate Control .............43, 344
Manual ...................43
Clock .....................306
Clock Setting .................306
Cold Weather Operation ..........150
Contract, Service ..............355
Cooling System ...............257
Coolant Capacity ........276,
277
Inspection ................257
Selection Of Coolant
(Antifreeze) .....276, 277, 280, 281
Cruise Light ..................88
Customer Assistance ............354
Customer Programmable Features . . . .322
Daytime Running Lights ...........38
Dealer Service ................251
Defroster, Windshield ............144 Diagnostic System, Onboard
........89
Diesel Fuel ..................275
Diesel Fuel Requirements .........275
Bulk Storage Of .............190
Dipsticks Oil (Engine) ...............248
Disabled Vehicle Towing ..........227
Disturb ....................336
Do Not Disturb ................350
Door Ajar ....................83
Door Ajar Light ................83
Door Locks, Automatic ............23
Driver Information Display Programmable Features .........75
DVD Player (Video Entertainment System) ..................324
Economy (Fuel) Mode ...........158
Electric Remote Mirrors ...........35
Electronic Brake Control System ......93
Anti-Lock Brake System ........92
Electronic Roll Mitigation .......98
Traction Control System ........95
Electronic Speed Control (Cruise Control) ...............172, 173
Electronic Stability Control (ESC) .....95
INDEX
360
Page 363 of 372
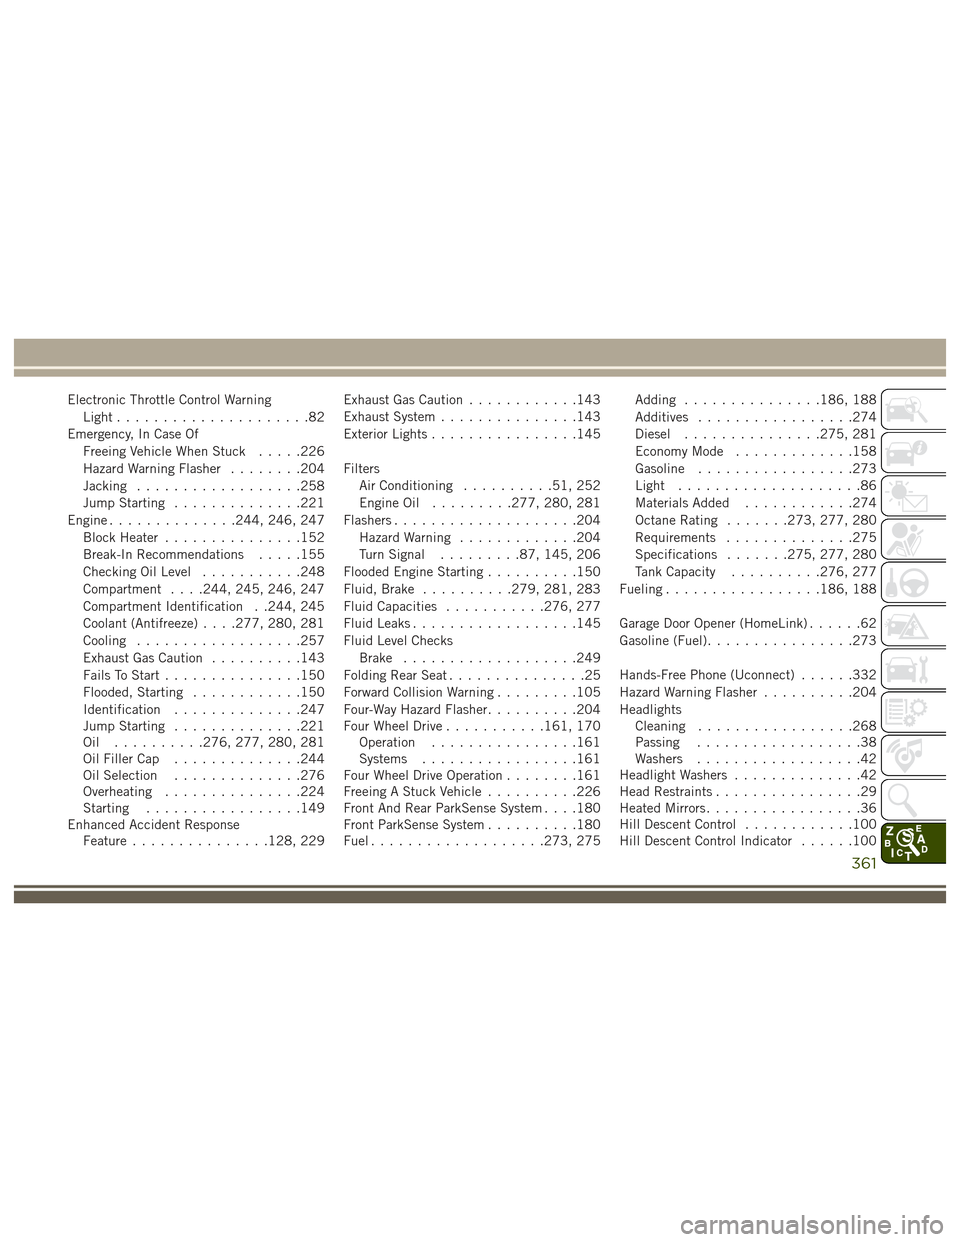
Electronic Throttle Control WarningLight .....................82
Emergency, In Case Of Freeing Vehicle When Stuck .....226
Hazard Warning Flasher ........204
Jacking ..................258
Jump Starting ..............221
Engine ..............244, 246, 247
Block Heater ...............152
Break-In Recommendations .....155
Checking Oil Level ...........248
Compartment . . . .244, 245, 246, 247
Compartment Identification . .244, 245
Coolant (Antifreeze) . . . .277, 280, 281
Cooling ..................257
Exhaust Gas Caution ..........143
Fails To Start ...............150
Flooded, Starting ............150
Identification ..............247
Jump Starting ..............221
Oil ..........276, 277, 280, 281
Oil Filler Cap ..............244
Oil Selection ..............276
Overheating ...............224
Starting .................149
Enhanced Accident Response Feature ...............128, 229 Exhaust Gas Caution
............143
Exhaust System ...............143
Exterior Lights ................145
Filters Air Conditioning ..........51, 252
Engine Oil .........277, 280, 281
Flashers ....................204
Hazard Warning .............204
Turn Signal .........87, 145, 206
Flooded Engine Starting ..........150
Fluid, Brake ..........279, 281, 283
Fluid Capacities ...........276, 277
Fluid
Leaks ..................145
Fluid Level Checks Brake ...................249
Folding Rear Seat ...............25
Forward Collision Warning .........105
Four-Way Hazard Flasher ..........204
Four Wheel Drive ...........161, 170
Operation ................161
Systems .................161
Four Wheel Drive Operation ........161
Freeing A Stuck Vehicle ..........226
Front And Rear ParkSense System . . . .180
Front ParkSense System ..........180
Fuel ...................273, 275 Adding
...............186, 188
Additives .................274
Diesel ...............275, 281
Economy Mode .............158
Gasoline .................273
Light ....................86
Materials Added ............274
Octane Rating .......273, 277, 280
Requirements ..............275
Specifications .......275, 277, 280
Tank Capacity ..........276, 277
Fueling .................186, 188
Garage Door Opener (HomeLink) ......62
Gasoline (Fuel) ................273
Hands-Free Phone (Uconnect) ......332
Hazard Warning Flasher ..........204
Headlights Cleaning .................268
Passing ..................38
Washers ..................42
Headlight Washers ..............42
Head Restraints ................29
Heated Mirrors .................36
Hill Descent Control ............100
Hill
Descent Control Indicator ......100
361