CD player JEEP GRAND CHEROKEE 2017 WK2 / 4.G User Guide
[x] Cancel search | Manufacturer: JEEP, Model Year: 2017, Model line: GRAND CHEROKEE, Model: JEEP GRAND CHEROKEE 2017 WK2 / 4.GPages: 372
Page 33 of 372
NOTE:
• The head restraints should only be re-moved by qualified technicians, for ser-
vice purposes only. If either of the head
restraints require removal, see your autho-
rized dealer.
• In the event of deployment of an Active Head Restraint, refer to “Occupant Re-
straint Systems” in “Safety” in your Own-
er’s Manual at www.jeep.com/en/
owners/manuals/ for further information.
WARNING!
• All occupants, including the driver,
should not operate a vehicle or sit in a
vehicle’s seat until the head restraints
are placed in their proper positions in
order to minimize the risk of neck injury
in the event of a collision.
• Do not place items over the top of the
Active Head Restraint, such as coats,
seat covers or portable DVD players.
These items may interfere with the op-
eration of the Active Head Restraint in
the event of a collision and could result
in serious injury or death.
• Active Head Restraints may be deployed
if they are struck by an object such as a
hand, foot or loose cargo. To avoid acci-
dental deployment of the Active Head
Restraint ensure that all cargo is se-
cured, as loose cargo could contact the
Active Head Restraint during sudden
stops. Failure to follow this warning
could cause personal injury if the Active
Head Restraint is deployed.
Front Removal
NOTE:
• The head restraints should only be re- moved by qualified technicians, for ser-
vice purposes only. If either of the head
restraints require removal, see your autho-
rized dealer.
• In the event of deployment of an Active Head Restraint, refer to “Occupant Re-
straint Systems” in “Safety” in your Own-
er’s Manual at www.jeep.com/en/
owners/manuals/ for further information.
WARNING!
• All occupants, including the driver,
should not operate a vehicle or sit in a
vehicle’s seat until the head restraints
are placed in their proper positions in
order to minimize the risk of neck injury
in the event of a collision.
• Do not place items over the top of the
Active Head Restraint, such as coats,
seat covers or portable DVD players.
These items may interfere with the op-
eration of the Active Head Restraint in
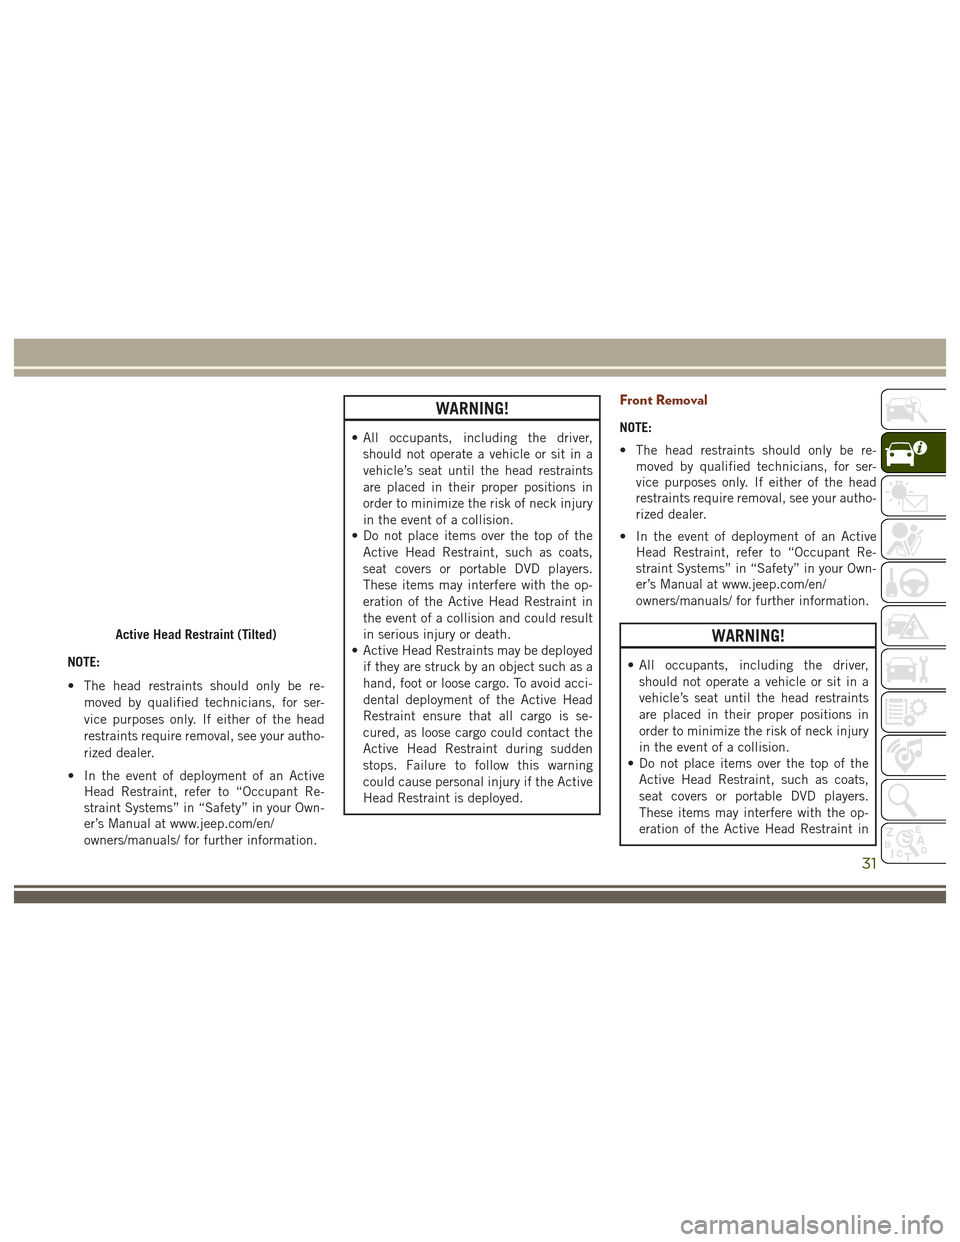
Active Head Restraint (Tilted)
31
Page 122 of 372
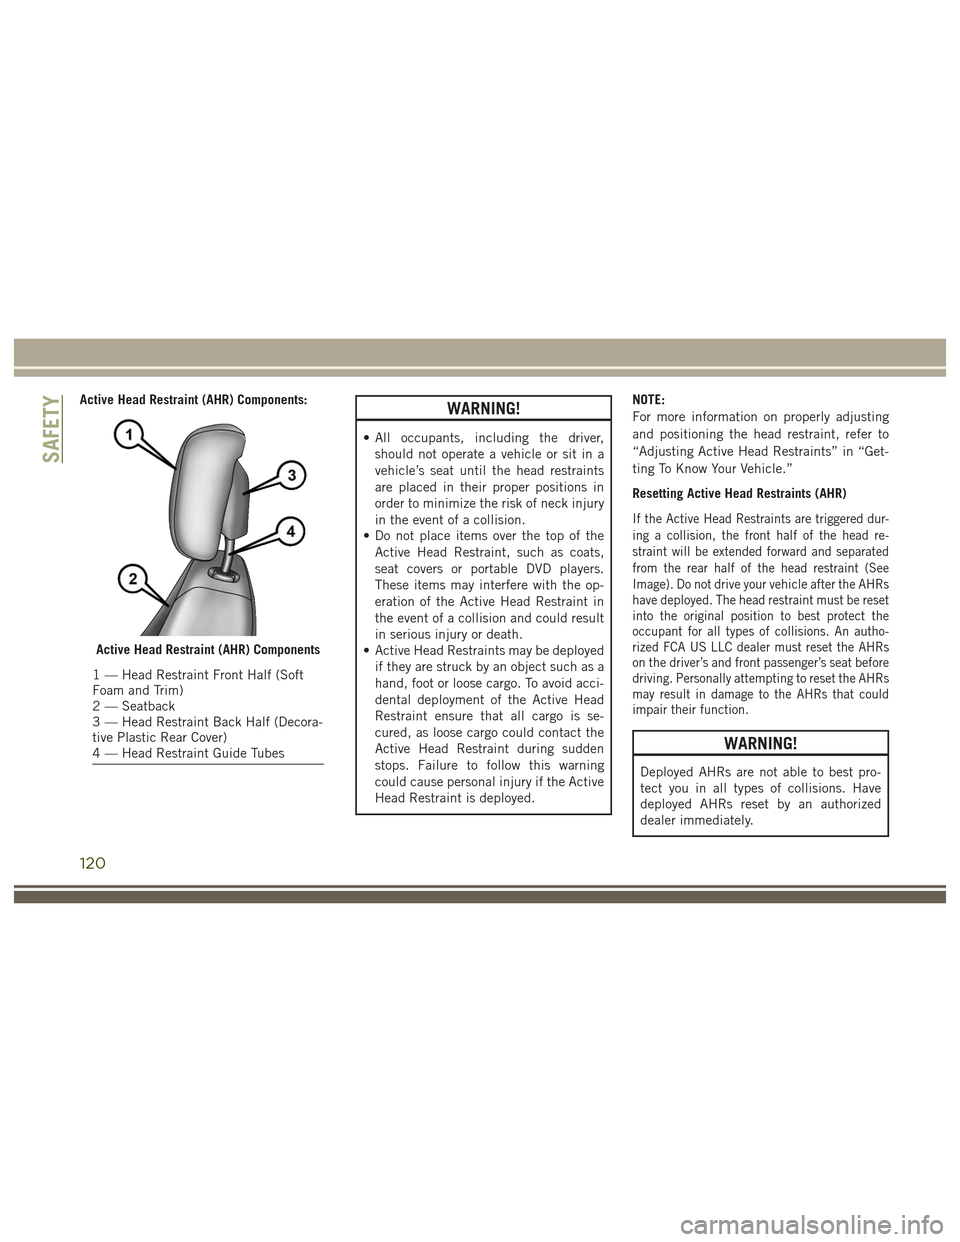
Active Head Restraint (AHR) Components:WARNING!
• All occupants, including the driver,should not operate a vehicle or sit in a
vehicle’s seat until the head restraints
are placed in their proper positions in
order to minimize the risk of neck injury
in the event of a collision.
• Do not place items over the top of the
Active Head Restraint, such as coats,
seat covers or portable DVD players.
These items may interfere with the op-
eration of the Active Head Restraint in
the event of a collision and could result
in serious injury or death.
• Active Head Restraints may be deployed
if they are struck by an object such as a
hand, foot or loose cargo. To avoid acci-
dental deployment of the Active Head
Restraint ensure that all cargo is se-
cured, as loose cargo could contact the
Active Head Restraint during sudden
stops. Failure to follow this warning
could cause personal injury if the Active
Head Restraint is deployed. NOTE:
For more information on properly adjusting
and positioning the head restraint, refer to
“Adjusting Active Head Restraints” in “Get-
ting To Know Your Vehicle.”
Resetting Active Head Restraints (AHR)
If the Active Head Restraints are triggered dur-
ing a collision, the front half of the head re-
straint will be extended forward and separated
from the rear half of the head restraint (See
Image). Do not drive your vehicle after the AHRs
have deployed. The head restraint must be reset
into the original position to best protect the
occupant for all types of collisions. An autho-
rized FCA US LLC dealer must reset the AHRs
on the driver’s and front passenger’s seat before
driving. Personally attempting to reset the AHRs
may result in damage to the AHRs that could
impair their function.
WARNING!
Deployed AHRs are not able to best pro-
tect you in all types of collisions. Have
deployed AHRs reset by an authorized
dealer immediately.
Active Head Restraint (AHR) Components
1 — Head Restraint Front Half (Soft
Foam and Trim)
2 — Seatback
3 — Head Restraint Back Half (Decora-
tive Plastic Rear Cover)
4 — Head Restraint Guide Tubes
SAFETY
120
Page 287 of 372
MULTIMEDIA
CYBERSECURITY............287
OFFROADPAGES—IF
EQUIPPED................ .288
Off Road Pages Status Bar........288
Drivetrain ...................288
Suspension ..................289
Accessory Gauges ..............289
Selec-Terrain .................289
TIPS CONTROLS AND GENERAL
INFORMATION ............ .290
Steering Wheel Audio Controls ......290
Reception Conditions ............290
Care And Maintenance ...........290
Anti-theft Protection ............291
UCONNECT ACCESS .........291
Uconnect Access — If Equipped (Available
On Uconnect 8.4/8.4 NAV — U.S.
Residents Only)...............291
Uconnect Access Registration (Uconnect
8.4/8.4 NAV, U.S. 48 Contiguous States,
Alaska And Hawaii) ............293
Download The Uconnect Access App . .293 Via Mobile Apps — If Equipped
.....294
Vehicle Finder ................295
Send&Go ..................296
Renewing Subscriptions And
Purchasing 3G Wi-Fi Hotspot (Uconnect
8.4/8.4 NAV, U.S. 48 Contiguous States,
Alaska And Hawaii) .............296
Getting Started With Apps ........297
Maintaining Your Uconnect Access
Account ....................298
Built-In Features ..............298
Vehicle Health Report/Alert ........301
Uconnect Access Remote Features . . .301
UCONNECT 5.0 .............305
Controls On The Front Panel .......305
Clock Setting .................306
Equalizer, Balance And Fade .......306
Radio Mode ..................307
Media Mode .................307
Bluetooth Source ..............310
iPod/USB/SD Card/AUX/Media Player
Control Support ...............311 USB/Audio Jack (AUX)/Bluetooth
Operation
...................311
Phone Mode .................312
SiriusXM Premier Over 160 Channels . .315
UCONNECT 8.4/8.4 NAV ......316
Uconnect 8.4/8.4 NAV At A Glance . . .316
Personalized Menu Bar...........318
Radio Mode ..................318
SiriusXM Premier Over 160 Channels .319
UCONNECT TOUCH SETTINGS . .322
IPOD/USB/SD CARD/MEDIA
PLAYERCONTROL ..........322
Audio Jack (AUX) ..............323
USB Port ...................323
SD Card ....................323
Bluetooth Streaming Audio ........323
Media Controls ................324
UCONNECT REAR SEAT ENTER-
TAINMENT (RSE) SYSTEM — IF
EQUIPPED................ .324
Getting Started...............324
MULTIMEDIA
285
Page 288 of 372
Dual Video Screen..............326
Blu-ray Disc Player .............326
Play Video Games ..............328
NAVIGATION.............. .328
Changing The Navigation Voice Prompt
Volume....................328
Finding Points Of Interest .........329
Finding A Place By Spelling The Name .329
One-Step Voice Destination Entry . . . .329
Setting Your Home Location ........329
Go Home ...................330
Adding A Stop ................330
Taking A Detour ...............330
UCONNECT PHONE ..........331
Operation...................331
Uconnect Phone Features .........331
General Information .............332
Uconnect Phone (Bluetooth Hands Free
Calling) ....................332 Pairing (Wirelessly Connecting) Your Mobile
Phone To The Uconnect System
.....332
Common Phone Commands
(Examples) ..................336
Mute (Or Unmute) Microphone During
Call ......................336
Transfer Ongoing Call Between Handset And
Vehicle ....................336
Phonebook ..................336
Voice Command Tips ............336
Changing The Volume ...........336
Using Do Not Disturb ...........336
Incoming Text Messages .........337
Voice Text Reply (Not Compatible With
iPhone) ....................338
Helpful Tips And Common Questions To
Improve Bluetooth Performance With Your
Uconnect System ..............339
UCONNECT VOICE RECOGNITION
QUICKTIPS ...............340
Introducing Uconnect ...........340 Get Started
.................340
Basic Voice Commands ...........341
Radio .....................342
Media .....................342
Phone .....................342
Voice Text Reply ..............343
Climate (8.4/8.4 NAV) ...........344
Navigation (8.4/8.4 NAV) .........344
Uconnect Access — If Equipped
(8.4/8.4 NAV) ................345
Register (8.4/8.4 NAV) ...........345
Vehicle Health Alert .............346
Mobile App (8.4/8.4 NAV) .........346
Voice Texting (8.4/8.4 NAV) ........347
Yelp (8.4/8.4 NAV) .............348
SiriusXM Travel Link (8.4/8.4 NAV — US
Market Only) .................348
Siri Eyes Free — If Equipped .......348
Do Not Disturb ................350
Additional Information ...........351
MULTIMEDIA
286
Page 292 of 372
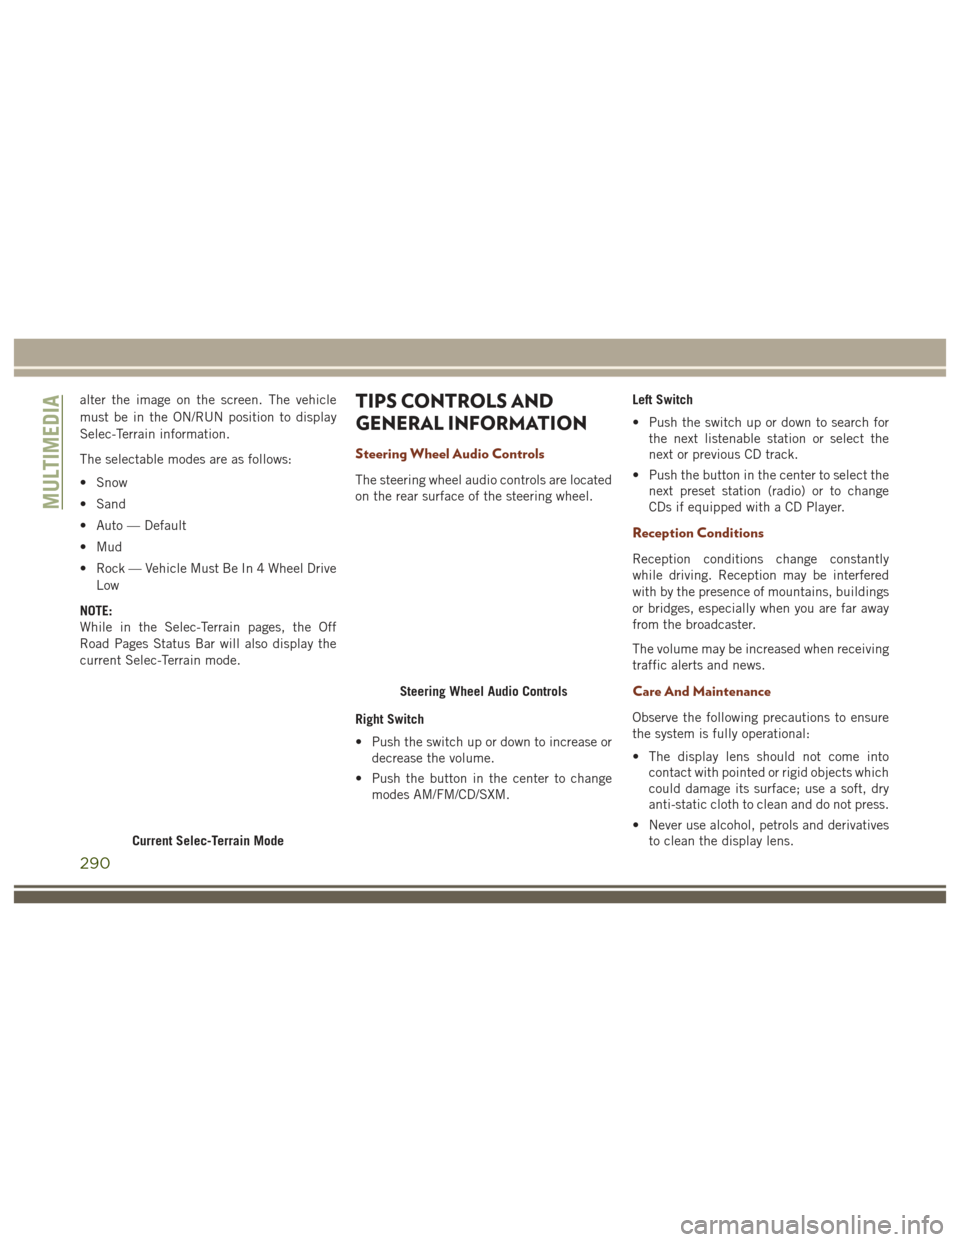
alter the image on the screen. The vehicle
must be in the ON/RUN position to display
Selec-Terrain information.
The selectable modes are as follows:
• Snow
• Sand
• Auto — Default
• Mud
• Rock — Vehicle Must Be In 4 Wheel DriveLow
NOTE:
While in the Selec-Terrain pages, the Off
Road Pages Status Bar will also display the
current Selec-Terrain mode.TIPS CONTROLS AND
GENERAL INFORMATION
Steering Wheel Audio Controls
The steering wheel audio controls are located
on the rear surface of the steering wheel.
Right Switch
• Push the switch up or down to increase or decrease the volume.
• Push the button in the center to change modes AM/FM/CD/SXM. Left Switch
• Push the switch up or down to search for
the next listenable station or select the
next or previous CD track.
• Push the button in the center to select the next preset station (radio) or to change
CDs if equipped with a CD Player.
Reception Conditions
Reception conditions change constantly
while driving. Reception may be interfered
with by the presence of mountains, buildings
or bridges, especially when you are far away
from the broadcaster.
The volume may be increased when receiving
traffic alerts and news.
Care And Maintenance
Observe the following precautions to ensure
the system is fully operational:
• The display lens should not come intocontact with pointed or rigid objects which
could damage its surface; use a soft, dry
anti-static cloth to clean and do not press.
• Never use alcohol, petrols and derivatives to clean the display lens.
Current Selec-Terrain Mode
Steering Wheel Audio Controls
MULTIMEDIA
290
Page 310 of 372
Media Mode is entered by pushing the ME-
DIA button located on the faceplate. Once in
Media Mode, press the “Source” button on
the touchscreen and the desired mode button
on the touchscreen. Disc (if equipped), USB,
SD Card (if equipped), AUX and Bluetooth (if
equipped), are the Media sources available.
When available, you can select the “Browse”
button on the touchscreen to be given these
options:
• Now Playing
• Artists
• Albums
• Genres
• Songs
• Playlists
• Folders
Source
Press the “Source” button on the touch-
screen to select the desired audio source:
Disc (if equipped), USB, SD (if equipped),
AUX and Bluetooth (if equipped). This screen
will time out after a few seconds and return to
the main radio screen if no selection is made.You can press the “Source,” “Pause/Play” or
the “Info” button on the touchscreen for
artist information on the current song play-
ing.
Disc Mode — If Equipped
Your vehicle may have a remote Disc player
located in the center console storage bin.
Disc Mode is entered by either inserting a
CD/Disc or by pushing the MEDIA button on
the faceplate. Once in Media Mode, press the
“Source” button on the touchscreen and se-
lect “Disc.”
Inserting Compact Disc
Gently insert one disc into the disc player
with the disc label following the illustration
indicated on the player. The disc will auto-
matically be pulled into the disc player and
the disc icon will illuminate on the radio
display. If a disc does not go into the slot
more than 1.0 inch (2.5 cm), a disc may
already be loaded and must be ejected before
a new disc can be loaded.
If you insert a disc with the ignition ON and
the radio ON, the unit will switch to disc
mode and begin to play when you insert the
disc. The display will show the track number
and index time in minutes and seconds. Play
will begin at the start of track 1.
Browse
Press the “Browse” button on the touch-
screen to scroll through and select a desired
track on the Disc. Press the “Exit” button on
the touchscreen if you wish to cancel the
browse function.
Eject Button — Ejecting a Disc
Push the eject button to eject the disc. If you
have ejected a disc and have not removed it
within 10 seconds, it will be reloaded. If the
Disc is not removed, the radio will reinsert
the disc but will not play it.
A disc can be ejected with the radio and
ignition OFF.
MULTIMEDIA
308
Page 313 of 372
4. Search for available devices on yourBluetooth enabled device.
• Select Bluetooth and ensure it is en- abled. Once enabled, the device will
begin to search for Bluetooth
connections.
5. If No is selected, and you still would like to pair a device, press the “Settings”
button from the Uconnect Phone main
screen.
• Select “Paired Phones” then press the “Add Device” button on the touch-
screen.
• Search for available devices on your Bluetooth enabled device (see below).
When prompted on the device, select
“Uconnect” and accept the connection
request.
6. Uconnect Phone will display an in prog- ress screen while the system is
connecting.
7. When your device finds the Uconnect sys- tem, select “Uconnect.” 8. When prompted on the device, accept the
connection request from Uconnect
Phone.
NOTE:
Some devices will require you to enter the
PIN number.
9. When the pairing process has successfully completed, the system will prompt you to
choose whether or not this is your favorite
device. Selecting “Yes” will make this
device the highest priority. This device
will take precedence over other paired
devices within range and will connect to
the Uconnect system automatically when
entering the vehicle. Only one Bluetooth
device can be connected to the Uconnect
system at a time. If “No” is selected,
simply select “Uconnect” from the device
Bluetooth screen, and the Uconnect sys-
tem will reconnect to the Bluetooth
device.iPod/USB/SD Card/AUX/Media Player
Control Support
This vehicle has an iPod/USB/SD Card/AUX/
Media Player Control located in the center
console directly below the Climate Controls.
USB/Audio Jack (AUX)/Bluetooth
Operation
To select a specific audio source, push the
MEDIA button on the radio faceplate. To
allow music to play from your portable device
through the vehicle’s speakers, press the
“Source” button on the touchscreen then
select one of the following modes:
USB/iPod
USB/iPod Mode is entered by either inserting
a USB Jump Drive or iPod cable into the USB
port or by pushing the MEDIA button on the
radio faceplate.
311
Page 314 of 372
Audio Jack (AUX)
The AUX allows a portable device, such as an
MP3 player or an iPod, to be plugged into the
radio and utilize the vehicle’s audio system,
using a 3.5 mm audio cable, to amplify the
source and play through the vehicle speakers.
The functions of the portable device are con-
trolled using the device buttons, not the
buttons on the radio. The volume may be
controlled using the radio or portable device.
Bluetooth
If using a Bluetooth - equipped device, you
may also be able to stream music to your
vehicle's sound system.
SD Card
Play songs stored on an SD card inserted into
the SD card slot.
Song playback can be controlled using the
radio or Steering Wheel Audio Controls to
play, skip to the next or previous track,
browse, and list the contents.
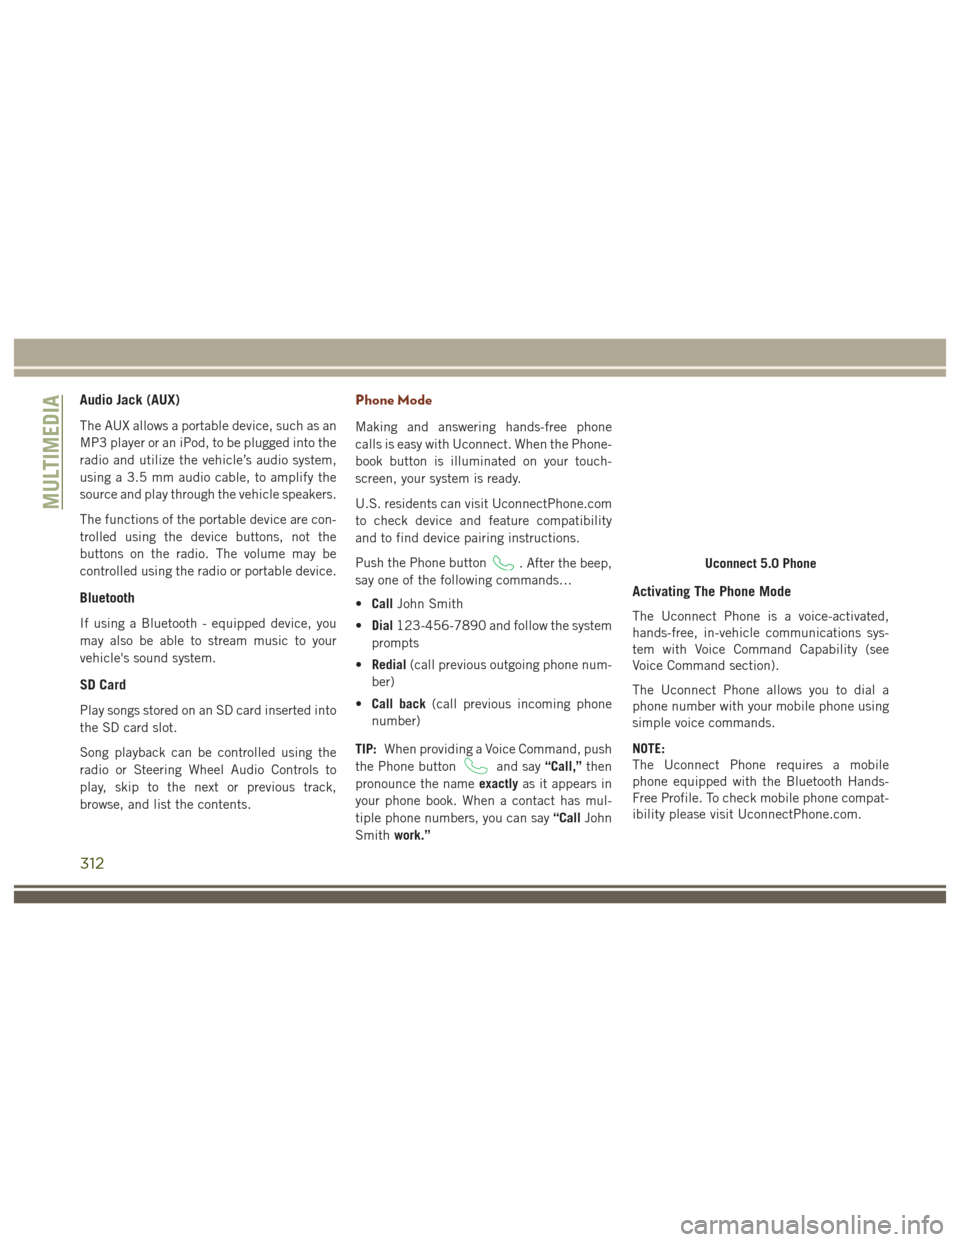
Phone Mode
Making and answering hands-free phone
calls is easy with Uconnect. When the Phone-
book button is illuminated on your touch-
screen, your system is ready.
U.S. residents can visit UconnectPhone.com
to check device and feature compatibility
and to find device pairing instructions.
Push the Phone button
. After the beep,
say one of the following commands…
• Call John Smith
• Dial 123-456-7890 and follow the system
prompts
• Redial (call previous outgoing phone num-
ber)
• Call back (call previous incoming phone
number)
TIP: When providing a Voice Command, push
the Phone button
and say “Call,”then
pronounce the name exactlyas it appears in
your phone book. When a contact has mul-
tiple phone numbers, you can say “CallJohn
Smith work.”
Activating The Phone Mode
The Uconnect Phone is a voice-activated,
hands-free, in-vehicle communications sys-
tem with Voice Command Capability (see
Voice Command section).
The Uconnect Phone allows you to dial a
phone number with your mobile phone using
simple voice commands.
NOTE:
The Uconnect Phone requires a mobile
phone equipped with the Bluetooth Hands-
Free Profile. To check mobile phone compat-
ibility please visit UconnectPhone.com.
Uconnect 5.0 Phone
MULTIMEDIA
312
Page 324 of 372
our satellite service area and in AK and HI.
©2016 Sirius XM Radio Inc. Sirius, XM
and all related marks and logos are trade-
marks of Sirius XM Radio Inc.
UCONNECT TOUCH
SETTINGS
The Uconnect system allows you to access
Customer Programmable feature settings
such as Display, Voice, Clock, Safety & Driv-
ing Assistance, Lights, Doors & Locks,
Auto-On Comfort & Remote Start, Engine Off
Options, Compass Settings, Audio, Phone/
Bluetooth, Suspension, SiriusXM Setup, Re-
store Settings, Clear Personal Data, and Sys-
tem Information through buttons on the
touchscreen.
Push the SETTINGS button (Uconnect 5.0),
or press the “Apps” button (Uconnect 8.4)
located near the bottom of the touchscreen,
then press the “Settings” button on the
touchscreen to access the Settings screen.
When making a selection, scroll up or down
until the preferred setting is highlighted,
then press the preferred setting until a check-mark appears next to the setting, showing
that setting has been selected. The following
feature settings are available:
• Display
• Engine Off Op-
tions
• Voice • Suspension
• Clock • Audio
• Safety & Driving Assistance • Phone/Bluetooth
• Lights • SiriusXM Setup
• Doors & Locks • Restore Settings
• Auto-On Comfort & Remote Start • Clear Personal
Data
• Compass (Uconnect 5.0) • System Informa-
tion
NOTE:
Depending on the vehicles options, feature
settings may vary.
Refer to “Uconnect Settings/Customer Pro-
grammable Features” in the “Multimedia”
Chapter on
www.jeep.com/en/owners/manuals/ for fur-
ther information.
IPOD/USB/SD CARD/MEDIA
PLAYER CONTROL
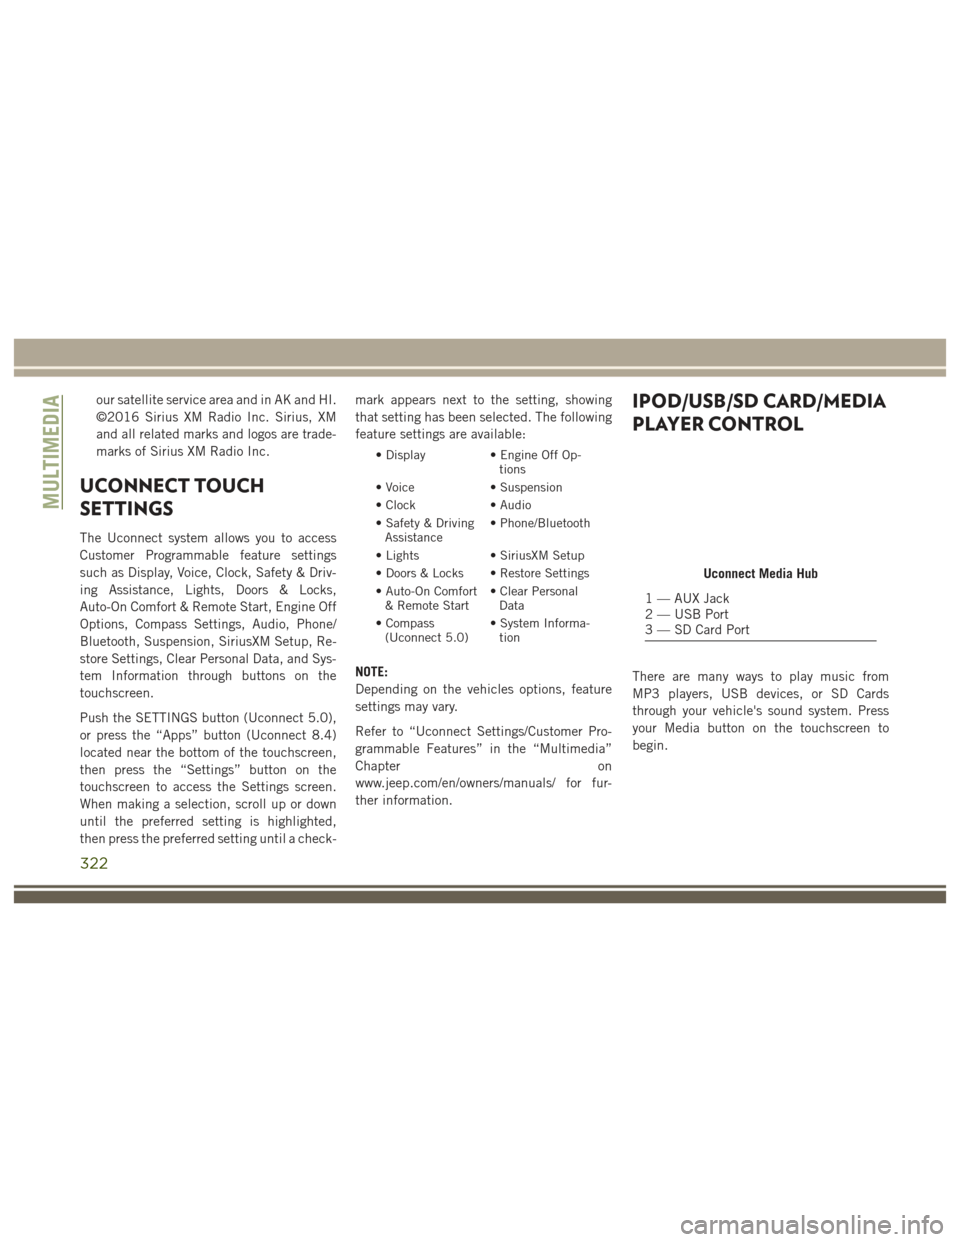
There are many ways to play music from
MP3 players, USB devices, or SD Cards
through your vehicle's sound system. Press
your Media button on the touchscreen to
begin.
Uconnect Media Hub
1 — AUX Jack
2 — USB Port
3 — SD Card Port
MULTIMEDIA
322
Page 326 of 372
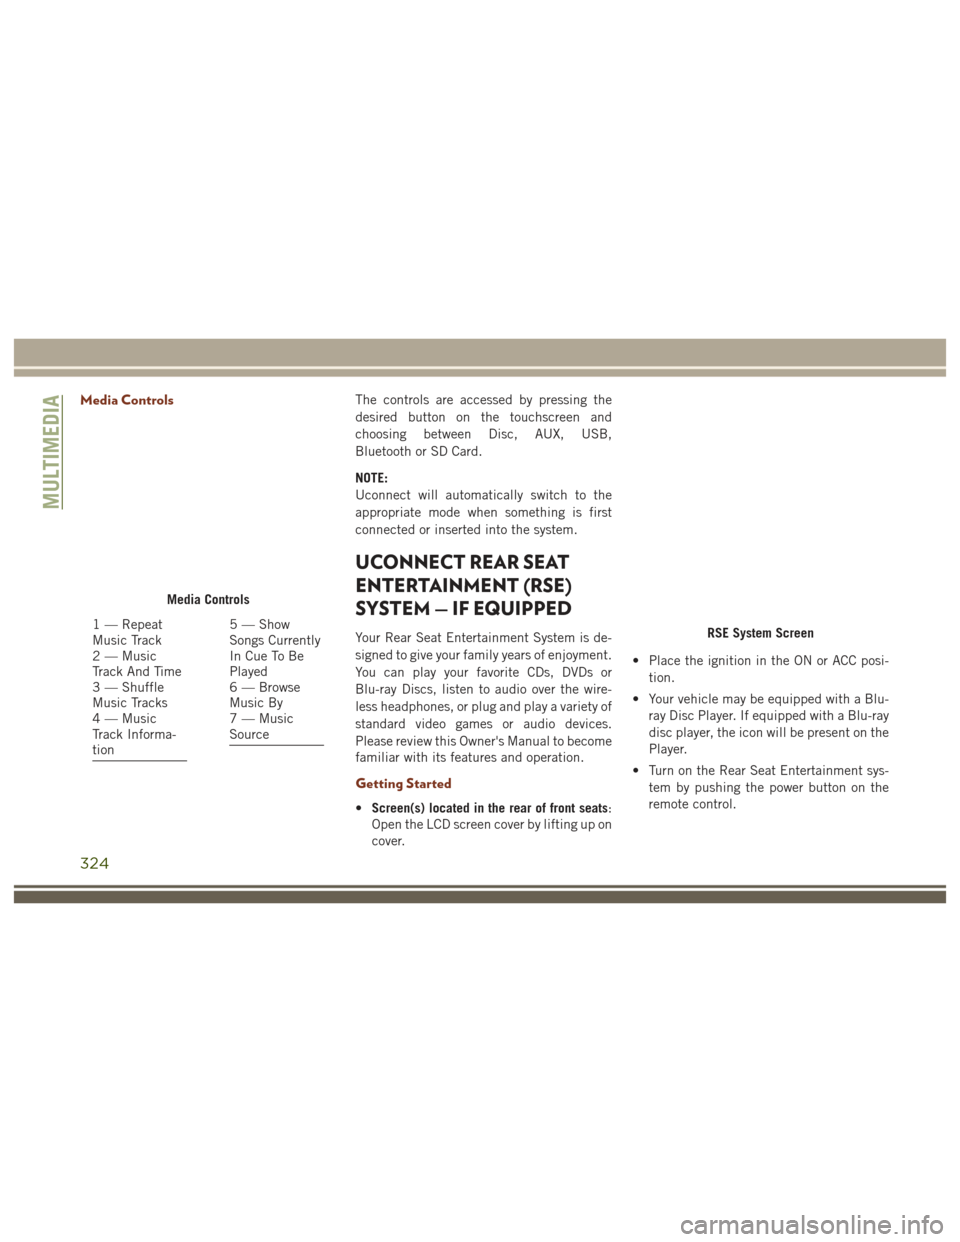
Media ControlsThe controls are accessed by pressing the
desired button on the touchscreen and
choosing between Disc, AUX, USB,
Bluetooth or SD Card.
NOTE:
Uconnect will automatically switch to the
appropriate mode when something is first
connected or inserted into the system.
UCONNECT REAR SEAT
ENTERTAINMENT (RSE)
SYSTEM — IF EQUIPPED
Your Rear Seat Entertainment System is de-
signed to give your family years of enjoyment.
You can play your favorite CDs, DVDs or
Blu-ray Discs, listen to audio over the wire-
less headphones, or plug and play a variety of
standard video games or audio devices.
Please review this Owner's Manual to become
familiar with its features and operation.
Getting Started
•Screen(s) located in the rear of front seats:
Open the LCD screen cover by lifting up on
cover. • Place the ignition in the ON or ACC posi-
tion.
• Your vehicle may be equipped with a Blu- ray Disc Player. If equipped with a Blu-ray
disc player, the icon will be present on the
Player.
• Turn on the Rear Seat Entertainment sys- tem by pushing the power button on the
remote control.
Media Controls
1 — Repeat
Music Track
2 — Music
Track And Time
3 — Shuffle
Music Tracks
4 — Music
Track Informa-
tion5 — Show
Songs Currently
In Cue To Be
Played
6 — Browse
Music By
7 — Music
SourceRSE System Screen
MULTIMEDIA
324