JEEP GRAND CHEROKEE LIMITED 2019 Owners Manual
GRAND CHEROKEE LIMITED 2019
JEEP
JEEP
https://www.carmanualsonline.info/img/16/56024/w960_56024-0.png
JEEP GRAND CHEROKEE LIMITED 2019 Owners Manual
Trending: differential, key battery, wheel bolt torque, suspension, key, fuel cap release, change key battery
Page 421 of 626
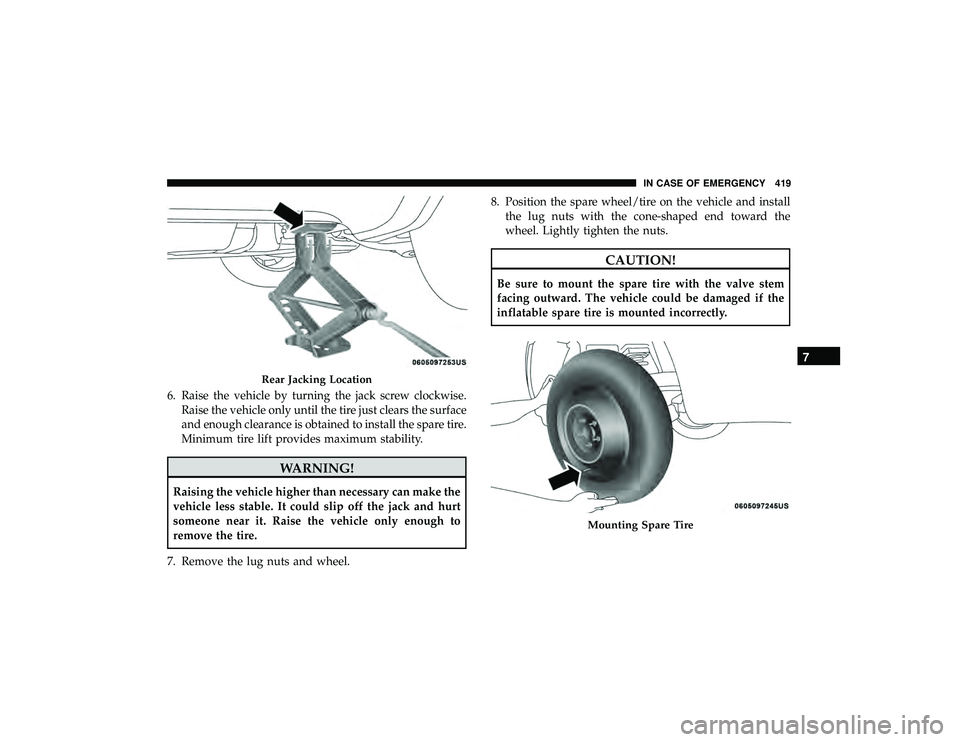
6. Raise the vehicle by turning the jack screw clockwise.Raise the vehicle only until the tire just clears the surface
and enough clearance is obtained to install the spare tire.
Minimum tire lift provides maximum stability.
Rear Jacking Location
Mounting Spare Tire
7
IN CASE OF EMERGENCY 419
Page 422 of 626
WARNING!
To avoid the risk of forcing the vehicle off the jack, do
not tighten the wheel nuts fully until the vehicle has
been lowered. Failure to follow this warning may
result in serious injury.
9. Lower the vehicle by turning the jack screw counter- clockwise, and remove the jack and wheel blocks.
10. Finish tightening the lug nuts. Push down on the wrench while at the end of the handle for increased
leverage. Tighten the lug nuts in a star pattern until
each nut has been tightened twice. For correct lug nut
torque, refer to “Torque Specifications” in “Technical
Specifications”. If in doubt about the correct tightness,
have them checked with a torque wrench by an autho-
rized dealer or at a service station.
11. Lower the jack to the fully closed position and return it and the tools to the proper positions in the foam tray.
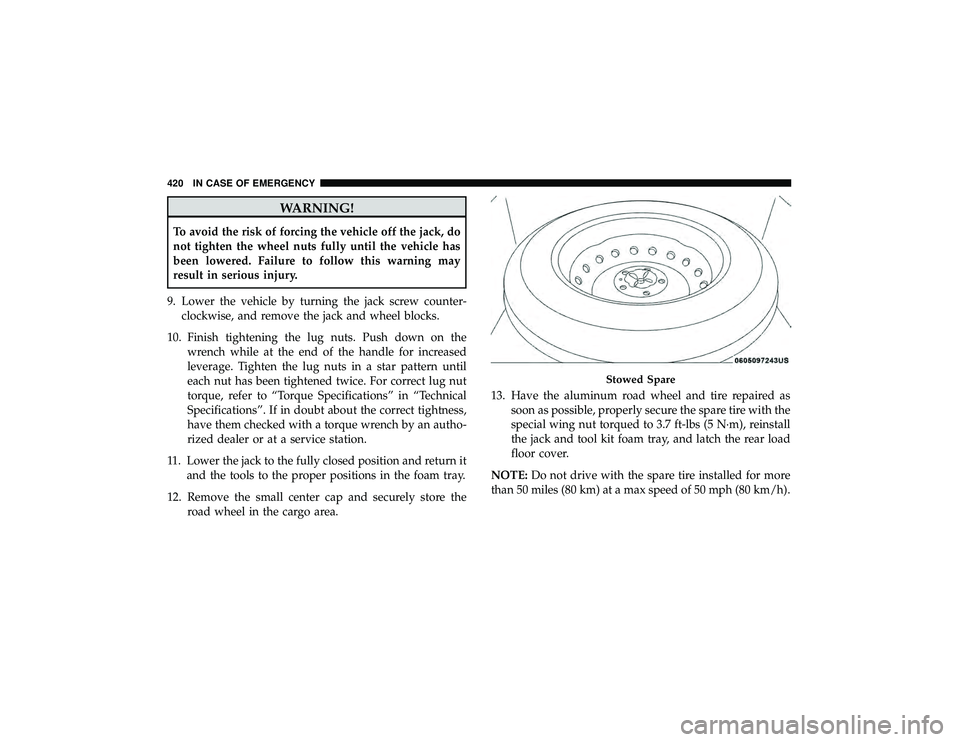
12. Remove the small center cap and securely store the road wheel in the cargo area. 13. Have the aluminum road wheel and tire repaired as
soon as possible, properly secure the spare tire with the
special wing nut torqued to 3.7 ft-lbs (5 N·m), reinstall
the jack and tool kit foam tray, and latch the rear load
floor cover.
NOTE: Do not drive with the spare tire installed for more
than 50 miles (80 km) at a max speed of 50 mph (80 km/h).
Page 423 of 626
WARNING!
A loose tire or jack thrown forward in a collision or
hard stop could endanger the occupants of the vehicle.
Always stow the jack parts and the spare tire in the
places provided. Have the deflated (flat) tire repaired
or replaced immediately.
Road Tire Installation
1. Mount the road tire on the axle.
2. Install the remaining lug nuts with the cone shaped endof the nut toward the wheel. Lightly tighten the lug
nuts.
CAUTION!
Do not use a portable battery booster pack or any other
booster source with a system voltage greater than 12
Volts or damage to the battery, starter motor, alternator
or electrical system may occur.
NOTE: When using a portable battery booster pack, follow
the manufacturer’s operating instructions and precautions.
7
IN CASE OF EMERGENCY 421
Page 424 of 626
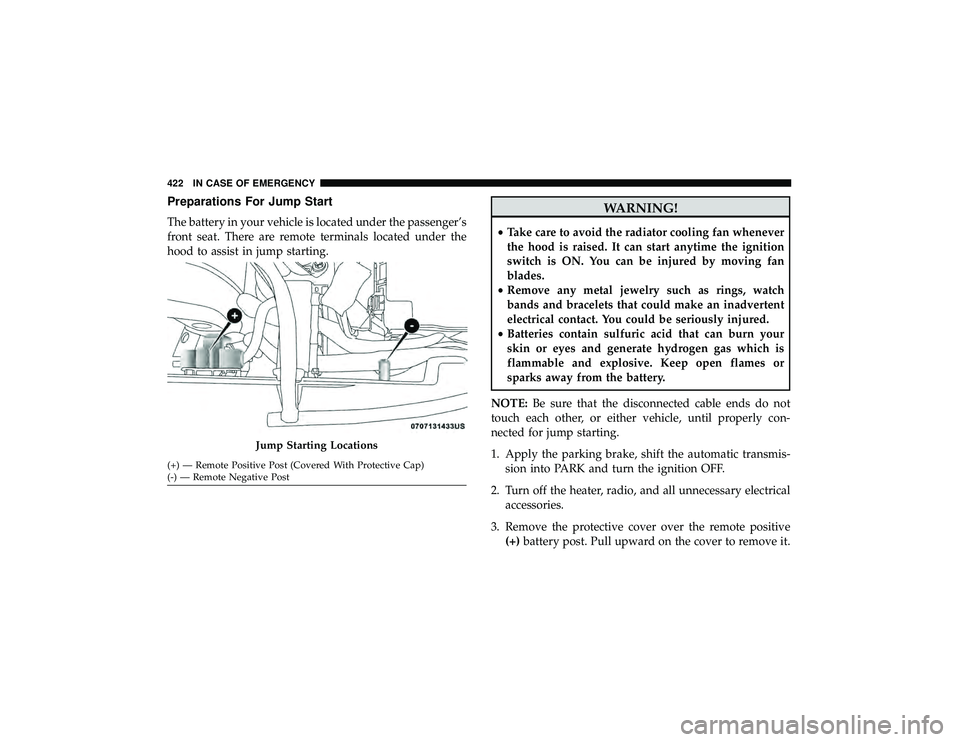
Preparations For Jump Start
The battery in your vehicle is located under the passenger’s
front seat. There are remote terminals located under the
hood to assist in jump starting.
Page 425 of 626
4. If using another vehicle to jump start the battery, parkthe vehicle within the jumper cables reach, apply the
parking brake and make sure the ignition is OFF.
CAUTION!
Failure to follow these procedures could result in
damage to the charging system of the booster vehicle
or the discharged vehicle.
NOTE: Make sure at all times that unused ends of jumper
cables are not contacting each other or either vehicle while
making connections. Connecting The Jumper Cables
1. Connect the positive
(+)end of the jumper cable to the
remote positive (+)post of the discharged vehicle.
2. Connect the opposite end of the positive (+)jumper
cable to the positive (+)post of the booster battery.
3. Connect the negative end (-)of the jumper cable to the
negative (-)post of the booster battery.
4. Connect the opposite end of the negative (-)jumper
cable to the remote negative (-)post of the vehicle with
the discharged battery.
Page 426 of 626
CAUTION!
Do not run the booster vehicle engine above 2,000 rpm
since it provides no charging benefit, wastes fuel, and
can damage booster vehicle engine.
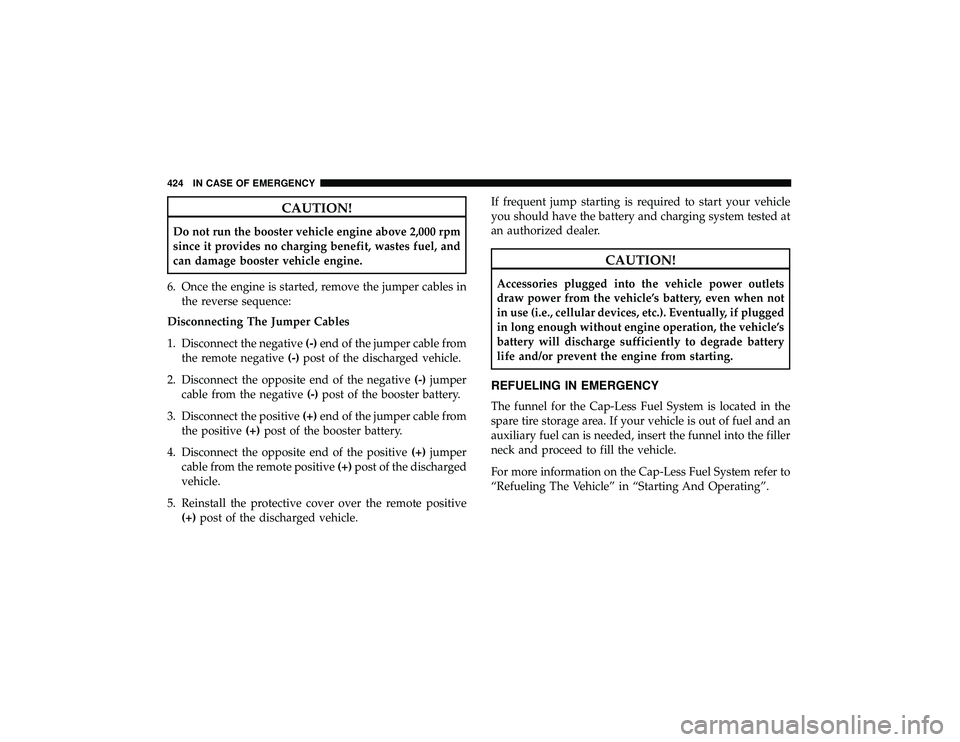
6. Once the engine is started, remove the jumper cables in the reverse sequence:
Disconnecting The Jumper Cables
1. Disconnect the negative (-)end of the jumper cable from
the remote negative (-)post of the discharged vehicle.
2. Disconnect the opposite end of the negative (-)jumper
cable from the negative (-)post of the booster battery.
3. Disconnect the positive (+)end of the jumper cable from
the positive (+)post of the booster battery.
4. Disconnect the opposite end of the positive (+)jumper
cable from the remote positive (+)post of the discharged
vehicle.
5. Reinstall the protective cover over the remote positive (+) post of the discharged vehicle. If frequent jump starting is required to start your vehicle
you should have the battery and charging system tested at
an authorized dealer.
Page 427 of 626
IF YOUR ENGINE OVERHEATS
In any of the following situations, you can reduce the
potential for overheating by taking the appropriate action.
•On the highways — slow down.
• In city traffic — while stopped, place the transmission in
NEUTRAL, but do not increase the engine idle speed
while preventing vehicle motion with the brakes.
NOTE: There are steps that you can take to slow down an
impending overheat condition:
• If your air conditioner (A/C) is on, turn it off. The A/C
system adds heat to the engine cooling system and
turning the A/C off can help remove this heat.
• You can also turn the temperature control to maximum
heat, the mode control to floor and the blower control to
high. This allows the heater core to act as a supplement
to the radiator and aids in removing heat from the
engine cooling system.
CAUTION!
Driving with a hot cooling system could damage your
vehicle. If the temperature gauge reads HOT (H), pull
over and stop the vehicle. Idle the vehicle with the air
conditioner turned off until the pointer drops back
into the normal range. If the pointer remains on HOT
(H), and you hear continuous chimes, turn the engine
off immediately and call for service.7
IN CASE OF EMERGENCY 425
Page 428 of 626
Page 429 of 626
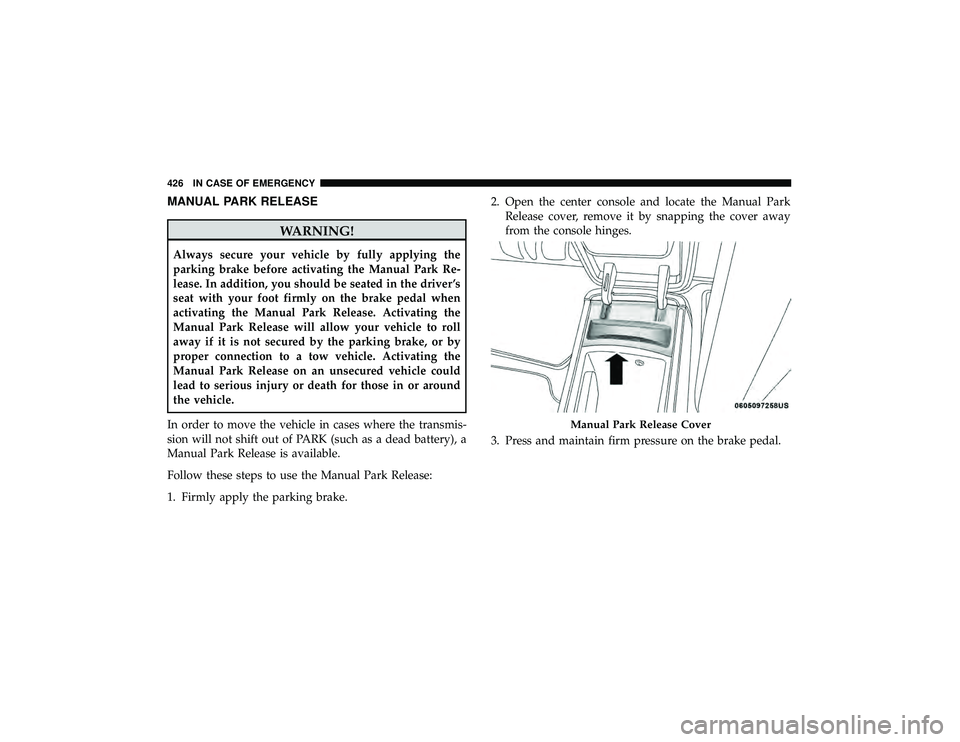
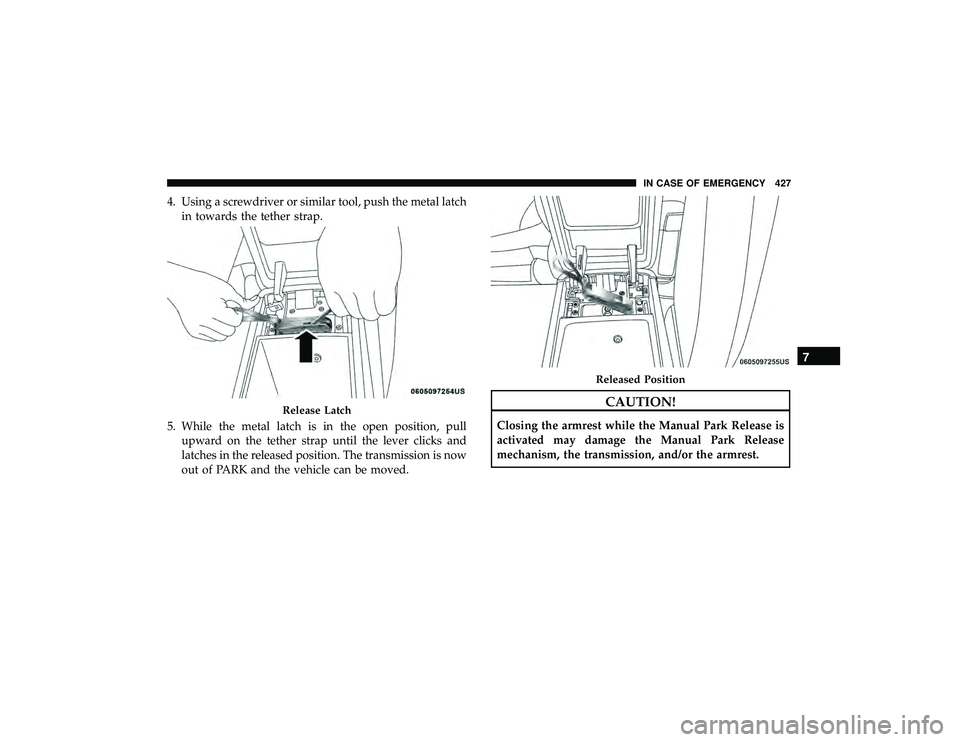
4. Using a screwdriver or similar tool, push the metal latchin towards the tether strap.
5. While the metal latch is in the open position, pull upward on the tether strap until the lever clicks and
latches in the released position. The transmission is now
out of PARK and the vehicle can be moved.
Release Latch
Released Position
7
IN CASE OF EMERGENCY 427
Page 430 of 626
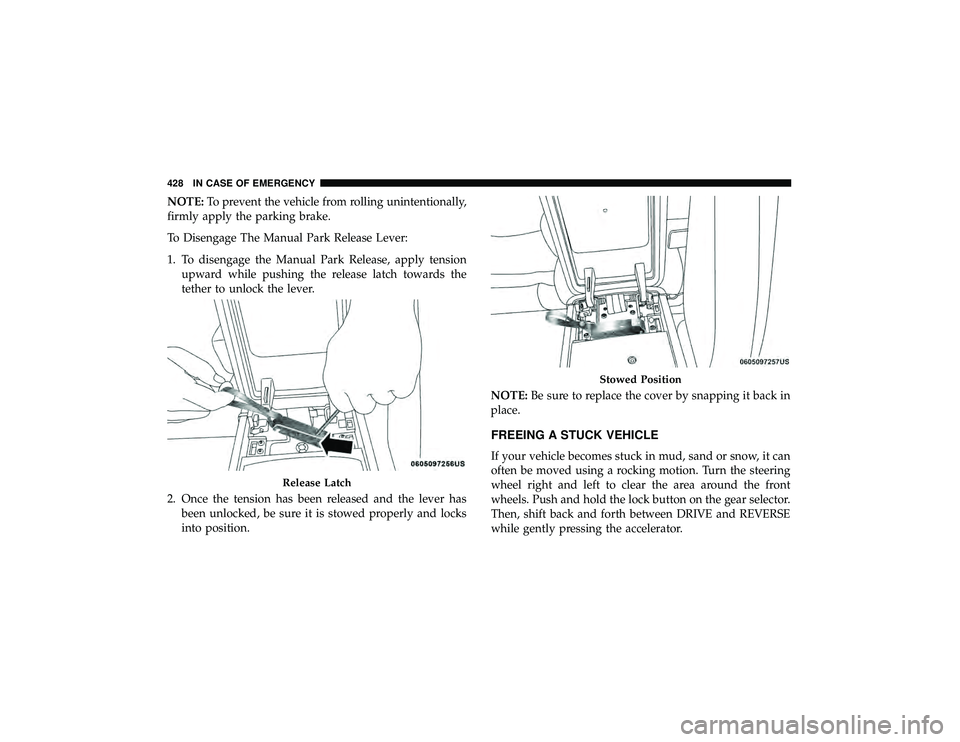
NOTE:To prevent the vehicle from rolling unintentionally,
firmly apply the parking brake.
To Disengage The Manual Park Release Lever:
1. To disengage the Manual Park Release, apply tension upward while pushing the release latch towards the
tether to unlock the lever.
2. Once the tension has been released and the lever has been unlocked, be sure it is stowed properly and locks
into position. NOTE:
Be sure to replace the cover by snapping it back in
place.
FREEING A STUCK VEHICLE
If your vehicle becomes stuck in mud, sand or snow, it can
often be moved using a rocking motion. Turn the steering
wheel right and left to clear the area around the front
wheels. Push and hold the lock button on the gear selector.
Then, shift back and forth between DRIVE and REVERSE
while gently pressing the accelerator.
Stowed Position
428 IN CASE OF EMERGENCY
Trending: oil capacity, keyless, tire type, service, tow bar, android auto, jump start terminals
