warning lights JEEP LIBERTY 2008 KK / 2.G Owners Manual
[x] Cancel search | Manufacturer: JEEP, Model Year: 2008, Model line: LIBERTY, Model: JEEP LIBERTY 2008 KK / 2.GPages: 493
Page 65 of 493

²As the airbags deflate, you may see some smoke-like
particles. The particles are a normal by-product of the
process that generates the nontoxic gas used for airbag
inflation. These airborne particles may irritate the skin,
eyes, nose, or throat. If you have skin or eye irritation,
rinse the area with cool water. For nose or throat
irritation, move to fresh air. If the irritation continues,
see your doctor. If these particles settle on your
clothing, follow the garment manufacturer's instruc-
tions for cleaning.
²It is not advisable to drive your vehicle after the
airbags have deployed. If you are involved in another
collision, the airbags will not be in place to protect you.
WARNING!
Deployed airbags and seat belt pretensioners cannot
protect you in another collision. Have the airbags,
seat belt pretensioner, and seat belt retractor assem-
bly replaced by an authorized dealer as soon as
possible. Also, have the Occupant Classification Sys-
tem serviced as well.
Enhanced Accident Response System
In the event of an impact that causes airbag deployment,
with the vehicle stopped, and the vehicle communication
network intact, and the power intact, the Enhanced
Accident Response System performs the following func-
tions:
²Cuts off fuel to the engine.
²Flashes hazard lights.
THINGS TO KNOW BEFORE STARTING YOUR VEHICLE 65
2
Page 66 of 493

²Turns on the interior lights, which remain on as long as
the battery has power or until the ignition key is
removed.
²Unlocks the doors automatically.
NOTE:The interior lights can only be deactivated if the
key is removed from the ignition switch or the vehicle is
driven.
Maintaining Your Airbag System
WARNING!
²Modifications to any part of the airbag system could cause it to fail when
you need it. You could be injured if the airbag system is not there to
protect you. Do not modify the components or wiring, including adding
any kind of badges or stickers to the steering wheel hub trim cover or the
upper passenger side of the instrument panel. Do not modify the front
bumper or vehicle body structure.
²Do not attempt to modify any part of your advanced airbag system. The
airbag may inflate accidentally or may not function properly if modifica-
tions are made. Take your vehicle to an authorized dealer for any advanced
airbag system service. If your seat including your trim cover and cushion
needs to be serviced in any way (including removal or loosening/
tightening of seat attachment bolts), take the vehicle to your authorized
dealer. Only manufacturer approved seat accessories may be used. If it is
necessary to modify an advanced airbag system for persons with disabili-
ties, contact your authorized dealer.
²Do not place or hang any items such as add-on video players on the front
passenger seat back. The additional weight may cause the Occupant
Classification System to be unable to classify the front seat passenger
correctly. This could allow the passenger frontal airbag to inflate when it
is not desired.
²It is dangerous to try to repair any part of the airbag system yourself. Be
sure to tell anyone who works on your vehicle that it has an airbag system.
66 THINGS TO KNOW BEFORE STARTING YOUR VEHICLE
Page 124 of 493

Press the switch once to select high-level heating. Press
the switch a second time to select low-level heating. Press
the switch a third time to shut off the heating elements.
When high-temperature heating is selected, the heaters
provide a boosted heat level during the first four minutes
of operation after heating is activated. The heat output
then drops to the normal high-temperature level. If
high-level heating is selected, the system will automati-
cally switch to the low level after 30 minutes of continu-
ous operation. At that time, the number of indicator
lights changes from two to one, indicating the change.
Operation on the low setting also turns off automatically
after 30 minutes.
NOTE:Once a heat setting is selected, heat will be felt
within two to five minutes.WARNING!
Persons who are unable to feel pain to the skin
because of advanced age, chronic illness, diabetes,
spinal cord injury, medication, alcohol use, exhaus-
tion or other physical condition must exercise care
when using the seat heater. It may cause burns even
at low temperatures, especially if used for long
periods. Do not place anything on the seat that
insulates against heat, such as a blanket or cushion.
This may cause the seat heater to overheat.
60/40 Split Folding Rear Seat with Fold Flat
Feature
To provide additional storage area, each rear seat can be
folded flat. This allows for extended cargo space and still
maintains some rear seating room.
124 UNDERSTANDING THE FEATURES OF YOUR VEHICLE
Page 190 of 493

INSTRUMENT CLUSTER DESCRIPTIONS
1. Fuel Gauge
The fuel gauge shows level of fuel in tank when
ignition switch is in the ON position. (See page 359
for more information.)
2. Fuel Cap Indicator
This symbol indicates the side of the vehicle
where the fuel cap is located.
3. Low Fuel Warning Light
This indicator lights when the fuel level drops to
approximately 1/8 tank. (See page 359 for more
information.)4. Tire Pressure Monitoring Telltale Light Ð If
Equipped
Each tire, including the spare (if provided),
should be checked monthly when cold and
inflated to the inflation pressure recommended
by the vehicle manufacturer on the vehicle
placard or tire inflation pressure label. (If your vehicle
has tires of a different size than the size indicated on the
vehicle placard or tire inflation pressure label, you should
determine the proper tire inflation pressure for those
tires.)
As an added safety feature, your vehicle has been
equipped with a tire pressure monitoring system (TPMS)
that illuminates a low tire pressure telltale when one or
more of your tires are significantly under-inflated. Ac-
cordingly, when the low tire pressure telltale illuminates,
you should stop and check your tires as soon as possible,
and inflate them to the proper pressure. Driving on a
190 INSTRUMENT PANEL AND CONTROLS
Page 194 of 493

8. Front Fog Light Indicator Light Ð If Equipped
This light shows when the fog lights are ON. (See
page 133 for more information.)
9. Speedometer
Shows the vehicle speed.
10. Turn Signal Indicator Light
The left or right arrow will flash in unison with the
corresponding front and rear turn signal lights when
the turn signal switch is operated. (See page 133 for more
information.)
NOTE:A chime will sound if the vehicle is driven more
than 1 mile (1.6 km) with either turn signal on.
NOTE:Check for a defective outside light bulb if either
indicator flashes at a rapid rate.11. Electronic Stability Program (ESP) / Traction
Control System (TCS) Indicator Light
If this indicator light flashes during accelera-
tion, apply as little throttle as possible. While
driving, ease up on the accelerator. Be sure to
adapt your speed and driving to the prevailing
road conditions. (See page 314 for more infor-
mation.)
12. Charging System Warning Light
This light shows the status of the electrical charg-
ing system. The light should turn on when the
ignition switch is first turned ON and remain on briefly
as a bulb check. If the light stays on or turns on while
driving, turn off some of the vehicle's electrical devices,
such as the Fog Lights or Rear Defroster. If the light
remains on, it means that the charging system is experi-
encing a problem. See your local authorized dealer to
obtain SERVICE IMMEDIATELY.
194 INSTRUMENT PANEL AND CONTROLS
Page 202 of 493

2. Fully depress the accelerator pedal slowly three
times within 10 seconds.
3. Turn the ignition switch to the LOCK position.
NOTE:If the indicator message illuminates when you
start the vehicle, the oil change indicator system did not
reset. If necessary, repeat this procedure.
28. Cruise Indicator Light Ð If Equipped
This indicator lights when the electronic speed
control system is turned on. (See page 147 for
more information.)
29. Transmission Range Indicator
This display indicator shows automatic transmission
gear selection. (See page 281 for more information.)
30. Seat Belt Reminder Light
This light will turn on for several seconds after the
ignition is turned ON as a reminder to ªbuckleup.º This light will remain on as long as the seat belt
remains unbuckled. (See page 48 for more information.)
31. Brake System Warning Light
This light monitors various brake functions,
including brake fluid level and parking brake
application. If the light turns on, it may indi-
cate that the parking brake is applied, that the
brake fluid level is low, or that there is a problem with the
anti-lock brake system (if equipped).
The dual brake system provides a reserve braking capac-
ity in the event of a failure to a portion of the hydraulic
system. Failure of either half of the dual brake system is
indicated by the Brake Warning Light, which will turn on
when the brake fluid level in the master cylinder has
dropped below a specified level.
The light will remain on until the cause is corrected.
202 INSTRUMENT PANEL AND CONTROLS
Page 289 of 493

6-Speed Manual Transmission
WARNING!
You or others could be injured if you leave the
vehicle unattended without having the parking
brake fully applied. The parking brake should al-
ways be applied when the driver is not in the vehicle,
especially on an incline.
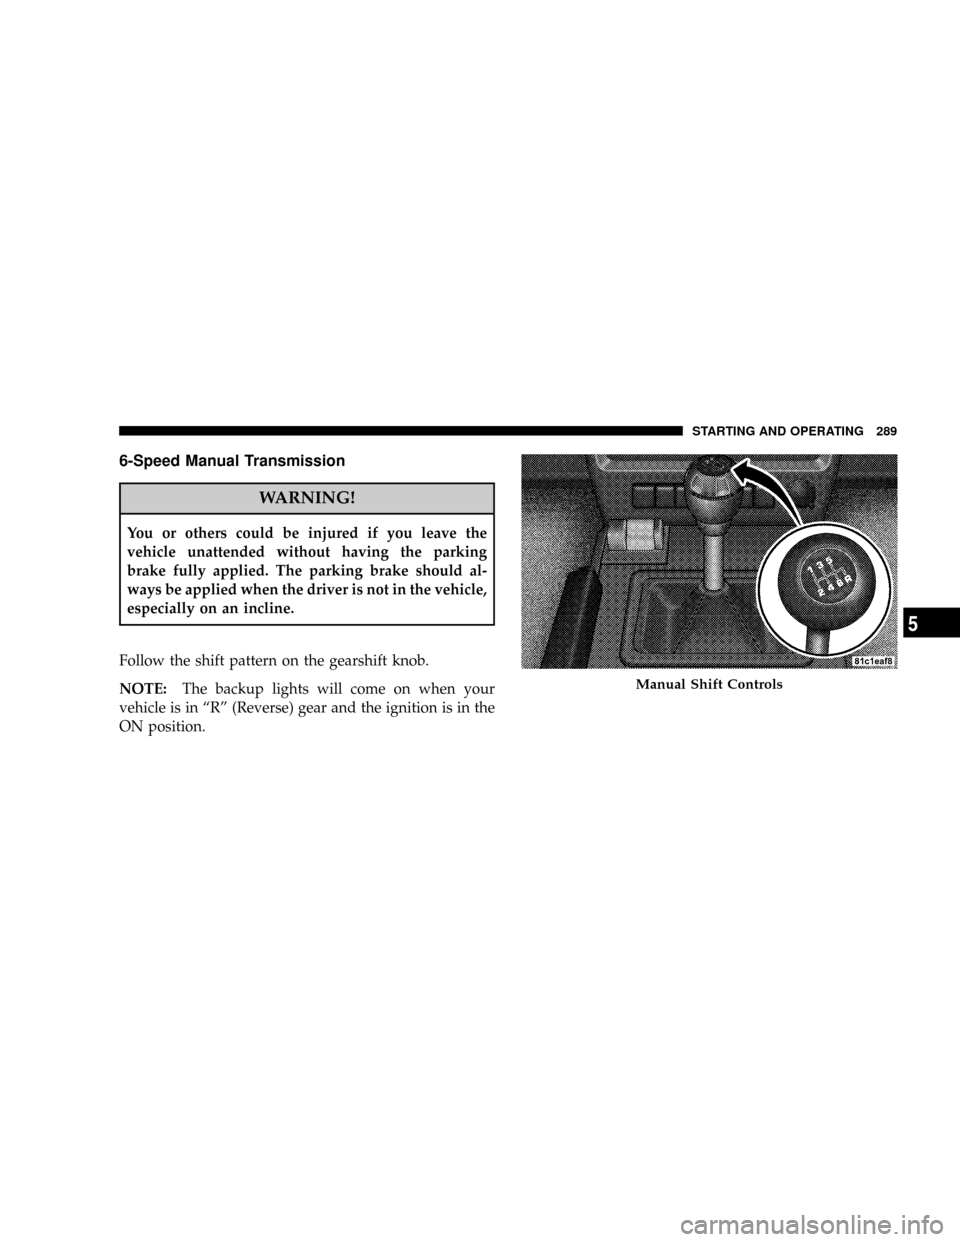
Follow the shift pattern on the gearshift knob.
NOTE:The backup lights will come on when your
vehicle is in ªRº (Reverse) gear and the ignition is in the
ON position.
Manual Shift Controls
STARTING AND OPERATING 289
5
Page 295 of 493

N
Neutral - Disengages both the front driveshaft and rear
driveshaft from the powertrain. To be used for flat
towing behind another vehicle. Refer to ªRecreational
Towingº in this section for more information.
Transfer Case Position Indicator Lights
The 4WD indicator lights are located in the instrument
cluster. The ªNº (Neutral) indicator light is located on the
4WD Control Switch. If there is no indicator light on or
flashing, the transfer case position is 2-wheel drive
(2WD). If the indicator light is on, the desired position
(4WD LOCK, 4WD LOW, or NEUTRAL) has been ob-
tained.
If One or More Shift Requirements are not met:
²An indicator light will flash.
²The transfer casewill notshift.NOTE:The ªSERV 4WDº warning light monitors the
electric shift 4WD system. If this light remains on after
engine start up, or it illuminates during driving, it means
that the 4WD system is not functioning properly and that
service is required.
Shifting Procedures
NOTE:If any of the requirements to select a new
transfer case position have not been met, the transfer case
will not shift, the indicator light for the previous position
will remain ON, and the newly selected position indica-
tor light will continue to flash until all the requirements
for the selected position have been met. To retry a shift,
move the 4WD Control Switch back to the original
position, make certain all shift requirements have been
met, wait five (5) seconds, and try the shift again.
STARTING AND OPERATING 295
5
Page 301 of 493

Interlocking Ignition Systemº under ªManual Transmis-
sionº or to ªStarting Proceduresº in this section for
details.
N
Neutral - Disengages both the front driveshaft and rear
driveshaft from the powertrain. To be used for flat
towing behind another vehicle. Refer to ªRecreational
Towingº in this section for more information.
Transfer Case Position Indicator Lights
The 4WD indicator lights are located in the instrument
cluster. The ªNº (Neutral) indicator light is located on the
4WD Control Switch. If there is no indicator light on or
flashing, the transfer case position is 2-wheel drive
(2WD). If the indicator light is on, the desired position
(4WD AUTO, 4WD LOW, or NEUTRAL) has been ob-
tained.If One or More Shift Requirements are not met:
²An indicator light will flash.
²The transfer casewill notshift.
NOTE:The ªSERV 4WDº warning light monitors the
electric shift 4WD system. If this light remains on after
engine start up, or it illuminates during driving, it means
that the 4WD system is not functioning properly and that
service is required.
Shifting Procedures
NOTE:If any of the requirements to select a new
transfer case position have not been met, the transfer case
will not shift, the indicator light for the previous position
will remain ON, and the newly selected position indica-
tor light will continue to flash until all the requirements
for the selected position have been met. To retry a shift,
move the 4WD Control Switch back to the original
STARTING AND OPERATING 301
5
Page 375 of 493

CAUTION!
If the trailer weighs more than 1,000 lbs (454 kg)
loaded, it should have its own brakes, and they
should be of adequate capacity. Failure to do this
could lead to accelerated brake lining wear, higher
brake pedal effort, and longer stopping distances.
WARNING!
Do not connect trailer brakes to your vehicle's hy-
draulic brake lines. It can overload your brake sys-
tem and cause it to fail. You might not have brakes
when you need them and could have an accident.
Towing any trailer will increase your stopping dis-
tance. When towing you should allow for additional
space between your vehicle and the vehicle in front
of you. Failure to do so could result in an accident.
Towing Requirements Ð Trailer Lights & Wiring
Whenever you pull a trailer, regardless of the trailer size,
stoplights and turn signals on the trailer are required for
motoring safety.
The Trailer Tow Package may includea4and7pin
wiring harness. Use a factory approved trailer harness
and connector.
NOTE:Do not cut or splice wiring into the vehicles
wiring harness.
STARTING AND OPERATING 375
5