JEEP PATRIOT 2007 1.G Owners Manual
Manufacturer: JEEP, Model Year: 2007, Model line: PATRIOT, Model: JEEP PATRIOT 2007 1.GPages: 440, PDF Size: 7.26 MB
Page 161 of 440
CAUTION!
Use care when washing the inside of the rear window
to prevent damage to heating elements. Use a soft
cloth and a mild washing solution, wiping parallel to
the heating elements. Also, keep all objects a safe
distance from the window to prevent damaging the
heating elements.
ROOF LUGGAGE RACK Ð IF EQUIPPED
External racks do not increase the total load carrying
capacity of the vehicle. Be sure that the total occupant
and luggage load inside the vehicle, plus the load on the
luggage rack, do not exceed the rated vehicle capacity.
This vehicle is not equipped with roof rack cross rails as
built, unless ordered as optional equipment. Cross rails
must be installed prior to carrying loads on the roof rack.
If not equipped, your authorized dealer can order andinstall Mopartcross rails built specifically for this roof
rack system or a number of after market rails that are
tailored to your lifestyle or activities.
NOTE:The optional cross rails have seven specific
locations identified by a feature on both the side rail and
the cross rail. Cross rails must be secured in one of the
seven detent locations on the side rail to prevent move-
ment with a sudden stop. For improved wind noise
performance when cross rails are not in use, place them
in detent positions #2 (second detent from the front of the
vehicle) and #7 (detent closest to the rear of the vehicle)
as indicated with a unique feature on the side rails.
160 UNDERSTANDING THE FEATURES OF YOUR VEHICLE
Page 162 of 440
CAUTION!
²To prevent damage to the roof of your vehicle, DO NOT
carry any loads on the roof rack without cross rails
installed. The load should be secured and placed on top of
the cross rails, not directly on the roof. If it is necessary to
place the load on the roof, place a blanket or some other
protection between the load and the roof surface.
²To avoid damage to the roof rack and vehicle, do not
exceed the rated load capacity of your cross rail system or
the roof rack system maximum load capacity of 150 lbs (68
kg). Always distribute heavy loads as evenly as possible
and secure the load appropriately.
²Long loads which extend over the windshield, such as
wood panels or surfboards, should be secured to both the
front and rear of the vehicle.
²Travel at reduced speeds and turn corners carefully when
carrying large or heavy loads on the roof rack. Wind forces,
due to natural causes or nearby truck traffic, can add
sudden upward loads. This is especially true on large flat
loads and may result in damage to the cargo or your
vehicle.
WARNING!
Cargo must be securely tied before driving your
vehicle. Improperly secured loads can fly off the
vehicle, particularly at high speeds, resulting in per-
sonal injury or property damage. Follow the roof rack
ªCautionsº when carrying cargo on your roof rack.
UNDERSTANDING THE FEATURES OF YOUR VEHICLE 161
3
Page 163 of 440

Page 164 of 440
UNDERSTANDING YOUR INSTRUMENT PANEL
CONTENTS
mInstrument Panel Features.................167
mInstrument ClusterÐPremium..............168
mInstrument Cluster Descriptions............169
mElectronic Vehicle Information Center (EVIC) ± If
Equipped............................179
NEVIC Functions.......................181
NCompass/Temperature/Audio............182
NAverage Fuel Economy.................182
NDistance To Empty (DTE)...............183NElapsed Time........................183
NTire Pressure Monitor (TPM).............183
NPersonal Settings (Customer Programmable
Features)...........................183
mSetting The Compass Variance And Compass
Calibration...........................186
NCompass Variance.....................186
NCompass Calibration...................188
mRadio General Information................189
NRadio Broadcast Signals.................1894
Page 165 of 440
NTwo Types Of Signals..................189
NElectrical Disturbances..................190
NAM Reception.......................190
NFM Reception........................190
mElectronic Digital Clock..................190
NClock Setting Procedure.................191
mSales Code REF Ð AM/FM/CD (Single Disc) Radio
With Optional Satellite Radio And Hands Free Phone
Capability............................191
NOperating Instructions - Radio Mode.......192
NOperation Instructions - CD Mode.........195
NOperation Instructions - Auxiliary Mode.....197
NOperating Instructions - Hands Free Phone Ð If
Equipped...........................198NOperating Instructions - Satellite Radio Ð If
Equipped...........................199
mSales Code RAQ ± AM/FM/CD (6-Disc) Radio With
Optional Satellite Radio, Hands Free Phone, And
Vehicle Entertainment Systems (VES)
Capabilities...........................199
NOperating Instructions - Radio Mode.......199
NOperation Instructions - (CD Mode For CD Audio
Play)..............................204
NLoad/Eject Button (CD Mode For CD Audio
Play)..............................206
NNotes On Playing MP3 Files.............208
NOperation Instructions - (CD Mode For MP3 Audio
Play)..............................210
NLoad/Eject Button (CD Mode For MP3 Play) . . 210
164 UNDERSTANDING YOUR INSTRUMENT PANEL
Page 166 of 440
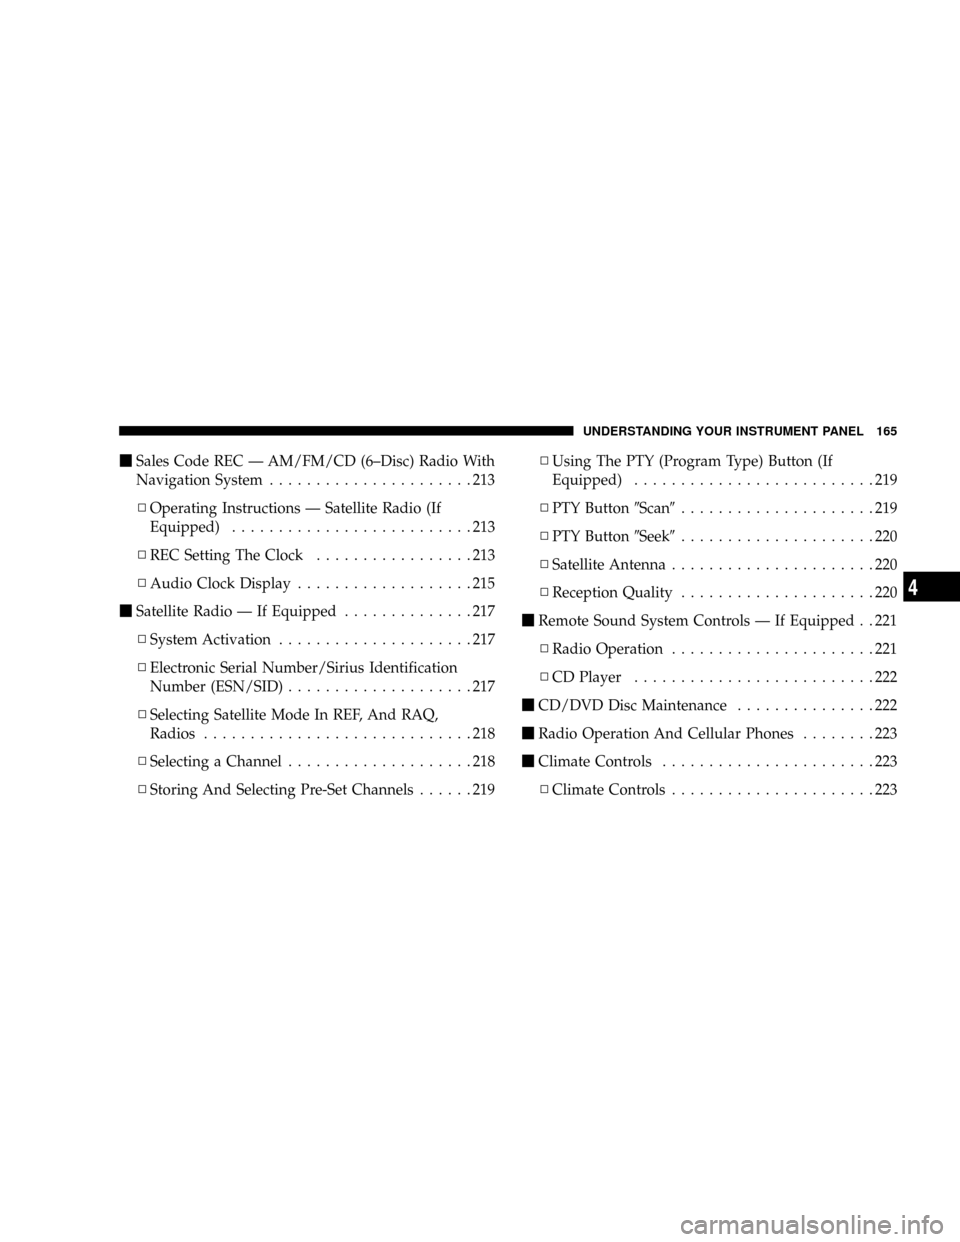
mSales Code REC Ð AM/FM/CD (6±Disc) Radio With
Navigation System......................213
NOperating Instructions Ð Satellite Radio (If
Equipped)..........................213
NREC Setting The Clock.................213
NAudio Clock Display...................215
mSatellite Radio Ð If Equipped..............217
NSystem Activation.....................217
NElectronic Serial Number/Sirius Identification
Number (ESN/SID)....................217
NSelecting Satellite Mode In REF, And RAQ,
Radios.............................218
NSelecting a Channel....................218
NStoring And Selecting Pre-Set Channels......219NUsing The PTY (Program Type) Button (If
Equipped)..........................219
NPTY Button9Scan9.....................219
NPTY Button9Seek9.....................220
NSatellite Antenna......................220
NReception Quality.....................220
mRemote Sound System Controls Ð If Equipped . . 221
NRadio Operation......................221
NCD Player..........................222
mCD/DVD Disc Maintenance...............222
mRadio Operation And Cellular Phones........223
mClimate Controls.......................223
NClimate Controls......................223
UNDERSTANDING YOUR INSTRUMENT PANEL 165
4
Page 167 of 440
NAir Conditioning.....................226
NAir Filtration System ± If Equipped........228NOperating Tips.......................229
166 UNDERSTANDING YOUR INSTRUMENT PANEL
Page 168 of 440
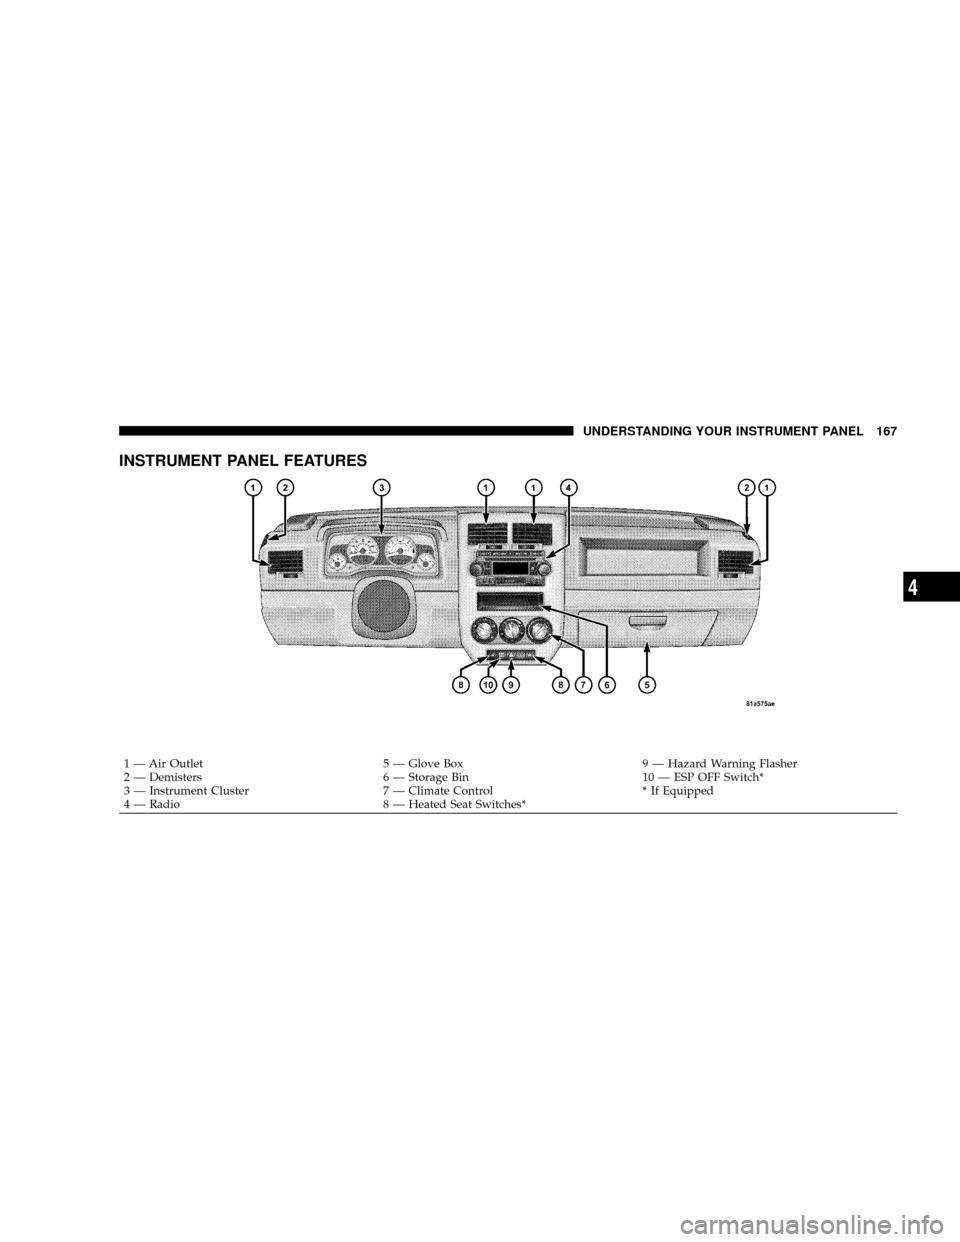
INSTRUMENT PANEL FEATURES
1 Ð Air Outlet 5 Ð Glove Box 9 Ð Hazard Warning Flasher
2 Ð Demisters 6 Ð Storage Bin 10 Ð ESP OFF Switch*
3 Ð Instrument Cluster 7 Ð Climate Control * If Equipped
4 Ð Radio 8 Ð Heated Seat Switches*
UNDERSTANDING YOUR INSTRUMENT PANEL 167
4
Page 169 of 440
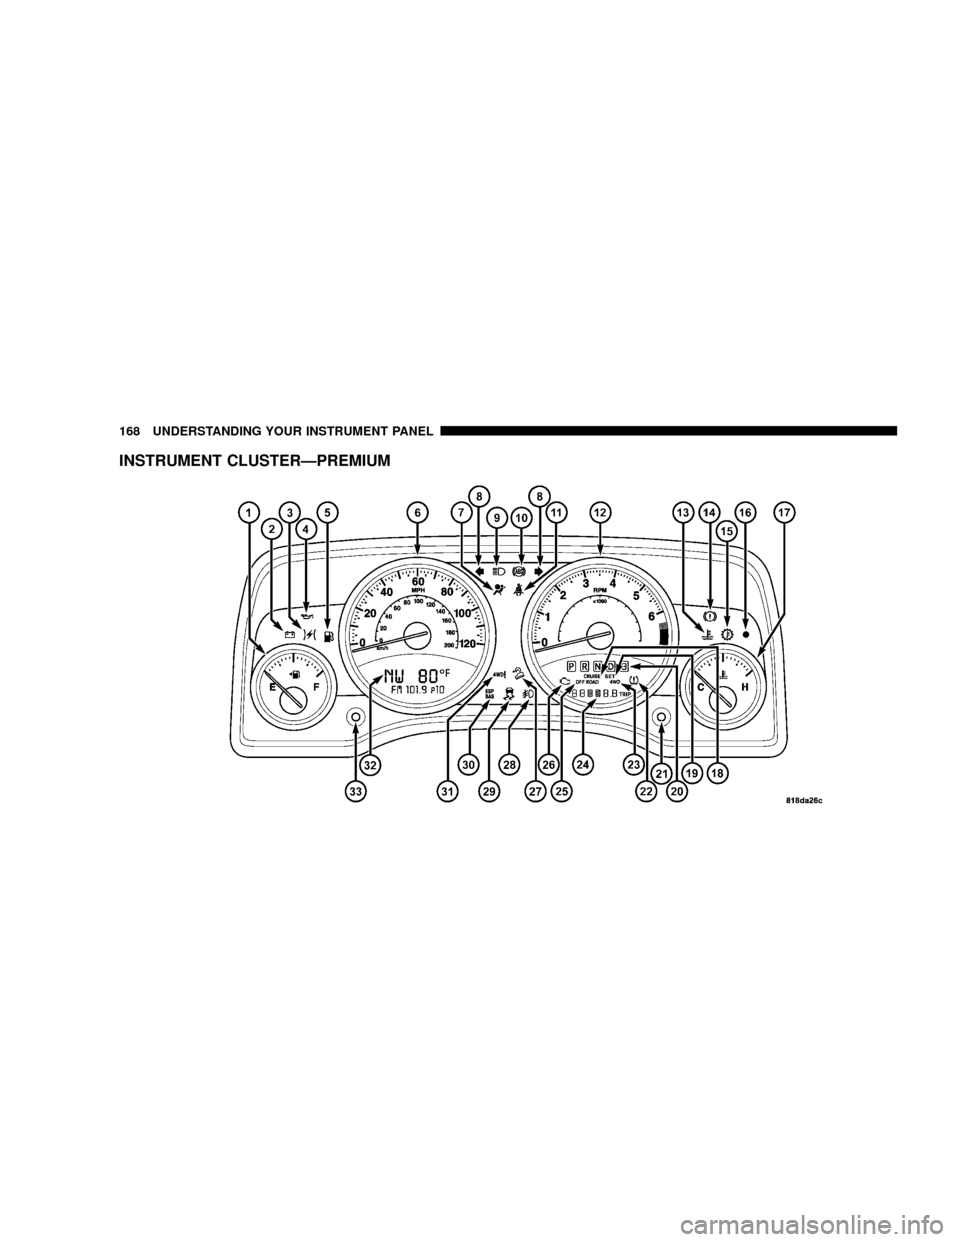
INSTRUMENT CLUSTERÐPREMIUM
168 UNDERSTANDING YOUR INSTRUMENT PANEL
Page 170 of 440
INSTRUMENT CLUSTER DESCRIPTIONS
1. Fuel Gauge/Fuel Door Location
When the ignition switch is in the ON position,
the pointer will show the level of fuel remain-
ing in the fuel tank. The fuel pump symbol
points to the side of the vehicle where the fuel
door is located
2. Charging System Light
9This light shows the status of the electrical charg-
ing system. The light should come on when the
ignition switch is first turned ON and remain on briefly
as a bulb check. If the light stays on or comes on while
driving, turn off some of the vehicle's non essential
electrical devices or increase engine speed (if at idle). If
the Charging System light remains on, it means that the
vehicle is experiencing a problem with the charging
system. Obtain SERVICE IMMEDIATELY. See your local
authorized dealer.93. Electronic Throttle Control Indicator Light
This light informs you of a problem with the
Electronic Throttle Control system. If a prob-
lem is detected, the light will come on while the
engine is running. If the light remains lit with
the engine running your vehicle will usually be drivable
and not need towing, however see your dealer for service
as soon as possible.
If the light is flashing when the engine is running you
may experience power loss, an elevated/rough idle, and
increased brake pedal effort, and your vehicle may
require towing. Immediate service is required.
The light will come on when the ignition switch is first
turned on and remain on briefly as a bulb check. This is
normal. If the light does not come on during starting,
have the system checked by an authorized dealer.
UNDERSTANDING YOUR INSTRUMENT PANEL 169
4