oil level JEEP PATRIOT 2007 1.G Owners Manual
[x] Cancel search | Manufacturer: JEEP, Model Year: 2007, Model line: PATRIOT, Model: JEEP PATRIOT 2007 1.GPages: 440, PDF Size: 7.26 MB
Page 171 of 440
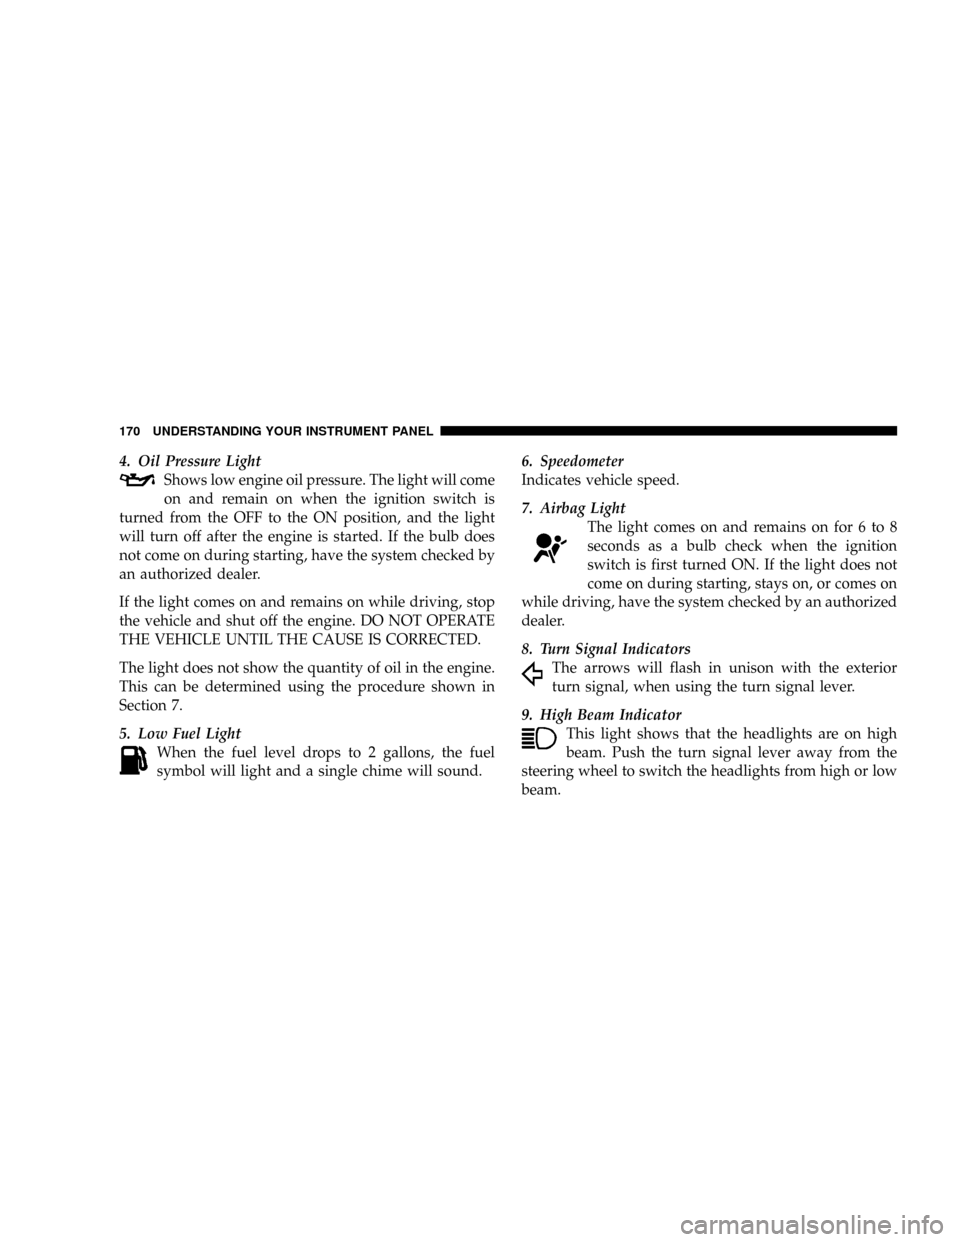
4. Oil Pressure Light
Shows low engine oil pressure. The light will come
on and remain on when the ignition switch is
turned from the OFF to the ON position, and the light
will turn off after the engine is started. If the bulb does
not come on during starting, have the system checked by
an authorized dealer.
If the light comes on and remains on while driving, stop
the vehicle and shut off the engine. DO NOT OPERATE
THE VEHICLE UNTIL THE CAUSE IS CORRECTED.
The light does not show the quantity of oil in the engine.
This can be determined using the procedure shown in
Section 7.
5. Low Fuel Light
When the fuel level drops to 2 gallons, the fuel
symbol will light and a single chime will sound.6. Speedometer
Indicates vehicle speed.
7. Airbag Light
The light comes on and remains on for 6 to 8
seconds as a bulb check when the ignition
switch is first turned ON. If the light does not
come on during starting, stays on, or comes on
while driving, have the system checked by an authorized
dealer.
8. Turn Signal Indicators
The arrows will flash in unison with the exterior
turn signal, when using the turn signal lever.
9. High Beam Indicator
This light shows that the headlights are on high
beam. Push the turn signal lever away from the
steering wheel to switch the headlights from high or low
beam.
170 UNDERSTANDING YOUR INSTRUMENT PANEL
Page 327 of 440
WARNING!
A hot engine cooling system is dangerous. You or
others could be badly burned by steam or boiling
coolant. You may want to call a service center if your
vehicle overheats. If you decide to look under the
hood yourself, refer to Section 7, Maintenance, of this
manual. Follow the warnings under the Cooling
System Pressure Cap paragraph.
AUTOMATIC TRANSAXLE OVERHEATING
During sustained high speed driving or trailer towing up
long grades on hot days, the automatic transaxle oil may
become too hot.
If this happens, the transmission overheat in-
dicator light will come on, and the vehicle will
slow slightly until the automatic transaxle
cools down enough to allow a return to therequested speed. If the high speed is maintained, the
overheating will reoccur, as before, in a cyclic fashion.
JACKING AND TIRE CHANGING
WARNING!
²Being under a jacked-up vehicle is dangerous. The
vehicle could slip off the jack and fall on you. You
could be crushed. Never put any part of your body
under a vehicle that is on a jack. Never start or run
the engine while the vehicle is on a jack. If you
need to get under a raised vehicle, take it to a
service center where it can be raised on a lift.
²The jack is designed to use as a tool for changing
tires only. The jack should not be used to lift the
vehicle for service purposes. The vehicle should
be jacked on a firm level surface only. Avoid ice or
slippery areas.
326 WHAT TO DO IN EMERGENCIES
Page 348 of 440
MAINTENANCE PROCEDURES
The pages that follow contain therequiredmaintenance
services determined by the engineers who designed your
vehicle.
Besides the maintenance items for which there are fixed
maintenance intervals, there are other items that should
operate satisfactorily without periodic maintenance.
However, if a malfunction of these items does occur, it
could adversely affect the engine or vehicle performance.
These items should be inspected if a malfunction is
observed or suspected.
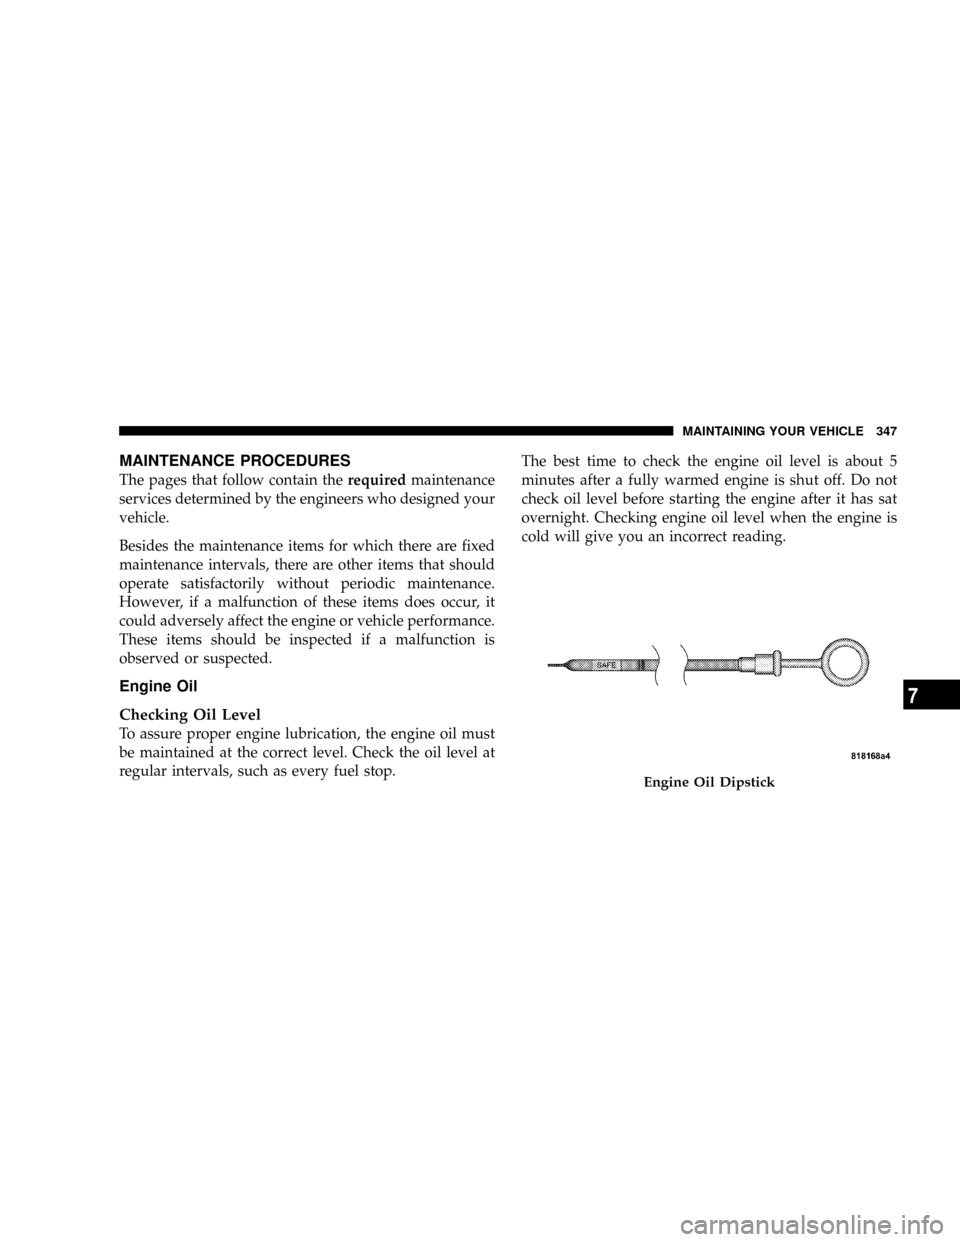
Engine Oil
Checking Oil Level
To assure proper engine lubrication, the engine oil must
be maintained at the correct level. Check the oil level at
regular intervals, such as every fuel stop.The best time to check the engine oil level is about 5
minutes after a fully warmed engine is shut off. Do not
check oil level before starting the engine after it has sat
overnight. Checking engine oil level when the engine is
cold will give you an incorrect reading.
Engine Oil Dipstick
MAINTAINING YOUR VEHICLE 347
7
Page 349 of 440
Checking the oil while the vehicle is on level ground and
only when the engine is hot, will improve the accuracy of
the oil level readings. Maintain the oil level between the
range markings on the dipstick. The range markings will
consist of a crosshatch zone that says SAFE or a cross-
hatch zone that says MIN at the low end of the range and
MAX at the high end of the range. Adding one quart of
oil when the reading is at the low end of the indicated
range will result in the oil level at the full end of the
indicator range.
CAUTION!
Do not overfill the engine. Overfilling the engine as
indicated by the range markings, as described above,
on the engine oil dipstick will cause oil aeration,
which can lead to loss of oil pressure and an increase
in oil temperature. This could damage your engine.
Change Engine Oil
Road conditions and your kind of driving affects the
interval at which your oil should be changed. Check the
following list to decide if any apply to you.
²Day and night temperatures are below 32ÉF (0ÉC).
²Stop and Go driving.
²Extensive engine idling.
²Driving in dusty conditions.
²Short trips of less than 10 miles (16 km).
²More than 50% of your driving is at sustained high
speeds during hot weather, above 90ÉF (32ÉC).
²Trailer towing.
²Taxi, Police or delivery service (commercial service).
²Off-Road or desert operation.
348 MAINTAINING YOUR VEHICLE
Page 358 of 440
Refrigerant Recovery and Recycling
R-134a Air Conditioning Refrigerant is a hydrofluorocar-
bon (HFC) that is endorsed by the Environmental Pro-
tection Agency and is an ozone-saving product. How-
ever, the manufacturer recommends that air conditioning
service be performed by dealers or other service facilities
using recovery and recycling equipment.
NOTE:Use only manufacturer approved A/C System
Sealers, Stop Leak Products, Seal Conditioners, Compres-
sor Oil, or Refrigerants.
Power Steering Ð Fluid Check
Checking the power steering fluid level at a defined
service interval is not required. The fluid should only be
checked if a leak is suspected, abnormal noises are
apparent, and/or the system is not functioning as antici-
pated. Coordinate inspection efforts through a certified
DaimlerChrysler Dealership.
WARNING!
Fluid level should be checked on a level surface and
with the engine off to prevent injury from moving
parts and to insure accurate fluid level reading. Do
not overfill. Use only manufacturers recommended
power steering fluid.
If necessary, add fluid to restore to the proper indicated
level. With a clean cloth, wipe any spilled fluid from all
surfaces. Refer to Fluids, Lubricants, and Genuine Parts
for correct fluid types.
Front Suspension Ball Joints
There are two front suspension lower ball joints that are
permanently lubricated. Inspect these ball joints when-
ever under vehicle service is done. Damaged seals and
their corresponding potentially damaged ball joints must
be replaced.
MAINTAINING YOUR VEHICLE 357
7
Page 360 of 440
2. Push the release tab and slide the wiper blade assem-
bly down along the arm. Gently place the wiper arm on
the windshield.
3. Install the new blade assembly onto the wiper arm tip
until it locks in place.
Windshield Washer Reservoir
The washer fluid reservoir is located in the rear of the
engine compartment on the right side and should be
checked for fluid level at regular intervals. Fill the
reservoir with windshield washer solvent (not radiator
antifreeze).
Exhaust System
The best protection against carbon monoxide entry into
the vehicle body is a properly maintained engine exhaust
system.
If you notice a change in the sound of the exhaust system,
or if exhaust fumes can be detected inside the vehicle, orwhen the underside or rear of the vehicle is damaged;
have a competent technician inspect the complete ex-
haust system and adjacent body areas for broken, dam-
aged, deteriorated, or mispositioned parts. Open seams
or loose connections could permit exhaust fumes to seep
into the passenger compartment. In addition, inspect the
exhaust system each time the vehicle is raised for an oil
change or lubrication. Replace as required.
WARNING!
Exhaust gases can injure or kill. They contain carbon
monoxide (CO) which is colorless and odorless.
Breathing it can make you unconscious and can
eventually poison you. To avoid breathing CO, refer
to Exhaust Gas in the Safety Tips section of this
manual.
MAINTAINING YOUR VEHICLE 359
7
Page 368 of 440
NOTE:Inspection of brake hoses should be done when-
ever the brake system is serviced and at every engine oil
change.
WARNING!
Worn brake hoses can burst and cause brake failure.
You could have an accident. If you see any signs of
cracking, scuffing, or worn spots, have the brake
hoses replaced immediately.
Brake Master Cylinder
The fluid level in the master cylinder should be checked
when performing under hood services, or immediately if
the brake system warning lamp is on.
Be sure to clean the top of the master cylinder area before
removing the cap. If necessary, add fluid to bring the
fluid level up to the requirements described on the brakefluid reservoir. Fluid level can be expected to fall as the
brake pads wear. Brake fluid level should be checked
when pads are replaced. However, low fluid level may be
caused by a leak and a checkup may be needed.
NOTE:If your vehicle is equipped with aManual
Transaxle, the Brake Fluid Reservoir supplies fluid to
both the Brake System and the Clutch Release System.
The two systems are separated in the reservoir and a leak
in one system will not affect the other system. The
Manual TransaxleClutch Release System should not
require fluid replacement during the life of the vehicle. If
the Brake Fluid Reservoir is low, and the brake system
does not indicate any leaks or other problems, it may be
a result of a leak in the Hydraulic Clutch Release System.
See your local authorized dealer for service.
Use only manufacturers recommended brake fluid, refer
to Fluids, Lubricants and Genuine Parts for correct fluid
type.
MAINTAINING YOUR VEHICLE 367
7
Page 371 of 440
Fluid Level Check
Check the fluid level by removing the fill plug. The fluid
level should be between the bottom of the fill hole and a
point not more that 3/16º (4.7 mm) below the bottom of
the hole.
Add fluid, if necessary, to maintain the proper level.
Frequency Of Fluid Change
Under normal operating conditions, the fluid installed at
the factory will give satisfactory lubrication for the life of
the vehicle. Fluid changes are not necessary unless the
following conditions exist:
²The lubricant has become contaminated with water. If
contaminated with water, the fluid should be changed
immediately.
²If severe usage has occurred, refer to Maintenance
Schedule ªBº in Section 8 of this manual.
Rear Drive Assembly (RDA )± AWD/4WD Models
Only
Lubricant Selection
Use only manufacturers recommended fluid. Refer to
Fluids, Lubricants and Genuine Parts for correct fluid
type.
Fluid Level Check
Visually inspected the unit at each oil change for leakage.
If leakage is detected, Check the fluid level by removing
the fill plug. The fluid level should be maintained be-
tween the bottom of the fill hole to 1/8 inch (4 mm)
below the fill hole.
Add fluid, if necessary, to maintain the proper level.
Frequency Of Fluid Change
Refer to the ªMaintenance Schedule located if section 8 of
this manual for the correct change interval for your type
of driving.
370 MAINTAINING YOUR VEHICLE
Page 372 of 440
Power Transfer Unit (PTU) ± AWD/4WD Models
Only
Lubricant Selection
Use only manufacturers recommended fluid. Refer to
Fluids, Lubricants and Genuine Parts for correct fluid
type.
Fluid Level Check
Visually inspected the unit at each oil change for leakage.
If leakage is detected, Check the fluid level by removing
the fill plug. The fluid level should be maintained be-
tween the bottom of the fill hole to 1/8 inch (4 mm)
below the fill hole.
Add fluid, if necessary, to maintain the proper level.
Frequency Of Fluid Change
Refer to the ªMaintenance Schedule located if section 8 of
this manual for the correct change interval for your type
of driving.
Appearance Care And Protection From Corrosion
Protection Of Body And Paint from Corrosion
Vehicle body care requirements vary according to geo-
graphic locations and usage. Chemicals that make roads
passable in snow and ice, and those that are sprayed on
trees and road surfaces during other seasons, are highly
corrosive to the metal in your vehicle. Outside parking,
which exposes your vehicle to airborne contaminants,
road surfaces on which the vehicle is operated, extreme
hot or cold weather and other extreme conditions will
have an adverse effect on paint, metal trim, and under-
body protection.
The following maintenance recommendations will enable
you to obtain maximum benefit from the corrosion
resistance built into your vehicle.
What Causes Corrosion?
Corrosion is the result of deterioration or removal of
paint and protective coatings from your vehicle.
MAINTAINING YOUR VEHICLE 371
7
Page 389 of 440
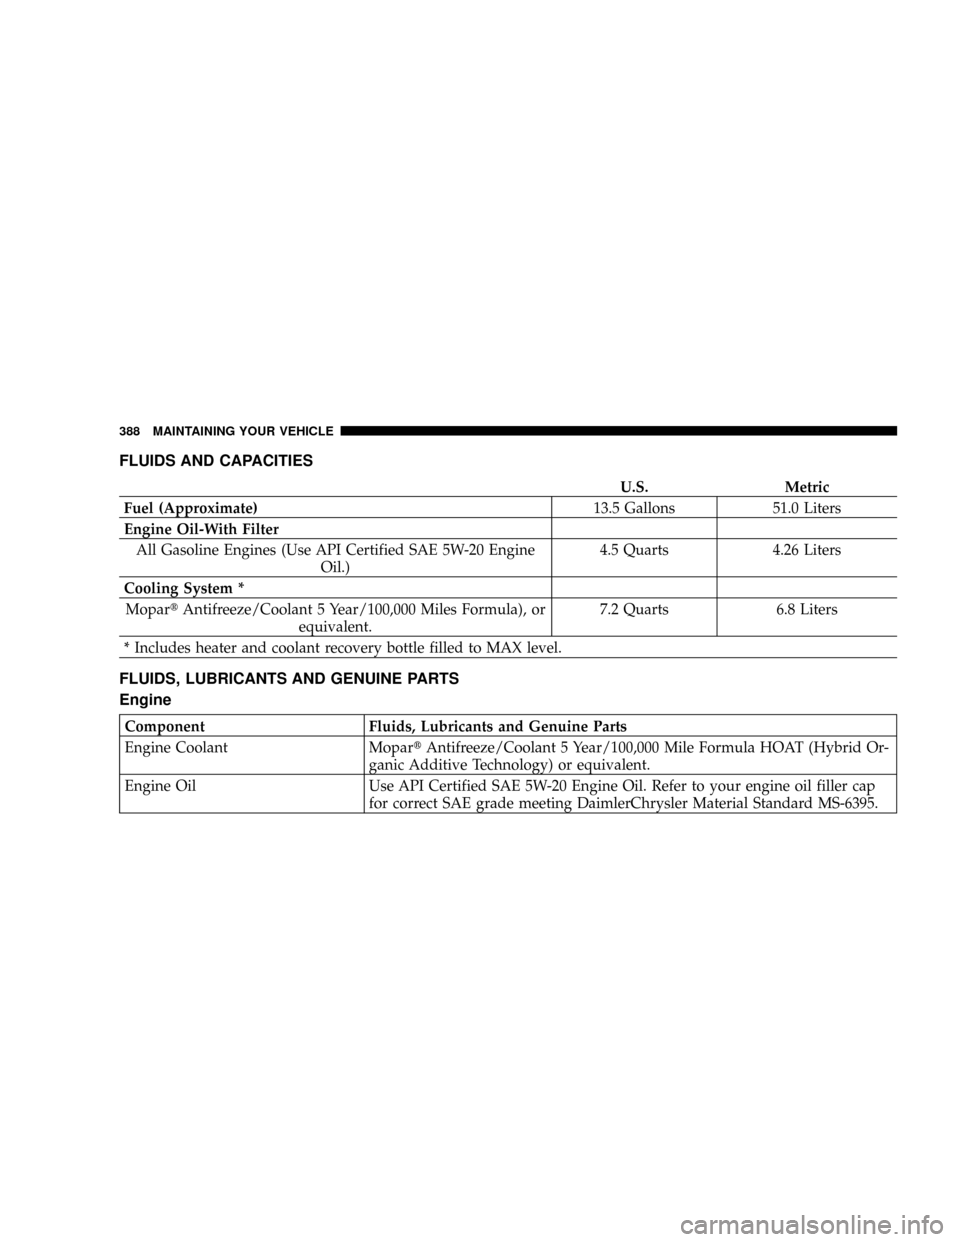
FLUIDS AND CAPACITIES
U.S. Metric
Fuel (Approximate)13.5 Gallons 51.0 Liters
Engine Oil-With Filter
All Gasoline Engines (Use API Certified SAE 5W-20 Engine
Oil.)4.5 Quarts 4.26 Liters
Cooling System *
MopartAntifreeze/Coolant 5 Year/100,000 Miles Formula), or
equivalent.7.2 Quarts 6.8 Liters
* Includes heater and coolant recovery bottle filled to MAX level.
FLUIDS, LUBRICANTS AND GENUINE PARTS
Engine
Component Fluids, Lubricants and Genuine Parts
Engine Coolant MopartAntifreeze/Coolant 5 Year/100,000 Mile Formula HOAT (Hybrid Or-
ganic Additive Technology) or equivalent.
Engine Oil Use API Certified SAE 5W-20 Engine Oil. Refer to your engine oil filler cap
for correct SAE grade meeting DaimlerChrysler Material Standard MS-6395.
388 MAINTAINING YOUR VEHICLE