JEEP PATRIOT 2017 1.G Manual PDF
Manufacturer: JEEP, Model Year: 2017, Model line: PATRIOT, Model: JEEP PATRIOT 2017 1.GPages: 421, PDF Size: 3.4 MB
Page 71 of 421
POWER SUNROOF — IF EQUIPPED
The power sunroof switch is located on the overhead
console.
WARNING!
•Never leave children alone in a vehicle, or with
access to an unlocked vehicle. Never leave the key
fob in or near the vehicle, or in a location accessible
(Continued)
WARNING! (Continued)
to children. Occupants, particularly unattended chil-
dren, can become entrapped by the power sunroof
while operating the power sunroof switch. Such
entrapment may result in serious injury or death.
• In a collision, there is a greater risk of being thrown
from a vehicle with an open sunroof. You could also
be seriously injured or killed. Always fasten your
seat belt properly and make sure all passengers are
properly secured.
• Do not allow small children to operate the sunroof.
Never allow your fingers, other body parts, or any
object to project through the sunroof opening. Injury
may result.
Opening Sunroof
Opening Sunroof — Express
Push the switch rearward and release it within one-half
second. The sunroof and sunshade will open automatically
and stop when the full open position is reached. This is
called “Express Open.” During Express Open operation,
any other actuation of the sunroof switch will stop the
sunroof.
Power Sunroof Switch
3
GETTING TO KNOW YOUR VEHICLE 69
Page 72 of 421
Opening Sunroof — Manual Mode
To open the sunroof, push and hold the switch rearward.
Sunroof will move rearward and automatically stop at full
open position. Any release of the switch will stop the
movement. The sunroof and sunshade will remain in a
partially opened condition until the sunroof switch is
pushed again.
Venting Sunroof — Express
Push and release the Vent button within one half second
and the sunroof will open to the vent position. This is
called “Express Vent”, and it will occur regardless of
sunroof position. During Express Vent operation, any other
actuation of the switch will stop the sunroof.
Closing
Closing Sunroof — Express
Push the switch forward and release it within one-half
second and the sunroof will close automatically from any
position. The sunroof will close fully and stop automati-
cally. This is called “Express Close.” During Express Close
operation, any other actuation of the switch will stop the
sunroof.
Closing Sunroof — Manual Mode
To close the sunroof, push and hold the switch forward.
Sunroof will move forward and automatically stop at full
closed position. Any release of the switch will stop the
movement and the sunroof will remain in a partially closed
condition until the sunroof switch is pushed again.
Wind Buffeting
Wind buffeting can be described as the perception of
pressure on the ears or a helicopter-type sound in the ears.
Your vehicle may exhibit wind buffeting with the windows
down, or the sunroof (if equipped) in certain open or
partially open positions. This is a normal occurrence and
can be minimized. If the buffeting occurs with the rear
windows open, open the front and rear windows together
to minimize the buffeting. If the buffeting occurs with the
sunroof open, adjust the sunroof opening to minimize the
buffeting or open any window.
Sunshade Operation
The sunshade can be opened manually. However, the
sunshade will open automatically as the sunroof opens.
NOTE:The sunshade cannot be closed if the sunroof is
open.
70 GETTING TO KNOW YOUR VEHICLE
Page 73 of 421
Pinch Protect Feature
This feature will detect an obstruction in the opening of the
sunroof during Express Close operation. If an obstruction
in the path of the sunroof is detected, the sunroof will
automatically retract. Remove the obstruction if this oc-
curs. Next, push the switch forward and release to Express
Close.
Sunroof Maintenance
Use only a non-abrasive cleaner and a soft cloth to clean the
glass panel.
Ignition Off Operation
For Vehicles Not Equipped With The Instrument Cluster
Display
The power sunroof switch will remain active for 45 seconds
after the ignition switch is turned to the LOCK position.
Opening either front door will cancel this feature.
For Vehicles Equipped With The Instrument Cluster
Display
The power sunroof switch will remain active for up to
approximately ten minutes after the ignition switch is
turned to the LOCK position. Opening either front door
will cancel this feature.
TO OPEN AND CLOSE THE HOOD
To open the hood, two latches must be released.
1. Pull the hood release lever located on the left kick panel.
Hood Release Lever
3
GETTING TO KNOW YOUR VEHICLE 71
Page 74 of 421
2. Move the safety latch, located outside the vehicle underthe front edge of the hood, toward the center and raise
the hood.
Lift the hood prop rod, clipped to the right side (left side
facing hood) of the engine compartment to secure the hood
in the open position. Place the hood prop at the location
stamped into the inner hood surface.
WARNING!
Be sure the hood is fully latched before driving your
vehicle. If the hood is not fully latched, it could open
when the vehicle is in motion and block your vision.
Failure to follow this warning could result in serious
injury or death.Hood Safety Latch Location
Prop Rod Location
72 GETTING TO KNOW YOUR VEHICLE
Page 75 of 421
CAUTION!
To prevent possible damage:
•Before closing hood, make sure the hood prop rod is
fully seated into its storage retaining clips.
• Do not slam the hood to close it. Use a firm down-
ward push at the center front edge of the hood to
ensure that both latches engage. Never drive your
vehicle unless the hood is fully closed, with both
latches engaged.
LIFTGATE
NOTE: The key that is used to start the vehicle is also used
to lock or unlock the doors and open the liftgate.
To unlock the liftgate, insert the key into the lock and turn it
to the right (manual lock models only). The liftgate can also
be unlocked
using the key fob or by activating the
power door lock
switches located on the front doors.
The central locking/unlocking feature (if equipped) can
also be activated from the liftgate key cylinder.
Once unlocked, the liftgate can be opened or closed
without using the key fob. To open the liftgate, squeeze the
liftgate release and pull the liftgate open with one fluid
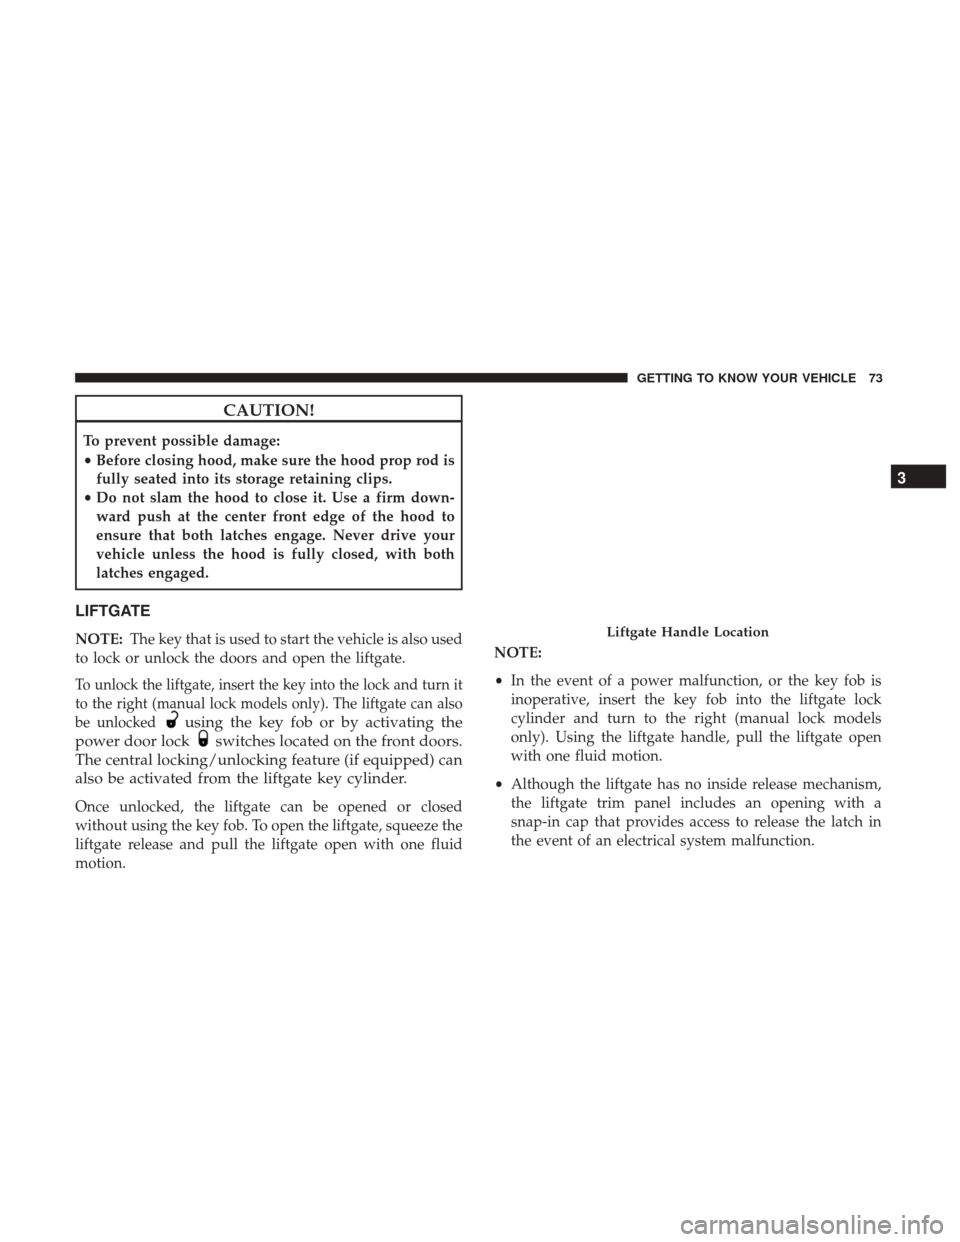
motion. NOTE:
•
In the event of a power malfunction, or the key fob is
inoperative, insert the key fob into the liftgate lock
cylinder and turn to the right (manual lock models
only). Using the liftgate handle, pull the liftgate open
with one fluid motion.
• Although the liftgate has no inside release mechanism,
the liftgate trim panel includes an opening with a
snap-in cap that provides access to release the latch in
the event of an electrical system malfunction.
Liftgate Handle Location
3
GETTING TO KNOW YOUR VEHICLE 73
Page 76 of 421
WARNING!
•Driving with the liftgate open can allow poisonous
exhaust gases into your vehicle. You and your pas-
sengers could be injured by these fumes. Keep the
liftgate closed when you are operating the vehicle.
• If you are required to drive with the liftgate open,
make sure that all windows are closed, and the
climate control blower switch is set at high speed. Do
not use the recirculation mode.
Gas props support the liftgate in the open position. How-
ever, because the gas pressure drops with temperature, it
may be necessary to assist the props when opening the
liftgate in cold weather.
Cargo Area Features
Cargo Light
The light is mounted in the headliner above the cargo area
to illuminate the cargo area.
Cargo Cover
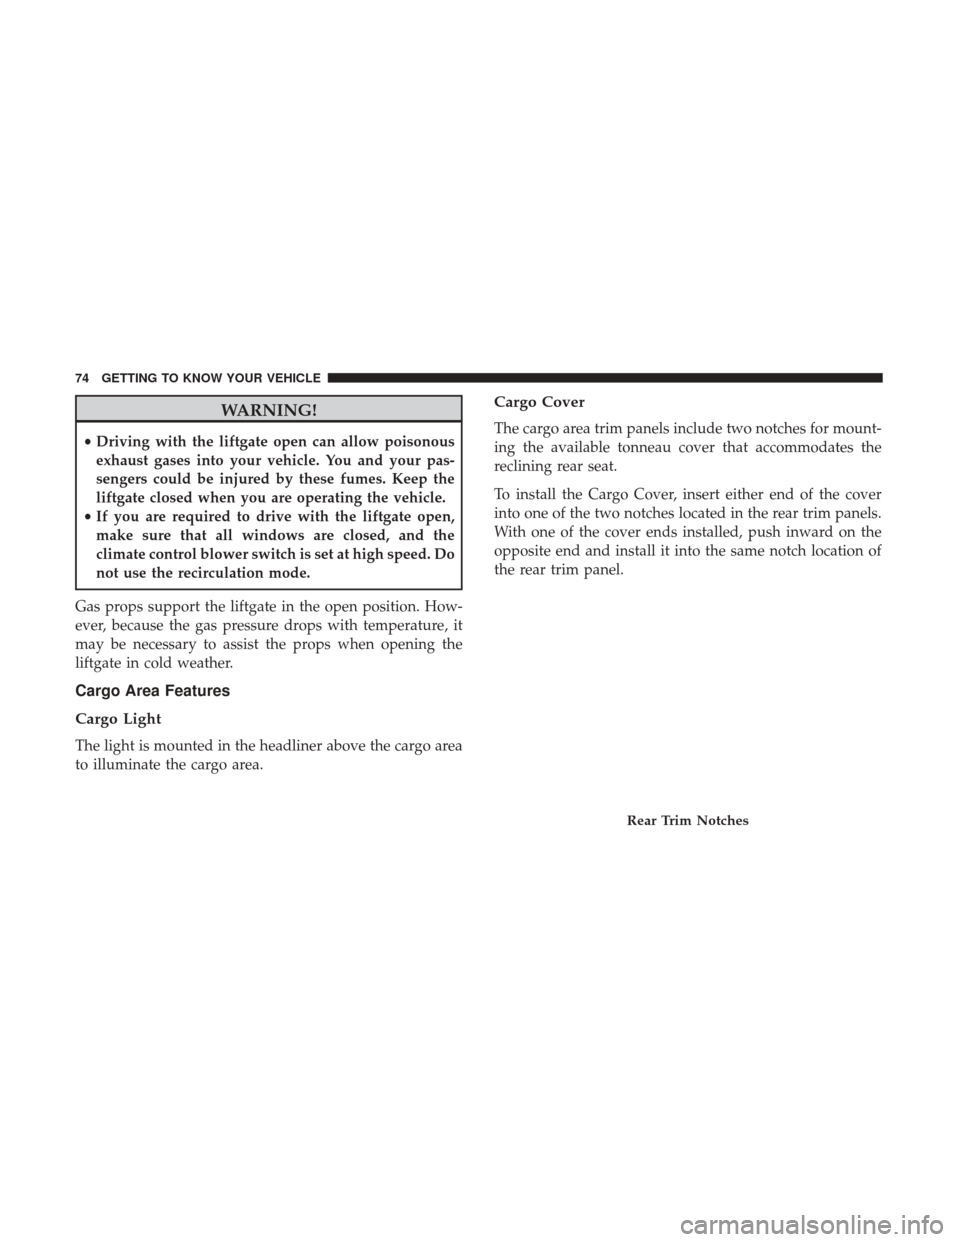
The cargo area trim panels include two notches for mount-
ing the available tonneau cover that accommodates the
reclining rear seat.
To install the Cargo Cover, insert either end of the cover
into one of the two notches located in the rear trim panels.
With one of the cover ends installed, push inward on the
opposite end and install it into the same notch location of
the rear trim panel.
Rear Trim Notches
74 GETTING TO KNOW YOUR VEHICLE
Page 77 of 421
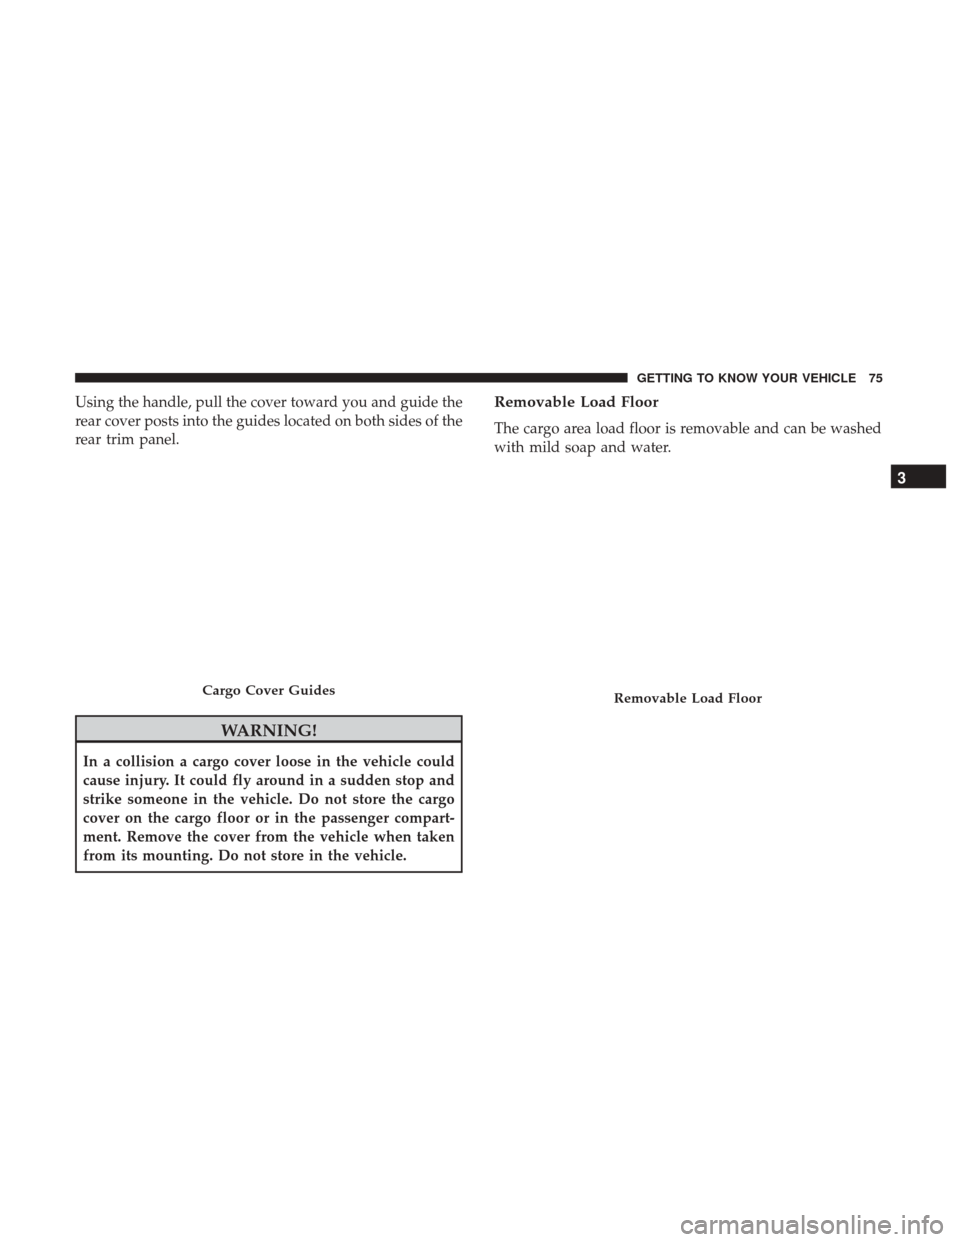
Using the handle, pull the cover toward you and guide the
rear cover posts into the guides located on both sides of the
rear trim panel.
WARNING!
In a collision a cargo cover loose in the vehicle could
cause injury. It could fly around in a sudden stop and
strike someone in the vehicle. Do not store the cargo
cover on the cargo floor or in the passenger compart-
ment. Remove the cover from the vehicle when taken
from its mounting. Do not store in the vehicle.
Removable Load Floor
The cargo area load floor is removable and can be washed
with mild soap and water.
Cargo Cover GuidesRemovable Load Floor
3
GETTING TO KNOW YOUR VEHICLE 75
Page 78 of 421
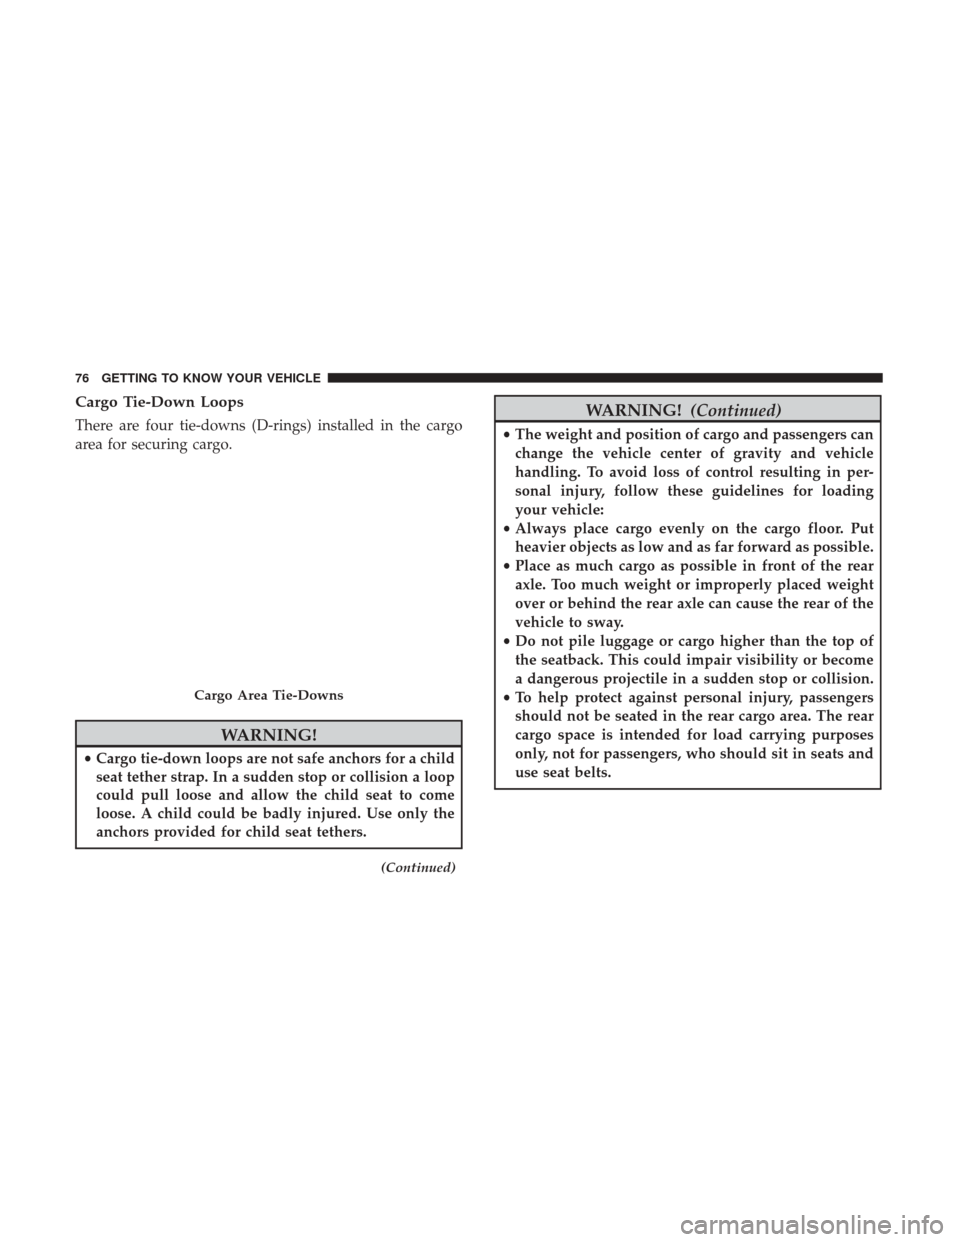
Cargo Tie-Down Loops
There are four tie-downs (D-rings) installed in the cargo
area for securing cargo.
WARNING!
•Cargo tie-down loops are not safe anchors for a child
seat tether strap. In a sudden stop or collision a loop
could pull loose and allow the child seat to come
loose. A child could be badly injured. Use only the
anchors provided for child seat tethers.
(Continued)
WARNING! (Continued)
•The weight and position of cargo and passengers can
change the vehicle center of gravity and vehicle
handling. To avoid loss of control resulting in per-
sonal injury, follow these guidelines for loading
your vehicle:
• Always place cargo evenly on the cargo floor. Put
heavier objects as low and as far forward as possible.
• Place as much cargo as possible in front of the rear
axle. Too much weight or improperly placed weight
over or behind the rear axle can cause the rear of the
vehicle to sway.
• Do not pile luggage or cargo higher than the top of
the seatback. This could impair visibility or become
a dangerous projectile in a sudden stop or collision.
• To help protect against personal injury, passengers
should not be seated in the rear cargo area. The rear
cargo space is intended for load carrying purposes
only, not for passengers, who should sit in seats and
use seat belts.
Cargo Area Tie-Downs
76 GETTING TO KNOW YOUR VEHICLE
Page 79 of 421
Fold Down Speakers — If Equipped
When the liftgate is open, the speakers can swing down off
the trim panel to face rearward, for tailgating and other
activities.
GARAGE DOOR OPENER — IF EQUIPPED
HomeLink replaces up to three hand-held transmitters that
operate devices such as garage door openers, motorized
gates, lighting or home security systems. The HomeLink
unit is powered by your vehicles 12 Volt battery.
The HomeLink buttons, located on either the overhead
console, headliner or sunvisor, designate the three different
HomeLink channels. The HomeLink indicator is located
above the center button.
Fold Down Speakers
HomeLink Buttons/Overhead Consoles
3
GETTING TO KNOW YOUR VEHICLE 77
Page 80 of 421
HomeLink Buttons/Sunvisor/Headliner
NOTE:HomeLink is disabled when the Vehicle Security
Alarm is active.
Before You Begin Programming HomeLink
Be sure that your vehicle is parked outside of the garage
before you begin programming.
For more efficient programming and accurate transmission
of the radio-frequency signal, it is recommended that a new
battery be placed in the hand-held transmitter of the device
that is being programmed to the HomeLink system. To erase the channels, place the ignition in the ON/RUN
position and push and hold the two outside HomeLink
buttons (I and III) for up 20 seconds or until the red
indicator flashes.
NOTE:
•
Erasing all channels should only be performed when
programming HomeLink for the first time. Do not erase
channels when programming additional buttons.
• If you have any problems, or require assistance, please
call toll-free 1-800-355-3515 or, on the Internet at
HomeLink.com for information or assistance.
Programming A Rolling Code
For programming garage door openers that were manufac-
tured after 1995:
These garage door openers can be identified by the
“LEARN” or “TRAIN” button located where the hanging
antenna is attached to the garage door opener. It is NOT the
button that is normally used to open and close the door.
The name and color of the button may vary by manufac-
turer.
78 GETTING TO KNOW YOUR VEHICLE