engine JEEP PATRIOT 2019 Owner handbook (in English)
[x] Cancel search | Manufacturer: JEEP, Model Year: 2019, Model line: PATRIOT, Model: JEEP PATRIOT 2019Pages: 332, PDF Size: 1.99 MB
Page 48 of 332
•Flash hazard lights as long as the battery has
power or until the hazard light button is
pressed. The hazard lights can be deacti-
vated by pressing the hazard light button.
•Turn on the interior lights, which remain on as
long as the battery has power.
•Unlock the power door locks.
Enhanced Accident Response System
Reset Procedure
In order to reset the Enhanced Accident Re-
sponse System functions after an event, the
ignition must be changed from the START or
ON/RUN position to the OFF position. Carefully
check the vehicle for fuel leaks in the engine
compartment and on the ground near the en-
gine compartment and fuel tank before resetting
the system and starting the engine.
Air Bag Warning Light
The air bags must be ready to
inflate for your protection in a colli-
sion. The Occupant Restraint Con-
troller (ORC) monitors the internal
circuits and interconnecting wiring
associated with air bag system electrical com-
ponents.The ORC monitors the readiness of the elec-
tronic parts of the air bag system whenever the
ignition is placed in the START or ON/RUN
position. If the ignition is in the OFF position or
in the ACC position, the air bag system is not on
and the air bags will not inflate.
The ORC contains a backup power supply
system that may deploy the air bags even if the
battery loses power or it becomes disconnected
prior to deployment.
The ORC turns on the Air Bag Warning Light in
the instrument panel for approximately four to
eight seconds for a self-check when the ignition
is first placed in the ON/RUN position. After the
self-check, the Air Bag Warning Light will turn
off. If the ORC detects a malfunction in any part
of the system, it turns on the Air Bag Warning
Light, either momentarily or continuously. A
single chime will sound to alert you if the light
comes on again after initial startup.
The ORC also includes diagnostics that will
illuminate the instrument panel Air Bag Warning
Light if a malfunction is detected that could
affect the air bag system. The diagnostics also
record the nature of the malfunction. While theair bag system is designed to be maintenance
free, if any of the following occurs, have an
authorized dealer service the air bag system
immediately.
•The Air Bag Warning Light does not come on
during the four to eight seconds when the
ignition is first placed in the ON/RUN posi-
tion.
•The Air Bag Warning Light remains on after
the four to eight-second interval.
•The Air Bag Warning Light comes on inter-
mittently or remains on while driving.
NOTE:
If the speedometer, tachometer, or any en-
gine related gauges are not working, the
Occupant Restraint Controller (ORC) may
also be disabled. In this condition the air
bags may not be ready to inflate for your
protection. Have an authorized dealer ser-
vice the air bag system immediately.
44
Page 61 of 332
room for the child seat. You may also move
the front seat forward to allow more room for
the child seat.
2. Pull enough of the seat belt webbing from
the retractor to pass it through the belt path
of the child restraint. Do not twist the belt
webbing in the belt path.
3. Slide the latch plate into the buckle until you
hear a “click.”
4. Pull on the webbing to make the lap portion
tight against the child seat.
5. To lock the seat belt, pull down on the
shoulder part of the belt until you have pulled
all the seat belt webbing out of the retractor.
Then, allow the webbing to retract back into
the retractor. As the webbing retracts, you
will hear a clicking sound. This means the
seat belt is now in the Automatic Locking
mode.6. Try to pull the webbing out of the retractor. If
it is locked, you should not be able to pull out
any webbing. If the retractor is not locked,
repeat step 5.
7.
Finally, pull up on any excess webbing to
tighten the lap portion around the child re-
straint while you push the child restraint rear-
ward and downward into the vehicle seat.
8. Test that the child restraint is installed tightly
by pulling back and forth on the child seat at
the belt path. It should not move more than
25 mm in any direction.
Any seat belt system will loosen with time, so
check the belt occasionally, and pull it tight if
necessary.
Transporting PetsAir Bags deploying in the front seat could harm
your pet. An unrestrained pet will be thrown
about and possibly injured, or injure a passen-
ger during panic braking or in a collision.
Pets should be restrained in the rear seat in pet
harnesses or pet carriers that are secured by
seat belts.
ENGINE BREAK-IN
RECOMMENDATIONS
A long break-in period is not required for the
engine and drivetrain (transmission and axle) in
your vehicle.
Drive moderately during the first 300 miles
(500 km). After the initial 60 miles (100 km),
speeds up to 50 or 55 mph (80 or 90 km/h) are
desirable.
While cruising, brief full-throttle acceleration
within the limits of local traffic laws contributes
to a good break-in. Wide-open throttle accelera-
tion in low gear can be detrimental and should
be avoided.
The engine oil installed in the engine at the
factory is a high-quality energy conserving type
lubricant. Oil changes should be consistent with
anticipated climate conditions under which ve-
hicle operations will occur. For the recom-
mended viscosity and quality grades, refer to
“Maintenance Procedures” in “Maintaining Your
Vehicle.”
57
Page 62 of 332
CAUTION!
Never use Non-Detergent Oil or Straight Min-
eral Oil in the engine or damage may result.
NOTE:
A new engine may consume some oil during
its first few thousand miles (kilometers) of
operation. This should be considered a nor-
mal part of the break-in and not interpreted
as a problem.
SAFETY TIPS
Transporting PassengersNEVER TRANSPORT PASSENGERS IN THE
CARGO AREA.
WARNING!
•Do not leave children or animals inside
parked vehicles in hot weather. Interior
heat build-up may cause serious injury or
death.
(Continued)
WARNING!(Continued)
•It is extremely dangerous to ride in a cargo
area, inside or outside of a vehicle. In a
collision, people riding in these areas are
more likely to be seriously injured or killed.
•Do not allow people to ride in any area of
your vehicle that is not equipped with seats
and seat belts.
•Be sure everyone in your vehicle is in a
seat and using a seat belt properly.
Exhaust Gas
WARNING!
Exhaust gases can injure or kill. They con-
tain carbon monoxide (CO), which is color-
less and odorless. Breathing it can make you
unconscious and can eventually poison you.
To avoid breathing (CO), follow these safety
tips:
(Continued)
WARNING!(Continued)
•Do not run the engine in a closed garage
or in confined areas any longer than
needed to move your vehicle in or out of
the area.
•If you are required to drive with the trunk/
liftgate/rear doors open, make sure that all
windows are closed and the climate con-
trol BLOWER switch is set at high speed.
DO NOT use the recirculation mode.
•If it is necessary to sit in a parked vehicle
with the engine running, adjust your heat-
ing or cooling controls to force outside air
into the vehicle. Set the blower at high
speed.
The best protection against carbon monoxide
entry into the vehicle body is a properly main-
tained engine exhaust system.
Whenever a change is noticed in the sound of
the exhaust system, when exhaust fumes can
be detected inside the vehicle, or when the
underside or rear of the vehicle is damaged,
have a competent mechanic inspect the com-
58
Page 64 of 332
WARNING!(Continued)
•Always make sure that objects cannot fall
into the driver footwell while the vehicle is
moving. Objects can become trapped un-
der the brake pedal and accelerator pedal
causing a loss of vehicle control.
•If required, mounting posts must be prop-
erly installed, if not equipped from the
factory.
Failure to properly follow floor mat installa-
tion or mounting can cause interference with
the brake pedal and accelerator pedal opera-
tion causing loss of control of the vehicle.
Periodic Safety Checks You Should
Make Outside The Vehicle
Tires
Examine tires for excessive tread wear and
uneven wear patterns. Check for stones, nails,
glass, or other objects lodged in the tread or
sidewall. Inspect the tread for cuts and cracks.
Inspect sidewalls for cuts, cracks, and bulges.
Check the wheel nuts for tightness. Check the
tires (including spare) for proper cold inflation
pressure.
Lights
Have someone observe the operation of brake
lights and exterior lights while you work the
controls. Check turn signal and high beam
indicator lights on the instrument panel.Door Latches
Check for proper closing, latching, and locking.
Fluid Leaks
Check area under vehicle after overnight park-
ing for fuel, engine coolant, oil, or other fluid
leaks. Also, if gasoline fumes are detected or if
fuel, power steering fluid (if equipped), or brake
fluid leaks are suspected. The cause should be
located and corrected immediately.
60
Page 81 of 332
Select Another Mobile Phone
This feature allows you to select and start using
another phone paired with the Uconnect Phone.
•Push the Phone
button to begin.
•After the “Ready” prompt and the following
beep, say “Setup Select Phone” and follow
the prompts.
•You can also push the Phone
button at
any time while the list is being played, and
then choose the phone that you wish to
select.
•The selected phone will be used for the next
phone call. If the selected phone is not
available, the Uconnect Phone will return to
using the highest priority phone present in or
near (approximately within 30 ft. [9 m]) the
vehicle.
Delete Uconnect Phone Paired Mobile
Phones
To delete mobile phones paired with the
Uconnect phone using Voice Commands:
1. Push the Phone
button to begin.2. After the “Ready” prompt and the following
beep, say “Setup Phone Pairing.”
3. At the next prompt, say “Delete” and follow
the prompts.
•You can also push the Phone
button at
any time while the list is being played, and
choose the phone you wish to delete.
Things You Should Know About
Your Uconnect Phone
Uconnect Phone Tutorial
To hear a brief tutorial of the system features,
push the Phone
button and say “Uconnect
Tutorial.”
Voice Training
For users experiencing difficulty with the system
recognizing their voice commands or numbers,
the Uconnect Phone Voice Training feature may
be used. To enter this training mode, follow one
of the two following procedures:
•From outside the Uconnect Phone mode
(e.g., from radio mode), push and hold the
Voice Command
button for five seconds
until the session begins, or,•Push the Voice Command
button and say
the “Voice Training,” “System Training,” or
“Start Voice Training” command.
You can either push the Uconnect Phone button
to restore the factory setting or repeat the words
and phrases when prompted by the Uconnect
Phone. For best results, the Voice Training
session should be completed when the vehicle
is parked with the engine running, all windows
closed, and the blower fan switched off.
This procedure may be repeated with a new
user. The system will adapt to the last trained
voice only.
Reset
To Reset all settings using Voice Command:
1. Push the Phone
button.
2. After the “Ready” prompt and the following
beep, say “Setup,” then “Reset.”
•This will delete all phone pairing, phone
book entries, and other settings in all lan-
guage modes. The System will prompt you
before resetting to factory settings.
77
Page 92 of 332
NOTE:
Keep in mind that you have to push the
Voice Command
button first and wait for
the beep before speaking the “Barge In”
commands.
Voice TrainingFor users experiencing difficulty with the system
recognizing their voice commands or numbers
the Uconnect Voice “Voice Training” feature
may be used.
1. Push the Voice Command
button, say
“System Setup” and once you are in that
menu then say “Voice Training.”
•This will train your own voice to the system
and will improve recognition.
2. Repeat the words and phrases when
prompted by Uconnect Voice.
•For best results, the Voice Training ses-
sion should be completed when the ve-
hicle is parked, engine running, all win-
dows closed, and the blower fan switchedoff. This procedure may be repeated with a
new user. The system will adapt to the last
trained voice only.
SEATS
Seats are a part of the Occupant Restraint
System of the vehicle.
WARNING!
•It is dangerous to ride in a cargo area,
inside or outside of a vehicle. In a collision,
people riding in these areas are more likely
to be seriously injured or killed.
•Do not allow people to ride in any area of
your vehicle that is not equipped with seats
and seat belts. In a collision, people riding
in these areas are more likely to be seri-
ously injured or killed.
•Be sure everyone in your vehicle is in a
seat and using a seat belt properly.
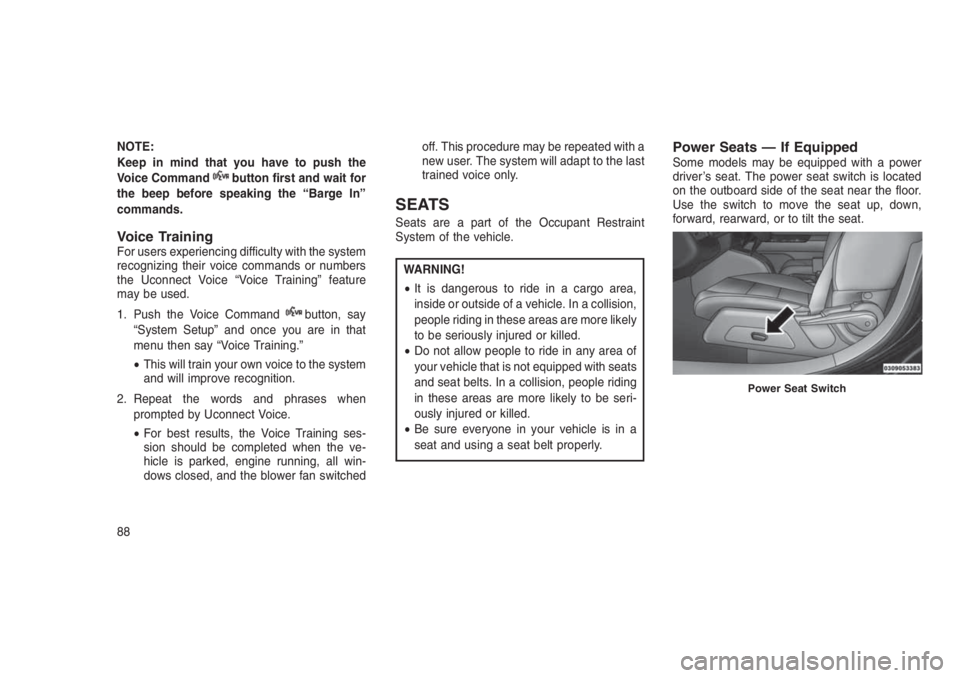
Power Seats — If EquippedSome models may be equipped with a power
driver’s seat. The power seat switch is located
on the outboard side of the seat near the floor.
Use the switch to move the seat up, down,
forward, rearward, or to tilt the seat.
Power Seat Switch
88
Page 99 of 332
WARNING!
Be certain that the seatback is securely
locked into position. If the seatback is not
securely locked into position the seat will not
provide the proper stability for child seats
and/or passengers. An improperly latched
seat could cause serious injury.
Reclining Rear Seat — If EquippedFor additional comfort, pull the strap forward
just enough to release the seatback latch. Then
push the seatback to a reclined position, ap-
proximately 35 degrees maximum, and release
the strap.
WARNING!
Do not ride with the seatback reclined so that
the shoulder belt is no longer resting against
your chest. In a collision you could slide
under the seat belt and be seriously or even
fatally injured. Use the recliner only when the
vehicle is parked.
TO OPEN AND CLOSE THE
HOOD
To open the hood, two latches must be re-
leased.
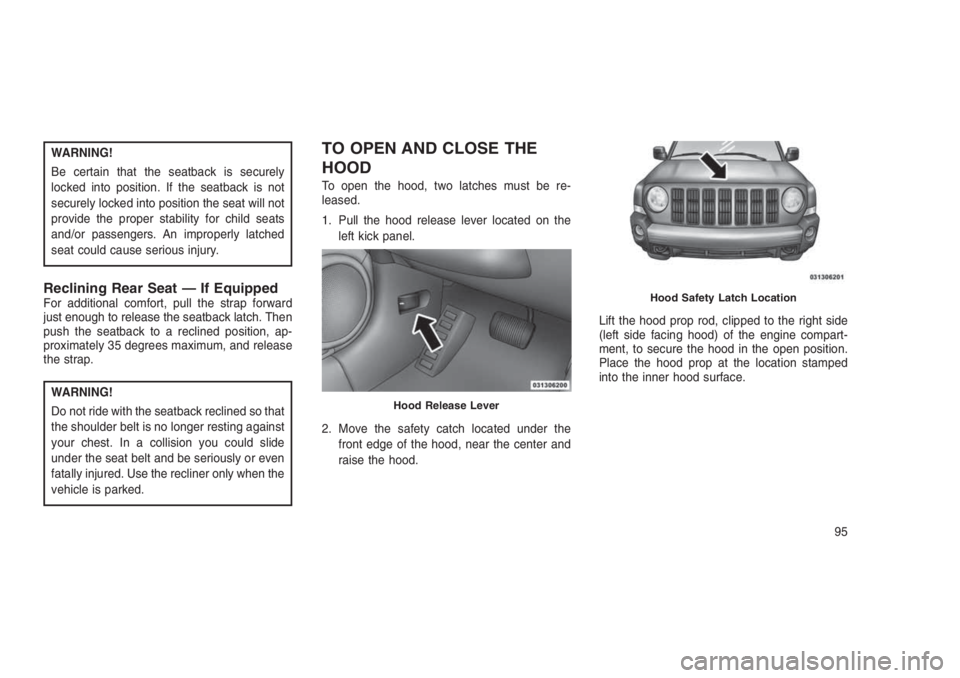
1. Pull the hood release lever located on the
left kick panel.
2. Move the safety catch located under the
front edge of the hood, near the center and
raise the hood.Lift the hood prop rod, clipped to the right side
(left side facing hood) of the engine compart-
ment, to secure the hood in the open position.
Place the hood prop at the location stamped
into the inner hood surface.
Hood Release Lever
Hood Safety Latch Location
95
Page 101 of 332
Daytime Running Lights — If
Equipped
The high beam lights will come on as Daytime
Running Lights (lower intensity), whenever the
ignition is ON, the engine is running, the head-
light switch is off, the parking brake is off, the
turn signal is off, and the gear selector is in any
position except PARK.
Lights-On ReminderIf the headlights or parking lights are left on after
the ignition is turned OFF, a chime will sound to
alert the driver when the driver’s door is opened.
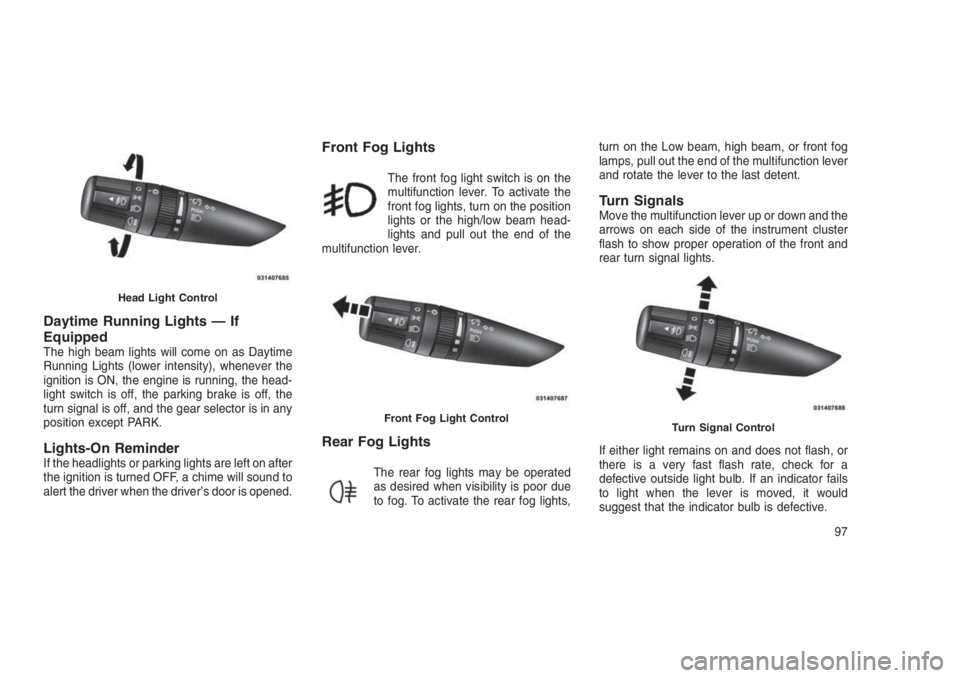
Front Fog Lights
The front fog light switch is on the
multifunction lever. To activate the
front fog lights, turn on the position
lights or the high/low beam head-
lights and pull out the end of the
multifunction lever.
Rear Fog Lights
The rear fog lights may be operated
as desired when visibility is poor due
to fog. To activate the rear fog lights,turn on the Low beam, high beam, or front fog
lamps, pull out the end of the multifunction lever
and rotate the lever to the last detent.
Turn SignalsMove the multifunction lever up or down and the
arrows on each side of the instrument cluster
flash to show proper operation of the front and
rear turn signal lights.
If either light remains on and does not flash, or
there is a very fast flash rate, check for a
defective outside light bulb. If an indicator fails
to light when the lever is moved, it would
suggest that the indicator bulb is defective.
Head Light Control
Front Fog Light ControlTurn Signal Control
97
Page 108 of 332
U.S. Speed (mph)
•Pushing the SET (-) button once will result in
a 1 mph decrease in set speed. Each subse-
quent tap of the button results in a decrease
of 1 mph.
•If the button is continually pushed, the set
speed will continue to decrease until the
button is released, then the new set speed
will be established.
Metric Speed (km/h)
•Pushing the SET (-) button once will result in
a 1 km/h decrease in set speed. Each sub-
sequent tap of the button results in a de-
crease of 1 km/h.
•If the button is continually pushed, the set
speed will continue to decrease until the
button is released, then the new set speed
will be established.
Manual TransmissionPressing the clutch pedal will disengage the
speed control. A slight increase in engine RPM
before the Electronic Speed Control disen-
gages is normal.Vehicles equipped with manual transmissions
may need to be shifted into a lower gear to climb
hills without speed loss.
To Accelerate For PassingPress the accelerator as you would normally.
When the pedal is released, the vehicle will
return to the set speed.
Using Electronic Speed Control On Hills
The transmission may downshift on hills to
maintain the vehicle set speed.
NOTE:
The Electronic Speed Control system main-
tains speed up and down hills. A slight
speed change on moderate hills is normal.
On steep hills, a greater speed loss or gain may
occur so it may be preferable to drive without
Electronic Speed Control.
WARNING!
Electronic Speed Control can be dangerous
where the system cannot maintain a constant
(Continued)
WARNING!(Continued)
speed. Your vehicle could go too fast for the
conditions, and you could lose control and
have an accident. Do not use Electronic Speed
Control in heavy traffic or on roads that are
winding, icy, snow-covered or slippery.
PARKVIEW REAR BACK UP
CAMERA — IF EQUIPPED
Your vehicle may be equipped with the
ParkView Rear Back Up Camera that allows
you to see an on-screen image of the rear
surroundings of your vehicle whenever the gear
selector is put into REVERSE. The image will
be displayed on the touchscreen along with a
caution note to “check entire surroundings”
across the top of the screen. After five seconds
this note will disappear. The ParkView camera
is located on the rear of the vehicle above the
rear license plate.
When the vehicle is shifted out of REVERSE,
the rear camera mode is exited and the last
selected touchscreen appears again.
104
Page 113 of 332
CAUTION!
•Many accessories that can be plugged in
draw power from the vehicle’s battery,
even when not in use (i.e., cellular phones,
etc.). Eventually, if plugged in long enough,
the vehicle’s battery will discharge suffi-
ciently to degrade battery life and/or pre-
vent the engine from starting.
•Accessories that draw higher power (i.e.,
coolers, vacuum cleaners, lights, etc.) will
degrade the battery even more quickly.
Only use these intermittently and with
great caution.
•After the use of high power draw accesso-
ries, or long periods of the vehicle not
being started (with accessories still
plugged in), the vehicle must be driven a
sufficient length of time to allow the gen-
erator to recharge the vehicle’s battery.CUPHOLDERS
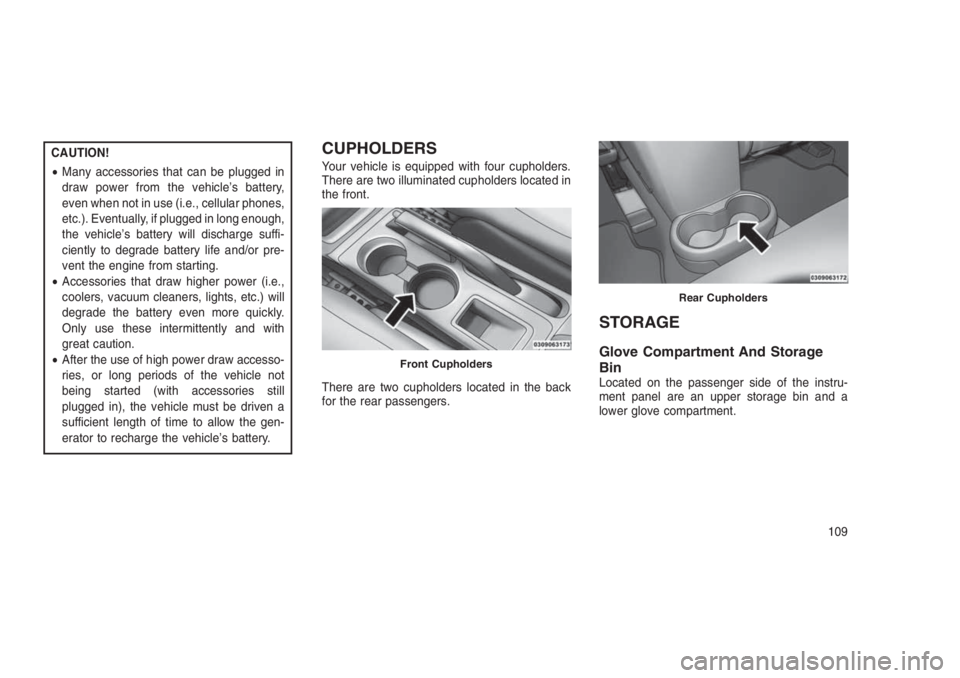
Your vehicle is equipped with four cupholders.
There are two illuminated cupholders located in
the front.
There are two cupholders located in the back
for the rear passengers.
STORAGE
Glove Compartment And Storage
Bin
Located on the passenger side of the instru-
ment panel are an upper storage bin and a
lower glove compartment.
Front Cupholders
Rear Cupholders
109