JEEP PATRIOT 2020 Owner handbook (in English)
Manufacturer: JEEP, Model Year: 2020, Model line: PATRIOT, Model: JEEP PATRIOT 2020Pages: 332, PDF Size: 1.99 MB
Page 141 of 332
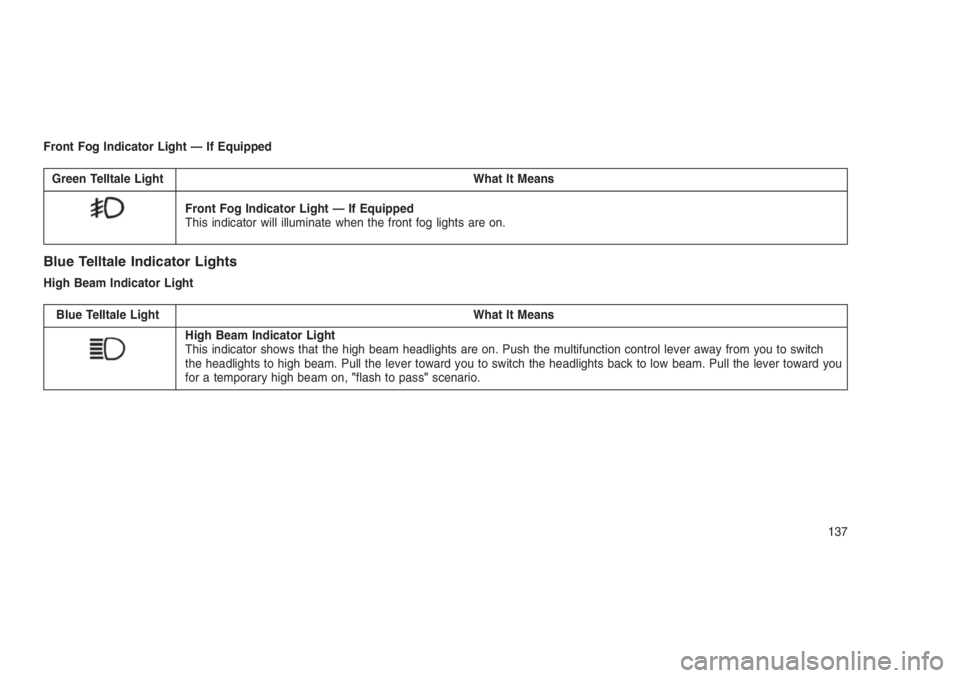
Front Fog Indicator Light — If Equipped
Green Telltale Light What It Means
Front Fog Indicator Light — If Equipped
This indicator will illuminate when the front fog lights are on.
Blue Telltale Indicator Lights
High Beam Indicator Light
Blue Telltale Light What It Means
High Beam Indicator Light
This indicator shows that the high beam headlights are on. Push the multifunction control lever away from you to switch
the headlights to high beam. Pull the lever toward you to switch the headlights back to low beam. Pull the lever toward you
for a temporary high beam on,"flash to pass"scenario.
137
Page 142 of 332
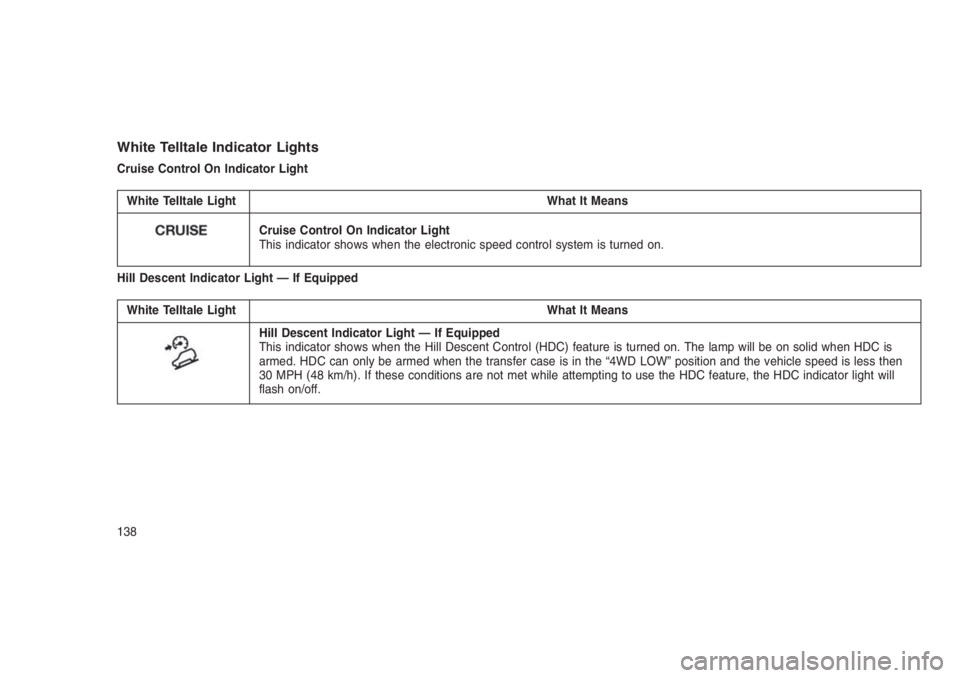
White Telltale Indicator Lights
Cruise Control On Indicator Light
White Telltale Light What It Means
Cruise Control On Indicator Light
This indicator shows when the electronic speed control system is turned on.
Hill Descent Indicator Light — If Equipped
White Telltale Light What It Means
Hill Descent Indicator Light — If Equipped
This indicator shows when the Hill Descent Control (HDC) feature is turned on. The lamp will be on solid when HDC is
armed. HDC can only be armed when the transfer case is in the “4WD LOW” position and the vehicle speed is less then
30 MPH (48 km/h). If these conditions are not met while attempting to use the HDC feature, the HDC indicator light will
flash on/off.
138
Page 143 of 332
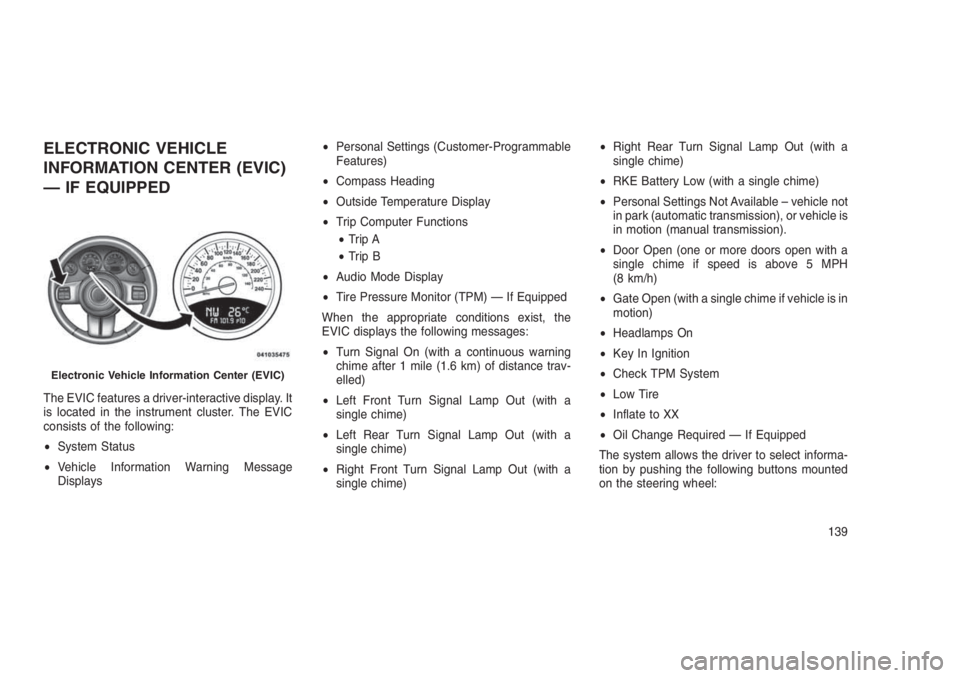
ELECTRONIC VEHICLE
INFORMATION CENTER (EVIC)
— IF EQUIPPED
The EVIC features a driver-interactive display. It
is located in the instrument cluster. The EVIC
consists of the following:
•System Status
•Vehicle Information Warning Message
Displays•Personal Settings (Customer-Programmable
Features)
•Compass Heading
•Outside Temperature Display
•Trip Computer Functions
•Trip A
•Trip B
•Audio Mode Display
•Tire Pressure Monitor (TPM) — If Equipped
When the appropriate conditions exist, the
EVIC displays the following messages:
•Turn Signal On (with a continuous warning
chime after 1 mile (1.6 km) of distance trav-
elled)
•Left Front Turn Signal Lamp Out (with a
single chime)
•Left Rear Turn Signal Lamp Out (with a
single chime)
•Right Front Turn Signal Lamp Out (with a
single chime)•Right Rear Turn Signal Lamp Out (with a
single chime)
•RKE Battery Low (with a single chime)
•Personal Settings Not Available – vehicle not
in park (automatic transmission), or vehicle is
in motion (manual transmission).
•Door Open (one or more doors open with a
single chime if speed is above 5 MPH
(8 km/h)
•Gate Open (with a single chime if vehicle is in
motion)
•Headlamps On
•Key In Ignition
•Check TPM System
•Low Tire
•Inflate to XX
•Oil Change Required — If Equipped
The system allows the driver to select informa-
tion by pushing the following buttons mounted
on the steering wheel:
Electronic Vehicle Information Center (EVIC)
139
Page 144 of 332
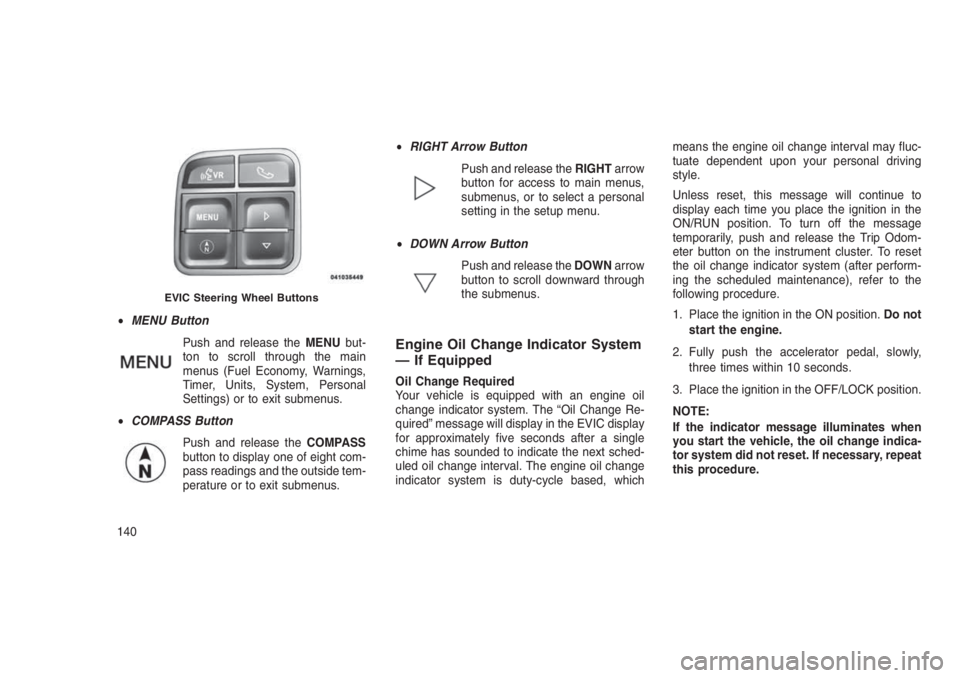
•MENU Button
Push and release theMENUbut-
ton to scroll through the main
menus (Fuel Economy, Warnings,
Timer, Units, System, Personal
Settings) or to exit submenus.
•COMPASS Button
Push and release theCOMPASS
button to display one of eight com-
pass readings and the outside tem-
perature or to exit submenus.•RIGHT Arrow Button
Push and release theRIGHTarrow
button for access to main menus,
submenus, or to select a personal
setting in the setup menu.
•DOWN Arrow Button
Push and release theDOWNarrow
button to scroll downward through
the submenus.
Engine Oil Change Indicator System
— If Equipped
Oil Change Required
Your vehicle is equipped with an engine oil
change indicator system. The “Oil Change Re-
quired” message will display in the EVIC display
for approximately five seconds after a single
chime has sounded to indicate the next sched-
uled oil change interval. The engine oil change
indicator system is duty-cycle based, whichmeans the engine oil change interval may fluc-
tuate dependent upon your personal driving
style.
Unless reset, this message will continue to
display each time you place the ignition in the
ON/RUN position. To turn off the message
temporarily, push and release the Trip Odom-
eter button on the instrument cluster. To reset
the oil change indicator system (after perform-
ing the scheduled maintenance), refer to the
following procedure.
1. Place the ignition in the ON position.Do not
start the engine.
2. Fully push the accelerator pedal, slowly,
three times within 10 seconds.
3. Place the ignition in the OFF/LOCK position.
NOTE:
If the indicator message illuminates when
you start the vehicle, the oil change indica-
tor system did not reset. If necessary, repeat
this procedure.
EVIC Steering Wheel Buttons
140
Page 145 of 332
Compass/Temperature/AudioPush and release theCOMPASSbutton to dis-
play one of eight compass headings to indicate
the direction the vehicle is facing, the outside
temperature, and the current radio station.
Refer to “Personal Settings (Customer-
Programmable Features)” in this section for
additional information regarding the compass.
Average Fuel EconomyShows the average fuel economy since the last
reset (pushing and holding theRIGHTarrow
button as prompted in the EVIC display to
reset). When the fuel economy is reset, the
display will read “RESET” or show dashes for
two seconds. Then, the history information will
be erased, and the averaging will continue from
the last fuel reading before the reset.
Distance To Empty (DTE)Shows the estimated distance that can be trav-
elled with the fuel remaining in the tank. This
estimated distance is determined by a weighted
average of the instantaneous and average fuel
economy, according to the current fuel tank
level. This is not resettable.NOTE:
Significant changes in driving style or ve-
hicle loading will greatly affect the actual
drivable distance of the vehicle, regardless
of the DTE displayed value.
When the DTE value is less than 30 miles
(48 km) estimated driving distance, the DTE
display will change to a text display of"LOW
FUEL.” This display will continue until the ve-
hicle runs out of fuel. Adding a significant
amount of fuel to the vehicle will turn off the
"LOW FUEL"text and a new DTE value will be
displayed, based on the current values in the
DTE calculation and the current fuel tank level.
Tire Pressure Monitor (TPM) — If
Equipped
Refer to “Starting And Operating,” “Tire Pres-
sure Monitoring System (TPMS) for system
operation.
Elapsed TimeShows the total elapsed time of travel since the
last reset. Elapsed time will increment when the
ignition is placed in the RUN/START position.Elapsed time is displayed as follows:
hours: minutes: seconds
Elapsed time can be reset by pushing and
holding theRIGHT
arrow button (as
prompted in the EVIC display). Upon reset, all
digits will change to zeros, and time will start
again if the ignition is in the RUN or START
position.
EVIC Units Selection (Units In
Display)
Displays the units used for the Outside Tem-
perature, Average Fuel Economy, Distance to
Empty, and Tire Pressure features. Push and
release theRIGHT
arrow button to toggle
units between"U.S."and"METRIC."
System WarningsDisplays “SYSTEM OK” if there are no active
Warning Messages stored. Pushing and releas-
ing theDOWN
arrow button when “SYSTEM
OK” is displayed will do nothing. Displays “SYS-
TEM WARNINGS PRESENT” if there are active
Warning Messages stored. Pushing and releas-
ing theDOWN
arrow button when “SYSTEM
141
Page 146 of 332
WARNINGS PRESENT” is displayed will dis-
play each stored warning for each button push.
Push and release theMENUbutton to return to
the Main Menu.
Personal Settings (Customer-
Programmable Features)
This allows the driver to set and recall features
when the transmission is in PARK (automatic
transmission) or the vehicle is stopped (manual
transmission).
Push and release theDOWN
arrow button
until “Personal Settings” is displayed in the
EVIC then push theRIGHT
arrow button.
Use theRIGHT
arrow button to display one
of the following choices:
Language
When in this display, you may select different
languages for all display nomenclature, includ-
ing the trip functions. Pushing theDOWN
ar-
row button while in this display selects English,
Espanol, Deutsch, Italiano, Francais, or NL
depending on availability. As you continue, the
displayed information will be shown in the se-
lected language.Auto Lock Doors — If Equipped
When ON is selected, all doors lock automati-
cally when the speed of the vehicle reaches 15
MPH (24 km/h). Push and hold theRIGHT
arrow button when in this display until “ON”
or “OFF” appears to make your selection.
Auto Unlock On Exit
When ON is selected, all the vehicle’s doors will
unlock when the driver’s door is opened if the
vehicle is stopped (manual transmission) or the
vehicle is stopped and the transmission is in
PARK or NEUTRAL position (automatic trans-
mission). Push and hold theRIGHT
arrow
button when in this display until “ON” or “OFF”
appears to make your selection.
RKE Unlock
When Driver’s Door 1st is selected, only the
driver’s door will unlock on the first push of the
RKE Key Fob UNLOCK button and require a
second push to unlock the remaining locked
doors. When Remote Unlock All Doors is se-
lected, all of the doors will unlock at the first
push of the RKE Key Fob UNLOCK button.
Push and hold theRIGHT
arrow button
when in this display until “Driver’s Door 1st” or
“All Doors” appears to make your selection.Flash Lights with Lock
When ON is selected, the front and rear turn
signals will flash when the doors are locked or
unlocked using the RKE Key Fob. Push and
hold theRIGHT
arrow button when in this
display until “ON” or “OFF” appears to make
your selection.
Headlamp Off Delay
When this feature is selected, the driver can
choose to have the headlamps remain on for 0,
30, 60, or 90 seconds when exiting the vehicle.
Push and hold theRIGHT
arrow button
when in this display until 0, 30, 60, or 90
appears to make your selection.
Key Off Power Delay
When this feature is selected, the power win-
dow switches, radio, Uconnect phone, power
sunroof, and power outlets will remain active for
up to 10 minutes after the ignition switch has
been turned off. Opening either front vehicle
door will cancel this feature. Push and hold the
RIGHT
arrow button when in this display
until “Off,” “45 sec,” “5 min,” or “10 min.” ap-
pears to make your selection.
142
Page 147 of 332
Illuminated Approach
When this feature is selected, the headlights will
activate and remain on for up to 90 seconds
when the doors are unlocked using the RKE
Key Fob. Push and hold theRIGHT
arrow
button when in this display until “OFF,” “30 sec,”
“60 sec,” or “90 sec.” appears to make your
selection.
Hill Start Assist (HSA) — If Equipped
When “On” is selected, the HSA system is
active. Refer to “Electronic Brake Control Sys-
tem” in “Starting And Operating” for system
function and operating information. To make
your selection, push and release theRIGHT
arrow button until “On” or “Off” appears.
Display Units In
The EVIC, odometer, and Uconnect GPS sys-
tem units can be changed between US and
Metric.
Push and hold theRIGHT
arrow button
when in this display until “US” or “METRIC”
appears to make your selection.
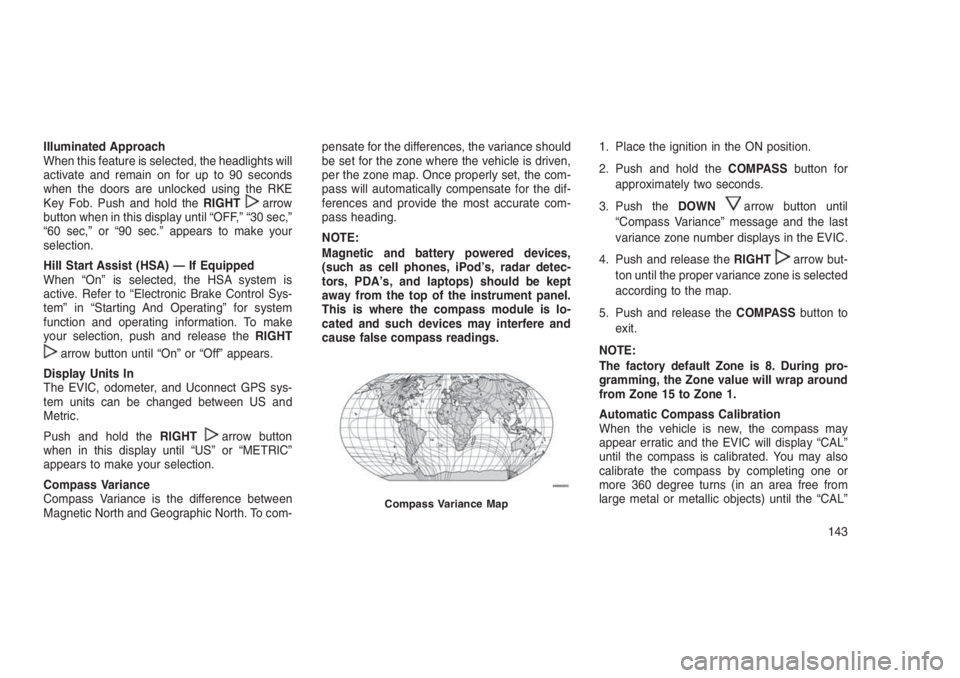
Compass Variance
Compass Variance is the difference between
Magnetic North and Geographic North. To com-pensate for the differences, the variance should
be set for the zone where the vehicle is driven,
per the zone map. Once properly set, the com-
pass will automatically compensate for the dif-
ferences and provide the most accurate com-
pass heading.
NOTE:
Magnetic and battery powered devices,
(such as cell phones, iPod’s, radar detec-
tors, PDA’s, and laptops) should be kept
away from the top of the instrument panel.
This is where the compass module is lo-
cated and such devices may interfere and
cause false compass readings.1. Place the ignition in the ON position.
2. Push and hold theCOMPASSbutton for
approximately two seconds.
3. Push theDOWN
arrow button until
“Compass Variance” message and the last
variance zone number displays in the EVIC.
4. Push and release theRIGHT
arrow but-
ton until the proper variance zone is selected
according to the map.
5. Push and release theCOMPASSbutton to
exit.
NOTE:
The factory default Zone is 8. During pro-
gramming, the Zone value will wrap around
from Zone 15 to Zone 1.
Automatic Compass Calibration
When the vehicle is new, the compass may
appear erratic and the EVIC will display “CAL”
until the compass is calibrated. You may also
calibrate the compass by completing one or
more 360 degree turns (in an area free from
large metal or metallic objects) until the “CAL”
Compass Variance Map
143
Page 148 of 332
message displayed in the EVIC turns off. The
compass will now function normally.
NOTE:
A good calibration requires a level surface
and an environment free from large metallic
objects such as buildings, bridges, under-
ground cables, railroad tracks, etc.
Manual Compass Calibration
If the compass appears erratic and the “CAL”
indicator does not appear in the EVIC display,
you must put the compass into the Calibration
Mode manually as follows:
1. Start the engine. Leave the gear selector in
PARK in order to enter the EVIC Program-
ming Menus.
2.
Push and release theMENUbutton until the
Personal Settings (Customer-Programmable
Features) menu displays in the EVIC.
3. Push and release theDOWNarrow but-
ton until “Calibrate Compass” displays in the
EVIC.4. Push and release theRIGHT
arrow but-
ton to start the calibration. The “CAL” indica-
tor will display in the EVIC.
5. Complete one or more 360–degree turns (in
an area free from large metal or metallic
objects) until the “CAL” indicator turns off.
The compass will now function normally.
CYBERSECURITY
Your vehicle may be a connected vehicle and
may be equipped with both wired and wireless
networks. These networks allow your vehicle to
send and receive information. This information
allows systems and features in your vehicle to
function properly.
Your vehicle may be equipped with certain
security features to reduce the risk of unauthor-
ized and unlawful access to vehicle systems
and wireless communications. Vehicle software
technology continues to evolve over time and
FCA US LLC, working with its suppliers, evalu-
ates and takes appropriate steps as needed.
Similar to a computer or other devices, your
vehicle may require software updates to im-prove the usability and performance of your
systems or to reduce the potential risk of unau-
thorized and unlawful access to your vehicle
systems.
The risk of unauthorized and unlawful access to
your vehicle systems may still exist, even if the
most recent version of vehicle software (such
as Uconnect software) is installed.WARNING!
•It is not possible to know or to predict all of
the possible outcomes if your vehicle’s
systems are breached. It may be possible
that vehicle systems, including safety re-
lated systems, could be impaired or a loss
of vehicle control could occur that may
result in an accident involving serious in-
jury or death.
(Continued)
144
Page 149 of 332
WARNING!(Continued)
•ONLY insert media (e.g., USB, SD card, or
CD) into your vehicle if it came from a
trusted source. Media of unknown origin
could possibly contain malicious software,
and if installed in your vehicle, it may
increase the possibility for vehicle systems
to be breached.
•As always, if you experience unusual ve-
hicle behavior, take your vehicle to your
nearest authorized dealer immediately.
NOTE:
•FCA or your dealer may contact you di-
rectly regarding software updates.
•To help further improve vehicle security
and minimize the potential risk of a secu-
rity breach, vehicle owners should:
•
Routinely checkwww.driveuconnect.com/
software-updateto learn about available
Uconnect software updates.•Only connect and use trusted media de-
vices (e.g. personal mobile phones,
USBs, CDs).
Privacy of any wireless and wired communica-
tions cannot be assured. Third parties may
unlawfully intercept information and private
communications without your consent. For fur-
ther information, refer to “Onboard Diagnostic
System (OBD II) Cybersecurity” in “Maintaining
Your Vehicle”.
SOUND SYSTEMS
Refer to your Uconnect Owner’s Manual
Supplement.
iPod/USB/MP3 CONTROL — IF
EQUIPPED
This feature allows an iPod or external USB
device to be plugged into the USB port, located
in the center console or glove compartment.
iPod control supports Mini, 4G, Photo, Nano,
5G iPod and iPhone devices. Some iPod soft-ware versions may not fully support the iPod
control features. Please visit Apple’s website for
software updates.
NOTE:
•If the radio has a USB port, refer to the
appropriate Uconnect Owner’s Manual
Supplement for iPod or external USB de-
vice support capability.
•Connecting an iPod or consumer elec-
tronic audio device to the AUX port lo-
cated in the radio faceplate, plays media,
but does not use the iPod/MP3 control
feature to control the connected device.
Connecting The iPod Or External
USB Device
Use the connection cable to connect an iPod or
external USB device to the vehicle’s USB/AUX
connector port which is located in the center
console or glove compartment.
145
Page 150 of 332
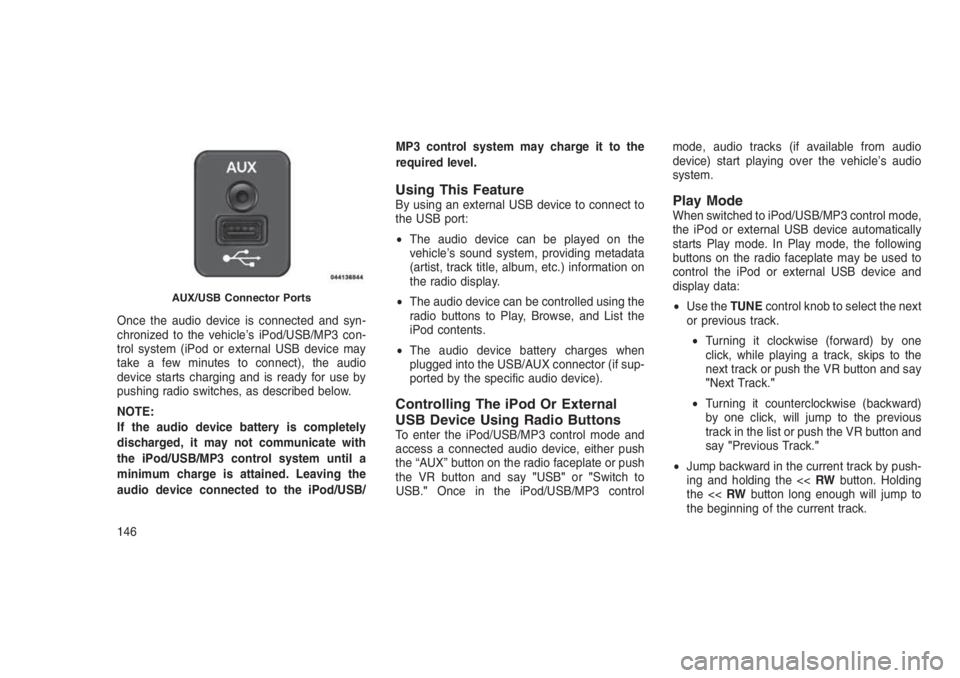
Once the audio device is connected and syn-
chronized to the vehicle’s iPod/USB/MP3 con-
trol system (iPod or external USB device may
take a few minutes to connect), the audio
device starts charging and is ready for use by
pushing radio switches, as described below.
NOTE:
If the audio device battery is completely
discharged, it may not communicate with
the iPod/USB/MP3 control system until a
minimum charge is attained. Leaving the
audio device connected to the iPod/USB/MP3 control system may charge it to the
required level.
Using This FeatureBy using an external USB device to connect to
the USB port:
•The audio device can be played on the
vehicle’s sound system, providing metadata
(artist, track title, album, etc.) information on
the radio display.
•The audio device can be controlled using the
radio buttons to Play, Browse, and List the
iPod contents.
•The audio device battery charges when
plugged into the USB/AUX connector (if sup-
ported by the specific audio device).
Controlling The iPod Or External
USB Device Using Radio Buttons
To enter the iPod/USB/MP3 control mode and
access a connected audio device, either push
the “AUX” button on the radio faceplate or push
the VR button and say"USB"or"Switch to
USB."Once in the iPod/USB/MP3 controlmode, audio tracks (if available from audio
device) start playing over the vehicle’s audio
system.
Play ModeWhen switched to iPod/USB/MP3 control mode,
the iPod or external USB device automatically
starts Play mode. In Play mode, the following
buttons on the radio faceplate may be used to
control the iPod or external USB device and
display data:
•Use theTUNEcontrol knob to select the next
or previous track.
•Turning it clockwise (forward) by one
click, while playing a track, skips to the
next track or push the VR button and say
"Next Track."
•Turning it counterclockwise (backward)
by one click, will jump to the previous
track in the list or push the VR button and
say"Previous Track."
•Jump backward in the current track by push-
ing and holding the <
AUX/USB Connector Ports
146