warning JEEP RENEGADE 2015 1.G Owner's Guide
[x] Cancel search | Manufacturer: JEEP, Model Year: 2015, Model line: RENEGADE, Model: JEEP RENEGADE 2015 1.GPages: 220, PDF Size: 34.11 MB
Page 58 of 220
Turning LaneSense ON Or OFF
The default status of LaneSense is “OFF”.
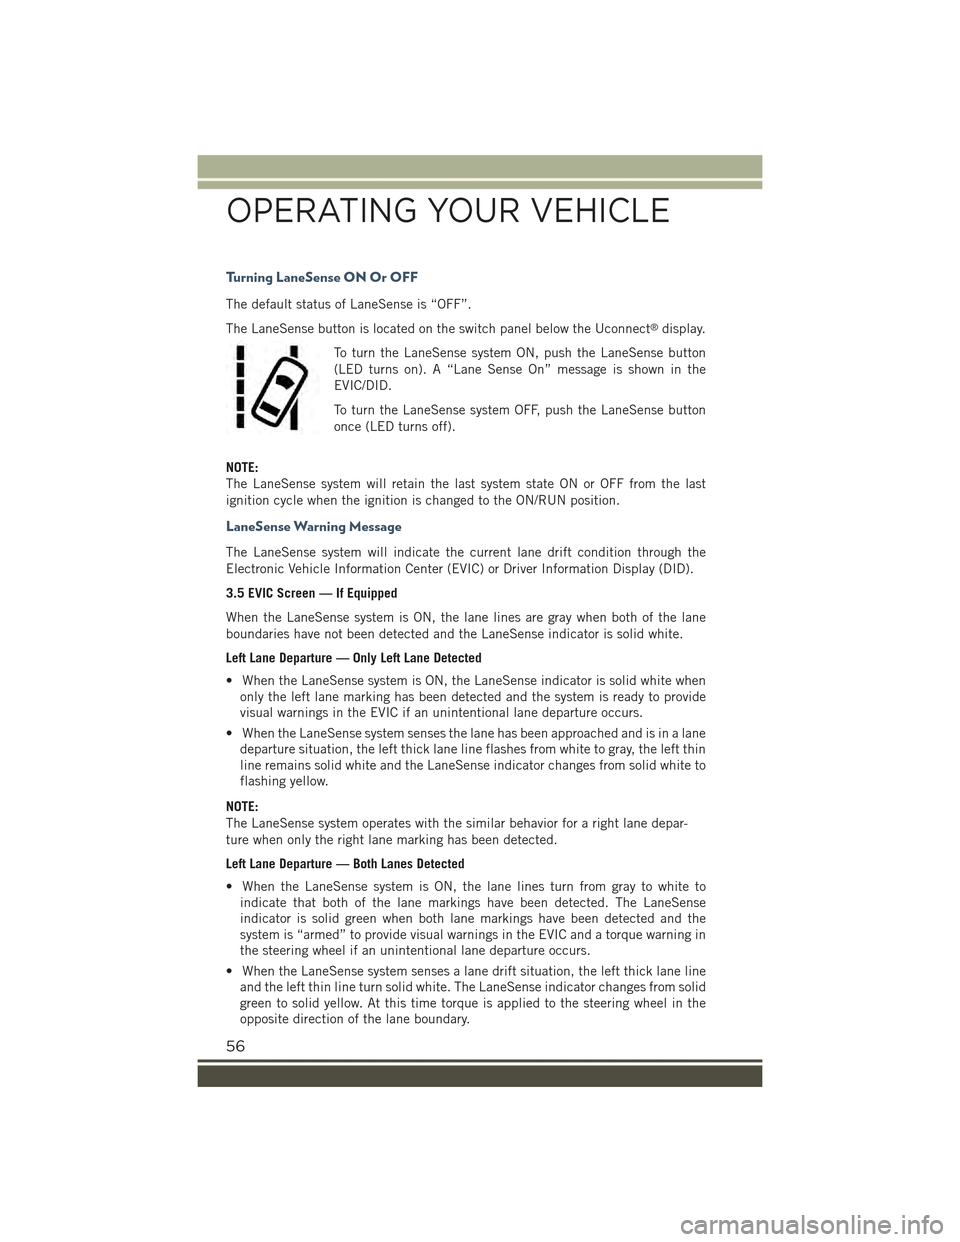
The LaneSense button is located on the switch panel below the Uconnect®display.
To turn the LaneSense system ON, push the LaneSense button
(LED turns on). A “Lane Sense On” message is shown in the
EVIC/DID.
To turn the LaneSense system OFF, push the LaneSense button
once (LED turns off).
NOTE:
The LaneSense system will retain the last system state ON or OFF from the last
ignition cycle when the ignition is changed to the ON/RUN position.
LaneSense Warning Message
The LaneSense system will indicate the current lane drift condition through the
Electronic Vehicle Information Center (EVIC) or Driver Information Display (DID).
3.5 EVIC Screen — If Equipped
When the LaneSense system is ON, the lane lines are gray when both of the lane
boundaries have not been detected and the LaneSense indicator is solid white.
Left Lane Departure — Only Left Lane Detected
• When the LaneSense system is ON, the LaneSense indicator is solid white when
only the left lane marking has been detected and the system is ready to provide
visual warnings in the EVIC if an unintentional lane departure occurs.
• When the LaneSense system senses the lane has been approached and is in a lane
departure situation, the left thick lane line flashes from white to gray, the left thin
line remains solid white and the LaneSense indicator changes from solid white to
flashing yellow.
NOTE:
The LaneSense system operates with the similar behavior for a right lane depar-
ture when only the right lane marking has been detected.
Left Lane Departure — Both Lanes Detected
• When the LaneSense system is ON, the lane lines turn from gray to white to
indicate that both of the lane markings have been detected. The LaneSense
indicator is solid green when both lane markings have been detected and the
system is “armed” to provide visual warnings in the EVIC and a torque warning in
the steering wheel if an unintentional lane departure occurs.
• When the LaneSense system senses a lane drift situation, the left thick lane line
and the left thin line turn solid white. The LaneSense indicator changes from solid
green to solid yellow. At this time torque is applied to the steering wheel in the
opposite direction of the lane boundary.
OPERATING YOUR VEHICLE
56
Page 59 of 220
For example: If approaching the left side of the lane, the steering wheel will turn to
the right.
• When the LaneSense system senses the lane has been approached and is in a lane
departure situation, the left thick lane line flashes from white to gray, the left thin
line remains solid white and the LaneSense indicator changes from solid yellow to
flashing yellow. At this time, torque is applied to the steering wheel in the opposite
direction of the lane boundary.
For example: If approaching the left side of the lane, the steering wheel will turn to
the right.
NOTE:
The LaneSense system operates with the similar behavior for a right lane departure.
7.0 DID Screen — If Equipped
When the LaneSense system is ON, the lane lines are gray when both of the lane
boundaries have not been detected and the LaneSense indicator is solid white.
Left Lane Departure — Only Left Lane Detected
• When the LaneSense system is ON, the LaneSense indicator is solid white when
only the left lane marking has been detected and the system is ready to provide
visual warnings in the DID if an unintentional lane departure occurs.
• When the LaneSense system senses the lane has been approached and is in a lane
departure situation, the left thick lane line flashes yellow (on/off), the left thin line
remains solid yellow and the LaneSense indicator changes from solid white to
flashing yellow.
NOTE:
The LaneSense system operates with the similar behavior for a right lane depar-
ture when only the right lane marking has been detected.
Left Lane Departure — Both Lanes Detected
• When the LaneSense system is ON, the lane lines turn from gray to white to
indicate that both of the lane markings have been detected. The LaneSense
indicator is solid green when both lane markings have been detected and the
system is “armed” to provide visual warnings in the DID and a torque warning in
the steering wheel if an unintentional lane departure occurs.
• When the LaneSense system senses a lane drift situation, the left thick lane line
and left thin line turn solid yellow. The LaneSense indicator changes from solid
green to solid yellow. At this time torque is applied to the steering wheel in the
opposite direction of the lane boundary.
For example: If approaching the left side of the lane the steering wheel will turn to the
right.
OPERATING YOUR VEHICLE
57
Page 60 of 220
• When the LaneSense system senses the lane has been approached and is in a lane
departure situation, the left thick lane line flashes yellow (on/off) and the left thin
line remains solid yellow. The LaneSense indicator changes from solid yellow to
flashing yellow. At this time torque is applied to the steering wheel in the opposite
direction of the lane boundary.
For example: If approaching the left side of the lane the steering wheel will turn to the
right.
NOTE:
The LaneSense system operates with the similar behavior for a right lane departure.
Changing LaneSense Status
The LaneSense system has settings to adjust the intensity of the torque warning and
the warning zone sensitivity (early/late) that you can configure through the
Uconnect®system screen.
NOTE:
• When enabled the system operates above 37 mph (60 km/h) and below 112 mph
(180 km/h).
• Use of the turn signal suppresses the warnings.
• The system will not apply torque to the steering wheel whenever a safety system
engages. (anti-lock brakes, traction control system, electronic stability control,
forward collision warning, etc.).
PARKSENSE® REAR PARK ASSIST
The ParkSense®Rear Park Assist system provides visual and audible indications of
the distance between the rear fascia and a detected obstacle when backing up, e.g.
during a parking maneuver.
ParkSense®will retain the last system state (enabled or disabled) from the last
ignition cycle when the ignition is changed to the MAR/RUN position.
ParkSense®can be active only when the shift lever/gear selector is in REVERSE. If
ParkSense®is enabled at this shift lever position, the system will remain active until
the vehicle speed is increased to approximately 7 mph (11 km/h) or above. When in
REVERSE and above the system's operating speed, a warning will appear within the
Electronic Vehicle Information Center (EVIC) or Driver Information Display (DID).
OPERATING YOUR VEHICLE
58
Page 63 of 220
Park Assist System Usage Precautions
NOTE:
• Ensure that the outer surface and the underside of the rear bumper is clean and
clear of snow, ice, mud, dirt or other obstruction to keep the Rear Park Assist
system operating properly.
• Jackhammers, large trucks, and other vibrations could affect the performance of
Rear Park Assist.
• Clean the Rear Park Assist sensors regularly, taking care not to scratch or damage
them. The sensors must not be covered with ice, snow, slush, mud, dirt or debris.
Failure to do so can result in the system not working properly. The Rear Park Assist
system might not detect an obstacle behind the fascia/bumper, or it could provide
a false indication that an obstacle is behind the fascia/bumper.
• Objects such as bicycle carriers, etc., must not be placed within 12 inches (30
cm) from the rear fascia/bumper while driving the vehicle. Failure to do so can
result in the system misinterpreting a close object as a sensor problem, causing a
failure indication to be displayed in the instrument cluster.
CAUTION!
• Rear Park Assist is only a parking aid and it is unable to recognize every
obstacle, including small obstacles. Parking curbs might be temporarily
detected or not detected at all. Obstacles located above or below the sensors
will not be detected when they are in close proximity.
• The vehicle must be driven slowly when using Rear Park Assist in order to be
able to stop in time when an obstacle is detected. It is recommended that the
driver looks over his/her shoulder when using Rear Park Assist.
WARNING!
• Drivers must be careful when backing up even when using ParkSense®. Always
check carefully behind your vehicle, look behind you, and be sure to check for
pedestrians, animals, other vehicles, obstructions, and blind spots before
backing up. You are responsible for safety and must continue to pay attention
to your surroundings. Failure to do so can result in serious injury or death.
• Before using ParkSense®, it is strongly recommended that the ball mount and
hitch ball assembly is disconnected from the vehicle when the vehicle is not
used for towing. Failure to do so can result in injury or damage to vehicles or
obstacles because the hitch ball will be much closer to the obstacle than the
rear fascia when the loudspeaker sounds the continuous tone. Also, the sensors
could detect the ball mount and hitch ball assembly, depending on its size and
shape, giving a false indication that an obstacle is behind the vehicle.
OPERATING YOUR VEHICLE
61
Page 65 of 220
WARNING!
Drivers must be careful when backing up even when using the ParkView®Rear
Back Up Camera. Always check carefully behind your vehicle, and be sure to
check for pedestrians, animals, other vehicles, obstructions, or blind spots before
backing up. You are responsible for the safety of your surroundings and must
continue to pay attention while backing up. Failure to do so can result in serious
injury or death.
CAUTION!
• To avoid vehicle damage, ParkView®should only be used as a parking aid. The
ParkView®camera is unable to view every obstacle or object in your drive path.
• To avoid vehicle damage, the vehicle must be driven slowly when using
ParkView®to be able to stop in time when an obstacle is seen. It is
recommended that the driver look frequently over his/her shoulder when using
ParkView®.
RETRACTABLE ROOF (MY SKY)
Retractable Roof
The roof consists of front and rear panels that can be removed independently.
On some vehicles the front panel can be power operated refer to “Power My Sky” in
this section.
CAUTION!
The panels are able to withstand the snow. However, it is recommended that you
remove excessive layers of snow that have accumulated or damage to the panels
may occur.
OPERATING YOUR VEHICLE
63
Page 77 of 220
Uconnect® ACCESS
Uconnect® Access — If Equipped (Available On Uconnect® 6.5AN — U.S.
Residents Only)
WARNING!
ALWAYS drive safely with your hands on the steering wheel. You have full
responsibility and assume all risks related to the use of the Uconnect®features
and applications in this vehicle. Only use Uconnect®when it is safe to do so.
Failure to do so may result in an accident involving serious injury or death.
Uconnect®Access enhances your ownership and driving experience by connecting
your vehicle with a built-in cellular connection. With Uconnect®Access, you can:
• Place a call to a local 9-1-1 Operator for emergency assistance.
• Remotely lock/unlock your doors and start your vehicle from virtually anywhere,
using the Uconnect®Access App from your smartphone. You can also do so by
logging into Mopar Owner Connect, or by calling Uconnect®Care. (Vehicle must be
within the United States and have network coverage).
• Turn your vehicle into a WiFi Hotspot and connect your devices to the internet.
• Receive text or email notifications if your vehicle's theft alarm goes off.
• Receive stolen vehicle assistance, using GPS technology to help authorities locate
your vehicle if it is stolen.
• Listen to your text messages or send free-form text messages with your voice while
keeping your hands on the wheel, using the Voice Texting feature. Requires a cell
phone that supports Bluetooth Message Access Profile (MAP).
• Search for places to eat, shop, relax and play with Yelp®, using your voice or
on-screen menu. Then navigate to them (navigation standard on Uconnect®
6.5AN).
• Get operator assistance using the ASSIST button on your Overhead Console.
Before you drive, familiarize yourself with the easy-to-use Uconnect® Access.
1. The ASSIST and 9-1-1 buttons are located in your Overhead Console. The ASSIST
button is used for contacting Roadside Assistance, Vehicle Care and Uconnect®
Care. The 9-1-1 button connects you to emergency services.
NOTE:
Vehicles sold in Canada and Mexico DO NOT have 9-1-1 Call system capabilities. 9-1-1
or other emergency line operators in Canada and Mexico may not answer or respond to
9-1-1 system calls.
2. The Uconnect®“Apps” button on the menu bar at the bottom right corner of the
radio touchscreen. This is where you can begin your registration process, manage
your Apps and purchase WiFi on demand.
ELECTRONICS
75
Page 84 of 220
Built-In Features (Uconnect® 6.5A/6.5AN)
CAUTION!
• Ignoring the light/LED on the 9-1-1 button in the overhead console could meanyou may not have 9-1-1 Call service if needed. If the light/LED on the 9-1-1button in the overhead console is illuminated, have an authorized dealerservice the 9-1-1 Call system immediately.
• The Occupant Restraint Controller (ORC) turns on the Air Bag Warning Light onthe instrument panel if a malfunction is detected in any part of the air bagsystem. If the Air Bag Warning Light is illuminated, the air bag system may notbe working properly and the 9-1-1 system may not be able to send a signal toa 9-1-1 operator. If the Air Bag Warning Light is illuminated, have anauthorized dealer service your vehicle immediately.
• If anyone in the vehicle could be in danger (e.g., fire or smoke is visible,dangerous road conditions or location), do not wait for voice contact from a9-1-1 operator. All occupants should exit the vehicle immediately and move toa safe location.
• Do not add any aftermarket electrical equipment to the vehicle’s electricalsystem. This may prevent your vehicle from sending a signal to initiate anemergency call. To avoid interference that can cause the 9-1-1 Call system tofail, never add aftermarket equipment (e.g., two-way mobile radio, CB radio,data recorder, etc.) to your vehicle’s electrical system or modify the antennason your vehicle. IF YOUR VEHICLE LOSES BATTERY POWER FOR ANYREASON (INCLUDING DURING OR AFTER AN ACCIDENT), THEUCONNECT®FEATURES, APPS AND SERVICES, AMONG OTHERS, WILLNOT OPERATE.
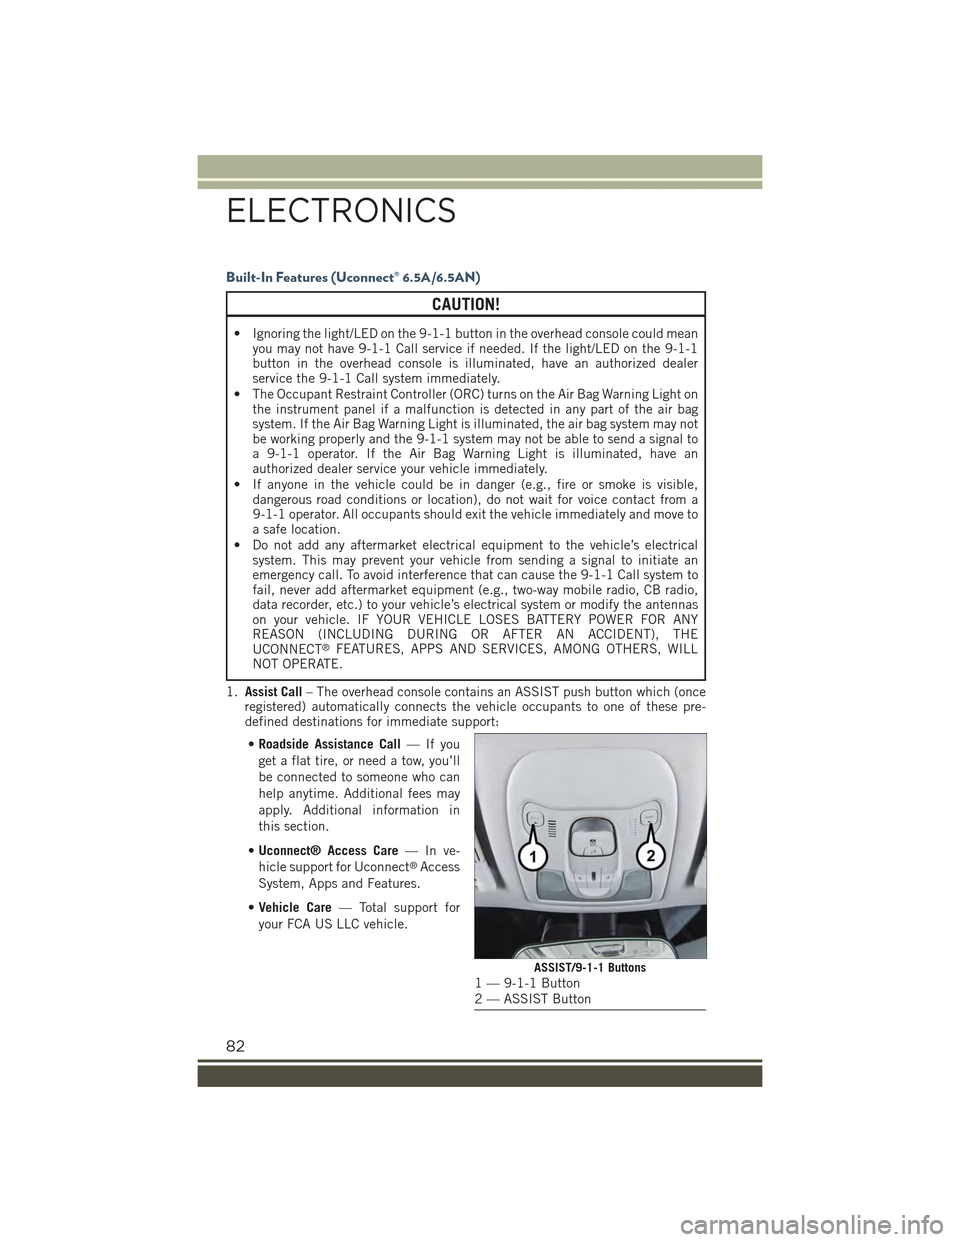
1.Assist Call– The overhead console contains an ASSIST push button which (onceregistered) automatically connects the vehicle occupants to one of these pre-defined destinations for immediate support:
•Roadside Assistance Call—Ifyou
get a flat tire, or need a tow, you’ll
be connected to someone who can
help anytime. Additional fees may
apply. Additional information in
this section.
•Uconnect® Access Care—Inve-
hicle support for Uconnect®Access
System, Apps and Features.
•Vehicle Care— Total support for
your FCA US LLC vehicle.
ASSIST/9-1-1 Buttons1 — 9-1-1 Button2 — ASSIST Button
ELECTRONICS
82
Page 145 of 220
• Safety and Assistance
• Lights
• Doors and Locks
• Compass (If Equipped)
Vehicles Equipped With Multifunctional Display Reconfigurable:Menu
items "Display" (you can select only the items "See Phone" and "See Navigation,"
"Security," and "Safety & Assistance" (only "Volume Alerts" is selectable) are present.
All other entries are displayed and selected on the display of the Uconnect®system.
“Display”
By selecting the "Display," you can access the following settings:
•Language: allows you to select the language in which to display the information/
warnings.
•See Phone:allows you to view, on the instrument cluster display, the information
relating to Phone mode displayed on the display of the Uconnect®system.
•See Navigation:allows you to view, on the instrument cluster display, information
relating to the navigation mode.
"Units Of Measure"
By selecting the item "Units of measure," you can select the unit of measure to use
for displaying various magnitudes.
Possible options are:
•US
• Metric
• Custom
"Clock & Data"
By selecting the item, "Clock & Data" you can adjust the clock.
Possible options are:
• Set Time: adjusting hours/minutes
• Set Format: adjusting the time format "12h" (12 hours) or "24h" (24 hours)
• Set Date: adjustment day/month/year
Safety
By selecting the item “Safety,” you can make the following adjustments:
Speed Warning:
• Set the vehicle speed limit (mph or km/h), which the driver is notified through a
visual and acoustic signaling (display of a message and a symbol on the display).
ELECTRONICS
143
Page 146 of 220
Speed Belt Buzzer:
• This function is only viewable when the Seat Belt Reminder (SBR) system is
active.
Hill Start Assist:
• Activation/Deactivation of the Hill Start Assist system.
"Safety & Assistance"
By selecting the item "Safety & Assistance," you can make the following adjustments:
• FCW: a selection of operating modes of the system Forward Collision Warning Plus
• FCW Sensitivity: a selection of the "readiness" of intervention of the Forward
Collision Warning Plus system, based on the distance to the obstacle
• ParkSense: a selection of the type of reporting provided by ParkSense
• Rear Parks. Vol.: selection of the volume of acoustic signals provided by
ParkSense
• ParkSense Vol.: a selection of the volume of acoustic signals provided by
ParkSense
• Front Parks. Vol.: selection of the volume of the beeps provided by ParkSense
• Side Dist. Warn. Vol. (If equipped) : a selection of the volume of the beeps of
SideSense system
• Side Dist. Warn. (if Equipped) : Select the type of reporting provided by SideSense
system
• Auto Wipers: enabling/disabling the automatic operation of wipers in the event of
rain
• LaneSense Warn.: a selection of the "readiness" of intervention of LaneSense
• LaneSense Force: selection of the force to be applied to the steering wheel to put
the car in the roadway through the system of electrical drive, in case of operation
of the system LaneSense
• Buzzer Volume
• Maintenance Brakes (If Equipped): activation of the procedure to carry out
braking system maintenance
• Auto Park Brake (If Equipped): enable/disable auto-insertion of the Electric
Parking Brake
"Lights"
By selecting the item "Lights," you can make the following adjustments:
• Headlight Off Delay: setting the delay for headlight shutoff after engine shutoff
• Lights in the opening: activation of the direction indicators when opening the
doors
• Headlight Sensor: adjusting the sensitivity of headlight brightness
• Auto. High Beam: activation/deactivation of the automatic main beam headlights
(If Equipped)
ELECTRONICS
144
Page 149 of 220
NOTE:
The power inverter is designed with built-in overload protection. If the power rating
of 150 Watts is exceeded, the power inverter will automatically shut down. Once the
electrical device has been removed from the outlet, the inverter should automatically
reset. If the power rating exceeds approximately 170 Watts, the power inverter may
have to be reset manually. To reset the inverter manually, unplug the device and plug
it in again. To avoid overloading the circuit, check the power ratings on electrical
devices prior to using the inverter.
WARNING!
To Avoid Serious Injury or Death DO NOT:
• insert any objects into the receptacles
• touch with wet hands
Close the lid when not in use. If this outlet is mishandled, it may cause an electric
shock and failure.
POWER OUTLET
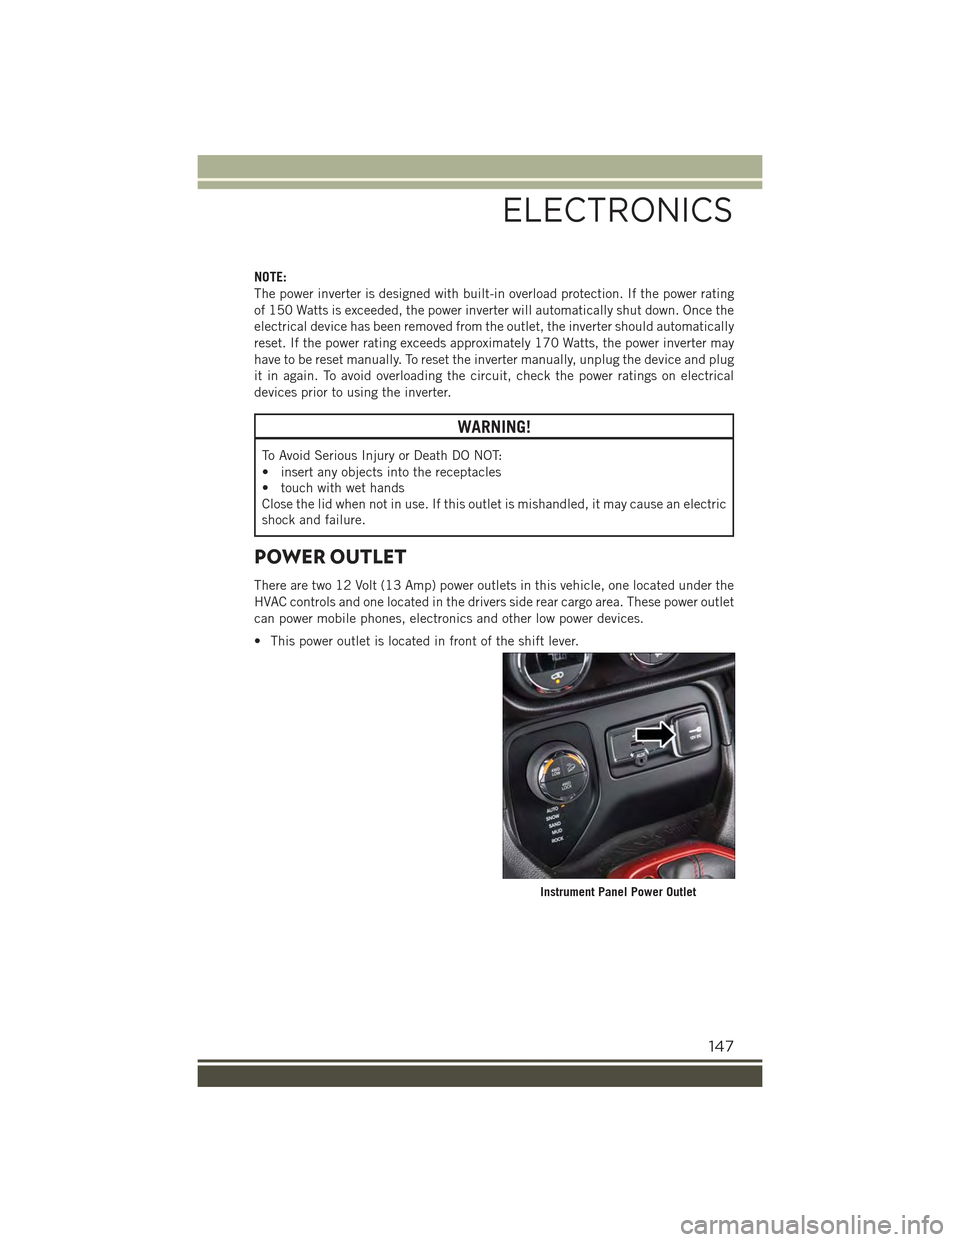
There are two 12 Volt (13 Amp) power outlets in this vehicle, one located under the
HVAC controls and one located in the drivers side rear cargo area. These power outlet
can power mobile phones, electronics and other low power devices.
• This power outlet is located in front of the shift lever.
Instrument Panel Power Outlet
ELECTRONICS
147