warning JEEP RENEGADE 2015 1.G Repair Manual
[x] Cancel search | Manufacturer: JEEP, Model Year: 2015, Model line: RENEGADE, Model: JEEP RENEGADE 2015 1.GPages: 220, PDF Size: 34.11 MB
Page 183 of 220
TO OPEN AND CLOSE THE HOOD
Opening
Two latches must be released to open the hood.
Pull the hood release lever located under the drivers side of the instrument panel.
Move to the outside of the vehicle and push the safety latch release lever toward the
passenger side of the vehicle. The hood release lever is located behind the center
front edge of the hood.
Remove the support rod from the locking tab and insert it into the seat located on the
underside of the hood.
Closing
Hold up the hood with one hand and with the other hand remove the support rod from
its seat and reinsert it into the locking tab.
Lower the hood to approximately 6 inches (15 cm) from the engine compartment and
drop it. Make sure that the hood is completely closed.
CAUTION!
To prevent possible damage, do not slam the hood to close it. Lower the hood until
it is open approximately 6 inches (15 cm), and then drop it. This should secure
both latches. Never drive your vehicle unless the hood is fully closed, with both
latches engaged.
WARNING!
Be sure the hood is fully latched before driving your vehicle. If the hood is not fully
latched, it could open when the vehicle is in motion and block your vision. Failure
to follow this warning could result in serious injury or death.
MAINTAINING YOUR VEHICLE
181
Page 191 of 220
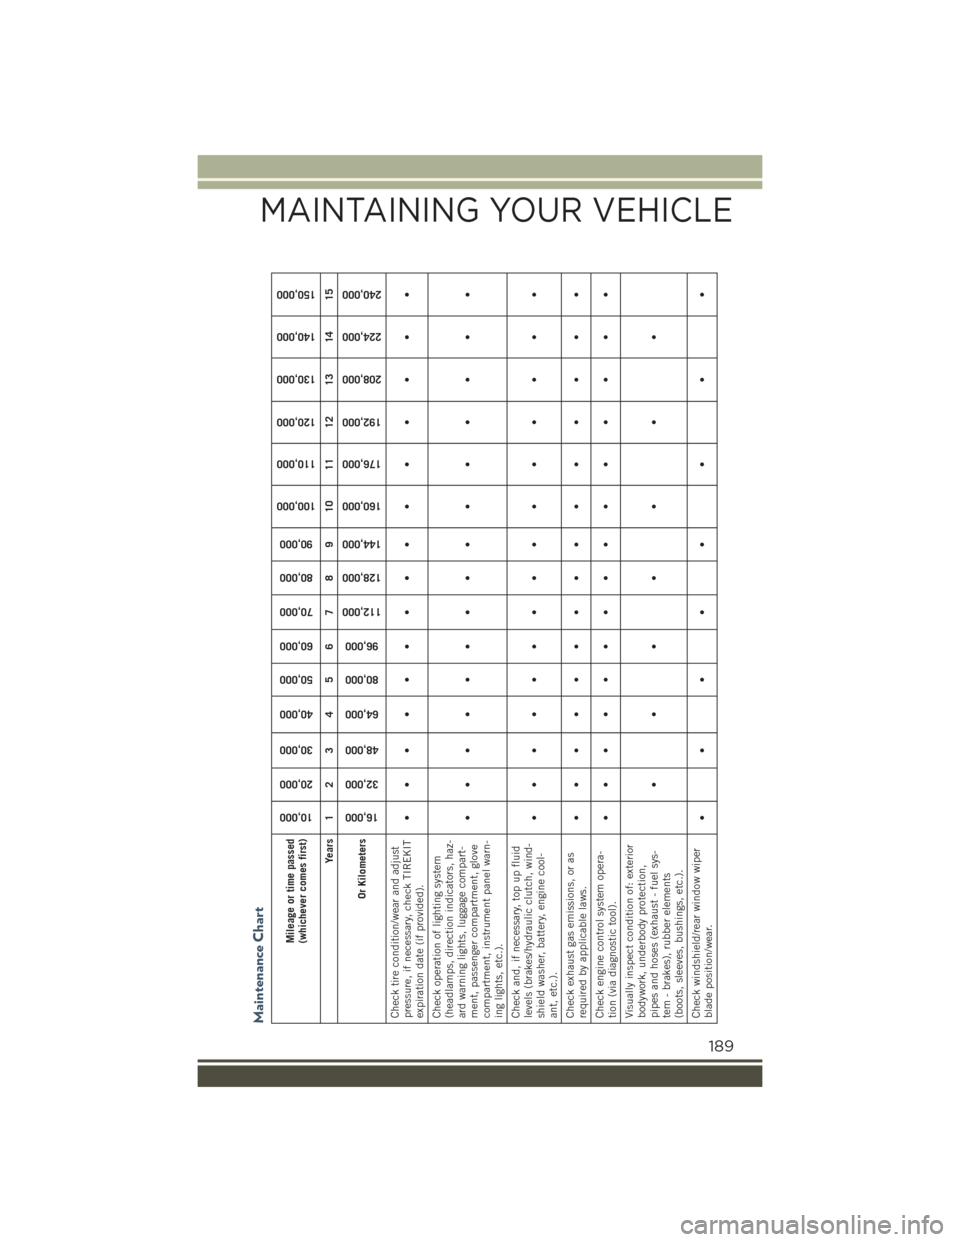
Maintenance Chart
Mileage or time passed(whichever comes first)
10,000
20,000
30,000
40,000
50,000
60,000
70,000
80,000
90,000
100,000
110,000
120,000
130,000
140,000
150,000
Years 1 2 3 4 5 6 7 8 9 10 11 12 13 14 15
Or Kilometers
16,000
32,000
48,000
64,000
80,000
96,000
112,000
128,000
144,000
160,000
176,000
192,000
208,000
224,000
240,000
Check tire condition/wear and adjustpressure, if necessary, check TIREKITexpiration date (if provided).
•• • • •• • •• • • • • • •
Check operation of lighting system(headlamps, direction indicators, haz-ard warning lights, luggage compart-ment, passenger compartment, glovecompartment, instrument panel warn-ing lights, etc.).
•• • • •• • •• • • • • • •
Check and, if necessary, top up fluidlevels (brakes/hydraulic clutch, wind-shield washer, battery, engine cool-ant, etc.).
•• • • •• • •• • • • • • •
Check exhaust gas emissions, or asrequired by applicable laws.
•• • • •• • •• • • • • • •
Check engine control system opera-tion (via diagnostic tool).
•• • • •• • •• • • • • • •
Visually inspect condition of: exteriorbodywork, underbody protection,pipes and hoses (exhaust - fuel sys-tem - brakes), rubber elements(boots, sleeves, bushings, etc.).
•••• • • •
Check windshield/rear window wiperblade position/wear.
•• ••• • • •
MAINTAINING YOUR VEHICLE
189
Page 194 of 220
(*) The oil and oil filter replacement must be carried out when indicated by a warning light or message on the instrument panel, orin any case should not exceed 1 year or 10,000 miles.(**) The spark plug change is distance based only, yearly intervals do not apply. The following are essential to ensure correct operationand prevent serious damage to the engine:• Only use spark plugs of the same make and type which are specially certified for such engines (refer to “Engine Information” in“Technical Data” for further information).• Strictly comply with the spark plug replacement interval given in the “Maintenance Schedule” for spark plug replacement.• Contact your authorized dealer if you have any questions.
WARNING!
• You can be badly injured working on or around a motor vehicle. Do only service work for which you have the knowledge and the
right equipment. If you have any doubt about your ability to perform a service job, take your vehicle to a competent mechanic.
• Failure to properly inspect and maintain your vehicle could result in a component malfunction and effect vehicle handling and
performance. This could cause an accident.
MAINTAINING YOUR VEHICLE
192
Page 196 of 220
FUSES
WARNING!
• When replacing a blown fuse, always use an appropriate replacement fuse with
the same amp rating as the original fuse. Never replace a fuse with another
fuse of higher amp rating. Never replace a blown fuse with metal wires or any
other material. Failure to use proper fuses may result in serious personal injury,
fire and/or property damage.
• Before replacing a fuse, make sure that the ignition is off and that all the other
services are switched off and/or disengaged.
• If the replaced fuse blows again, contact an authorized dealer.
• If a general protection fuse for safety systems (air bag system, braking system),
power unit systems (engine system, gearbox system) or steering system blows,
contact an authorized dealer.
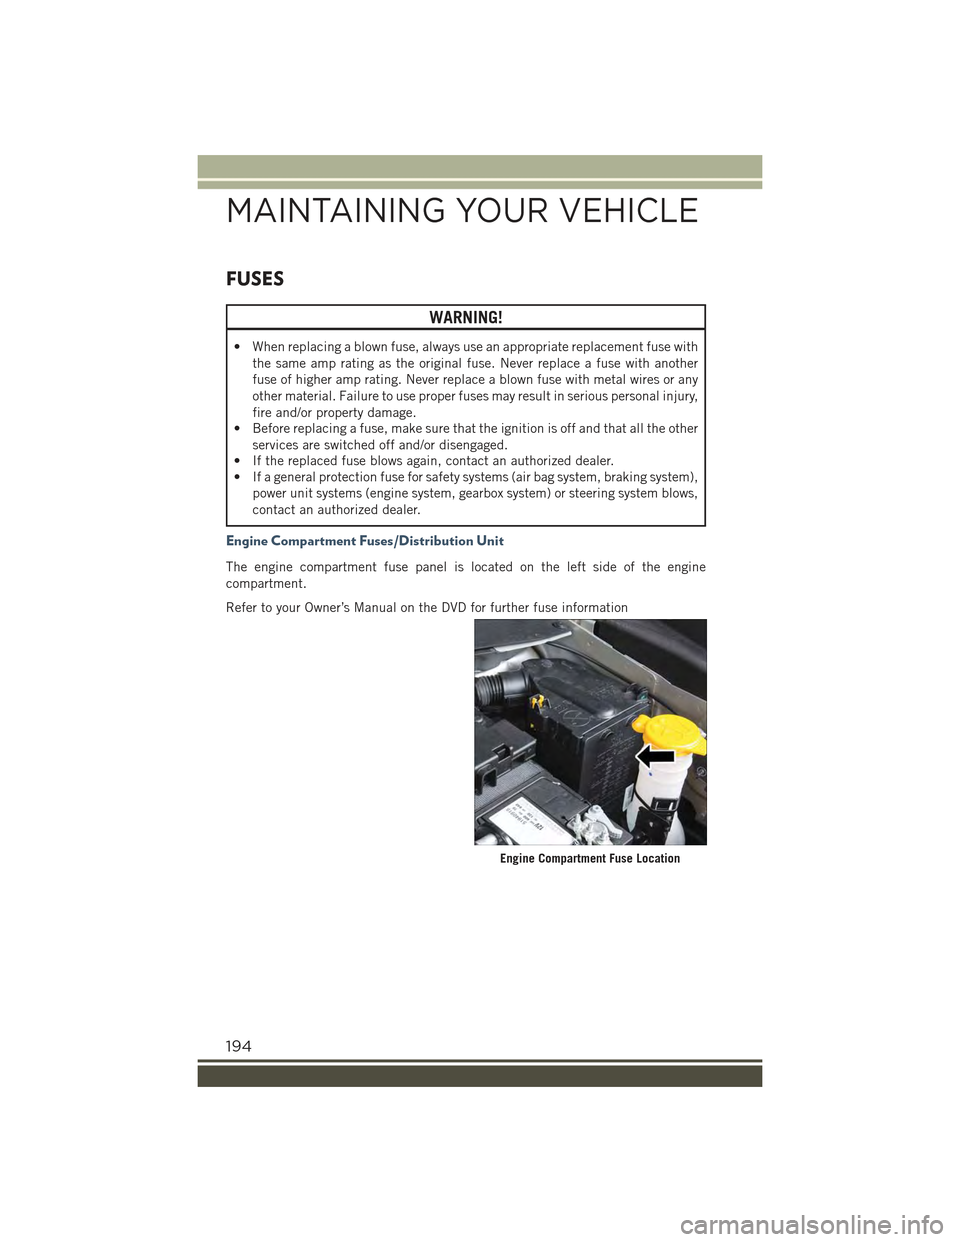
Engine Compartment Fuses/Distribution Unit
The engine compartment fuse panel is located on the left side of the engine
compartment.
Refer to your Owner’s Manual on the DVD for further fuse information
Engine Compartment Fuse Location
MAINTAINING YOUR VEHICLE
194
Page 199 of 220
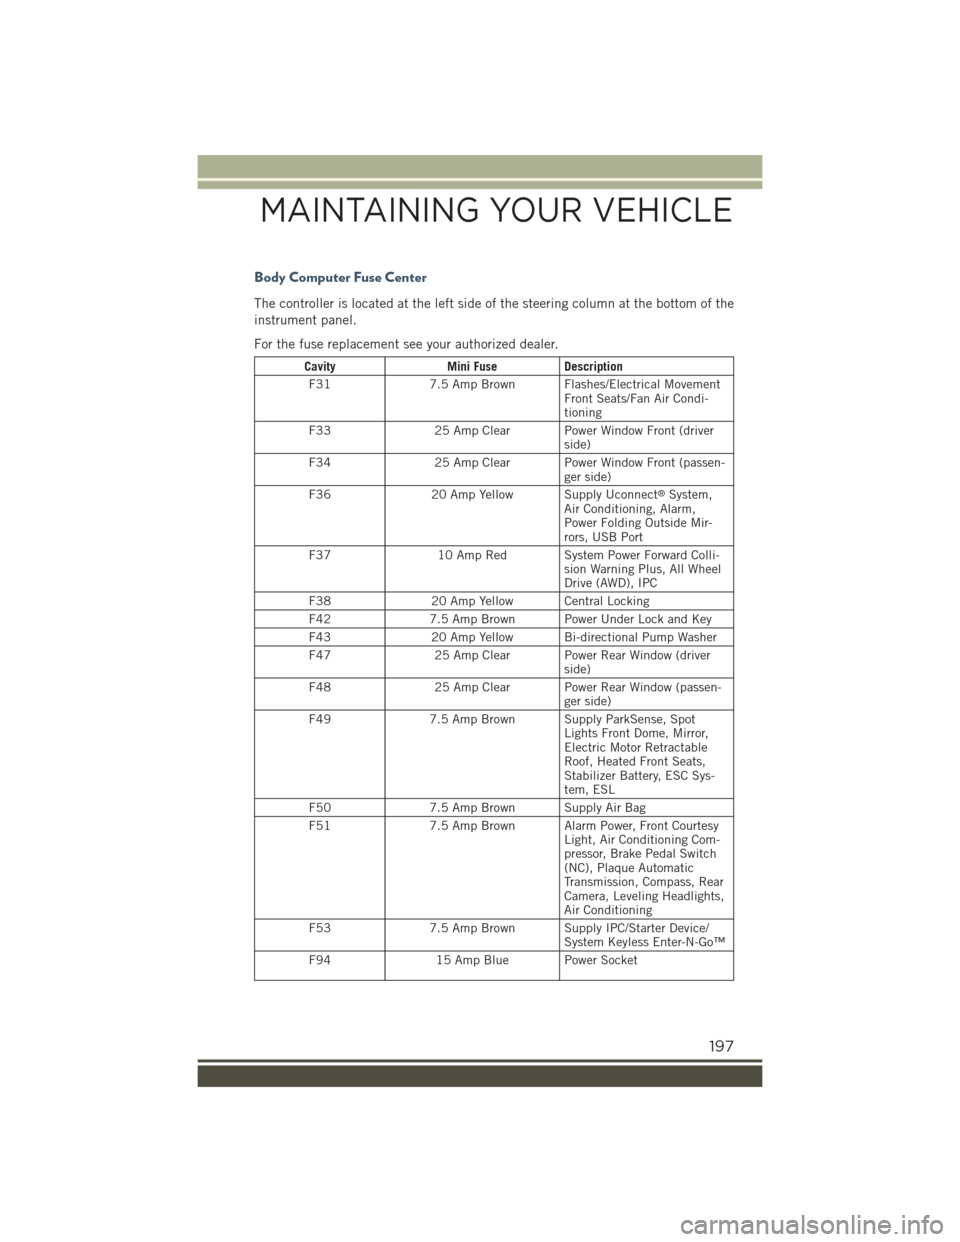
Body Computer Fuse Center
The controller is located at the left side of the steering column at the bottom of the
instrument panel.
For the fuse replacement see your authorized dealer.
CavityMini FuseDescription
F317.5 Amp Brown Flashes/Electrical MovementFront Seats/Fan Air Condi-tioning
F3325 Amp Clear Power Window Front (driverside)
F3425 Amp Clear Power Window Front (passen-ger side)
F3620 Amp Yellow Supply Uconnect®System,Air Conditioning, Alarm,Power Folding Outside Mir-rors, USB Port
F3710 Amp Red System Power Forward Colli-sion Warning Plus, All WheelDrive (AWD), IPC
F3820 Amp Yellow Central Locking
F427.5 Amp Brown Power Under Lock and Key
F4320 Amp Yellow Bi-directional Pump Washer
F4725 Amp Clear Power Rear Window (driverside)
F4825 Amp Clear Power Rear Window (passen-ger side)
F497.5 Amp Brown Supply ParkSense, SpotLights Front Dome, Mirror,Electric Motor RetractableRoof, Heated Front Seats,Stabilizer Battery, ESC Sys-tem, ESL
F507.5 Amp Brown Supply Air Bag
F517.5 Amp Brown Alarm Power, Front CourtesyLight, Air Conditioning Com-pressor, Brake Pedal Switch(NC), Plaque AutomaticTransmission, Compass, RearCamera, Leveling Headlights,Air Conditioning
F537.5 Amp Brown Supply IPC/Starter Device/System Keyless Enter-N-Go™
F9415 Amp Blue Power Socket
MAINTAINING YOUR VEHICLE
197
Page 202 of 220
WARNING!
• Do not to affix objects/plugs to the end of the filler neck other than is provided
on the car.
• The use of objects/plugs do not comply with the vehicle and may cause
pressure increases inside the tank, creating dangerous conditions.
• Do not approach the neck of the tank with open flames or lit cigarettes its an
extreme fire hazard. Also, avoid close contact with the filler pipe with your face,
do not inhale harmful vapors.
• Do not use your mobile phone in the vicinity of the pump fuel nozzle, it can be
a possible risk of fire.
TIRE PRESSURES
Check the inflation pressure of each tire, including the spare tire (if equipped), at
least monthly and inflate to the recommended pressure for your vehicle.
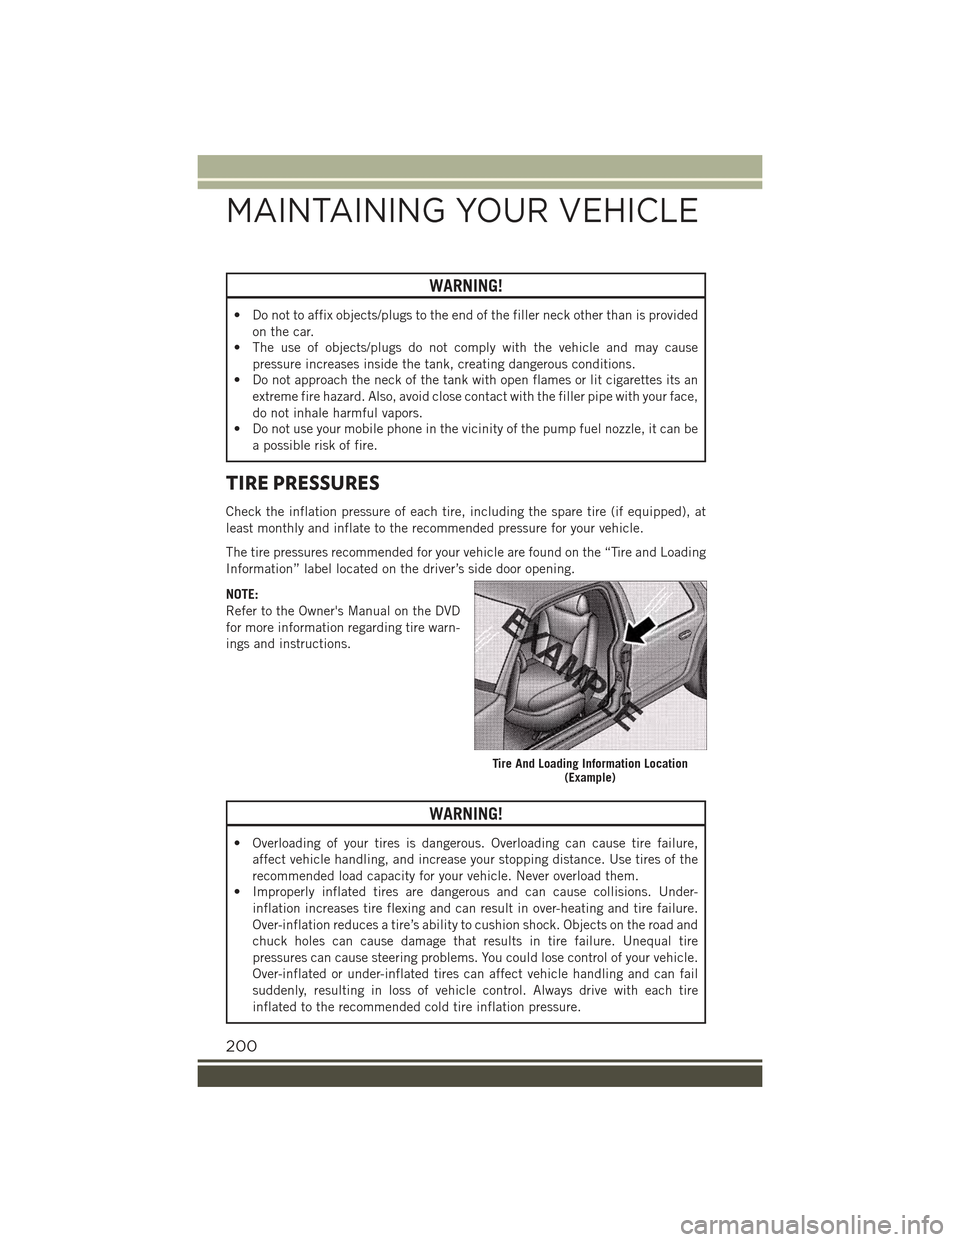
The tire pressures recommended for your vehicle are found on the “Tire and Loading
Information” label located on the driver’s side door opening.
NOTE:
Refer to the Owner's Manual on the DVD
for more information regarding tire warn-
ings and instructions.
WARNING!
• Overloading of your tires is dangerous. Overloading can cause tire failure,
affect vehicle handling, and increase your stopping distance. Use tires of the
recommended load capacity for your vehicle. Never overload them.
• Improperly inflated tires are dangerous and can cause collisions. Under-
inflation increases tire flexing and can result in over-heating and tire failure.
Over-inflation reduces a tire’s ability to cushion shock. Objects on the road and
chuck holes can cause damage that results in tire failure. Unequal tire
pressures can cause steering problems. You could lose control of your vehicle.
Over-inflated or under-inflated tires can affect vehicle handling and can fail
suddenly, resulting in loss of vehicle control. Always drive with each tire
inflated to the recommended cold tire inflation pressure.
Tire And Loading Information Location(Example)
MAINTAINING YOUR VEHICLE
200
Page 203 of 220
SPARE TIRES — IF EQUIPPED
NOTE:
For vehicles equipped with Tire Service Kit instead of a spare tire, please refer to “Tire
Service Kit” in “What To Do In Emergencies” on your DVD for further information.
CAUTION!
Because of the reduced ground clearance, do not take your vehicle through an
automatic car wash with a compact or limited-use temporary spare installed.
Damage to the vehicle may result.
Spare Tire Matching Original Equipped Tire And Wheel — If Equipped
Your vehicle may be equipped with a spare tire and wheel equivalent in look and
function to the original equipment tire and wheel found on the front or rear axle of
your vehicle. This spare tire may be used in the tire rotation for your vehicle. If your
vehicle has this option, refer to an authorized tire dealer for the recommended tire
rotation pattern.
Compact Spare Tire — If Equipped
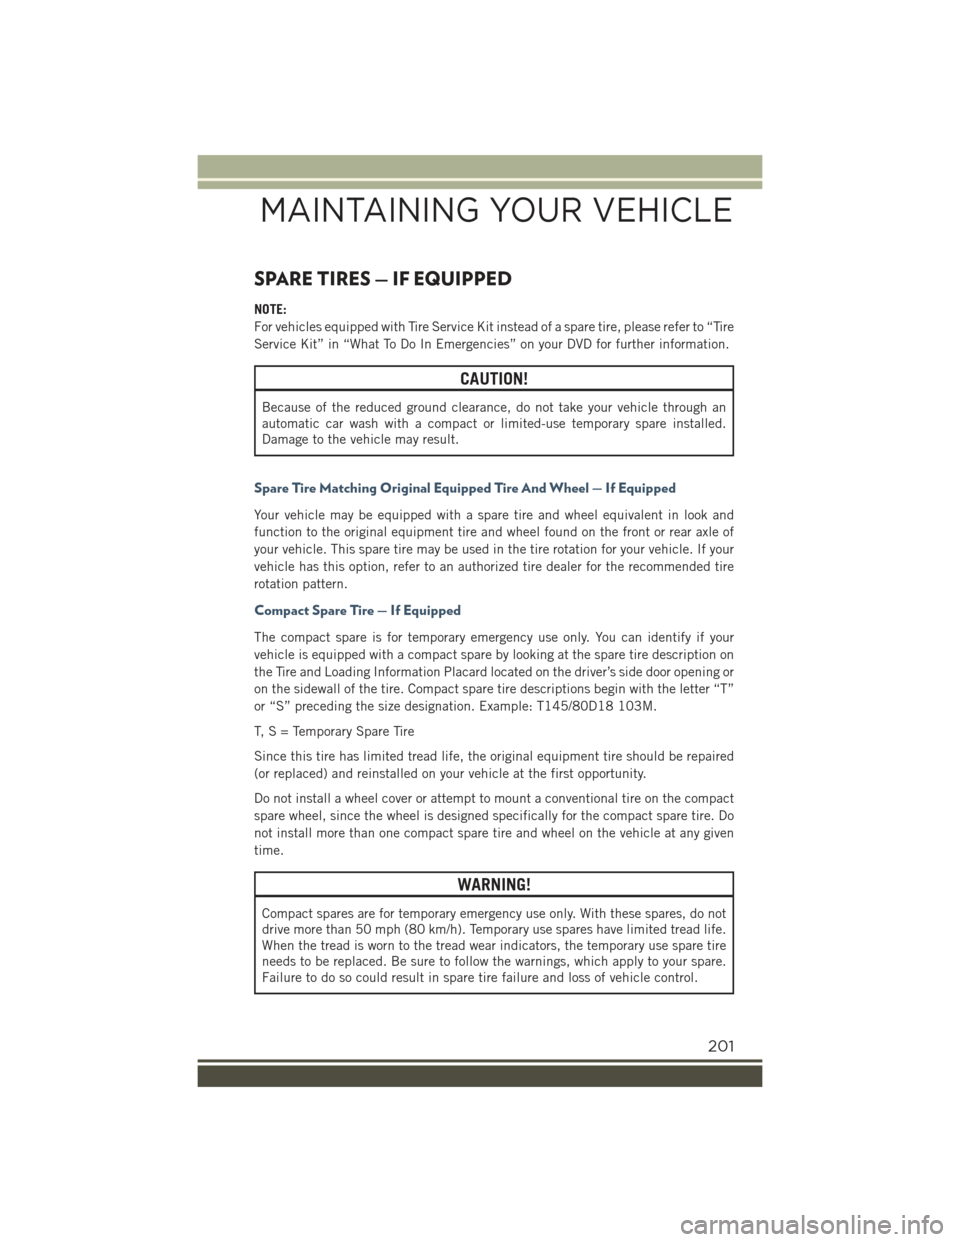
The compact spare is for temporary emergency use only. You can identify if your
vehicle is equipped with a compact spare by looking at the spare tire description on
the Tire and Loading Information Placard located on the driver’s side door opening or
on the sidewall of the tire. Compact spare tire descriptions begin with the letter “T”
or “S” preceding the size designation. Example: T145/80D18 103M.
T, S = Temporary Spare Tire
Since this tire has limited tread life, the original equipment tire should be repaired
(or replaced) and reinstalled on your vehicle at the first opportunity.
Do not install a wheel cover or attempt to mount a conventional tire on the compact
spare wheel, since the wheel is designed specifically for the compact spare tire. Do
not install more than one compact spare tire and wheel on the vehicle at any given
time.
WARNING!
Compact spares are for temporary emergency use only. With these spares, do not
drive more than 50 mph (80 km/h). Temporary use spares have limited tread life.
When the tread is worn to the tread wear indicators, the temporary use spare tire
needs to be replaced. Be sure to follow the warnings, which apply to your spare.
Failure to do so could result in spare tire failure and loss of vehicle control.
MAINTAINING YOUR VEHICLE
201
Page 204 of 220
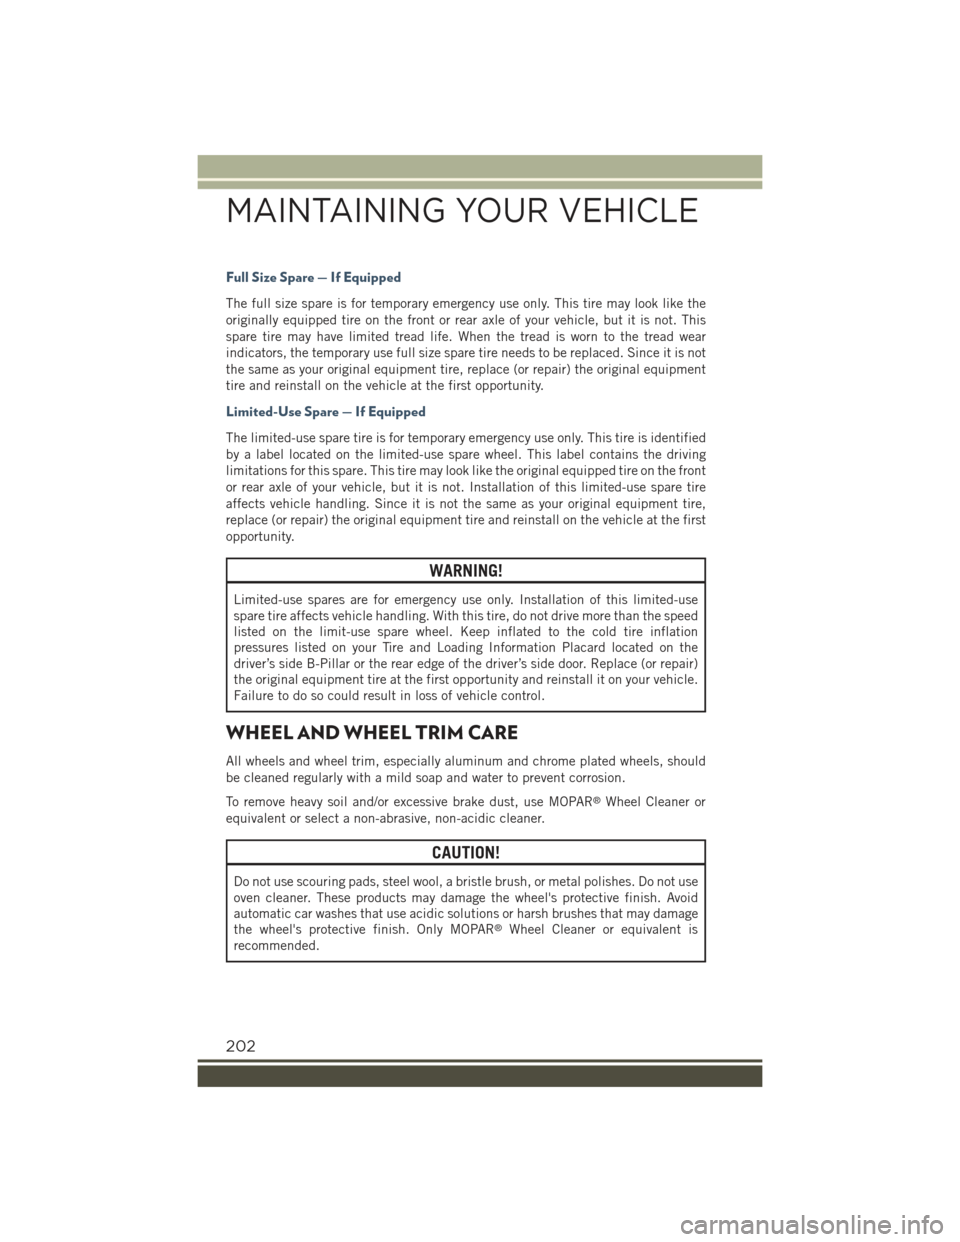
Full Size Spare — If Equipped
The full size spare is for temporary emergency use only. This tire may look like the
originally equipped tire on the front or rear axle of your vehicle, but it is not. This
spare tire may have limited tread life. When the tread is worn to the tread wear
indicators, the temporary use full size spare tire needs to be replaced. Since it is not
the same as your original equipment tire, replace (or repair) the original equipment
tire and reinstall on the vehicle at the first opportunity.
Limited-Use Spare — If Equipped
The limited-use spare tire is for temporary emergency use only. This tire is identified
by a label located on the limited-use spare wheel. This label contains the driving
limitations for this spare. This tire may look like the original equipped tire on the front
or rear axle of your vehicle, but it is not. Installation of this limited-use spare tire
affects vehicle handling. Since it is not the same as your original equipment tire,
replace (or repair) the original equipment tire and reinstall on the vehicle at the first
opportunity.
WARNING!
Limited-use spares are for emergency use only. Installation of this limited-use
spare tire affects vehicle handling. With this tire, do not drive more than the speed
listed on the limit-use spare wheel. Keep inflated to the cold tire inflation
pressures listed on your Tire and Loading Information Placard located on the
driver’s side B-Pillar or the rear edge of the driver’s side door. Replace (or repair)
the original equipment tire at the first opportunity and reinstall it on your vehicle.
Failure to do so could result in loss of vehicle control.
WHEEL AND WHEEL TRIM CARE
All wheels and wheel trim, especially aluminum and chrome plated wheels, should
be cleaned regularly with a mild soap and water to prevent corrosion.
To remove heavy soil and/or excessive brake dust, use MOPAR®Wheel Cleaner or
equivalent or select a non-abrasive, non-acidic cleaner.
CAUTION!
Do not use scouring pads, steel wool, a bristle brush, or metal polishes. Do not use
oven cleaner. These products may damage the wheel's protective finish. Avoid
automatic car washes that use acidic solutions or harsh brushes that may damage
the wheel's protective finish. Only MOPAR®Wheel Cleaner or equivalent is
recommended.
MAINTAINING YOUR VEHICLE
202
Page 206 of 220
FCA US LLC CUSTOMER CENTER
P.O. Box 21–8004 Auburn Hills, MI 48321–8004 Phone: 1-877-426-5337
CHRYSLER CANADA INC. CUSTOMER CENTER
P.O. Box 1621 Windsor, Ontario N9A 4H6 Phone: 1-800-465-2001 (English)
Phone: 1-800-387-9983 (French)
ASSISTANCE FOR THE HEARING IMPAIRED
To assist customers who have hearing difficulties, the manufacturer has installed
special TDD (Telecommunication Devices for the Deaf) equipment at its customer
center. Any hearing or speech impaired customer, who has access to a TDD or a
conventional teletypewriter (TTY) in the United States, can communicate with the
manufacturer by dialing 1-800-380-CHRY. Canadian residents with hearing difficul-
ties that require assistance can use the special needs relay service offered by Bell
Canada. For TTY teletypewriter users, dial 711 and for Voice callers, dial
1-800-855-0511 to connect with a Bell Relay Service operator.
WARNING!
Engine exhaust, some of its constituents, and certain vehicle components con-
tain, or emit, chemicals known to the State of California to cause cancer and birth
defects, or other reproductive harm. In addition, certain fluids contained in
vehicles and certain products of component wear contain, or emit, chemicals
known to the State of California to cause cancer and birth defects, or other
reproductive harm.
PUBLICATIONS ORDERING
• If you are the first registered retail owner of your vehicle, you may obtain a
complimentary printed copy of the Owner's Manual, Navigation/Uconnect®Manu-
als or Warranty Booklet. United States customers may visit the Jeep Contact Us
page at www.jeep.com scroll to the bottom of the page and select the “Contact Us”
link, then select the “Owner’s Manual and Glove Box Material” from the left menu.
You may also obtain a complimentary copy by calling 1-877-426-5337 (U.S.) or
1-800-387-1143 (Canada).
• Replacement User Guide kits or DVDs or, if you prefer, additional printed copies
of the Owner's Manual, Warranty Booklet or Radio Manuals may be purchased by
visiting www.techauthority.com or by calling 1-877-890-4038 (U.S.) or
1-800-387-1143 (Canada). Visa, Master Card, American Express and Discover
orders are accepted. If you prefer mailing your order, please call the above
numbers for an order form.
CUSTOMER ASSISTANCE
204
Page 209 of 220
FREQUENTLY ASKED QUESTIONS
GETTING STARTED
How do I install my LATCH Equipped Child Seat? pg. 23
ELECTRONICS
Which radio is in my vehicle?
• Uconnect®3.0 pg. 91
• Uconnect®5.0 pg. 94
• Uconnect®6.5AN pg. 106
How do I activate the Audio Jack?
• Uconnect®3.0 pg. 93
• Uconnect®5.0 pg. 97
• Uconnect®6.5AN pg. 111
How do I set the clock on my radio?
• Uconnect®3.0 pg. 92
• Uconnect®5.0 pg. 94
• Uconnect®6.5AN pg. 106
How do I use the Navigation feature?
• Uconnect®6.5AN pg. 114
How do I pair my cell phone via Bluetooth®with the Uconnect®Hands-Free Voice
Activation System? pg. 130
How do I improve the Bluetooth®performance of my Uconnect®System? pg. 137
OFF-ROAD CAPABILITIES
How do I shift into different four-wheel drive selections? pg. 150
UTILITY
How do I know how much I can tow with my Jeep Renegade? pg. 153
WHAT TO DO IN EMERGENCIES
What do I do if my TPMS warning light is blinking? pg. 157
How do I change a flat tire? pg. 168
How do I Jump-Start my vehicle? pg. 174
MAINTAINING YOUR VEHICLE
Where is my Fuse Block located? pg. 194
What type of oil do I use? pg. 186
How often should I change my engine’s oil? pg. 187
What should my tire pressure be set at? pg. 200
FAQ’s
207