brake JEEP RENEGADE 2015 1.G User Guide
[x] Cancel search | Manufacturer: JEEP, Model Year: 2015, Model line: RENEGADE, Model: JEEP RENEGADE 2015 1.GPages: 220, PDF Size: 34.11 MB
Page 3 of 220
INTRODUCTION/WELCOME
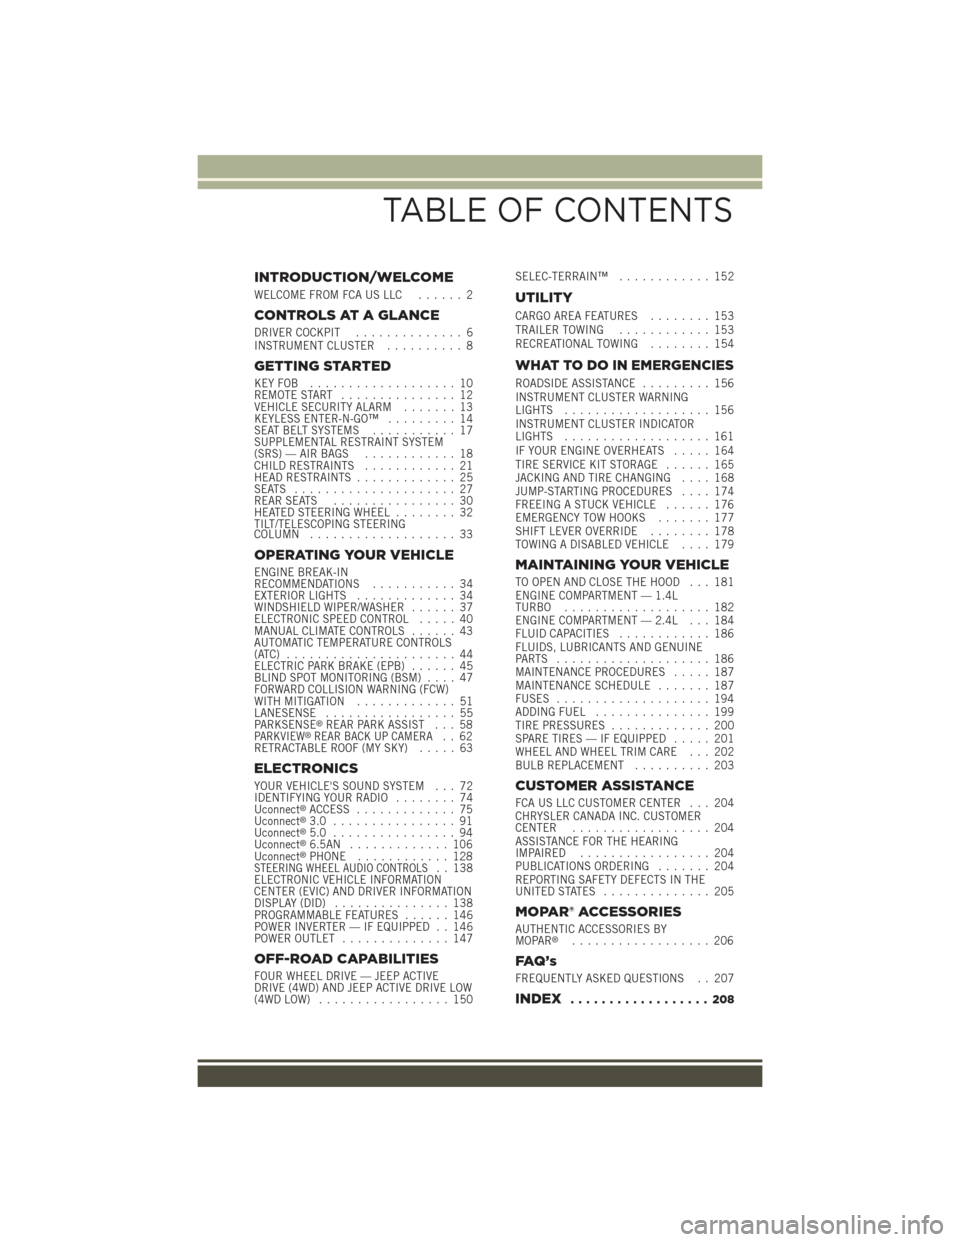
WELCOME FROM FCA US LLC...... 2
CONTROLS AT A GLANCE
DRIVER COCKPIT.............. 6INSTRUMENT CLUSTER.......... 8
GETTING STARTED
KEY FOB . . . . . . . . . . . . . . . . . . . 10REMOTE START............... 12VEHICLE SECURITY ALARM....... 13KEYLESS ENTER-N-GO™......... 14SEAT BELT SYSTEMS........... 17SUPPLEMENTAL RESTRAINT SYSTEM(SRS) — AIR BAGS............ 18CHILD RESTRAINTS............ 21HEAD RESTRAINTS............. 25SEATS . . . . . . . . . . . . . . . . . . . . . 27REAR SEATS................ 30HEATED STEERING WHEEL........ 32TILT/TELESCOPING STEERINGCOLUMN................... 33
OPERATING YOUR VEHICLE
ENGINE BREAK-INRECOMMENDATIONS........... 34EXTERIOR LIGHTS............. 34WINDSHIELD WIPER/WASHER...... 37ELECTRONIC SPEED CONTROL..... 40MANUAL CLIMATE CONTROLS...... 43AUTOMATIC TEMPERATURE CONTROLS(ATC) . . . . . . . . . . . . . . . . . . . . . . 44ELECTRIC PARK BRAKE (EPB)...... 45BLIND SPOT MONITORING (BSM).... 47FORWARD COLLISION WARNING (FCW)WITH MITIGATION . . . . . . . . . . . . . 51LANESENSE................. 55PA R K S E N S E®REAR PARK ASSIST . . . 58PARKVIEW®REAR BACK UP CAMERA.. 62RETRACTABLE ROOF (MY SKY)..... 63
ELECTRONICS
YOUR VEHICLE'S SOUND SYSTEM . . . 72IDENTIFYING YOUR RADIO........ 74Uconnect®ACCESS............. 75Uconnect®3.0 . . . . . . . . . . . . . . . . 91Uconnect®5.0 . . . . . . . . . . . . . . . . 94Uconnect®6.5AN . . . . . . . . . . . . . 106Uconnect®PHONE............ 128STEERING WHEEL AUDIO CONTROLS.. 138ELECTRONIC VEHICLE INFORMATIONCENTER (EVIC) AND DRIVER INFORMATIONDISPLAY (DID)............... 138PROGRAMMABLE FEATURES...... 146POWER INVERTER — IF EQUIPPED . . 146POWER OUTLET.............. 147
OFF-ROAD CAPABILITIES
FOUR WHEEL DRIVE — JEEP ACTIVEDRIVE (4WD) AND JEEP ACTIVE DRIVE LOW(4WD LOW)................. 150
SELEC-TERRAIN™............ 152
UTILITY
CARGO AREA FEATURES........ 153TRAILER TOWING............ 153RECREATIONAL TOWING........ 154
WHAT TO DO IN EMERGENCIES
ROADSIDE ASSISTANCE......... 156INSTRUMENT CLUSTER WARNINGLIGHTS................... 156INSTRUMENT CLUSTER INDICATORLIGHTS................... 161IF YOUR ENGINE OVERHEATS..... 164TIRE SERVICE KIT STORAGE...... 165JACKING AND TIRE CHANGING.... 168JUMP-STARTING PROCEDURES.... 174FREEING A STUCK VEHICLE...... 176EMERGENCY TOW HOOKS....... 177SHIFT LEVER OVERRIDE........ 178TOWING A DISABLED VEHICLE.... 179
MAINTAINING YOUR VEHICLE
TO OPEN AND CLOSE THE HOOD . . . 181ENGINE COMPARTMENT — 1.4LTURBO................... 182ENGINE COMPARTMENT — 2.4L . . . 184FLUID CAPACITIES............ 186FLUIDS, LUBRICANTS AND GENUINEPA RT S . . . . . . . . . . . . . . . . . . . . 1 8 6MAINTENANCE PROCEDURES..... 187MAINTENANCE SCHEDULE....... 187FUSES.................... 194ADDING FUEL............... 199TIRE PRESSURES............. 200SPARE TIRES — IF EQUIPPED..... 201WHEEL AND WHEEL TRIM CARE . . . 202BULB REPLACEMENT.......... 203
CUSTOMER ASSISTANCE
FCA US LLC CUSTOMER CENTER . . . 204CHRYSLER CANADA INC. CUSTOMERCENTER.................. 204ASSISTANCE FOR THE HEARINGIMPAIRED . . . . . . . . . . . . . . . . . 204PUBLICATIONS ORDERING....... 204REPORTING SAFETY DEFECTS IN THEUNITED STATES . . . . . . . . . . . . . . 205
MOPAR® ACCESSORIES
AUTHENTIC ACCESSORIES BYMOPAR®.................. 206
FAQ ’ s
FREQUENTLY ASKED QUESTIONS . . 207
INDEX.................. 208
TABLE OF CONTENTS
Page 5 of 220
VEHICLES SOLD IN CANADA
With respect to any vehicles sold in Canada, the name FCA US LLC shall be deemed
to be deleted and the name Chrysler Canada Inc. used in substitution (excluding
legal lines).
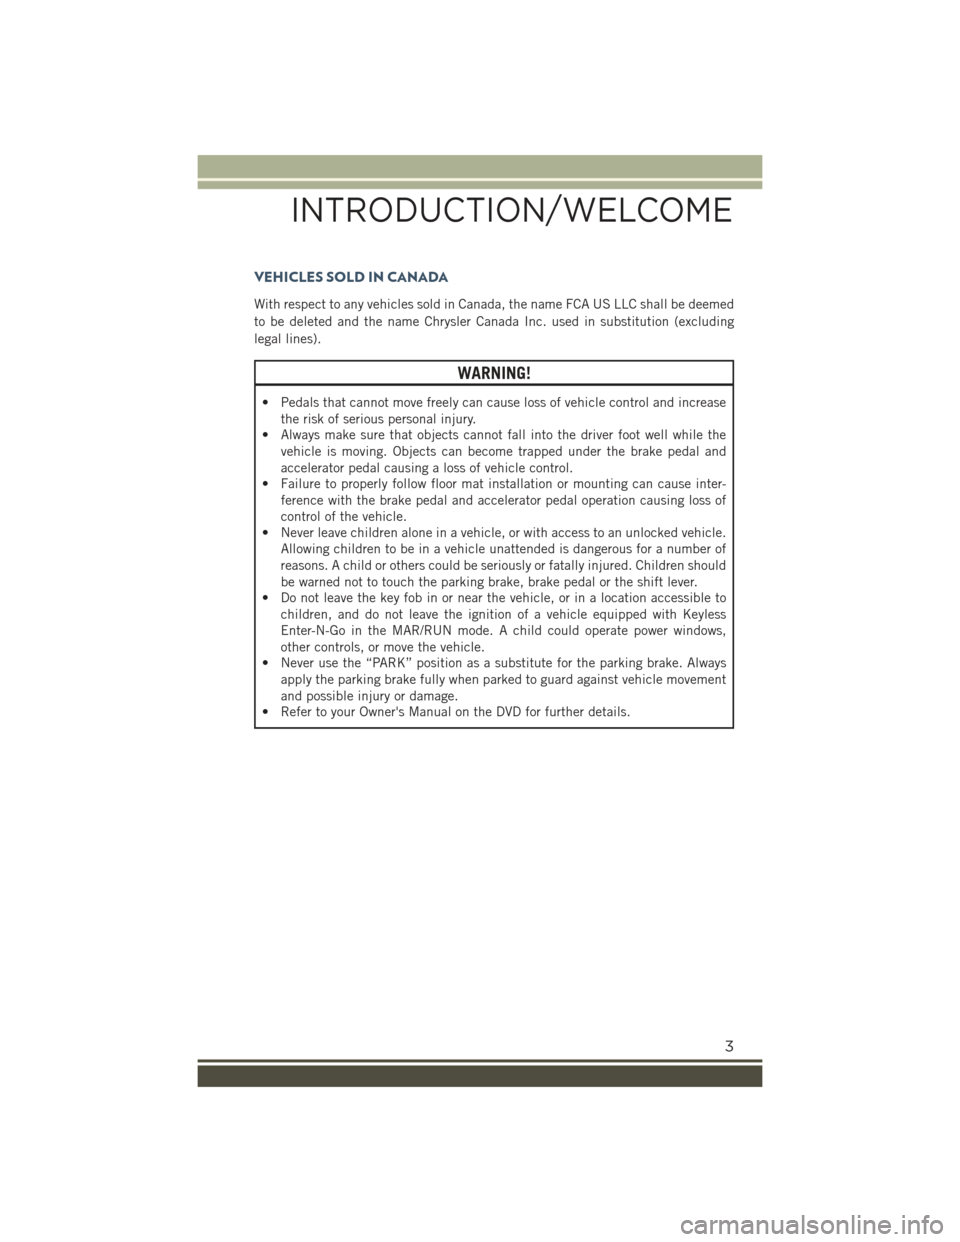
WARNING!
• Pedals that cannot move freely can cause loss of vehicle control and increase
the risk of serious personal injury.
• Always make sure that objects cannot fall into the driver foot well while the
vehicle is moving. Objects can become trapped under the brake pedal and
accelerator pedal causing a loss of vehicle control.
• Failure to properly follow floor mat installation or mounting can cause inter-
ference with the brake pedal and accelerator pedal operation causing loss of
control of the vehicle.
• Never leave children alone in a vehicle, or with access to an unlocked vehicle.
Allowing children to be in a vehicle unattended is dangerous for a number of
reasons. A child or others could be seriously or fatally injured. Children should
be warned not to touch the parking brake, brake pedal or the shift lever.
• Do not leave the key fob in or near the vehicle, or in a location accessible to
children, and do not leave the ignition of a vehicle equipped with Keyless
Enter-N-Go in the MAR/RUN mode. A child could operate power windows,
other controls, or move the vehicle.
• Never use the “PARK” position as a substitute for the parking brake. Always
apply the parking brake fully when parked to guard against vehicle movement
and possible injury or damage.
• Refer to your Owner's Manual on the DVD for further details.
INTRODUCTION/WELCOME
3
Page 6 of 220
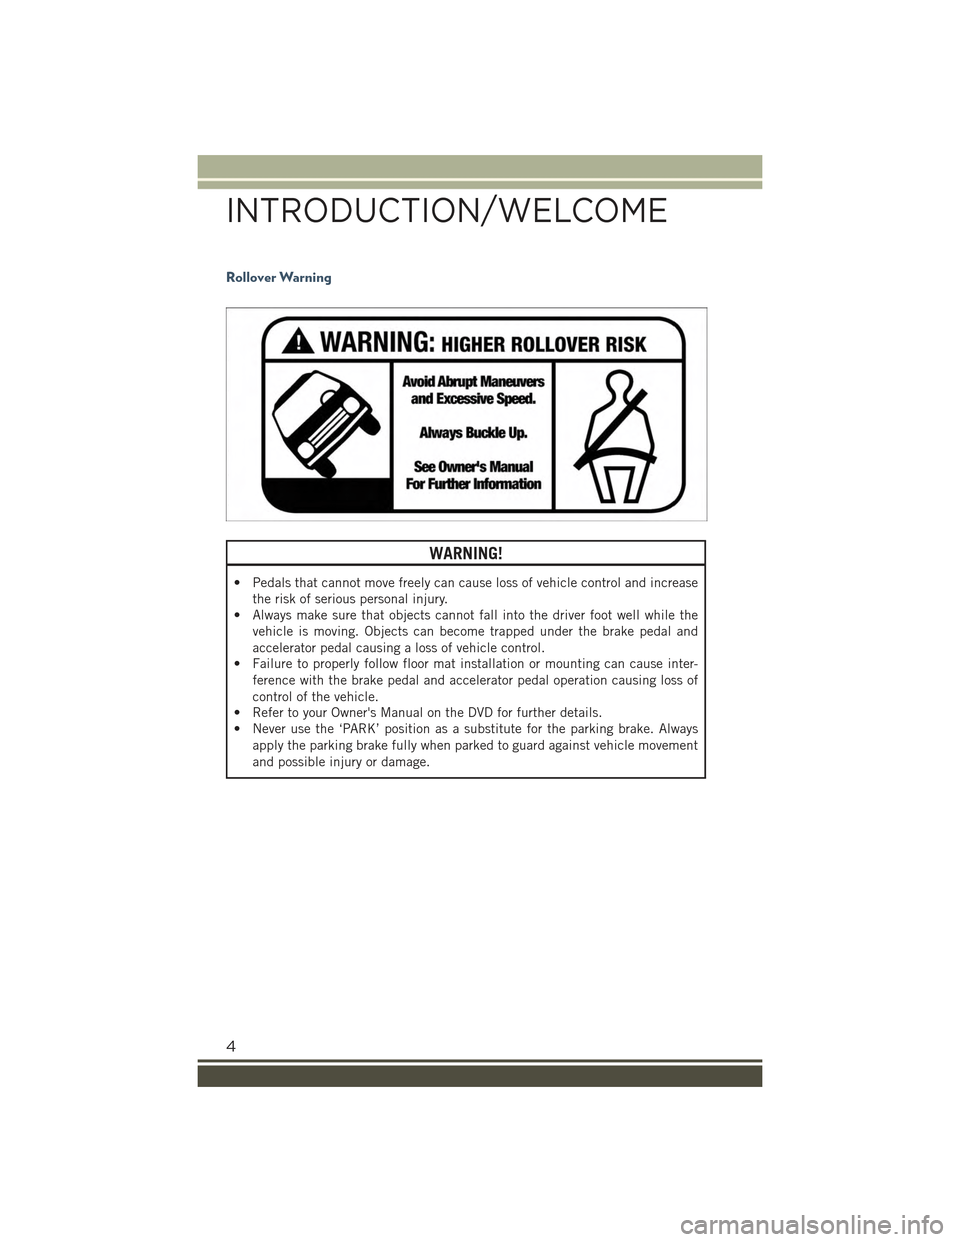
Rollover Warning
WARNING!
• Pedals that cannot move freely can cause loss of vehicle control and increase
the risk of serious personal injury.
• Always make sure that objects cannot fall into the driver foot well while the
vehicle is moving. Objects can become trapped under the brake pedal and
accelerator pedal causing a loss of vehicle control.
• Failure to properly follow floor mat installation or mounting can cause inter-
ference with the brake pedal and accelerator pedal operation causing loss of
control of the vehicle.
• Refer to your Owner's Manual on the DVD for further details.
• Never use the ‘PARK’ position as a substitute for the parking brake. Always
apply the parking brake fully when parked to guard against vehicle movement
and possible injury or damage.
INTRODUCTION/WELCOME
4
Page 14 of 220
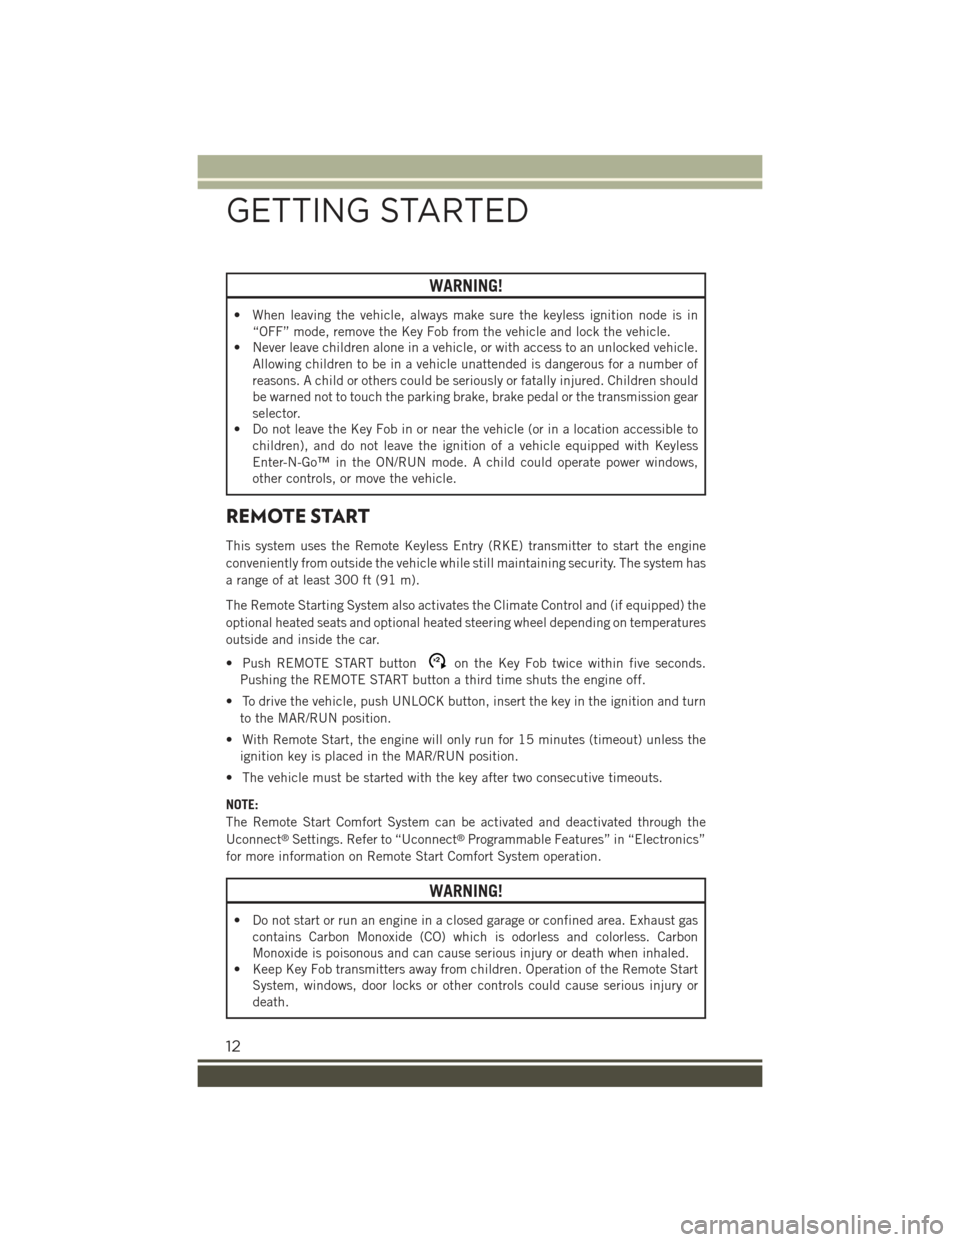
WARNING!
• When leaving the vehicle, always make sure the keyless ignition node is in
“OFF” mode, remove the Key Fob from the vehicle and lock the vehicle.
• Never leave children alone in a vehicle, or with access to an unlocked vehicle.
Allowing children to be in a vehicle unattended is dangerous for a number of
reasons. A child or others could be seriously or fatally injured. Children should
be warned not to touch the parking brake, brake pedal or the transmission gear
selector.
• Do not leave the Key Fob in or near the vehicle (or in a location accessible to
children), and do not leave the ignition of a vehicle equipped with Keyless
Enter-N-Go™ in the ON/RUN mode. A child could operate power windows,
other controls, or move the vehicle.
REMOTE START
This system uses the Remote Keyless Entry (RKE) transmitter to start the engine
conveniently from outside the vehicle while still maintaining security. The system has
a range of at least 300 ft (91 m).
The Remote Starting System also activates the Climate Control and (if equipped) the
optional heated seats and optional heated steering wheel depending on temperatures
outside and inside the car.
• Push REMOTE START buttonx2on the Key Fob twice within five seconds.
Pushing the REMOTE START button a third time shuts the engine off.
• To drive the vehicle, push UNLOCK button, insert the key in the ignition and turn
to the MAR/RUN position.
• With Remote Start, the engine will only run for 15 minutes (timeout) unless the
ignition key is placed in the MAR/RUN position.
• The vehicle must be started with the key after two consecutive timeouts.
NOTE:
The Remote Start Comfort System can be activated and deactivated through the
Uconnect®Settings. Refer to “Uconnect®Programmable Features” in “Electronics”
for more information on Remote Start Comfort System operation.
WARNING!
• Do not start or run an engine in a closed garage or confined area. Exhaust gas
contains Carbon Monoxide (CO) which is odorless and colorless. Carbon
Monoxide is poisonous and can cause serious injury or death when inhaled.
• Keep Key Fob transmitters away from children. Operation of the Remote Start
System, windows, door locks or other controls could cause serious injury or
death.
GETTING STARTED
12
Page 18 of 220
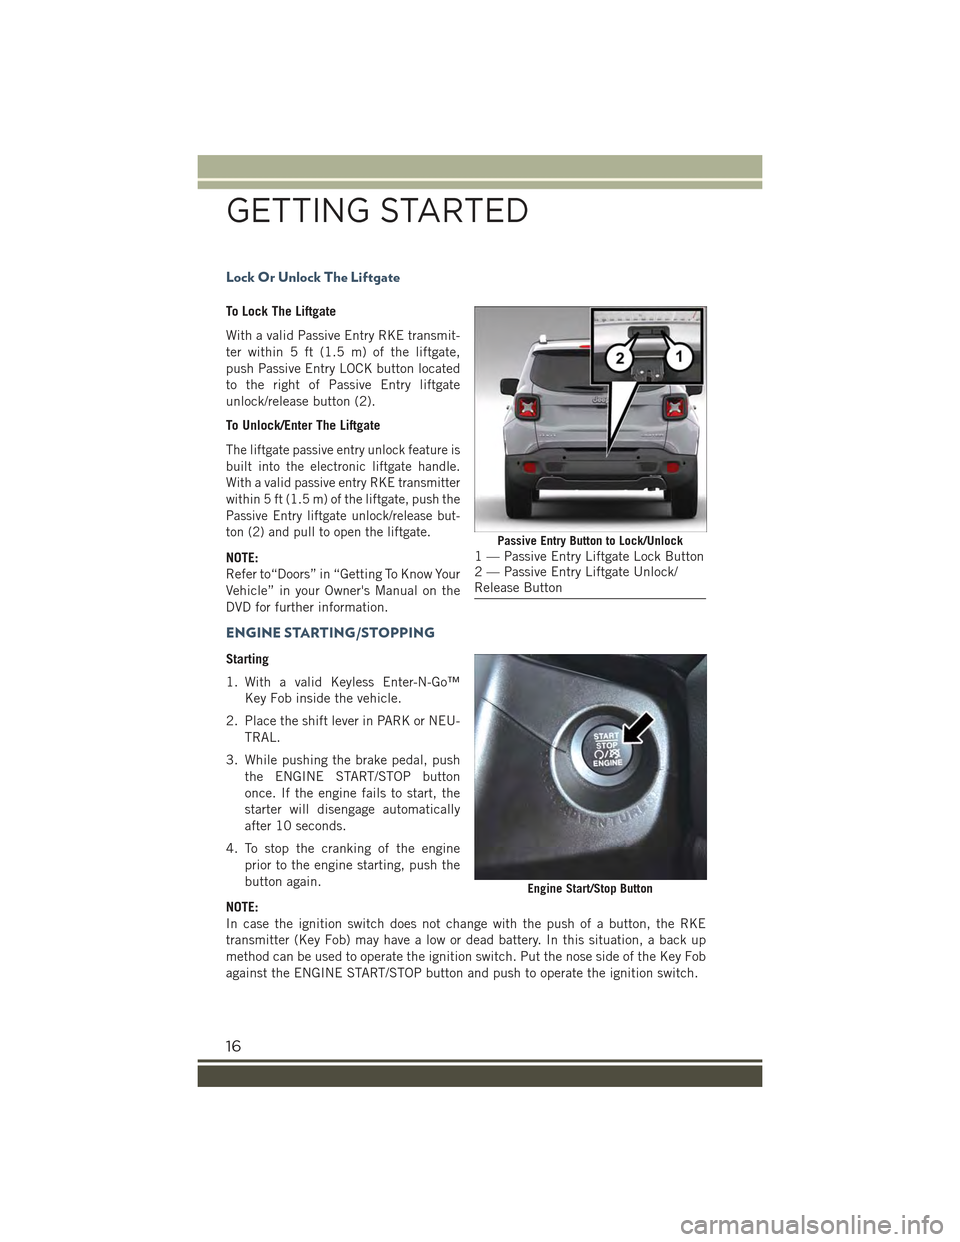
Lock Or Unlock The Liftgate
To Lock The Liftgate
With a valid Passive Entry RKE transmit-
ter within 5 ft (1.5 m) of the liftgate,
push Passive Entry LOCK button located
to the right of Passive Entry liftgate
unlock/release button (2).
To Unlock/Enter The Liftgate
The liftgate passive entry unlock feature is
built into the electronic liftgate handle.
With a valid passive entry RKE transmitter
within 5 ft (1.5 m) of the liftgate, push the
Passive Entry liftgate unlock/release but-
ton (2) and pull to open the liftgate.
NOTE:
Refer to“Doors” in “Getting To Know Your
Vehicle” in your Owner's Manual on the
DVD for further information.
ENGINE STARTING/STOPPING
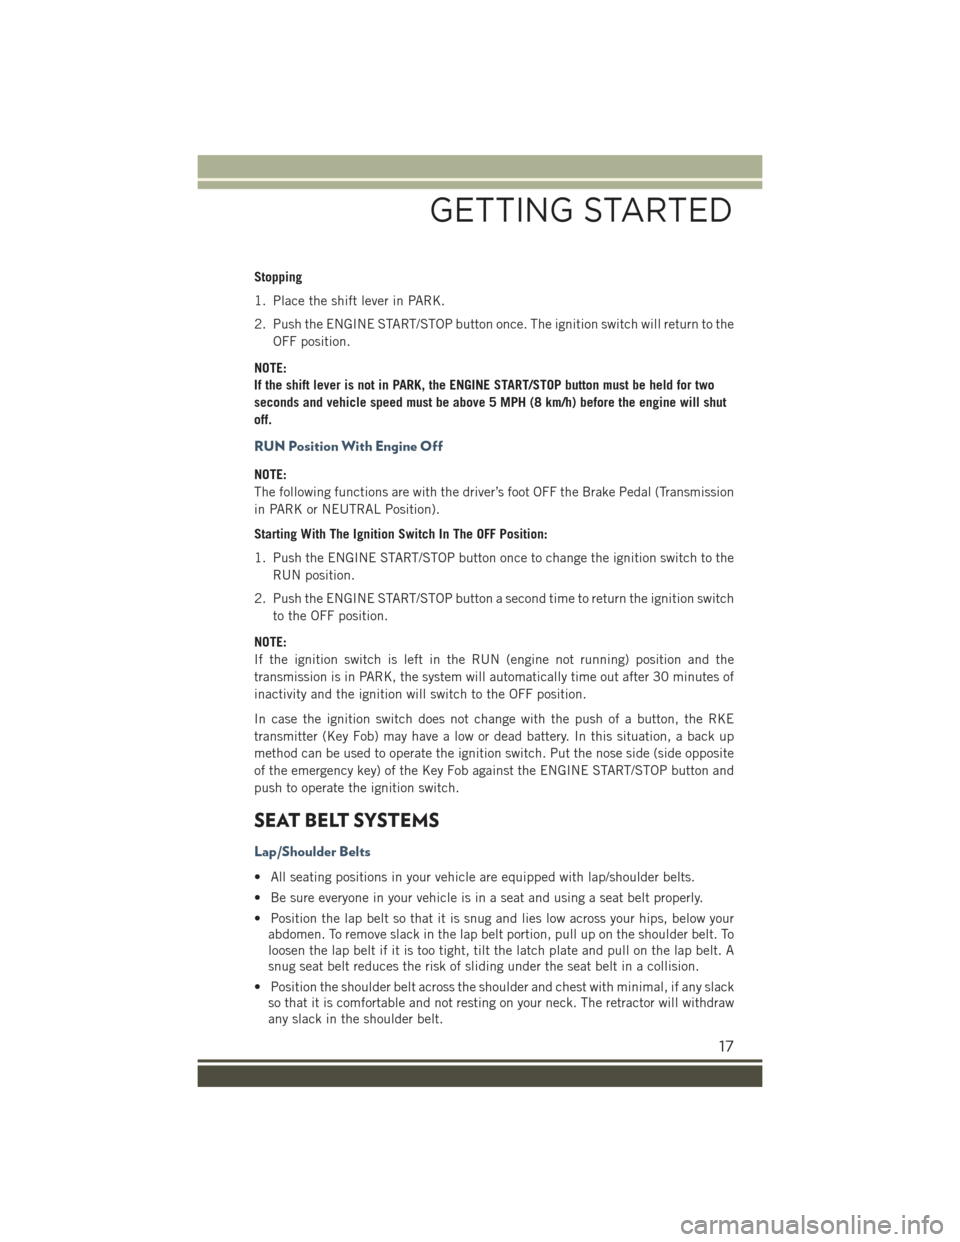
Starting
1. With a valid Keyless Enter-N-Go™
Key Fob inside the vehicle.
2. Place the shift lever in PARK or NEU-
TRAL.
3. While pushing the brake pedal, push
the ENGINE START/STOP button
once. If the engine fails to start, the
starter will disengage automatically
after 10 seconds.
4. To stop the cranking of the engine
prior to the engine starting, push the
button again.
NOTE:
In case the ignition switch does not change with the push of a button, the RKE
transmitter (Key Fob) may have a low or dead battery. In this situation, a back up
method can be used to operate the ignition switch. Put the nose side of the Key Fob
against the ENGINE START/STOP button and push to operate the ignition switch.
Passive Entry Button to Lock/Unlock1 — Passive Entry Liftgate Lock Button2 — Passive Entry Liftgate Unlock/Release Button
Engine Start/Stop Button
GETTING STARTED
16
Page 19 of 220
Stopping
1. Place the shift lever in PARK.
2. Push the ENGINE START/STOP button once. The ignition switch will return to the
OFF position.
NOTE:
If the shift lever is not in PARK, the ENGINE START/STOP button must be held for two
seconds and vehicle speed must be above 5 MPH (8 km/h) before the engine will shut
off.
RUN Position With Engine Off
NOTE:
The following functions are with the driver’s foot OFF the Brake Pedal (Transmission
in PARK or NEUTRAL Position).
Starting With The Ignition Switch In The OFF Position:
1. Push the ENGINE START/STOP button once to change the ignition switch to the
RUN position.
2. Push the ENGINE START/STOP button a second time to return the ignition switch
to the OFF position.
NOTE:
If the ignition switch is left in the RUN (engine not running) position and the
transmission is in PARK, the system will automatically time out after 30 minutes of
inactivity and the ignition will switch to the OFF position.
In case the ignition switch does not change with the push of a button, the RKE
transmitter (Key Fob) may have a low or dead battery. In this situation, a back up
method can be used to operate the ignition switch. Put the nose side (side opposite
of the emergency key) of the Key Fob against the ENGINE START/STOP button and
push to operate the ignition switch.
SEAT BELT SYSTEMS
Lap/Shoulder Belts
• All seating positions in your vehicle are equipped with lap/shoulder belts.
• Be sure everyone in your vehicle is in a seat and using a seat belt properly.
• Position the lap belt so that it is snug and lies low across your hips, below your
abdomen. To remove slack in the lap belt portion, pull up on the shoulder belt. To
loosen the lap belt if it is too tight, tilt the latch plate and pull on the lap belt. A
snug seat belt reduces the risk of sliding under the seat belt in a collision.
• Position the shoulder belt across the shoulder and chest with minimal, if any slack
so that it is comfortable and not resting on your neck. The retractor will withdraw
any slack in the shoulder belt.
GETTING STARTED
17
Page 37 of 220
Automatic Lighting — If Equipped
Light Sensor
The light sensor is equipped with an infrared LED, located on the windshield. It
detects changes in light intensity outside the vehicle, based on the sensitivity of light
set by using the Menu on the display or on the Uconnect®system.
The higher the sensitivity, the lesser the amount of external light required for
controlling the lighting.
Automatic Headlights
Turn the headlight switch to the AUTO position.
When the automatic headlights are enabled, the headlight time delay is active. After
the ignition switch is placed in the STOP/OFF position, the headlights will automati-
cally turn off after approximately 90 seconds depending on the settings of the
feature.
The timing of the headlights is adjustable between 0, 30, 60 and 90 seconds.
NOTE:
The engine must be running before the headlights will come on in the automatic
mode.
Daytime Running Lights (DRL) — If Equipped
The Daytime Running Lights (DRLs) will turn on when the engine is started and
remain on unless the headlights are turned on, the electronic parking brake is
applied, or the engine is shut off.
The DRLs will be disabled during turn signal operation and resume operation when
the turn signal operation has ended.
Front Fog Lights — If Equipped
The front fog light switch is built into the headlight switch.
To activate the front fog lights, turn on the parking lights or the low beam headlights
and push the headlight switch. To turn off the front fog lights, push the headlight
switch a second time or turn off the headlight switch.
An indicator light in the instrument cluster illuminates when the fog lights are turned
on.
NOTE:
The fog lights will operate with the low beam headlights or parking lights on.
Selecting the high beam headlights will turn off the fog lights.
Parking Lights
Rotate the headlight switch to the first position to turn on the parking lights. The
parking light indicator in the cluster will illuminate.
OPERATING YOUR VEHICLE
35
Page 43 of 220
To Set A Desired Speed
Turn the Electronic Speed Control ON.
NOTE:
The vehicle should be traveling at a steady speed and on level ground before pushing
the SET (+) or SET (-) button.
When the vehicle has reached the desired speed, push the SET (+) or SET (-) button
and release. Release the accelerator and the vehicle will operate at the selected
speed.
To Deactivate
A soft tap on the brake pedal, pushing the CANCEL button, or normal brake pressure
while slowing the vehicle will deactivate the Electronic Speed Control without erasing
the set speed from memory.
Pushing the ON/OFF button or turning the ignition switch OFF erases the set speed
from memory.
To Resume Speed
To resume a previously set speed, push the RES button and release. Resume can be
used at any speed above 20 mph (32 km/h).
To Vary The Speed Setting
To Increase Speed
When the Electronic Speed Control is set, you can increase speed by pushing the SET
+button.
The drivers preferred units can be selected through the Uconnect®system if
equipped. The speed increment shown is dependant on the chosen speed unit of
U.S. (mph) or Metric (km/h):
U.S. Speed (mph)
• Pushing the SET+button once will result in a 1 mph increase in set speed. Each
subsequent tap of the button results in an increase of 1 mph.
• If the button is continually pushed, the set speed will continue to increase until
the button is released, then the new set speed will be established.
Metric Speed (km/h)
• Pushing the SET+button once will result in a 1 km/h increase in set speed. Each
subsequent tap of the button results in an increase of 1 km/h.
• If the button is continually pushed, the set speed will continue to increase until
the button is released, then the new set speed will be established.
OPERATING YOUR VEHICLE
41
Page 47 of 220
Max Defrost
• Push the MAX Defrost button to change the current airflow setting to Defrost
mode. Performing this function will cause the ATC to change to manual mode, the
blower speed will increase to full, the A/C compressor is turned ON, the tempera-
ture controls are set to (HI), defrost mode is selected, rear defroster is turned ON,
and the air recirculation is turned OFF.
• If the MAX Defrost mode is turned OFF, the climate system will return to the
previous setting.
SYNC
• Push the SYNC button to synchronize the passenger temperature setting with the
driver temperature setting.
• Changing the passenger temperature setting while in Sync will automatically exit
this feature.
Mode Buttons
• The airflow distribution modes can be adjusted so air comes from the instrument
panel, floor, de-mist, and defrost outlets. One, two or all modes may be selected at
any one time.
Heated Mirrors
• The mirrors are heated to melt frost or ice. This feature is activated whenever you
turn on the rear window defroster.
ELECTRIC PARK BRAKE (EPB)
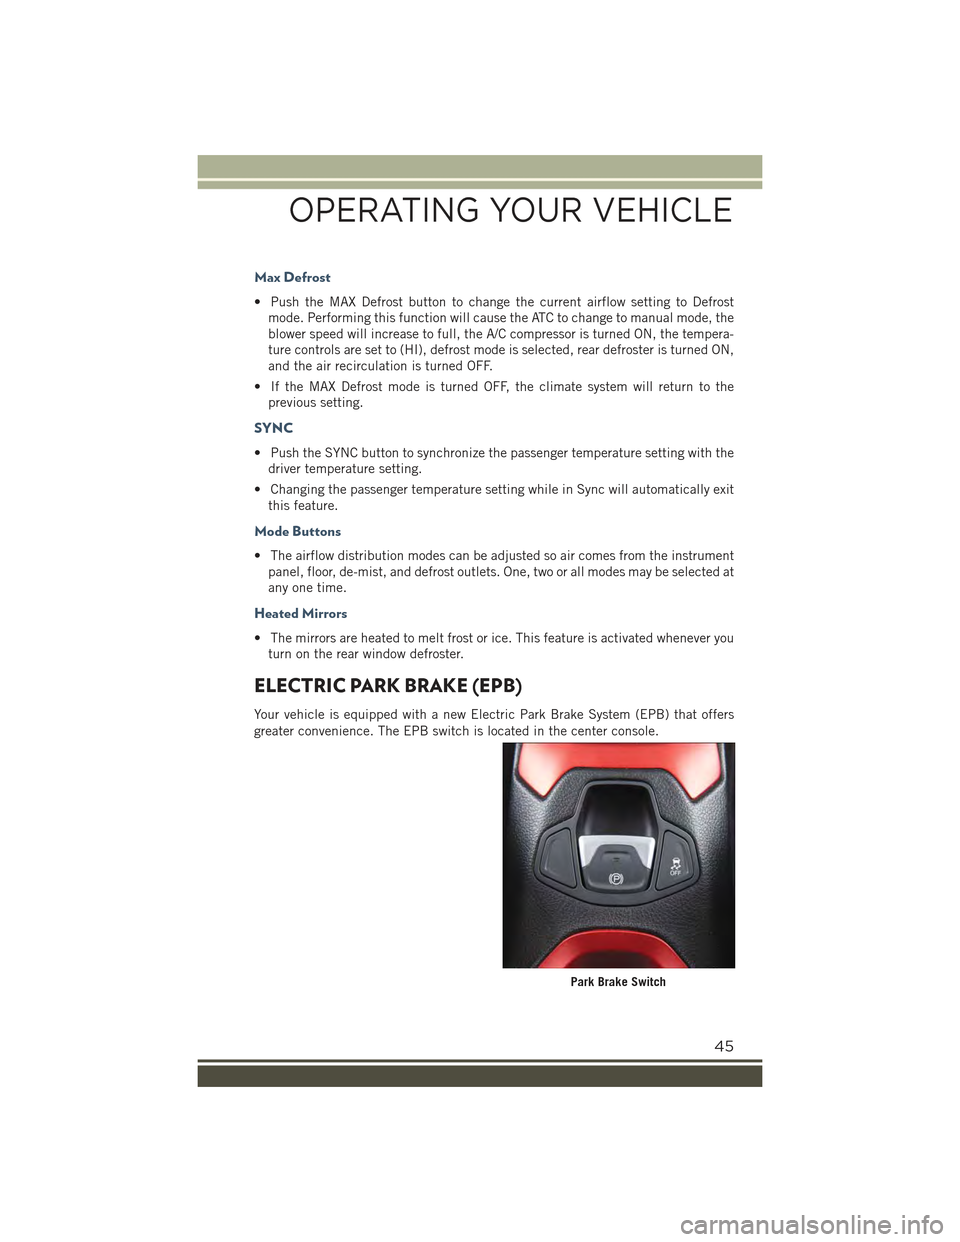
Your vehicle is equipped with a new Electric Park Brake System (EPB) that offers
greater convenience. The EPB switch is located in the center console.
Park Brake Switch
OPERATING YOUR VEHICLE
45
Page 48 of 220
To apply the park brake manually, pull up on the switch momentarily. The BRAKE
warning lamp in the instrument cluster and an indicator on the switch will illuminate.
To release the park brake manually, the ignition switch must be in RUN. Then put
your foot on the brake pedal and push the park brake switch down momentarily. Once
the park brake is fully disengaged, the BRAKE warning lamp and the switch indicator
will extinguish.
The park brake can also be automatically released. With the engine running and the
transmission in gear, release the brake pedal and depress the throttle pedal. For
safety reasons, your seat belt must also be fastened.
NOTE:
• You may hear a slight whirring sound from the back of the vehicle while the parking
brake engages or disengages.
• If your foot is on the brake pedal while you are engaging or disengaging the parking
brake, you may notice a small amount of brake pedal movement.
• The new Auto Park Brake feature can be used to apply the park brake automati-
cally every time you park the vehicle. Auto Park Brake can be enabled and disabled
in the Settings menu in Uconnect®or in “Safe Hold” conditions.
• The parking brake can be engaged even when the ignition switch is OFF, however,
it can only be disengaged when the ignition switch is in the ON/RUN position.
• Safehold is a new feature that will automatically apply the park brake under
certain conditions. The EPB monitors the status of the driver’s seat belt, driver’s
door and pedal positions to determine if the driver may have exited while the
vehicle is still capable of moving and will then automatically apply the park brake
to prevent the vehicle from rolling.
• The EPB fault lamp will illuminate if the EPB switch is held for longer than 20
seconds in either the released or applied position. The light will extinguish upon
releasing the switch.
• Refer to the Starting and Operating section of your vehicle’s Owner’s Manual on
the DVD for further details.
CAUTION!
If the Brake System Warning Light remains on with the parking brake released, a
brake system malfunction is indicated. Have the brake system serviced by an
authorized dealer immediately.
OPERATING YOUR VEHICLE
46