change wheel JEEP RENEGADE 2015 1.G User Guide
[x] Cancel search | Manufacturer: JEEP, Model Year: 2015, Model line: RENEGADE, Model: JEEP RENEGADE 2015 1.GPages: 220, PDF Size: 34.11 MB
Page 57 of 220
Small Vehicles And/Or Not Aligned To The Lane
The system is not able to detect the presence of vehicles that are in front of the car
but placed outside the field of action of the radar sensor and could therefore not react
in the presence of small vehicles such as bicycles or motorcycles.
Lane Changing Of Other Vehicles
Vehicles that suddenly change lane, while standing in the traffic lane of their car and
inside the field of action of the radar sensor may cause the intervention of the system.
Passing Of Vehicles In An Oncoming Intersection
The system could temporarily react to a vehicle that crossed the range of the radar
sensor, in an oncoming intersection.
LANESENSE
LaneSense Operation
The LaneSense system is operational at speeds above 37 mph (60 km/h) and below
112 mph (180 km/h). The LaneSense system uses a forward looking camera to
detect lane markings and measure vehicle position within the lane boundaries.
When both lane markings are detected and the driver unintentionally drifts out of the
lane (no turn signal applied), the LaneSense system provides a haptic warning in the
form of torque applied to the steering wheel to prompt the driver to remain within the
lane boundaries. If the driver continues to unintentionally drift out of the lane, the
LaneSense system provides a visual warning through the Electronic Vehicle Informa-
tion Center (EVIC) or Driver Information Display (DID) to prompt the driver to remain
within the lane boundaries.
The driver may manually override the haptic warning by applying torque into the
steering wheel at any time.
When only a single lane marking is detected and the driver unintentionally drifts
across the lane marking (no turn signal applied), the LaneSense system provides a
visual warning through the EVIC/DID to prompt the driver to remain within the lane.
When only a single lane marking is detected, a haptic (torque) warning will not be
provided.
NOTE:
When operating conditions have been met, the LaneSense system will monitor if the
driver’s hands are on the steering wheel and provides an audible warning to the driver
when the driver’s hands are not detected on the steering wheel. The system will
cancel if the driver does not return their hands to the wheel.
OPERATING YOUR VEHICLE
55
Page 58 of 220
Turning LaneSense ON Or OFF
The default status of LaneSense is “OFF”.
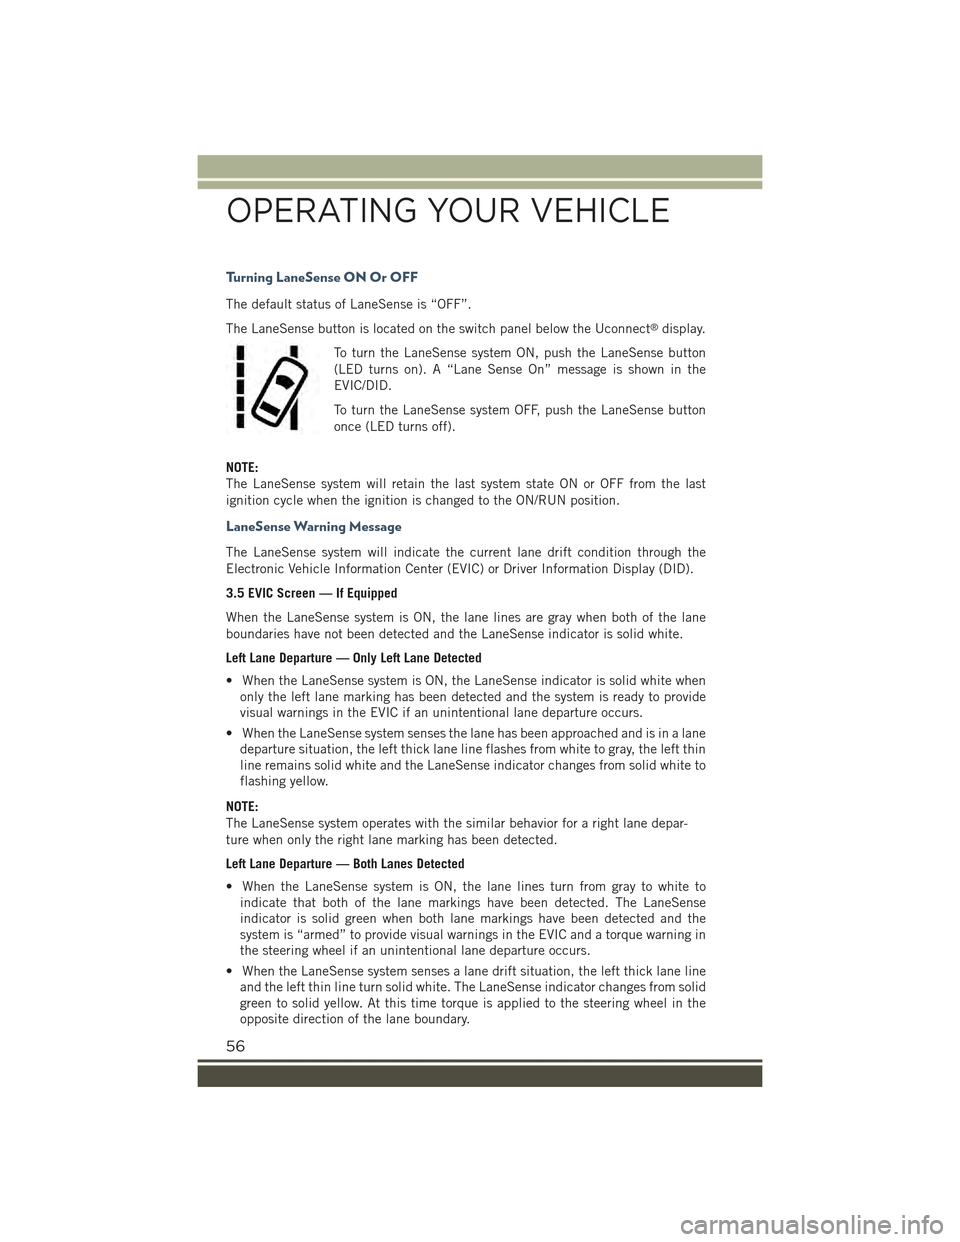
The LaneSense button is located on the switch panel below the Uconnect®display.
To turn the LaneSense system ON, push the LaneSense button
(LED turns on). A “Lane Sense On” message is shown in the
EVIC/DID.
To turn the LaneSense system OFF, push the LaneSense button
once (LED turns off).
NOTE:
The LaneSense system will retain the last system state ON or OFF from the last
ignition cycle when the ignition is changed to the ON/RUN position.
LaneSense Warning Message
The LaneSense system will indicate the current lane drift condition through the
Electronic Vehicle Information Center (EVIC) or Driver Information Display (DID).
3.5 EVIC Screen — If Equipped
When the LaneSense system is ON, the lane lines are gray when both of the lane
boundaries have not been detected and the LaneSense indicator is solid white.
Left Lane Departure — Only Left Lane Detected
• When the LaneSense system is ON, the LaneSense indicator is solid white when
only the left lane marking has been detected and the system is ready to provide
visual warnings in the EVIC if an unintentional lane departure occurs.
• When the LaneSense system senses the lane has been approached and is in a lane
departure situation, the left thick lane line flashes from white to gray, the left thin
line remains solid white and the LaneSense indicator changes from solid white to
flashing yellow.
NOTE:
The LaneSense system operates with the similar behavior for a right lane depar-
ture when only the right lane marking has been detected.
Left Lane Departure — Both Lanes Detected
• When the LaneSense system is ON, the lane lines turn from gray to white to
indicate that both of the lane markings have been detected. The LaneSense
indicator is solid green when both lane markings have been detected and the
system is “armed” to provide visual warnings in the EVIC and a torque warning in
the steering wheel if an unintentional lane departure occurs.
• When the LaneSense system senses a lane drift situation, the left thick lane line
and the left thin line turn solid white. The LaneSense indicator changes from solid
green to solid yellow. At this time torque is applied to the steering wheel in the
opposite direction of the lane boundary.
OPERATING YOUR VEHICLE
56
Page 59 of 220
For example: If approaching the left side of the lane, the steering wheel will turn to
the right.
• When the LaneSense system senses the lane has been approached and is in a lane
departure situation, the left thick lane line flashes from white to gray, the left thin
line remains solid white and the LaneSense indicator changes from solid yellow to
flashing yellow. At this time, torque is applied to the steering wheel in the opposite
direction of the lane boundary.
For example: If approaching the left side of the lane, the steering wheel will turn to
the right.
NOTE:
The LaneSense system operates with the similar behavior for a right lane departure.
7.0 DID Screen — If Equipped
When the LaneSense system is ON, the lane lines are gray when both of the lane
boundaries have not been detected and the LaneSense indicator is solid white.
Left Lane Departure — Only Left Lane Detected
• When the LaneSense system is ON, the LaneSense indicator is solid white when
only the left lane marking has been detected and the system is ready to provide
visual warnings in the DID if an unintentional lane departure occurs.
• When the LaneSense system senses the lane has been approached and is in a lane
departure situation, the left thick lane line flashes yellow (on/off), the left thin line
remains solid yellow and the LaneSense indicator changes from solid white to
flashing yellow.
NOTE:
The LaneSense system operates with the similar behavior for a right lane depar-
ture when only the right lane marking has been detected.
Left Lane Departure — Both Lanes Detected
• When the LaneSense system is ON, the lane lines turn from gray to white to
indicate that both of the lane markings have been detected. The LaneSense
indicator is solid green when both lane markings have been detected and the
system is “armed” to provide visual warnings in the DID and a torque warning in
the steering wheel if an unintentional lane departure occurs.
• When the LaneSense system senses a lane drift situation, the left thick lane line
and left thin line turn solid yellow. The LaneSense indicator changes from solid
green to solid yellow. At this time torque is applied to the steering wheel in the
opposite direction of the lane boundary.
For example: If approaching the left side of the lane the steering wheel will turn to the
right.
OPERATING YOUR VEHICLE
57
Page 60 of 220
• When the LaneSense system senses the lane has been approached and is in a lane
departure situation, the left thick lane line flashes yellow (on/off) and the left thin
line remains solid yellow. The LaneSense indicator changes from solid yellow to
flashing yellow. At this time torque is applied to the steering wheel in the opposite
direction of the lane boundary.
For example: If approaching the left side of the lane the steering wheel will turn to the
right.
NOTE:
The LaneSense system operates with the similar behavior for a right lane departure.
Changing LaneSense Status
The LaneSense system has settings to adjust the intensity of the torque warning and
the warning zone sensitivity (early/late) that you can configure through the
Uconnect®system screen.
NOTE:
• When enabled the system operates above 37 mph (60 km/h) and below 112 mph
(180 km/h).
• Use of the turn signal suppresses the warnings.
• The system will not apply torque to the steering wheel whenever a safety system
engages. (anti-lock brakes, traction control system, electronic stability control,
forward collision warning, etc.).
PARKSENSE® REAR PARK ASSIST
The ParkSense®Rear Park Assist system provides visual and audible indications of
the distance between the rear fascia and a detected obstacle when backing up, e.g.
during a parking maneuver.
ParkSense®will retain the last system state (enabled or disabled) from the last
ignition cycle when the ignition is changed to the MAR/RUN position.
ParkSense®can be active only when the shift lever/gear selector is in REVERSE. If
ParkSense®is enabled at this shift lever position, the system will remain active until
the vehicle speed is increased to approximately 7 mph (11 km/h) or above. When in
REVERSE and above the system's operating speed, a warning will appear within the
Electronic Vehicle Information Center (EVIC) or Driver Information Display (DID).
OPERATING YOUR VEHICLE
58
Page 113 of 220
• SiriusXM services require subscriptions, sold separately after the 12-month trial
included with the new vehicle purchase.If you decide to continue your service at the
end of your trial subscription, the plan you choose will automatically renew and bill at
then-current rates until you call SiriusXM at 1-866-635-2349 for U.S. residents and
1-888-539-7474 for Canadian residents to cancel. See SiriusXM Customer Agreement
for complete terms at www.siriusxm.com for U.S. residents and www.siriusxm.ca for
Canadian residents.All fees and programming subject to change. Our satellite
service is available only to those at least 18 and older in the 48 contiguous USA
and D.C. Our Sirius satellite service is also available in PR (with coverage
limitations). Our Internet radio service is available throughout our satellite service
area and in AK and HI. © 2014 Sirius XM Radio Inc. Sirius, XM and all related
marks and logos are trademarks of Sirius XM Radio Inc.
MEDIA HUB – PLAYING iPod®/USB/MP3 DEVICES
There are many ways to play music from iPod®/MP3 players or USB devices through
your vehicle's sound system.
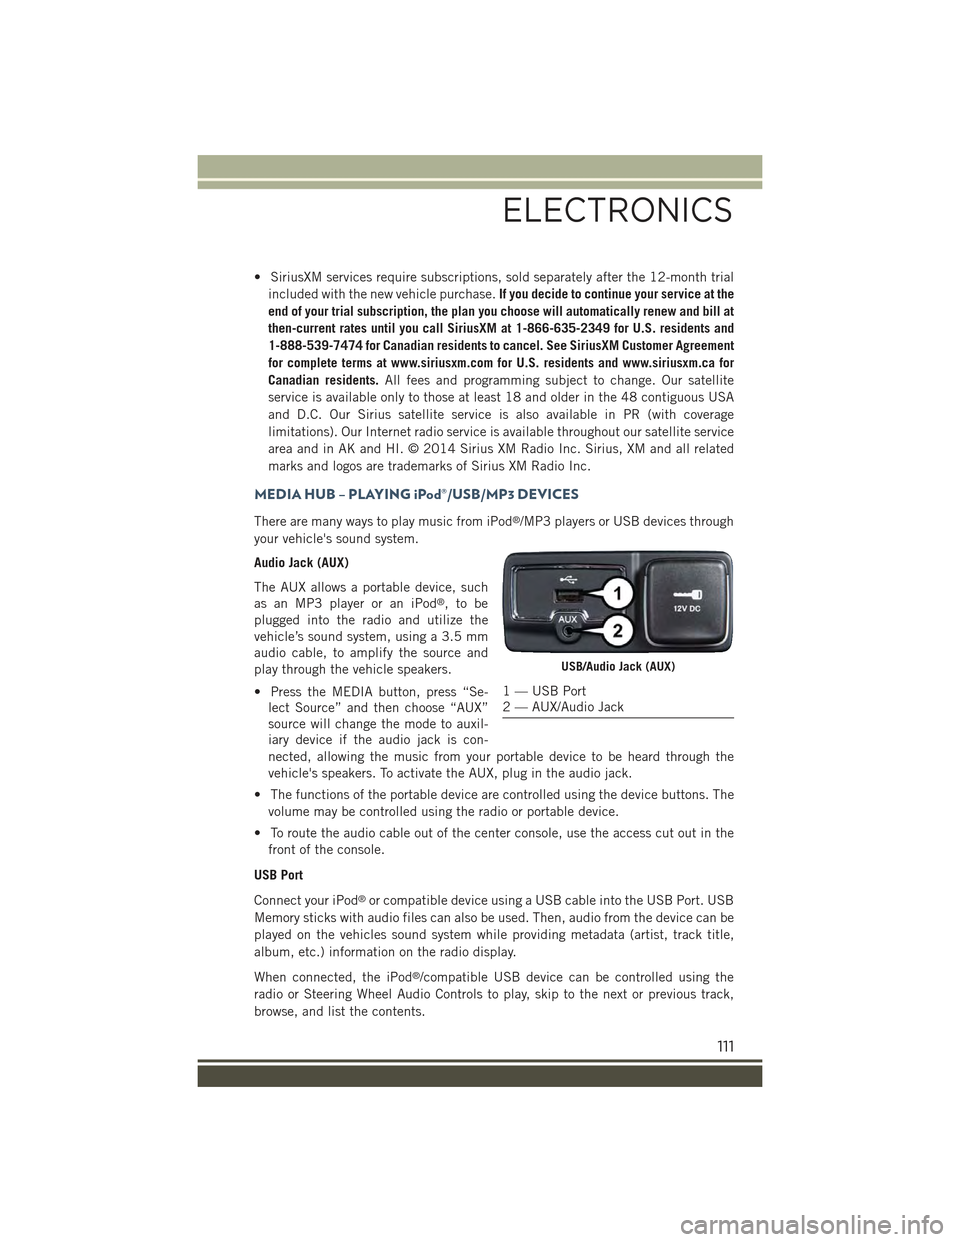
Audio Jack (AUX)
The AUX allows a portable device, such
as an MP3 player or an iPod®,tobe
plugged into the radio and utilize the
vehicle’s sound system, using a 3.5 mm
audio cable, to amplify the source and
play through the vehicle speakers.
• Press the MEDIA button, press “Se-
lect Source” and then choose “AUX”
source will change the mode to auxil-
iary device if the audio jack is con-
nected, allowing the music from your portable device to be heard through the
vehicle's speakers. To activate the AUX, plug in the audio jack.
• The functions of the portable device are controlled using the device buttons. The
volume may be controlled using the radio or portable device.
• To route the audio cable out of the center console, use the access cut out in the
front of the console.
USB Port
Connect your iPod®or compatible device using a USB cable into the USB Port. USB
Memory sticks with audio files can also be used. Then, audio from the device can be
played on the vehicles sound system while providing metadata (artist, track title,
album, etc.) information on the radio display.
When connected, the iPod®/compatible USB device can be controlled using the
radio or Steering Wheel Audio Controls to play, skip to the next or previous track,
browse, and list the contents.
USB/Audio Jack (AUX)
1 — USB Port2 — AUX/Audio Jack
ELECTRONICS
111
Page 140 of 220
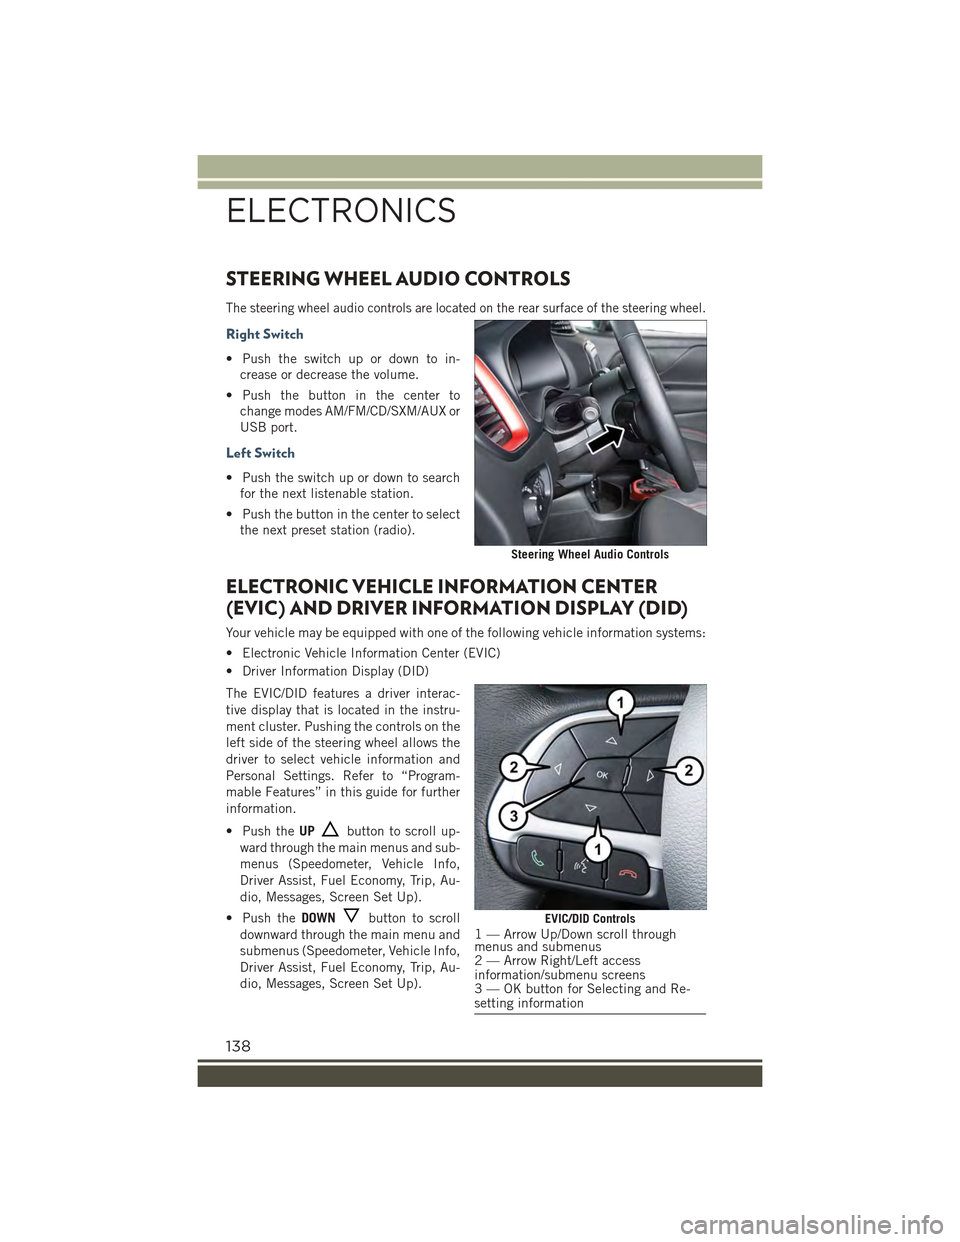
STEERING WHEEL AUDIO CONTROLS
The steering wheel audio controls are located on the rear surface of the steering wheel.
Right Switch
• Push the switch up or down to in-
crease or decrease the volume.
• Push the button in the center to
change modes AM/FM/CD/SXM/AUX or
USB port.
Left Switch
• Push the switch up or down to search
for the next listenable station.
• Push the button in the center to select
the next preset station (radio).
ELECTRONIC VEHICLE INFORMATION CENTER
(EVIC) AND DRIVER INFORMATION DISPLAY (DID)
Your vehicle may be equipped with one of the following vehicle information systems:
• Electronic Vehicle Information Center (EVIC)
• Driver Information Display (DID)
The EVIC/DID features a driver interac-
tive display that is located in the instru-
ment cluster. Pushing the controls on the
left side of the steering wheel allows the
driver to select vehicle information and
Personal Settings. Refer to “Program-
mable Features” in this guide for further
information.
• Push theUPbutton to scroll up-
ward through the main menus and sub-
menus (Speedometer, Vehicle Info,
Driver Assist, Fuel Economy, Trip, Au-
dio, Messages, Screen Set Up).
• Push theDOWNbutton to scroll
downward through the main menu and
submenus (Speedometer, Vehicle Info,
Driver Assist, Fuel Economy, Trip, Au-
dio, Messages, Screen Set Up).
Steering Wheel Audio Controls
EVIC/DID Controls1 — Arrow Up/Down scroll throughmenus and submenus2 — Arrow Right/Left accessinformation/submenu screens3 — OK button for Selecting and Re-setting information
ELECTRONICS
138
Page 142 of 220
Vehicle Info (Information About The Status Of The Car)
Push and release the UP or DOWN arrow button until "Vehicle Info" is highlighted in
the EVIC/DID. Push and release the RIGHT arrow button and Coolant Temp will be
displayed. Push the RIGHT or LEFT arrow button to scroll through the following
information displays:
Tire Pressure
• View the information relating to the TPMS system (if equipped).
Engine Coolant Temperature
• View the engine coolant temperature.
Tr a n s m i s s i o n Te m p e r a t u r e
• Display the temperature of the automatic transmission (if equipped).
Engine Oil Temperature
• View the engine oil temperature.
Battery Voltage
• View the voltage value (state of charge) of the battery.
Driver Assist
This menu item allows you to change the settings ("Notice LaneSense" and "Intensity
LaneSense") relating to the LaneSense system (if equipped).
Notice LaneSense
• By selecting this function, you can select the "readiness" of LaneSense, choosing
between the options "Near," "Medium," or "Far."
Intensity LaneSense
• Using this function, you can select the force applied to the steering wheel to keep
the car in the roadway through the electrical drive system due to LaneSense.
Fuel Consumption
This menu item allows you to set the unit of measurement for the "Fuel Consumption
and Range."
Average Consumption/Instantaneous Consumption
• By selecting these options, you can choose the unit of measurement of the average
consumption and the instantaneous, choosing between "MPG" or "l/100 km" or
"km/l."
Range
• By selecting this option, you can choose the unit of measurement for Range,
choosing between “miles” or "km."
Trip
This menu item allows you to view information about the "Trip Computer."
The information displayed, for Trip A and for Trip B, are:
Distance
• (Miles or Km)
ELECTRONICS
140
Page 152 of 220
FOUR WHEEL DRIVE — JEEP ACTIVE DRIVE (4WD)
AND JEEP ACTIVE DRIVE LOW (4WD LOW)
Your vehicle may be equipped with a Power Transfer Unit (PTU). This system is
automatic with no driver inputs or additional driving skills required. Under normal
driving conditions, the front wheels provide most of the traction. If the front wheels
begin to lose traction, power is shifted automatically to the rear wheels. The greater
the front wheel traction loss, the greater the power transfer to the rear wheels.
Additionally, on dry pavement under heavy throttle input (where one may have no
wheel spin), torque will be sent to the rear in a preemptive effort to improve vehicle
launch and performance characteristics.
CAUTION!
All wheels must have the same size and type tires. Unequal tire sizes must not beused. Unequal tire size may cause failure of the power transfer unit.
Four Wheel Drive (4X4)
The four wheel drive (4WD) is fully automatic in normal driving mode.
NOTE:
It is not possible to carry out the change of mode when the car exceeds the speed of
75 mph (120 km/h).
Enabling Four Wheel Drive (4x4)
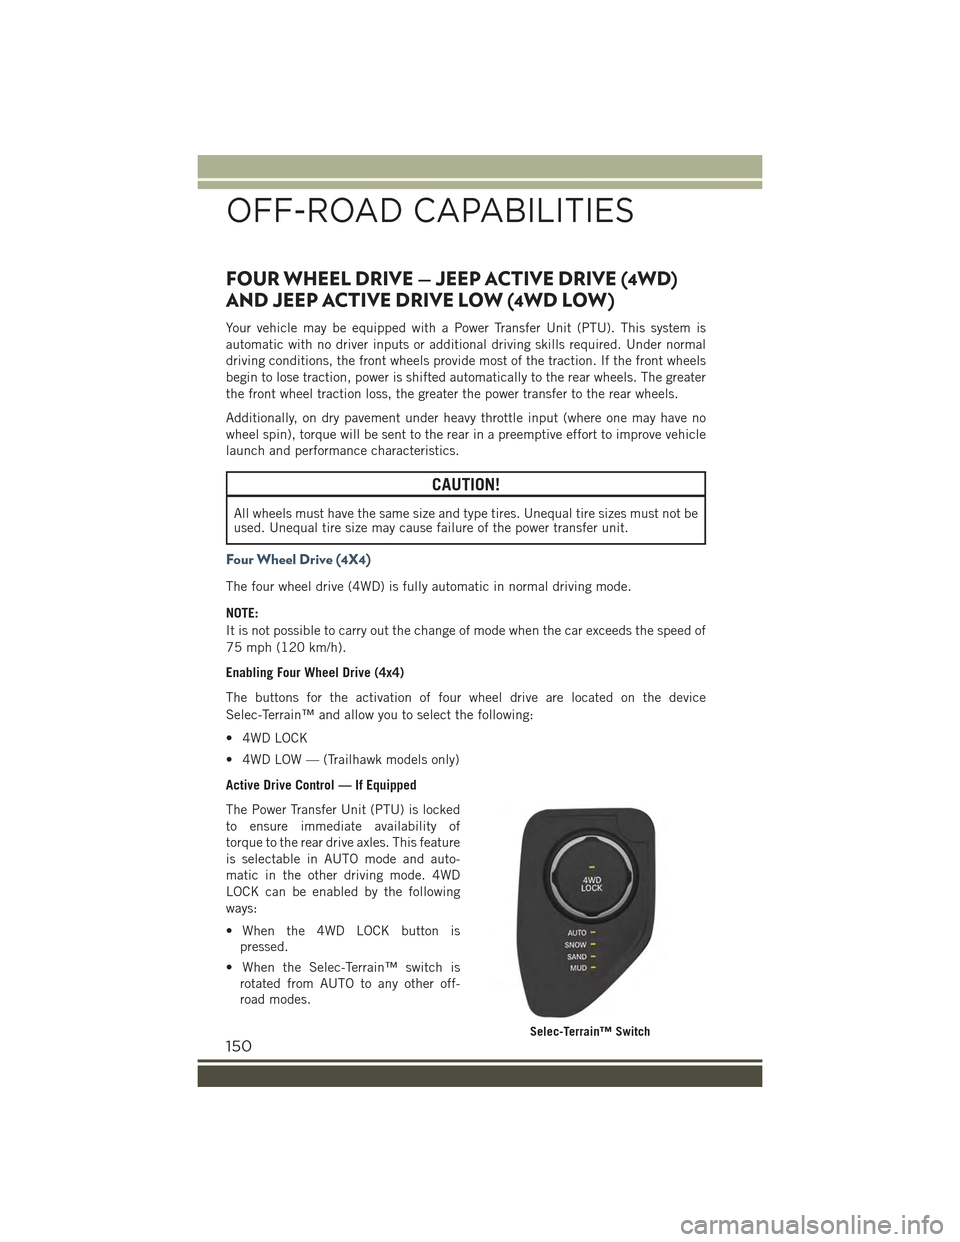
The buttons for the activation of four wheel drive are located on the device
Selec-Terrain™ and allow you to select the following:
• 4WD LOCK
• 4WD LOW — (Trailhawk models only)
Active Drive Control — If Equipped
The Power Transfer Unit (PTU) is locked
to ensure immediate availability of
torque to the rear drive axles. This feature
is selectable in AUTO mode and auto-
matic in the other driving mode. 4WD
LOCK can be enabled by the following
ways:
• When the 4WD LOCK button is
pressed.
• When the Selec-Terrain™ switch is
rotated from AUTO to any other off-
road modes.
Selec-Terrain™ Switch
OFF-ROAD CAPABILITIES
150
Page 160 of 220
IF THE LIGHT STARTS FLASHING INDICATING A LOW TIRE PRESSURE, ADJUST THE AIR
PRESSURE IN THE LOW TIRE TO THE AIR PRESSURE SHOWN ON THE VEHICLE PLACARD OR
TIRE INFLATION PRESSURE LABEL LOCATED ON THE DRIVER'S DOOR.
NOTE:
After inflation, the vehicle may need to be driven for 20 minutes before the flashing light
will turn off.
Please note that the TPMS is not a substitute for proper tire maintenance, and it is
the driver’s responsibility to maintain correct tire pressure, even if under-inflation has
not reached the level to trigger illumination of the TPMS low EVIC or DID display.
Your vehicle has also been equipped with a TPMS malfunction indicator to indicate
when the system is not operating properly. The TPMS malfunction indicator is
combined with the low tire pressure telltale. When the system detects a malfunction,
the telltale will flash for approximately one minute and then remain continuously
illuminated. This sequence will continue each time the vehicle is restarted as long as
the malfunction exists.
When the malfunction indicator is illuminated, the system may not be able to detect
or signal low tire pressure as intended. TPMS malfunctions may occur for a variety of
reasons, including the installation of replacement or alternate tires or wheels on the
vehicle that prevent the TPMS from functioning properly. Always check the TPMS
malfunction telltale after replacing one or more tires or wheels on your vehicle, to
ensure that the replacement or alternate tires and wheels allow the TPMS to continue
to function properly.
NOTE:
Tire pressures change by approximately 1 psi (7 kPa) per 12° F (7° C) of air
temperature change. Keep this in mind when checking tire pressure inside a garage,
especially in the Winter. Example: If garage temperature is 68°F (20°C) and the
outside temperature is 32°F (0°C), then the cold tire inflation pressure should be
increased by 3 psi (21 kPa), which equals 1 psi (7 kPa) for every 12°F (7°C) for this
outside temperature condition.
CAUTION!
The TPMS has been optimized for the original equipment tires and wheels. TPMS
pressures and warning have been established for the tire size equipped on your
vehicle. Undesirable system operation or sensor damage may result when using
replacement equipment that is not of the same size, type, and/or style. Aftermar-
ket wheels can cause sensor damage. Do not use tire sealant from a can, or
balance beads if your vehicle is equipped with a TPMS, as damage to the sensors
may result.
WHAT TO DO IN EMERGENCIES
158
Page 168 of 220
WARNING!
• Do not attempt to seal a tire on the side of the vehicle closest to traffic. Pull far
enough off the road to avoid the danger of being hit when using the Tire Service
Kit.
• Do not use Tire Service Kit or drive the vehicle under the following circum-
stances:
• If the puncture in the tire tread is approximately 1/4” (6 mm) or larger.
• If the tire has any sidewall damage.
• If the tire has any damage from driving with extremely low tire pressure.
• If the tire has any damage from driving on a flat tire.
• If the wheel has any damage.
• If you are unsure of the condition of the tire or the wheel.
• Keep Tire Service Kit away from open flames or heat source.
• A loose Tire Service Kit thrown forward in a collision or hard stop could
endanger the occupants of the vehicle. Always stow the Tire Service Kit in the
place provided. Failure to follow these warnings can result in injuries that are
serious or fatal to you, your passengers, and others around you.
• Take care not to allow the contents of Tire Service Kit to come in contact with
hair, eyes, or clothing. Tire Service Kit sealant is harmful if inhaled, swallowed,
or absorbed through the skin. It causes skin, eye, and respiratory irritation.
Flush immediately with plenty of water if there is any contact with eyes or skin.
Change clothing as soon as possible, if there is any contact with clothing.
• Tire Service Kit Sealant solution contains latex. In case of an allergic reaction
or rash, consult a physician immediately. Keep Tire Service Kit out of reach of
children. If swallowed, rinse mouth immediately with plenty of water and drink
plenty of water. Do not induce vomiting! Consult a physician immediately.
Insert the power plug into the vehicle power outlet socket. Start the vehicle engine.
Push the Tire Service Kit power button to the “I” position. The electric compressor
will be turned on, sealant and air will inflate the tire.
Minimum 26 psi (1.8 bar) of pressure should be reached within 20 minutes. If the
pressure has not been reached turn off and remove the Tire Service Kit, drive the
vehicle 30 feet (10 meters) back and forth, to better distribute the sealant inside the
tire.
Attach the clear flexible filling tube of the compressor directly to the tire valve and
repeat the inflation process.
When the correct pressure has been reached, start driving the vehicle to uniformly
distribute the sealant inside the tire. After 10 minutes, stop and check the tire
pressure. If the pressure is below 19 psi (1.3 bar), do not drive the vehicle, as the tire
is too damaged, contact the nearest Authorized Dealer.
WHAT TO DO IN EMERGENCIES
166