tow JEEP RENEGADE 2023 Workshop Manual
[x] Cancel search | Manufacturer: JEEP, Model Year: 2023, Model line: RENEGADE, Model: JEEP RENEGADE 2023Pages: 364, PDF Size: 18.65 MB
Page 275 of 364
IN CASE OF EMERGENCY 273
(Continued)
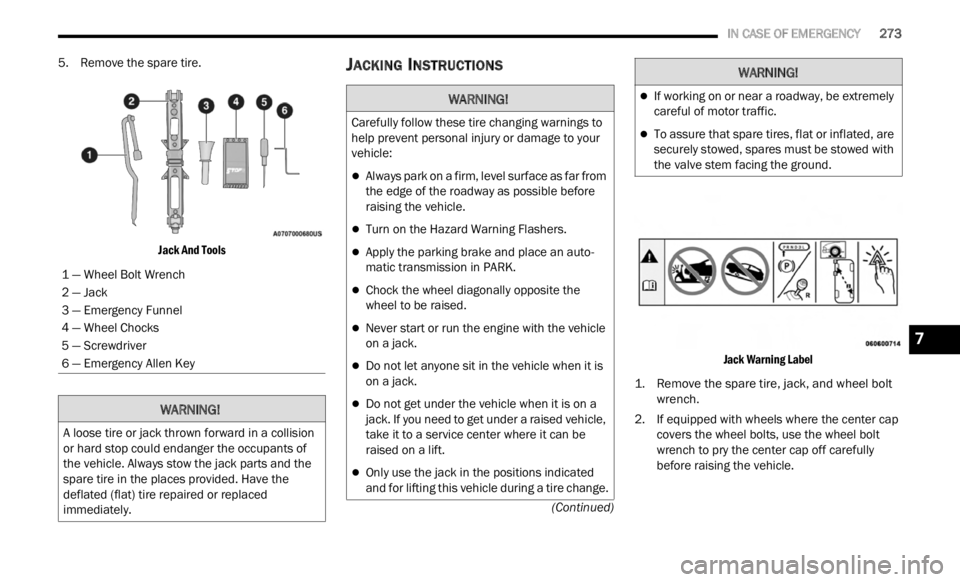
5. Remove the spare tire.
Jack And Tools
JACKING INSTRUCTIONS
Jack Warning Label
1. Remove the spare tire, jack, and wheel bolt wrench.
2
. If equipped with wheels where the center cap covers
the wheel bolts, use the wheel bolt
wrench to pry the center cap off carefully
before raising the vehicle.
1 — Wheel Bolt Wrench
2 — Jack
3 — Emergency Funnel
4 — Wheel Chocks
5 — Screwdriver
6 — Emergency Allen KeyWARNING!
A loose tire or jack thrown forward in a collision
or hard stop could endanger the occupants of
the vehicle. Always stow the jack parts and the
spare tire in the places provided. Have the
deflated (flat) tire repaired or replaced
immediately.
WARNING!
Carefully follow these tire changing warnings to
help prevent personal injury or damage to your
vehicle:
Always park on a firm, level surface as far from
the edge of the roadway as possible before
raising the vehicle.
Turn on the Hazard Warning Flashers.
Apply the parking brake and place an auto
-
matic transmission in PARK.
Chock the wheel diagonally opposite the
wheel to be raised.
Never start or run the engine with the vehicle
on a jack.
Do not let anyone sit in the vehicle when it is
on a jack.
Do not get under the vehicle when it is on a
jack. If you need to get under a raised vehicle,
take it to a service center where it can be
raised on a lift.
Only use the jack in the positions indicated
and for lifting this vehicle during a tire change.
If working on or near a roadway, be extremely
careful of motor traffic.
To assure that spare tires, flat or inflated, are
securely stowed, spares must be stowed with
the valve stem facing the ground.
WARNING!
7
Page 277 of 364
IN CASE OF EMERGENCY 275
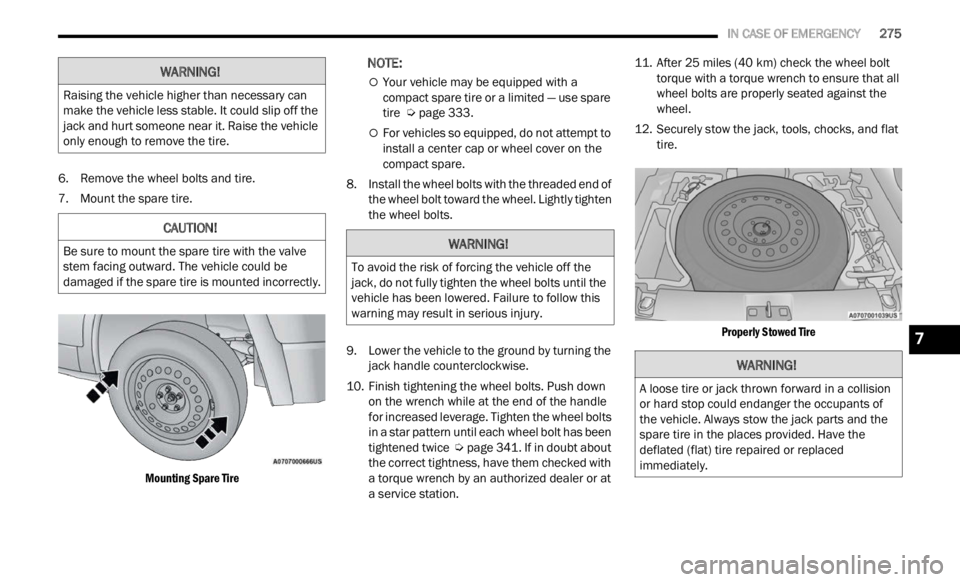
6. Remove the wheel bolts and tire.
7. M
ount the spare tire.
Mo
un
t
ing Spare Tire
NOTE:
Your vehicle may be equipped with a
compact spare tire or a limited — use spare
tire Ú page 333.
For vehicles so equipped, do not attempt to
install a center cap or wheel cover on the
compact spare.
8. Install the wheel bolts with the threaded end of the w
heel bolt toward the wheel. Lightly tighten
the wheel bolts.
9. Lower the vehicle to the ground by turning the jack
handle counterclockwise.
10. Finish tightening the wheel bolts. Push down on the
wrench while at the end of the handle
for increased leverage. Tighten the wheel bolts
in a star pattern until each wheel bolt has been
tightened twice Ú page 341. If in doubt about
the correct tightness, have them checked with
a torq u
e wrench by an authorized dealer or at
a service station. 11. After 25
mile
s (40 km) check the wheel bolt
torque
with a torque wrench to ensure that all
wheel bolts are properly seated against the
wheel.
12. Securely stow the jack, tools, chocks, and flat tire.
P
roperly Stowed Tire
WARNING!
Raising the vehicle higher than necessary can
make the vehicle less stable. It could slip off the
jack and hurt someone near it. Raise the vehicle
only enough to remove the tire.
CAUTION!
Be sure to mount the spare tire with the valve
stem facing outward. The vehicle could be
damaged if the spare tire is mounted incorrectly.WARNING!
To avoid the risk of forcing the vehicle off the
jack, do not fully tighten the wheel bolts until the
vehicle has been lowered. Failure to follow this
warning may result in serious injury.
WARNING!
A loose tire or jack thrown forward in a collision
or hard stop could endanger the occupants of
the vehicle. Always stow the jack parts and the
spare tire in the places provided. Have the
deflated (flat) tire repaired or replaced
immediately.
7
Page 279 of 364
IN CASE OF EMERGENCY 277
(Continued)
If the pressure is at 19 psi (1.3 bar) or above
repeat the inflation process to reach the cor -
rect tire pressure and continue driving.
5. Peel off the warning label from the bottle and plac e
it on the dashboard as a reminder to the
driver that the tire has been treated with Tire
Service Kit.
TIRE SERVICE KIT USAGE PRECAUTIONSWARNING!
Tire Service Kit is not a permanent flat tire
repair. Have the tire inspected and repaired or
replaced after using Tire Service Kit. Do not
exceed 50 mph (80 km/h) until the tire is
repai r
ed or replaced. Failure to follow this
warning can result in injuries that are serious or
fatal to you, your passengers, and others around
you. Have the tire checked as soon as possible
at an authorized dealer.
WARNING!
The metal end fitting from Power Plug may get
hot after use, so it should be handled carefully.
WARNING!
Do not attempt to seal a tire on the side of the
vehicle closest to traffic. Pull far enough off
the road to avoid the danger of being hit when
using the Tire Service Kit.
Do not use Tire Service Kit or drive the vehicle
under the following circumstances:
If the puncture in the tire tread is approxi -
mately 1/4 inch (6 mm) or larger.
If the tire has any sidewall damage.
If the tire has any damage from driving
with extremely low tire pressure.
If the tire has any damage from driving on
a flat tire.
If the wheel has any damage.
If you are unsure of the condition of the
tire or the wheel.
Keep Tire Service Kit away from open flames
or heat source.
A loose Tire Service Kit thrown forward in a
collision or hard stop could endanger the
occupants of the vehicle. Always stow the Tire
Service Kit in the place provided. Failure to
follow these warnings can result in injuries
that are serious or fatal to you, your passen
-
gers, and others around you.
Take care not to allow the contents of Tire
Service Kit to come in contact with hair, eyes,
or clothing. Tire Service Kit sealant is harmful
if inhaled, swallowed, or absorbed through the
skin. It causes skin, eye, and respiratory irrita -
tion. Flush immediately with plenty of water if
there
is any contact with eyes or skin. Change
clothing as soon as possible, if there is any
contact with clothing.
Tire Service Kit Sealant solution contains
latex. In case of an allergic reaction or rash,
consult a physician immediately. Keep Tire
Service Kit out of reach of children. If swal -
lowed, rinse mouth immediately with plenty of
w ater
and drink plenty of water. Do not induce
vomiting! Consult a physician immediately.
WARNING!
7
Page 285 of 364
IN CASE OF EMERGENCY 283
(Continued)
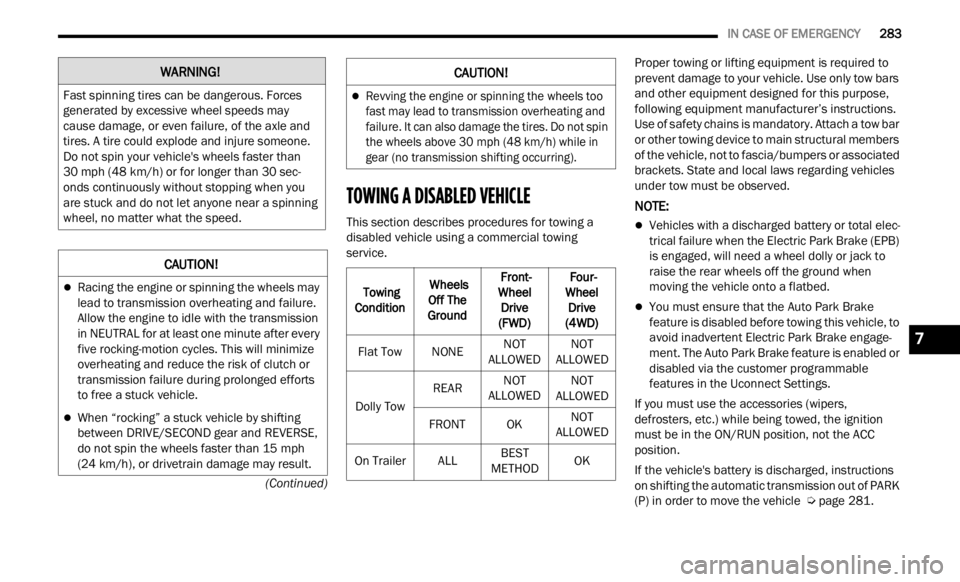
TOWING A DISABLED VEHICLE
This section describes procedures for towing a
disabled vehicle using a commercial towing
service. Proper towing or lifting equipment is required to
preve
n
t damage to your vehicle. Use only tow bars
and other equipment designed for this purpose,
following equipment manufacturer’s instructions.
Use of safety chains is mandatory. Attach a tow bar
or other towing device to main structural members
of the vehicle, not to fascia/bumpers or associated
brackets. State and local laws regarding vehicles
under tow must be observed.
NOTE:
Vehicles with a discharged battery or total elec -
trical failure when the Electric Park Brake (EPB)
is en g
aged, will need a wheel dolly or jack to
raise the rear wheels off the ground when
moving the vehicle onto a flatbed.
You must ensure that the Auto Park Brake
feature is disabled before towing this vehicle, to
avoid inadvertent Electric Park Brake engage -
ment. The Auto Park Brake feature is enabled or
disab l
ed via the customer programmable
features in the Uconnect Settings.
If you must use the accessories (wipers,
defros t
ers, etc.) while being towed, the ignition
must be in the ON/RUN position, not the ACC
position.
If the vehicle's battery is discharged, instructions
on shif
ting the automatic transmission out of PARK
(P) in order to move the vehicle Ú page 281.
WARNING!
Fast spinning tires can be dangerous. Forces
generated by excessive wheel speeds may
cause damage, or even failure, of the axle and
tires. A tire could explode and injure someone.
Do not spin your vehicle's wheels faster than
30
mph (48 km/h) or for longer than 30 sec-
onds c on
tinuously without stopping when you
are stuck and do not let anyone near a spinning
wheel, no matter what the speed.
CAUTION!
Racing the engine or spinning the wheels may
lead to transmission overheating and failure.
Allow the engine to idle with the transmission
in NEUTRAL for at least one minute after every
five rocking-motion cycles. This will minimize
overheating and reduce the risk of clutch or
transmission failure during prolonged efforts
to free a stuck vehicle.
When “rocking” a stuck vehicle by shifting
between DRIVE/SECOND gear and REVERSE,
do not spin the wheels faster than 15 mph
(24 km/
h), or drivetrain damage may result.
Revving the engine or spinning the wheels too
fast may lead to transmission overheating and
failure. It can also damage the tires. Do not spin
the wheels above 30 mph (48 km/h) while in
gear (
no transmission shifting occurring).
Towing
Condit i
on Wheels
Off T h
e
Ground Front-
Wheel
D
rive
(FWD) Four-
Wheel D
rive
(4WD)
Flat Tow NONENOT
ALLOWED N
O
T
ALLOWED
Dol
ly Tow REAR
NOT
ALLOWED N
O
T
ALLOWED
FR
ONT OK NOT
ALLOWED
O n
Trailer ALLBEST
METHOD O
K
CAUTION!
7
Page 286 of 364
284 IN CASE OF EMERGENCY
FRONT–WHEEL DRIVE (FWD)
FCA US LLC recommends towing your vehicle with
all four wheels OFF the ground on a flatbed.
If flatbed equipment is not available, this vehicle
must t
owed with the front wheels OFF the ground
(using a towing dolly, or wheel lift equipment with
the front wheels raised).
NOTE:
Ensure that the Electric Park Brake is released,
and r e
mains released, while being towed.
FOUR–WHEEL DRIVE (4WD)
FCA US LLC requires towing with all four wheels OFF
the ground. Acceptable methods are to tow the
vehicle on a flatbed, or with one end of the vehicle
raised and the opposite end on a towing dolly.
EMERGENCY TOW HOOKS —
I
F EQUIPPED
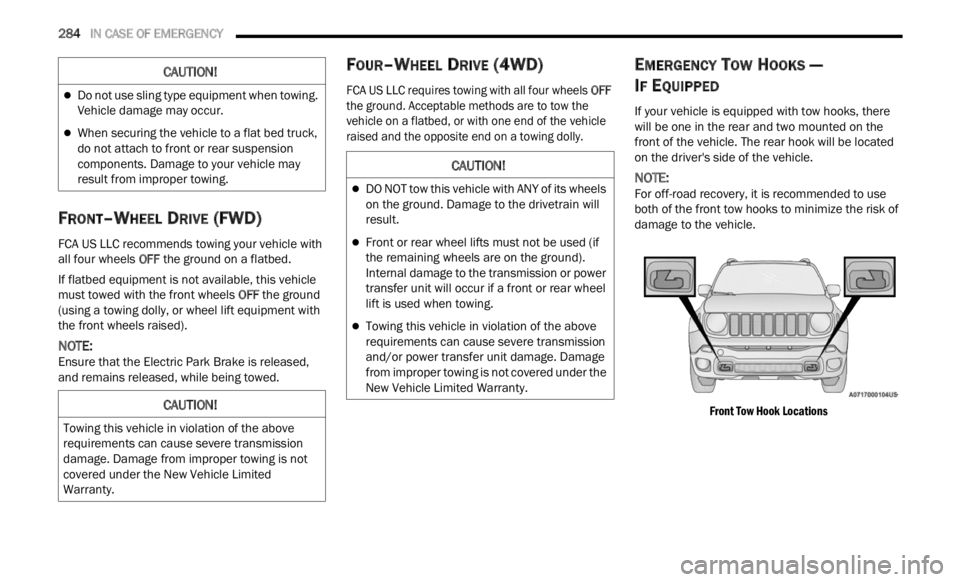
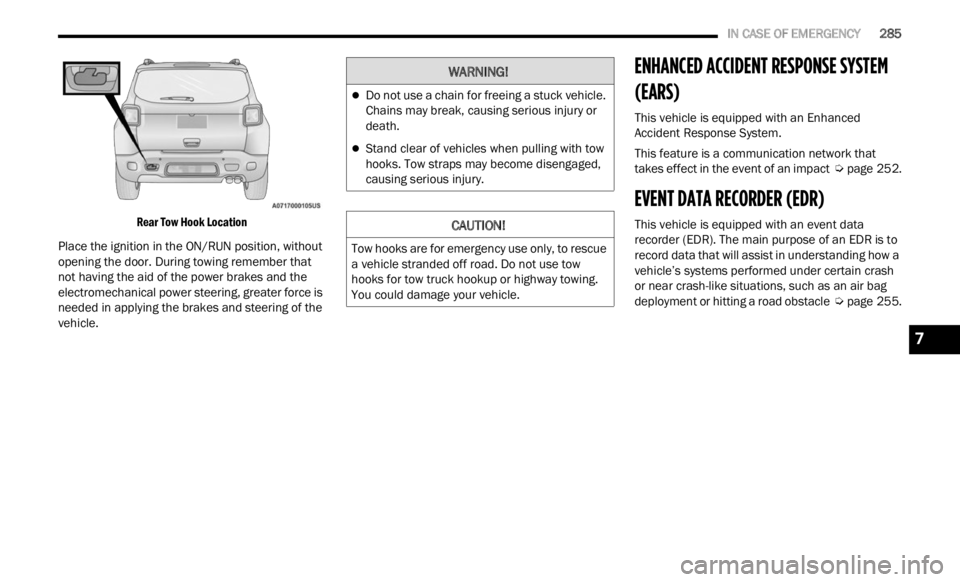
If your vehicle is equipped with tow hooks, there
will be one in the rear and two mounted on the
front of the vehicle. The rear hook will be located
on the driver's side of the vehicle.
NOTE:
For off-road recovery, it is recommended to use
both of
the front tow hooks to minimize the risk of
damage to the vehicle.
Front Tow Hook Locations
CAUTION!
Do not use sling type equipment when towing.
Vehicle damage may occur.
When securing the vehicle to a flat bed truck,
do not attach to front or rear suspension
components. Damage to your vehicle may
result from improper towing.
CAUTION!
Towing this vehicle in violation of the above
requirements can cause severe transmission
damage. Damage from improper towing is not
covered under the New Vehicle Limited
Warranty.
CAUTION!
DO NOT tow this vehicle with ANY of its wheels
on the ground. Damage to the drivetrain will
result.
Front or rear wheel lifts must not be used (if
the remaining wheels are on the ground).
Internal damage to the transmission or power
transfer unit will occur if a front or rear wheel
lift is used when towing.
Towing this vehicle in violation of the above
requirements can cause severe transmission
and/or power transfer unit damage. Damage
from improper towing is not covered under the
New Vehicle Limited Warranty.
Page 287 of 364
IN CASE OF EMERGENCY 285
Rear Tow Hook Location
Place the ignition in the ON/RUN position, without
opening
the door. During towing remember that
not having the aid of the power brakes and the
electromechanical power steering, greater force is
needed in applying the brakes and steering of the
vehicle.
ENHANCED ACCIDENT RESPONSE SYSTEM
(EARS)
This vehicle is equipped with an Enhanced
Accident Response System.
This feature is a communication network that
takes
effect in the event of an impact Ú page 252.
EVENT DATA RECORDER (EDR)
This vehicle is equipped with an event data
recorder (EDR). The main purpose of an EDR is to
record data that will assist in understanding how a
vehicle’s systems performed under certain crash
or near crash-like situations, such as an air bag
deployment or hitting a road obstacle
Ú page 255.
WARNING!
Do not use a chain for freeing a stuck vehicle.
Chains may break, causing serious injury or
death.
Stand clear of vehicles when pulling with tow
hooks. Tow straps may become disengaged,
causing serious injury.
CAUTION!
Tow hooks are for emergency use only, to rescue
a vehicle stranded off road. Do not use tow
hooks for tow truck hookup or highway towing.
You could damage your vehicle.
7
Page 288 of 364
286
SERVICING AND MAINTENANCE
SCHEDULED SERVICING
Your vehicle is equipped with an automatic oil
change indicator system. The oil change indicator
system will remind you that it is time to take your
vehicle in for scheduled maintenance.
Based on engine operation conditions, the oil
change
indicator message will illuminate in the
instrument cluster. This means that service is
required for your vehicle. Operating conditions
such as frequent short-trips, trailer tow and
extremely hot or cold ambient temperatures will
influence when the “Change Oil” or “Oil Change
Required” message is displayed. Have your vehicle
serviced as soon as possible, within the next
500 miles (805 km). An authorized dealer will reset the oil change
indica
tor message after completing the scheduled
oil change.
NOTE:
Under no circumstances should oil change
inter v
als exceed 10,000 miles (16,000 km),
1 year or 350 hours of engine run time, whichever
c omes f
irst. The 350 hours of engine run or idle
time is generally only a concern for fleet
customers.
NOTE:
The Oil Change Indicator will not illuminate under
these
conditions. Once A Month Or Before A Long Trip:
Check engine oil level.
Check windshield washer fluid level.
Check the tire inflation pressures and look for
unusual wear or damage.
Check the fluid levels of the coolant reservoir,
and brake master cylinder reservoir, and fill as
needed.
Check function of all interior and exterior lights.
Page 300 of 364
298 SERVICING AND MAINTENANCE
Function Deactivation:
The functionality is reset if:
The ignition is turned to the MAR/RUN position.
Number of subsequent activations is three.
Two minutes timer has expired after turning the
ignition OFF.
NOTE:
When turning the ignition ON, the blades will go
into t h
e parking position.
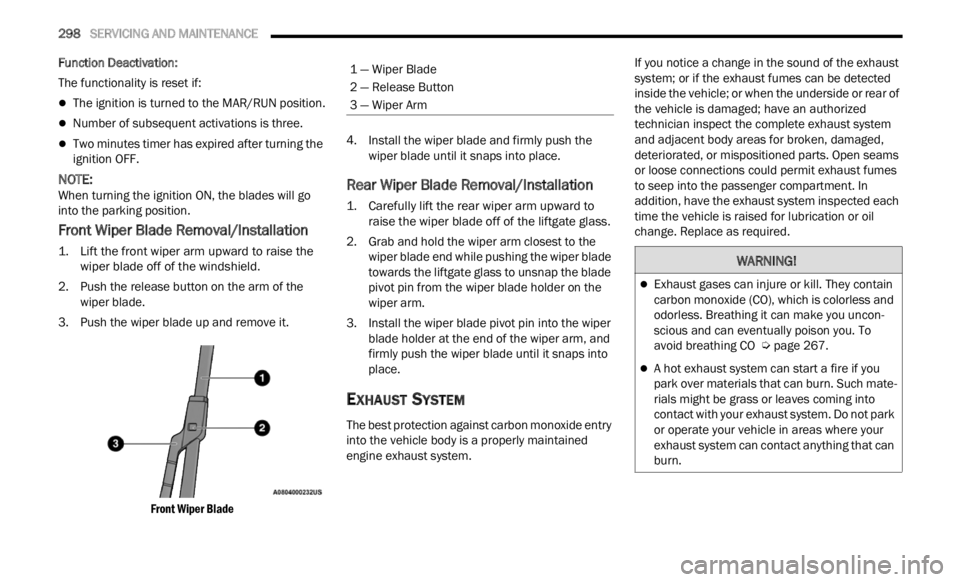
Front Wiper Blade Removal/Installation
1. Lift the front wiper arm upward to raise the wiper blade off of the windshield.
2. Push the release button on the arm of the wiper
blade.
3. Push the wiper blade up and remove it.
Front
Wiper Blade
4. Install the wiper blade and firmly push the
wipe r
blade until it snaps into place.
Rear Wiper Blade Removal/Installation
1. Carefully lift the rear wiper arm upward to raise the wiper blade off of the liftgate glass.
2. Grab and hold the wiper arm closest to the wiper
blade end while pushing the wiper blade
towards the liftgate glass to unsnap the blade
pivot pin from the wiper blade holder on the
wiper arm.
3. Install the wiper blade pivot pin into the wiper blad e
holder at the end of the wiper arm, and
firmly push the wiper blade until it snaps into
place.
EXHAUST SYSTEM
The best protection against carbon monoxide entry
into the vehicle body is a properly maintained
engine exhaust system. If you notice a change in the sound of the exhaust
syste
m
; or if the exhaust fumes can be detected
inside the vehicle; or when the underside or rear of
the vehicle is damaged; have an authorized
technician inspect the complete exhaust system
and adjacent body areas for broken, damaged,
deteriorated, or mispositioned parts. Open seams
or loose connections could permit exhaust fumes
to seep into the passenger compartment. In
addition, have the exhaust system inspected each
time the vehicle is raised for lubrication or oil
change. Replace as required.1 — Wiper Blade
2 — Release Button
3 — Wiper Arm
WARNING!
Exhaust gases can injure or kill. They contain
carbon monoxide (CO), which is colorless and
odorless. Breathing it can make you uncon -
scious and can eventually poison you. To
avoid b
reathing CO Ú page 267.
A hot exhaust system can start a fire if you
park over materials that can burn. Such mate -
rials might be grass or leaves coming into
c ontact
with your exhaust system. Do not park
or operate your vehicle in areas where your
exhaust system can contact anything that can
burn.
Page 301 of 364
SERVICING AND MAINTENANCE 299
(Continued)
Under normal operating conditions, the catalytic
converter will not require maintenance. However, it
is important to keep the engine properly tuned to
ensure proper catalyst operation and prevent
possible catalyst damage.
NOTE:
Intentional tampering with emissions control
syste m
s can result in civil penalties being
assessed against you.
In unusual situations involving grossly
malfu n
ctioning engine operation, a scorching odor
may suggest severe and abnormal catalyst overheating. If this occurs, stop the vehicle, turn off
the engine and allow it to cool. Service, including a
tune-up to manufacturer's specifications, should
be obtained immediately.
To minimize the possibility of catalytic converter
damag
e
:
Do not interrupt the ignition when the transmis -
sion is in gear and the vehicle is in motion.
Do not try to start the vehicle by pushing or
towing the vehicle.
Do not idle the engine with any ignition compo -
nents disconnected or removed, such as when
diagn os
tic testing, or for prolonged periods
during very rough idle or malfunctioning oper -
ating conditions.
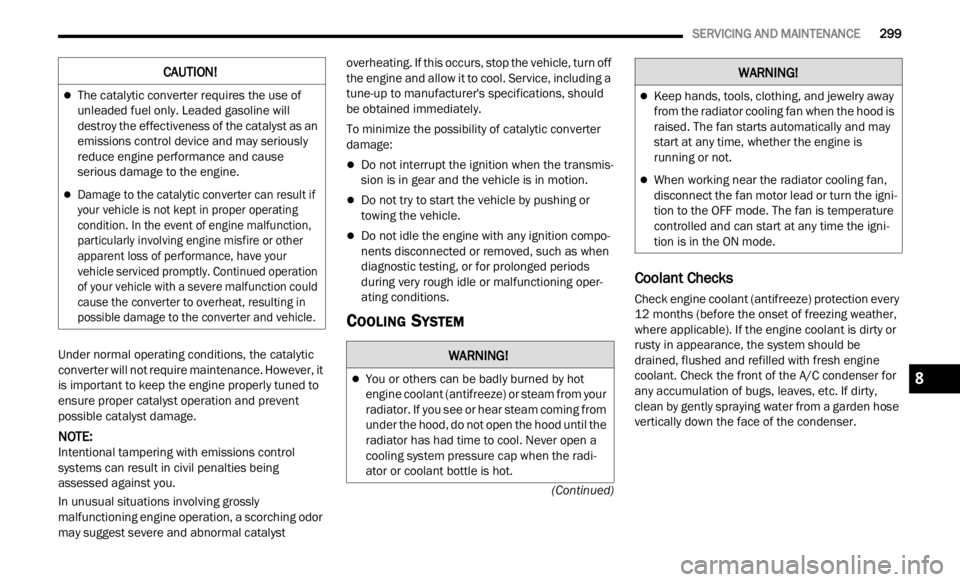
COOLING SYSTEM
Coolant Checks
Check engine coolant (antifreeze) protection every
12 months (before the onset of freezing weather,
where
applicable). If the engine coolant is dirty or
rusty in appearance, the system should be
drained, flushed and refilled with fresh engine
coolant. Check the front of the A/C condenser for
any accumulation of bugs, leaves, etc. If dirty,
clean by gently spraying water from a garden hose
vertically down the face of the condenser.
CAUTION!
The catalytic converter requires the use of
unleaded fuel only. Leaded gasoline will
destroy the effectiveness of the catalyst as an
emissions control device and may seriously
reduce engine performance and cause
serious damage to the engine.
Damage to the catalytic converter can result if
your vehicle is not kept in proper operating
condition. In the event of engine malfunction,
particularly involving engine misfire or other
apparent loss of performance, have your
vehicle serviced promptly. Continued operation
of your vehicle with a severe malfunction could
cause the converter to overheat, resulting in
possible damage to the converter and vehicle.
WARNING!
You or others can be badly burned by hot
engine coolant (antifreeze) or steam from your
radiator. If you see or hear steam coming from
under the hood, do not open the hood until the
radiator has had time to cool. Never open a
cooling system pressure cap when the radi -
ator or coolant bottle is hot.
Keep hands, tools, clothing, and jewelry away
from the radiator cooling fan when the hood is
raised. The fan starts automatically and may
start at any time, whether the engine is
running or not.
When working near the radiator cooling fan,
disconnect the fan motor lead or turn the igni -
tion to the OFF mode. The fan is temperature
c ontroll
ed and can start at any time the igni -
tion is in the ON mode.
WARNING!
8
Page 311 of 364
SERVICING AND MAINTENANCE 309
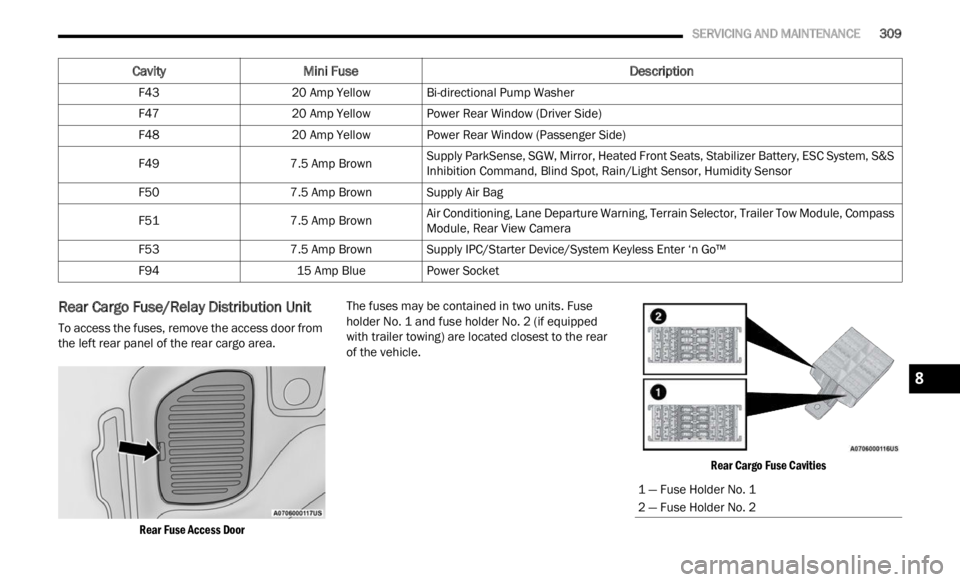
Rear Cargo Fuse/Relay Distribution Unit
To access the fuses, remove the access door from
the left rear panel of the rear cargo area.
Rear Fuse Access Door
The fuses may be contained in two units. Fuse
holder
No. 1 and fuse holder No. 2 (if equipped
with trailer towing) are located closest to the rear
of the vehicle.
Rear Cargo Fuse Cavities
F43
20 Amp YellowBi-directional Pump Washer
F47 20 Amp YellowPower Rear Window (Driver Side)
F48 20 Amp YellowPower Rear Window (Passenger Side)
F49 7.5 Amp BrownSupply ParkSense, SGW, Mirror, Heated Front Seats, Stabilizer Battery, ESC System, S&S
Inhib
i
tion Command, Blind Spot, Rain/Light Sensor, Humidity Sensor
F50 7.5 Amp BrownSupply Air Bag
F51 7.5 Amp BrownAir Conditioning, Lane Departure Warning, Terrain Selector, Trailer Tow Module, Compass
Module
,
Rear View Camera
F53 7.5 Amp BrownSupply IPC/Starter Device/System Keyless Enter ‘n Go™
F94 15 Amp BluePower Socket
Cavity Mini Fuse Description
1 — Fuse Holder No. 1
2 — Fuse Holder No. 2
8