warning JEEP RENEGADE 2023 Manual PDF
[x] Cancel search | Manufacturer: JEEP, Model Year: 2023, Model line: RENEGADE, Model: JEEP RENEGADE 2023Pages: 364, PDF Size: 18.65 MB
Page 112 of 364

110 STARTING AND OPERATING
The system warns the driver with an acoustic
signal and where provided, with visual indications
on the instrument panel display.
NOTE:
Parksense will reduce the volume of the radio if
on when the system is sounding an audible
tone.
The alert chime is activated only when the
obstacle is in the vehicle path.
Activation — Deactivation
The system can operate only after driving a short
distance and if the vehicle speed is between 0 and
11
mph (0 and 18 km/h). The system can be
activa
ted/deactivated via the "Settings" menu of
the Uconnect system. If the ParkSense System is
deactivated via the ParkSense Hard switch then
the Side Distance Warning system will
automatically be deactivated.
Message on the display for Side Distance Warning
featu r
e:
“Wipe Sensors” — This message is displayed in the
case o
f a failure of the Side Distance Warning
system sensors. Free the bumpers of any
obstacles, ensure that the front and rear bumper
are free of snow, ice, mud, dirt and debris to keep
the ParkSense system operating properly.
“SDW Not Available” — This message is displayed
if the
Side Distance Warning system is not
available. The failed operation of the system might
be due to the insufficient voltage from the battery
or other failures on the electrical system. Contact
an authorized dealer as soon as possible to have
the electrical system checked.
Operation With A Trailer
The system is automatically deactivated when the
trailer's electric plug is inserted in the vehicle's tow
hook socket. The rear sensors are automatically
reactivated when the trailer's cable plug is
removed.
ParkSense Usage Precautions
Some conditions may influence the performance
of the Side Distance Warning system:
NOTE:
Ensure that the front and rear bumper are free
of snow, ice, mud, dirt and debris to keep the
ParkSense system operating properly.
Construction equipment, large trucks, and other
vibrations could affect the performance of Park -
Sense.
When you turn ParkSense off, the message to
appear in the instrument cluster display will
read “PARKSENSE OFF.” Furthermore, once you
turn ParkSense off, it remains off until you turn
it on again, even if you cycle the ignition key.
ParkSense, when on, will reduce the volume of
the radio when it is sounding a tone.
WARNING ALERTS
Distance
(inches/cm) Less than
12 inc h
es
( 3 0
c
m
) 12–65
inches
(30–6 0
cm)
Arcs-Left 11th Flashing 12th Flashing
Arcs-Right 11th Flashing 12th Flashing
Audible Alert Chime C
on
tinuousAudible chime
incre
a
ses as
the objects within the
vehicle’s path get close to the vehicle
Radio Volume Reduc e
d Yes
Yes
Page 113 of 364
STARTING AND OPERATING 111
Clean the ParkSense sensors regularly, taking
care not to scratch or damage them. The
sensors must not be covered with ice, snow,
slush, mud, dirt or debris. Failure to do so can
result in the system not working properly. The
ParkSense system might not detect an obstacle
behind or in front of the fascia/bumper, or it
could provide a false indication that an obstacle
is behind or in front of the fascia/bumper.
The presence of a tow hook without a trailer may
interfere with the correct operation of the
parking sensors. Before using the ParkSense
system, it is recommended to remove the
removable tow hook ball assembly and any
attachments from the vehicle when it is not
used for towing operations. If you wish to leave
the tow hook fitted when not towing a trailer,
contact your authorized dealer for the Park
-
Sense system operations update because the
tow hook
could be detected as an obstacle by
the sensors.
PARKSENSE ACTIVE PARK ASSIST SYSTEM —
IF EQUIPPED
The ParkSense Active Park Assist system is
intended to assist the driver during parallel,
perpendicular, and parallel park exit maneuvers by
identifying a proper parking space, providing
audible/visual instructions, and controlling the
steering wheel. The ParkSense Active Park Assist
system is defined as “semi-automatic” since the
driver maintains control of the accelerator, gear
selector and brakes. Depending on the driver's
parking maneuver selection, the ParkSense Active
Park Assist system is capable of maneuvering a
WARNING!
Drivers must be careful when backing up even
when using ParkSense. Always check carefully
behind your vehicle, look behind you, and be
sure to check for pedestrians, animals, other
vehicles, obstructions, and blind spots before
backing up. You are responsible for safety and
must continue to pay attention to your
surroundings. Failure to do so can result in
serious injury or death.
Before using ParkSense, it is strongly recom -
mended that the ball mount and hitch ball
assem b
ly be disconnected from the vehicle
when the vehicle is not used for towing.
Failure to do so can result in injury or damage
to vehicles or obstacles because the hitch ball
will be much closer to the obstacle than the
rear fascia when the vehicle sounds the
continuous tone. Also, the sensors could
detect the ball mount and hitch ball assembly,
depending on its size and shape, giving a false
indication that an obstacle is behind the
vehicle.
CAUTION!
ParkSense is only a parking aid and it is
unable to recognize every obstacle, including
small obstacles. Parking curbs might be
temporarily detected or not detected at all.
Obstacles located above or below the sensors
will not be detected when they are in close
proximity.
The vehicle must be driven slowly when using
ParkSense in order to be able to stop in time
when an obstacle is detected. It is recom -
mended that the driver looks over his/her
should e
r when using ParkSense.
4
Page 116 of 364
114 STARTING AND OPERATING
(Continued)
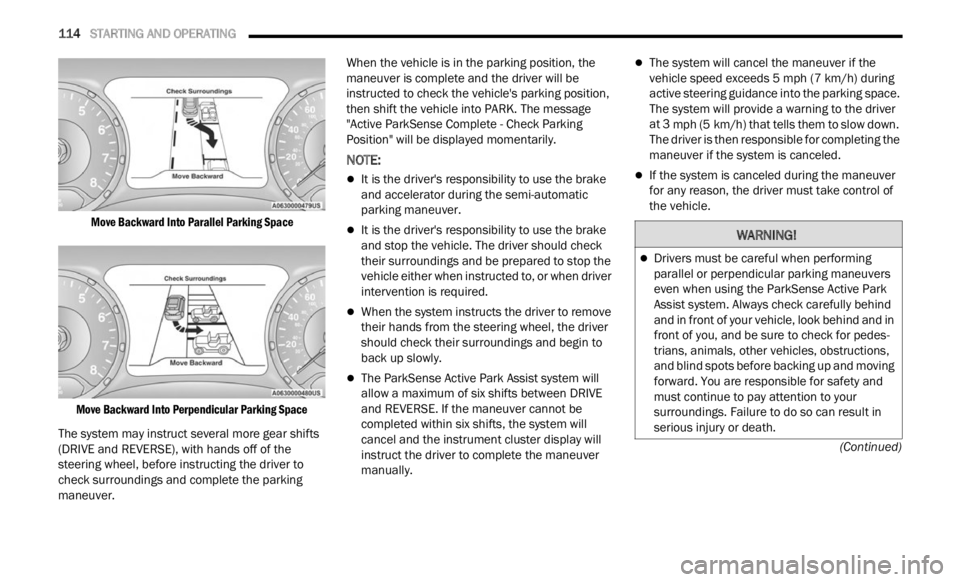
Move Backward Into Parallel Parking Space
Move Backward Into Perpendicular Parking Space
The system may instruct several more gear shifts
(DRIV E
and REVERSE), with hands off of the
steering wheel, before instructing the driver to
check surroundings and complete the parking
maneuver. When the vehicle is in the parking position, the
maneu
v
er is complete and the driver will be
instructed to check the vehicle's parking position,
then shift the vehicle into PARK. The message
"Active ParkSense Complete - Check Parking
Position" will be displayed momentarily.
NOTE:
It is the driver's responsibility to use the brake
and accelerator during the semi-automatic
parking maneuver.
It is the driver's responsibility to use the brake
and stop the vehicle. The driver should check
their surroundings and be prepared to stop the
vehicle either when instructed to, or when driver
intervention is required.
When the system instructs the driver to remove
their hands from the steering wheel, the driver
should check their surroundings and begin to
back up slowly.
The ParkSense Active Park Assist system will
allow a maximum of six shifts between DRIVE
and REVERSE. If the maneuver cannot be
completed within six shifts, the system will
cancel and the instrument cluster display will
instruct the driver to complete the maneuver
manually.
The system will cancel the maneuver if the
vehicle speed exceeds 5 mph (7 km/h) during
activ e
steering guidance into the parking space.
The system will provide a warning to the driver
at 3 mph (5 km/h) that tells them to slow down.
The d r
iver is then responsible for completing the
maneuver if the system is canceled.
If the system is canceled during the maneuver
for any reason, the driver must take control of
the vehicle.
WARNING!
Drivers must be careful when performing
parallel or perpendicular parking maneuvers
even when using the ParkSense Active Park
Assist system. Always check carefully behind
and in front of your vehicle, look behind and in
front of you, and be sure to check for pedes -
trians, animals, other vehicles, obstructions,
a nd b l
ind spots before backing up and moving
forward. You are responsible for safety and
must continue to pay attention to your
surroundings. Failure to do so can result in
serious injury or death.
Page 117 of 364
STARTING AND OPERATING 115
(Continued)
EXITING THE PARKING SPACE
NOTE:
The function does not work for exiting a perpen -
dicular parking space, but only exiting parallel
p arki n
g spaces.
Activation
To activate this function, push the ParkSense
Activ e
Park Assist switch and then use the steering
wheel arrow buttons to select the Parallel Park Exit
feature. After the selection, the system activates
and instructs the driver through the instrument
cluster display about the operations that have to
be carried out to perform the maneuver correctly. Selection Of The Maneuver Side
Use the right and left arrow buttons on the steering
wheel
to select between parallel or perpendicular
parking mode. Then use the direction indicators
(turn signals) to choose the direction that you want
to perform the maneuver.
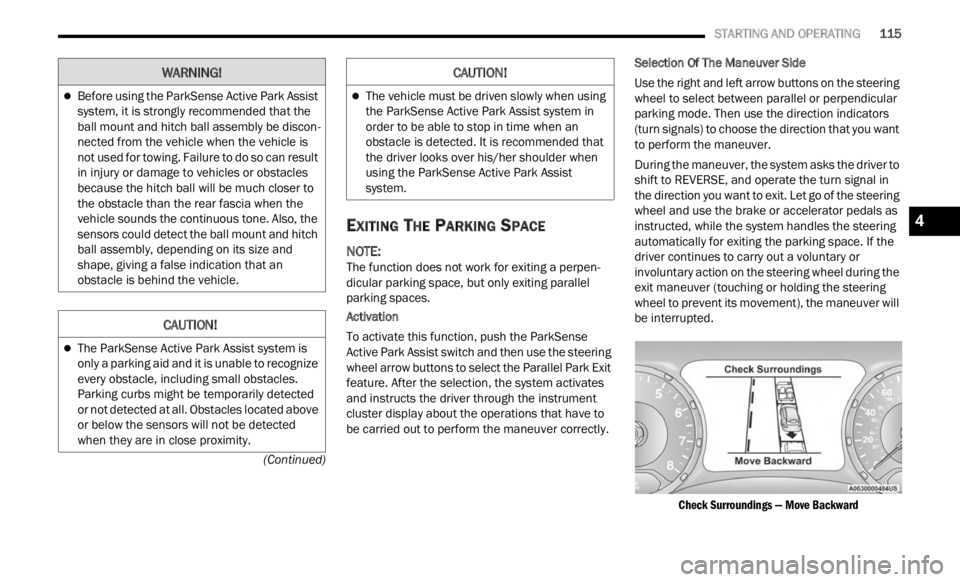
During the maneuver, the system asks the driver to
shift
to REVERSE, and operate the turn signal in
the direction you want to exit. Let go of the steering
wheel and use the brake or accelerator pedals as
instructed, while the system handles the steering
automatically for exiting the parking space. If the
driver continues to carry out a voluntary or
involuntary action on the steering wheel during the
exit maneuver (touching or holding the steering
wheel to prevent its movement), the maneuver will
be interrupted.
Check Surroundings — Move Backward
Before using the ParkSense Active Park Assist
system, it is strongly recommended that the
ball mount and hitch ball assembly be discon -
nected from the vehicle when the vehicle is
not us e
d for towing. Failure to do so can result
in injury or damage to vehicles or obstacles
because the hitch ball will be much closer to
the obstacle than the rear fascia when the
vehicle sounds the continuous tone. Also, the
sensors could detect the ball mount and hitch
ball assembly, depending on its size and
shape, giving a false indication that an
obstacle is behind the vehicle.
CAUTION!
The ParkSense Active Park Assist system is
only a parking aid and it is unable to recognize
every obstacle, including small obstacles.
Parking curbs might be temporarily detected
or not detected at all. Obstacles located above
or below the sensors will not be detected
when they are in close proximity.
WARNING!
The vehicle must be driven slowly when using
the ParkSense Active Park Assist system in
order to be able to stop in time when an
obstacle is detected. It is recommended that
the driver looks over his/her shoulder when
using the ParkSense Active Park Assist
system.
CAUTION!
4
Page 118 of 364
116 STARTING AND OPERATING
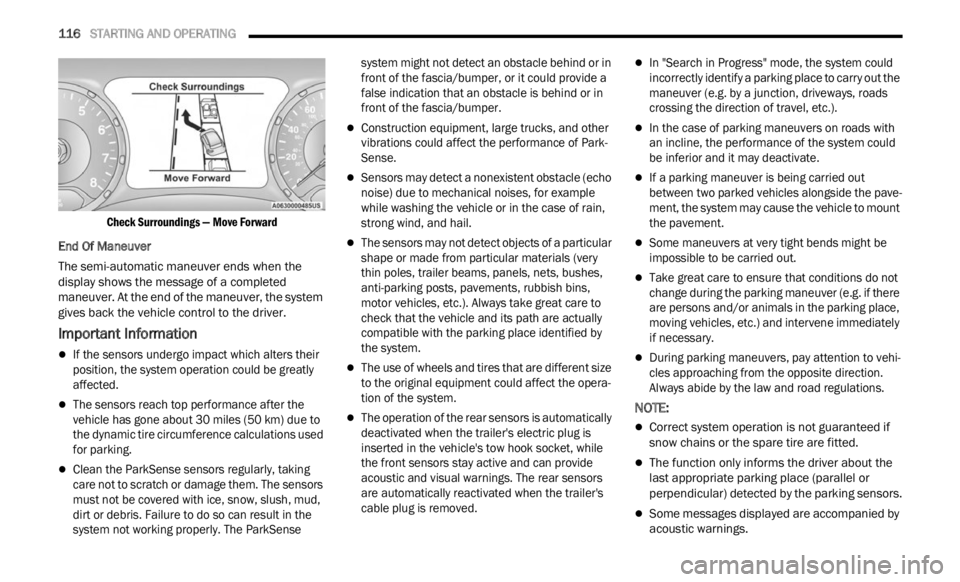
Check Surroundings — Move Forward
End Of Maneuver
The semi-automatic maneuver ends when the
displ a
y shows the message of a completed
maneuver. At the end of the maneuver, the system
gives back the vehicle control to the driver.
Important Information
If the sensors undergo impact which alters their
position, the system operation could be greatly
affected.
The sensors reach top performance after the
vehicle has gone about 30 miles (50 km) due to
the d y
namic tire circumference calculations used
for parking.
Clean the ParkSense sensors regularly, taking
care not to scratch or damage them. The sensors
must not be covered with ice, snow, slush, mud,
dirt or debris. Failure to do so can result in the
system not working properly. The ParkSense system might not detect an obstacle behind or in
front of the fascia/bumper, or it could provide a
false indication that an obstacle is behind or in
front of the fascia/bumper.
Construction equipment, large trucks, and other
vibrations could affect the performance of Park
-
Sense.
Sensors may detect a nonexistent obstacle (echo
noise) due to mechanical noises, for example
while washing the vehicle or in the case of rain,
strong wind, and hail.
The sensors may not detect objects of a particular
shape or made from particular materials (very
thin poles, trailer beams, panels, nets, bushes,
anti-parking posts, pavements, rubbish bins,
motor vehicles, etc.). Always take great care to
check that the vehicle and its path are actually
compatible with the parking place identified by
the system.
The use of wheels and tires that are different size
to the original equipment could affect the opera -
tion of the system.
The operation of the rear sensors is automatically
deactivated when the trailer's electric plug is
inserted in the vehicle's tow hook socket, while
the front sensors stay active and can provide
acoustic and visual warnings. The rear sensors
are automatically reactivated when the trailer's
cable plug is removed.
In "Search in Progress" mode, the system could
incorrectly identify a parking place to carry out the
maneuver (e.g. by a junction, driveways, roads
crossing the direction of travel, etc.).
In the case of parking maneuvers on roads with
an incline, the performance of the system could
be inferior and it may deactivate.
If a parking maneuver is being carried out
between two parked vehicles alongside the pave -
ment, the system may cause the vehicle to mount
t he pa
vement.
Some maneuvers at very tight bends might be
impossible to be carried out.
Take great care to ensure that conditions do not
change during the parking maneuver (e.g. if there
are persons and/or animals in the parking place,
moving vehicles, etc.) and intervene immediately
if necessary.
During parking maneuvers, pay attention to vehi -
cles approaching from the opposite direction.
Alway s
abide by the law and road regulations.
NOTE:
Correct system operation is not guaranteed if
snow chains or the spare tire are fitted.
The function only informs the driver about the
last appropriate parking place (parallel or
perpendicular) detected by the parking sensors.
Some messages displayed are accompanied by
acoustic warnings.
Page 119 of 364
STARTING AND OPERATING 117
LANESENSE — IF EQUIPPED
LANESENSE OPERATION
The LaneSense system is operational at speeds
above 37 mph (60 km/h) and below 112 mph
(180 km
/h). The LaneSense system uses a
f or
wa
rd
looking camera to detect lane markings
and measure vehicle position within the lane
boundaries.
When both lane markings are detected and the
driver
unintentionally drifts out of the lane (no turn
signal applied), the LaneSense system provides a
haptic warning in the form of torque applied to the
steering wheel to prompt the driver to remain within
the lane boundaries. If the driver continues to
unintentionally drift out of the lane, the LaneSense
system provides a visual warning through the
instrument cluster display to prompt the driver to
remain within the lane boundaries.
The driver may manually override the haptic warning
by app l
ying torque to the steering wheel at any time.
When only a single lane marking is detected and
the dr
iver unintentionally drifts across the lane
marking (no turn signal applied), the LaneSense
system provides a visual warning through the
instrument cluster display to prompt the driver to
remain within the lane. When only a single lane
marking is detected, a haptic (torque) warning will
not be provided.
NOTE:
When operating conditions have been met, the
LaneSe n
se system will monitor if the driver’s
hands are on the steering wheel and provides an
audible warning to the driver when the driver’s
hands are not detected on the steering wheel. The
system will cancel if the driver does not return their
hands to the wheel.
TURNING LANESENSE ON OR OFF
The LaneSense button is located on the
center stack.
To turn the LaneSense system on, push the
La neSen
se button (LED turns off). A “Lane Sense
On” message is shown in the instrument cluster
display.
To turn the LaneSense system off, push the
LaneSen
se button once (LED turns on).
NOTE:
The LaneSense system will retain the last system
state
on or off from the last ignition cycle when the
ignition is changed to the ON/RUN position.
LANESENSE WARNING MESSAGE
The LaneSense system will indicate the current
lane drift condition through the instrument cluster
display.
Base Instrument Cluster Display — If Equipped
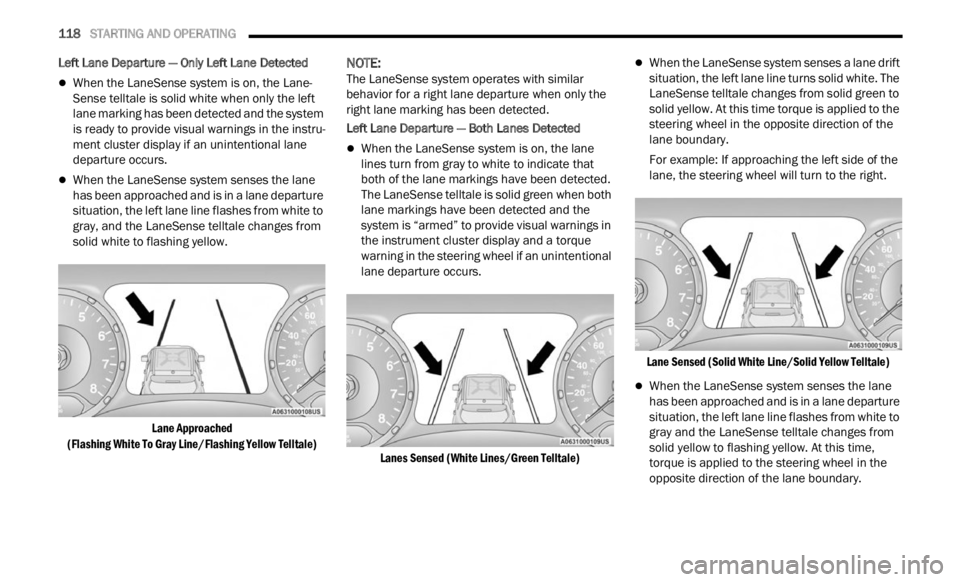
When the LaneSense system is on, the lane lines
a re gr
ay when both of the lane boundaries have
not been detected and the LaneSense telltale is
solid white.
System On (Gray Lines/White Telltale)
4
Page 120 of 364
118 STARTING AND OPERATING
Left Lane Departure — Only Left Lane Detected
When the LaneSense system is on, the Lane-
Sense telltale is solid white when only the left
lane m
arking has been detected and the system
is ready to provide visual warnings in the instru -
ment cluster display if an unintentional lane
depar t
ure occurs.
When the LaneSense system senses the lane
has been approached and is in a lane departure
situation, the left lane line flashes from white to
gray, and the LaneSense telltale changes from
solid white to flashing yellow.
Lane Approached
(Flash
ing White To Gray Line/Flashing Yellow Telltale)
NOTE:
The LaneSense system operates with similar
behav i
or for a right lane departure when only the
right lane marking has been detected.
Left Lane Departure — Both Lanes Detected
When the LaneSense system is on, the lane
lines turn from gray to white to indicate that
both of the lane markings have been detected.
The LaneSense telltale is solid green when both
lane markings have been detected and the
system is “armed” to provide visual warnings in
the instrument cluster display and a torque
warning in the steering wheel if an unintentional
lane departure occurs.
Lanes Sensed (White Lines/Green Telltale)
When the LaneSense system senses a lane drift
situation, the left lane line turns solid white. The
LaneSense telltale changes from solid green to
solid yellow. At this time torque is applied to the
steering wheel in the opposite direction of the
lane boundary.
For example: If approaching the left side of the
lane,
the steering wheel will turn to the right.
Lane Sensed (Solid White Line/Solid Yellow Telltale)
When the LaneSense system senses the lane
has been approached and is in a lane departure
situation, the left lane line flashes from white to
gray and the LaneSense telltale changes from
solid yellow to flashing yellow. At this time,
torque is applied to the steering wheel in the
opposite direction of the lane boundary.
Page 121 of 364
STARTING AND OPERATING 119
For example: If approaching the left side of the
lane, the steering wheel will turn to the right.
Lane Approached
(Flas h
ing White To Gray Line/Flashing Yellow Telltale)
NOTE:
The LaneSense system operates with similar
behav i
or for a right lane departure.
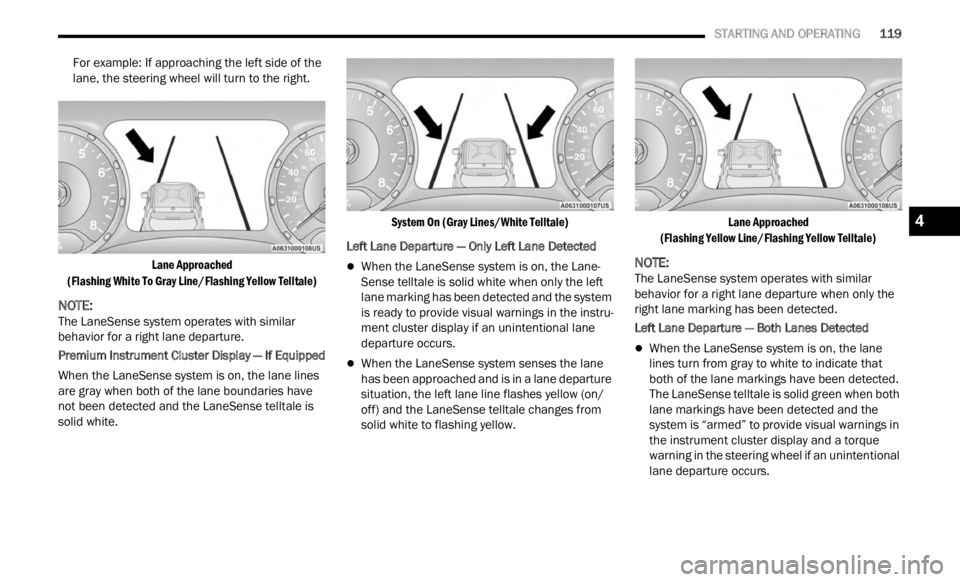
Premium Instrument Cluster Display — If Equipped
When the LaneSense system is on, the lane lines
are g r
ay when both of the lane boundaries have
not been detected and the LaneSense telltale is
solid white.
System On (Gray Lines/White Telltale)
Left Lane Departure — Only Left Lane Detected
When the LaneSense system is on, the Lane-
Sense telltale is solid white when only the left
lane m
arking has been detected and the system
is ready to provide visual warnings in the instru -
ment cluster display if an unintentional lane
depar t
ure occurs.
When the LaneSense system senses the lane
has been approached and is in a lane departure
situation, the left lane line flashes yellow (on/
off) and the LaneSense telltale changes from
solid white to flashing yellow.
Lane Approached
(Flas h
ing Yellow Line/Flashing Yellow Telltale)
NOTE:
The LaneSense system operates with similar
behav i
or for a right lane departure when only the
right lane marking has been detected.
Left Lane Departure — Both Lanes Detected
When the LaneSense system is on, the lane
lines turn from gray to white to indicate that
both of the lane markings have been detected.
The LaneSense telltale is solid green when both
lane markings have been detected and the
system is “armed” to provide visual warnings in
the instrument cluster display and a torque
warning in the steering wheel if an unintentional
lane departure occurs.
4
Page 123 of 364
STARTING AND OPERATING 121
CHANGING LANESENSE STATUS
The LaneSense system has settings to adjust the
intensity of the torque warning and the warning
zone sensitivity (early/late) that you can configure
through the Uconnect system
Ú page 133.
NOTE:
When enabled the system operates above
37 mph (60 km/h) and below 112 mph
(180 km
/h).
Use of the turn signal suppresses the warnings.
The system will not apply torque to the steering
wheel whenever a safety system engages
(Anti-Lock Brakes, Traction Control System,
Electronic Stability Control, Forward Collision
Warning, etc.).
REAR BACK UP CAMERA
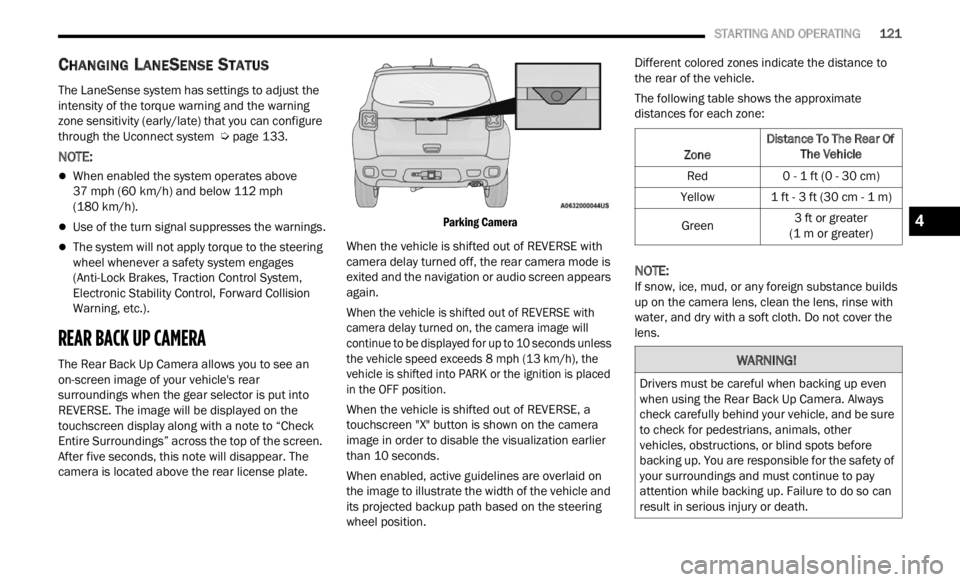
The Rear Back Up Camera allows you to see an
on-screen image of your vehicle's rear
surroundings when the gear selector is put into
REVERSE. The image will be displayed on the
touchscreen display along with a note to “Check
Entire Surroundings” across the top of the screen.
After five seconds, this note will disappear. The
camera is located above the rear license plate.
Parking Camera
When the vehicle is shifted out of REVERSE with
camer a
delay turned off, the rear camera mode is
exited and the navigation or audio screen appears
again.
When the vehicle is shifted out of REVERSE with
camera
delay turned on, the camera image will
continue to be displayed for up to 10 seconds unless
the vehicle speed exceeds 8 mph (13 km/h), the
vehic l
e is shifted into PARK or the ignition is placed
in the OFF position.
When the vehicle is shifted out of REVERSE, a
touchs c
reen "X" button is shown on the camera
image in order to disable the visualization earlier
than 10 seconds.
When enabled, active guidelines are overlaid on
the im
age to illustrate the width of the vehicle and
its projected backup path based on the steering
wheel position. Different colored zones indicate the distance to
the r
e
ar of the vehicle.
The following table shows the approximate
distan
ces for each zone:
NOTE:
If snow, ice, mud, or any foreign substance builds
up on t
he camera lens, clean the lens, rinse with
water, and dry with a soft cloth. Do not cover the
lens.
Zone Distance To The Rear Of
The Ve hicle
Red 0 - 1 ft (0 - 30 cm)
Yellow 1 ft - 3 ft (30 cm - 1 m)
Green 3
ft or greater
(1 m or
greater)
WARNING!
Drivers must be careful when backing up even
when using the Rear Back Up Camera. Always
check carefully behind your vehicle, and be sure
to check for pedestrians, animals, other
vehicles, obstructions, or blind spots before
backing up. You are responsible for the safety of
your surroundings and must continue to pay
attention while backing up. Failure to do so can
result in serious injury or death.
4
Page 124 of 364
122 STARTING AND OPERATING
REFUELING THE VEHICLE
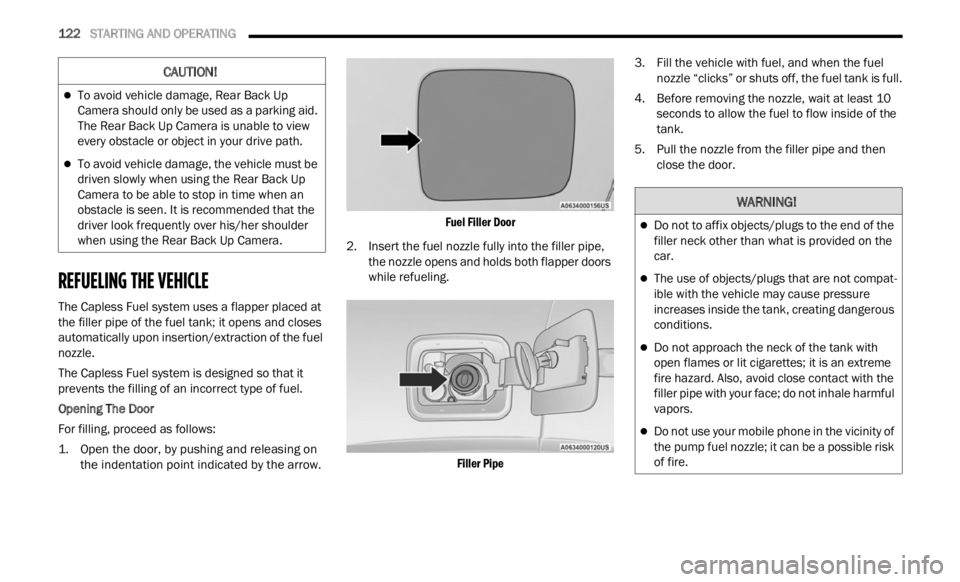
The Capless Fuel system uses a flapper placed at
the filler pipe of the fuel tank; it opens and closes
automatically upon insertion/extraction of the fuel
nozzle.
The Capless Fuel system is designed so that it
preven
ts the filling of an incorrect type of fuel.
Opening The Door
For filling, proceed as follows:
1. O pen the door, by pushing and releasing on
the in
dentation point indicated by the arrow.
Fuel Filler Door
2. Insert the fuel nozzle fully into the filler pipe, the n
ozzle opens and holds both flapper doors
while refueling.
Filler Pipe
3. Fill the vehicle with fuel, and when the fuel
nozzle
“clicks” or shuts off, the fuel tank is full.
4. Before removing the nozzle, wait at least 10 second
s to allow the fuel to flow inside of the
tank.
5. Pull the nozzle from the filler pipe and then close
the door.
CAUTION!
To avoid vehicle damage, Rear Back Up
Camera should only be used as a parking aid.
The Rear Back Up Camera is unable to view
every obstacle or object in your drive path.
To avoid vehicle damage, the vehicle must be
driven slowly when using the Rear Back Up
Camera to be able to stop in time when an
obstacle is seen. It is recommended that the
driver look frequently over his/her shoulder
when using the Rear Back Up Camera.
WARNING!
Do not to affix objects/plugs to the end of the
filler neck other than what is provided on the
car.
The use of objects/plugs that are not compat -
ible with the vehicle may cause pressure
i n c
re
a
ses inside the tank, creating dangerous
conditions.
Do not approach the neck of the tank with
open flames or lit cigarettes; it is an extreme
fire hazard. Also, avoid close contact with the
filler pipe with your face; do not inhale harmful
vapors.
Do not use your mobile phone in the vicinity of
the pump fuel nozzle; it can be a possible risk
of fire.