headlamp JEEP RENEGADE 2023 Owners Manual
[x] Cancel search | Manufacturer: JEEP, Model Year: 2023, Model line: RENEGADE, Model: JEEP RENEGADE 2023Pages: 364, PDF Size: 18.65 MB
Page 4 of 364

2
INTRODUCTION
SYMBOLS KEY ...........................................................9
ROLLOVER WARNING ...... ....................................... 9
VEHICLE MODIFICATIONS/ALTERATIONS ...... .... 10
SYMBOL GLOSSARY...... ........................................ 10
GETTING TO KNOW YOUR VEHICLE
KEYS ....................................................................... 14
Key Fob .............................................................14
SENTRY KEY ..... . ..................................................... 16
IGNITION SWITCH ...... ............................................ 17
Keyless Enter ‘n Go™ Ignition ...... ...................17
REMOTE START — IF EQUIPPED ..... . .................... 18
How To Use Remote Start ...... ..........................18
To Exit Remote Start Mode ..... . ........................19
Remote Start Front Defrost Activation —
If Equipped. .....
..................................................19
Remote Start Comfort Systems —
If Equipped . .....
.................................................19
Remote Start Windshield Wiper
De–Icer Activation — If Equipped . .....
..............20
Remote Start Cancel Message —
If Equipped. .....
..................................................20
VEHICLE SECURITY SYSTEM — IF EQUIPPED ..... 2 0
To Arm The System ...... ...................................20
To Disarm The System . ..
..
. ..............................21DOORS .....................................................................21
Manu a
l Door Locks ...... ....................................21
Power Door Locks ..... . .....................................22
Keyless Enter ‘n Go™ — Passive Entry
(If Equipped) . .....
...............................................22
Automatic Unlock On Exit Feature —
If Equipped. .....
..................................................24
Dead Lock Device — If Equipped. ..
..
. ...............25
Child Locks ..... . ................................................25
STEERING WHEEL ..... . ............................................26
Tilt/Telescoping Steering Column ...... .............26
Heated Steering Wheel — If Equipped ..... . .....26
SEATS . ....................................................................26
M a
n u
a
l Front Seats...... ....................................27
Manual Rear Seat Adjustment ..... . ..................27
Power Adjustment (Front) — If Equipped . ..
..
. ..29
Heated Seats — If Equipped . ..
..
. .....................30
Unfolding The Rear Armrest
40/20/40 . ........................................................31
Head R
estraints . ..
..
. .........................................31
UCONNECT VOICE RECOGNITION ..... . ..................33
Introducing Voice Recognition...... ...................33
Basic Voice Commands . ..
..
. .............................33
Get Started ..... . .................................................33
Additional Information . ..
..
. ...............................33MIRRORS ................................................................ 34
Insi d
e Rearview Mirror...... ............................... 34
Illuminated Vanity Mirrors — If Equipped ..... . 34
Outside Mirrors . ..
..
. .......................................... 35
Heated Mirrors — If Equipped ..... . ................... 36
EXTERIOR LIGHTS. ..
..
. ............................................ 36
Headlight Switch ...... ....................................... 36
Daytime Running Lights (DRLs) —
If Equipped . .....
................................................ 37
High Beams ..... . ............................................... 37
Automatic High Beam Headlamp Control —
If Equipped . .....
................................................ 37
Flash-To-Pass . ..
..
. ............................................. 37
Automatic Headlights — If Equipped ..... . ........ 38
Parking Lights ..... . ............................................. 38
Headlight Time Delay . ..
..
. ................................ 38
Front Fog Lights — If Equipped ..... . .................38
Turn Signals. ..
..
. ................................................ 39
Lane Change Assist..... . ....................................39
Courtesy Lights. ..
..
. ...........................................39
INTERIOR LIGHTS ..... . ........................................... 39
Front Map/Reading Lights ...... ........................ 39
Dimmer Controls ..... . ....................................... 40
Rear Lights . ..
..
. .................................................40
Dome Light Timing ..... . ..................................... 41
Page 39 of 364

GETTING TO KNOW YOUR VEHICLE 37
Turning on the headlights will illuminate the
instrument cluster and the controls located on the
instrument panel.
NOTE:
On vehicles sold in Canada, both the rear position
light s
and Daytime Running Lights (DRLs) will turn
on when the headlight switch is rotated to the O
(off) position.
DAYTIME RUNNING LIGHTS (DRLS) —
I
F EQUIPPED
The Daytime Running Lights (DRLs), if enabled
through Uconnect Settings, will turn on when the
instrument cluster is on and remain on unless the
headlights are turned on or the instrument cluster
is switched off.
NOTE:
For vehicles sold in Canada, the Daytime
Running Lights will automatically deactivate
when the front fog lights are turned on.
On some vehicles, the Daytime Running Lights
may deactivate, or reduce intensity, on one side
of the vehicle (when a turn signal is activated on
that side), or on both sides of the vehicle (when
the hazard warning lights are activated).
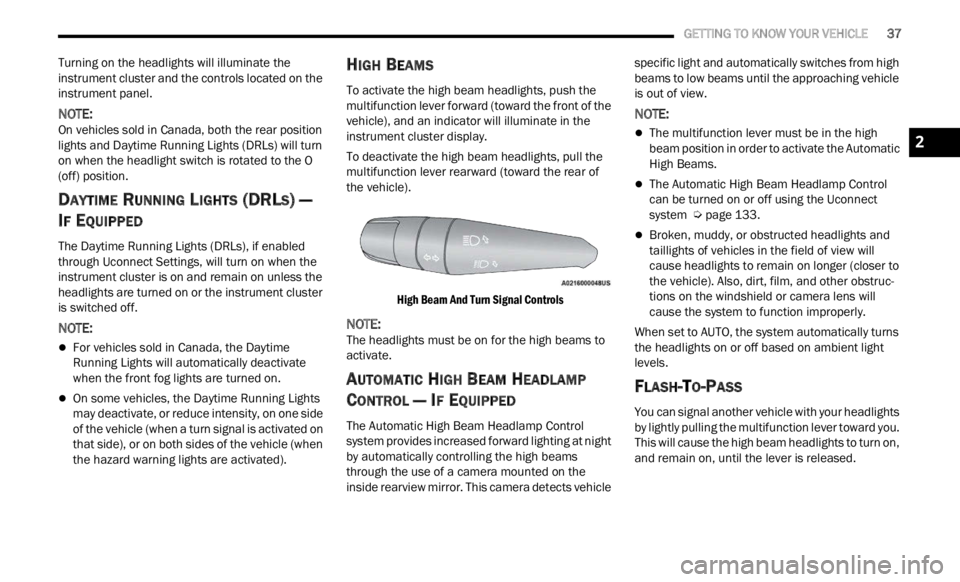
HIGH BEAMS
To activate the high beam headlights, push the
multifunction lever forward (toward the front of the
vehicle), and an indicator will illuminate in the
instrument cluster display.
To deactivate the high beam headlights, pull the
multif
unction lever rearward (toward the rear of
the vehicle).
High Beam And Turn Signal Controls
NOTE:
The headlights must be on for the high beams to
activ a
te.
AUTOMATIC HIGH BEAM HEADLAMP
C
ONTROL — IF EQUIPPED
The Automatic High Beam Headlamp Control
system provides increased forward lighting at night
by automatically controlling the high beams
through the use of a camera mounted on the
inside rearview mirror. This camera detects vehicle specific light and automatically switches from high
beams to low beams until the approaching vehicle
is out of view.
NOTE:
The multifunction lever must be in the high
beam position in order to activate the Automatic
High Beams.
The Automatic High Beam Headlamp Control
can be turned on or off using the Uconnect
system
Ú page 133.
Broken, muddy, or obstructed headlights and
taillights of vehicles in the field of view will
cause headlights to remain on longer (closer to
the vehicle). Also, dirt, film, and other obstruc
-
tions on the windshield or camera lens will
c ause
the system to function improperly.
When set to AUTO, the system automatically turns
the he
adlights on or off based on ambient light
levels.
FLASH-TO-PASS
You can signal another vehicle with your headlights
by lightly pulling the multifunction lever toward you.
This will cause the high beam headlights to turn on,
and remain on, until the lever is released.
2
Page 254 of 364

252 SAFETY
If A Deployment Occurs
The front air bags are designed to deflate
immediately after deployment.
NOTE:
Front and/or side air bags will not deploy in all colli -
sions. This does not mean something is wrong with
t he a i
r bag system.
If you do have a collision which deploys the air
bags,
any or all of the following may occur:
The air bag material may sometimes cause
abrasions and/or skin reddening to the occu -
pants as the air bags deploy and unfold. The
abrasi
ons are similar to friction rope burns or
those you might get sliding along a carpet or
gymnasium floor. They are not caused by
contact with chemicals. They are not permanent
and normally heal quickly. However, if you
haven’t healed significantly within a few days, or
if you have any blistering, see your doctor imme -
diately.
As the air bags deflate, you may see some
smoke-like particles. The particles are a normal
by-product of the process that generates the
non-toxic gas used for air bag inflation. These
airborne particles may irritate the skin, eyes,
nose, or throat. If you have skin or eye irritation,
rinse the area with cool water. For nose or throat
irritation, move to fresh air. If the irritation
continues, see your doctor. If these particles settle on your clothing, follow the garment
manufacturer’s instructions for cleaning.
Do not drive your vehicle after the air bags have
deploy e
d. If you are involved in another collision,
the air bags will not be in place to protect you.
NOTE:
Air bag covers may not be obvious in the interior
trim, but they will open during air bag deploy -
ment.
After any collision, the vehicle should be taken
to an authorized dealer immediately.
Enhanced Accident Response System
In the event of an impact, if the communication
network remains intact, and the power remains
intact, depending on the nature of the event, the
Occupant Restraint Controller (ORC) will determine
whether to have the Enhanced Accident Response
System perform the following functions:
Cut off fuel to the engine (if equipped)
Cut off battery power to the electric motor (if
equipped)
Flash hazard lights as long as the battery has
power
Turn on the interior lights, which remain on as
long as the battery has power or for 15 minutes
f r
om
t h
e intervention of the Enhanced Accident
Response System
Unlock the power door locks
Your vehicle may also be designed to perform any
of the s
e other functions in response to the
Enhanced Accident Response System:
Turn off the Fuel Filter Heater, Turn off the HVAC
Blower Motor, Close the HVAC Circulation Door
Cut off battery power to the:
Engine
Electric Motor (if equipped)
Electric power steering
Brake booster
Electric park brake
Automatic transmission gear selector
Horn
Front wiper
Headlamp washer pump (if equipped)
WARNING!
Deployed air bags and seat belt pretensioners
cannot protect you in another collision. Have the
air bags, seat belt pretensioners, and the seat
belt retractor assemblies replaced by an autho -
rized dealer immediately. Also, have the Occu -
pant Restraint Controller System serviced as well.
Page 313 of 364

SERVICING AND MAINTENANCE 311
BULB REPLACEMENT
General Information
Before you replace a bulb, check the contacts to
be sure they are not oxidized.
Replace the bulbs with the same type and
wattage.
After replacing a light bulb, always check the
correct orientation.
Before replacing a bulb that is not functioning,
check that the fuse is intact.
NOTE:
Lens fogging can occur under certain atmospheric
condit i
ons. This will usually clear as atmospheric
conditions change to allow the condensation to
change back into a vapor. Turning the lamps on will
usually accelerate the clearing process.Replacement Bulbs, Names, And Part
Numbers
In the instance a bulb needs to be replaced, this
section includes bulb description and replacement
part numbers.
NOTE:
See an authorized dealer for LED bulb
repla c
ement.
Interior Bulbs
Lamps Bulb Number
Front Courtesy Light C5W
Front Courtesy Lights (Sun Visors) C5W
Rear Dome Light (Models Without Retractable Roof) C5W
Rear Interior Lights (Models With Retractable Roof) C5W
Interior Lights W5W
Dome Light (Glove Compartment) W5W
Exterior Bulbs
Lamps Bulb Number
Low Beam/High Beam Headlamps (LED Version) LED (Serviced at an authorized dealer)
Low Beam/High Beam Headlamps H13
8
Page 314 of 364

312 SERVICING AND MAINTENANCE
Front Position/Daytime Running Lights (DRL)/Front Turn Indicator PSY24W
Front Direction Indicator Lamps (If Equipped With LED Headlamps) PSY24W
Front Fog Lamps H11
Front Fog Lamps (LED Versions) LED (Serviced at an authorized dealer)
Side Indicators (Front And Side View Mirror) WY5W
Tail/Brake Lights/Turn Indicators (LED Versions) LED (Serviced at an authorized dealer)
Tail/Brake Lights/Turn Indicators P21W
Center High Mounted Stop Lamp (CHMSL) LED (Serviced at an authorized dealer)
Reverse W16W
License Plate Lamp W5W
Exterior Bulbs
Lamps Bulb Number
Page 315 of 364

SERVICING AND MAINTENANCE 313
Replacing Exterior Bulbs
Headlamps
Hi/Lo Beam Light Halogen
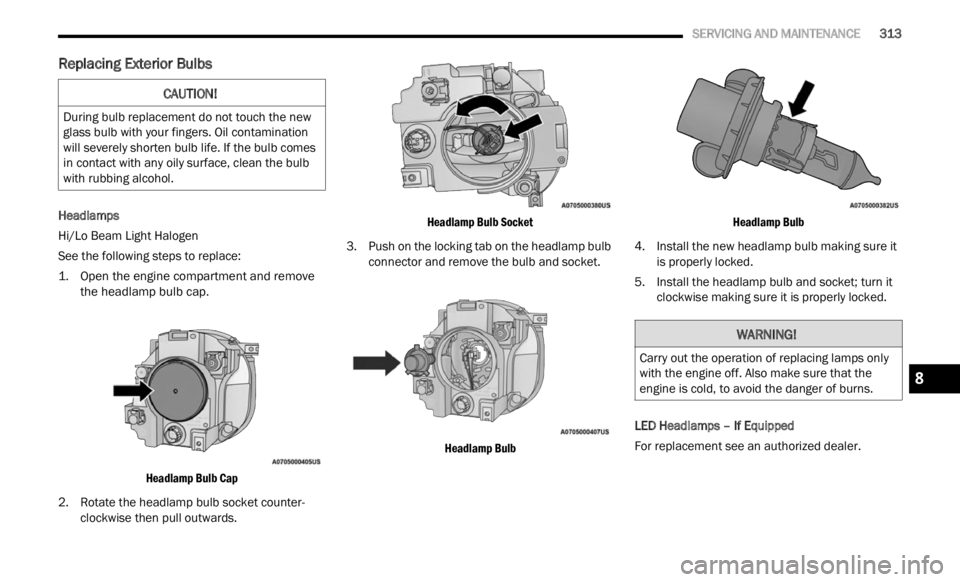
See the following steps to replace:
1. O
pen the engine compartment and remove
the he a
dlamp bulb cap.
Headlamp Bulb Cap
2. Rotate the headlamp bulb socket counter -
clock w
ise then pull outwards.
Headlamp Bulb Socket
3. P ush on the locking tab on the headlamp bulb
conne c
tor and remove the bulb and socket.
Headlamp Bulb Headlamp Bulb
4. Install the new headlamp bulb making sure it is pr operly locked.
5. Install the headlamp bulb and socket; turn it clockw
ise making sure it is properly locked.
LED Headlamps – If Equipped
For replacement see an authorized dealer.
CAUTION!
During bulb replacement do not touch the new
glass bulb with your fingers. Oil contamination
will severely shorten bulb life. If the bulb comes
in contact with any oily surface, clean the bulb
with rubbing alcohol.
WARNING!
Carry out the operation of replacing lamps only
with the engine off. Also make sure that the
engine is cold, to avoid the danger of burns.
8