tow JEEP RENEGADE 2023 Owners Manual
[x] Cancel search | Manufacturer: JEEP, Model Year: 2023, Model line: RENEGADE, Model: JEEP RENEGADE 2023Pages: 364, PDF Size: 18.65 MB
Page 6 of 364

4
FOUR-WHEEL DRIVE .............................................. 90
Four-Wheel Drive (4WD) ...... ............................91
SELEC-TERRAIN ..... . ............................................... 92
Mode Selection Guide...... ................................92
ACTIVE GRILLE SHUTTERS — IF EQUIPPED ..... . .. 93
POWER STEERING ...... ........................................... 93
STOP/START SYSTEM ...... ..................................... 93
Autostop Mode ......
...........................................93
Possible Reasons The Engine Does Not
Autostop . ...........................................................94
To Sta
rt The Engine While In Autostop
Mode . ................................................................94
To Man
ually Turn Off The Stop/Start
System . .............................................................95
To Man
ually Turn On The Stop/Start
System . .............................................................95
Syste
m Malfunction ..... . ...................................95
CRUISE CONTROL SYSTEMS — IF EQUIPPED. ..
. .
9 5
Cruise Control ...... ............................................95
Adaptive Cruise Control (ACC) . ..
. .
. ...................97
PARKSENSE FRONT/REAR PARK ASSIST
SYSTEM — IF EQUIPPED ..... .
.............................. 105
ParkSense Sensors ...... ................................. 105
ParkSense Warning Display..... . .................... 105
ParkSense Display . ..
..
. .................................. 105
Enabling And Disabling ParkSense ..... . ........ 108
Service The ParkSense Park Assist System .. 108
C l
eaning The ParkSense System . ..
..
. ........... 108
ParkSense System Usage Precautions ..... . .. 108
Side Distance Warning (SDW) System . ..
. .
. ... 109PARKSENSE ACTIVE PARK ASSIST SYSTEM —
IF EQUIPPED ..... .
.................................................. 111
Enabling And Disabling The ParkSense
Active Park Assist System..... .
....................... 112
Parallel/Perpendicular Parking Space
Assistance Operation . .....
.............................. 113
Exiting The Parking Space ..... . ...................... 115
LANESENSE — IF EQUIPPED . ..
. .
. ....................... 117
LaneSense Operation ...... ............................. 117
Turning LaneSense On Or Off ..... . ................. 117
LaneSense Warning Message . ..
..
. ................ 117
Changing LaneSense Status ..... . .................. 121
REAR BACK UP CAMERA . ..
..
. ............................. 121
REFUELING THE VEHICLE ...... ............................ 122
VEHICLE LOADING ...... ....................................... 123
Certification Label ...... ................................... 123
TRAILER TOWING ..... . .......................................... 124
Common Towing Definitions...... ................... 124
Trailer Hitch Classification ..... . ...................... 125
Trailer Towing Weights (Maximum Trailer
Weight Ratings) . .....
....................................... 126
Trailer And Tongue Weight..... . ...................... 126
Towing Requirements . ..
..
. ............................ 126
Towing Tips ..... . .............................................. 128
RECREATIONAL TOWING . ..
..
. ............................. 129
Towing This Vehicle Behind Another
Vehicle ........................................................... 129
Recr e
ational Towing. ..
..
. ................................ 129 DRIVING TIPS .....
.
................................................. 130
On-Road Driving Tips...... ............................... 130
Off-Road Driving Tips ..... . .............................. 130
MULTIMEDIA
UCONNECT SYSTEMS ......................................... 133
CYBERSECURITY ................................................. 133
UCONNECT SETTINGS ...... ................................... 133
Customer Programmable Features ...... ...... 134
UCONNECT INTRODUCTION..... . .......................... 147
System Overview ...... .................................... 147
Drag & Drop Menu Bar . ..
..
. ........................... 149
Safety And General Information..... . ............. 149
UCONNECT MODES ..... . ....................................... 150
Steering Wheel Audio Controls .................... 150
Radi o Mode ..... . ............................................ 151
Media Mode . ..
. .
. ........................................... 162
Phone Mode ..... . ........................................... 164
ANDROID AUTO™ & APPLE CARPLAY® —
IF EQUIPPED ..... .
................................................... 174
Android Auto™ ...... ........................................ 174
Apple CarPlay® . ..
..
. ....................................... 176
Android Auto™ And Apple CarPlay® Tips
And Tricks . ..................................................... 178
Page 7 of 364
5
NAVIGATION MODE — IF EQUIPPED
(UCONNECT 4C NAV ONLY) ...... ......................... 180
Operating Navigation ...... ............................. 180
Where To? . ..
..
. ............................................... 180
View Map ...................................................... 191
Infor m
ation . ..
..
. ............................................. 199
Emergency ..... . .............................................. 200
Map Updates . ..
. .
. .......................................... 200
SiriusXM® Travel Link ..... . ............................ 201
SiriusXM® Traffic Plus ..... . ........................... 201
CONNECTED VEHICLE SERVICES —
IF EQUIPPED ..... .
.................................................. 202
Is My Vehicle Connected?...... ....................... 202
Introduction To Connected Vehicle
Services . ........................................................ 202
Getti
ng Started With Connected Vehicle
Services . ........................................................ 203
Using
SiriusXM Guardian™ . ..
..
. .................... 205
Manage My SiriusXM Guardian™ Account .. 215
C O
NNECTED SERVICES FAQS . ..
..
. ..................... 215
Connected Services SOS FAQs —
If Equipped ..... .
.............................................. 215
Connected Services Remote Door Lock/
Unlock FAQs . .....
............................................ 215
Connected Services Roadside Assistance
FAQs . ............................................................. 216
Connec
ted Services Send & Go FAQs —
If Equipped . .....
.............................................. 216 Connected Services Vehicle Finder FAQs ... 21
6
C
onnected Services Stolen Vehicle
Assistance FAQs — If Equipped . .....
............. 217
Connected Services Remote Vehicle Start
FAQs . ............................................................. 217
Connec
ted Services Remote Horn & Lights
FAQs . .............................................................. 217
Connec
ted Services Account
FAQs — If Equipped . .....
................................. 218
Data Collection & Privacy ..... . ....................... 220
RADIO OPERATION AND MOBILE PHONES . ..
..
2 20
Regulatory And Safety Information ...... ........ 220
SAFETY
SAFETY FEATURES .............................................. 221
Anti-Lock Brake System (ABS) ...... ............... 221
Electronic Brake Control (EBC) System . ..
..
. . 222
AUXILIARY DRIVING SYSTEMS ..... . ................... 228
Blind Spot Monitoring (BSM) —
If Equipped..... .
............................................... 228
Forward Collision Warning (FCW) With
Mitigation Operation — If Equipped . .....
....... 232
Tire Pressure Monitoring System (TPMS) .... 2 3 5
OCCUPANT RESTRAINT SYSTEMS . ..
..
. ............. 240
Occupant Restraint Systems ...... .................. 240
Important Safety Precautions . ..
..
. ................ 240
Seat Belt Systems ..... . ................................... 241
Supplemental Restraint Systems (SRS) ..... . 246
Child Restraints . ..
..
. ...................................... 255 SAFETY TIPS .....
.
................................................... 265
Transporting Passengers...... ........................ 265
Transporting Pets ..... . .................................... 265
Connected Vehicles . ..
..
. ................................ 265
Safety Checks You Should Make Inside The
Vehicle . ......................................................... 265
Period
ic Safety Checks You Should Make
Outside The Vehicle . .....
................................ 267
Exhaust Gas ..... . ............................................ 267
Carbon Monoxide Warnings ..... . ................... 267
IN CASE OF EMERGENCY
HAZARD WARNING FLASHERS ......................... 268
ASSIST AND SOS SYSTEM — IF EQUIPPED ...... 268
JACKING AND TIRE CHANGING ...... .................. 271
Preparations For Jacking ...... ....................... 271
Jack Location/Spare Tire Stowage ..... . ....... 272
Jacking Instructions ..... . ................................ 273
TIRE SERVICE KIT — IF EQUIPPED . ..
..
. ............... 276
Tire Service Kit Storage ...... .......................... 276
Tire Service Kit Components And
Operation . ...................................................... 276
Tire
Service Kit Usage Precautions ..... . ........ 277
Replacing The Sealant . ..
..
. ............................ 278
JUMP STARTING ..... . ............................................ 278
Preparations For Jump Start ...... .................. 278
Jump Starting Procedure ..... . ........................ 279
Page 8 of 364
6
REFUELING IN EMERGENCY – IF EQUIPPED .. 280
IF YOUR ENGINE OVERHEATS ...... ...................... 281
GEAR SELECTOR OVERRIDE ...... ....................... 281
FREEING A STUCK VEHICLE ...... ........................ 282
TOWING A DISABLED VEHICLE ...... ...................283
Front–Wheel Drive (FWD) ...... ....................... 284
Four–Wheel Drive (4WD) ..... . ........................ 284
Emergency Tow Hooks — If Equipped . ..
..
. .... 284
ENHANCED ACCIDENT RESPONSE SYSTEM
(EARS) .................................................................. 285
EVEN T
DATA RECORDER (EDR) ...... ...................285
SERVICING AND MAINTENANCE
SCHEDULED SERVICING .................................... 286
Maintenance Plan ...... ................................... 287
ENGINE COMPARTMENT ..... . .............................. 293
1.3L Turbo Engine ...... ................................... 293
Checking Oil Level ..... . ................................... 294
Adding Washer Fluid . ..
..
. ............................... 294
Maintenance-Free Battery ..... . ..................... 294
Pressure Washing . ..
..
. ................................... 295
VEHICLE MAINTENANCE ..... . .............................. 295
Engine Oil ...................................................... 295
Engin e Oil Filter . ..
..
. ....................................... 296
Engine Air Cleaner Filter ..... . ........................ 296
Air Conditioner Maintenance . ..
..
. .................. 296Body Lubrication .....
.
..................................... 297
Windshield Wiper Blades ..... . ....................... 297
Exhaust System ..... . ...................................... 298
Cooling System . ..
..
. ........................................ 299
Brake System ..... . .......................................... 302
Automatic Transmission . ..
..
. ........................ 303
Fuses.............................................................. 303
Bulb
Replacement. ..
..
. ................................... 311
TIRES..................................................................... 322
Tire
Safety Information ...... ........................... 322
Tires — General Information . ..
..
. .................. 329
Tire Types....................................................... 332
Spar e
Tires — If Equipped . ..
. .
. ....................... 333
Wheel And Wheel Trim Care ..... . ................... 334
Snow Traction Devices . ..
..
. ........................... 335
Tire Rotation Recommendations ..... . .......... 336
DEPARTMENT OF TRANSPORTATION
UNIFORM TIRE QUALITY GRADES ..... .
............. 337
Treadwear ...................................................... 337
Tract ion Grades . ..
..
. ....................................... 337
Temperature Grades ..... . ............................... 337
STORING THE VEHICLE . ..
..
. ................................. 338
BODYWORK ...... ................................................... 338
Protection From Atmospheric Agents ...... .... 338
Body And Underbody Maintenance. ..
..
. ........ 338
Preserving The Bodywork ..... . ....................... 338INTERIORS .....
.
..................................................... 339
Seats And Fabric Parts ...... ........................... 339
Plastic And Coated Parts ..... . ........................ 339
Leather Surfaces. ..
..
. ..................................... 340
Glass Surfaces ..... . ....................................... 340
TECHNICAL SPECIFICATIONS
VEHICLE IDENTIFICATION NUMBER (VIN) ........ 341
BRAKE SYSTEM ...... ............................................. 341
WHEEL AND TIRE TORQUE SPECIFICATIONS .. 341 Tor que Specifications ...... ............................. 341
FUEL REQUIREMENTS . ..
..
. ................................... 342
1.3L Turbo Engine ...... ................................... 342
Reformulated Gasoline..... . ........................... 342
Gasoline/Oxygenate Blends . ..
..
. .................. 342
E-85 Usage In Non-Flex Fuel Vehicles ..... . ... 343
CNG And LP Fuel System Modifications . ..
..
. 343
Methylcyclopentadienyl Manganese
Tricarbonyl (MMT) In Gasoline . .....
............... 343
Materials Added To Fuel ..... . ......................... 343
Fuel System Cautions ..... . ............................. 344
FLUID CAPACITIES . ..
..
. ......................................... 344
ENGINE FLUIDS AND LUBRICANTS ...... ............ 345
CHASSIS FLUIDS AND LUBRICANTS ...... .......... 345
Page 14 of 364
12
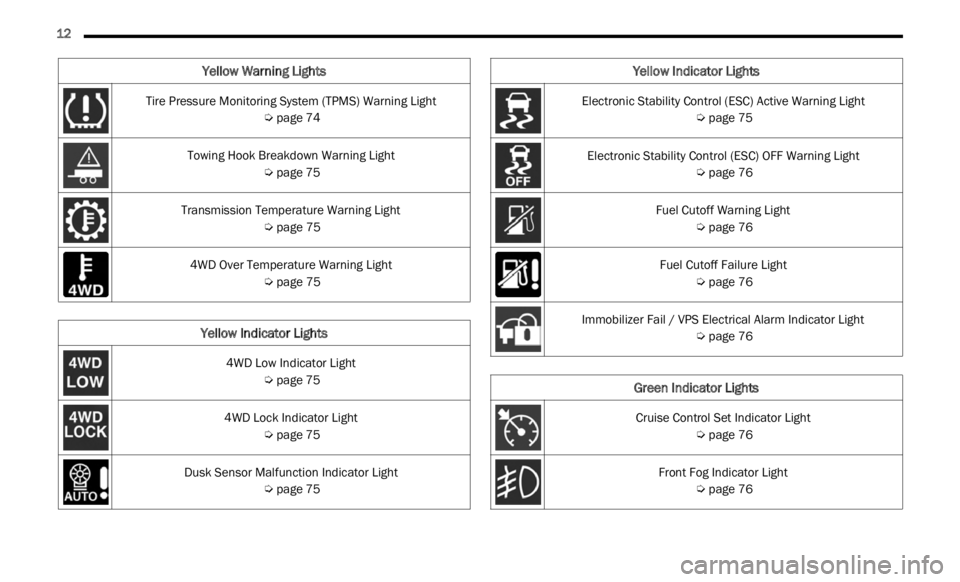
Tire Pressure Monitoring System (TPMS) Warning Light
Ú page 74
Towing Hook Breakdown Warning Light Ú page 75
Transmission Temperature Warning Light Ú page 75
4WD Over Temperature Warning Light Ú page 75
Yellow Indicator Lights
4WD Low Indicator Light
Ú page 75
4WD Lock Indicator Light Ú page 75
Dusk Sensor Malfunction Indicator Light Ú page 75
Yellow Warning Lights
Electronic Stability Control (ESC) Active Warning Light
Ú page 75
Electronic Stability Control (ESC) OFF Warning Light Ú page 76
Fuel Cutoff Warning Light Ú page 76
Fuel Cutoff Failure Light Ú page 76
Immobilizer Fail / VPS Electrical Alarm Indicator Light Ú page 76
Green Indicator Lights
Cruise Control Set Indicator Light
Ú page 76
Front Fog Indicator Light Ú page 76
Yellow Indicator Lights
Page 28 of 364
26 GETTING TO KNOW YOUR VEHICLE
(Continued)
STEERING WHEEL
TILT/TELESCOPING STEERING COLUMN
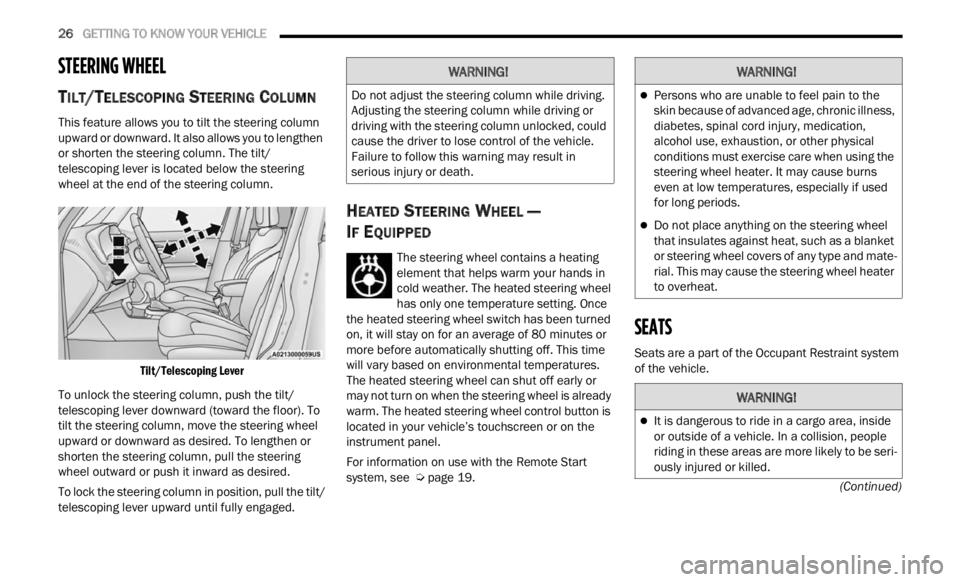
This feature allows you to tilt the steering column
upward or downward. It also allows you to lengthen
or shorten the steering column. The tilt/
telescoping lever is located below the steering
wheel at the end of the steering column.
Tilt/Telescoping Lever
To unlock the steering column, push the tilt/
telesc
oping lever downward (toward the floor). To
tilt the steering column, move the steering wheel
upward or downward as desired. To lengthen or
shorten the steering column, pull the steering
wheel outward or push it inward as desired.
To lock the steering column in position, pull the tilt/
teles c
oping lever upward until fully engaged.
HEATED STEERING WHEEL —
I
F EQUIPPED
The steering wheel contains a heating
element that helps warm your hands in
cold w e
ather. The heated steering wheel
has only one temperature setting. Once
the heated steering wheel switch has been turned
on, it will stay on for an average of 80 minutes or
more be
fore automatically shutting off. This time
will vary based on environmental temperatures.
The heated steering wheel can shut off early or
may not turn on when the steering wheel is already
warm. The heated steering wheel control button is
located in your vehicle’s touchscreen or on the
instrument panel.
For information on use with the Remote Start
syste m
, see Ú page 19.
SEATS
Seats are a part of the Occupant Restraint system
of the vehicle.
WARNING!
Do not adjust the steering column while driving.
Adjusting the steering column while driving or
driving with the steering column unlocked, could
cause the driver to lose control of the vehicle.
Failure to follow this warning may result in
serious injury or death.
WARNING!
Persons who are unable to feel pain to the
skin because of advanced age, chronic illness,
diabetes, spinal cord injury, medication,
alcohol use, exhaustion, or other physical
conditions must exercise care when using the
steering wheel heater. It may cause burns
even at low temperatures, especially if used
for long periods.
Do not place anything on the steering wheel
that insulates against heat, such as a blanket
or steering wheel covers of any type and mate
-
rial. This may cause the steering wheel heater
to over h
eat.
WARNING!
It is dangerous to ride in a cargo area, inside
or outside of a vehicle. In a collision, people
riding in these areas are more likely to be seri -
ously injured or killed.
Page 36 of 364
34 GETTING TO KNOW YOUR VEHICLE
MIRRORS
INSIDE REARVIEW MIRROR
Manual Mirror — If Equipped
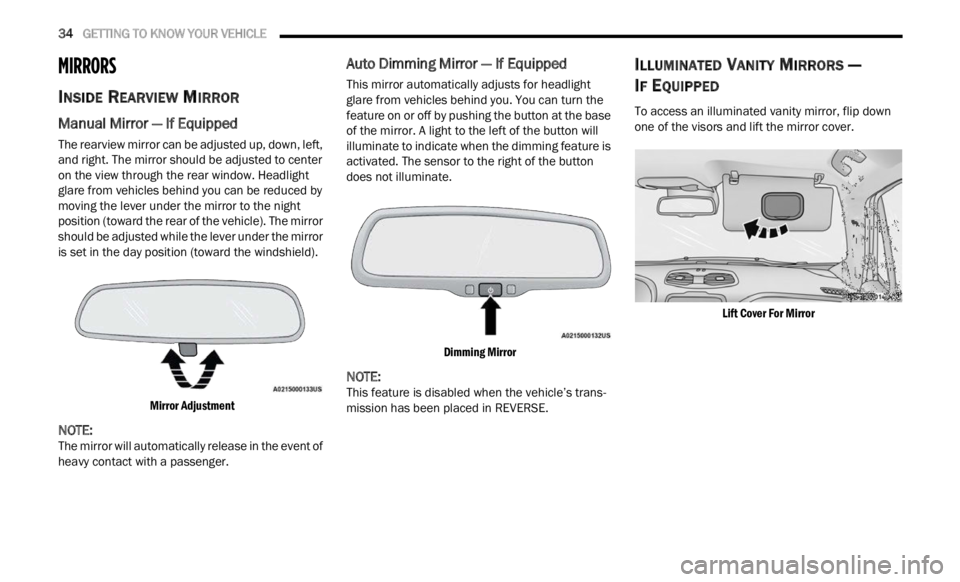
The rearview mirror can be adjusted up, down, left,
and right. The mirror should be adjusted to center
on the view through the rear window. Headlight
glare from vehicles behind you can be reduced by
moving the lever under the mirror to the night
position (toward the rear of the vehicle). The mirror
should be adjusted while the lever under the mirror
is set in the day position (toward the windshield).
Mirror Adjustment
NOTE:
The mirror will automatically release in the event of
heavy
contact with a passenger.
Auto Dimming Mirror — If Equipped
This mirror automatically adjusts for headlight
glare from vehicles behind you. You can turn the
feature on or off by pushing the button at the base
of the mirror. A light to the left of the button will
illuminate to indicate when the dimming feature is
activated. The sensor to the right of the button
does not illuminate.
Dimming Mirror
NOTE:
This feature is disabled when the vehicle’s trans -
mission has been placed in REVERSE.
ILLUMINATED VANITY MIRRORS —
I
F EQUIPPED
To access an illuminated vanity mirror, flip down
one of the visors and lift the mirror cover.
Lift Cover For Mirror
Page 37 of 364
GETTING TO KNOW YOUR VEHICLE 35
Sun Visor “Slide-On-Rod” Feature —
If Equipped
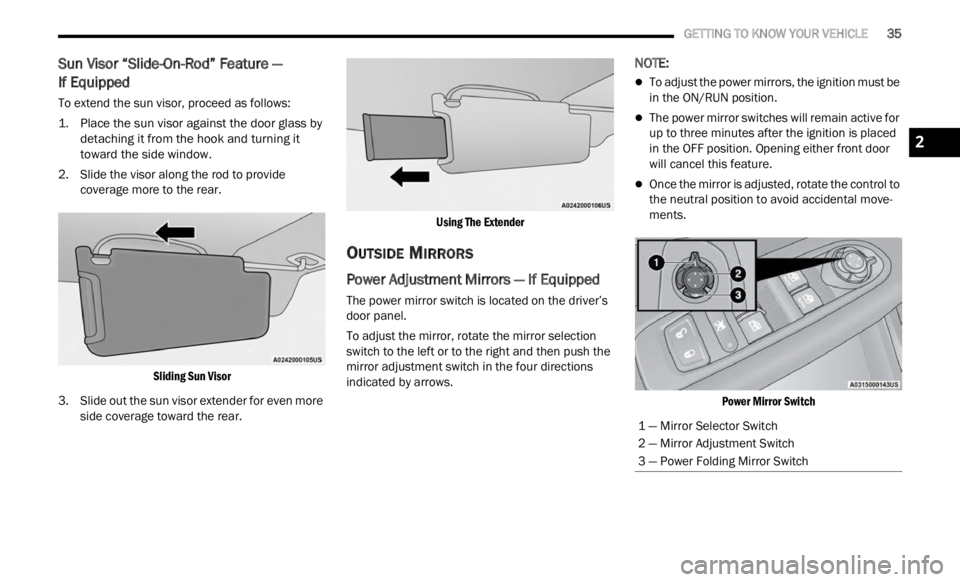
To extend the sun visor, proceed as follows:
1. P lace the sun visor against the door glass by
d e
ta
c
hing it from the hook and turning it
toward the side window.
2. Slide the visor along the rod to provide cover a
ge more to the rear.
Sliding Sun Visor
3. Slide out the sun visor extender for even more side
coverage toward the rear.
Using The Extender
OUTSIDE MIRRORS
Power Adjustment Mirrors — If Equipped
The power mirror switch is located on the driver’s
door panel.
To adjust the mirror, rotate the mirror selection
switch
to the left or to the right and then push the
mirror adjustment switch in the four directions
indicated by arrows.
NOTE:
To adjust the power mirrors, the ignition must be
in the ON/RUN position.
The power mirror switches will remain active for
up to three minutes after the ignition is placed
in the OFF position. Opening either front door
will cancel this feature.
Once the mirror is adjusted, rotate the control to
the neutral position to avoid accidental move -
ments.
Power Mirror Switch
1 — Mirror Selector Switch
2 — Mirror Adjustment Switch
3 — Power Folding Mirror Switch
2
Page 39 of 364
GETTING TO KNOW YOUR VEHICLE 37
Turning on the headlights will illuminate the
instrument cluster and the controls located on the
instrument panel.
NOTE:
On vehicles sold in Canada, both the rear position
light s
and Daytime Running Lights (DRLs) will turn
on when the headlight switch is rotated to the O
(off) position.
DAYTIME RUNNING LIGHTS (DRLS) —
I
F EQUIPPED
The Daytime Running Lights (DRLs), if enabled
through Uconnect Settings, will turn on when the
instrument cluster is on and remain on unless the
headlights are turned on or the instrument cluster
is switched off.
NOTE:
For vehicles sold in Canada, the Daytime
Running Lights will automatically deactivate
when the front fog lights are turned on.
On some vehicles, the Daytime Running Lights
may deactivate, or reduce intensity, on one side
of the vehicle (when a turn signal is activated on
that side), or on both sides of the vehicle (when
the hazard warning lights are activated).
HIGH BEAMS
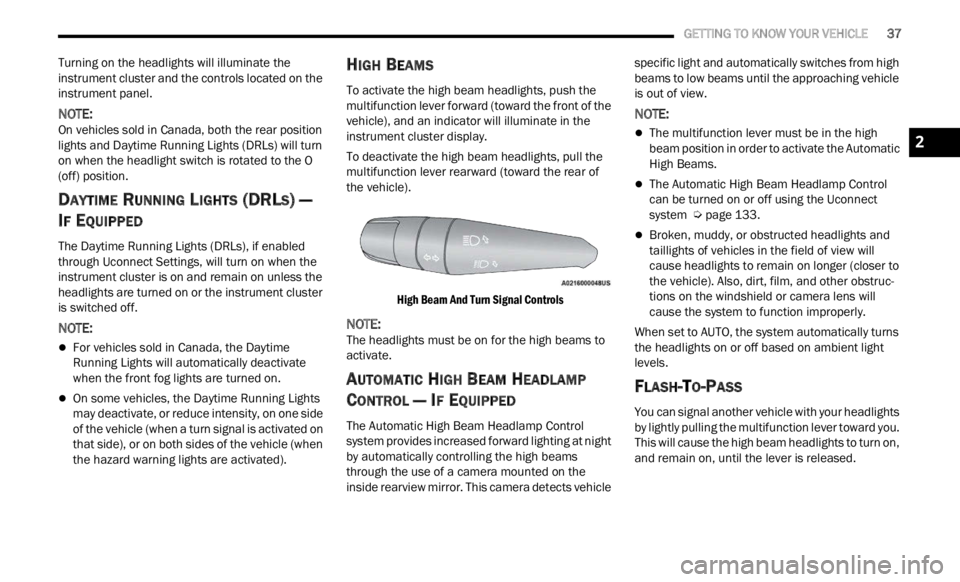
To activate the high beam headlights, push the
multifunction lever forward (toward the front of the
vehicle), and an indicator will illuminate in the
instrument cluster display.
To deactivate the high beam headlights, pull the
multif
unction lever rearward (toward the rear of
the vehicle).
High Beam And Turn Signal Controls
NOTE:
The headlights must be on for the high beams to
activ a
te.
AUTOMATIC HIGH BEAM HEADLAMP
C
ONTROL — IF EQUIPPED
The Automatic High Beam Headlamp Control
system provides increased forward lighting at night
by automatically controlling the high beams
through the use of a camera mounted on the
inside rearview mirror. This camera detects vehicle specific light and automatically switches from high
beams to low beams until the approaching vehicle
is out of view.
NOTE:
The multifunction lever must be in the high
beam position in order to activate the Automatic
High Beams.
The Automatic High Beam Headlamp Control
can be turned on or off using the Uconnect
system
Ú page 133.
Broken, muddy, or obstructed headlights and
taillights of vehicles in the field of view will
cause headlights to remain on longer (closer to
the vehicle). Also, dirt, film, and other obstruc
-
tions on the windshield or camera lens will
c ause
the system to function improperly.
When set to AUTO, the system automatically turns
the he
adlights on or off based on ambient light
levels.
FLASH-TO-PASS
You can signal another vehicle with your headlights
by lightly pulling the multifunction lever toward you.
This will cause the high beam headlights to turn on,
and remain on, until the lever is released.
2
Page 44 of 364
42 GETTING TO KNOW YOUR VEHICLE
WINDSHIELD WIPER OPERATION
Rotate the windshield wiper knob to one of the two
detent positions for intermittent settings, the third
detent for low wiper operation and the fourth for
high wiper operation.
Windshield Washer Operation
To use the washer, pull the lever toward you and
hold w h
ile spray is desired. If the lever is pulled
while in the intermittent setting, the wipers will turn
on and operate for several wipe cycles after the
lever is released, and then resume the intermittent
interval previously selected.
If the lever is pulled while the wipers are in the off
positi on
, the wipers will operate for several wipe
cycles, then turn off. Mist
Use this feature when weather conditions make
occasi
on
al usage of the wipers necessary. Push
the lever upward to the MIST position and release
for a single wiping cycle.
NOTE:
The Mist feature does not activate the washer
pump;
therefore, no washer fluid will be sprayed on
the windshield. The wash function must be used in
order to spray the windshield with washer fluid.
For information on wiper care and replacement,
see Ú p
age 297 .
RAIN SENSING WIPERS — IF EQUIPPED
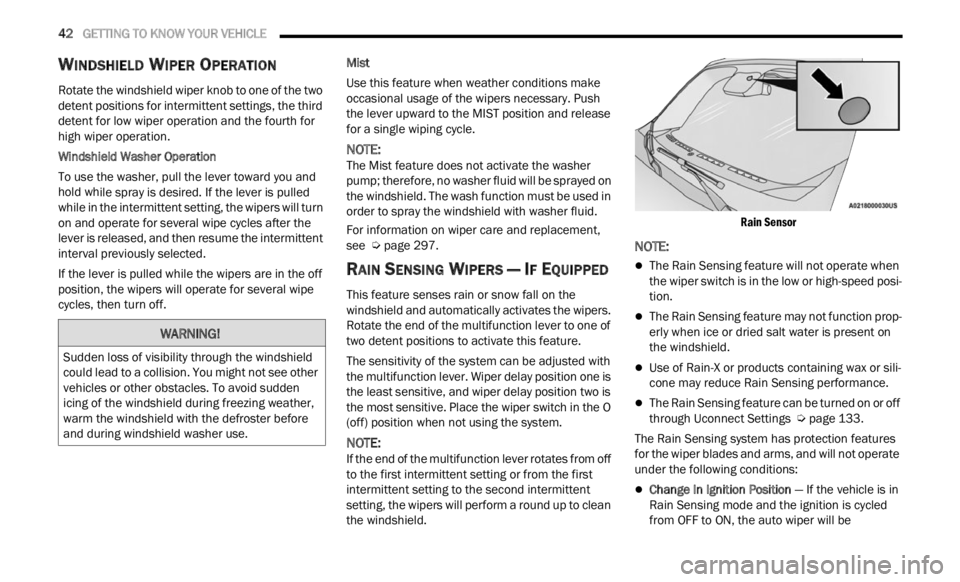
This feature senses rain or snow fall on the
windshield and automatically activates the wipers.
Rotate the end of the multifunction lever to one of
two detent positions to activate this feature.
The sensitivity of the system can be adjusted with
the mu
ltifunction lever. Wiper delay position one is
the least sensitive, and wiper delay position two is
the most sensitive. Place the wiper switch in the O
(off) position when not using the system.
NOTE:
If the end of the multifunction lever rotates from off
to the
first intermittent setting or from the first
intermittent setting to the second intermittent
setting, the wipers will perform a round up to clean
the windshield.
Rain Sensor
NOTE:
The Rain Sensing feature will not operate when
the wiper switch is in the low or high-speed posi
-
tion.
The Rain Sensing feature may not function prop -
erly when ice or dried salt water is present on
t h e
w
i
ndshield.
Use of Rain-X or products containing wax or sili-
cone may reduce Rain Sensing performance.
The Rain Sensing feature can be turned on or off
through Uconnect Settings Ú page 133.
The Rain Sensing system has protection features
f or the
wiper blades and arms, and will not operate
under the following conditions:
Change In Ignition Position — If the vehicle is in
Rain Sensing mode and the ignition is cycled
from OFF to ON, the auto wiper will be
WARNING!
Sudden loss of visibility through the windshield
could lead to a collision. You might not see other
vehicles or other obstacles. To avoid sudden
icing of the windshield during freezing weather,
warm the windshield with the defroster before
and during windshield washer use.
Page 47 of 364
GETTING TO KNOW YOUR VEHICLE 45
(button on the touchscreen grayed out) if
conditions exist that could create fogging on the
inside of the windshield. The A/C can be
deselected manually without disturbing the mode
control selection. Continuous use of the
Recirculation mode may make the inside air stuffy
and window fogging may occur. Extended use of
this mode is not recommended. Recirculation
mode may automatically adjust to optimize
customer experience for warming, cooling,
dehumidification, etc.
In cold weather, use of Recirculation mode may
lead t
o excessive window fogging. The
Recirculation feature may be unavailable if
conditions exist that could create fogging on the
inside of the windshield.
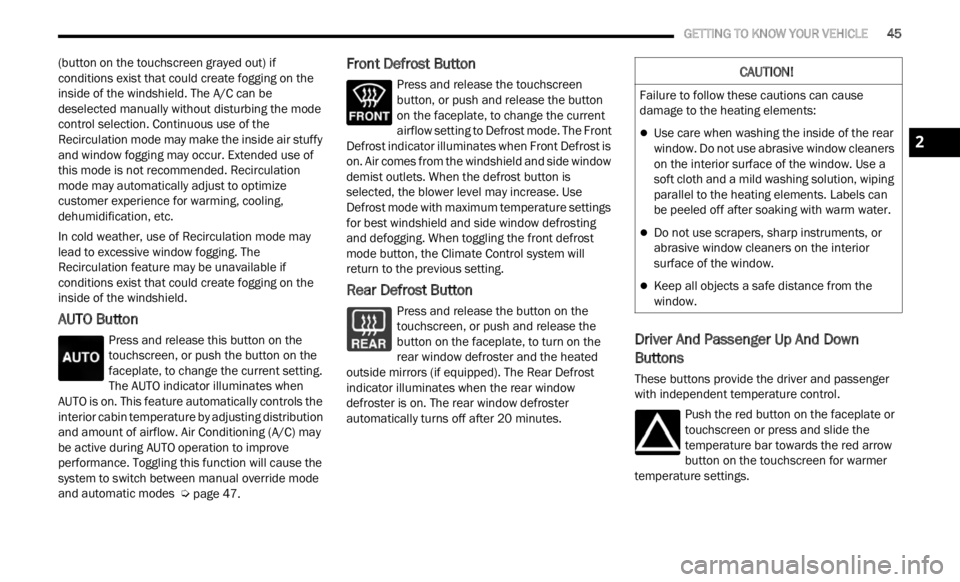
AUTO Button
Press and release this button on the
touchscreen, or push the button on the
facep l
ate, to change the current setting.
The AUTO indicator illuminates when
AUTO is on. This feature automatically controls the
interior cabin temperature by adjusting distribution
and amount of airflow. Air Conditioning (A/C) may
be active during AUTO operation to improve
performance. Toggling this function will cause the
system to switch between manual override mode
and automatic modes Ú page 47.
Front Defrost Button
Press and release the touchscreen
button, or push and release the button
on the
faceplate, to change the current
airflow setting to Defrost mode. The Front
Defrost indicator illuminates when Front Defrost is
on. Air comes from the windshield and side window
demist outlets. When the defrost button is
selected, the blower level may increase. Use
Defrost mode with maximum temperature settings
for best windshield and side window defrosting
and defogging. When toggling the front defrost
mode button, the Climate Control system will
return to the previous setting.
Rear Defrost Button
Press and release the button on the
touchscreen, or push and release the
button
on the faceplate, to turn on the
rear window defroster and the heated
outside mirrors (if equipped). The Rear Defrost
indicator illuminates when the rear window
defroster is on. The rear window defroster
automatically turns off after 20 minutes.Driver And Passenger Up And Down
Buttons
These buttons provide the driver and passenger
with independent temperature control.
Push the red button on the faceplate or
touchscreen or press and slide the
temper
ature bar towards the red arrow
button on the touchscreen for warmer
temperature settings.
CAUTION!
Failure to follow these cautions can cause
damage to the heating elements:
Use care when washing the inside of the rear
window. Do not use abrasive window cleaners
on the interior surface of the window. Use a
soft cloth and a mild washing solution, wiping
parallel to the heating elements. Labels can
be peeled off after soaking with warm water.
Do not use scrapers, sharp instruments, or
abrasive window cleaners on the interior
surface of the window.
Keep all objects a safe distance from the
window.
2