ECO JEEP RENEGADE LATITUDE 2017 Owner's Manual
[x] Cancel search | Manufacturer: JEEP, Model Year: 2017, Model line: RENEGADE LATITUDE, Model: JEEP RENEGADE LATITUDE 2017Pages: 516, PDF Size: 5.3 MB
Page 217 of 516
Air Bag Warning Light
The ORC monitors the readiness of the electronic parts of
the air bag system whenever the ignition switch is in the
AVV/START or MAR/ACC/ON/RUN position. If the
ignition switch is in the STOP/OFF/LOCK position the air
bag system is not on and the air bags will not inflate.
The ORC contains a backup power supply system that may
deploy the air bag system even if the battery loses power or
it becomes disconnected prior to deployment.
The ORC turns on the Air Bag Warning Light in the
instrument panel for approximately four to eight seconds
for a self-check when the ignition switch is in the MAR/
ACC/ON/RUN position. After the self-check, the Air Bag
Warning Light will turn off. If the ORC detects a malfunc-
tion in any part of the system, it turns on the Air Bag
Warning Light, either momentarily or continuously. A
single chime will sound to alert you if the light comes on
again after initial startup.
The ORC also includes diagnostics that will illuminate the
instrument panel Air Bag Warning Light if a malfunction is
detected that could affect the air bag system. The diagnos-
tics also record the nature of the malfunction. While the airbag system is designed to be maintenance free, if any of the
following occurs, have an authorized dealer service the air
bag system immediately.
•
The Air Bag Warning Light does not come on during the
four to eight seconds when the ignition switch is first in
the MAR/ACC/ON/RUN position.
• The Air Bag Warning Light remains on after the four to
eight-second interval.
• The Air Bag Warning Light comes on intermittently or
remains on while driving.
NOTE: If the speedometer, tachometer, or any engine
related gauges are not working, the Occupant Restraint
Controller (ORC) may also be disabled. In this condition
the air bags may not be ready to inflate for your protection.
Have an authorized dealer service the air bag system
immediately.
Page 228 of 516
Customer ActionCustomer Will See
NOTE: Each step MUST BE held for at least two sec-
onds
SOLID.
10. Turn left turn signal
switch OFF. (Turn Signal
Switch Must be placed in
Neutral State). Right turn light is OFF.
Left turn light is OFF.
11. Turn ignition STOP/
OFF/LOCK.
12. Turn ignition MAR/
ACC/ON/RUN. (Entire
sequence needs to be
completed within one
minute or sequence will
need to be repeated). System is now reset and
the engine may be started.
Turn hazard flashers OFF
(Manually)
If a reset procedure step is not completed within 60
seconds, then the turn signal lights will blink and the reset
procedure must be performed again in order to be success-
ful.Maintaining Your Air Bag System
WARNING!
• Modifications to any part of the air bag system could
cause it to fail when you need it. You could be
injured if the air bag system is not there to protect
you. Do not modify the components or wiring, in-
cluding adding any kind of badges or stickers to the
steering wheel hub trim cover or the upper right side
of the instrument panel. Do not modify the front
bumper, vehicle body structure, or add aftermarket
side steps or running boards.
• It is dangerous to try to repair any part of the air bag
system yourself. Be sure to tell anyone who works on
your vehicle that it has an air bag system.
• Do not attempt to modify any part of your air bag
system. The air bag may inflate accidentally or may
not function properly if modifications are made.
Take your vehicle to an authorized dealer for any air
bag system service. If your seat, including your trim
cover and cushion, needs to be serviced in any way
(including removal or loosening/tightening of seat
attachment bolts), take the vehicle to your authorized
(Continued)
226 SAFETY
Page 229 of 516
WARNING!(Continued)
dealer. Only manufacturer approved seat accessories
may be used. If it is necessary to modify the air bag
system for persons with disabilities, contact your
authorized dealer.
Event Data Recorder (EDR)
This vehicle is equipped with an event data recorder
(EDR). The main purpose of an EDR is to record, in certain
crash or near crash-like situations, such as an air bag
deployment or hitting a road obstacle, data that will assist
in understanding how a vehicle’s systems performed. The
EDR is designed to record data related to vehicle dynamics
and safety systems for a short period of time, typically 30
seconds or less. The EDR in this vehicle is designed to
record such data as:
•How various systems in your vehicle were operating;
• Whether or not the driver and passenger safety belts
were buckled/fastened;
• How far (if at all) the driver was depressing the accel-
erator and/or brake pedal; and,
• How fast the vehicle was traveling. •
These data can help provide a better understanding of
the circumstances in which crashes and injuries occur.
NOTE: EDR data are recorded by your vehicle only if a
non-trivial crash situation occurs; no data are recorded by
the EDR under normal driving conditions and no personal
data (e.g., name, gender, age, and crash location) are
recorded. However, other parties, such as law enforcement,
could combine the EDR data with the type of personally
identifying data routinely acquired during a crash investi-
gation.
To read data recorded by an EDR, special equipment is
required, and access to the vehicle or the EDR is needed. In
addition to the vehicle manufacturer, other parties, such as
law enforcement, that have the special equipment, can read
the information if they have access to the vehicle or the
EDR.
Child Restraints
Everyone in your vehicle needs to be buckled up at all
times, including babies and children. Every state in the
United States, and every Canadian province, requires that
small children ride in proper restraint systems. This is the
law, and you can be prosecuted for ignoring it.
5
SAFETY 227
Page 231 of 516
Child Size, Height, Weight Or AgeRecommended Type Of
Child Restraint
Infants and Toddlers Children who are two years old or
younger and who have not reached the height or weight limits of their child restraint Either an Infant Carrier or a Convert-
ible Child Restraint, facing rearward in the rear seat of the vehicle
Small Children Children who are at least two years
old or who have out-grown theheight or weight limit of their rear-facing child restraint Forward-Facing Child Restraint with
a five-point Harness, facing forward in the rear seat of the vehicle
Larger Children Children who have out-grown their
forward-facing child restraint, but
are too small to properly fit the vehi- cle’s seat belt Belt Positioning Booster Seat and the
vehicle seat belt, seated in the rear seat of the vehicle
Children Too Large for Child Restraints Children 12 years old or younger,
who have out-grown the height or weight limit of their booster seat Vehicle Seat Belt, seated in the rear
seat of the vehicle
Infant And Child Restraints
Safety experts recommend that children ride rear-facing in
the vehicle until they are two years old or until they reach
either the height or weight limit of their rear-facing child restraint. Two types of child restraints can be used rear-
facing: infant carriers and convertible child seats.
5
SAFETY 229
Page 232 of 516
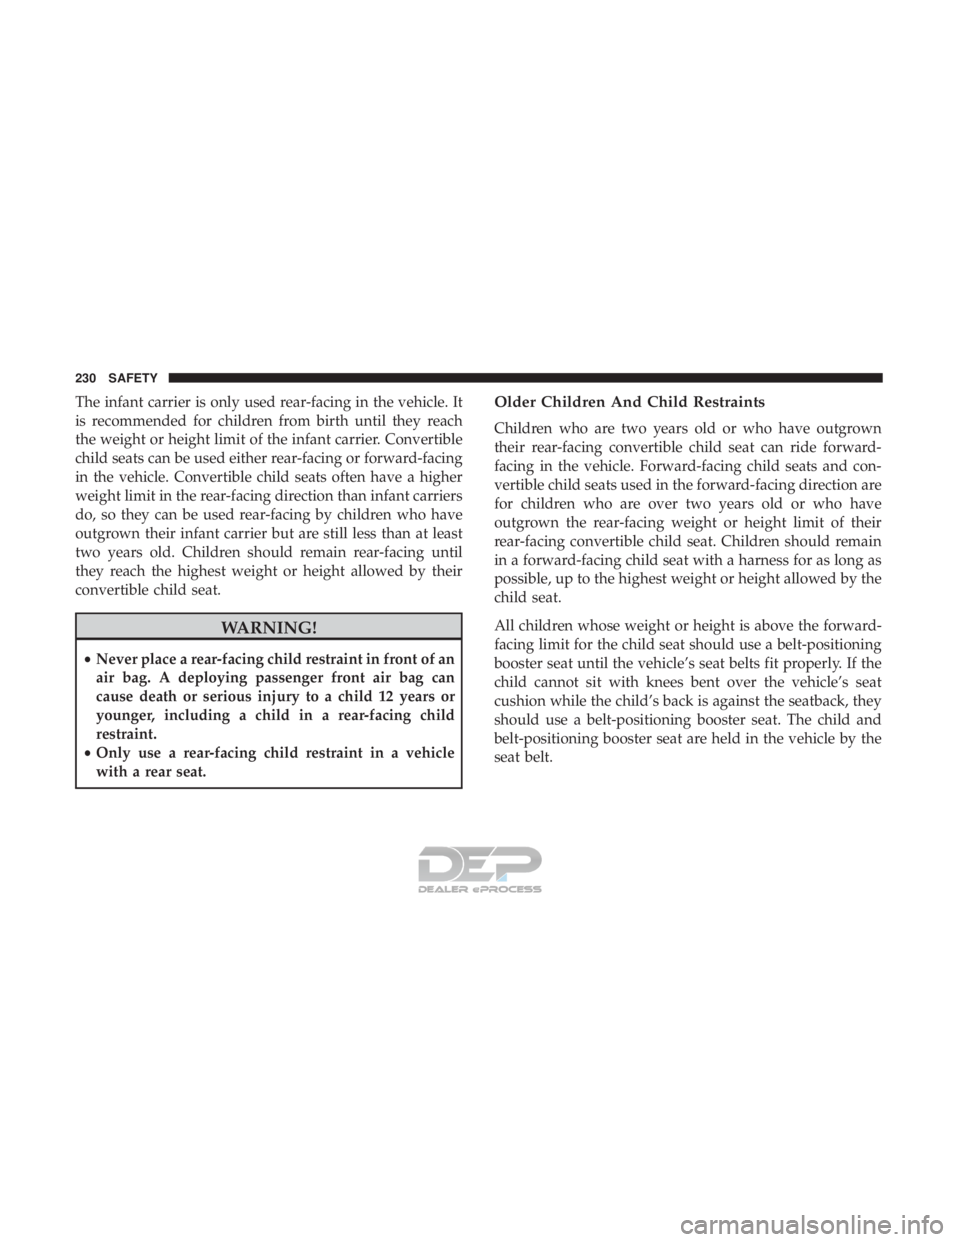
The infant carrier is only used rear-facing in the vehicle. It
is recommended for children from birth until they reach
the weight or height limit of the infant carrier. Convertible
child seats can be used either rear-facing or forward-facing
in the vehicle. Convertible child seats often have a higher
weight limit in the rear-facing direction than infant carriers
do, so they can be used rear-facing by children who have
outgrown their infant carrier but are still less than at least
two years old. Children should remain rear-facing until
they reach the highest weight or height allowed by their
convertible child seat.
Page 234 of 516
WARNING!
Never allow a child to put the shoulder belt under an
arm or behind their back. In a crash, the shoulder belt
will not protect a child properly, which may result in
serious injury or death. A child must always wear both
the lap and shoulder portions of the belt correctly.
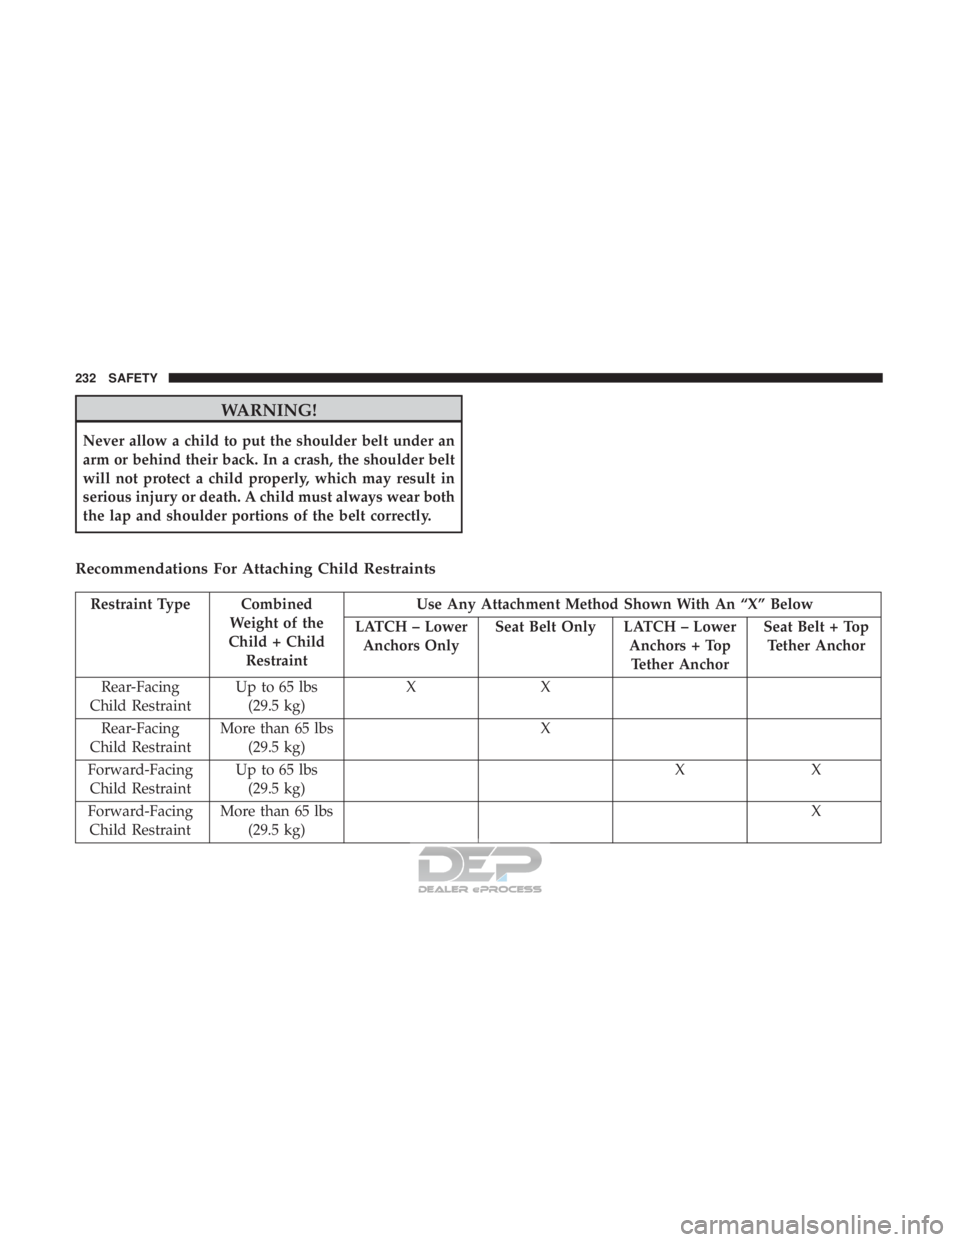
Recommendations For Attaching Child Restraints
Restraint Type CombinedWeight of the
Child + Child Restraint Use Any Attachment Method Shown With An “X” Below
LATCH – Lower Anchors Only Seat Belt Only LATCH – Lower
Anchors + TopTether Anchor Seat Belt + Top
Tether Anchor
Rear-Facing
Child Restraint Up to 65 lbs
(29.5 kg) XX
Rear-Facing
Child Restraint More than 65 lbs
(29.5 kg) X
Forward-Facing Child Restraint Up to 65 lbs
(29.5 kg) XX
Forward-Facing Child Restraint More than 65 lbs
(29.5 kg) X
232 SAFETY
Page 239 of 516
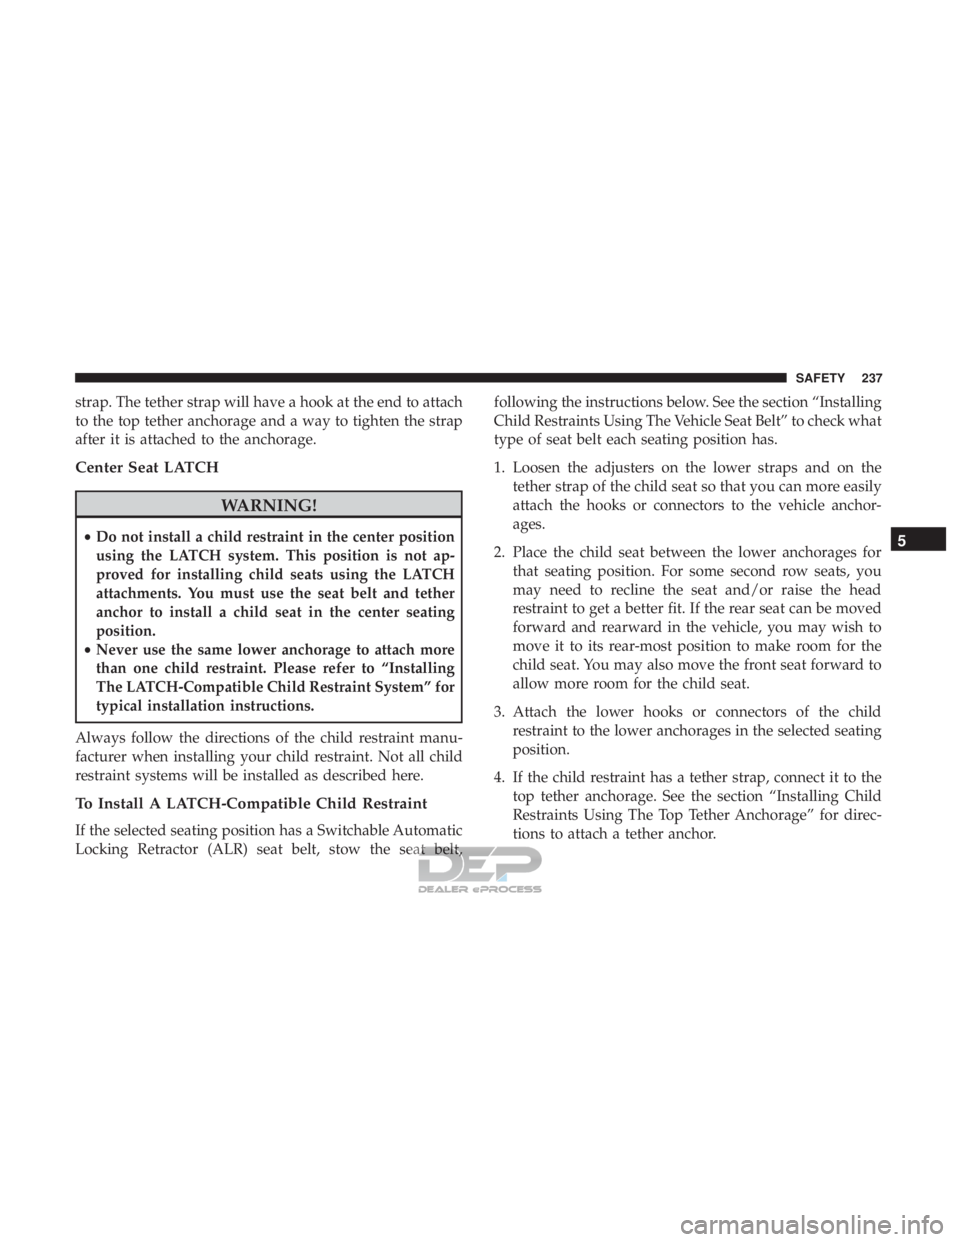
strap. The tether strap will have a hook at the end to attach
to the top tether anchorage and a way to tighten the strap
after it is attached to the anchorage.
Center Seat LATCH
WARNING!
•Do not install a child restraint in the center position
using the LATCH system. This position is not ap-
proved for installing child seats using the LATCH
attachments. You must use the seat belt and tether
anchor to install a child seat in the center seating
position.
• Never use the same lower anchorage to attach more
than one child restraint. Please refer to “Installing
The LATCH-Compatible Child Restraint System” for
typical installation instructions.
Always follow the directions of the child restraint manu-
facturer when installing your child restraint. Not all child
restraint systems will be installed as described here.
To Install A LATCH-Compatible Child Restraint
If the selected seating position has a Switchable Automatic
Locking Retractor (ALR) seat belt, stow the seat belt, following the instructions below. See the section “Installing
Child Restraints Using The Vehicle Seat Belt” to check what
type of seat belt each seating position has.
1. Loosen the adjusters on the lower straps and on the
tether strap of the child seat so that you can more easily
attach the hooks or connectors to the vehicle anchor-
ages.
2. Place the child seat between the lower anchorages for that seating position. For some second row seats, you
may need to recline the seat and/or raise the head
restraint to get a better fit. If the rear seat can be moved
forward and rearward in the vehicle, you may wish to
move it to its rear-most position to make room for the
child seat. You may also move the front seat forward to
allow more room for the child seat.
3. Attach the lower hooks or connectors of the child restraint to the lower anchorages in the selected seating
position.
4. If the child restraint has a tether strap, connect it to the top tether anchorage. See the section “Installing Child
Restraints Using The Top Tether Anchorage” for direc-
tions to attach a tether anchor.
5
SAFETY 237
Page 242 of 516
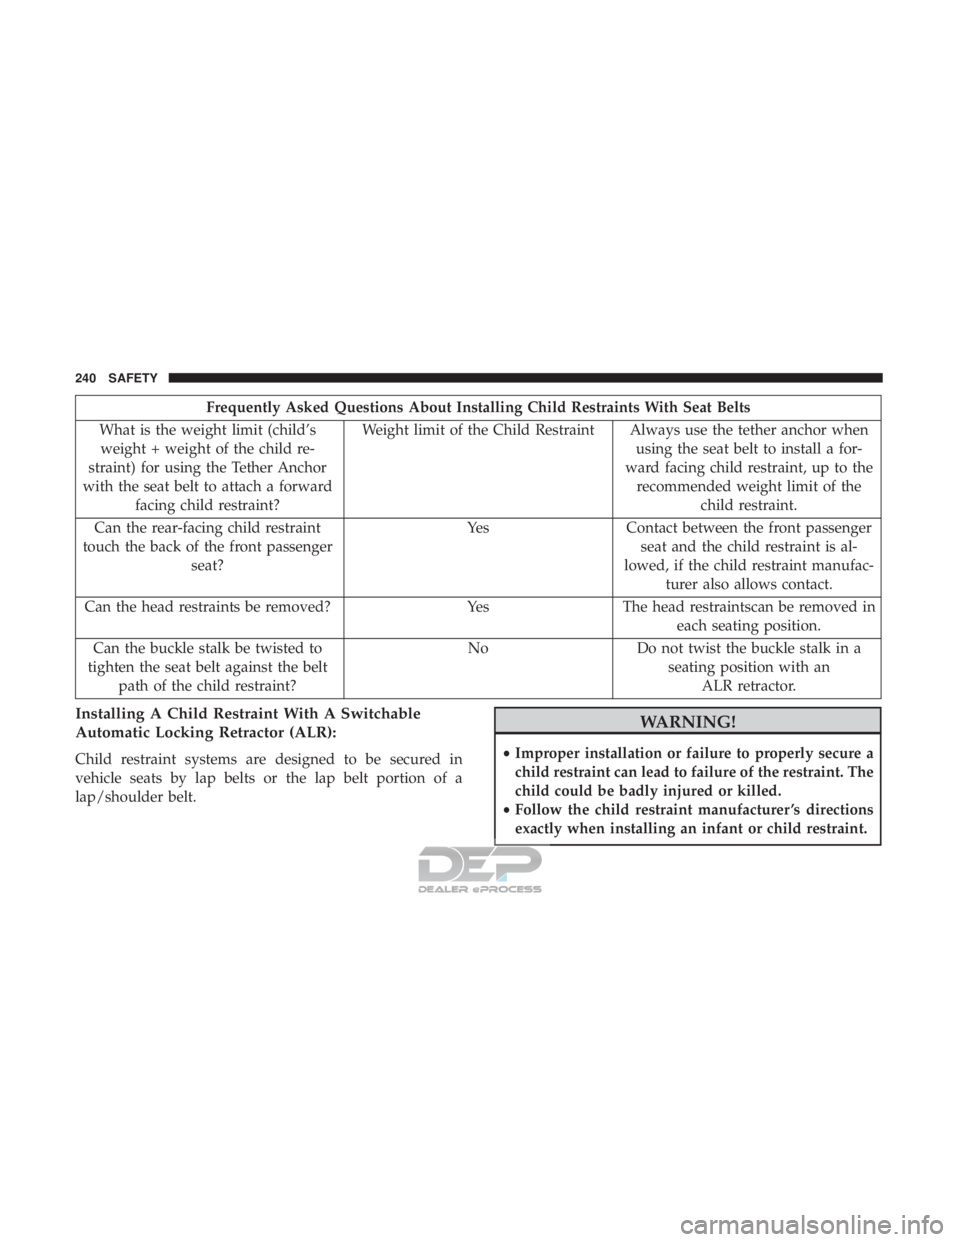
Frequently Asked Questions About Installing Child Restraints With Seat Belts
What is the weight limit (child’s weight + weight of the child re-
straint) for using the Tether Anchor
with the seat belt to attach a forward facing child restraint? Weight limit of the Child Restraint Always use the tether anchor when
using the seat belt to install a for-
ward facing child restraint, up to the recommended weight limit of the child restraint.
Can the rear-facing child restraint
touch the back of the front passenger seat? Yes Contact between the front passenger
seat and the child restraint is al-
lowed, if the child restraint manufac- turer also allows contact.
Can the head restraints be removed? YesThe head restraintscan be removed in
each seating position.
Can the buckle stalk be twisted to
tighten the seat belt against the belt path of the child restraint? No
Do not twist the buckle stalk in a
seating position with an ALR retractor.
Installing A Child Restraint With A Switchable
Automatic Locking Retractor (ALR):
Child restraint systems are designed to be secured in
vehicle seats by lap belts or the lap belt portion of a
lap/shoulder belt.
Page 247 of 516
Air Bag Warning Light
The Air Bag warning lightwill turn on for four to
eight seconds as a bulb check when the ignition switch
is first turned to ON/RUN. If the light is either not on
during starting, stays on, or turns on while driving,
have the system inspected at an authorized dealer as
soon as possible. This light will illuminate with a single
chime when a fault with the Air Bag Warning Light has
been detected, it will stay on until the fault is cleared. If
the light comes on intermittently or remains on while
driving, have an authorized dealer service the vehicle
immediately. Refer to “Occupant Restraints” in “Safety”
for further information.
Defroster
Check operation by selecting the defrost mode and place
the blower control on high speed. You should be able to
feel the air directed against the windshield. See your
authorized dealer for service if your defroster is inoper-
able.
Floor Mat Safety Information
Always use floor mats designed to fit the footwell of your
vehicle. Use only floor mats that leave the pedal area
unobstructed and that are firmly secured so that they cannot slip out of position and interfere with the pedals or
impair safe operation of your vehicle in other ways.
your floor mat using
the floor mat fasteners. DO NOT install your floor
mat upside down or turn your floor mat over.
Lightly pull to confirm mat is secured using the
floor mat fasteners on a regular basis.
• ALWAYS REMOVE THE EXISTING FLOOR MAT
FROM THE VEHICLE
before installing any
other floor mat. NEVER install or stack an addi-
tional floor mat on top of an existing floor mat.
•ONLY install floor mats designed to fit your vehicle.
NEVER install a floor mat that cannot be properly
attached and secured to your vehicle. If a floor mat
needs to be replaced, only use a FCA approved floor mat
for the specific make, model, and year of your vehicle.
(Continued)
5
SAFETY 245
Page 248 of 516
WARNING!(Continued)
•ONLY use the driver ’s side floor mat on the driver ’s
side floor area. To check for interference, with the
vehicle properly parked with the engine off, fully
depress the accelerator, the brake, and the clutch
pedal (if present) to check for interference. If your
floor mat interferes with the operation of any pedal,
or is not secure to the floor, remove the floor mat
from the vehicle and place the floor mat in your
trunk.
• ONLY use the passenger ’s side floor mat on the
passenger ’s side floor area.
• ALWAYS make sure objects cannot fall or slide into
the driver ’s side floor area when the vehicle is
moving. Objects can become trapped under accelera-
tor, brake, or clutch pedals and could cause a loss of
vehicle control.
• NEVER place any objects under the floor mat (e.g.,
towels, keys, etc.). These objects could change the
position of the floor mat and may cause interference
with the accelerator, brake, or clutch pedals.
(Continued)