stop start JEEP WAGONEER 2023 Owner's Manual
[x] Cancel search | Manufacturer: JEEP, Model Year: 2023, Model line: WAGONEER, Model: JEEP WAGONEER 2023Pages: 396, PDF Size: 15.17 MB
Page 122 of 396
120STARTING AND OPERATING
4. If the gear selector is not in PARK and the ENGINE
START/STOP button is pushed once with the vehicle
speed above 5 mph (8 km/h), the instrument cluster will display a “ Vehicle Not In Park ” message and the
engine will remain running. Never leave a vehicle out
of the PARK position, or it could roll.
NOTE:If the gear selector is not in PARK, and the ENGINE START/
STOP button is pushed once with the vehicle speed below
5 mph (8 km/h), the engine will shut off and the ignition
will remain in the ON/RUN position. If vehicle speed drops
below 1.2 mph (1.9 km/h), the vehicle may AutoPark
Úpage 120.
ENGINE START/STOP Button Functions — With Driver’s
Foot Off The Brake Pedal (In PARK Or NEUTRAL Position)
The ENGINE START/STOP button operates similar to an
ignition switch. It has two positions: OFF, and RUN. To
change the ignition positions without starting the vehicle
and use the accessories, follow these directions:
1. Start with the ignition in the OFF position.
2. Push the ENGINE START/STOP button once to place the ignition in the ON/RUN position.
3. Push the ENGINE START/STOP button a second time to return the ignition to the OFF position.
NOTE:Only press one pedal at a time while driving the vehicle.
Torque performance of the vehicle could be reduced if
both pedals are pressed at the same time. If pressure is
detected on both pedals simultaneously, a warning
message will display in the instrument cluster
Úpage 96.
AUTOPARK
AutoPark is a supplemental feature to assist in placing the
vehicle in PARK (P) should the situations on the following
pages occur. It is a back-up system and should not be
relied upon as the primary method by which the driver
shifts the vehicle into PARK.
The conditions under which AutoPark will engage are
outlined on the following pages.
If the vehicle is not in PARK and the driver turns off the
engine, the vehicle may AutoPark.
AutoPark will engage when all of these conditions are met:
Vehicle is equipped with an 8-speed transmission
Vehicle is not in PARK
Vehicle speed is 1.2 mph (1.9 km/h) or less
Ignition is switched from RUN to OFF
NOTE:For Keyless Enter ‘n Go™ equipped vehicles, the engine
will turn off and the ignition switch will change to ON/RUN
position. After 30 minutes the ignition switches to OFF
automatically, unless the driver turns the ignition
switch OFF.
If the vehicle is not in PARK and the driver exits the vehicle
with the engine running, the vehicle may AutoPark.
AutoPark will engage when all of these conditions are met:
Vehicle is equipped with an 8-speed transmission
Vehicle is not in PARK
Vehicle speed is 1.2 mph (1.9 km/h) or less
Driver’s seat belt is unbuckled
Driver’s door is ajar
Brake pedal is not pressed
The message “ AutoPark Engaged Shift To P Then Shift To
Gear ” will display in the instrument cluster.
NOTE:In some cases the ParkSense graphic will be displayed in
the instrument cluster. In these cases, the gear selector
must be returned to “P” to select desired gear.
If the driver shifts into PARK while moving, the vehicle may
AutoPark.
AutoPark will engage ONLY when vehicle speed is 1.2 mph
(1.9 km/h) or less.
The message “ Vehicle Speed Is Too High To Shift To P ” will
be displayed in the instrument cluster if vehicle speed is
above 1.2 mph (1.9 km/h).
WARNING!
Driver inattention could lead to failure to place the
vehicle in PARK. ALWAYS DO A VISUAL CHECK that
your vehicle is in PARK by verifying that a solid (not
blinking) “P” is indicated in the instrument cluster
display and on the gear selector. If the "P" indicator is
blinking, your vehicle is not in PARK. As an added
precaution, always apply the parking brake when
exiting the vehicle.
AutoPark is a supplemental feature. It is not
designed to replace the need to shift your vehicle
into PARK. It is a back up system and should not be
relied upon as the primary method by which the
driver shifts the vehicle into PARK.
23_WS_OM_EN_USC_t.book Page 120
Page 123 of 396
STARTING AND OPERATING121
4WD LOW — If Equipped
AutoPark will be disabled when operating the vehicle in
4WD LOW.
The message “AutoPark Disabled ” will be displayed in the
instrument cluster.
Additional customer warnings will be given when both of
these conditions are met:
Vehicle is not in PARK
Driver’s door is ajar
The message “ AutoPark Not Engaged ” will be displayed in
the instrument cluster. A warning chime will continue until
you shift the vehicle into PARK or the driver’s door is
closed.
ALWAYS DO A VISUAL CHECK
that your vehicle is in PARK
by looking for the "P" in the instrument cluster display and
on the gear selector. As an added precaution, always apply
the parking brake when exiting the vehicle.
EXTENDED PARK STARTING
NOTE:Extended Park condition occurs when the vehicle has not
been started or driven for at least 30 days.
1. Install a battery charger or jumper cables to the battery to ensure a full battery charge during the
crank cycle.
2. Press and hold the brake pedal while pushing the ENGINE START/STOP button once.
3. If the engine fails to start within 10 seconds, wait 10 to 15 seconds to allow the starter to cool, then
repeat the Extended Park Starting procedure.
4. If the engine fails to start after eight attempts, allow the starter to cool for at least 10 minutes, then repeat
the Extended Park Starting procedure.
IF ENGINE FAILS TO START
If the engine fails to start after you have followed the
“Normal Starting” procedure and has not experienced an
extended park condition as defined previously, it may be
flooded. Push the accelerator pedal all the way to the floor
and hold it there while the engine is cranking. This should
clear any excess fuel in case the engine is flooded.
The starter motor will engage automatically, run for
10 seconds, and then disengage. Once this occurs, release the accelerator pedal and the
brake pedal, wait 10 to 15 seconds, then repeat the
“Normal Starting” procedure.
WARNING!
If vehicle speed is above 1.2 mph (1.9 km/h), the
transmission will default to NEUTRAL until the vehicle
speed drops below 1.2 mph (1.9 km/h). A vehicle left in
the NEUTRAL position can roll. As an added precaution,
always apply the parking brake when exiting the vehicle.
CAUTION!
To prevent damage to the starter, do not crank
continuously for more than 10 seconds at a time.
Wait 10 to 15 seconds before trying again.
WARNING!
Never pour fuel or other flammable liquid into the
throttle body air inlet opening in an attempt to start
the vehicle. This could result in flash fire causing
serious personal injury.
Do not attempt to push or tow your vehicle to get it
started. Vehicles equipped with an automatic trans -
mission cannot be started this way. Unburned fuel
could enter the catalytic converter and once the
engine has started, ignite and damage the converter
and vehicle.
If the vehicle has a discharged battery, booster
cables may be used to obtain a start from a booster
battery or the battery in another vehicle. This type of
start can be dangerous if done improperly
Úpage 301.
CAUTION!
To prevent damage to the starter, do not continuously
crank the engine for more than 10 seconds at a time.
Wait 10 to 15 seconds before trying again.
4
23_WS_OM_EN_USC_t.book Page 121
Page 126 of 396
124STARTING AND OPERATING
If exceptional circumstances should make it necessary to
engage the parking brake while the vehicle is in motion,
maintain upward pressure on the EPB switch for as long as
engagement is desired. The Brake Warning Light will
illuminate, and a continuous chime will sound. The rear
stop lamps will also be illuminated automatically while the
vehicle remains in motion.
To disengage the parking brake while the vehicle is in
motion, release the switch. If the vehicle is brought to a
complete stop using the parking brake, when the vehicle
reaches approximately 3 mph (5 km/h), the parking brake
will remain engaged. In the unlikely event of a malfunction of the EPB system, a
yellow EPB Warning Light will illuminate. This may be
accompanied by the Brake Warning Light flashing. In this
event, urgent service of the EPB system is required. Do not
rely on the parking brake to hold the vehicle stationary.
Auto Park Brake
The EPB can be programmed to be applied automatically
whenever the vehicle is at a standstill and the
transmission is placed in PARK. Auto Park Brake is
enabled and disabled by customer selection through the
customer programmable features section of the Uconnect
Settings
Úpage 211.
Any single Auto Park Brake application can be bypassed by
pushing the EPB switch to the release position while the
transmission is placed in PARK.
SafeHold
SafeHold is a safety feature of the EPB system that will
engage the parking brake automatically if the vehicle is
left unsecured while the ignition is in ON/RUN.
The parking brake will automatically engage if all of the
following conditions are met:
The vehicle is at a standstill.
There is no attempt to press the brake pedal or accel -
erator pedal.
The seat belt is unbuckled.
The driver’s door is open. SafeHold can be temporarily bypassed by pushing the EPB
switch while the driver’s door is open. Once manually
bypassed, SafeHold will be enabled again once the vehicle
reaches 12 mph (20 km/h) or the ignition is turned to the
OFF position and back to ON again.
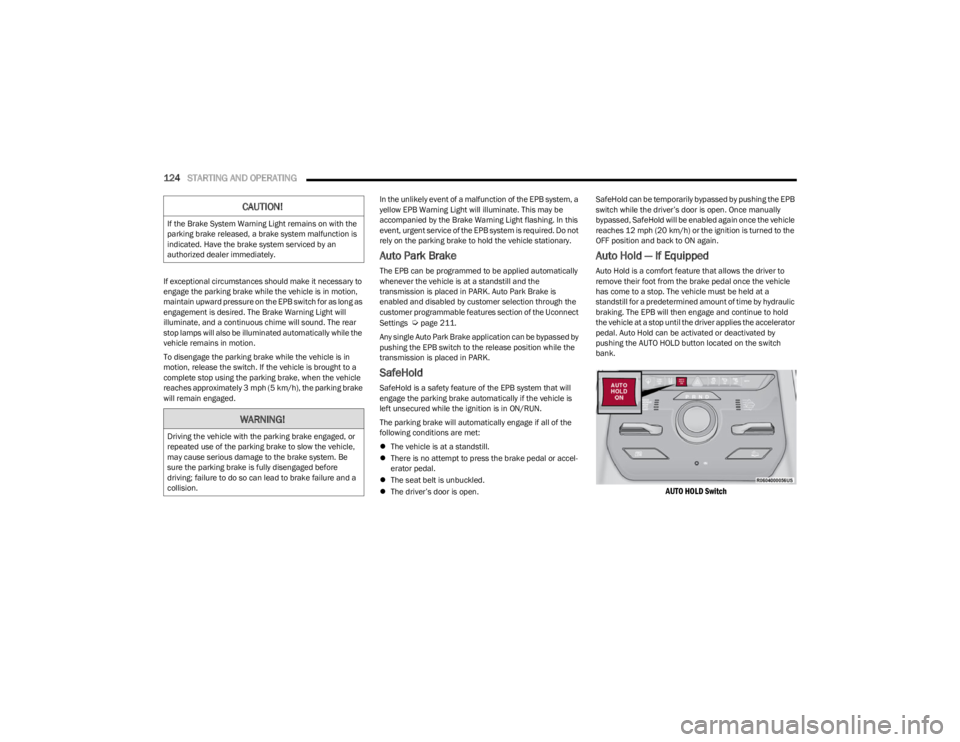
Auto Hold — If Equipped
Auto Hold is a comfort feature that allows the driver to
remove their foot from the brake pedal once the vehicle
has come to a stop. The vehicle must be held at a
standstill for a predetermined amount of time by hydraulic
braking. The EPB will then engage and continue to hold
the vehicle at a stop until the driver applies the accelerator
pedal. Auto Hold can be activated or deactivated by
pushing the AUTO HOLD button located on the switch
bank.
AUTO HOLD Switch
CAUTION!
If the Brake System Warning Light remains on with the
parking brake released, a brake system malfunction is
indicated. Have the brake system serviced by an
authorized dealer immediately.
WARNING!
Driving the vehicle with the parking brake engaged, or
repeated use of the parking brake to slow the vehicle,
may cause serious damage to the brake system. Be
sure the parking brake is fully disengaged before
driving; failure to do so can lead to brake failure and a
collision.
23_WS_OM_EN_USC_t.book Page 124
Page 127 of 396
STARTING AND OPERATING125
(Continued)
The following conditions must be met for Auto Hold to
activate:
Driver’s door is closed
Driver's seat belt is fastened
Vehicle is at a standstill
Forward gear is selected
ACC is not engaged
EPB is not applied
ParkSense Active Park Assist System auto parking
maneuver is not activated
Brake Maintenance Mode
We recommend having your brakes serviced by an
authorized dealer. You should only make repairs for which
you have the knowledge and the right equipment. You
should only enter Brake Maintenance mode during brake
service.
When servicing your rear brakes, it may be necessary for
you or your technician to push the rear piston into the rear
caliper bore. With the EPB system, this can only be done
after retracting the EPB actuator. Fortunately, actuator
retraction can be done easily by entering the Brake
Maintenance mode through the Uconnect Settings in your
vehicle. This menu-based system will guide you through
the steps necessary to retract the EPB actuator in order to
perform rear brake service. Maintenance mode has requirements that must be met in
order to be activated:
The vehicle must be at a standstill.
The parking brake must be unapplied.
The transmission must be in PARK or NEUTRAL.
While in Maintenance mode, the EPB Warning Light will
flash continuously while the ignition is ON.
When brake service work is complete, the following steps
must be followed to reset the parking brake system to
normal operation:
Ensure the vehicle is at a standstill.
Press the brake pedal with moderate force.
Apply the EPB switch.
AUTOMATIC TRANSMISSION
You must press and hold the brake pedal while shifting out
of PARK.
WARNING!
You can be badly injured working on or around a motor
vehicle. Do only that service work for which you have
the knowledge and the right equipment. If you have any
doubt about your ability to perform a service job, take
your vehicle to a competent mechanic.
WARNING!
Never use the PARK (P) position as a substitute for
the parking brake. Always apply the parking brake
fully when exiting the vehicle to guard against vehicle
movement and possible injury or damage.
Your vehicle could move and injure you and others if
it is not in PARK. Check by trying to move the trans -
mission gear selector out of PARK with the brake
pedal released. Make sure the transmission is in
PARK before exiting the vehicle.
The transmission may not engage PARK if the vehicle
is moving. Always bring the vehicle to a complete
stop before shifting to PARK, and verify that the
transmission gear position indicator solidly indicates
PARK without blinking. Ensure that the vehicle is
completely stopped, and the PARK position is prop -
erly indicated, before exiting the vehicle.
It is dangerous to shift out of PARK or NEUTRAL (N) if
the engine speed is higher than idle speed. If your
foot is not firmly pressing the brake pedal, the
vehicle could accelerate quickly forward or in
reverse. You could lose control of the vehicle and hit
someone or something. Only shift into gear when the
engine is idling normally and your foot is firmly
pressing the brake pedal.
4
23_WS_OM_EN_USC_t.book Page 125
Page 128 of 396

126STARTING AND OPERATING
IGNITION PARK INTERLOCK
This vehicle is equipped with an Ignition Park Interlock
which requires the transmission to be in PARK (P) before
the ignition can be turned to the OFF position. This helps
the driver avoid inadvertently leaving the vehicle without
placing the transmission in PARK. This system also locks
the transmission in PARK whenever the ignition is in the
OFF position.
NOTE:The transmission is NOT locked in PARK when the ignition
is in the ON/RUN position (even though the engine will be
off). Ensure that the transmission is in PARK, and the
ignition is OFF (not in ON/RUN position) before exiting the
vehicle.
BRAKE/TRANSMISSION SHIFT
I
NTERLOCK (BTSI) SYSTEM
This vehicle is equipped with a BTSI system that holds the
transmission gear selector in PARK unless the brakes are
applied. To shift the transmission out of PARK, the engine
must be running and the brake pedal must be pressed.
The brake pedal must also be pressed to shift from
NEUTRAL into DRIVE or REVERSE when the vehicle is
stopped or moving at low speeds.
8-SPEED AUTOMATIC TRANSMISSION
The transmission is controlled using a rotary electronic
gear selector located on the center console. The
transmission gear range (PRND) is displayed both above
the gear selector and in the instrument cluster. To select
a gear range, simply rotate the gear selector. You must
press the brake pedal to shift the transmission out of
PARK (or NEUTRAL, when the vehicle is stopped or moving
at low speeds). To shift past multiple gear ranges at once
(such as PARK to DRIVE), simply rotate the gear selector
to the appropriate detent. Select the DRIVE range for
normal driving.
NOTE:In the event of a mismatch between the gear selector
position and the actual transmission gear (for example,
driver selects PARK while driving), the position indicator
will blink continuously until the selector is returned to the
proper position, or the requested shift can be completed.
Unintended movement of a vehicle could injure
those in or near the vehicle. As with all vehicles, you
should never exit a vehicle while the engine is
running. Before exiting a vehicle, always come to a
complete stop, then apply the parking brake, shift
the transmission into PARK, and turn the ignition
OFF. When the ignition is in the OFF position, the
transmission is locked in PARK, securing the vehicle
against unwanted movement.
When exiting the vehicle, always make sure the igni -
tion is in the OFF position, remove the key fob from
the vehicle, and lock the vehicle.
Never leave children alone in a vehicle, or with
access to an unlocked vehicle. Allowing children to
be in a vehicle unattended is dangerous for a
number of reasons. A child or others could be seri -
ously or fatally injured. Children should be warned
not to touch the parking brake, brake pedal or the
transmission gear selector.
Do not leave the key fob in or near the vehicle (or in
a location accessible to children), and do not leave
the ignition in the ON/RUN position. A child could
operate power windows, other controls, or move the
vehicle.
WARNING!CAUTION!
Damage to the transmission may occur if the following
precautions are not observed:
Shift into or out of PARK or REVERSE (R) only after
the vehicle has come to a complete stop.
Do not shift between PARK, REVERSE, NEUTRAL, or
DRIVE (D) when the engine is above idle speed.
Before shifting into any gear, make sure your foot is
firmly pressing the brake pedal.
23_WS_OM_EN_USC_t.book Page 126
Page 129 of 396
STARTING AND OPERATING127
The electronically controlled transmission adapts its shift
schedule based on driver inputs, along with environmental
and road conditions. The transmission electronics are
self-calibrating; therefore, the first few shifts on a new
vehicle may be somewhat abrupt. This is a normal
condition, and precision shifts will develop within a few
hundred miles (kilometers).
Only shift from DRIVE to PARK or REVERSE when the
accelerator pedal is released and the vehicle is stopped.
Be sure to keep your foot on the brake pedal when shifting
between these gears.
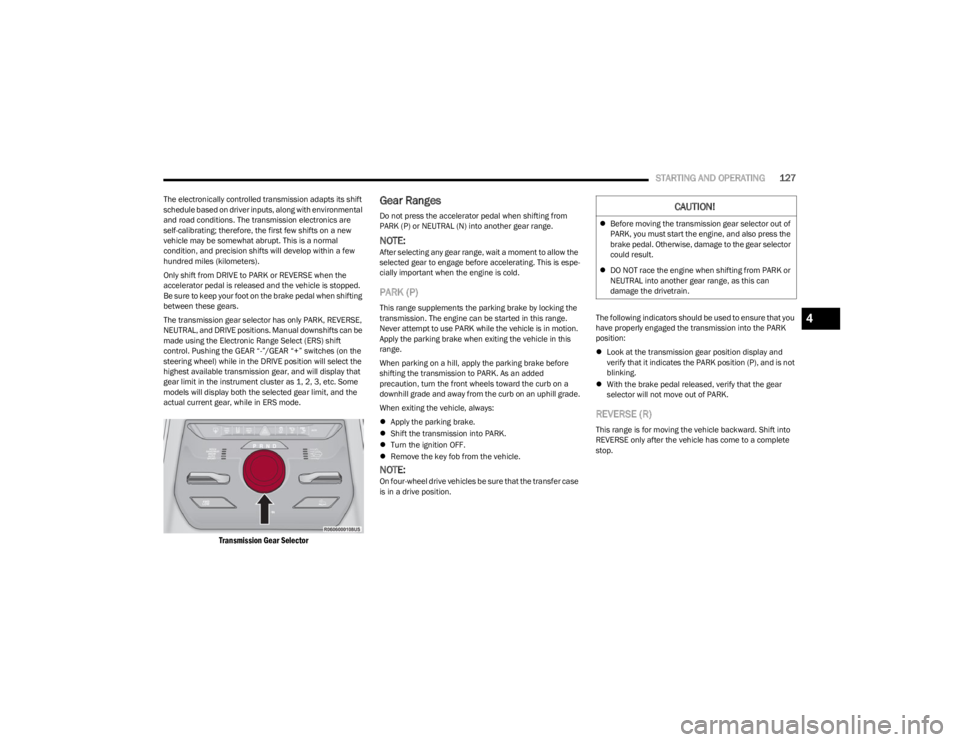
The transmission gear selector has only PARK, REVERSE,
NEUTRAL, and DRIVE positions. Manual downshifts can be
made using the Electronic Range Select (ERS) shift
control. Pushing the GEAR “-”/GEAR “+” switches (on the
steering wheel) while in the DRIVE position will select the
highest available transmission gear, and will display that
gear limit in the instrument cluster as 1, 2, 3, etc. Some
models will display both the selected gear limit, and the
actual current gear, while in ERS mode.
Transmission Gear Selector
Gear Ranges
Do not press the accelerator pedal when shifting from
PARK (P) or NEUTRAL (N) into another gear range.
NOTE:After selecting any gear range, wait a moment to allow the
selected gear to engage before accelerating. This is espe -
cially important when the engine is cold.
PARK (P)
This range supplements the parking brake by locking the
transmission. The engine can be started in this range.
Never attempt to use PARK while the vehicle is in motion.
Apply the parking brake when exiting the vehicle in this
range.
When parking on a hill, apply the parking brake before
shifting the transmission to PARK. As an added
precaution, turn the front wheels toward the curb on a
downhill grade and away from the curb on an uphill grade.
When exiting the vehicle, always:
Apply the parking brake.
Shift the transmission into PARK.
Turn the ignition OFF.
Remove the key fob from the vehicle.
NOTE:On four-wheel drive vehicles be sure that the transfer case
is in a drive position. The following indicators should be used to ensure that you
have properly engaged the transmission into the PARK
position:
Look at the transmission gear position display and
verify that it indicates the PARK position (P), and is not
blinking.
With the brake pedal released, verify that the gear
selector will not move out of PARK.
REVERSE (R)
This range is for moving the vehicle backward. Shift into
REVERSE only after the vehicle has come to a complete
stop.
CAUTION!
Before moving the transmission gear selector out of
PARK, you must start the engine, and also press the
brake pedal. Otherwise, damage to the gear selector
could result.
DO NOT race the engine when shifting from PARK or
NEUTRAL into another gear range, as this can
damage the drivetrain.
4
23_WS_OM_EN_USC_t.book Page 127
Page 130 of 396
128STARTING AND OPERATING
NEUTRAL (N)
Use this range when the vehicle is standing for prolonged
periods with the engine running. Apply the parking brake
and shift the transmission into PARK (P) if you must exit
the vehicle.
DRIVE (D)
This range should be used for most city and highway
driving. It provides the smoothest upshifts and downshifts,
and the best fuel economy. The transmission
automatically upshifts through all forward gears. When frequent transmission shifting occurs (such as
when operating the vehicle under heavy loading
conditions, in hilly terrain, traveling into strong head
winds, or while towing a heavy trailer), use the Electronic
Range Select (ERS) shift control to select a lower gear
Úpage 129. Under these conditions, using a lower gear
will improve performance and extend transmission life by
reducing excessive shifting and heat build-up.
During cold temperatures, transmission operation may be
modified depending on engine and transmission
temperature as well as vehicle speed. This feature
improves warm-up time of the engine and transmission to
achieve maximum efficiency. Engagement of the torque
converter clutch is inhibited until the transmission fluid is
warm. Normal operation will resume once the
transmission temperature has risen to a suitable level.
Transmission Limp Home Mode
Transmission function is monitored electronically for
abnormal conditions. If a condition is detected that could
result in transmission damage, Transmission Limp Home
mode is activated. In this mode, the transmission may
operate only in certain gears, or may not shift at all.
Vehicle performance may be severely degraded and the
engine may stall. In some situations, the transmission may
not re-engage if the engine is turned off and restarted. The
Malfunction Indicator Light (MIL) may be illuminated. A
message in the instrument cluster will inform the driver of
the more serious conditions, and indicate what actions
may be necessary. In the event of a momentary problem, the transmission
can be reset to regain all forward gears by performing the
following steps:
NOTE:In cases where the instrument cluster message indicates
the transmission may not re-engage after engine
shutdown, perform this procedure only in a desired
location (preferably, at an authorized dealer).
1. Stop the vehicle.
2. Shift the transmission into PARK (P), if possible.
If not, shift the transmission to NEUTRAL (N).
3. Push and hold the ignition switch until the engine turns off.
4. Wait approximately 30 seconds.
5. Restart the engine.
6. Shift into the desired gear range. If the problem is no longer detected, the transmission will return to
normal operation.
NOTE:Even if the transmission can be reset, we recommend that
you visit an authorized dealer at your earliest possible
convenience. An authorized dealer has diagnostic
equipment to assess the condition of your transmission.
If the transmission cannot be reset, authorized dealer
service is required.
WARNING!
Do not coast in NEUTRAL and never turn off the ignition
to coast down a hill. These are unsafe practices that
limit your response to changing traffic or road
conditions. You might lose control of the vehicle and
have a collision.
CAUTION!
Towing the vehicle, coasting, or driving for any other
reason with the transmission in NEUTRAL can cause
severe transmission damage.
For Recreational Towing see
Úpage 190.
For Towing A Disabled Vehicle see
Úpage 306.
23_WS_OM_EN_USC_t.book Page 128
Page 132 of 396
130STARTING AND OPERATING
QUADRA-TRAC II OPERATING
I
NSTRUCTIONS/PRECAUTIONS —
I
F EQUIPPED
The Quadra-Trac II transfer case is fully automatic in the
normal driving 4WD HI mode. The Quadra-Trac II transfer
case provides three positions:
4WD HI
N (Neutral)
4WD LOW
When additional traction is required, the 4WD LOW
position can be used for increased torque at the wheels.
Driving in the 4WD LOW position on dry, hard-surfaced
roads may cause increased tire wear and damage to
driveline components.
When operating your vehicle in 4WD LOW, the engine
speed is approximately three times that of the 4WD HI
position at a given road speed. Take care not to overspeed
the engine and do not exceed 25 mph (40 km/h).
Proper operation of four-wheel drive vehicles depends on
tires of equal size, type, and circumference on each wheel.
Any difference will adversely affect shifting and cause
damage to the transfer case.
Because four-wheel drive provides improved traction,
there is a tendency to exceed safe turning and stopping
speeds. Do not go faster than road conditions permit.
SHIFT POSITIONS
For additional information on the appropriate use of each
four-wheel drive system mode position, see the following
information:
4WD HI
This range is the default operating mode for daily use.
N (NEUTRAL)
This range disengages the driveline from the powertrain. It
is used for towing your vehicle behind another vehicle
Úpage 190.
4WD LOW
This range is for low speed four-wheel drive. It provides an
additional gear reduction which allows for increased
torque to be delivered to both the front and rear wheels
while providing maximum pulling power for loose, slippery
road surfaces. Do not exceed 25 mph (40 km/h).
SHIFTING PROCEDURES
4WD HI To 4WD LOW
With the vehicle at speeds of 0 to 3 mph (0 to 5 km/h), the
ignition switch in the ON position or the engine running,
shift the transmission into NEUTRAL (N), and push and
hold the 4WD LOW button once on the transfer case
switch until the 4WD LOW indicator light begins to flash in
the instrument cluster.
WARNING!
You or others could be injured or killed if you leave the
vehicle unattended with the transfer case in the N
(Neutral) position without first fully engaging the
parking brake. The transfer case N (Neutral) position
disengages both the front and rear drive shafts from
the powertrain and will allow the vehicle to roll, even if
the transmission is in PARK. The parking brake should
always be applied when the driver is not in the vehicle.
23_WS_OM_EN_USC_t.book Page 130
Page 133 of 396
STARTING AND OPERATING131
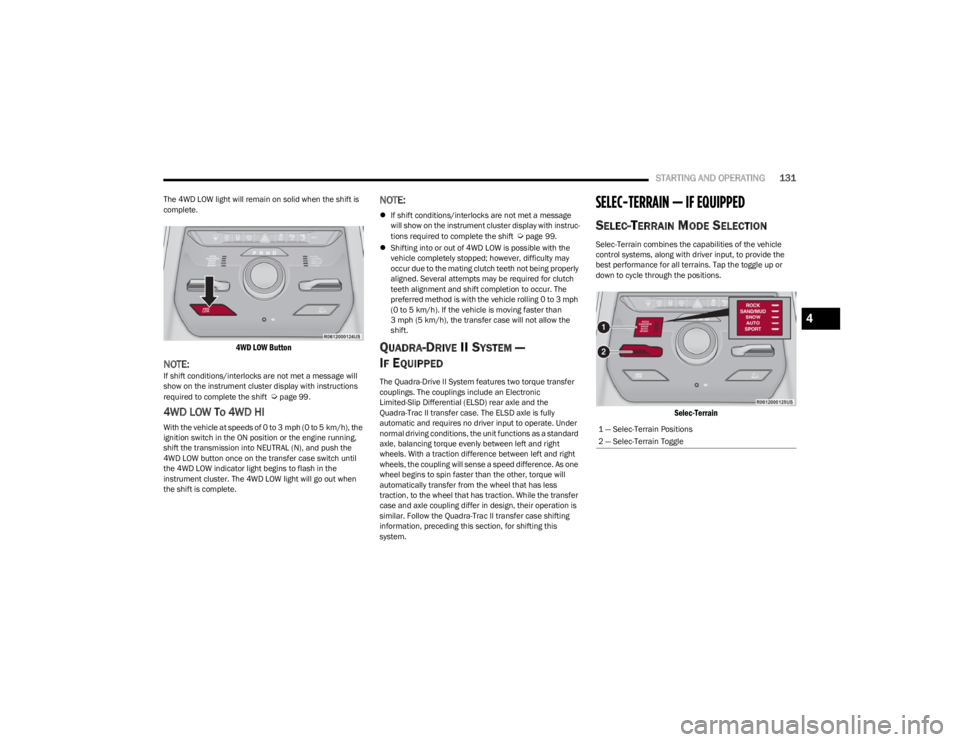
The 4WD LOW light will remain on solid when the shift is
complete.
4WD LOW Button
NOTE:If shift conditions/interlocks are not met a message will
show on the instrument cluster display with instructions
required to complete the shift
Úpage 99.
4WD LOW To 4WD HI
With the vehicle at speeds of 0 to 3 mph (0 to 5 km/h), the
ignition switch in the ON position or the engine running,
shift the transmission into NEUTRAL (N), and push the
4WD LOW button once on the transfer case switch until
the 4WD LOW indicator light begins to flash in the
instrument cluster. The 4WD LOW light will go out when
the shift is complete.
NOTE:
If shift conditions/interlocks are not met a message
will show on the instrument cluster display with instruc -
tions required to complete the shift
Úpage 99.
Shifting into or out of 4WD LOW is possible with the
vehicle completely stopped; however, difficulty may
occur due to the mating clutch teeth not being properly
aligned. Several attempts may be required for clutch
teeth alignment and shift completion to occur. The
preferred method is with the vehicle rolling 0 to 3 mph
(0 to 5 km/h). If the vehicle is moving faster than
3 mph (5 km/h), the transfer case will not allow the
shift.
QUADRA-DRIVE II SYSTEM —
I
F EQUIPPED
The Quadra-Drive II System features two torque transfer
couplings. The couplings include an Electronic
Limited-Slip Differential (ELSD) rear axle and the
Quadra-Trac II transfer case. The ELSD axle is fully
automatic and requires no driver input to operate. Under
normal driving conditions, the unit functions as a standard
axle, balancing torque evenly between left and right
wheels. With a traction difference between left and right
wheels, the coupling will sense a speed difference. As one
wheel begins to spin faster than the other, torque will
automatically transfer from the wheel that has less
traction, to the wheel that has traction. While the transfer
case and axle coupling differ in design, their operation is
similar. Follow the Quadra-Trac II transfer case shifting
information, preceding this section, for shifting this
system.
SELEC-TERRAIN — IF EQUIPPED
SELEC-TERRAIN MODE SELECTION
Selec-Terrain combines the capabilities of the vehicle
control systems, along with driver input, to provide the
best performance for all terrains. Tap the toggle up or
down to cycle through the positions.
Selec-Terrain
1 — Selec-Terrain Positions
2 — Selec-Terrain Toggle
4
23_WS_OM_EN_USC_t.book Page 131
Page 138 of 396

136STARTING AND OPERATING
NOTE:
Even if the power steering assistance is no longer oper -
ational, it is still possible to steer the vehicle. Under
these conditions there will be a substantial increase in
steering effort, especially at low speeds and during
parking maneuvers.
If the condition persists, see an authorized dealer for
service.
If the Steering icon is displayed and the “POWER
STEERING SYSTEM OVER TEMP” message is displayed on
the instrument cluster screen, they indicate that extreme
steering maneuvers may have occurred which caused an
over temperature condition in the electric power steering
system. Once driving conditions are safe, pull over and let
the vehicle idle for a few moments until the icon and
message turn off.
STOP/START SYSTEM — IF EQUIPPED
The Stop/Start function is developed to reduce fuel
consumption. The system will stop the engine
automatically during a vehicle stop if the required
conditions are met. Releasing the brake pedal or pressing
the accelerator pedal will automatically restart the engine
Úpage 136.
This vehicle has been upgraded with a heavy-duty starter,
enhanced battery, and other upgraded engine parts, to
handle the additional engine starts.
AUTOSTOP MODE
The Stop/Start feature is enabled after every normal
customer engine start. At that time, the system will go into
STOP/START READY and if all other conditions are met,
can go into a STOP/START AUTOSTOP ACTIVE Autostop
mode.
To Activate The Autostop Mode, The Following Must Occur:
The system must be in STOP/START READY state. A
“STOP/START READY” message will be displayed in the
instrument cluster display within the Stop/Start
section
Úpage 99.
The vehicle must be completely stopped.
The gear selector must be in a forward gear and the
brake pedal pressed.
The engine will shut down, the tachometer will move to the
zero position, and the Stop/Start telltale will illuminate
indicating you are in Autostop. Customer settings will be
maintained upon return to an engine-running condition.
POSSIBLE REASONS THE ENGINE DOES
N
OT AUTOSTOP
Prior to engine shut down, the system will check many
safety and comfort conditions to see if they are fulfilled.
Detailed information about the operation of the Stop/Start
system may be viewed in the instrument cluster display
Stop/Start Screen. In the following situations, the engine
will not stop:
Driver’s seat belt is not buckled.
Driver’s door is not closed.
Battery temperature is too warm or cold.
Battery charge is low.
The vehicle is on a steep grade.
Cabin heating or cooling is in process and an accept -
able cabin temperature has not been achieved.
HVAC is set to full defrost mode at a high blower speed.
HVAC is set to MAX A/C.
Engine has not reached normal operating temperature.
The transmission is not in a forward gear.
Hood is open.
Vehicle is in 4WD LOW, or an off-road
Selec-Terrain mode.
Brake pedal is not pressed with sufficient pressure.
Accelerator pedal input.
Engine temperature is too high.
5 mph (8 km/h) threshold has not been achieved from
previous Autostop.
Steering angle is beyond threshold.
It may be possible for the vehicle to be driven several
times without the Stop/Start system going into a
STOP/START READY state under more extreme conditions
of the items listed above.
TO START THE ENGINE WHILE IN
A
UTOSTOP MODE
While in a forward gear, the engine will start when the
brake pedal is released or the throttle pedal is pressed.
The transmission will automatically re-engage upon
engine restart.
23_WS_OM_EN_USC_t.book Page 136