rear view mirror JEEP WAGONEER 2023 Owners Manual
[x] Cancel search | Manufacturer: JEEP, Model Year: 2023, Model line: WAGONEER, Model: JEEP WAGONEER 2023Pages: 396, PDF Size: 15.17 MB
Page 4 of 396
2
INTRODUCTION
KNOW & GO ........................................................................... 9
SYMBOLS KEY .....................................................................10
ROLLOVER WARNING .......................................................10
VEHICLE MODIFICATIONS/ALTERATIONS .......................10
SYMBOLS GLOSSARY ........................................................11
GETTING TO KNOW YOUR VEHICLE
KEYS ....................................................................................16 Key Fob ........................................................................ 16
SENTRY KEY ....................................................................... 20
IGNITION SWITCH ...............................................................20 Keyless Enter ‘n Go™ Ignition .................................... 20
REMOTE START ...................................................................22 How To Use Remote Start .......................................... 22
To Exit Remote Start Mode ....................................... 23
Remote Start Front Defrost Activation —
If Equipped .................................................................. 23
Remote Start Comfort Systems — If Equipped.......... 23
Remote Start Windshield Wiper De-Icer
Activation — If Equipped ............................................. 23
Remote Start Abort Message ..................................... 24
VEHICLE SECURITY SYSTEM — IF EQUIPPED ..................24 To Arm The System ..................................................... 24
To Disarm The System ................................................ 24
Rearming Of The System ............................................ 25
Security System Manual Override.............................. 25
Tamper Alert ................................................................ 25 DELUXE VEHICLE SECURITY SYSTEM —
IF EQUIPPED ........................................................................ 25
To Arm The System ......................................................25
To Disarm The System ................................................ 25
Security System Manual Override ..............................26
DOORS ................................................................................ 26 Manual Door Locks......................................................26
Power Door Locks .......................................................27
Power Side Steps — If Equipped ................................. 27
Keyless Enter ‘n Go™ — Passive Entry ...................... 27
Automatic Unlock Doors On Exit ................................. 30
Automatic Door Locks — If Equipped ......................... 30
Child-Protection Door Lock System — Rear Doors.....30
STEERING WHEEL............................................................... 30 Power Tilt/Telescoping Steering Column ................... 30
Heated Steering Wheel ............................................... 31
DRIVER AND PASSENGER MEMORY SETTINGS —
IF EQUIPPED ........................................................................ 31 Programming The Memory Feature............................ 32
Linking And Unlinking The Key Fob To Memory......... 33
Memory Position Recall............................................... 33
SEATS ................................................................................... 33 Manual Adjustment (Rear Seats) ............................... 33
Power Adjustment (Front Seats) — If Equipped ........ 38
Power Adjustment (Rear Seats) — If Equipped .......... 41
Power Seat Massage — If Equipped ........................... 42
Heated Seats — If Equipped ....................................... 43
Ventilated Seats — If Equipped................................... 44
Head Restraints ........................................................... 44 UCONNECT VOICE RECOGNITION
QUICK TIPS — IF EQUIPPED ............................................. 48
Introducing Voice Recognition .................................... 48
Basic Voice Commands .............................................. 48
Get Started .................................................................. 48
Additional Information ................................................ 49
DRIVER ADJUSTABLE PEDALS ......................................... 49
MIRRORS ............................................................................ 50 Inside Rearview Mirror ................................................ 50
Illuminated Vanity Mirrors .......................................... 50
Outside Mirrors ........................................................... 51
Outside Automatic Dimming Mirror — If Equipped .... 51
Conversation Mirror .................................................... 51
Power Mirrors ............................................................. 52
Automatic Power Folding Mirrors — If Equipped ....... 52
Heated Mirrors ............................................................ 53
Tilt Side Mirrors In Reverse ....................................... 53
UNIVERSAL GARAGE DOOR OPENER
(HOMELINK®) .................................................................... 53 Before You Begin Programming HomeLink® ............ 53
Erasing All The HomeLink® Channels ....................... 54
Identifying Whether You Have A Rolling Code Or
Non-Rolling Code Device............................................. 54
Programming HomeLink® To A Garage
Door Opener ................................................................ 54
Programming HomeLink® To A
Miscellaneous Device ................................................. 55
Reprogramming A Single HomeLink® Button ........... 55
Canadian/Gate Operator Programming .................... 55
Security ........................................................................ 56
Troubleshooting Tips ................................................... 56
23_WS_OM_EN_USC_t.book Page 2
Page 52 of 396
50GETTING TO KNOW YOUR VEHICLE
MIRRORS
INSIDE REARVIEW MIRROR
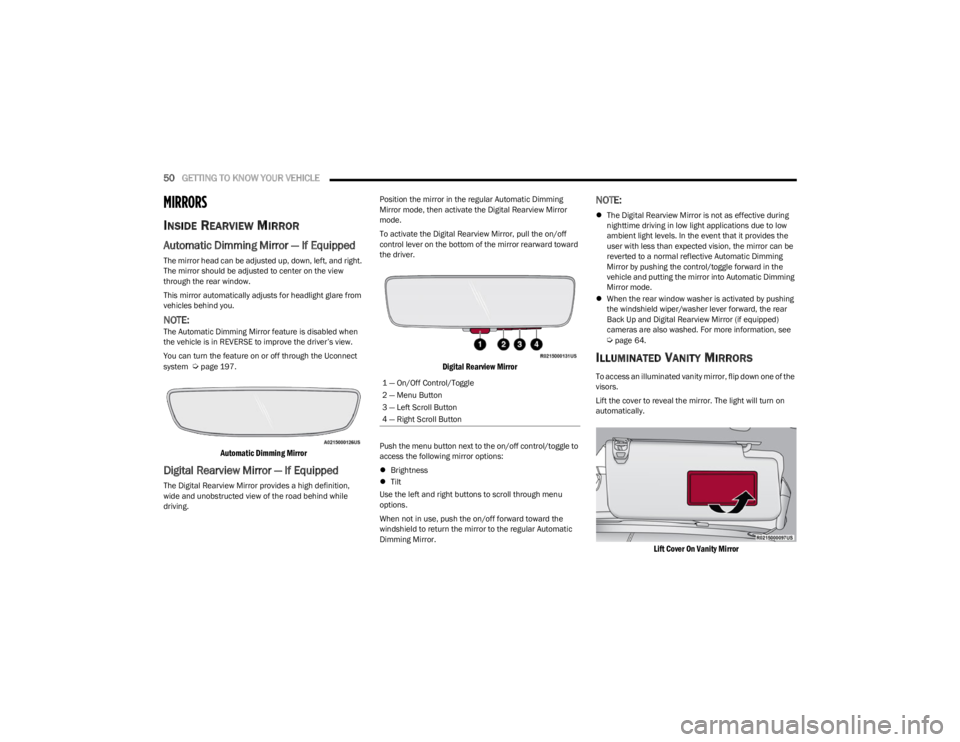
Automatic Dimming Mirror — If Equipped
The mirror head can be adjusted up, down, left, and right.
The mirror should be adjusted to center on the view
through the rear window.
This mirror automatically adjusts for headlight glare from
vehicles behind you.
NOTE:The Automatic Dimming Mirror feature is disabled when
the vehicle is in REVERSE to improve the driver’s view.
You can turn the feature on or off through the Uconnect
system
Úpage 197.
Automatic Dimming Mirror
Digital Rearview Mirror — If Equipped
The Digital Rearview Mirror provides a high definition,
wide and unobstructed view of the road behind while
driving. Position the mirror in the regular Automatic Dimming
Mirror mode, then activate the Digital Rearview Mirror
mode.
To activate the Digital Rearview Mirror, pull the on/off
control lever on the bottom of the mirror rearward toward
the driver.
Digital Rearview Mirror
Push the menu button next to the on/off control/toggle to
access the following mirror options:
Brightness
Tilt
Use the left and right buttons to scroll through menu
options.
When not in use, push the on/off forward toward the
windshield to return the mirror to the regular Automatic
Dimming Mirror.
NOTE:
The Digital Rearview Mirror is not as effective during
nighttime driving in low light applications due to low
ambient light levels. In the event that it provides the
user with less than expected vision, the mirror can be
reverted to a normal reflective Automatic Dimming
Mirror by pushing the control/toggle forward in the
vehicle and putting the mirror into Automatic Dimming
Mirror mode.
When the rear window washer is activated by pushing
the windshield wiper/washer lever forward, the rear
Back Up and Digital Rearview Mirror (if equipped)
cameras are also washed. For more information, see
Úpage 64.
ILLUMINATED VANITY MIRRORS
To access an illuminated vanity mirror, flip down one of the
visors.
Lift the cover to reveal the mirror. The light will turn on
automatically.
Lift Cover On Vanity Mirror
1 — On/Off Control/Toggle
2 — Menu Button
3 — Left Scroll Button
4 — Right Scroll Button
23_WS_OM_EN_USC_t.book Page 50
Page 53 of 396
GETTING TO KNOW YOUR VEHICLE51
Sun Visor Slide-On-Rod Feature —
If Equipped
The sun visor Slide-On-Rod feature allows for additional
flexibility in positioning the sun visor to block out the sun.
1. Fold down the sun visor.
2. Unclip the visor from the center clip.
3. Pivot the sun visor toward the side window.
4. Extend the sun visor blade for additional sun
blockage.
NOTE:The sun visor blade can also be extended while the sun
visor is against the windshield for additional sun blockage
through the front of the vehicle.
OUTSIDE MIRRORS
To receive maximum benefit, adjust the outside mirror(s)
to center on the adjacent lane of traffic with a slight
overlap of the view obtained on the inside mirror.
Outside Mirrors Folding Feature
All outside mirrors are hinged and may be moved either
forward or rearward to resist damage. The hinges have
three detent positions:
Full forward position
Full rearward position
Normal position
Outside Mirrors With Turn Signal And
Approach Lighting — If Equipped
Driver and passenger outside mirrors with turn signal and
approach lighting contain four LEDs, which are located in
the upper outer corner of each mirror.
Three of the LEDs are turn signal indicators, which flash
with the corresponding turn signal lights in the front and
rear of the vehicle. Turning on the Hazard Warning
flashers will also activate these LEDs.
The fourth LED supplies illuminated entry lighting, which
turns on in both mirrors when you use the key fob or open
any door. This LED shines outward to illuminate the front
and rear door handles. It also shines downward to
illuminate the area in front of the doors.
The illuminated entry lighting fades to off after about 30
seconds or it will fade to off immediately once the ignition
is placed into the ON/RUN position.
NOTE:The approach lighting will not function when the gear
selector is moved out of the PARK position.
OUTSIDE AUTOMATIC DIMMING
M
IRROR — IF EQUIPPED
The exterior driver side mirror will automatically adjust for
glare from vehicles behind you. This feature is controlled
by the inside automatic dimming mirror. The mirror will
automatically adjust for headlight glare when the inside
mirror adjusts.
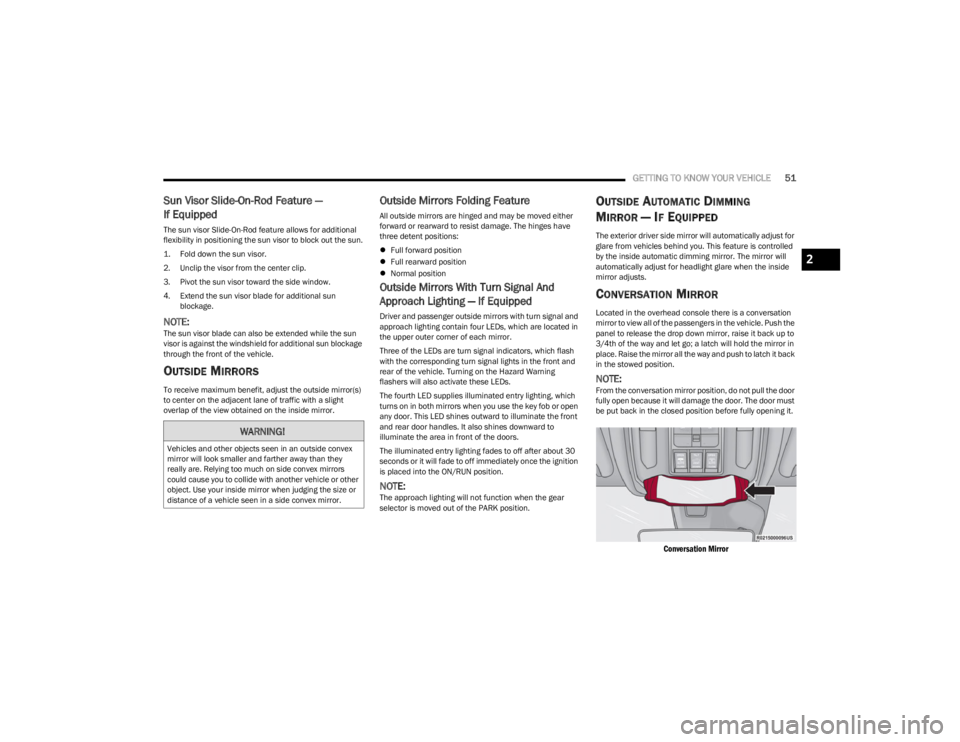
CONVERSATION MIRROR
Located in the overhead console there is a conversation
mirror to view all of the passengers in the vehicle. Push the
panel to release the drop down mirror, raise it back up to
3/4th of the way and let go; a latch will hold the mirror in
place. Raise the mirror all the way and push to latch it back
in the stowed position.
NOTE:From the conversation mirror position, do not pull the door
fully open because it will damage the door. The door must
be put back in the closed position before fully opening it.
Conversation Mirror
WARNING!
Vehicles and other objects seen in an outside convex
mirror will look smaller and farther away than they
really are. Relying too much on side convex mirrors
could cause you to collide with another vehicle or other
object. Use your inside mirror when judging the size or
distance of a vehicle seen in a side convex mirror.
2
23_WS_OM_EN_USC_t.book Page 51
Page 55 of 396
GETTING TO KNOW YOUR VEHICLE53
NOTE:If the mirrors were folded manually by using the power
folding mirror switch on the driver’s door panel, they will
not automatically unfold.
HEATED MIRRORS
These mirrors are heated to melt frost or ice.
This feature will be activated whenever you
turn on the rear window defroster (if equipped)
Úpage 64.
TILT SIDE MIRRORS IN REVERSE
Tilt Side Mirrors In Reverse provides automatic outside
mirror positioning which will aid the driver’s view of the
ground rearward of the front doors. Outside mirrors will
move slightly downward from the present position when
the vehicle is shifted into REVERSE. Outside mirrors will
then return to the original position when the vehicle is
shifted out of REVERSE position. Each stored memory
setting will have an associated Tilt Side Mirrors In Reverse
position.
NOTE:The Tilt Side Mirrors In Reverse feature can be turned on
and off using the Uconnect system Úpage 197.
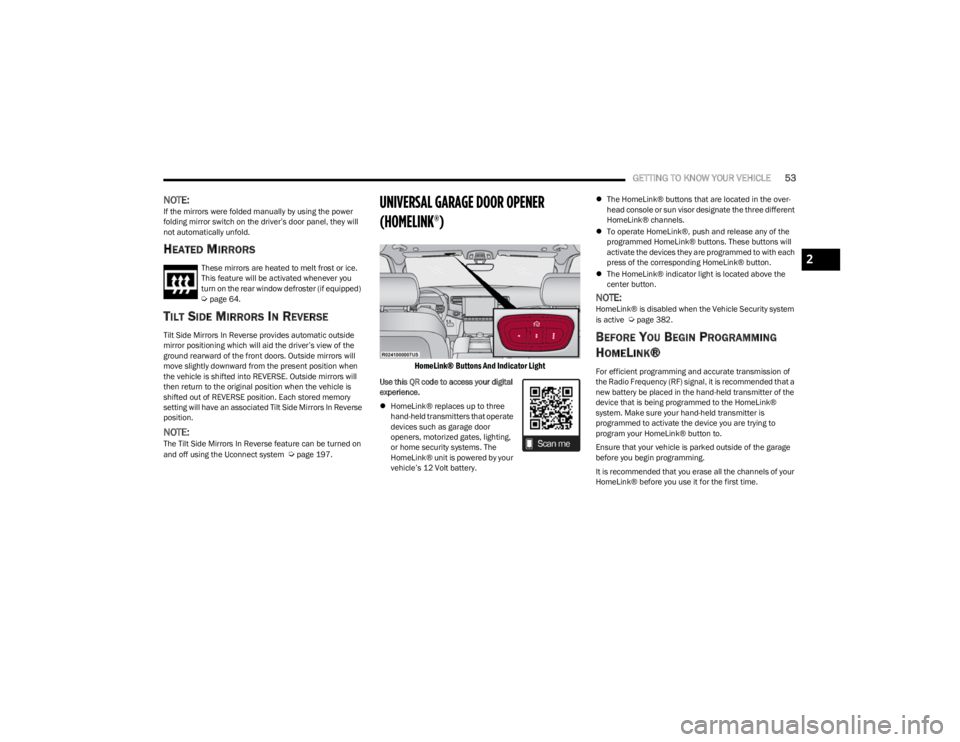
UNIVERSAL GARAGE DOOR OPENER
(HOMELINK®)
HomeLink® Buttons And Indicator Light
Use this QR code to access your digital
experience.
HomeLink® replaces up to three
hand-held transmitters that operate
devices such as garage door
openers, motorized gates, lighting,
or home security systems. The
HomeLink® unit is powered by your
vehicle’s 12 Volt battery.
The HomeLink® buttons that are located in the over -
head console or sun visor designate the three different
HomeLink® channels.
To operate HomeLink®, push and release any of the
programmed HomeLink® buttons. These buttons will
activate the devices they are programmed to with each
press of the corresponding HomeLink® button.
The HomeLink® indicator light is located above the
center button.
NOTE:HomeLink® is disabled when the Vehicle Security system
is active Úpage 382.
BEFORE YOU BEGIN PROGRAMMING
H
OMELINK®
For efficient programming and accurate transmission of
the Radio Frequency (RF) signal, it is recommended that a
new battery be placed in the hand-held transmitter of the
device that is being programmed to the HomeLink®
system. Make sure your hand-held transmitter is
programmed to activate the device you are trying to
program your HomeLink® button to.
Ensure that your vehicle is parked outside of the garage
before you begin programming.
It is recommended that you erase all the channels of your
HomeLink® before you use it for the first time.
2
23_WS_OM_EN_USC_t.book Page 53
Page 60 of 396
58GETTING TO KNOW YOUR VEHICLE
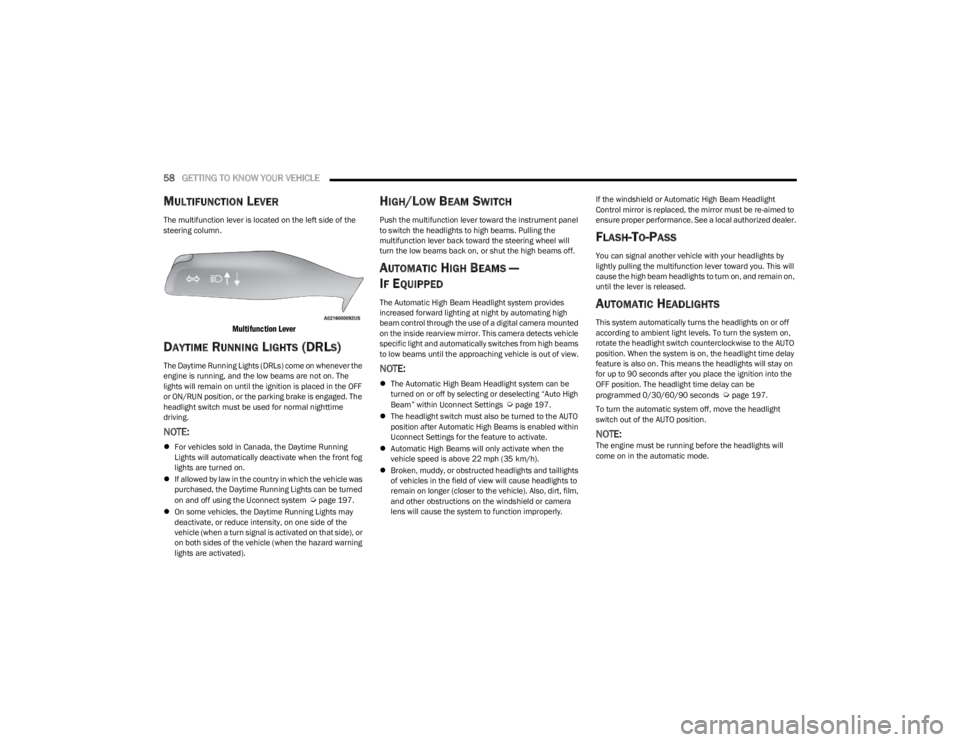
MULTIFUNCTION LEVER
The multifunction lever is located on the left side of the
steering column.
Multifunction Lever
DAYTIME RUNNING LIGHTS (DRLS)
The Daytime Running Lights (DRLs) come on whenever the
engine is running, and the low beams are not on. The
lights will remain on until the ignition is placed in the OFF
or ON/RUN position, or the parking brake is engaged. The
headlight switch must be used for normal nighttime
driving.
NOTE:
For vehicles sold in Canada, the Daytime Running
Lights will automatically deactivate when the front fog
lights are turned on.
If allowed by law in the country in which the vehicle was
purchased, the Daytime Running Lights can be turned
on and off using the Uconnect system
Úpage 197.
On some vehicles, the Daytime Running Lights may
deactivate, or reduce intensity, on one side of the
vehicle (when a turn signal is activated on that side), or
on both sides of the vehicle (when the hazard warning
lights are activated).
HIGH/LOW BEAM SWITCH
Push the multifunction lever toward the instrument panel
to switch the headlights to high beams. Pulling the
multifunction lever back toward the steering wheel will
turn the low beams back on, or shut the high beams off.
AUTOMATIC HIGH BEAMS —
I
F EQUIPPED
The Automatic High Beam Headlight system provides
increased forward lighting at night by automating high
beam control through the use of a digital camera mounted
on the inside rearview mirror. This camera detects vehicle
specific light and automatically switches from high beams
to low beams until the approaching vehicle is out of view.
NOTE:
The Automatic High Beam Headlight system can be
turned on or off by selecting or deselecting “Auto High
Beam” within Uconnect Settings
Úpage 197.
The headlight switch must also be turned to the AUTO
position after Automatic High Beams is enabled within
Uconnect Settings for the feature to activate.
Automatic High Beams will only activate when the
vehicle speed is above 22 mph (35 km/h).
Broken, muddy, or obstructed headlights and taillights
of vehicles in the field of view will cause headlights to
remain on longer (closer to the vehicle). Also, dirt, film,
and other obstructions on the windshield or camera
lens will cause the system to function improperly. If the windshield or Automatic High Beam Headlight
Control mirror is replaced, the mirror must be re-aimed to
ensure proper performance. See a local authorized dealer.
FLASH-TO-PASS
You can signal another vehicle with your headlights by
lightly pulling the multifunction lever toward you. This will
cause the high beam headlights to turn on, and remain on,
until the lever is released.
AUTOMATIC HEADLIGHTS
This system automatically turns the headlights on or off
according to ambient light levels. To turn the system on,
rotate the headlight switch counterclockwise to the AUTO
position. When the system is on, the headlight time delay
feature is also on. This means the headlights will stay on
for up to 90 seconds after you place the ignition into the
OFF position. The headlight time delay can be
programmed 0/30/60/90 seconds
Úpage 197.
To turn the automatic system off, move the headlight
switch out of the AUTO position.
NOTE:The engine must be running before the headlights will
come on in the automatic mode.
23_WS_OM_EN_USC_t.book Page 58
Page 66 of 396
64GETTING TO KNOW YOUR VEHICLE
REAR WIPER AND WASHER
The rear wiper/washer is operated by rotating a switch,
located at the middle of the lever.
Rotate the center portion of the lever upward to
the first detent for intermittent operation and to
the second detent for continuous rear wiper
operation.
Rear Window Washer Operation Pushing the windshield wiper lever forward
activates the rear window washer. If the lever is
pushed while on the intermittent setting, the
wipers will turn on and operate for several wipe
cycles after the lever is released, and then resume the
intermittent interval previously selected. If the lever is
pushed while the wipers are in the off position, the wipers
will operate several wipe cycles, then turn off.
NOTE:When the rear window washer is activated, the rear Back
Up camera and Digital Rearview Mirror (if equipped)
cameras are also washed.
WINDSHIELD WIPER DE-ICER —
I
F EQUIPPED
Your vehicle may be equipped with a Windshield Wiper
De-Icer feature that may be activated under the following
conditions:
Activation By Front Defrost — The Windshield Wiper
De-Icer shall be activated automatically in the case of
a cold weather manual start with full front defrost, and
when the ambient temperature is below 33°F (0.6°C).
Activation By Rear Defrost — The Windshield Wiper
De-Icer shall be activated automatically when the rear
defrost is turned on and when the ambient tempera -
ture is below 33°F (0.6°C).
Activation By Remote Start Operation — When Remote
Start is active and the outside ambient temperature is
less than 33°F (0.6°C), the Windshield Wiper De-Icer
will activate. Exiting Remote Start will resume its
previous operation. If the Windshield Wiper De-Icer was
active, the timer and operation will continue.
CLIMATE CONTROLS
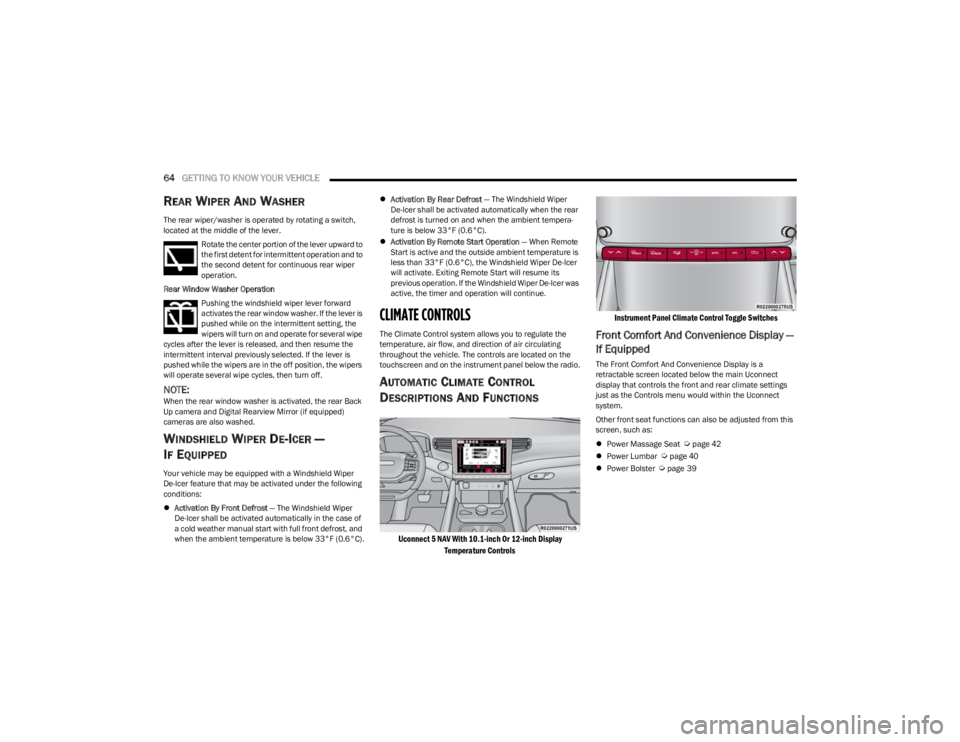
The Climate Control system allows you to regulate the
temperature, air flow, and direction of air circulating
throughout the vehicle. The controls are located on the
touchscreen and on the instrument panel below the radio.
AUTOMATIC CLIMATE CONTROL
D
ESCRIPTIONS AND FUNCTIONS
Uconnect 5 NAV With 10.1-inch Or 12-inch Display
Temperature Controls Instrument Panel Climate Control Toggle Switches
Front Comfort And Convenience Display —
If Equipped
The Front Comfort And Convenience Display is a
retractable screen located below the main Uconnect
display that controls the front and rear climate settings
just as the Controls menu would within the Uconnect
system.
Other front seat functions can also be adjusted from this
screen, such as:
Power Massage Seat
Úpage 42
Power Lumbar Úpage 40
Power Bolster Úpage 39
23_WS_OM_EN_USC_t.book Page 64
Page 110 of 396
108GETTING TO KNOW YOUR INSTRUMENT PANEL
When load reduction is activated, the message “Battery
Saver On” or “Battery Saver Mode” will appear in the
instrument cluster.
These messages indicate the vehicle battery has a low
state of charge and continues to lose electrical charge at
a rate that the charging system cannot sustain.
NOTE:
The charging system is independent from load reduc -
tion. The charging system performs a diagnostic on the
charging system continuously.
If the Battery Charge Warning Light is on it may indicate
a problem with the charging system
Úpage 109.
The electrical loads that may be switched off (if equipped),
and vehicle functions which can be affected by load
reduction:
Heated Seat/Vented Seats/Heated Wheel
Rear Defroster And Heated Mirrors
HVAC System
115 Volt AC Power Inverter System
Audio and Telematics System
Loss of the battery charge may indicate one or more of the
following conditions:
The charging system cannot deliver enough electrical
power to the vehicle system because the electrical
loads are larger than the capability of the charging
system. The charging system is still functioning
properly.
Turning on all possible vehicle electrical loads (e.g.
HVAC to max settings, exterior and interior lights, over -
loaded power outlets +12 Volt, 115 Volt AC, USB ports)
during certain driving conditions (city driving, towing,
frequent stopping, etc.).
Installing options like additional lights, upfitter elec -
trical accessories, audio systems, alarms and similar
devices.
Unusual driving cycles (short trips separated by long
parking periods).
The vehicle was parked for an extended period of time
(weeks, months).
The battery was recently replaced and was not charged
completely.
The battery was discharged by an electrical load left on
when the vehicle was parked.
The battery was used for an extended period with the
engine not running to supply radio, lights, chargers,
+12 Volt portable appliances like vacuum cleaners,
game consoles and similar devices.
What to do when an electrical load reduction action
message is present (“Battery Saver On” or “Battery Saver
Mode”)
During a trip:
Reduce power to unnecessary loads if possible:
Turn off redundant lights (interior or exterior)
Check what may be plugged in to power outlets
+12 Volt, 115 Volt AC, USB ports
Check HVAC settings (blower, temperature)
Check the audio settings (volume) After a trip:
Check if any aftermarket equipment was installed
(additional lights, upfitter electrical accessories, audio
systems, alarms) and review specifications if any (load
and Ignition Off Draw currents).
Evaluate the latest driving cycles (distance, driving
time and parking time).
The vehicle should have service performed if the
message is still present during consecutive trips, and if
the evaluation and driving pattern of the vehicle did not
help to identify the cause.WARNING LIGHTS AND MESSAGES
The warning/indicator lights will illuminate in the
instrument panel together with a dedicated message and/
or acoustic signal when applicable. These indications are
indicative and precautionary and as such must not be
considered as exhaustive and/or alternative to the
information contained in the Owner’s Manual, which you
are advised to read carefully in all cases. Always refer to
the information in this chapter in the event of a failure
indication. All active telltales will display first if applicable.
The system check menu may appear different based upon
equipment options and current vehicle status. Some
telltales are optional and may not appear.
23_WS_OM_EN_USC_t.book Page 108
Page 147 of 396
STARTING AND OPERATING145
If weather conditions are not a factor, the driver should
examine the windshield and the camera located on the
back side of the inside rearview mirror. They may require
cleaning or removal of an obstruction.
When the condition that created limited functionality is no
longer present, the system will return to full functionality.
NOTE:If the “ACC Limited Functionality Clean Front Windshield”
message occurs frequently (e.g. more than once on every
trip) without any snow, rain, mud, or other obstruction,
have the windshield and forward facing camera inspected
at an authorized dealer.
SERVICE ACC WARNING
If the system turns off, and the instrument cluster display
reads “ACC Unavailable Service Required” or “Cruise
Unavailable Service Required”, there may be an internal
system fault or a temporary malfunction that limits ACC
functionality. Although the vehicle is still drivable under
normal conditions, ACC will be temporarily unavailable.
If this occurs, try activating ACC again later, following an
ignition cycle. If the problem persists, see an authorized
dealer.
Precautions While Driving With ACC
In certain driving situations, ACC may have detection
issues. In these cases, ACC may brake late or
unexpectedly. The driver needs to stay alert and may need
to intervene. The following are examples of these types of
situations:
TOWING A TRAILER
ACC while towing a trailer is recommended only with an
Integrated Trailer Brake Controller. Aftermarket trailer
brake controllers will not activate the trailer brakes when
ACC is braking.
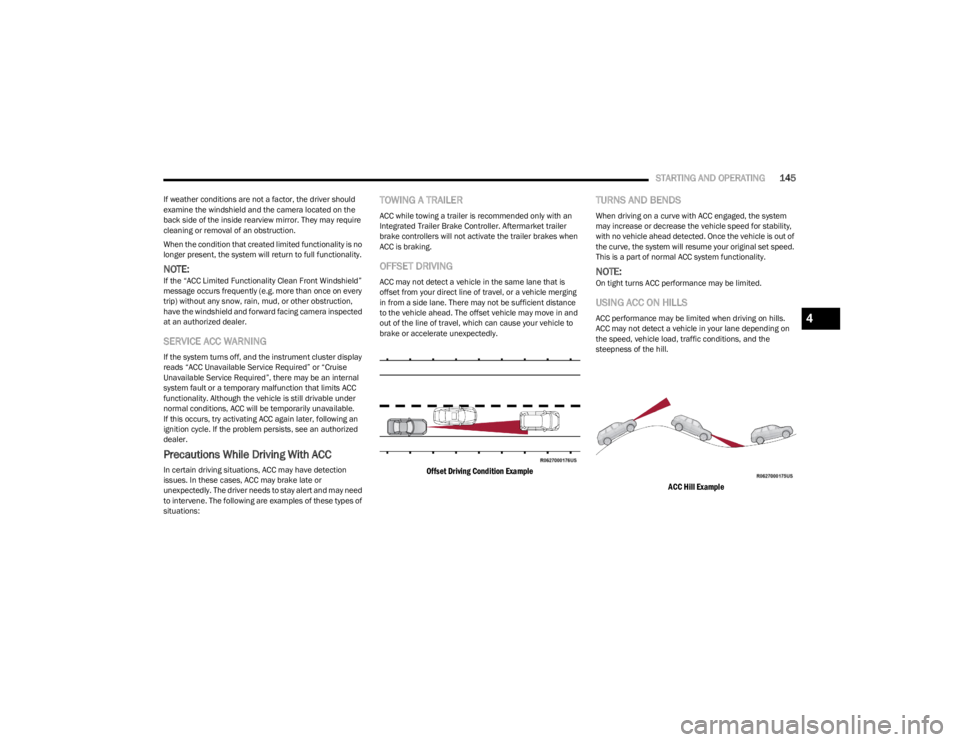
OFFSET DRIVING
ACC may not detect a vehicle in the same lane that is
offset from your direct line of travel, or a vehicle merging
in from a side lane. There may not be sufficient distance
to the vehicle ahead. The offset vehicle may move in and
out of the line of travel, which can cause your vehicle to
brake or accelerate unexpectedly.
Offset Driving Condition Example
TURNS AND BENDS
When driving on a curve with ACC engaged, the system
may increase or decrease the vehicle speed for stability,
with no vehicle ahead detected. Once the vehicle is out of
the curve, the system will resume your original set speed.
This is a part of normal ACC system functionality.
NOTE:On tight turns ACC performance may be limited.
USING ACC ON HILLS
ACC performance may be limited when driving on hills.
ACC may not detect a vehicle in your lane depending on
the speed, vehicle load, traffic conditions, and the
steepness of the hill.
ACC Hill Example
4
23_WS_OM_EN_USC_t.book Page 145
Page 173 of 396
STARTING AND OPERATING171
NOTE:If snow, ice, mud, or any foreign substance builds up on
the camera lens, clean the lens, rinse with water, and dry
with a soft cloth. Do not cover the lens. Rear Camera Washer
When the rear window washer is activated by pushing the
windshield wiper/washer lever forward, the rear Back Up
and digital rearview mirror (if equipped) cameras are also
washed. For more information, see
Úpage 64.
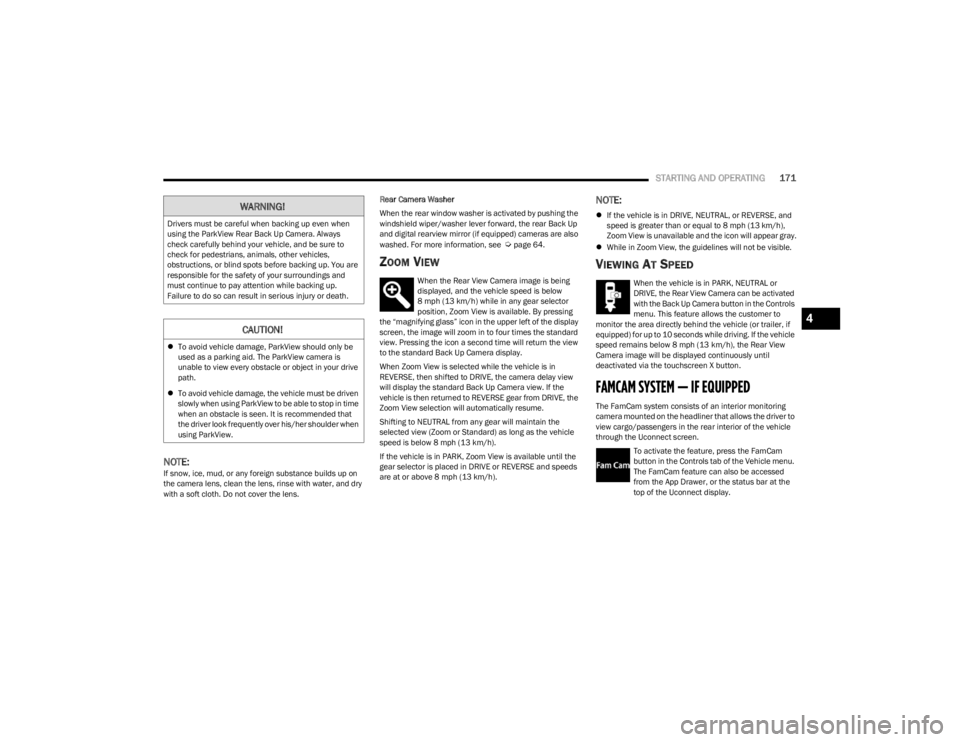
ZOOM VIEW
When the Rear View Camera image is being
displayed, and the vehicle speed is below
8 mph (13 km/h) while in any gear selector
position, Zoom View is available. By pressing
the “magnifying glass” icon in the upper left of the display
screen, the image will zoom in to four times the standard
view. Pressing the icon a second time will return the view
to the standard Back Up Camera display.
When Zoom View is selected while the vehicle is in
REVERSE, then shifted to DRIVE, the camera delay view
will display the standard Back Up Camera view. If the
vehicle is then returned to REVERSE gear from DRIVE, the
Zoom View selection will automatically resume.
Shifting to NEUTRAL from any gear will maintain the
selected view (Zoom or Standard) as long as the vehicle
speed is below 8 mph (13 km/h).
If the vehicle is in PARK, Zoom View is available until the
gear selector is placed in DRIVE or REVERSE and speeds
are at or above 8 mph (13 km/h).
NOTE:
If the vehicle is in DRIVE, NEUTRAL, or REVERSE, and
speed is greater than or equal to 8 mph (13 km/h),
Zoom View is unavailable and the icon will appear gray.
While in Zoom View, the guidelines will not be visible.
VIEWING AT SPEED
When the vehicle is in PARK, NEUTRAL or
DRIVE, the Rear View Camera can be activated
with the Back Up Camera button in the Controls
menu. This feature allows the customer to
monitor the area directly behind the vehicle (or trailer, if
equipped) for up to 10 seconds while driving. If the vehicle
speed remains below 8 mph (13 km/h), the Rear View
Camera image will be displayed continuously until
deactivated via the touchscreen X button.
FAMCAM SYSTEM — IF EQUIPPED
The FamCam system consists of an interior monitoring
camera mounted on the headliner that allows the driver to
view cargo/passengers in the rear interior of the vehicle
through the Uconnect screen.
To activate the feature, press the FamCam
button in the Controls tab of the Vehicle menu.
The FamCam feature can also be accessed
from the App Drawer, or the status bar at the
top of the Uconnect display.
WARNING!
Drivers must be careful when backing up even when
using the ParkView Rear Back Up Camera. Always
check carefully behind your vehicle, and be sure to
check for pedestrians, animals, other vehicles,
obstructions, or blind spots before backing up. You are
responsible for the safety of your surroundings and
must continue to pay attention while backing up.
Failure to do so can result in serious injury or death.
CAUTION!
To avoid vehicle damage, ParkView should only be
used as a parking aid. The ParkView camera is
unable to view every obstacle or object in your drive
path.
To avoid vehicle damage, the vehicle must be driven
slowly when using ParkView to be able to stop in time
when an obstacle is seen. It is recommended that
the driver look frequently over his/her shoulder when
using ParkView.
4
23_WS_OM_EN_USC_t.book Page 171
Page 177 of 396
STARTING AND OPERATING175
SURROUND VIEW CAMERA SYSTEM —
IF EQUIPPED
Your vehicle may be equipped with the Surround View
Camera system that allows you to see an on-screen image
of the surroundings and Top View of your vehicle whenever
the gear selector is put into REVERSE or a different view is
selected through the touchscreen buttons. The Top View
of the vehicle will show which doors are open. The image
will be displayed on the touchscreen display along with a
caution note “Check Entire Surroundings” across the top
of the screen. After five seconds, this note will disappear.
The Surround View Camera system is comprised of four
sequential cameras located in the front grille, rear liftgate
and side mirrors.
NOTE:The Surround View Camera system has programmable
settings that may be selected through the Uconnect
system
Úpage 197.
Press this button on the touchscreen to enter
the Surround View Camera menu in the
Uconnect system. When the vehicle is shifted into REVERSE, the
Rear View or Top View is the default view of the system.
When the vehicle is shifted out of REVERSE with camera
delay turned on, the camera image will continue to be
displayed for up to 10 seconds unless the vehicle speed
exceeds
8 mph (13 km/h, the vehicle is shifted into PARK
or the ignition is placed in the OFF position. There is a
touchscreen X button to disable the display of the camera
image.
When the vehicle is shifted out of REVERSE with camera
delay turned off, the Surround View Camera mode is
exited and the last known screen appears again.
When enabled, active guidelines are overlaid on the image
to illustrate the width of the vehicle, including the side
view mirrors and its projected back up path based on the
steering wheel position.
Different colored zones indicate the distance to the rear of
the vehicle.
The following table shows the approximate distances for
each zone:
Modes Of Operation
Manual activation of the Surround View Camera is
selected by pressing the Surround View Camera button
located in the Controls menu within the Uconnect system.
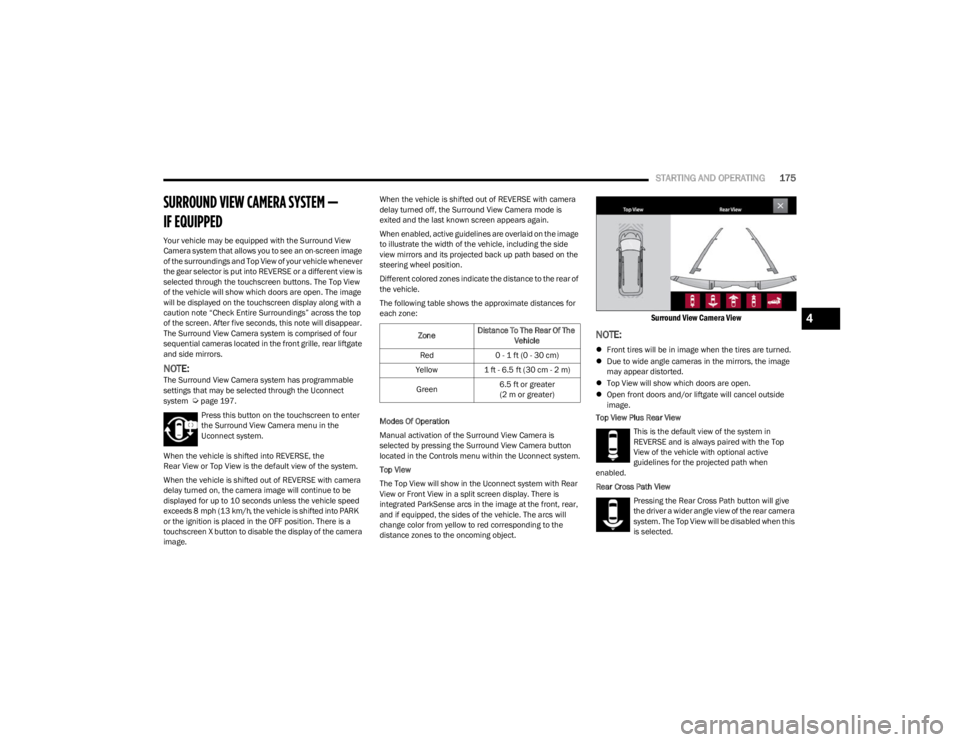
Top View
The Top View will show in the Uconnect system with Rear
View or Front View in a split screen display. There is
integrated ParkSense arcs in the image at the front, rear,
and if equipped, the sides of the vehicle. The arcs will
change color from yellow to red corresponding to the
distance zones to the oncoming object.
Surround View Camera View
NOTE:
Front tires will be in image when the tires are turned.
Due to wide angle cameras in the mirrors, the image
may appear distorted.
Top View will show which doors are open.
Open front doors and/or liftgate will cancel outside
image.
Top View Plus Rear View
This is the default view of the system in
REVERSE and is always paired with the Top
View of the vehicle with optional active
guidelines for the projected path when
enabled.
Rear Cross Path View
Pressing the Rear Cross Path button will give
the driver a wider angle view of the rear camera
system. The Top View will be disabled when this
is selected.
Zone Distance To The Rear Of The
Vehicle
Red 0 - 1 ft (0 - 30 cm)
Yellow 1 ft - 6.5 ft (30 cm - 2 m)
Green 6.5 ft or greater
(2 m or greater)
4
23_WS_OM_EN_USC_t.book Page 175