JEEP WRANGLER 2004 TJ / 2.G Owners Manual
Manufacturer: JEEP, Model Year: 2004, Model line: WRANGLER, Model: JEEP WRANGLER 2004 TJ / 2.GPages: 299, PDF Size: 6.82 MB
Page 101 of 299
6. Tuck drip rail retainers into the door frame slots.
7. Close the header latches, and return sun visors to their
original position.
DOOR FRAME
WARNING!
Do not drive your vehicle on-pavement with the
door frame removed or the windshield down as you
lose the protection these structural elements can
provide. These two procedures are furnished for use
during off-road operation only.
Door Frame Removal
1. Unscrew and remove the door frame attachment
knobs. Place one hand in the upper rear and one hand on
the upper front of the door frame. Pull the frame towards
you with your rearward hand to remove the frame from
the vehicle.2. Fold the door frames and store the knobs and door
frames outside of the vehicle. Repeat this step for the
other side.
WARNING!
²Use both hands to remove the door frames. The
door frames will fold and could cause injury if
both hands are not used.
²Never store the door frames in your vehicle. In an
event of an accident, a loose door frame many
cause personal injury. If removed, always store
the door frames outside of the vehicle.
Door Frame Installation
1. Set the door frame pin into the hole on top of the body
side, just behind the door opening.
UNDERSTANDING THE FEATURES OF YOUR VEHICLE 101
3
Page 102 of 299

2. Insert the top front of the door frame into the opening
at the top corner of the door opening. Push the top rear of
the door frame to the side bar.
3. Slide door frame forward until the pin holes in the top
line up with the holes in the side bar. Screw in the knobs
and tighten, beginning with the front knob. Repeat
procedures on the other side.
FOLDING WINDSHIELD
The fold down windshield and removable side bars on
your vehicle are structural elements that can provide
some protection in some accidents. The windshield also
provides some protection against weather, road debris
and intrusion of small branches and other objects.
Do not drive your vehicle on-road with the windshield
down and the side bars removed as you lose the protec-
tion these structural elements can provide.
102 UNDERSTANDING THE FEATURES OF YOUR VEHICLE
Page 103 of 299
NOTE:Before lowering windshield, disconnect the
electrical connector for the inside Compass/Temperature
mirror (if equipped).
If required for certain off-road uses, the side bars can be
removed and the windshield folded down. However, the
protection afforded by these features is then lost. If you
remove the side bars and fold down the windshield,
drive slowly and cautiously. It is recommended that the
speed of the vehicle be limited to 10 mph (16 km/h), with
low range operation preferred, if you are driving off-road
with the windshield folded down.
Raise the windshield and reinstall the side bars as soon as
the task that required their removal is completed and
before you return to on-road driving. Both you and your
passenger should wear seat belts at all times, on-road and
off-road, regardless of whether the windshield is raised
or folded down.Outside rear view mirrors are mounted on the doors. If
you choose to remove the doors, see your authorized
dealer for a replacement cowl-mounted outside mirror.
Federal law requires outside mirrors on vehicles for
on-road use.
NOTE:If the doors are removed, the courtesy lights
will remain on. To turn these lights off, remove fuse #4 in
the fuse panel. Refer to ªFuse Panelº in Section 7 of this
manual.
UNDERSTANDING THE FEATURES OF YOUR VEHICLE 103
3
Page 104 of 299
WARNING!
Carefully follow these warnings to help protect
against personal injury:
²Do not drive your vehicle on-road with the wind-
shield down.
²Do not drive your vehicle unless the windshield is
securely fastened, either up or down.
²Eye protection, such as goggles, should be worn at
all times when the windshield is down.
²Be sure that you carefully follow the instructions
for raising the windshield. Make sure that the
folding windshield, windshield wipers, side bars,
and all associated hardware and fasteners are
correctly and tightly assembled before driving
your vehicle. Failure to follow these instructions
may prevent your vehicle from providing you and
your passengers protection in some accidents.
²If you remove the doors, store them outside the
vehicle. In the event of an accident, a loose door
may cause personal injury.
Lowering the Windshield and Removing Side
Bars
1. Lower the fabric top or remove the hard top following
the instructions in this manual.
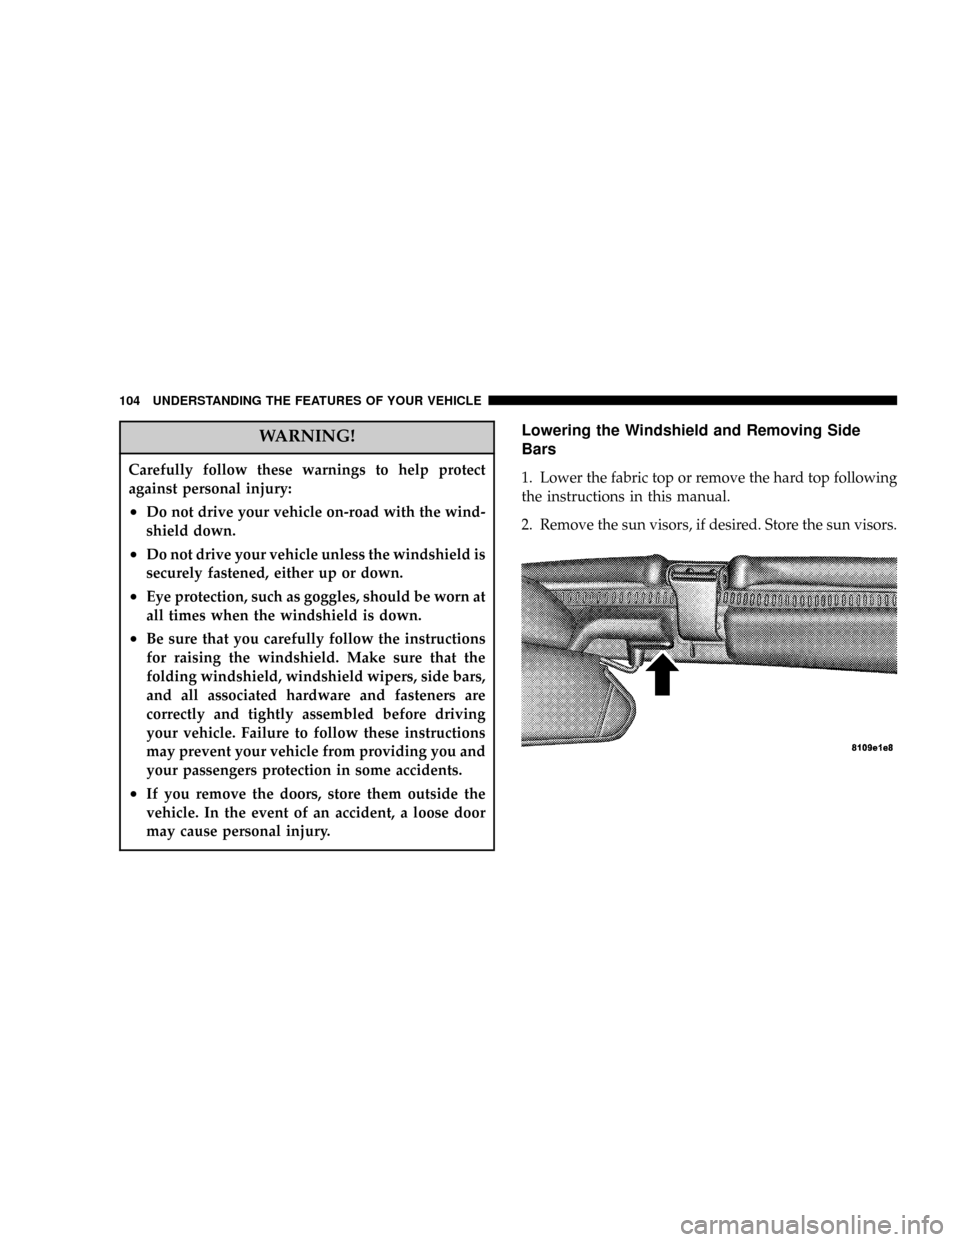
2. Remove the sun visors, if desired. Store the sun visors.
104 UNDERSTANDING THE FEATURES OF YOUR VEHICLE
Page 105 of 299
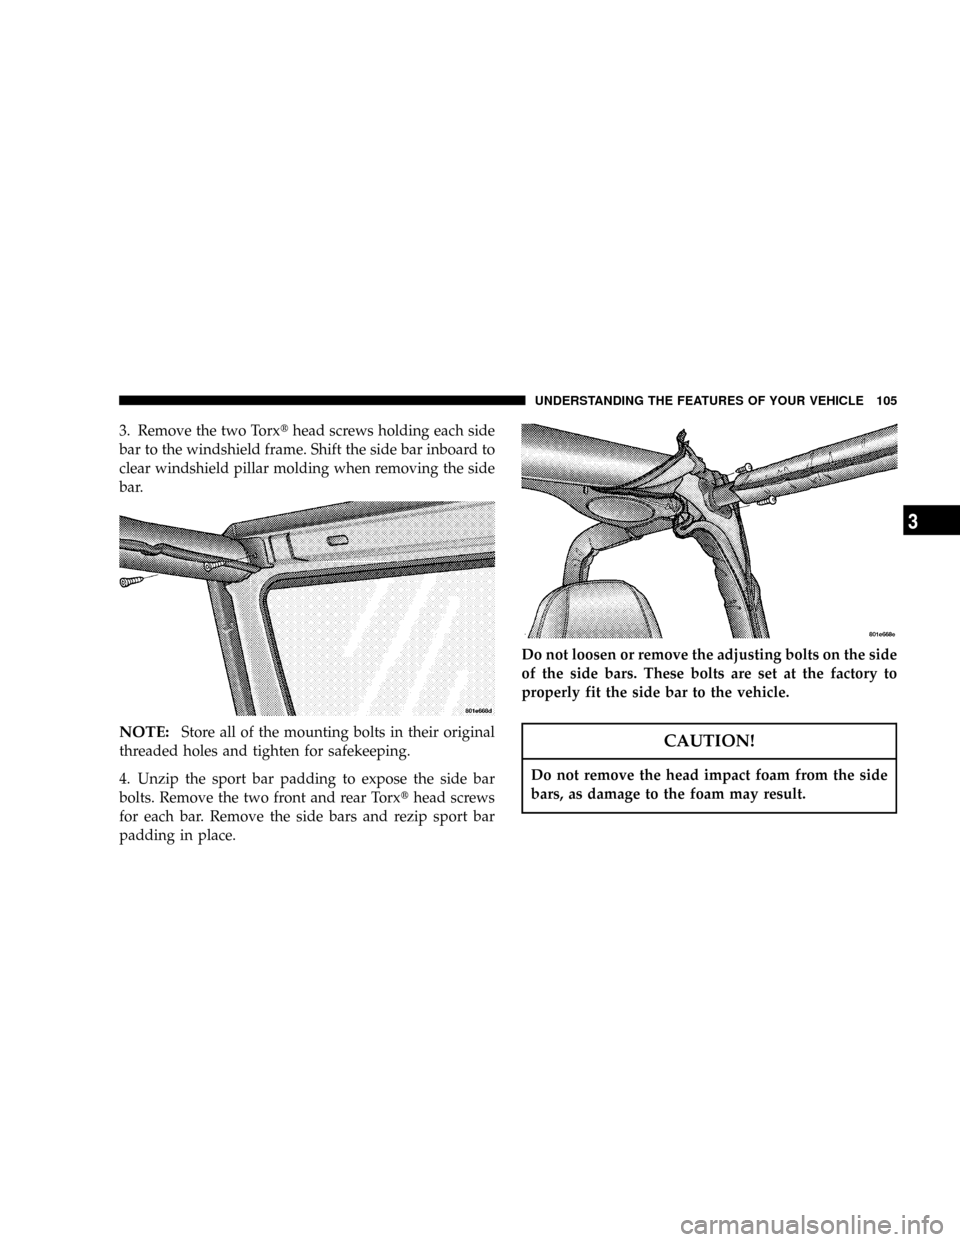
3. Remove the two Torxthead screws holding each side
bar to the windshield frame. Shift the side bar inboard to
clear windshield pillar molding when removing the side
bar.
NOTE:Store all of the mounting bolts in their original
threaded holes and tighten for safekeeping.
4. Unzip the sport bar padding to expose the side bar
bolts. Remove the two front and rear Torxthead screws
for each bar. Remove the side bars and rezip sport bar
padding in place.Do not loosen or remove the adjusting bolts on the side
of the side bars. These bolts are set at the factory to
properly fit the side bar to the vehicle.CAUTION!
Do not remove the head impact foam from the side
bars, as damage to the foam may result.
UNDERSTANDING THE FEATURES OF YOUR VEHICLE 105
3
Page 106 of 299
5. To safely store the side bars in your vehicle, use four of
the cinch straps, found in the glove box. Attach the straps
through the footman loops located in the floor behind the
folded rear seat on each side of the vehicle.
WARNING!
You or others could be injured if you carry the side
bars loose in your vehicle. Remove the bars from the
vehicle or securely store them as described or they
may cause personal injury if an accident occurs. See
your authorized dealer for replacement if the cinch
straps are not found in the glove box.
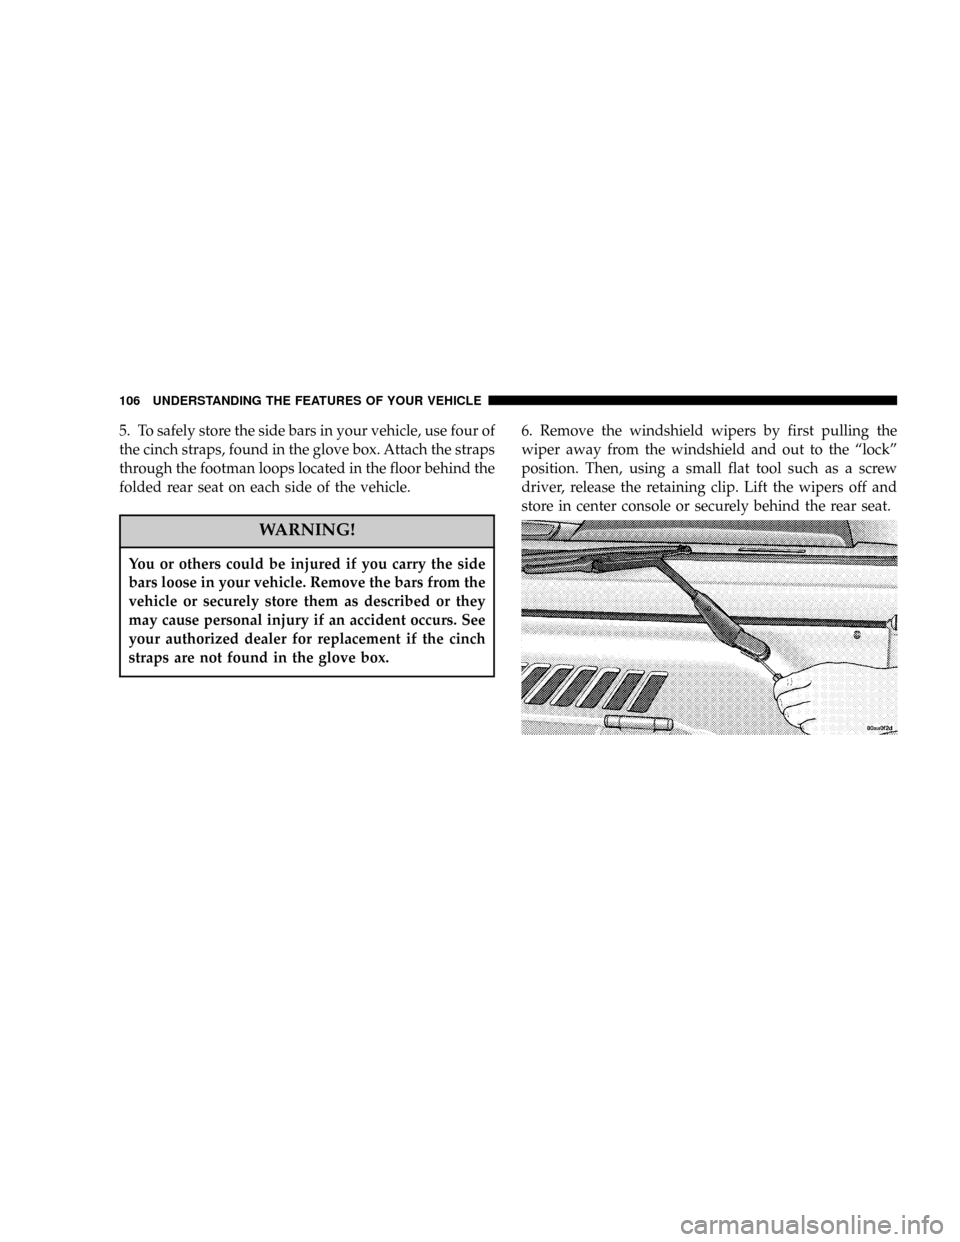
6. Remove the windshield wipers by first pulling the
wiper away from the windshield and out to the ªlockº
position. Then, using a small flat tool such as a screw
driver, release the retaining clip. Lift the wipers off and
store in center console or securely behind the rear seat.
106 UNDERSTANDING THE FEATURES OF YOUR VEHICLE
Page 107 of 299
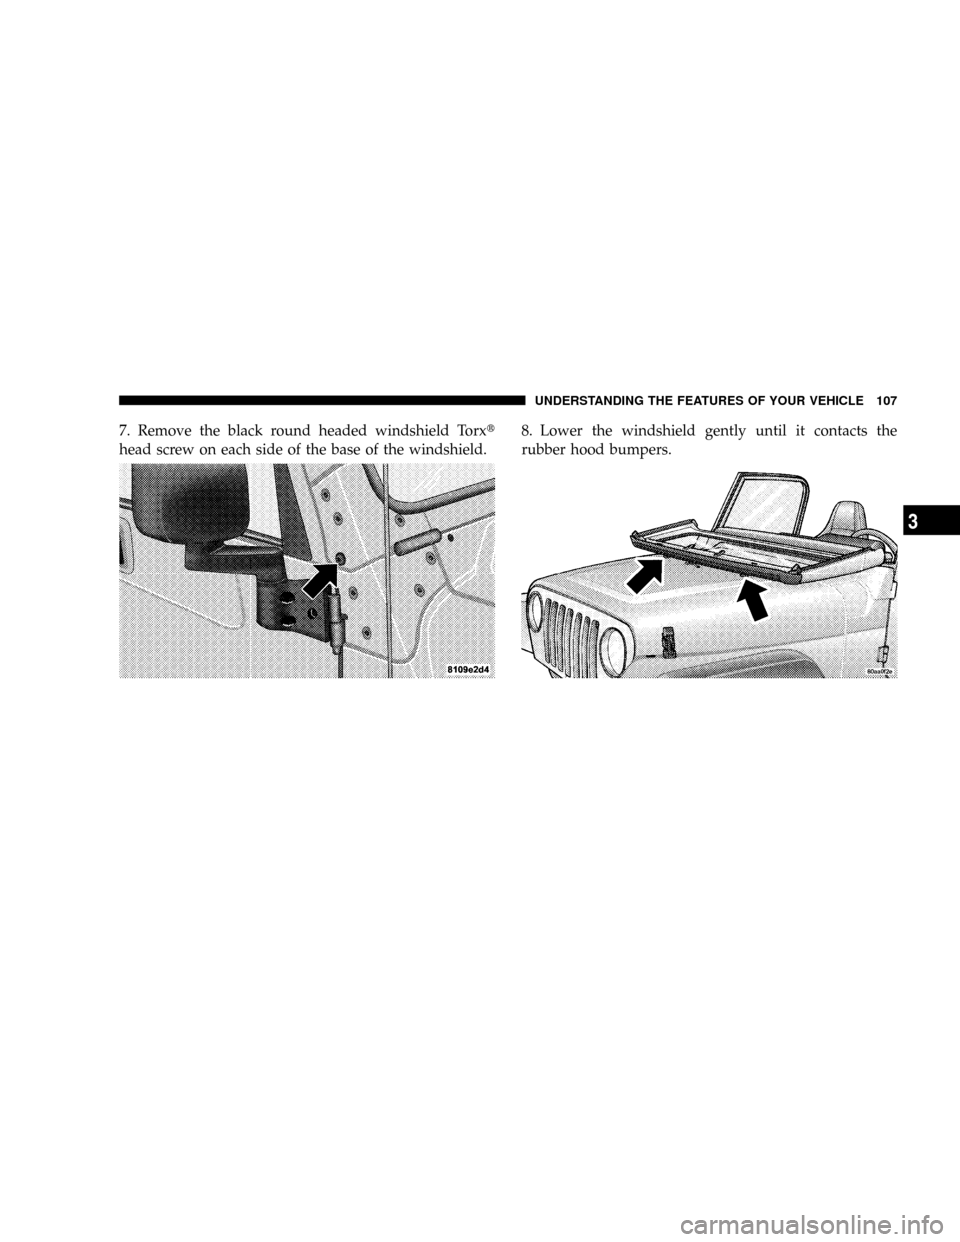
7. Remove the black round headed windshield Torxt
head screw on each side of the base of the windshield.8. Lower the windshield gently until it contacts the
rubber hood bumpers.
UNDERSTANDING THE FEATURES OF YOUR VEHICLE 107
3
Page 108 of 299
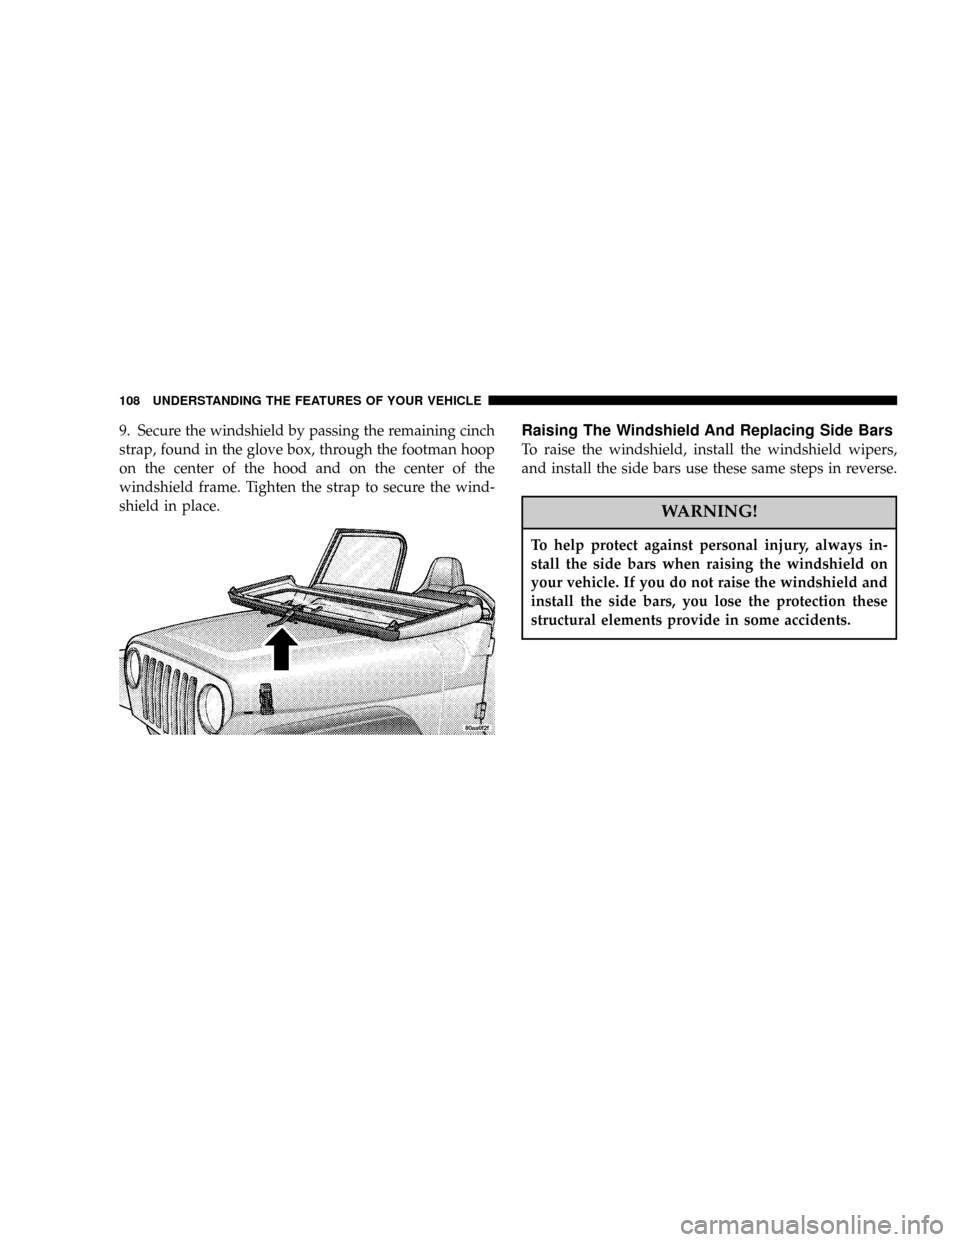
9. Secure the windshield by passing the remaining cinch
strap, found in the glove box, through the footman hoop
on the center of the hood and on the center of the
windshield frame. Tighten the strap to secure the wind-
shield in place.Raising The Windshield And Replacing Side Bars
To raise the windshield, install the windshield wipers,
and install the side bars use these same steps in reverse.
WARNING!
To help protect against personal injury, always in-
stall the side bars when raising the windshield on
your vehicle. If you do not raise the windshield and
install the side bars, you lose the protection these
structural elements provide in some accidents.
108 UNDERSTANDING THE FEATURES OF YOUR VEHICLE
Page 109 of 299

UNDERSTANDING YOUR INSTRUMENT PANEL
CONTENTS
mInstrument Panel And Interior Controls......114
mInstrument Cluster.....................115
mInstrument Cluster Description............116
mElectronic Digital Clock.................120
NClock Setting Procedure.................121
mRadio General Information...............121
NRadio Broadcast Signals.................121
NTwo Types Of Signals..................121
NElectrical Disturbances..................121
NAM Reception.......................121
NFM Reception........................121
mSales Code RADÐAM & FM Stereo Radio
With Graphic Equalizer, Cassette Tape Player
With CD Player
.......................122
NRadio Security Code...................122
NOperating Instructions - Radio Mode.......122
NPower Switch, Volume Control............123
NSeek Button (Radio Mode)...............123
NTuning.............................123
NBalance............................123
NFade..............................123
NTone Control........................123
NAM/FM-Tape/CD/CD-C................123
4
Page 110 of 299

NTo Set The Radio Push-Button Memory......123
NOperating Instructions - RDS Mode........124
NTime Button.........................124
NTA (Traffic Announcement) Button.........125
NPTY (Program Type) Button..............125
NAF LOC (Alternative Frequencies And Local
Frequencies) Button....................126
NOperating Instructions - Tape Mode........126
NChanging Tape Direction................127
NSeek Button.........................127
NFast Forward (FF).....................127
NRewind (RW)........................127
NTape EjectD.........................127
NMetal Tape Selection (70s)..............127
NPinch Roller Release...................128
NDolby Noise Reduction.................128NOperation Instructions Ð CD Player........128
NInserting The Compact Disc..............128
NSeek Button.........................128
NEJT CD (Eject) Button..................129
NFF/Tune/RW Button...................129
NProgram Button 4 (Random Play)..........129
NCD/CDÐC/Tape Button................129
NTime Button.........................129
mSales Code RBBÐAM/FM Stereo Radio
With Cassette Tape Player And CD Changer
Capability
...........................130
NOperating Instructions..................130
NPower Button........................130
NElectronic Volume Control...............130
NSeek..............................130
NTune ..............................131
110 UNDERSTANDING YOUR INSTRUMENT PANEL