start stop button JEEP WRANGLER 2004 TJ / 2.G Owners Manual
[x] Cancel search | Manufacturer: JEEP, Model Year: 2004, Model line: WRANGLER, Model: JEEP WRANGLER 2004 TJ / 2.GPages: 299, PDF Size: 6.82 MB
Page 32 of 299

Here are some tips on getting the most out of your child
restraint:
²Before buying any restraint system, make sure that it
has a label certifying that it meets all applicable Safety
Standards. The manufacturer also recommends that
you make sure that you can install the child restraint in
the vehicle where you will use it before you buy it.
²The restraint must be appropriate for your child's
weight and height. Check the label on the restraint for
weight and height limits.
²Carefully follow the instructions that come with the
restraint. If you install the restraint improperly, it may
not work when you need it.
²The passenger seat belts are equipped with cinching
latch plates designed to keep the lap portion or lap belt
tight around the child restraint so that it is not
necessary to use a locking clip. Pull up on the shoulder
portion of the lap/shoulder belt, or on the free end of
the lap belt to tighten the belt. The cinching latch plate
will keep the belt tight, however, any seat belt system
will loosen with time, so check the belt occasionally
and pull it tight if necessary.
²In the rear seat, you may have trouble tightening the
lap belt or lap/shoulder belt on the child restraint
because the buckle or latch plate is too close to the belt
path opening on the restraint. Disconnect the latch
plate from the buckle and twist the short buckle-end
belt several times to shorten it. Insert the latch plate
into the buckle with the release button facing out.
²If the belt still cannot be tightened, or if pulling and
pushing on the restraint loosens the belt, disconnect
the latch plate from the buckle, turn the buckle
around, and insert the latch plate into the buckle
again. If you still cannot make the child restraint
secure, try a different seating position.
²Buckle the child into the seat according to the child
restraint manufacturer's instructions.
²When your child restraint is not in use, secure it with
the seat belt or remove it from the vehicle. Do not leave
it loose in the vehicle. In a sudden stop or collision, it
could strike the occupants or seat backs and cause
serious personal injury.
32 THINGS TO KNOW BEFORE STARTING YOUR VEHICLE
Page 132 of 299

AM/FM Selection
Press the AM/FM button to change from AM to FM. The
operating mode will be displayed next to the station
frequency. The display will show ST when a stereo
station is received in the FM mode.
Mode Button
Press the MODE button to select between the cassette
tape player, CD changer, or the Satellite Radio (if
equipped). When the Satellite Radio (if equipped) is
selected ªSAº will appear in your radio display.
A CD or tape may remain in the player while in the
Satellite or radio mode.
Cassette Player Features
With ignition OFF and the sound system OFF, you can
eject the tape cassette by pushing the EJECT button.
You can turn the tape player ON by inserting a cassette or
activating the MODE button (with a cassette in the radio),
but only when the ignition and radio are on.
Each time a cassette is inserted the tape player will begin
playing on the side of the cassette that is facing up in the
player.
Music Search
Pressing the SEEK button while playing a tape will start
the Music Search mode. Press the SEEK button up for the
next selection on the tape and down to return to the
beginning of the current selection, or return to the
beginning of the previous selection if the tape is within
the first 5 seconds of the current selection.
The SEEK symbol appears on the display when Music
Search is in operation. Music Search shuts off automati-
cally when a selection has been located.
Selective Music Search
Press the SEEK button up or down to move the track
number to skip forward or backward 1 to 7 selections.
Press the SEEK button once to move 1 selection, twice to
move 2 selections, etc.
Fast Forward And Rewind Buttons
Pressing the TUNE button up or down momentarily
activates Fast Forward or Rewind and makes the direc-
tional arrows appear on the display.
To stop Fast Forward or Rewind, press the TUNE button
again.
132 UNDERSTANDING YOUR INSTRUMENT PANEL
Page 144 of 299

Operation Instructions Ð CD Player
NOTE:
The ignition switch must be in the ON or ACC
position and the volume control ON before the CD player
will operate.
Inserting The Compact Disc
You may either insert or eject a disc with the radio OFF.
If you insert a disc with the ignition ON and the radio
OFF, the disc icon will be displayed in addition to the
time of day.
If the volume control is ON, the unit will switch from
radio to CD mode and begin to play when you insert the
disc. The display will show the track number and index
time in minutes and seconds. Play will begin at the start
of track 1.
Seek
Press the top of the SEEK button for the next selection on
the CD. Press the bottom of the button to return to the
beginning of the current selection, or return to the
beginning of the previous selection, if the CD is within
the first second of the current selection.
EJT CD
Press the EJT CD button and the disc will unload and
move to the entrance for easy removal. The unit will
switch to the radio mode.
If you do not remove the disc within 15 seconds, it will be
reloaded. The unit will continue in radio mode.
FF/TUNE/RW
Press FF (Fast Forward) and the CD player will begin to
fast forward until FF is released. The RW (Reverse)
button works in a similar manner.
RND (Random Play)
Press the RND button while the CD is playing to activate
Random Play. This feature plays the selections on the
compact disc in random order to provide an interesting
change of pace.
Press the SEEK button to move to the next randomly
selected track.
Press TUNE FF to fast forward through the tracks.
Press the RND button a second time to stop Random
Play.
144 UNDERSTANDING YOUR INSTRUMENT PANEL
Page 167 of 299

WARNING!
Unintended movement of a vehicle could injure
those in and near the vehicle. As with all vehicles,
you should never exit a vehicle while the engine is
running. Before exiting a vehicle, you should always
shift the vehicle into P (Park), remove the key from
the ignition, and apply the parking brake. Once the
key is removed from the ignition, the transmission
shift lever is locked in the P (Park) position, securing
the vehicle against unwanted movement. Further-
more, you should never leave children unattended
inside a vehicle.
The following indicators should be used to ensure that
you have engaged the transmission shift lever into the P
(Park) position:
²When shifting into P (Park), depress the button on the
shift lever and firmly move the lever all the way
forward until it stops.
²Look at the shift indicator window on the console to
ensure it is in the P (Park) position.
²When engaged in P (Park), you will not be able to
move the shifter rearward without depressing the shift
lever button.
CAUTION!
Before moving the shift lever out of P (Park), you
must turn the ignition from LOCK to ON so the
steering wheel and shift lever are released. Other-
wise, damage to the steering column or shifter could
result.
R (Reverse)
For moving the vehicle rearward. Always stop before
moving the lever to R (Reverse), except when rocking
the vehicle.
N (Neutral)
Engine may be started in this position.
STARTING AND OPERATING 167
5
Page 176 of 299

WARNING!
²Always fully apply the parking brake when leav-
ing your vehicle, or vehicle may roll and cause
damage or injury. Also be certain to leave a
automatic transmission in P (Park), or a manual
transmission in 1st gear. Make certain the transfer
case is in gear. Failure to do so may cause the
vehicle to roll and cause damage or injury.
²If the parking brake is released, and the BRAKE
warning light glows while the ignition switch is
ON or the engine is running, there may be a brake
system problem. Brake pedal travel, effort and
stopping distances may increase, and you should
obtain corrective service immediately.
When parking on a hill, it is important to set the parking
brake before placing the gear selector in P (Park), other-
wise the load on the transmission locking mechanism
may make it difficult to move the selector out of P (Park).
The parking brake should always be applied when the
driver is not in the vehicle.
WARNING!
²Leaving children unattended in a vehicle is dan-
gerous for a number of reasons. A child or others
could be injured. Children should be warned not
to touch the parking brake or the gear selector
lever. Don't leave the keys in the ignition. A child
could operate controls or move the vehicle.
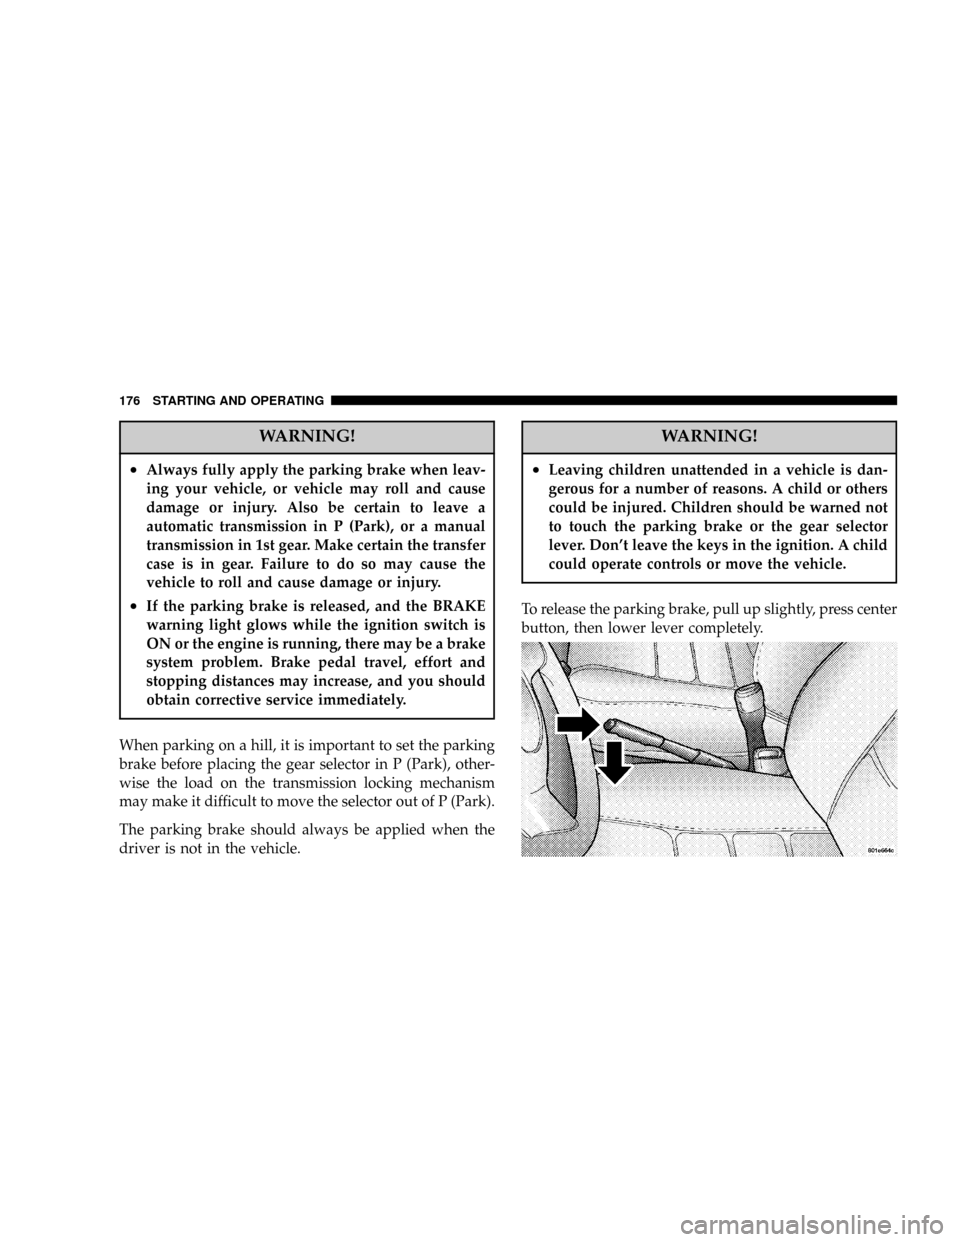
To release the parking brake, pull up slightly, press center
button, then lower lever completely.
176 STARTING AND OPERATING