JEEP WRANGLER 2015 JK / 3.G Owner's Guide
WRANGLER 2015 JK / 3.G
JEEP
JEEP
https://www.carmanualsonline.info/img/16/7170/w960_7170-0.png
JEEP WRANGLER 2015 JK / 3.G Owner's Guide
Trending: suspension, immobilizer, traction control, check transmission fluid, start stop button, spark plugs, glove box
Page 31 of 695
2. Closeness to a radio transmitter such as a radio station
tower, airport transmitter, and some mobile or CB
radios.
REMOTE STARTING SYSTEM — IF EQUIPPED
This system uses the Remote Keyless Entry
(RKE) transmitter to start the engine conve-
niently from outside the vehicle while still
maintaining security. The system has a range of
approximately 300 ft (91 m).
NOTE:
•The vehicle must be equipped with an automatic
transmission to be equipped with Remote Start.
•Obstructions between the vehicle and RKE transmitter
may reduce this range.
How To Use Remote Start
All of the following conditions must be met before the
engine will remote start:
•Shift lever in PARK
•Doors closed
•Hood closed
•Hazard switch off
•Brake switch inactive (brake pedal not pushed)
•Ignition key removed from ignition switch
•Battery at an acceptable charge level
•RKE PANIC button not pushed
•System not disabled from previous remote start event
•Vehicle theft alarm not active
2
THINGS TO KNOW BEFORE STARTING YOUR VEHICLE 29
Page 32 of 695
WARNING!
•Do not start or run an engine in a closed garage or
confined area. Exhaust gas contains Carbon Mon-
oxide (CO) which is odorless and colorless. Carbon
Monoxide is poisonous and can cause serious in-
jury or death when inhaled.
•Keep Remote Keyless Entry (RKE) transmitters
away from children. Operation of the Remote Start
System, windows, door locks or other controls
could cause serious injury or death.
Remote Start Abort Message On Electronic
Vehicle Information Center (EVIC) — If Equipped
The following messages will display in the EVIC if the
vehicle fails to remote start or exits remote start prema-
turely:
•Remote Start Aborted — Door Ajar
•Remote Start Aborted — Hood Ajar
•Remote Start Aborted — Fuel Low
•Remote Start Aborted — L/Gate Ajar
•Remote Start Aborted — System Fault
The EVIC message stays active until the ignition is turned
to the ON/RUN position.
30 THINGS TO KNOW BEFORE STARTING YOUR VEHICLE
Page 33 of 695
To Enter Remote Start
Push and release the REMOTE START button
on the RKE transmitter twice within five sec-
onds. The vehicle doors will lock, the parking
lights will flash and the horn will chirp twice (if
programmed). Then, the engine will start and the vehicle
will remain in the Remote Start mode for a 15-minute
cycle.
NOTE:
•The park lamps will turn on and remain on during
Remote Start mode.
•For security, power window operation is disabled
when the vehicle is in the Remote Start mode.
•The engine can be started two consecutive times (two
15-minute cycles) with the RKE transmitter. However,
the ignition switch must be cycled to the ON/RUN
position before you can repeat the start sequence for a
third cycle.
Remote start will also cancel if any of the following occur:
•The engine stalls or RPM exceeds 2500
•Any engine warning lamps come on
•The hood is opened
•The hazard switch is pushed
•The transmission is moved out of PARK
•The brake pedal is pushed
2
THINGS TO KNOW BEFORE STARTING YOUR VEHICLE 31
Page 34 of 695
To Exit Remote Start Mode Without Driving The
Vehicle
Push and release the REMOTE START button one time or
allow the engine to run for the entire 15-minute cycle.
NOTE:To avoid unintentional shut downs, the system
will disable the one time push of the REMOTE START
button for two seconds after receiving a valid Remote
Start request.
To Exit Remote Start Mode And Drive The Vehicle
Before the end of the 15-minute cycle, push and release
the UNLOCK button on the RKE transmitter to unlock
the doors and disarm the Vehicle Security Alarm (if
equipped). Then, insert the key into the ignition switch
and turn the switch to the ON/RUN position.
NOTE:The ignition switch must be in the ON/RUN
position in order to drive the vehicle.
DOORS
CAUTION!
Careless handling and storage of the removable door
panels may damage the seals, causing water to leak
into the vehicle’s interior.
32 THINGS TO KNOW BEFORE STARTING YOUR VEHICLE
Page 35 of 695
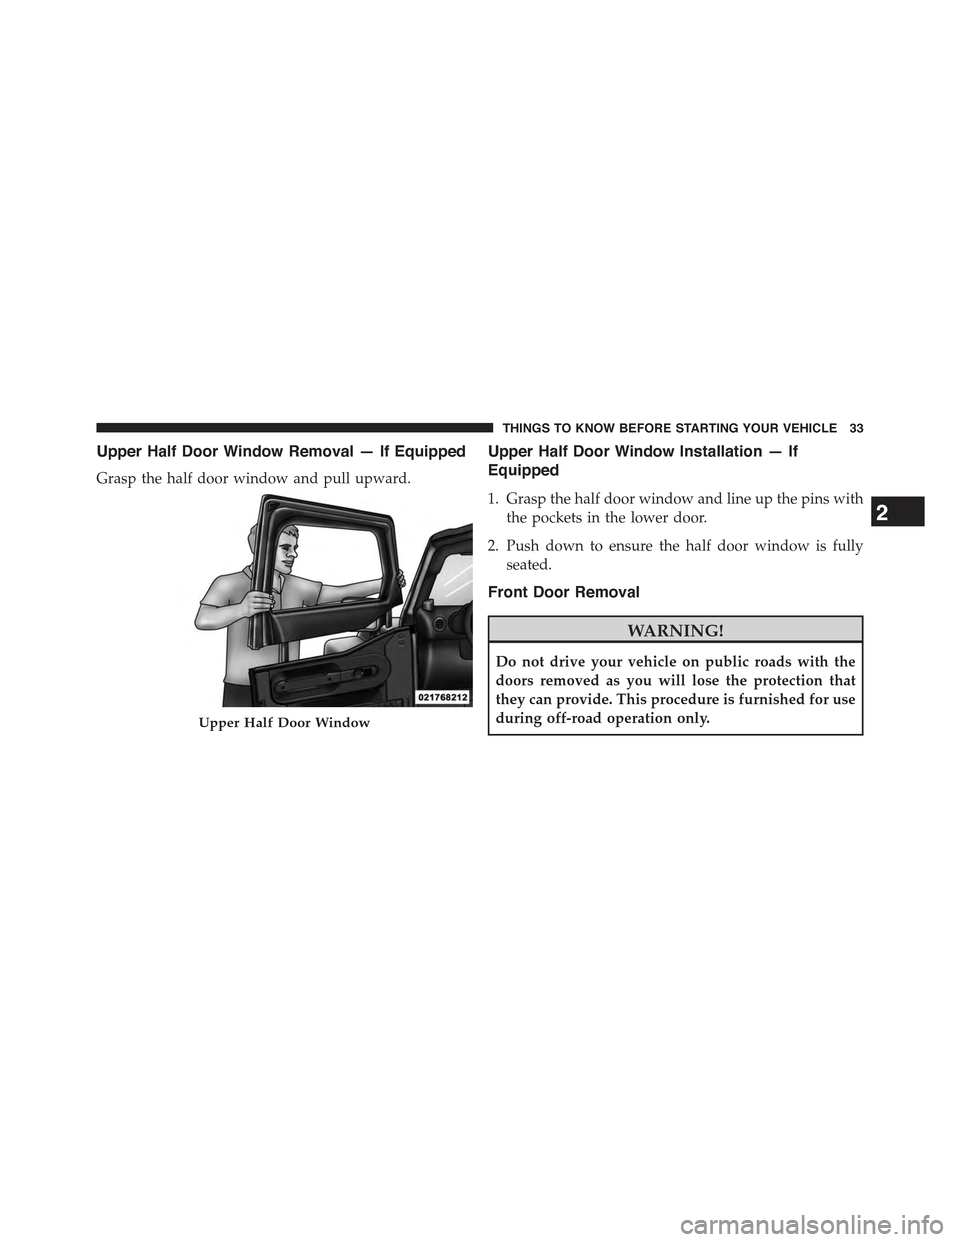
Upper Half Door Window Removal — If Equipped
Grasp the half door window and pull upward.
Upper Half Door Window Installation — If
Equipped
1. Grasp the half door window and line up the pins with
the pockets in the lower door.
2. Push down to ensure the half door window is fully
seated.
Front Door Removal
WARNING!
Do not drive your vehicle on public roads with the
doors removed as you will lose the protection that
they can provide. This procedure is furnished for use
during off-road operation only.Upper Half Door Window
2
THINGS TO KNOW BEFORE STARTING YOUR VEHICLE 33
Page 36 of 695
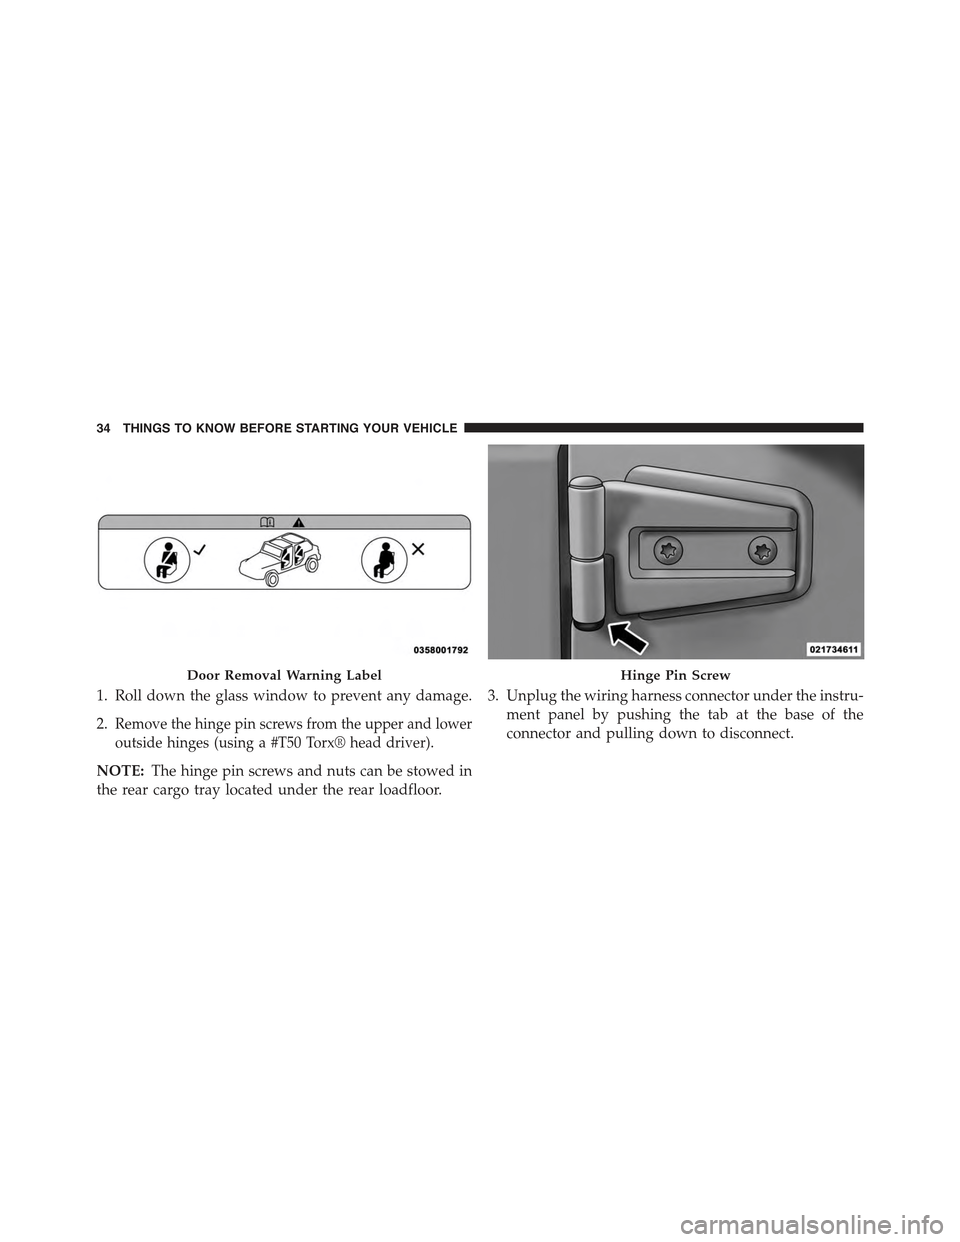
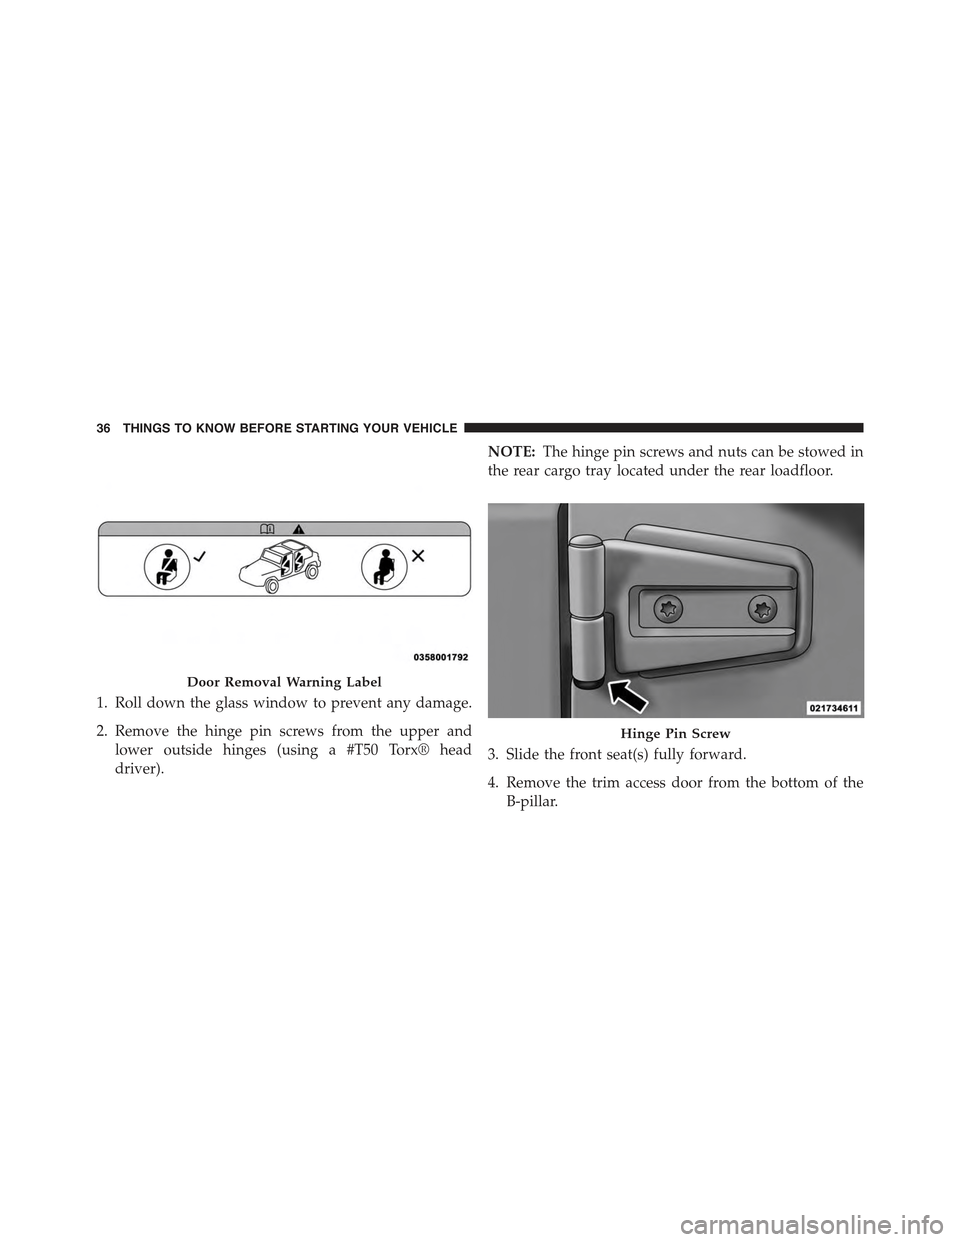
1. Roll down the glass window to prevent any damage.
2.Remove the hinge pin screws from the upper and lower
outside hinges (using a #T50 Torx® head driver).
NOTE:The hinge pin screws and nuts can be stowed in
the rear cargo tray located under the rear loadfloor.
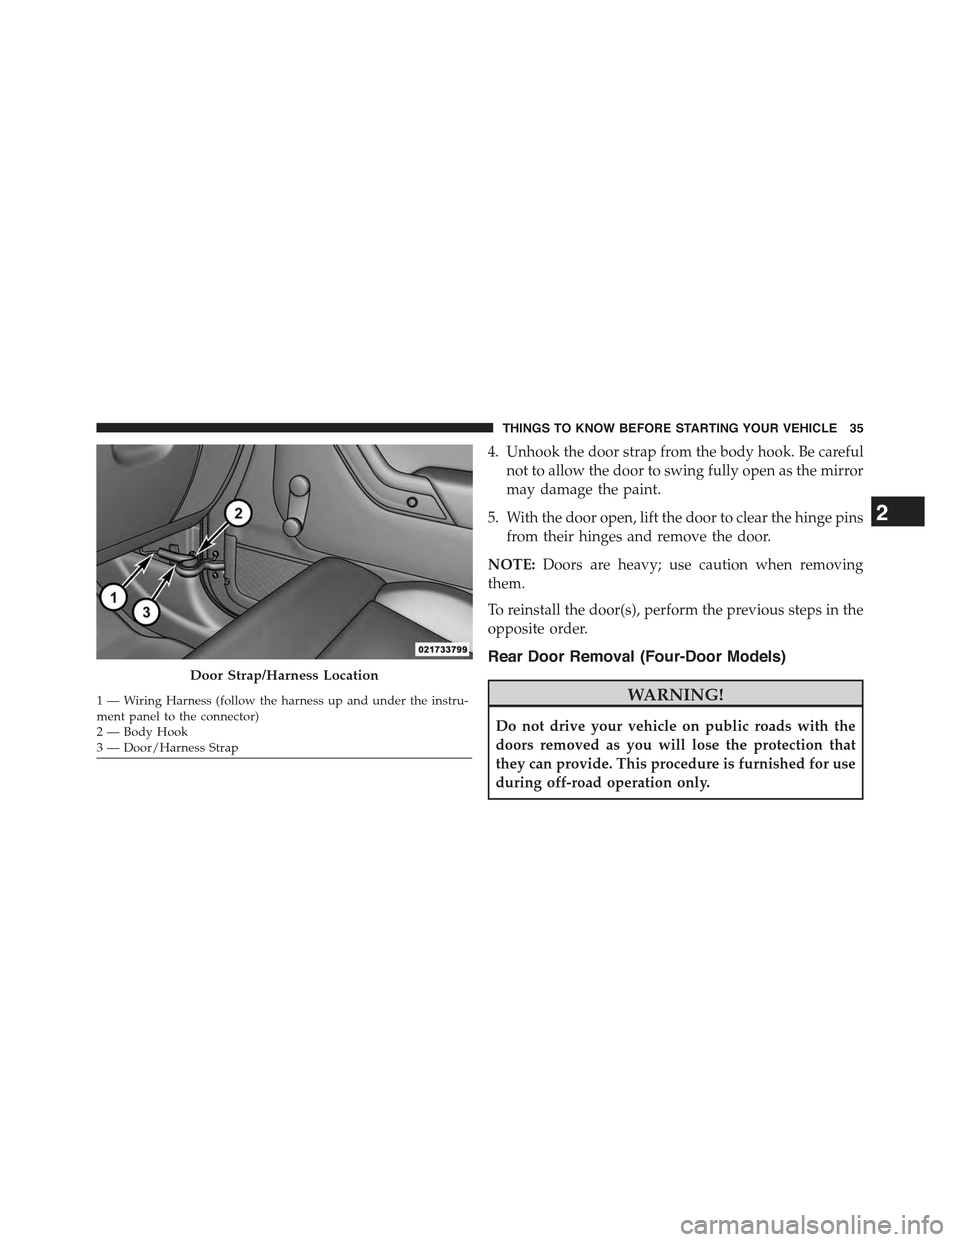
3. Unplug the wiring harness connector under the instru-
ment panel by pushing the tab at the base of the
connector and pulling down to disconnect.
Door Removal Warning LabelHinge Pin Screw
34 THINGS TO KNOW BEFORE STARTING YOUR VEHICLE
Page 37 of 695
4. Unhook the door strap from the body hook. Be careful
not to allow the door to swing fully open as the mirror
may damage the paint.
5. With the door open, lift the door to clear the hinge pins
from their hinges and remove the door.
NOTE:Doors are heavy; use caution when removing
them.
To reinstall the door(s), perform the previous steps in the
opposite order.
Rear Door Removal (Four-Door Models)
WARNING!
Do not drive your vehicle on public roads with the
doors removed as you will lose the protection that
they can provide. This procedure is furnished for use
during off-road operation only.
Door Strap/Harness Location
1 — Wiring Harness (follow the harness up and under the instru-ment panel to the connector)2—BodyHook3 — Door/Harness Strap
2
THINGS TO KNOW BEFORE STARTING YOUR VEHICLE 35
Page 38 of 695
1. Roll down the glass window to prevent any damage.
2. Remove the hinge pin screws from the upper and
lower outside hinges (using a #T50 Torx® head
driver).
NOTE:The hinge pin screws and nuts can be stowed in
the rear cargo tray located under the rear loadfloor.
3. Slide the front seat(s) fully forward.
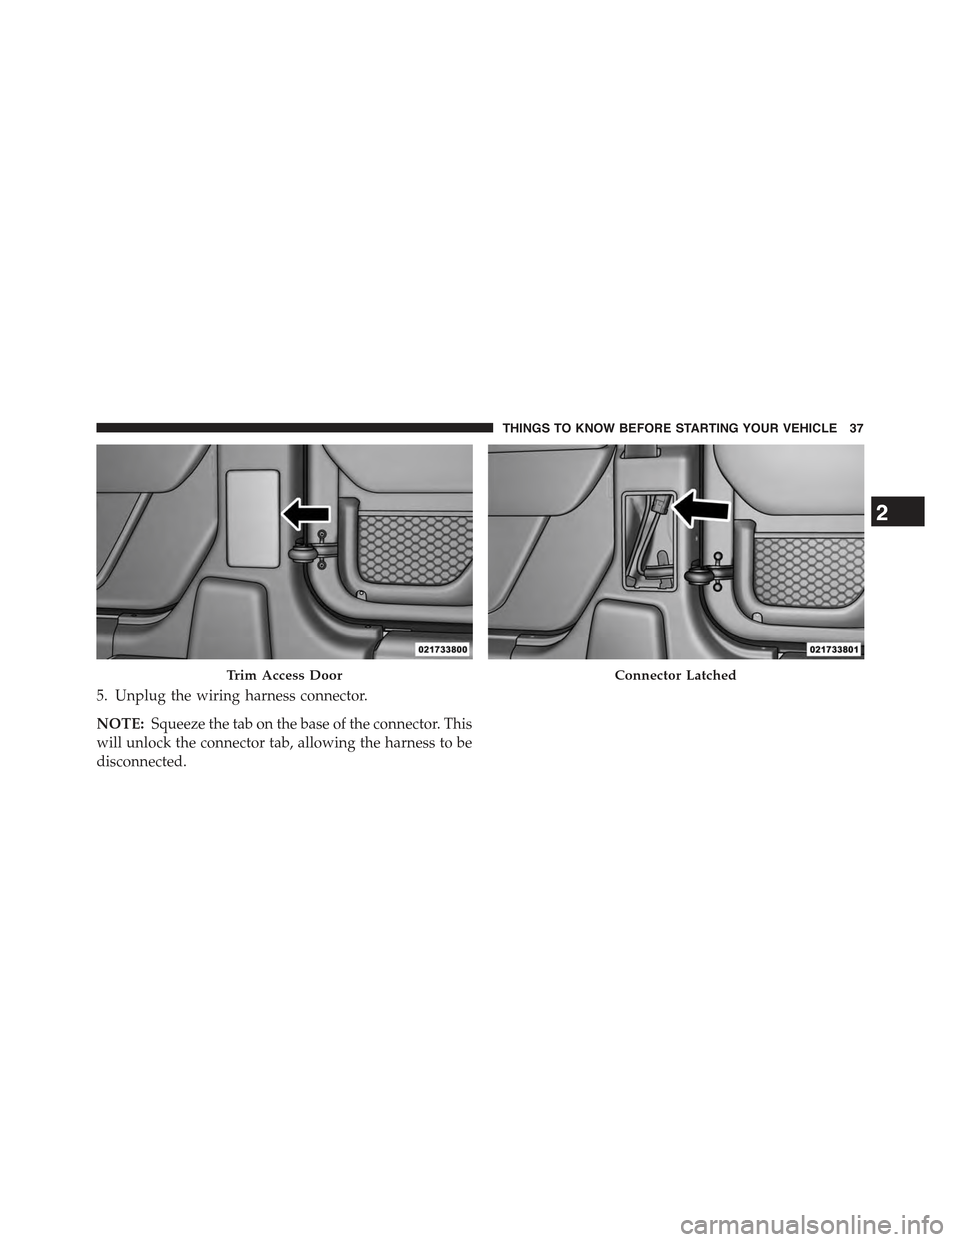
4. Remove the trim access door from the bottom of the
B-pillar.
Door Removal Warning Label
Hinge Pin Screw
36 THINGS TO KNOW BEFORE STARTING YOUR VEHICLE
Page 39 of 695
5. Unplug the wiring harness connector.
NOTE:Squeeze the tab on the base of the connector. This
will unlock the connector tab, allowing the harness to be
disconnected.
Trim Access DoorConnector Latched
2
THINGS TO KNOW BEFORE STARTING YOUR VEHICLE 37
Page 40 of 695
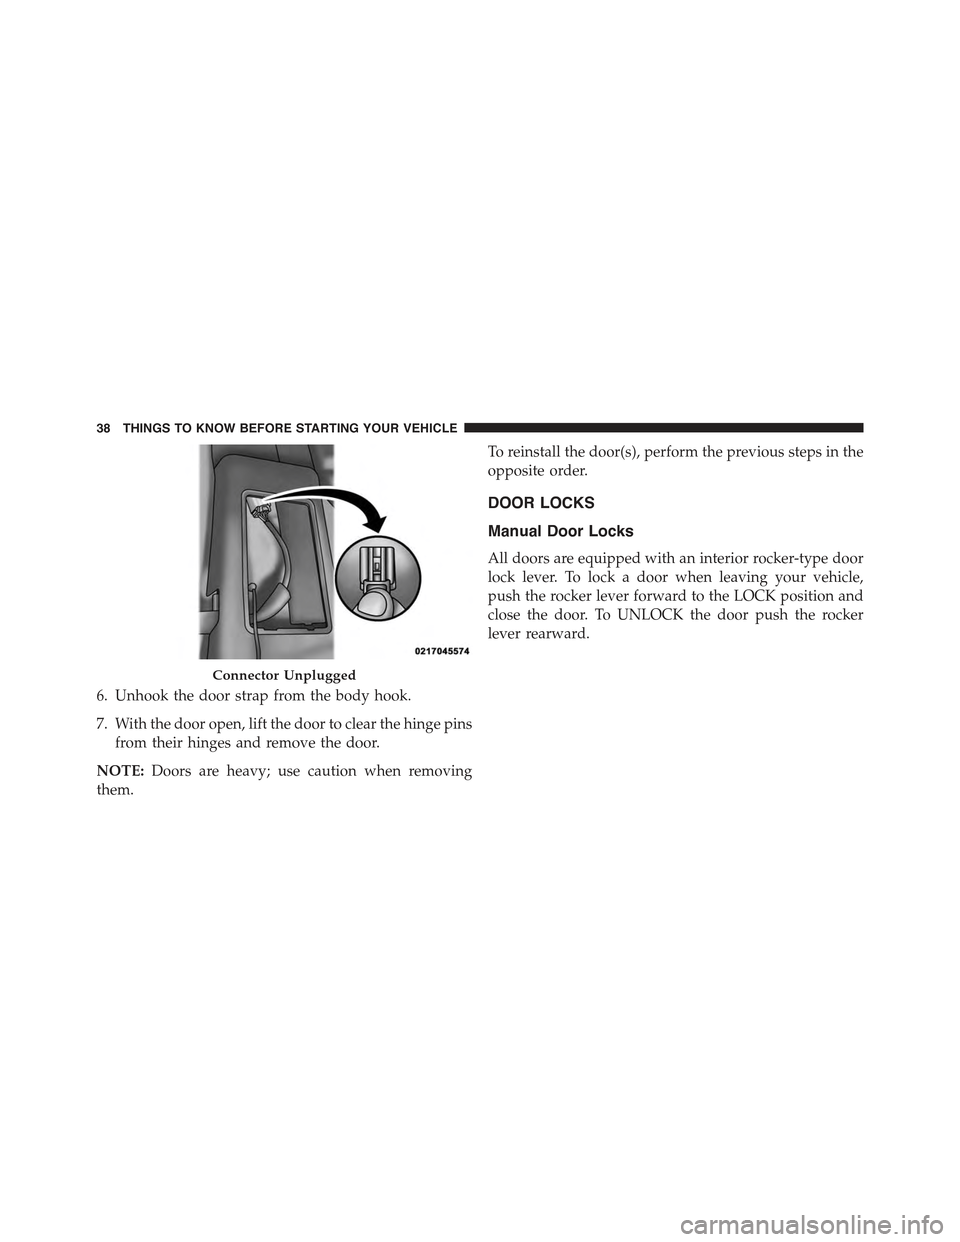
6. Unhook the door strap from the body hook.
7. With the door open, lift the door to clear the hinge pins
from their hinges and remove the door.
NOTE:Doors are heavy; use caution when removing
them.
To reinstall the door(s), perform the previous steps in the
opposite order.
DOOR LOCKS
Manual Door Locks
All doors are equipped with an interior rocker-type door
lock lever. To lock a door when leaving your vehicle,
push the rocker lever forward to the LOCK position and
close the door. To UNLOCK the door push the rocker
lever rearward.
Connector Unplugged
38 THINGS TO KNOW BEFORE STARTING YOUR VEHICLE
Trending: heater, gearbox, trip computer, window, transmission, towing capacity, power steering

