fuel pressure JEEP WRANGLER 2023 User Guide
[x] Cancel search | Manufacturer: JEEP, Model Year: 2023, Model line: WRANGLER, Model: JEEP WRANGLER 2023Pages: 396, PDF Size: 25.15 MB
Page 172 of 396
170STARTING AND OPERATING
Payload
The payload of a vehicle is defined as the allowable load
weight a truck can carry, including the weight of the driver,
all passengers, options and cargo.
Gross Axle Weight Rating (GAWR)
The GAWR is the maximum permissible load on the front
and rear axles. The load must be distributed in the cargo
area so that the GAWR of each axle is not exceeded.
Each axle GAWR is determined by the components in the
system with the lowest load carrying capacity (axle,
springs, tires or wheels). Heavier axles or suspension
components sometimes specified by purchasers for
increased durability do not necessarily increase the
vehicle's GVWR.
Tire Size
The tire size on the Vehicle Certification Label represents
the actual tire size on your vehicle. Replacement tires
must be equal to the load capacity of this tire size.
Rim Size
This is the rim size that is appropriate for the tire size
listed.
Inflation Pressure
This is the cold tire inflation pressure for your vehicle for
all loading conditions up to full GAWR.
Curb Weight
The curb weight of a vehicle is defined as the total weight
of the vehicle with all fluids, including vehicle fuel, at full
capacity conditions, and with no occupants or cargo
loaded into the vehicle. The front and rear curb weight values are determined by weighing your vehicle on a
commercial scale before any occupants or cargo are
added.
Loading
The actual total weight and the weight of the front and rear
of your vehicle at the ground can best be determined by
weighing it when it is loaded and ready for operation.
The entire vehicle should first be weighed on a commercial
scale to ensure that the GVWR has not been exceeded.
The weight on the front and rear of the vehicle should then
be determined separately to be sure that the load is
properly distributed over the front and rear axle. Weighing
the vehicle may show that the GAWR of either the front or
rear axles has been exceeded but the total load is within
the specified GVWR. If so, weight must be shifted from
front to rear or rear to front as appropriate until the
specified weight limitations are met. Store the heavier
items down low and be sure that the weight is distributed
equally. Stow all loose items securely before driving.
Improper weight distributions can have an adverse effect
on the way your vehicle steers and handles and the way
the brakes operate.
TRAILER TOWING
In this section you will find safety tips and information on
limits to the type of towing you can reasonably do with your
vehicle. Before towing a trailer, carefully review this
information to tow your load as efficiently and safely as
possible.
To maintain the New Vehicle Limited Warranty coverage,
follow the requirements and recommendations in this
manual concerning vehicles used for trailer towing.
COMMON TOWING DEFINITIONS
The following trailer towing related definitions will assist
you in understanding the following information:
Gross Vehicle Weight Rating (GVWR)
The GVWR is the total allowable weight of your vehicle.
This includes driver, passengers, cargo and tongue
weight. The total load must be limited so that you do not
exceed the GVWR
Úpage 169.
Gross Trailer Weight (GTW)
The GTW is the weight of the trailer plus the weight of all
cargo, consumables and equipment (permanent or
temporary) loaded in or on the trailer in its "loaded and
ready for operation" condition.
The recommended way to measure GTW is to put your fully
loaded trailer on a vehicle scale. The entire weight of the
trailer must be supported by the scale.
WARNING!
Do not load your vehicle any heavier than the GVWR or
the maximum front and rear GAWR. If you do, parts on
your vehicle can break, or it can change the way your
vehicle handles. This could cause you to lose control.
Overloading can shorten the life of your vehicle.
23_JL_OM_EN_USC_t.book Page 170
Page 189 of 396
MULTIMEDIA187
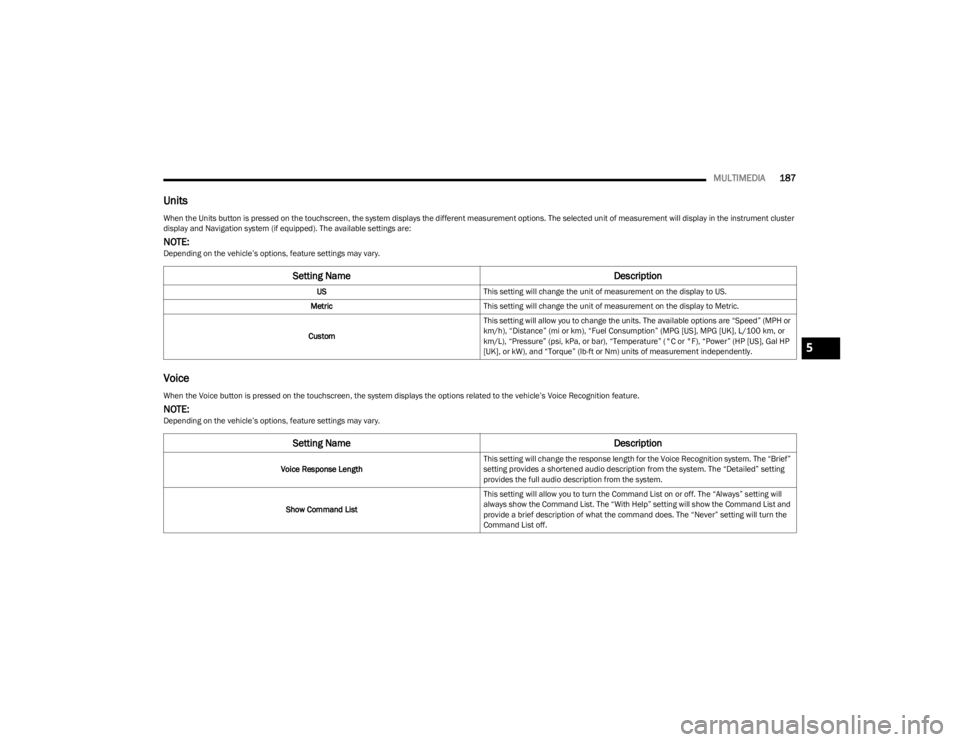
Units
Voice
When the Units button is pressed on the touchscreen, the system displays the different measurement options. The selected unit of measurement will display in the instrument cluster
display and Navigation system (if equipped). The available settings are:
NOTE:Depending on the vehicle’s options, feature settings may vary.
Setting Name Description
USThis setting will change the unit of measurement on the display to US.
Metric This setting will change the unit of measurement on the display to Metric.
Custom This setting will allow you to change the units. The available options are “Speed” (MPH or
km/h), “Distance” (mi or km), “Fuel Consumption” (MPG [US], MPG [UK], L/100 km, or
km/L), “Pressure” (psi, kPa, or bar), “Temperature” (°C or °F), “Power” (HP [US], Gal HP
[UK], or kW), and “Torque” (lb-ft or Nm) units of measurement independently.
When the Voice button is pressed on the touchscreen, the system displays the options related to the vehicle’s Voice Recognition feature.
NOTE:Depending on the vehicle’s options, feature settings may vary.
Setting Name
Description
Voice Response LengthThis setting will change the response length for the Voice Recognition system. The “Brief”
setting provides a shortened audio description from the system. The “Detailed” setting
provides the full audio description from the system.
Show Command List This setting will allow you to turn the Command List on or off. The “Always” setting will
always show the Command List. The “With Help” setting will show the Command List and
provide a brief description of what the command does. The “Never” setting will turn the
Command List off.
5
23_JL_OM_EN_USC_t.book Page 187
Page 238 of 396
236MULTIMEDIA
Google Assistant — If Equipped
With the Google Assistant, you can get help and keep tabs
on your car. Google Assistant is available across your
devices, including Android™ phones, iPhone® devices, or
voice-activated speakers, like Google Home. If you need
assistance, ask Google for help, or for a complete list of
commands by saying: “Hey Google, ask
help with my car.”
Here are a few examples of commands:
“Hey Google, ask
“Hey Google, ask
“Hey Google, ask
Chrysler Drive, Auburn Hills, Michigan to my
“Hey Google, ask
of my
To link your Uconnect account with Google Assistant,
follow these steps:
1. Download and install the Google Assistant app on your smart phone from the App Store® or Google
Play.
2. After installation, log in to the Google Assistant app with your Gmail ID. Verify your account by pressing
the icon in the upper right-hand corner.
3. Press the Discover button in the bottom left corner of the screen. Enter the vehicle brand name.
4. A prompt will appear to link your Uconnect account. Press “Link Uconnect to Google”. 5. Press “Sign In” and enter the email address and
password you created when you activated SiriusXM
Guardian™. There will be additional settings to
confirm on the following screen.
6. Lastly, press “Authorize” to complete the linking process.
Now, you can ask Google Assistant to help you:
Remotely start the engine, or cancel a remote start
Send a destination to your vehicle’s built-in Uconnect
Navigation system
Monitor vehicle vitals, such as tire pressure, fuel level
and oil life
And more!
Family Drive Alerts — If Equipped
Description
Family Drive Alerts help promote safer driving and give you
peace of mind when your loved ones are out on the road.
You can set boundary limits, monitor driving speed, and
pinpoint your vehicle’s location any time, any place. Use
the Vehicle Branded App to set alerts:
Boundary Alert
Receive a notification the moment your vehicle is
driven either out of or into a geographic boundary that
you set.
Curfew Alert
Receive a notification when your car is being driven
outside of the curfew time.
Speed Alert
Receive a notification whenever your car exceeds a
speed limit you set.
Valet Alert
Receive a notification if and when your vehicle is driven
outside a quarter-mile radius of a valet drop-off zone.
SmartWatch Integration — If Equipped
Description
SmartWatch Integration puts the Vehicle Branded App
right on your Apple® Watch or Android™ Wear. To get
started, follow these steps:
1. Download the Vehicle Branded App from the App
Store® or Google Play.
2. Log onto the app from your smartphone using the username and password you created when you first
set up your account.
3. Make sure your watch and smartphone are connected through Bluetooth®.
4. The Vehicle Branded App should appear on your SmartWatch.
Once the app is downloaded on your SmartWatch, you can
enjoy these features:
Lock or unlock your vehicle by tapping the remote lock
button in the app and entering your security PIN.
Remote start or stop your vehicle.
View important vehicle stats, such as fuel level, vehicle
location, tire pressure warning, and more.
23_JL_OM_EN_USC_t.book Page 236
Page 260 of 396
258SAFETY
NOTE:
The TPMS is not intended to replace normal tire care
and maintenance, or to provide warning of a tire failure
or condition.
The TPMS should not be used as a tire pressure gauge
while adjusting your tire pressure, unless your vehicle
is equipped with a Tire Fill Alert or Selectable Tire Fill
Alert feature.
Driving on a significantly underinflated tire causes the
tire to overheat and can lead to tire failure. Underinfla -
tion also reduces fuel efficiency and tire tread life, and
may affect the vehicle’s handling and stopping ability.
The TPMS is not a substitute for proper tire mainte -
nance, and it is the driver’s responsibility to maintain
correct tire pressure using an accurate tire pressure
gauge, even if underinflation has not reached the level
to trigger illumination of the TPMS Warning Light.
Seasonal temperature changes will affect tire pres -
sure, and the TPMS will monitor the actual tire pres -
sure in the tire.
System Operation
The Tire Pressure Monitoring System (TPMS) uses wireless
technology with wheel rim mounted electronic sensors to
monitor tire pressure levels. Sensors, mounted to each
wheel as part of the valve stem, transmit tire pressure
readings to the receiver module.
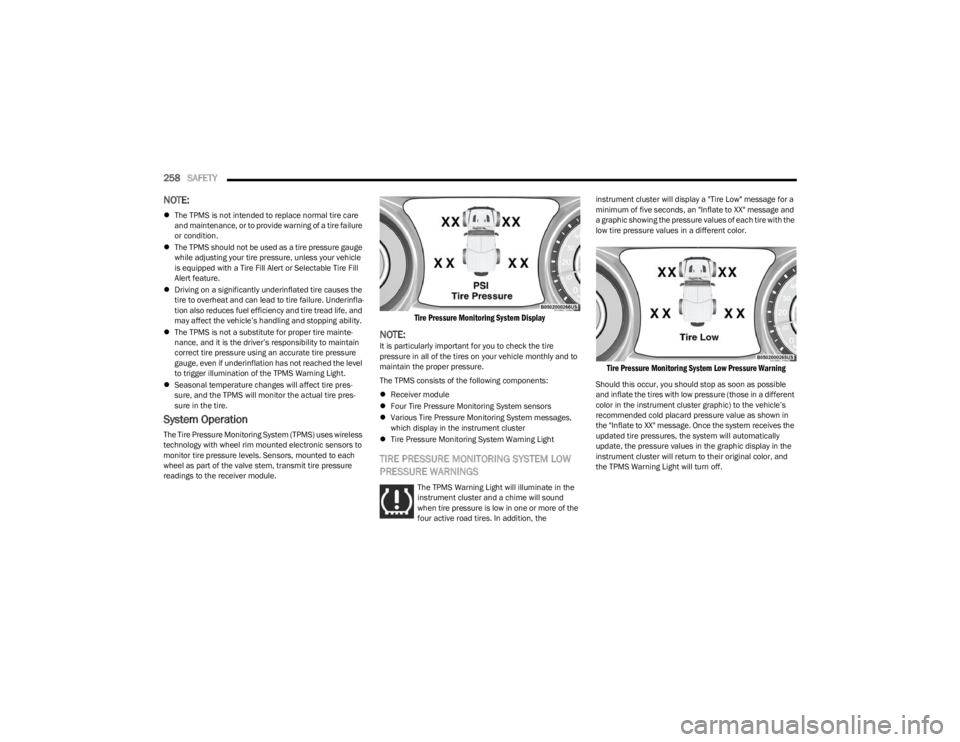
Tire Pressure Monitoring System Display
NOTE:It is particularly important for you to check the tire
pressure in all of the tires on your vehicle monthly and to
maintain the proper pressure.
The TPMS consists of the following components:
Receiver module
Four Tire Pressure Monitoring System sensors
Various Tire Pressure Monitoring System messages,
which display in the instrument cluster
Tire Pressure Monitoring System Warning Light
TIRE PRESSURE MONITORING SYSTEM LOW
PRESSURE WARNINGS
The TPMS Warning Light will illuminate in the
instrument cluster and a chime will sound
when tire pressure is low in one or more of the
four active road tires. In addition, the instrument cluster will display a "Tire Low" message for a
minimum of five seconds, an "Inflate to XX" message and
a graphic showing the pressure values of each tire with the
low tire pressure values in a different color.
Tire Pressure Monitoring System Low Pressure Warning
Should this occur, you should stop as soon as possible
and inflate the tires with low pressure (those in a different
color in the instrument cluster graphic) to the vehicle’s
recommended cold placard pressure value as shown in
the "Inflate to XX" message. Once the system receives the
updated tire pressures, the system will automatically
update, the pressure values in the graphic display in the
instrument cluster will return to their original color, and
the TPMS Warning Light will turn off.
23_JL_OM_EN_USC_t.book Page 258
Page 292 of 396
290SAFETY
PERIODIC SAFETY CHECKS YOU SHOULD
M
AKE OUTSIDE THE VEHICLE
Tires
Examine tires for excessive tread wear and uneven wear
patterns. Check for stones, nails, glass, or other objects
lodged in the tread or sidewall. Inspect the tread for cuts
and cracks. Inspect sidewalls for cuts, cracks, and bulges.
Check the lug nut/bolt torque for tightness. Check the
tires (including spare) for proper cold inflation pressure.
Lights
Have someone observe the operation of brake lights and
exterior lights while you work the controls. Check turn
signal and high beam indicator lights on the instrument
panel.
Door Latches
Check for proper closing, latching, and locking.
Fluid Leaks
Check area under vehicle after overnight parking for fuel,
coolant, oil, or other fluid leaks. Also, if gasoline fumes are
detected or if fuel or brake fluid leaks are suspected, the
cause should be located and corrected immediately.
EXHAUST GAS
The best protection against carbon monoxide entry into
the vehicle body is a properly maintained engine exhaust
system.
Whenever a change is noticed in the sound of the exhaust
system, when exhaust fumes can be detected inside the
vehicle, or when the underside or rear of the vehicle is
damaged, have an authorized dealer inspect the complete
exhaust system and adjacent body areas for broken,
damaged, deteriorated, or mispositioned parts. Open seams or loose connections could permit exhaust fumes
to seep into the passenger compartment. In addition,
inspect the exhaust system each time the vehicle is raised
for lubrication or oil change. Replace as required.
CARBON MONOXIDE WARNINGS
WARNING!
Exhaust gases can injure or kill. They contain carbon
monoxide (CO), which is colorless and odorless.
Breathing it can make you unconscious and can
eventually poison you. To avoid breathing (CO), follow
these safety tips:
Do not run the engine in a closed garage or in
confined areas any longer than needed to move your
vehicle in or out of the area.
If you are required to drive with the trunk/liftgate/
rear doors open, make sure that all windows are
closed and the climate control BLOWER switch is set
at high speed. DO NOT use the recirculation mode.
If it is necessary to sit in a parked vehicle with the
engine running, adjust your heating or cooling
controls to force outside air into the vehicle. Set the
blower at high speed.
WARNING!
Carbon monoxide (CO) in exhaust gases is deadly.
Follow the precautions below to prevent carbon
monoxide poisoning:
Do not inhale exhaust gases. They contain carbon
monoxide, a colorless and odorless gas, which can
kill. Never run the engine in a closed area, such as a
garage, and never sit in a parked vehicle with the
engine running for an extended period. If the vehicle
is stopped in an open area with the engine running
for more than a short period, adjust the ventilation
system to force fresh, outside air into the vehicle.
Guard against carbon monoxide with proper mainte -
nance. Have the exhaust system inspected every
time the vehicle is raised. Have any abnormal condi -
tions repaired promptly. Until repaired, drive with all
side windows fully open.
When exiting the vehicle, always make sure the igni -
tion is in the OFF position, remove the key fob from
the vehicle and lock your vehicle.
23_JL_OM_EN_USC_t.book Page 290
Page 302 of 396
300IN CASE OF EMERGENCY
5. Start the engine in the vehicle that has the booster
battery, let the engine idle a few minutes, and then
start the engine in the vehicle with the discharged
battery.
6. Once the engine is started, remove the jumper cables in the reverse sequence.
Disconnecting The Jumper Cables
1. Disconnect the negative
(-)
end of the jumper cable
from the engine ground of the vehicle with the
discharged battery.
2. Disconnect the opposite end of the negative (-)
jumper cable from the negative (-) post of the booster
battery.
3. Disconnect the positive (+) end of the jumper cable
from the positive (+) post of the booster battery. 4. Disconnect the opposite end of the positive
(+)
jumper cable from the positive (+) post of the
discharged vehicle.
5. Reinstall the protective cover over the positive (+)
post of the discharged vehicle.
NOTE:If frequent jump starting is required to start your vehicle
you should have the battery and charging system tested at
an authorized dealer.
IF YOUR ENGINE OVERHEATS
If the vehicle is overheating, it will need to be serviced by
an authorized dealer.
Potential signs of vehicle overheating:
Temperature gauge is at HOT (H)
Strong smell of coolant
White smoke coming from engine or exhaust
Coolant bottle coolant has bubbles present In the event it is observed that the temperature gauge is
moving towards or close to the HOT (H) position, you can
reduce the potential for overheating by taking the
appropriate action.
On the highways — slow down.
In city traffic — while stopped, place the transmission in
NEUTRAL (N), but do not increase the engine idle speed
while preventing vehicle motion with the brakes.
If your Air Conditioner (A/C) is on, turn it off. The A/C
system adds heat to the engine cooling system and
turning the A/C off can help remove this heat.
You can also turn the temperature control to maximum
heat, the mode control to floor and the blower control
to high. This allows the heater core to act as a supple -
ment to the radiator and aids in removing heat from the
engine cooling system.
CAUTION!
Make sure at all times that unused ends of jumper
cables are not contacting each other or either vehicle
while making connections. Failure to follow these
procedures could result in damage to the charging
system of the booster vehicle or the discharged vehicle.
CAUTION!
Do not run the booster vehicle engine above 2,000 RPM
since it provides no charging benefit, wastes fuel, and
can damage booster vehicle engine.
CAUTION!
Accessories plugged into the vehicle power outlets draw
power from the vehicle’s battery, even when not in use
(i.e., cellular devices, etc.). Eventually, if plugged in long
enough without engine operation, the vehicle’s battery
will discharge sufficiently to degrade battery life and/or
prevent the engine from starting.
WARNING!
You or others can be badly burned by hot engine
coolant (antifreeze) or steam from your radiator. If you
see or hear steam coming from under the hood, do not
open the hood until the radiator has had time to cool.
Never try to open a cooling system pressure cap when
the radiator or coolant bottle is hot.
23_JL_OM_EN_USC_t.book Page 300
Page 319 of 396
SERVICING AND MAINTENANCE317
CHECKING OIL LEVEL
To ensure proper engine lubrication, the engine oil must
be maintained at the correct level. Check the oil level at
regular intervals, such as every fuel stop. The best time to
check the engine oil level is about five minutes after a fully
warmed up engine is shut off.
Checking the oil while the vehicle is on level ground will
improve the accuracy of the oil level readings.
There are four possible dipstick types:
Crosshatched zone.
Crosshatched zone marked SAFE.
Crosshatched zone marked with MIN at the low end of
the range and MAX at the high end of the range.
Crosshatched zone marked with dimples at the MIN
and the MAX ends of the range.
NOTE:Always maintain the oil level within the crosshatch
markings on the dipstick.
NOTE:Use care when filling under hood fluids such as engine oil,
washer fluid, antifreeze, etc., to minimize spillage onto the
top of the engine. Any excess fluid that is spilled onto the
top of the engine should be removed using compressed
air or an absorbent cloth.
Adding 1 qt (1 L) of oil when the reading is at the low end
of the dipstick range will raise the oil level to the high end
of the range marking.
ADDING WASHER FLUID
The fluid reservoir for the windshield washers and the rear
window washer (if equipped) is shared. The fluid reservoir
is located in the engine compartment. Be sure to check
the fluid level at regular intervals. Fill the reservoir with
windshield washer solvent only (not radiator antifreeze).
When refilling the washer fluid reservoir, take some
washer fluid and apply it to a cloth or towel and wipe clean
the wiper blades; this will help blade performance.
To prevent freeze-up of your windshield washer system in
cold weather, select a solution or mixture that meets or
exceeds the temperature range of your climate. This rating
information can be found on most washer fluid containers.
NOTE:Use care when filling under hood fluids such as engine oil,
washer fluid, antifreeze, etc., to minimize spillage onto the
top of the engine. Any excess fluid that is spilled onto the
top of the engine should be removed using compressed
air or an absorbent cloth.
MAINTENANCE-FREE BATTERY
Your vehicle is equipped with a maintenance-free battery.
You will never have to add water, and periodic
maintenance is not required.
CAUTION!
Overfilling or underfilling the crankcase will cause
aeration or loss of oil pressure. This could damage your
engine.
WARNING!
Commercial windshield washer solvents are flammable.
They could ignite and burn you. Care must be exercised
when filling or working around the washer solution.
WARNING!
Battery fluid is a corrosive acid solution and can burn
or even blind you. Do not allow battery fluid to
contact your eyes, skin, or clothing. Do not lean over
a battery when attaching clamps. If acid splashes in
eyes or on skin, flush the area immediately with large
amounts of water
Úpage 298.
Battery gas is flammable and explosive. Keep flame
or sparks away from the battery. Do not use a
booster battery or any other booster source with an
output greater than 12 Volts. Do not allow cable
clamps to touch each other.
Battery posts, terminals, and related accessories
contain lead and lead compounds. Wash hands after
handling.
Vehicles with the Stop/Start system will be equipped
with two batteries. Both the main and the supple -
mental batteries must be disconnected to
completely de-energize the 12 Volt electrical system.
Serious injury or death could result if you do not
disconnect both batteries. To learn how to properly
disconnect, see an authorized dealer.
8
23_JL_OM_EN_USC_t.book Page 317
Page 325 of 396
SERVICING AND MAINTENANCE323
10. Lubricate o-ring on the cap with clean engine oil.
11. Install the new fuel filter cartridge onto the cap.
12. Insert the cap and filter into the housing with
clockwise rotation, use a socket to tighten.
13. Push the ignition switch twice without your foot on the brake to place vehicle in RUN position. This will
activate the in tank fuel pump for approximately 30
seconds. Repeat this process twice to prime the fuel
system. Start the engine using the Normal Starting
procedure. After engine start, verify the fuel filter cap
does not leak.
PRIMING IF THE ENGINE HAS RUN OUT
O
F FUEL — DIESEL ENGINE
1. Add a substantial amount of fuel to the tank, approx -
imately 2 to 5 gal (8L to 19L).
2. Push ignition switch twice without your foot on brake to put vehicle in RUN position. This will activate the in
tank fuel pump for approximately 30 seconds.
Repeat this process twice to prime the fuel system.
3. Start the engine using the Normal Starting procedure
Úpage 130.
NOTE:The engine may run rough until the air is forced from all
the fuel lines.
NOTE:
Use of biodiesel mixture in excess of 20% can nega -
tively impact the fuel filter's ability to separate water
from the fuel, resulting in high pressure fuel system
corrosion or damage.
In addition, commercially available fuel additives are
not necessary for the proper operation of your diesel
engine.
For extreme cold conditions, "Mopar® Premium Diesel
Fuel Treatment" is recommended to assist with cold
starting.
INTERVENTION REGENERATION
S
TRATEGY — MESSAGE PROCESS FLOW
This engine meets all required diesel engine emissions
standards. To achieve these emissions standards, your
vehicle is equipped with a state-of-the-art engine and
exhaust system. These systems are seamlessly integrated
into your vehicle and managed by the Powertrain Control
Module (PCM). The PCM manages engine combustion to
allow the exhaust system’s catalyst to trap and burn
Particulate Matter (PM) pollutants, with no input or
interaction on your part.
Additionally, your vehicle has the ability to alert you to
additional maintenance required on your vehicle or
engine.
Refer to Instrument Cluster Display for further information
Úpage 108.
DIESEL EXHAUST FLUID
Diesel Exhaust Fluid (DEF) sometimes known simply by
the name of its active component, UREA—is a key
component of Selective Catalytic Reduction (SCR)
systems, which help diesel vehicles meet stringent
emission regulations. DEF is a liquid reducing agent that
WARNING!
Do not open the high pressure fuel system with the
engine running. Engine operation causes high fuel
pressure. High pressure fuel spray can cause serious
injury or death.
CAUTION!
The starter motor will engage for approximately
30 seconds at a time. Allow two minutes between
cranking intervals.
WARNING!
Do not use alcohol or gasoline as a fuel blending agent.
They can be unstable under certain conditions and be
hazardous or explosive when mixed with diesel fuel.
CAUTION!
Due to lack of lubricants in alcohol or gasoline, the use
of these fuels can cause damage to the fuel system.WARNING!
A hot exhaust system can start a fire if you park over
materials that can burn. Such materials might be grass
or leaves coming into contact with your exhaust system.
Do not park or operate your vehicle in areas where your
exhaust system can contact anything that can burn.
8
23_JL_OM_EN_USC_t.book Page 323
Page 330 of 396
328SERVICING AND MAINTENANCE
(Continued)
(Continued)
Installing The Rear Wiper
1. Lift the wiper arm off of the glass.
2. Insert the wiper blade pivot pin into the opening on
the end of the wiper arm and rotate the wiper in to
place.
3. Place with wiper on the glass and close the tail gate.
EXHAUST SYSTEM
The best protection against carbon monoxide entry into
the vehicle body is a properly maintained engine exhaust
system.
If you notice a change in the sound of the exhaust system;
or if the exhaust fumes can be detected inside the vehicle;
or when the underside or rear of the vehicle is damaged;
have an authorized technician inspect the complete
exhaust system and adjacent body areas for broken,
damaged, deteriorated, or mispositioned parts. Open
seams or loose connections could permit exhaust fumes
to seep into the passenger compartment. In addition, have
the exhaust system inspected each time the vehicle is
raised for lubrication or oil change. Replace as required.
Under normal operating conditions, the catalytic converter
will not require maintenance. However, it is important to
keep the engine properly tuned to ensure proper catalyst
operation and prevent possible catalyst damage.
NOTE:Intentional tampering with emissions control systems can
result in civil penalties being assessed against you.
In unusual situations involving grossly malfunctioning
engine operation, a scorching odor may suggest severe
and abnormal catalyst overheating. If this occurs, stop the
vehicle, turn off the engine and allow it to cool. Service,
including a tune-up to manufacturer's specifications,
should be obtained immediately.
To minimize the possibility of catalytic converter damage:
Do not interrupt the ignition when the transmission is
in gear and the vehicle is in motion.
Do not try to start the vehicle by pushing or towing the
vehicle.
Do not idle the engine with any ignition components
disconnected or removed, such as when diagnostic
testing, or for prolonged periods during very rough idle
or malfunctioning operating conditions.
COOLING SYSTEM
WARNING!
Exhaust gases can injure or kill. They contain Carbon
Monoxide (CO), which is colorless and odorless.
Breathing it can make you unconscious and can
eventually poison you
Úpage 288.
A hot exhaust system can start a fire if you park over
materials that can burn. Such materials might be
grass or leaves coming into contact with your
exhaust system. Do not park or operate your vehicle
in areas where your exhaust system can contact
anything that can burn.
CAUTION!
The catalytic converter requires the use of unleaded
fuel only. Leaded gasoline will destroy the effective -
ness of the catalyst as an emissions control device
and may seriously reduce engine performance and
cause serious damage to the engine.
Damage to the catalytic converter can result if your
vehicle is not kept in proper operating condition. In
the event of engine malfunction, particularly
involving engine misfire or other apparent loss of
performance, have your vehicle serviced promptly.
Continued operation of your vehicle with a severe
malfunction could cause the converter to overheat,
resulting in possible damage to the converter and
vehicle.
WARNING!
WARNING!
You or others can be badly burned by hot engine
coolant (antifreeze) or steam from your radiator. If
you see or hear steam coming from under the hood,
do not open the hood until the radiator has had time
to cool. Never open a cooling system pressure cap
when the radiator or coolant bottle is hot.
Keep hands, tools, clothing, and jewelry away from
the radiator cooling fan when the hood is raised. The
fan starts automatically and may start at any time,
whether the engine is running or not.
23_JL_OM_EN_USC_t.book Page 328
Page 354 of 396
352SERVICING AND MAINTENANCE
(Continued)
TIRES — GENERAL INFORMATION
Tire Pressure
Proper tire inflation pressure is essential to the safe and
satisfactory operation of your vehicle. Four primary areas
are affected by improper tire pressure:
Safety
Fuel Economy
Tread Wear
Ride Comfort and Vehicle Stability
Safety Both underinflation and overinflation affect the stability of
the vehicle and can produce a feeling of sluggish response
or over responsiveness in the steering.
NOTE:
Unequal tire pressures from side to side may cause
erratic and unpredictable steering response.
Unequal tire pressure from side to side may cause the
vehicle to drift left or right.
Fuel Economy
Underinflated tires will increase tire rolling resistance
resulting in higher fuel consumption.
Tread Wear
Improper cold tire inflation pressures can cause abnormal
wear patterns and reduced tread life, resulting in the need
for earlier tire replacement.
Ride Comfort And Vehicle Stability
Proper tire inflation contributes to a comfortable ride.
Overinflation produces a jarring and uncomfortable ride.
Tire Inflation Pressures
The proper cold tire inflation pressure is listed on the
driver's side B-pillar or rear edge of the driver's side door. At least once a month:
Check and adjust tire pressure with a good quality
pocket-type pressure gauge. Do not make a visual
judgement when determining proper inflation. Tires
may look properly inflated even when they are
under-inflated.
Inspect tires for signs of tire wear or visible damage.
Inflation pressures specified on the placard are always
“cold tire inflation pressure”. Cold tire inflation pressure is
defined as the tire pressure after the vehicle has not been
driven for at least three hours, or driven less than 1 mile
(1.6 km) after sitting for a minimum of three hours. The
cold tire inflation pressure must not exceed the maximum
inflation pressure molded into the tire sidewall.
Check tire pressures more often if subject to a wide range
of outdoor temperatures, as tire pressures vary with
temperature changes.
Tire pressures change by approximately 1 psi (7 kPa) per
12°F (7°C) of air temperature change. Keep this in mind
when checking tire pressure inside a garage, especially in
the Winter.
WARNING!
Improperly inflated tires are dangerous and can
cause collisions.
Underinflation increases tire flexing and can result in
overheating and tire failure.
Overinflation reduces a tire's ability to cushion shock.
Objects on the road and chuckholes can cause
damage that result in tire failure.
Overinflated or underinflated tires can affect vehicle
handling and can fail suddenly, resulting in loss of
vehicle control.
Unequal tire pressures can cause steering problems.
You could lose control of your vehicle.
Unequal tire pressures from one side of the vehicle
to the other can cause the vehicle to drift to the right
or left.
Always drive with each tire inflated to the recom -
mended cold tire inflation pressure.
WARNING!
CAUTION!
After inspecting or adjusting the tire pressure, always
reinstall the valve stem cap. This will prevent moisture
and dirt from entering the valve stem, which could
damage the valve stem.
23_JL_OM_EN_USC_t.book Page 352