key JEEP WRANGLER 2023 User Guide
[x] Cancel search | Manufacturer: JEEP, Model Year: 2023, Model line: WRANGLER, Model: JEEP WRANGLER 2023Pages: 396, PDF Size: 25.15 MB
Page 21 of 396

GETTING TO KNOW YOUR VEHICLE19
REMOTE START — IF EQUIPPED (DIESEL)
This system uses the key fob to start the engine
conveniently from outside the vehicle while still
maintaining security. The system has a range
of approximately 300 ft (91 m).
Remote Start is used to defrost windows in cold weather,
and to reach a comfortable climate in all ambient
conditions before the driver enters the vehicle.
NOTE:
The vehicle must be equipped with an automatic trans -
mission to be equipped with Remote Start.
Obstructions between the vehicle and the key fob may
reduce this range.
The Remote Start system will wait for the Wait To Start
Indicator Light
Úpage 116 to extinguish before
cranking the engine. This allows time for the engine
preheat cycle to heat the cylinder air, and is normal in
cold weather.
HOW TO USE REMOTE START
Push and release the Remote Start button on the key fob
twice within five seconds. The vehicle doors and swing
gate will lock, the turn signals will flash twice, and the horn
will chirp twice. Pushing the Remote Start button again will
shut the engine off.
NOTE:
With Remote Start, the engine will only run for
15 minutes.
Remote Start can only be used twice.
If an engine fault is present or fuel level is low, the
vehicle will start and then shut down in 10 seconds.
The park lamps will turn on and remain on during
Remote Start mode.
For security, power window operation is disabled when
the vehicle is in the Remote Start mode.
The ignition must be placed in the ON/RUN position
before the Remote Start sequence can be repeated for
a third cycle.
All of the following conditions must be met before the
engine will remote start:
Gear selector in PARK
Doors closed
Hood closed
Swing gate closed
Hazard switch off
Brake switch inactive (brake pedal not pressed)
Battery at an acceptable charge level
Panic button not pushed
Fuel meets minimum requirement
System not disabled from previous Remote Start event
Vehicle Security system not active
Malfunction Indicator Light (MIL) is not illuminated
Water In Fuel Indicator Light is not illuminated
Wait To Start Indicator Light is not illuminated
For additional Remote Start information, see
Úpage 18.
VEHICLE SECURITY SYSTEM — IF EQUIPPED
The Vehicle Security system monitors the vehicle doors for
unauthorized entry and the ignition switch for
unauthorized operation. When the alarm is activated, the
interior switches for door locks are disabled. The Vehicle
Security system provides both audible and visible signals.
If something triggers the alarm, the Vehicle Security
system will provide the following audible and visible
signals: the horn will pulse, the park lamps and/or turn
signals will flash, and the Vehicle Security Light in the
instrument cluster will flash.WARNING!
Do not start or run an engine in a closed garage or
confined area. Exhaust gas contains carbon
monoxide (CO) which is odorless and colorless.
Carbon monoxide is poisonous and can cause
serious injury or death when inhaled.
Keep key fobs away from children. Operation of the
Remote Start system, windows, door locks or other
controls could cause serious injury or death.
WARNING!
Do not start or run an engine in a closed garage or
confined area. Exhaust gas contains carbon
monoxide (CO) which is odorless and colorless.
Carbon monoxide is poisonous and can cause
serious injury or death when inhaled.
Keep key fobs away from children. Operation of the
Remote Start system, windows, door locks or other
controls could cause serious injury or death.2
23_JL_OM_EN_USC_t.book Page 19
Page 22 of 396
20GETTING TO KNOW YOUR VEHICLE
TO ARM THE SYSTEM
Follow these steps to arm the Vehicle Security system:
1. Make sure the vehicle’s ignition is placed in the OFF
position.
2. Perform one of the following methods to lock the vehicle:
Push lock on the interior power door lock switch
with the driver and/or passenger door open.
Push the lock button on the exterior Passive Entry
door handle with a valid key fob available in the
same exterior zone
Úpage 21.
Push the lock button on the key fob.
3. If any doors are open, close them.
NOTE:The Vehicle Security system will not arm if you lock the
doors using the manual door lock.
TO DISARM THE SYSTEM
The Vehicle Security system can be disarmed using any of
the following methods:
Push the unlock button on the key fob.
Grab the Passive Entry door handle (if equipped)
Úpage 21.
Cycle the vehicle ignition system out of the OFF posi -
tion.
NOTE:
The driver's door key cylinder cannot arm or disarm the
Vehicle Security system.
When the Vehicle Security system is armed, the interior
power door lock switches will not unlock the doors.
The Vehicle Security system is designed to protect your
vehicle. However, you can create conditions where the
system will give you a false alarm. If one of the previously
described arming sequences has occurred, the Vehicle
Security system will arm regardless of whether you are in
the vehicle or not. If you remain in the vehicle and open a
door, the alarm will sound. If this occurs, disarm the
Vehicle Security system.
If the Vehicle Security system is armed and the battery
becomes disconnected, the Vehicle Security system will
remain armed when the battery is reconnected; the
exterior lights will flash, and the horn will sound. If this
occurs, disarm the Vehicle Security system.
REARMING OF THE SYSTEM
If something triggers the alarm and no action is taken to
disarm it, the Vehicle Security system will turn the horn off
after a 29 second cycle (with five seconds between cycles
and up to eight cycles if the trigger remains active) and
then rearm itself.
DOORS
MANUAL DOOR LOCKS
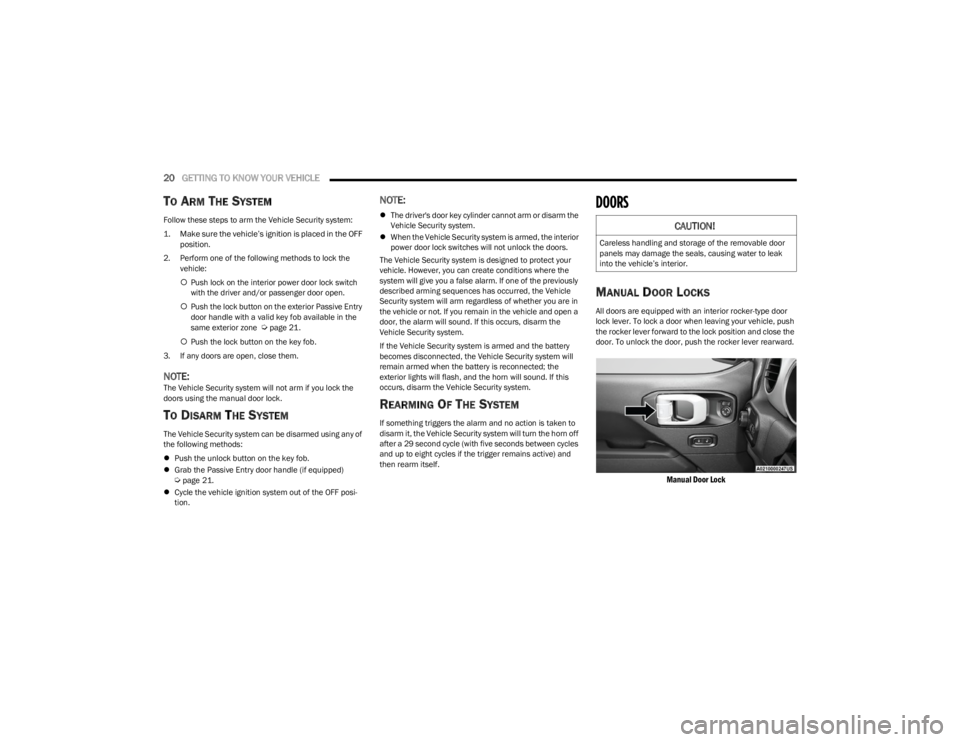
All doors are equipped with an interior rocker-type door
lock lever. To lock a door when leaving your vehicle, push
the rocker lever forward to the lock position and close the
door. To unlock the door, push the rocker lever rearward.
Manual Door Lock
CAUTION!
Careless handling and storage of the removable door
panels may damage the seals, causing water to leak
into the vehicle’s interior.
23_JL_OM_EN_USC_t.book Page 20
Page 23 of 396
GETTING TO KNOW YOUR VEHICLE21
(Continued)
NOTE:The mechanical key can be used to lock or unlock the
doors, swing gate (if equipped with a lock), glove
compartment, and console storage.POWER DOOR LOCKS — IF EQUIPPED
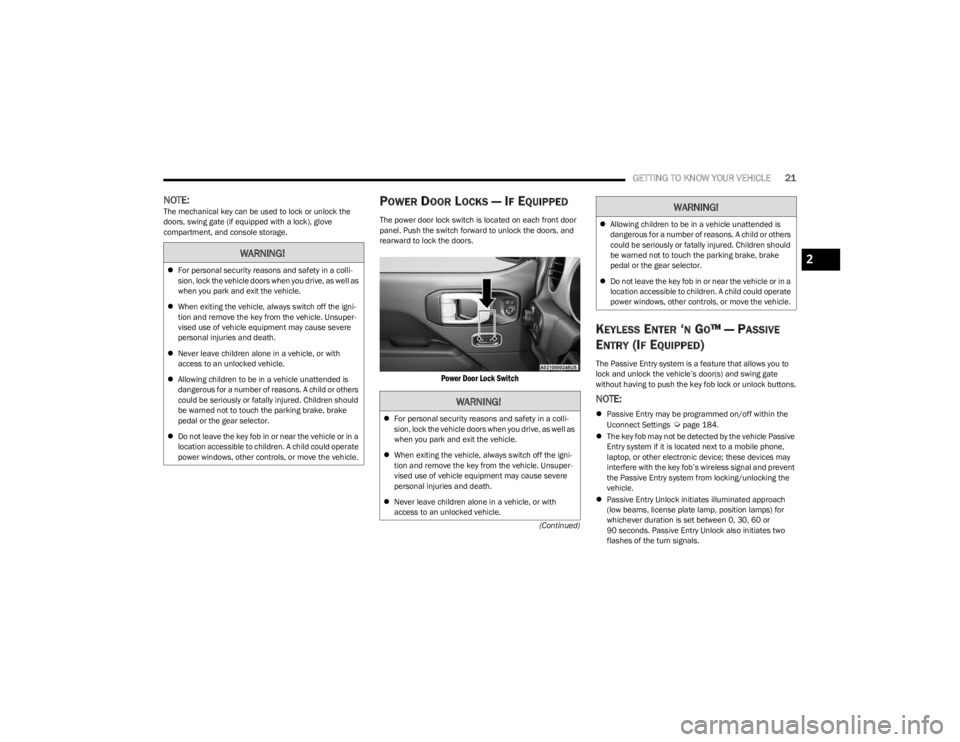
The power door lock switch is located on each front door
panel. Push the switch forward to unlock the doors, and
rearward to lock the doors.
Power Door Lock Switch
KEYLESS ENTER ‘N GO™ — PASSIVE
E
NTRY (IF EQUIPPED)
The Passive Entry system is a feature that allows you to
lock and unlock the vehicle’s door(s) and swing gate
without having to push the key fob lock or unlock buttons.
NOTE:
Passive Entry may be programmed on/off within the
Uconnect Settings Úpage 184.
The key fob may not be detected by the vehicle Passive
Entry system if it is located next to a mobile phone,
laptop, or other electronic device; these devices may
interfere with the key fob’s wireless signal and prevent
the Passive Entry system from locking/unlocking the
vehicle.
Passive Entry Unlock initiates illuminated approach
(low beams, license plate lamp, position lamps) for
whichever duration is set between 0, 30, 60 or
90 seconds. Passive Entry Unlock also initiates two
flashes of the turn signals.
WARNING!
For personal security reasons and safety in a colli -
sion, lock the vehicle doors when you drive, as well as
when you park and exit the vehicle.
When exiting the vehicle, always switch off the igni -
tion and remove the key from the vehicle. Unsuper -
vised use of vehicle equipment may cause severe
personal injuries and death.
Never leave children alone in a vehicle, or with
access to an unlocked vehicle.
Allowing children to be in a vehicle unattended is
dangerous for a number of reasons. A child or others
could be seriously or fatally injured. Children should
be warned not to touch the parking brake, brake
pedal or the gear selector.
Do not leave the key fob in or near the vehicle or in a
location accessible to children. A child could operate
power windows, other controls, or move the vehicle.
WARNING!
2
23_JL_OM_EN_USC_t.book Page 21
Page 24 of 396
22GETTING TO KNOW YOUR VEHICLE
If wearing gloves, or if it has been raining/snowing, or
there is salt/dirt covering the Passive Entry door
handle, the unlock sensitivity can be affected, resulting
in a slower response time.
If the vehicle is unlocked by Passive Entry and no door
is opened within 60 seconds, the vehicle will relock
and, if equipped, will arm the Vehicle Security system.
To Unlock From The Driver or Passenger Side
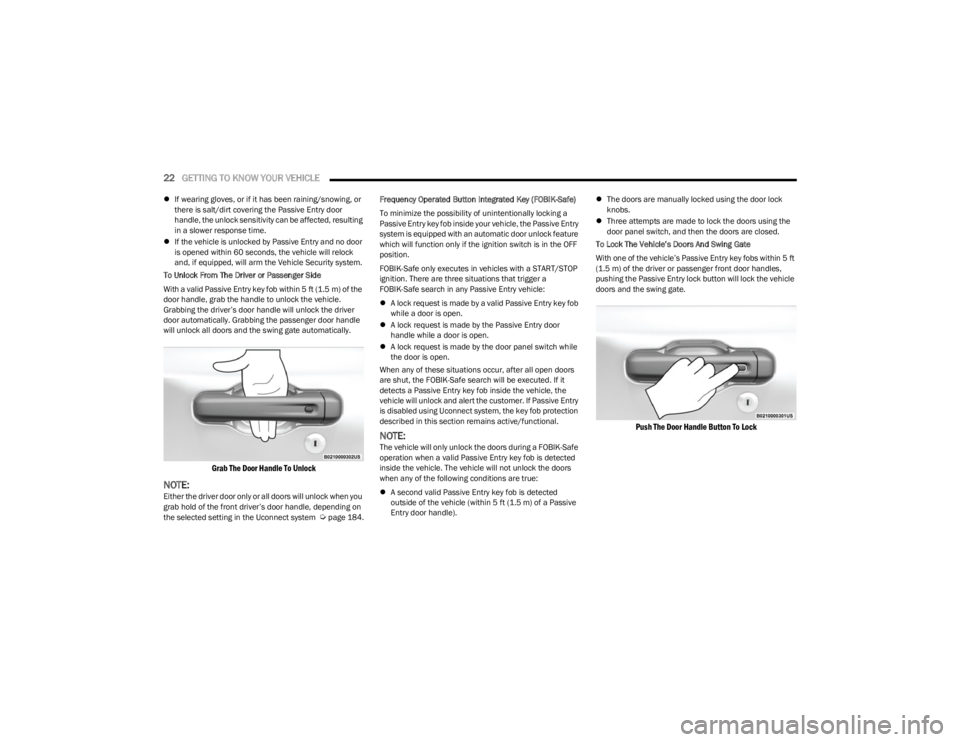
With a valid Passive Entry key fob within 5 ft (1.5 m) of the door handle, grab the handle to unlock the vehicle.
Grabbing the driver’s door handle will unlock the driver
door automatically. Grabbing the passenger door handle
will unlock all doors and the swing gate automatically.
Grab The Door Handle To Unlock
NOTE:Either the driver door only or all doors will unlock when you
grab hold of the front driver’s door handle, depending on
the selected setting in the Uconnect system
Úpage 184. Frequency Operated Button Integrated Key (FOBIK-Safe)
To minimize the possibility of unintentionally locking a
Passive Entry key fob inside your vehicle, the Passive Entry
system is equipped with an automatic door unlock feature
which will function only if the ignition switch is in the OFF
position.
FOBIK-Safe only executes in vehicles with a START/STOP
ignition. There are three situations that trigger a
FOBIK-Safe search in any Passive Entry vehicle:
A lock request is made by a valid Passive Entry key fob
while a door is open.
A lock request is made by the Passive Entry door
handle while a door is open.
A lock request is made by the door panel switch while
the door is open.
When any of these situations occur, after all open doors
are shut, the FOBIK-Safe search will be executed. If it
detects a Passive Entry key fob inside the vehicle, the
vehicle will unlock and alert the customer. If Passive Entry
is disabled using Uconnect system, the key fob protection
described in this section remains active/functional.
NOTE:The vehicle will only unlock the doors during a FOBIK-Safe
operation when a valid Passive Entry key fob is detected
inside the vehicle. The vehicle will not unlock the doors
when any of the following conditions are true:
A second valid Passive Entry key fob is detected
outside of the vehicle (within 5 ft (1.5 m) of a Passive
Entry door handle).
The doors are manually locked using the door lock
knobs.
Three attempts are made to lock the doors using the
door panel switch, and then the doors are closed.
To Lock The Vehicle’s Doors And Swing Gate
With one of the vehicle’s Passive Entry key fobs within 5 ft
(1.5 m) of the driver or passenger front door handles,
pushing the Passive Entry lock button will lock the vehicle
doors and the swing gate.
Push The Door Handle Button To Lock
23_JL_OM_EN_USC_t.book Page 22
Page 25 of 396
GETTING TO KNOW YOUR VEHICLE23
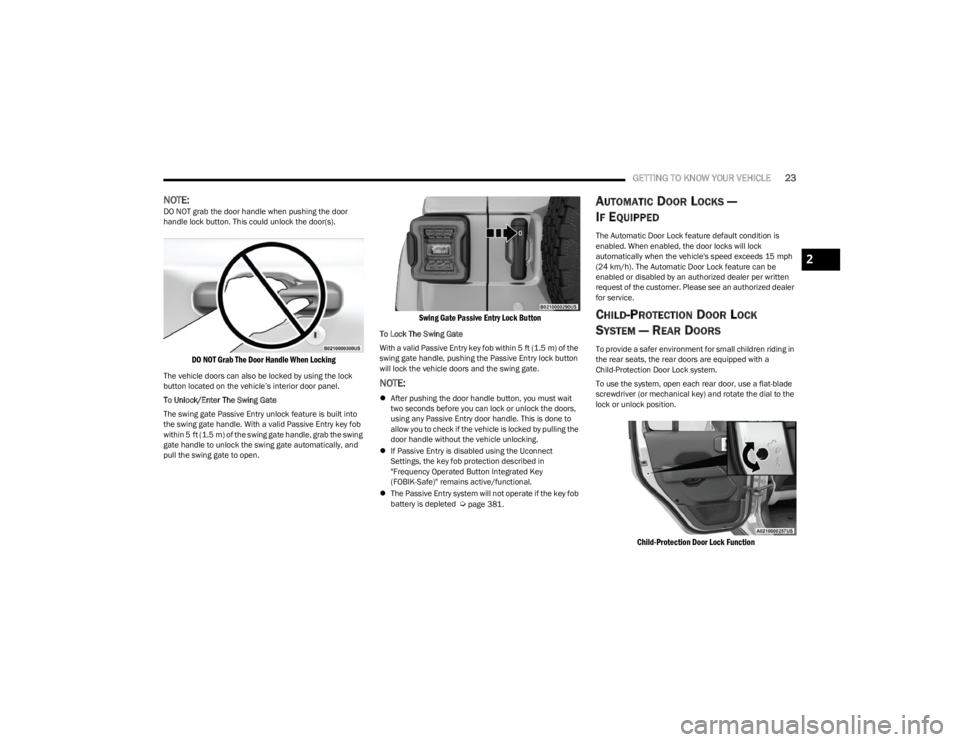
NOTE:DO NOT grab the door handle when pushing the door
handle lock button. This could unlock the door(s).
DO NOT Grab The Door Handle When Locking
The vehicle doors can also be locked by using the lock
button located on the vehicle’s interior door panel.
To Unlock/Enter The Swing Gate
The swing gate Passive Entry unlock feature is built into
the swing gate handle. With a valid Passive Entry key fob
within 5 ft (1.5 m) of the swing gate handle, grab the swing
gate handle to unlock the swing gate automatically, and
pull the swing gate to open.
Swing Gate Passive Entry Lock Button
To Lock The Swing Gate
With a valid Passive Entry key fob within 5 ft (1.5 m) of the
swing gate handle, pushing the Passive Entry lock button
will lock the vehicle doors and the swing gate.
NOTE:
After pushing the door handle button, you must wait
two seconds before you can lock or unlock the doors,
using any Passive Entry door handle. This is done to
allow you to check if the vehicle is locked by pulling the
door handle without the vehicle unlocking.
If Passive Entry is disabled using the Uconnect
Settings, the key fob protection described in
"Frequency Operated Button Integrated Key
(FOBIK-Safe)" remains active/functional.
The Passive Entry system will not operate if the key fob
battery is depleted
Úpage 381.
AUTOMATIC DOOR LOCKS —
I
F EQUIPPED
The Automatic Door Lock feature default condition is
enabled. When enabled, the door locks will lock
automatically when the vehicle's speed exceeds 15 mph
(24 km/h). The Automatic Door Lock feature can be
enabled or disabled by an authorized dealer per written
request of the customer. Please see an authorized dealer
for service.
CHILD-PROTECTION DOOR LOCK
S
YSTEM — REAR DOORS
To provide a safer environment for small children riding in
the rear seats, the rear doors are equipped with a
Child-Protection Door Lock system.
To use the system, open each rear door, use a flat-blade
screwdriver (or mechanical key) and rotate the dial to the
lock or unlock position.
Child-Protection Door Lock Function
2
23_JL_OM_EN_USC_t.book Page 23
Page 46 of 396
44GETTING TO KNOW YOUR VEHICLE
UCONNECT VOICE RECOGNITION
INTRODUCING VOICE RECOGNITION
Start using Uconnect Voice Recognition with these helpful
quick tips. It provides the key Voice Commands and tips
you need to know to control your vehicle’s Voice
Recognition (VR) system.
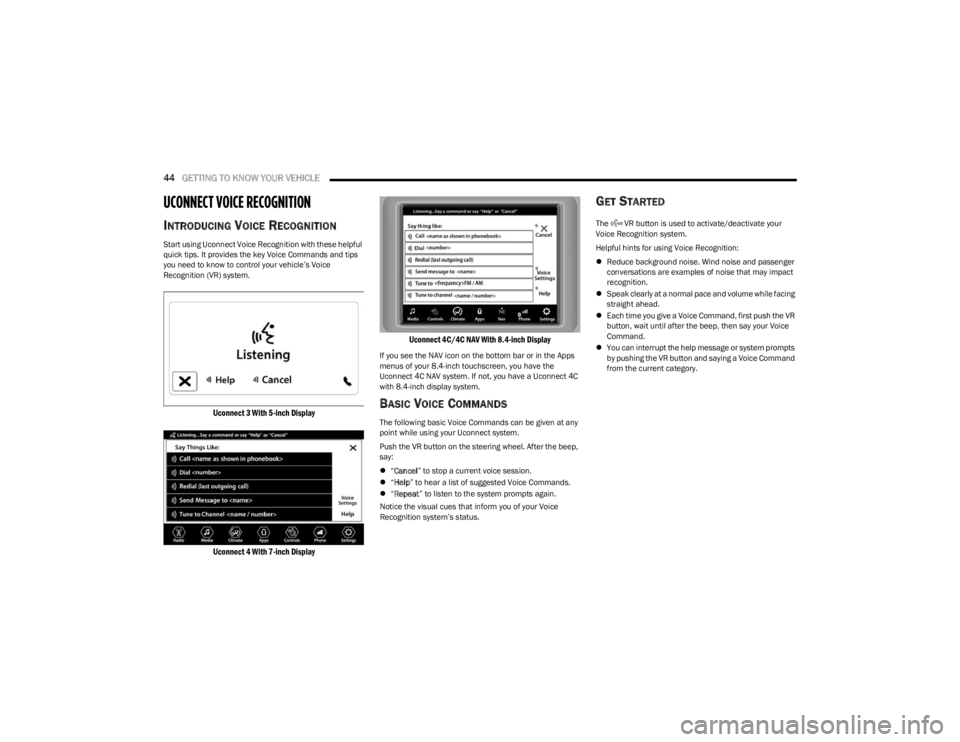
Uconnect 3 With 5-inch Display
Uconnect 4 With 7-inch Display Uconnect 4C/4C NAV With 8.4-inch Display
If you see the NAV icon on the bottom bar or in the Apps
menus of your 8.4-inch touchscreen, you have the
Uconnect 4C NAV system. If not, you have a Uconnect 4C
with 8.4-inch display system.
BASIC VOICE COMMANDS
The following basic Voice Commands can be given at any
point while using your Uconnect system.
Push the VR button on the steering wheel. After the beep,
say:
“Cancel ” to stop a current voice session.
“Help ” to hear a list of suggested Voice Commands.
“Repeat ” to listen to the system prompts again.
Notice the visual cues that inform you of your Voice
Recognition system’s status.
GET STARTED
The VR button is used to activate/deactivate your
Voice Recognition system.
Helpful hints for using Voice Recognition:
Reduce background noise. Wind noise and passenger
conversations are examples of noise that may impact
recognition.
Speak clearly at a normal pace and volume while facing
straight ahead.
Each time you give a Voice Command, first push the VR
button, wait until after the beep, then say your Voice
Command.
You can interrupt the help message or system prompts
by pushing the VR button and saying a Voice Command
from the current category.
23_JL_OM_EN_USC_t.book Page 44
Page 54 of 396
52GETTING TO KNOW YOUR VEHICLE
FRONT FOG LIGHTS — IF EQUIPPED
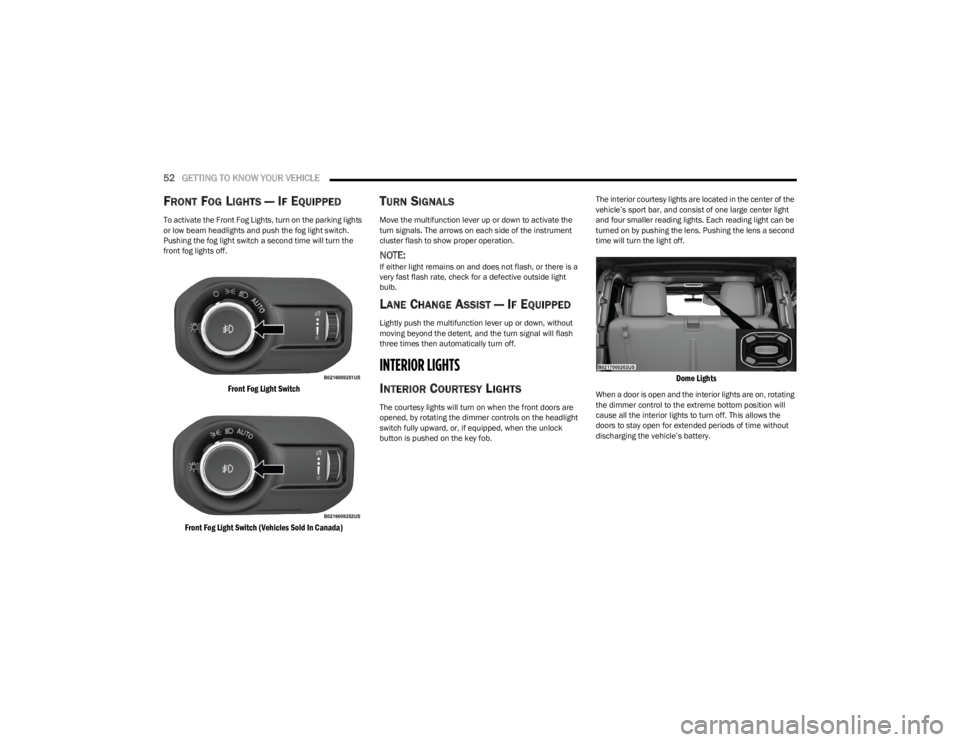
To activate the Front Fog Lights, turn on the parking lights
or low beam headlights and push the fog light switch.
Pushing the fog light switch a second time will turn the
front fog lights off.
Front Fog Light Switch
Front Fog Light Switch (Vehicles Sold In Canada)
TURN SIGNALS
Move the multifunction lever up or down to activate the
turn signals. The arrows on each side of the instrument
cluster flash to show proper operation.
NOTE:If either light remains on and does not flash, or there is a
very fast flash rate, check for a defective outside light
bulb.
LANE CHANGE ASSIST — IF EQUIPPED
Lightly push the multifunction lever up or down, without
moving beyond the detent, and the turn signal will flash
three times then automatically turn off.
INTERIOR LIGHTS
INTERIOR COURTESY LIGHTS
The courtesy lights will turn on when the front doors are
opened, by rotating the dimmer controls on the headlight
switch fully upward, or, if equipped, when the unlock
button is pushed on the key fob. The interior courtesy lights are located in the center of the
vehicle’s sport bar, and consist of one large center light
and four smaller reading lights. Each reading light can be
turned on by pushing the lens. Pushing the lens a second
time will turn the light off.
Dome Lights
When a door is open and the interior lights are on, rotating
the dimmer control to the extreme bottom position will
cause all the interior lights to turn off. This allows the
doors to stay open for extended periods of time without
discharging the vehicle’s battery.
23_JL_OM_EN_USC_t.book Page 52
Page 66 of 396
64GETTING TO KNOW YOUR VEHICLE
AUXILIARY SWITCHES — IF EQUIPPED
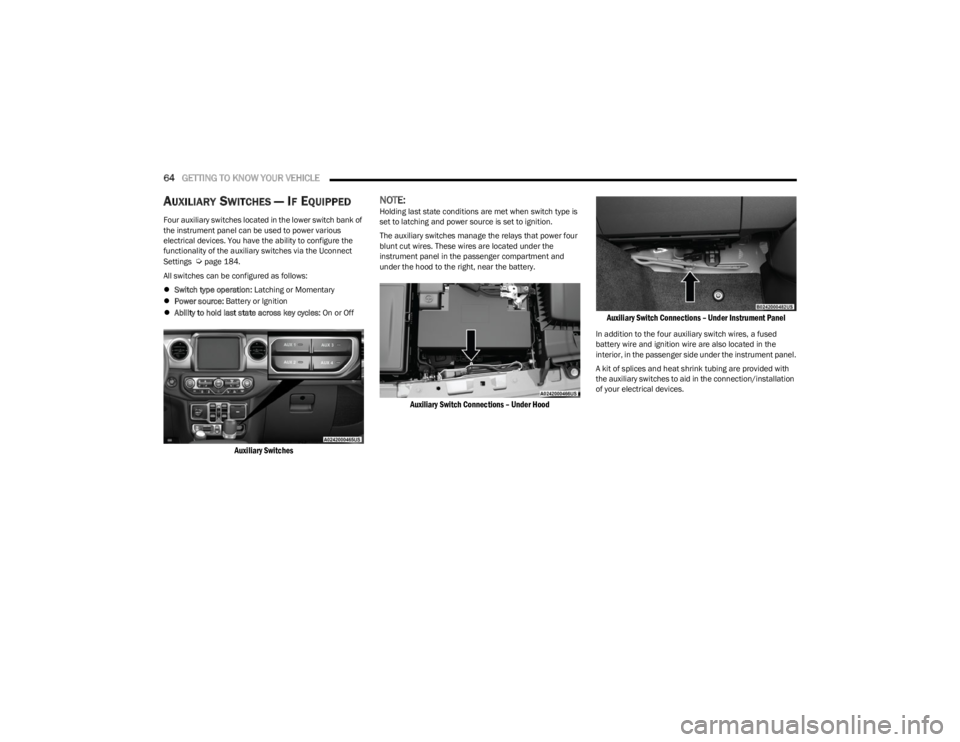
Four auxiliary switches located in the lower switch bank of
the instrument panel can be used to power various
electrical devices. You have the ability to configure the
functionality of the auxiliary switches via the Uconnect
Settings
Úpage 184.
All switches can be configured as follows:
Switch type operation: Latching or Momentary
Power source: Battery or Ignition
Ability to hold last state across key cycles: On or Off
Auxiliary Switches
NOTE:Holding last state conditions are met when switch type is
set to latching and power source is set to ignition.
The auxiliary switches manage the relays that power four
blunt cut wires. These wires are located under the
instrument panel in the passenger compartment and
under the hood to the right, near the battery.
Auxiliary Switch Connections – Under Hood Auxiliary Switch Connections – Under Instrument Panel
In addition to the four auxiliary switch wires, a fused
battery wire and ignition wire are also located in the
interior, in the passenger side under the instrument panel.
A kit of splices and heat shrink tubing are provided with
the auxiliary switches to aid in the connection/installation
of your electrical devices.
23_JL_OM_EN_USC_t.book Page 64
Page 67 of 396
GETTING TO KNOW YOUR VEHICLE65
Wire Color Chart
POWER WINDOWS — IF EQUIPPED
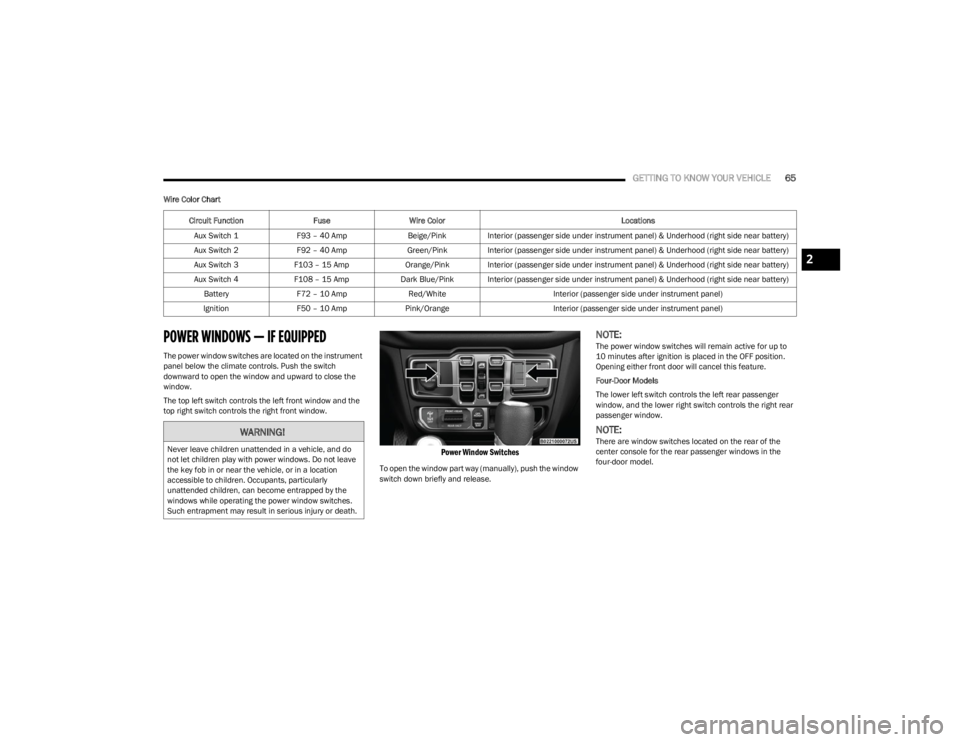
The power window switches are located on the instrument
panel below the climate controls. Push the switch
downward to open the window and upward to close the
window.
The top left switch controls the left front window and the
top right switch controls the right front window.
Power Window Switches
To open the window part way (manually), push the window
switch down briefly and release.
NOTE:The power window switches will remain active for up to
10 minutes after ignition is placed in the OFF position.
Opening either front door will cancel this feature.
Four-Door Models
The lower left switch controls the left rear passenger
window, and the lower right switch controls the right rear
passenger window.
NOTE:There are window switches located on the rear of the
center console for the rear passenger windows in the
four-door model.
Circuit Function
FuseWire Color Locations
Aux Switch 1 F93 – 40 Amp Beige/Pink Interior (passenger side under instrument panel) & Underhood (right side near battery)
Aux Switch 2 F92 – 40 Amp Green/Pink Interior (passenger side under instrument panel) & Underhood (right side near battery)
Aux Switch 3 F103 – 15 Amp Orange/Pink Interior (passenger side under instrument panel) & Underhood (right side near battery)
Aux Switch 4 F108 – 15 Amp Dark Blue/Pink Interior (passenger side under instrument panel) & Underhood (right side near battery)
Battery F72 – 10 Amp Red/White Interior (passenger side under instrument panel)
Ignition F50 – 10 Amp Pink/Orange Interior (passenger side under instrument panel)WARNING!
Never leave children unattended in a vehicle, and do
not let children play with power windows. Do not leave
the key fob in or near the vehicle, or in a location
accessible to children. Occupants, particularly
unattended children, can become entrapped by the
windows while operating the power window switches.
Such entrapment may result in serious injury or death.
2
23_JL_OM_EN_USC_t.book Page 65
Page 94 of 396

92GETTING TO KNOW YOUR VEHICLE
(Continued)
NOTE:
The power top is non-removable. If desired, the rear
quarter windows can be removed and stored in the
provided storage bag
Úpage 93.
The power top will not open in temperatures below
-4°F (-20°C). However, if it is opened at a higher
temperature, it can be closed at temperatures above
-40°F (-40°C).
The power top will not operate at vehicle speeds above
60 mph (96 km/h).
NOTE:A slight pause in audio may be heard when opening and
closing the Power Sliding Top as a result of the Uconnect
system switching between power top Closed and power
top Open audio modes.
Opening And Closing The Power Top
Express Open/Close
Push the open switch and release it within one-half
second and the power top will open automatically from
any position. The power top will open fully and stop
automatically.
Push the close switch and release it within one-half
second and the power top will close automatically from
any position. The power top will close fully and stop
automatically.
During Express Open or Express Close operation, any
other movement of the power top switch will stop the
power top.
Manual Open/Close
To open the power top manually, push and hold the open
switch to the full open position, then release.
To close the power top manually, push and hold the close
switch to the fully closed position, then release.
Any release of the switch during open or close operation
will stop the power top movement. The top will remain in a
partially opened position until the switch is operated and
held again.
Pinch Protect Feature
This feature will detect an obstruction in the opening of
the power top during Express Close operation. If an
obstruction in the path of the power top is detected, the
power top will automatically retract. Remove the
obstruction if this occurs. Next, push the close switch and
release to Express Close.
NOTE:
The Power Sliding Top may reverse motion if closing
during a severe headwind. If this occurs, push and hold
the Power Sliding Top switch again to close the top
completely.
If three consecutive power top close attempts result in
Pinch Protect reversals, Pinch Protect will disable and
the power top must be closed in Manual Mode.
Power Top Maintenance
Use only a non-abrasive cleaner and a soft cloth to clean
the quarter window glass panel. For important information
on cleaning and caring for your vehicle
Úpage 360.
WARNING!
Never leave children unattended in a vehicle, or with
access to an unlocked vehicle. Never leave the key
fob in or near the vehicle, or in a location accessible
to children. Do not leave the Keyless Enter ‘n Go™
Ignition in the ACC or ON/RUN position. Occupants,
particularly unattended children, can become
entrapped by the power top while operating the
power top switch. Such entrapment may result in
serious injury or death.
In a collision, there is a greater risk of being thrown
from a vehicle with an open power top. You could
also be seriously injured or killed. Always fasten your
seat belt properly and make sure all passengers are
also properly secured.
Do not allow small children to operate the power top.
Never allow your fingers, other body parts, or any
object, to project through the power top opening.
Injury may result.
WARNING!
WARNING!
There is no anti-pinch protection when the power top is
almost closed. To avoid personal injury be sure to clear
your arms, hands, fingers and all objects from the top’s
path before closing.
23_JL_OM_EN_USC_t.book Page 92