clock JEEP WRANGLER 2023 Owner's Manual
[x] Cancel search | Manufacturer: JEEP, Model Year: 2023, Model line: WRANGLER, Model: JEEP WRANGLER 2023Pages: 396, PDF Size: 25.15 MB
Page 346 of 396

344SERVICING AND MAINTENANCE
FRONT PARK/TURN SIGNAL
See the following steps to replace:
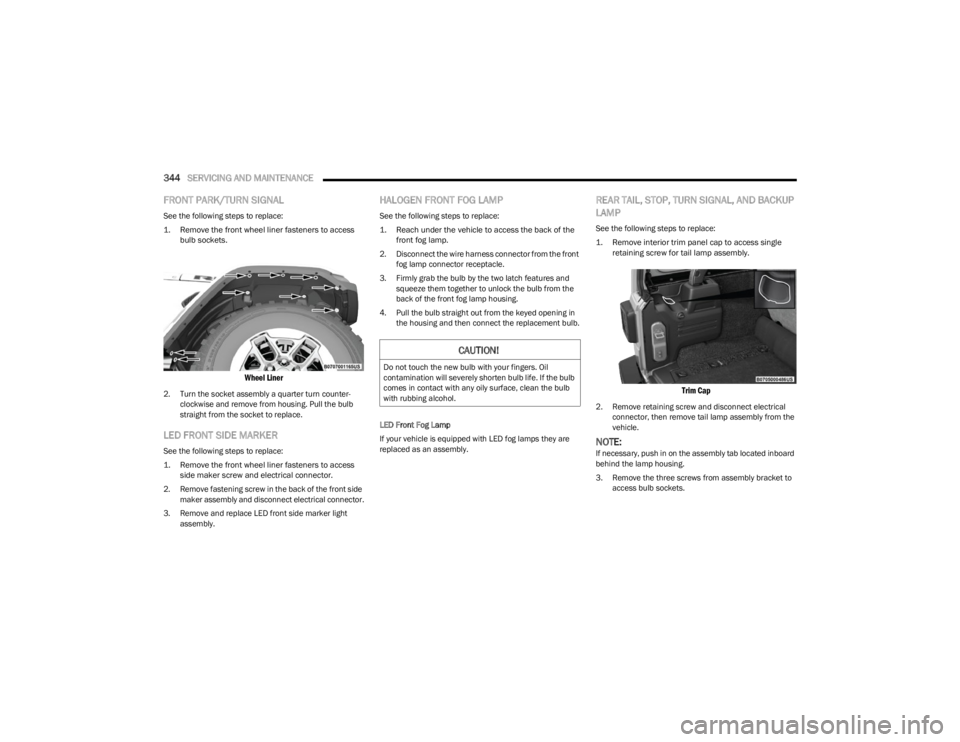
1. Remove the front wheel liner fasteners to access
bulb sockets.
Wheel Liner
2. Turn the socket assembly a quarter turn counter -
clockwise and remove from housing. Pull the bulb
straight from the socket to replace.
LED FRONT SIDE MARKER
See the following steps to replace:
1. Remove the front wheel liner fasteners to access side maker screw and electrical connector.
2. Remove fastening screw in the back of the front side maker assembly and disconnect electrical connector.
3. Remove and replace LED front side marker light assembly.
HALOGEN FRONT FOG LAMP
See the following steps to replace:
1. Reach under the vehicle to access the back of the front fog lamp.
2. Disconnect the wire harness connector from the front fog lamp connector receptacle.
3. Firmly grab the bulb by the two latch features and squeeze them together to unlock the bulb from the
back of the front fog lamp housing.
4. Pull the bulb straight out from the keyed opening in the housing and then connect the replacement bulb.
LED Front Fog Lamp
If your vehicle is equipped with LED fog lamps they are
replaced as an assembly.
REAR TAIL, STOP, TURN SIGNAL, AND BACKUP
LAMP
See the following steps to replace:
1. Remove interior trim panel cap to access single retaining screw for tail lamp assembly.
Trim Cap
2. Remove retaining screw and disconnect electrical connector, then remove tail lamp assembly from the
vehicle.
NOTE:If necessary, push in on the assembly tab located inboard
behind the lamp housing.
3. Remove the three screws from assembly bracket to access bulb sockets.
CAUTION!
Do not touch the new bulb with your fingers. Oil
contamination will severely shorten bulb life. If the bulb
comes in contact with any oily surface, clean the bulb
with rubbing alcohol.
23_JL_OM_EN_USC_t.book Page 344
Page 347 of 396

SERVICING AND MAINTENANCE345
4. Rotate the appropriate socket a quarter turn counter -
clockwise, then remove it from the housing.
Bulb Removal
5. Pull the bulb straight from the socket to replace.
CENTER HIGH MOUNTED STOP LAMP (CHMSL)
The stop lamp is mounted on a bracket that extends
upward from the swing gate behind the spare tire. If
service is needed, obtain the LED Assembly from an
authorized dealer.
See the following steps to replace:
1. Remove the spare tire.
2. Remove the screws holding the tire carrier cover.
3. Remove two screws from lamp assembly and disconnect electrical connector.
LICENSE PLATE LAMPS
See the following steps to replace:
NOTE:To install a new bulb, reverse the procedure above. When
installing the new bulb, care should be taken to not allow
bare skin to come in contact with the bulb.
See an authorized dealer to replace LED lamps.
TIRES
TIRE SAFETY INFORMATION
Tire safety information will cover aspects of the following
information: Tire Markings, Tire Identification Numbers,
Tire Terminology and Definitions, Tire Pressures, and Tire
Loading.
NOTE:If your vehicle is equipped with bead-lock wheels, please
refer to your vehicles bead-lock specific part number for
additional information and instructions on mopar.com or
by contacting an authorized dealer.
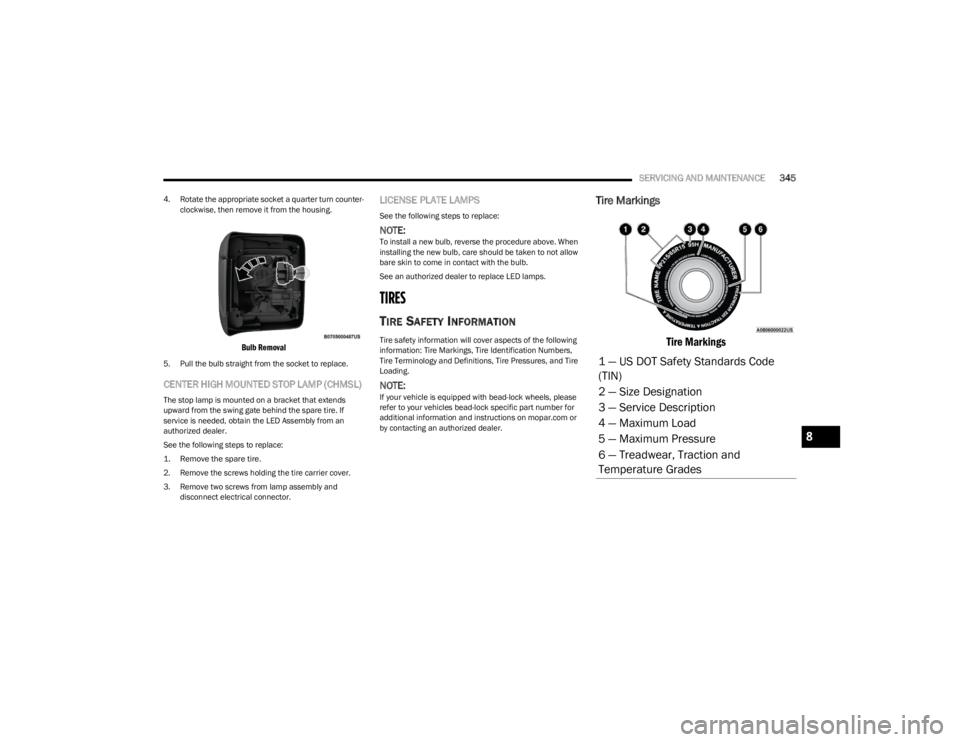
Tire Markings
Tire Markings
1 — US DOT Safety Standards Code
(TIN)
2 — Size Designation
3 — Service Description
4 — Maximum Load
5 — Maximum Pressure
6 — Treadwear, Traction and
Temperature Grades
8
23_JL_OM_EN_USC_t.book Page 345