battery KIA CADENZA 2017 Owners Manual
[x] Cancel search | Manufacturer: KIA, Model Year: 2017, Model line: CADENZA, Model: KIA CADENZA 2017Pages: 500, PDF Size: 10.37 MB
Page 16 of 500

Your vehicle at a glance
62
ENGINE COMPARTMENT
OYG076002
1. Engine coolant reservoir....................7-26
2. Engine oil filler cap ............................7-24
3. Brake fluid reservoir ..........................7-29
4. Air cleaner .........................................7-32
5. Fuse box ............................................7-58
6. Negative battery terminal ..................7-40
7. Positive battery terminal ....................7-40
8. Engine oil dipstick..............................7-24
9. Radiator cap ......................................7-26
10. Windshield washer fluid reservoir....7-30
■
■Gasoline Engine (Lambda 3.3L - GDI)
❈ The actual engine compartment in the vehicle may differ from the illustration.
Page 26 of 500
Safety features of your vehicle
10
3
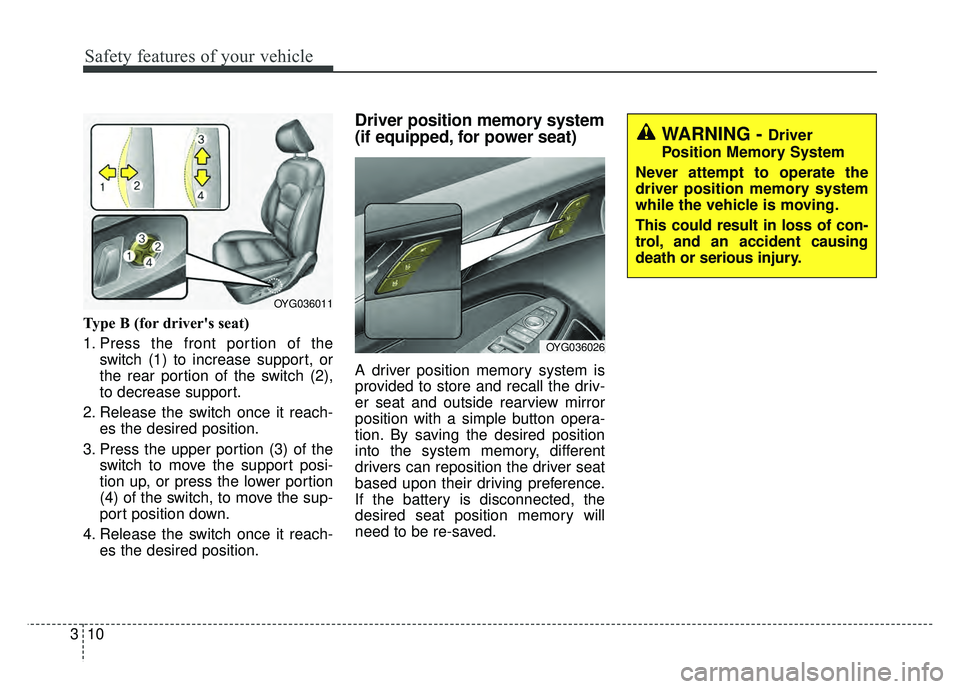
Type B (for driver's seat)
1. Press the front portion of the
switch (1) to increase support, or
the rear portion of the switch (2),
to decrease support.
2. Release the switch once it reach- es the desired position.
3. Press the upper portion (3) of the switch to move the support posi-
tion up, or press the lower portion
(4) of the switch, to move the sup-
port position down.
4. Release the switch once it reach- es the desired position.
Driver position memory system
(if equipped, for power seat)
A driver position memory system is
provided to store and recall the driv-
er seat and outside rearview mirror
position with a simple button opera-
tion. By saving the desired position
into the system memory, different
drivers can reposition the driver seat
based upon their driving preference.
If the battery is disconnected, the
desired seat position memory will
need to be re-saved.
OYG036011
OYG036026
WARNING - Driver
Position Memory System
Never attempt to operate the
driver position memory system
while the vehicle is moving.
This could result in loss of con-
trol, and an accident causing
death or serious injury.
Page 34 of 500
Safety features of your vehicle
18
3
SEAT BELTS
Seat belt restraint system
For maximum restraint system pro-
tection, the seat belts must always
be used whenever the vehicle is
moving. A properly positioned
shoulder belt should be positioned
midway over your shoulder across
your collarbone.
Never allow children to ride in the front passenger seat. See child
restraint system section for further
discussion. Seat belts are designed to bear upon
the bony structure of the body, and
should be worn low across the front
of the pelvis, chest and shoulders, as
applicable; wearing the lap section of
the belt across the abdominal area
must be avoided.
Seat belts should be adjusted as
firmly as possible, consistent with
comfort, to provide the protection for
which they have been designed.
A slack belt will greatly reduce the
protection afforded to the wearer.
Care should be taken to avoid con-
tamination of the webbing with pol-
ishes, oils and chemicals, and partic-
ularly battery acid. Cleaning may
safely be carried out using mild soap
and water. The belt should be
replaced if webbing becomes frayed,
contaminated or damaged.
No modifications or additions
should be made by the user which
would either prevent the seat belt
adjusting devices from operating to
remove slack, or prevent the seat
belt assembly from being adjusted
to remove slack.
WARNING- Damaged
seat belt
Replace the entire seat belt
assembly if any part of the web-
bing or hardware is damaged as
you can no longer be sure that a
damaged seat belt will provide
protection in a crash.WARNING- Twisted seat belt
Make sure your seat belt is not
twisted when worn. A twisted
seat belt may not properly pro-
tect you in an accident and
could even cut into your body.
WARNING- Shoulder Belt
Never wear the shoulder belt under your arm or behind
your back. An improperly
positioned shoulder belt can-
not protect the occupant in a
crash.
Always wear both the shoul- der portion and lap portion of
the lap/shoulder belt.
Page 62 of 500
Safety features of your vehicle
46
3
The SRS can function only when
the Engine Start/Stop button is in
the ON position. If the SRS air bag
warning light does not illuminate,
or continuously remains on after
illuminating for about 6 seconds
when the ignition switch is turned
to the ON position, or after the
engine is started, comes on while
driving, the SRS is not working
properly. If this occurs, have your
vehicle immediately inspected by
an authorized Kia dealer.
✽ ✽ NOTICE
Before you replace a fuse or discon-
nect a battery terminal, turn the
Engine Start/Stop button to the OFF
position.
Never remove or replace the air bag
related fuse(s) when the Engine
Start/Stop button to the ON position.
Failure to heed this warning will
cause the SRS air bag warning light
to illuminate.
Occupant Detection System
(ODS)
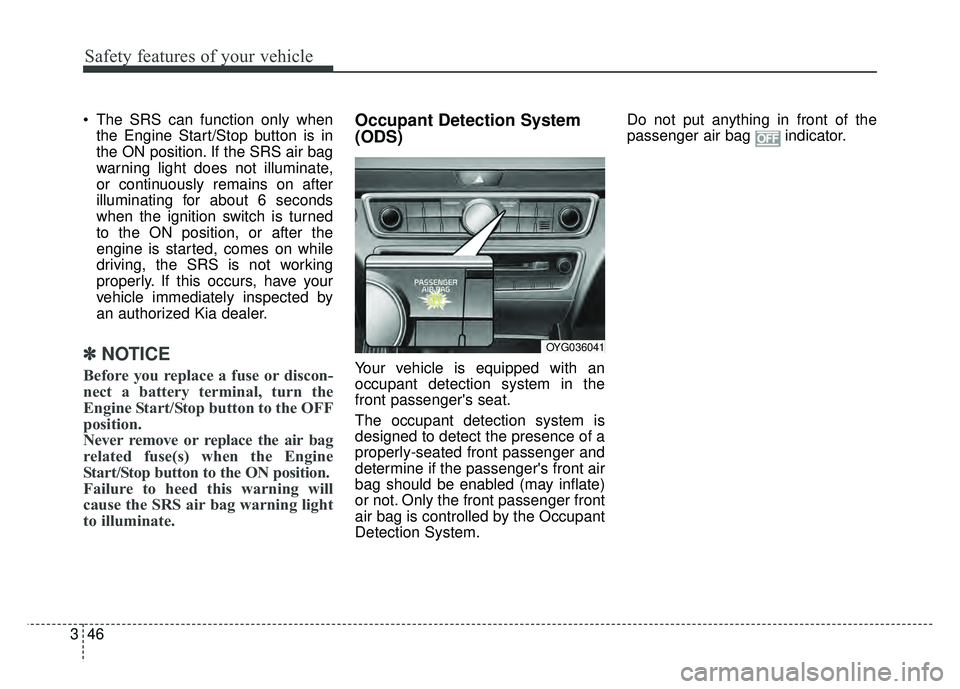
Your vehicle is equipped with an
occupant detection system in the
front passenger's seat.
The occupant detection system is
designed to detect the presence of a
properly-seated front passenger and
determine if the passenger's front air
bag should be enabled (may inflate)
or not. Only the front passenger front
air bag is controlled by the Occupant
Detection System. Do not put anything in front of the
passenger air bag indicator.
OYG036041
Page 82 of 500
Features of your vehicle
Smart key . . . . . . . . . . . . . . . . . . . . . . . . . . . . . . . . . 4-5
• Record your key number . . . . . . . . . . . . . . . . . . . . . . . 4-5
• Smart key functions . . . . . . . . . . . . . . . . . . . . . . . . . . . 4-5
• Remote keyless entry system operations . . . . . . . . . . . 4-8
• Transmitter precautions . . . . . . . . . . . . . . . . . . . . . . . . 4-9
• This device complies with Part 15 of the FCC rules . . . . . . . . . . . . . . . . . . . . . . . . . . . . . . . . . . . . \
. . 4-10
• Battery replacement . . . . . . . . . . . . . . . . . . . . . . . . . . 4-10
• Mechanical key operations . . . . . . . . . . . . . . . . . . . . . 4-11
• Restrictions in Handling Keys . . . . . . . . . . . . . . . . . . 4-12
• Immobilizer system . . . . . . . . . . . . . . . . . . . . . . . . . . . 4-12
• This device complies with Part 15 of the FCC rules . . . . . . . . . . . . . . . . . . . . . . . . . . . . . . . . . . . . \
. . 4-13
Theft-alarm system . . . . . . . . . . . . . . . . . . . . . . . . 4-14
• Armed stage . . . . . . . . . . . . . . . . . . . . . . . . . . . . . . . . . 4-14
• Theft-alarm stage . . . . . . . . . . . . . . . . . . . . . . . . . . . . 4-15
• Disarmed stage. . . . . . . . . . . . . . . . . . . . . . . . . . . . . . . 4-15
Door locks . . . . . . . . . . . . . . . . . . . . . . . . . . . . . . . . 4-16
• Operating door locks from outside the vehicle . . . . 4-16
• Operating door locks from inside the vehicle . . . . . . 4-17
• Impact sensing door unlock system . . . . . . . . . . . . . . 4-19
• Auto door lock/unlock feature . . . . . . . . . . . . . . . . . . 4-19
• Child-protector rear door lock. . . . . . . . . . . . . . . . . . 4-19
Trunk . . . . . . . . . . . . . . . . . . . . . . . . . . . . . . . . . . . . \
4-20
• Non-Powered Trunk . . . . . . . . . . . . . . . . . . . . . . . . . . 4-20
• Power Trunk . . . . . . . . . . . . . . . . . . . . . . . . . . . . . . . . 4-21
• Trunk Lid Control Button . . . . . . . . . . . . . . . . . . . . . 4-24
• Emergency Trunk Safety Release . . . . . . . . . . . . . . . 4-25
Smart trunk . . . . . . . . . . . . . . . . . . . . . . . . . . . . . . 4-27
Windows . . . . . . . . . . . . . . . . . . . . . . . . . . . . . . . . . 4-31
• Power windows . . . . . . . . . . . . . . . . . . . . . . . . . . . . . . 4-32
Hood. . . . . . . . . . . . . . . . . . . . . . . . . . . . . . . . . . . . \
. 4-35
• Opening the hood . . . . . . . . . . . . . . . . . . . . . . . . . . . . 4-35
• Closing the hood . . . . . . . . . . . . . . . . . . . . . . . . . . . . . 4-36
Fuel filler lid . . . . . . . . . . . . . . . . . . . . . . . . . . . . . . 4-37
• Opening the fuel filler lid . . . . . . . . . . . . . . . . . . . . . . 4-37
• Closing the fuel filler lid . . . . . . . . . . . . . . . . . . . . . . . 4-37
• Emergency fuel filler lid release . . . . . . . . . . . . . . . . 4-38
Panoramic sunroof . . . . . . . . . . . . . . . . . . . . . . . . . 4-41
• Sunroof open warning. . . . . . . . . . . . . . . . . . . . . . . . . 4-42
• Sunshade . . . . . . . . . . . . . . . . . . . . . . . . . . . . . . . . . . . 4-\
43
• Sliding the sunroof . . . . . . . . . . . . . . . . . . . . . . . . . . . 4-43
• Tilting the sunroof . . . . . . . . . . . . . . . . . . . . . . . . . . . . 4-45
• Closing the sunroof . . . . . . . . . . . . . . . . . . . . . . . . . . . 4-45
• Resetting the sunroof . . . . . . . . . . . . . . . . . . . . . . . . . 4-46
4
Page 84 of 500
Lighting . . . . . . . . . . . . . . . . . . . . . . . . . . . . . . . . . 4-106
• Battery saver function. . . . . . . . . . . . . . . . . . . . . . . . 4-106
• Lighting control . . . . . . . . . . . . . . . . . . . . . . . . . . . . . 4-106
• High beam operation. . . . . . . . . . . . . . . . . . . . . . . . . 4-108
• High Beam Assist . . . . . . . . . . . . . . . . . . . . . . . . . . . . 4-108
• Turn signals and lane change signals. . . . . . . . . . . . 4-110
• Front fog light . . . . . . . . . . . . . . . . . . . . . . . . . . . . . . 4-111
• Check headlight . . . . . . . . . . . . . . . . . . . . . . . . . . . . . 4-111
• Headlight leveling device . . . . . . . . . . . . . . . . . . . . . 4-112
Wipers and washers . . . . . . . . . . . . . . . . . . . . . . . 4-113
• Windshield wipers . . . . . . . . . . . . . . . . . . . . . . . . . . 4-113
• Front windshield washers . . . . . . . . . . . . . . . . . . . . . 4-115
Interior lights . . . . . . . . . . . . . . . . . . . . . . . . . . . . 4-117
• Automatic turn off function . . . . . . . . . . . . . . . . . . . 4-117
• Room lamp . . . . . . . . . . . . . . . . . . . . . . . . . . . . . . . . . 4-117
• Map lamp . . . . . . . . . . . . . . . . . . . . . . . . . . . . . . . . . . 4-118
• Trunk room lamp. . . . . . . . . . . . . . . . . . . . . . . . . . . . 4-119
• Vanity mirror lamp . . . . . . . . . . . . . . . . . . . . . . . . . . 4-119
• Glove box lamp . . . . . . . . . . . . . . . . . . . . . . . . . . . . . 4-119
Welcome system . . . . . . . . . . . . . . . . . . . . . . . . . . 4-120
• Headlight (Headlamp) escort function . . . . . . . . . . 4-120
• Interior light . . . . . . . . . . . . . . . . . . . . . . . . . . . . . . . 4-120
• Pocket lamp . . . . . . . . . . . . . . . . . . . . . . . . . . . . . . . . 4-120
Defroster . . . . . . . . . . . . . . . . . . . . . . . . . . . . . . . . 4-121
• Rear window defroster . . . . . . . . . . . . . . . . . . . . . . . 4-121
Automatic climate control system . . . . . . . . . . . 4-122
• Automatic heating and air conditioning . . . . . . . . . 4-123
• Manual heating and air conditioning . . . . . . . . . . . 4-125
• System operation . . . . . . . . . . . . . . . . . . . . . . . . . . . . 4-131
• Climate control air filter. . . . . . . . . . . . . . . . . . . . . . 4-133
• Checking the amount of air conditionerrefrigerant and compressor lubricant . . . . . . . . . . 4-134
• Air Conditioning refrigerant label. . . . . . . . . . . . . . 4-134
Windshield defrosting and defogging . . . . . . . . . 4-135
• Automatic climate control system . . . . . . . . . . . . . . 4-135
• Defogging logic. . . . . . . . . . . . . . . . . . . . . . . . . . . . . . 4-136
Clean air . . . . . . . . . . . . . . . . . . . . . . . . . . . . . . . . 4-139
Automatic ventilation. . . . . . . . . . . . . . . . . . . . . . 4-139
• To cancel or reset the Automatic Ventilation . . . . . 4-139
Storage compartments . . . . . . . . . . . . . . . . . . . . . 4-140
• Center console storage . . . . . . . . . . . . . . . . . . . . . . . 4-140
• Glove box . . . . . . . . . . . . . . . . . . . . . . . . . . . . . . . . . . 4-14\
0
• Sunglass holder . . . . . . . . . . . . . . . . . . . . . . . . . . . . . 4-141
4
Page 90 of 500
49
Features of your vehicle
✽
✽NOTICE
If the keyless entry system is inoper-
ative due to exposure to water or liq-
uids, it will not be covered by your
manufacturer's vehicle warranty.
Trunk open (3)
The trunk is opened if the button is
pressed for more than 1 second.
Once the trunk is opened and then
closed, the trunk will lock automati-
cally.
Panic alarm (4)
The horn sounds and the hazard
warning lights blink for about 30 sec-
onds if this button is pressed for
more than 0.5 seconds. To stop the
horn and lights, press any button on
the transmitter.
Transmitter precautions
The smart key will not
work if any of following occurs:
You exceed the operating distance
limit (about 90 feet [30 m]).
The battery in the smart key is weak.
Other vehicles or objects may be blocking the signal.
The weather is extremely cold.
The smart key is close to a radio transmitter such as a radio station
or an airport which can interfere
with normal operation of the trans-
mitter.
When the smart key does not work
properly, open and close the door
with the smart key. If you have a
problem with the smart key, contact
an authorized Kia dealer.
Page 91 of 500

Features of your vehicle
10
4
If the transmitter is in close proxim-
ity to your cell phone or smart
phone, the signal from the trans-
mitter could be blocked by normal
operation of your cell phone or
smart phone. This is especially
important when the phone is active
such as making call, receiving
calls, text messaging, and/or send-
ing/receiving emails.
Avoid placing the transmitter and
your cell phone or smart phone in
the same pants or jacket pocket
and maintain adequate distance
between the two devices.This device complies with Part
15 of the FCC rules.
Operation is subject to the following
two conditions:
1. This device may not cause harmful interference, and
2. This device must accept any inter- ference received, including inter-
ference that may cause undesired
operation.
✽ ✽NOTICE
Changes or modifications not
expressly approved by the party
responsible for compliance could
void the user’s authority to operate
the equipment. If the keyless entry
system is inoperative due to changes
or modifications not expressly
approved by the party responsible
for compliance, it will not be cov-
ered by your manufacturer’s vehicle
warranty.
Battery replacement
A battery should last for several
years, but if the smart key is not
working properly, try replacing the
battery with a new one. If you are
unsure how to use or replace the
battery, contact an authorized Kia
dealer.
CAUTION - Transmitter
damage
Do not drop, wet or expose the
keyless entry system transmit-ter to heat or sunlight.
Page 92 of 500

411
Features of your vehicle
1. Pry open the smart key centercover.
2. Replace the battery with a new battery (CR2032). When replacing
the battery, make sure the battery
position.
3. Install the battery in the reverse order of removal.
Mechanical key operations
Used to lock and unlock the glovebox.
Lock and unlock the doors when the vehicle or smart key battery is
discharged.
Smart key
To remove the mechanical key, press
and hold the release button and
remove the mechanical key.
To reinstall the mechanical key, put
the key into the hole and push it until
a click sound is heard.
OYG046057N
OVG043401L
Page 103 of 500
Features of your vehicle
22
4
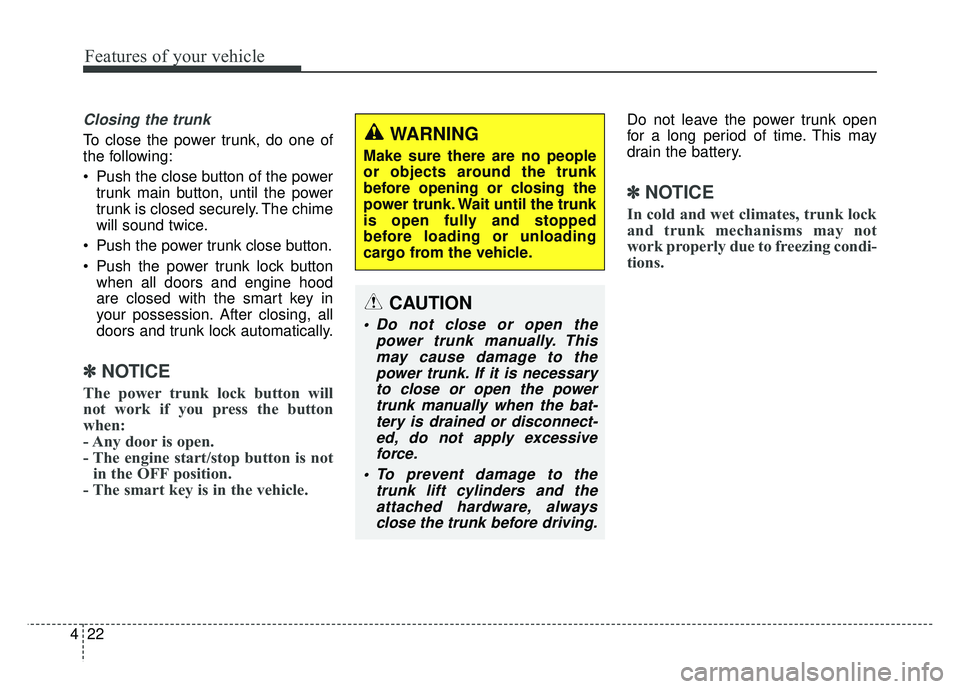
Closing the trunk
To close the power trunk, do one of
the following:
Push the close button of the power
trunk main button, until the power
trunk is closed securely. The chime
will sound twice.
Push the power trunk close button.
Push the power trunk lock button when all doors and engine hood
are closed with the smart key in
your possession. After closing, all
doors and trunk lock automatically.
✽ ✽ NOTICE
The power trunk lock button will
not work if you press the button
when:
- Any door is open.
- The engine start/stop button is not
in the OFF position.
- The smart key is in the vehicle.
Do not leave the power trunk open
for a long period of time. This may
drain the battery.
✽ ✽ NOTICE
In cold and wet climates, trunk lock
and trunk mechanisms may not
work properly due to freezing condi-
tions.
WARNING
Make sure there are no people
or objects around the trunk
before opening or closing the
power trunk. Wait until the trunk
is open fully and stopped
before loading or unloading
cargo from the vehicle.
CAUTION
• Do not close or open the
power trunk manually. Thismay cause damage to thepower trunk. If it is necessaryto close or open the powertrunk manually when the bat-tery is drained or disconnect-ed, do not apply excessiveforce.
To prevent damage to the trunk lift cylinders and theattached hardware, alwaysclose the trunk before driving.