start stop button KIA Carens 2017 3.G Owner's Guide
[x] Cancel search | Manufacturer: KIA, Model Year: 2017, Model line: Carens, Model: KIA Carens 2017 3.GPages: 625, PDF Size: 19.69 MB
Page 181 of 625
Features of your vehicle
84
4
✽ ✽
NOTICE- Electronic Parking
Brake (EPB) Warning Light
The Electronic Parking Brake
(EPB) Warning Light may illumi-
nates when the Electronic Stability
control (ESC) Indicator Light comes
on to indicates that the ESC is not
working properly (This does not
indicate malfunction of the EPB).
Electronic Power Steering (EPS) WarningLight (if equipped)
This warning light illuminates:
Once you set the ignition switch or Engine Start/Stop Button to the ON
position.
- It remains on until the engine isstarted.
When there is a malfunction with the EPS.
In this case, have your vehicle
inspected by an authorized Kia
dealer.
Malfunction Indicator
Lamp (MIL)
This warning light illuminates:
Once you set the ignition switch or Engine Start/Stop Button to the ON
position.
- It remains on until the engine isstarted.
When there is a malfunction with the emission control system.
In this case, have your vehicle
inspected by an authorized Kia
dealer.
Page 182 of 625
485
Features of your vehicle
Charging SystemWarning Light
This warning light illuminates:
Once you set the ignition switch or Engine Start/Stop Button to the ON
position.
- It remains on until the engine isstarted.
When there is a malfunction with either the alternator or electrical
charging system. If there is a malfunction with either
the alternator or electrical charging
system:
1. Drive carefully to the nearest safe
location and stop your vehicle.
2. Turn the engine off and check the alternator drive belt for looseness
or breakage.
If the belt is adjusted properly,
there may be a problem in the
electrical charging system.
In this case, have your vehicle
inspected by an authorized Kia
dealer as soon as possible.
CAUTION - Gasoline
Engine
If the Malfunction Indicator Lamp (MIL) illuminates, poten-tial catalytic converter damageis possible which could result inloss of engine power.
In this case, have your vehicleinspected by an authorized Kiadealer as soon as possible.
CAUTION - Malfunction
Indicator Lamp (MIL)
Driving with the Malfunction Indicator Lamp (MIL) on maycause damage to the emissioncontrol systems which couldeffect drivability and/or fueleconomy.
Page 183 of 625
Features of your vehicle
86
4
Engine Coolant
Temperature WarningLight (if equipped)
This warning light illuminates:
When the engine coolant tempera- ture is above 120°C (248°F). This
means that the engine is overheat-
ed and may be damaged.
If your vehicle is overheated, refer
to “Overheating” in chapter 7.
Engine Oil Pressure
Warning Light
This warning light illuminates:
Once you set the ignition switch or Engine Start/Stop Button to the ON
position.
- It remains on until the engine isstarted.
When the engine oil pressure is low.
If the engine oil pressure is low:
1. Drive carefully to the nearest safe location and stop your vehicle.
2. Turn the engine off and check the engine oil level (For more details,
refer to “Engine Oil” in section 8). If
the level is low, add oil as required.
If the warning light remains on
after adding oil or if oil is not avail-
able, have your vehicle inspected
by an authorized Kia dealer as
soon as possible.
CAUTION - Engine Oil
Pressure Warning Light
If the engine does not stop immediately after the EngineOil Pressure Warning Light isilluminated, severe damagecould result.
If the warning light stays on while the engine is running, itindicates that there may beserious engine damage ormalfunction. In this case,
1. Stop the vehicle as soon as it is safe to do so.
2. Turn off the engine and check the oil level. If the oillevel is low, fill the engineoil to the proper level.
3. Start the engine again. If the warning light stays on afterthe engine is started, turnthe engine off immediately.In this case, have your vehi-cle inspected by an author-ized Kia dealer.
CAUTION - Engine
Overheating
Do not continue driving with theengine overheated. Otherwiseengine may be damaged.
Page 184 of 625
487
Features of your vehicle
Low Fuel Level WarningLight
This warning light illuminates:
When the fuel tank is nearly empty.
If the fuel tank is nearly empty:
Add fuel as soon as possible.
Low Tire PressureWarning Light (if equipped)
This warning light illuminates:
Once you set the ignition switch or Engine Start/Stop Button to the ON
position.
- It illuminates for approximately 3seconds and then goes off.
When one or more of your tires are significantly underinflated.
For more details, refer to "Tire
Pressure Monitoring System
(TPMS)" in chapter 7. This warning light remains on after
blinking for approximately 60 seconds
or repeats blinking and off at the
intervals of approximately 3 seconds:
When there is a malfunction with
the TPMS.
In this case, have your vehicle
inspected by an authorized Kia
dealer as soon as possible.
For more details, refer to "Tire
Pressure Monitoring System
(TPMS)" in chapter 7.
CAUTION - Low Fuel
Level
Driving with the Low Fuel Levelwarning light on or with the fuellevel below “0 or E” can cause theengine to misfire and damage thecatalytic converter (if equipped).
Page 186 of 625
489
Features of your vehicle
Indicator lights
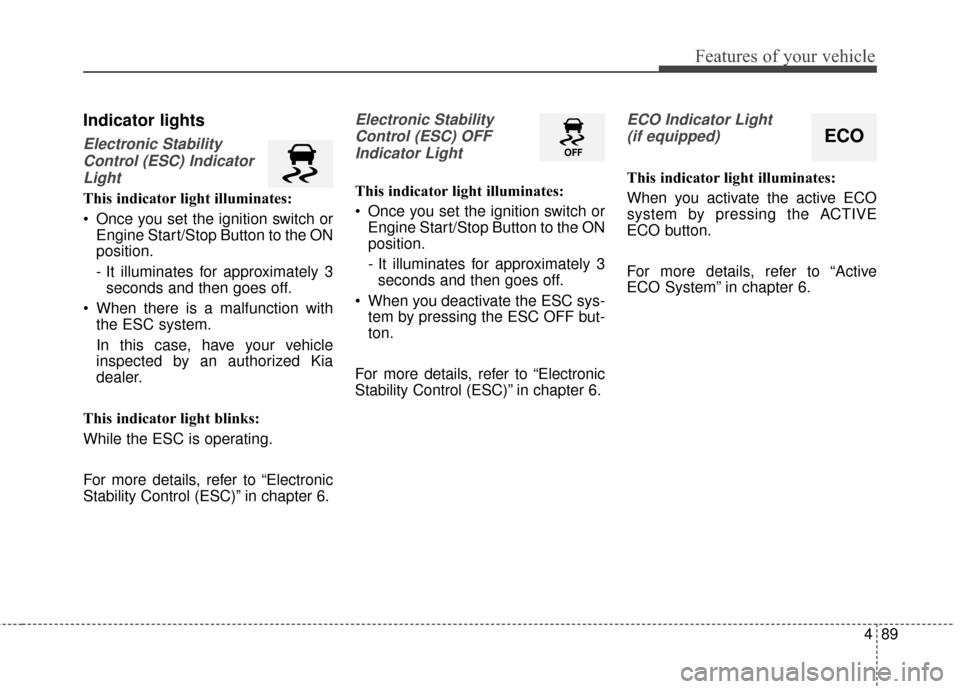
Electronic StabilityControl (ESC) IndicatorLight
This indicator light illuminates:
Once you set the ignition switch or Engine Start/Stop Button to the ON
position.
- It illuminates for approximately 3seconds and then goes off.
When there is a malfunction with the ESC system.
In this case, have your vehicle
inspected by an authorized Kia
dealer.
This indicator light blinks:
While the ESC is operating.
For more details, refer to “Electronic
Stability Control (ESC)” in chapter 6.
Electronic Stability Control (ESC) OFFIndicator Light
This indicator light illuminates:
Once you set the ignition switch or Engine Start/Stop Button to the ON
position.
- It illuminates for approximately 3seconds and then goes off.
When you deactivate the ESC sys- tem by pressing the ESC OFF but-
ton.
For more details, refer to “Electronic
Stability Control (ESC)” in chapter 6.
ECO Indicator Light (if equipped)
This indicator light illuminates:
When you activate the active ECO
system by pressing the ACTIVE
ECO button.
For more details, refer to “Active
ECO System” in chapter 6.
ECO
Page 187 of 625
Features of your vehicle
90
4
Immobilizer Indicator
Light (Without Smart Key)
This indicator light illuminates:
When the vehicle detects the immobilizer in your key properly
while the ignition switch is ON.
- At this time, you can start theengine.
- The indicator light goes off after starting the engine.
This indicator light blinks:
When there is a malfunction with the immobilizer system.
In this case, have your vehicle
inspected by an authorized Kia
dealer.
Immobilizer Indicator
Light (With Smart Key)
This indicator light illuminates for up
to 30 seconds:
When the vehicle detects the smart key in the vehicle properly
while the Engine Start/Stop Button
is ACC or ON.
- At this time, you can start theengine.
- The indicator light goes off after starting the engine.
This indicator light blinks for a few
seconds:
When the smart key is not in the vehicle.
- At this time, you can not start theengine. This indicator light illuminates for 2
seconds and goes off:
When the vehicle can not detect
the smart key which is in the vehi-
cle while the Engine Start/Stop
Button is ON.
In this case, have your vehicle
inspected by an authorized Kia
dealer.
This indicator light blinks:
When the battery of the smart key is weak.
- At this time, you can not start theengine. However, you can start
the engine if you press the Engine
Start/Stop Button with the smart
key. (For more details, refer to
“Starting the Engine” in section 6).
When there is a malfunction with the immobilizer system.
In this case, have your vehicle
inspected by an authorized Kia
dealer.
Page 256 of 625
4159
Features of your vehicle
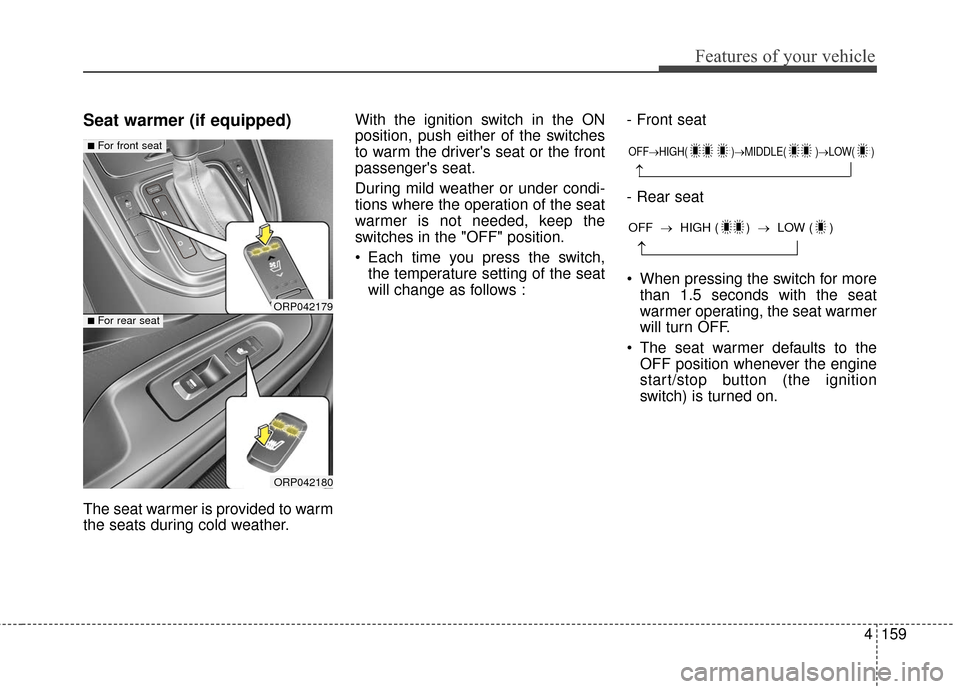
Seat warmer (if equipped)
The seat warmer is provided to warm
the seats during cold weather.With the ignition switch in the ON
position, push either of the switches
to warm the driver's seat or the front
passenger's seat.
During mild weather or under condi-
tions where the operation of the seat
warmer is not needed, keep the
switches in the "OFF" position.
Each time you press the switch,
the temperature setting of the seat
will change as follows : - Front seat
- Rear seat
When pressing the switch for more
than 1.5 seconds with the seat
warmer operating, the seat warmer
will turn OFF.
The seat warmer defaults to the OFF position whenever the engine
start/stop button (the ignition
switch) is turned on.
ORP042179
ORP042180
■For front seat
■For rear seat
OFF→ HIGH( )→ MIDDLE( )→LOW( )
→
→
OFF →HIGH ( ) → LOW ( )
Page 267 of 625
Features of your vehicle
170
4
❈ If the portable lamp does not turn
on, it means the portable lamp
needs to be charged. Insert the
lamp holder and then charge it
again. The charge mode will be
activated if the ignition switch (or
engine start/stop button) is on
position or engine is running.Battery replacement
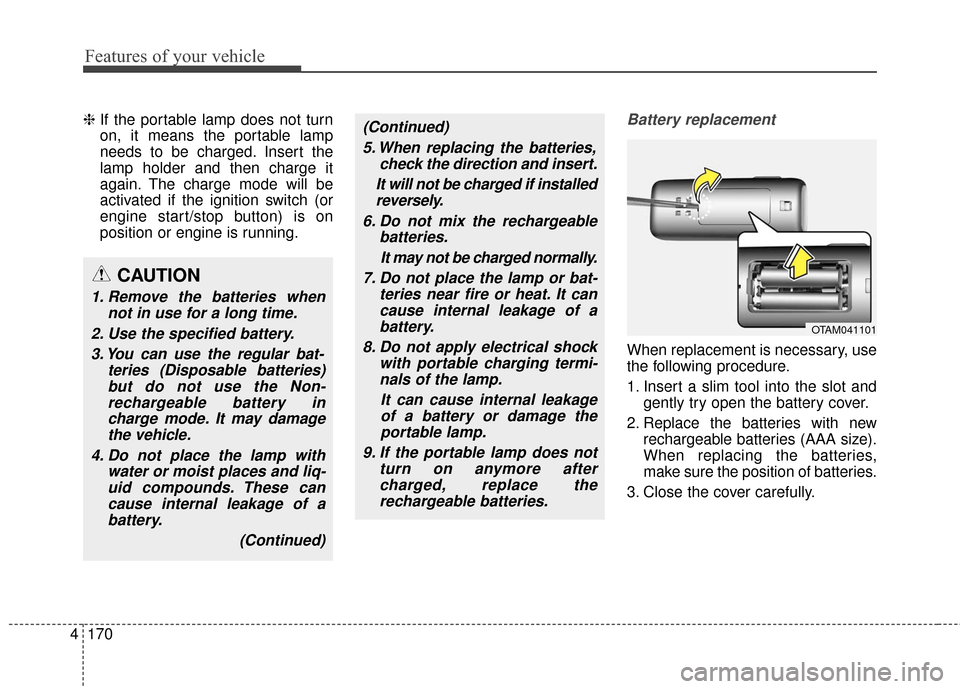
When replacement is necessary, use
the following procedure.
1. Insert a slim tool into the slot and
gently try open the battery cover.
2. Replace the batteries with new rechargeable batteries (AAA size).
When replacing the batteries,
make sure the position of batteries.
3. Close the cover carefully.
CAUTION
1. Remove the batteries when not in use for a long time.
2. Use the specified battery. 3. You can use the regular bat- teries (Disposable batteries)but do not use the Non-rechargeable battery incharge mode. It may damagethe vehicle.
4. Do not place the lamp with water or moist places and liq-uid compounds. These cancause internal leakage of abattery.
(Continued)
(Continued)5. When replacing the batteries, check the direction and insert.
It will not be charged if installed reversely.
6. Do not mix the rechargeable batteries.
It may not be charged normally.
7. Do not place the lamp or bat- teries near fire or heat. It cancause internal leakage of abattery.
8. Do not apply electrical shock with portable charging termi-nals of the lamp.
It can cause internal leakageof a battery or damage theportable lamp.
9. If the portable lamp does not turn on anymore aftercharged, replace therechargeable batteries.
OTAM041101
Page 363 of 625
Audio system
593
Phone Mode
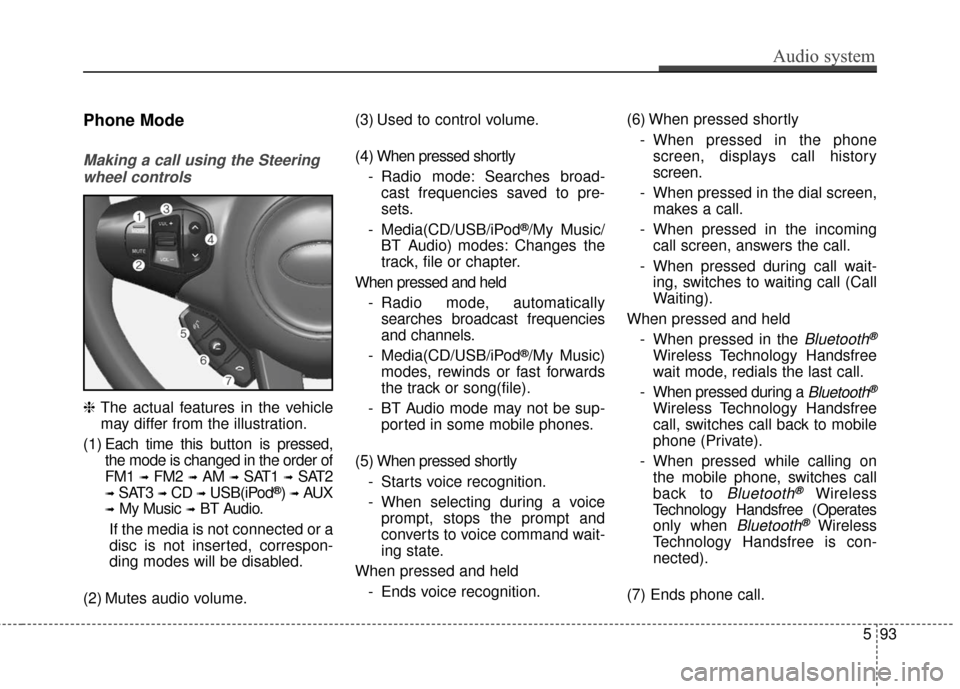
Making a call using the Steeringwheel controls
❈ The actual features in the vehicle
may differ from the illustration.
(1) Each time this button is pressed,
the mode is changed in the order of
FM1
➟FM2➟AM➟SAT1➟SAT2
➟SAT3➟CD➟USB(iPod®)➟AUX
➟My Music➟BT Audio.
If the media is not connected or a
disc is not inserted, correspon-
ding modes will be disabled.
(2) Mutes audio volume. (3) Used to control volume.
(4) When pressed shortly
- Radio mode: Searches broad-cast frequencies saved to pre-
sets.
- Media(CD/USB/iPod
®/My Music/
BT Audio) modes: Changes the
track, file or chapter.
When pressed and held - Radio mode, automaticallysearches broadcast frequencies
and channels.
- Media(CD/USB/iPod
®/My Music)
modes, rewinds or fast forwards
the track or song(file).
- BT Audio mode may not be sup- ported in some mobile phones.
(5) When pressed shortly - Starts voice recognition.
- When selecting during a voiceprompt, stops the prompt and
converts to voice command wait-
ing state.
When pressed and held - Ends voice recognition. (6) When pressed shortly
- When pressed in the phonescreen, displays call history
screen.
- When pressed in the dial screen, makes a call.
- When pressed in the incoming call screen, answers the call.
- When pressed during call wait- ing, switches to waiting call (Call
Waiting).
When pressed and held - When pressed in the
Bluetooth®
Wireless Technology Handsfree
wait mode, redials the last call.
- When pressed during a
Bluetooth®
Wireless Technology Handsfree
call, switches call back to mobile
phone (Private).
- When pressed while calling on the mobile phone, switches call
back to
Bluetooth®Wireless
Technology Handsfree (Operates
only when
Bluetooth®Wireless
Technology Handsfree is con-
nected).
(7) Ends phone call.
Page 389 of 625
Driving your vehicle
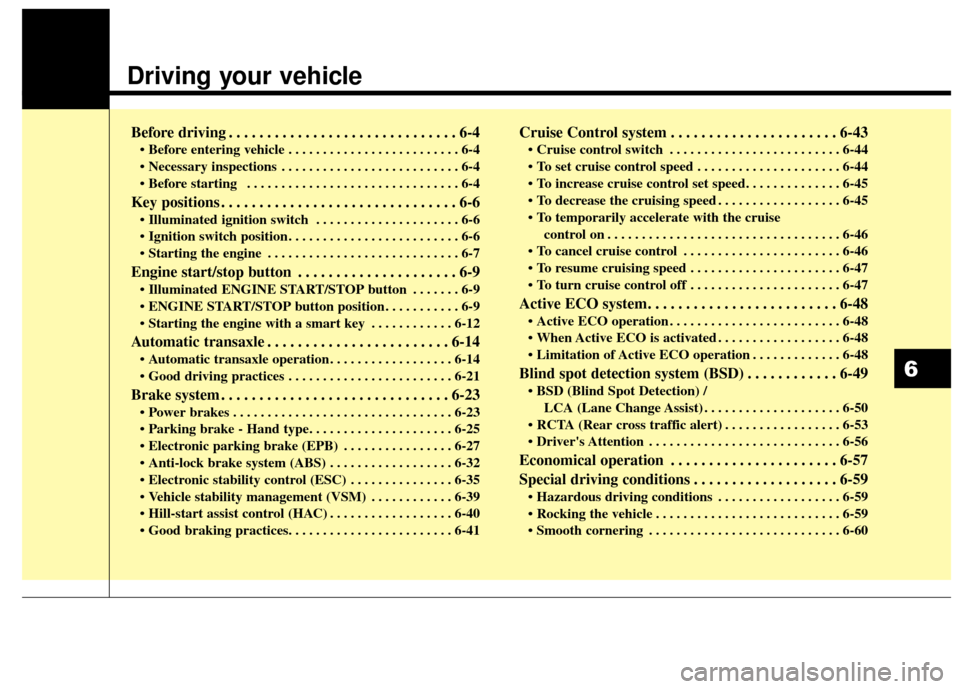
Before driving . . . . . . . . . . . . . . . . . . . . . . . . . . . . . . 6-4
• Before entering vehicle . . . . . . . . . . . . . . . . . . . . . . . . . 6-4
. . . . . . . . . . . . . . . . . . . . . . . . . . 6-4
. . . . . . . . . . . . . . . . . . . . . . . . . . . . . . . 6-4
Key positions . . . . . . . . . . . . . . . . . . . . . . . . . . . . . . . 6-6
. . . . . . . . . . . . . . . . . . . . . 6-6
. . . . . . . . . . . . . . . . . . . . . . . . . 6-6
. . . . . . . . . . . . . . . . . . . . . . . . . . . . 6-7
Engine start/stop button . . . . . . . . . . . . . . . . . . . . . 6-9
. . . . . . . 6-9
. . . . . . . . . . . 6-9
. . . . . . . . . . . . 6-12
Automatic transaxle . . . . . . . . . . . . . . . . . . . . . . . . 6-14
. . . . . . . . . . . . . . . . . . 6-14
. . . . . . . . . . . . . . . . . . . . . . . . 6-21
Brake system . . . . . . . . . . . . . . . . . . . . . . . . . . . . . . 6-23
. . . . . . . . . . . . . . . . . . . . . . . . . . . . . . . . 6-23
. . . . . . . . . . . . . . . . 6-27
. . . . . . . . . . . . . . . . . . 6-32
. . . . . . . . . . . . . . . 6-35
. . . . . . . . . . . . 6-39
. . . . . . . . . . . . . . . . . . 6-40
Cruise Control system . . . . . . . . . . . . . . . . . . . . . . 6-43
. . . . . . . . . . . . . . . . . . . . . . . . . 6-44
. . . . . . . . . . . . . . . . . . . . . 6-44
. . . . . . . . . . . . . . . . . . 6-45
control on . . . . . . . . . . . . . . . . . . . . . . . . . . . . . . . . . . 6-46\
. . . . . . . . . . . . . . . . . . . . . . . 6-46
. . . . . . . . . . . . . . . . . . . . . . 6-47
. . . . . . . . . . . . . . . . . . . . . . 6-47
Active ECO system. . . . . . . . . . . . . . . . . . . . . . . . . 6-48
. . . . . . . . . . . . . . . . . . . . . . . . . 6-48
. . . . . . . . . . . . . . . . . . 6-48
. . . . . . . . . . . . . 6-48
Blind spot detection system (BSD) . . . . . . . . . . . . 6-49
LCA (Lane Change Assist) . . . . . . . . . . . . . . . . . . . . 6-50
. . . . . . . . . . . . . . . . . 6-53
. . . . . . . . . . . . . . . . . . . . . . . . . . . . 6-56
Economical operation . . . . . . . . . . . . . . . . . . . . . . 6-57
Special driving conditions . . . . . . . . . . . . . . . . . . . 6-59
. . . . . . . . . . . . . . . . . . 6-59
. . . . . . . . . . . . . . . . . . . . . . . . . . . 6-59
. . . . . . . . . . . . . . . . . . . . . . . . . . . . 6-60
6