KIA CARENS RHD 2018 Owners Manual
Manufacturer: KIA, Model Year: 2018, Model line: CARENS RHD, Model: KIA CARENS RHD 2018Pages: 723, PDF Size: 40.94 MB
Page 151 of 723
455
Features of your vehicle
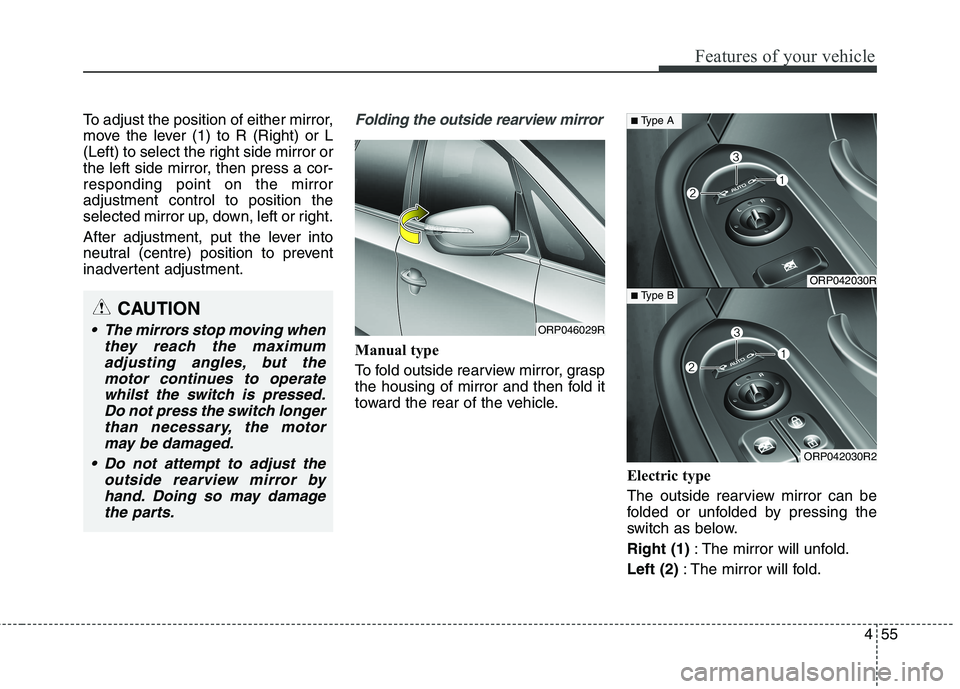
To adjust the position of either mirror,
move the lever (1) to R (Right) or L
(Left) to select the right side mirror or
the left side mirror, then press a cor-responding point on the mirroradjustment control to position the
selected mirror up, down, left or right.
After adjustment, put the lever into
neutral (centre) position to prevent
inadvertent adjustment.Folding the outside rearview mirror
Manual type
To fold outside rearview mirror, grasp
the housing of mirror and then fold it
toward the rear of the vehicle.Electric type
The outside rearview mirror can be
folded or unfolded by pressing the
switch as below. Right (1): The mirror will unfold.
Left (2) : The mirror will fold.
CAUTION
The mirrors stop moving when
they reach the maximumadjusting angles, but themotor continues to operatewhilst the switch is pressed. Do not press the switch longerthan necessary, the motormay be damaged.
Do not attempt to adjust the outside rearview mirror byhand. Doing so may damagethe parts.ORP046029R
ORP042030R
ORP042030R2
■ Type A
■ Type B
Page 152 of 723
Features of your vehicle
56
4
Centre (AUTO, 3) :
The mirror will fold or unfold automat-
ically as follows:
Without smart key system - The mirror will fold or unfold whenthe door is locked or unlocked by
the transmitter.
With smart key system - The mirror will fold or unfold whenthe door is locked or unlocked by
the smart key.
- The mirror will fold or unfold when the door is locked or unlocked by
the button on the outside door
handle.
- The mirror will unfold when you approach the vehicle (all doors
closed and locked) with a smart
key in possession.
CAUTION
In case it is an electric type out-
side rearview mirror, don’t fold itby hand. It could cause motor failure.
CAUTION
The electric type outsiderearview mirror operates eventhough the ignition switch is in the OFF position. However, toprevent unnecessary batterydischarge, do not adjust the mirrors longer than necessarywhilst the engine is not running.
Page 153 of 723
457
Features of your vehicle
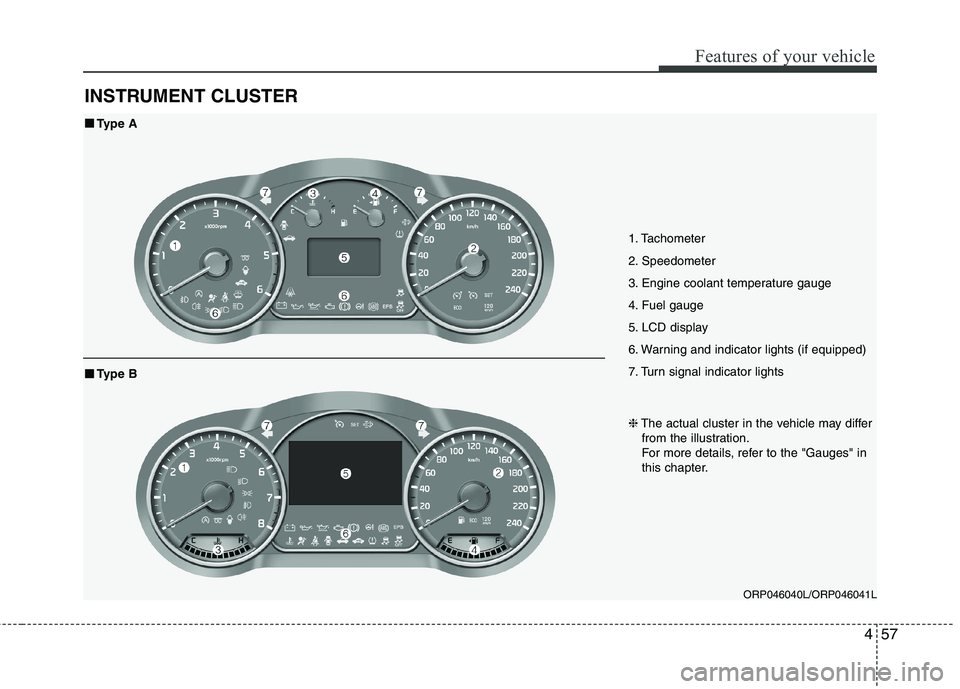
INSTRUMENT CLUSTER
1. Tachometer
2. Speedometer
3. Engine coolant temperature gauge
4. Fuel gauge
5. LCD display
6. Warning and indicator lights (if equipped)
7. Turn signal indicator lightsORP046040L/ORP046041L
■■Type A
❈The actual cluster in the vehicle may differ
from the illustration.
For more details, refer to the "Gauges" in
this chapter.
■■ Type B
Page 154 of 723
Features of your vehicle
58
4
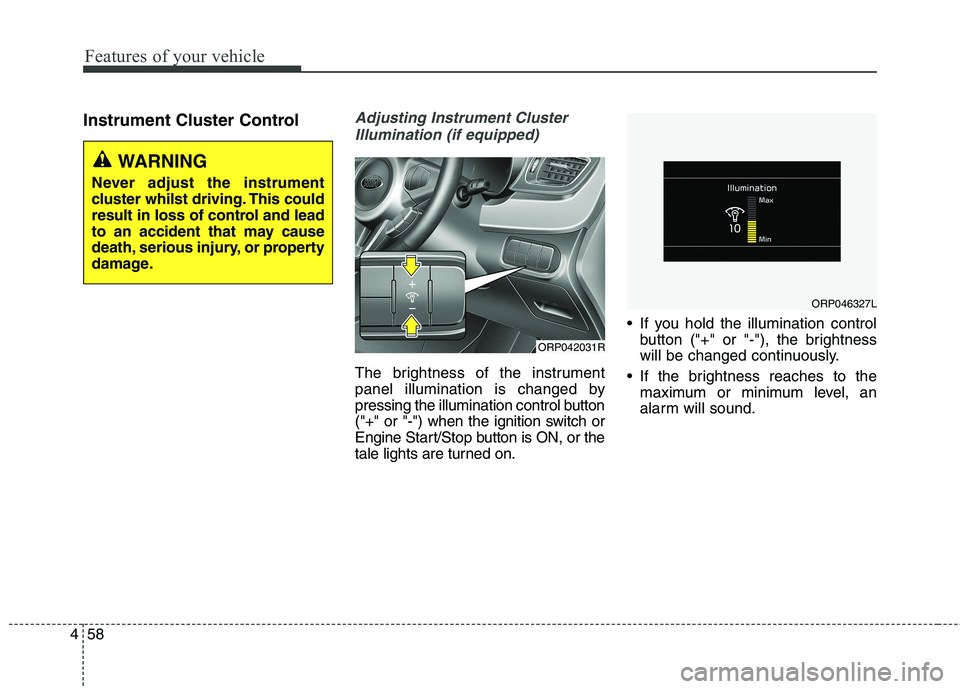
Instrument Cluster ControlAdjusting Instrument Cluster
Illumination (if equipped)
The brightness of the instrument
panel illumination is changed by
pressing the illumination control button
("+" or "-") when the ignition switch or
Engine Start/Stop button is ON, or the
tale lights are turned on. If you hold the illumination control
button ("+" or "-"), the brightness
will be changed continuously.
If the brightness reaches to the maximum or minimum level, an
alarm will sound.
ORP042031R
WARNING
Never adjust the instrument
cluster whilst driving. This could
result in loss of control and lead
to an accident that may cause
death, serious injury, or property
damage.
ORP046327L
Page 155 of 723
![KIA CARENS RHD 2018 Owners Manual 459
Features of your vehicle
LCD Display Control
The LCD display modes can be
changed by using the control buttons
on the steering wheel.
[Type A]
(1) : TRIP button for changing tripmodes
(2) : KIA CARENS RHD 2018 Owners Manual 459
Features of your vehicle
LCD Display Control
The LCD display modes can be
changed by using the control buttons
on the steering wheel.
[Type A]
(1) : TRIP button for changing tripmodes
(2) :](/img/2/57938/w960_57938-154.png)
459
Features of your vehicle
LCD Display Control
The LCD display modes can be
changed by using the control buttons
on the steering wheel.
[Type A]
(1) : TRIP button for changing tripmodes
(2) : RESET button for resetting items [Type B]
(1) : MODE button for changing
modes or SELECT button
for setting the selected item
(2) : MOVE button for changing items or RESET button forresetting the selected item
❈ For the LCD modes, refer to “LCD
Display” in this chapter.
ORP042032
Page 156 of 723
Features of your vehicle
60
4
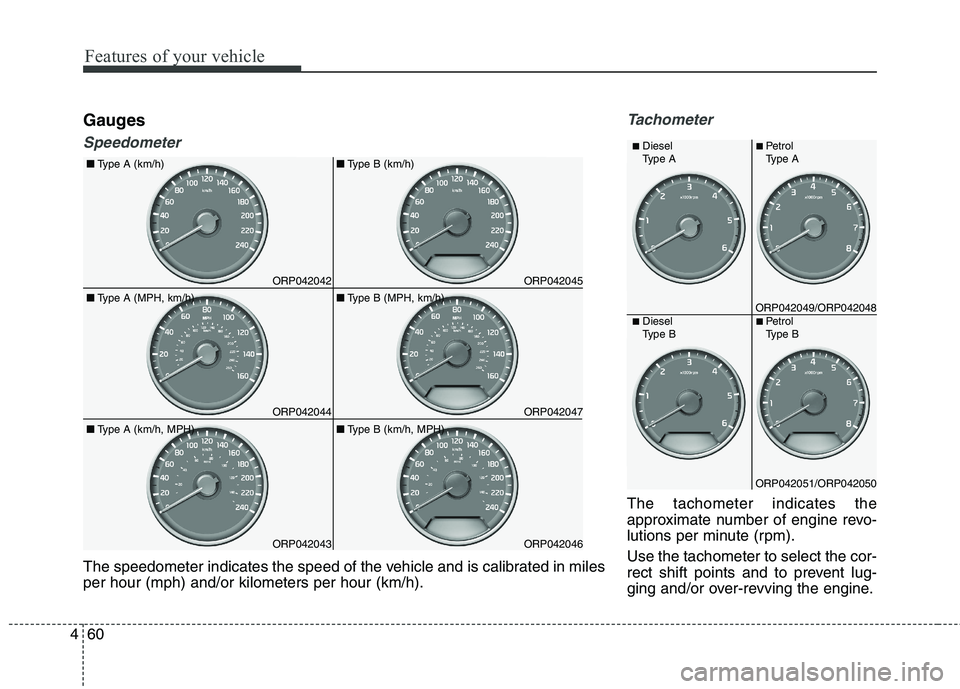
Gauges
Speedometer Tachometer
The tachometer indicates the
approximate number of engine revo-
lutions per minute (rpm). Use the tachometer to select the cor-
rect shift points and to prevent lug-
ging and/or over-revving the engine.
ORP042042
ORP042044
ORP042043
■
Type A (MPH, km/h)
■
Type A (km/h)
■ Type A (km/h, MPH)
ORP042045
ORP042047
ORP042046
■
Type B (MPH, km/h)
■
Type B (km/h)
■ Type B (km/h, MPH)
The speedometer indicates the speed of the vehicle and is calibrated in miles per hour (mph) and/or kilometers per hour (km/h).
ORP042049/ORP042048
■Diesel
Type A ■
Petrol
Type A
ORP042051/ORP042050
■ Diesel
Type B ■
Petrol
Type B
Page 157 of 723
461
Features of your vehicle
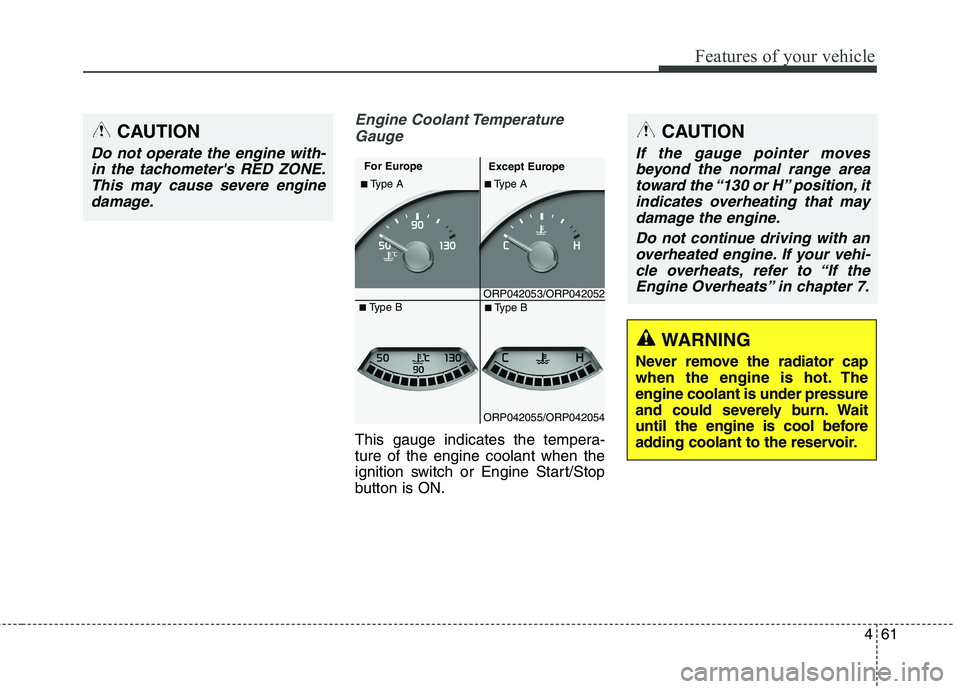
Engine Coolant TemperatureGauge
This gauge indicates the tempera- ture of the engine coolant when the
ignition switch or Engine Start/Stop
button is ON.
CAUTION
Do not operate the engine with-in the tachometer's RED ZONE.This may cause severe engine damage.
ORP042053/ORP042052
■
Type A
For Europe
Except Europe
■ Type A
ORP042055/ORP042054■
Type B
■ Type B
WARNING
Never remove the radiator cap
when the engine is hot. Theengine coolant is under pressure
and could severely burn. Wait
until the engine is cool before
adding coolant to the reservoir.
CAUTION
If the gauge pointer moves beyond the normal range areatoward the “130 or H” position, itindicates overheating that may damage the engine.
Do not continue driving with anoverheated engine. If your vehi-cle overheats, refer to “If theEngine Overheats” in chapter 7.
Page 158 of 723
Features of your vehicle
62
4
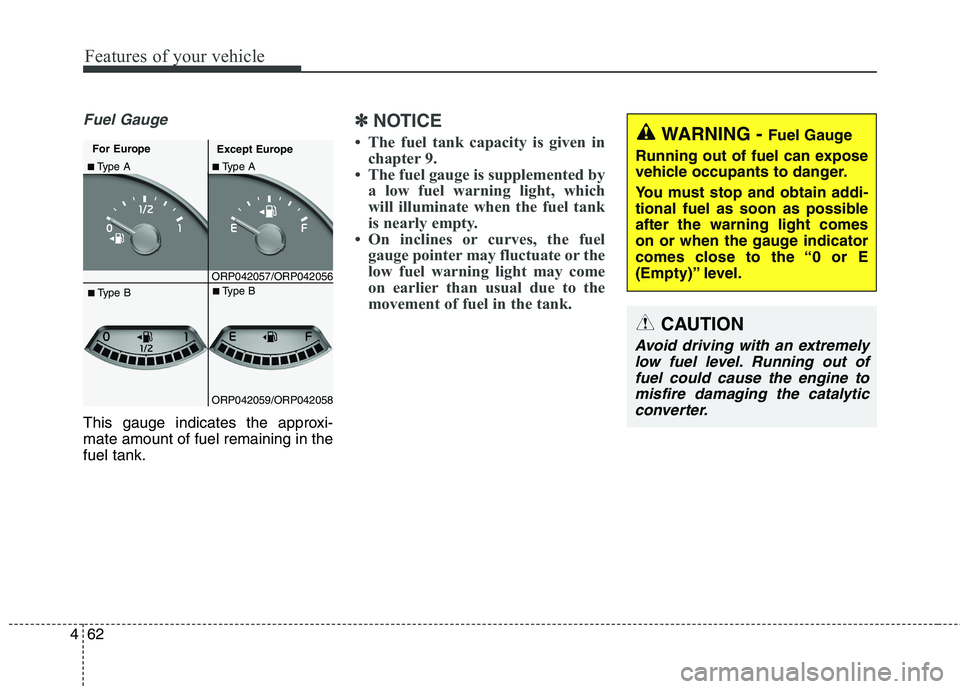
Fuel Gauge
This gauge indicates the approxi- mate amount of fuel remaining in thefuel tank.
✽✽
NOTICE
The fuel tank capacity is given in chapter 9.
The fuel gauge is supplemented by a low fuel warning light, which
will illuminate when the fuel tank
is nearly empty.
On inclines or curves, the fuel gauge pointer may fluctuate or the
low fuel warning light may come
on earlier than usual due to the
movement of fuel in the tank.
ORP042057/ORP042056
■Type A
For Europe
Except Europe■ Type A
ORP042059/ORP042058■
Type B
■Type B
WARNING - Fuel Gauge
Running out of fuel can expose
vehicle occupants to danger.
You must stop and obtain addi-
tional fuel as soon as possibleafter the warning light comes
on or when the gauge indicator
comes close to the “0 or E
(Empty)” level.
CAUTION
Avoid driving with an extremely low fuel level. Running out offuel could cause the engine tomisfire damaging the catalytic converter.
Page 159 of 723
463
Features of your vehicle
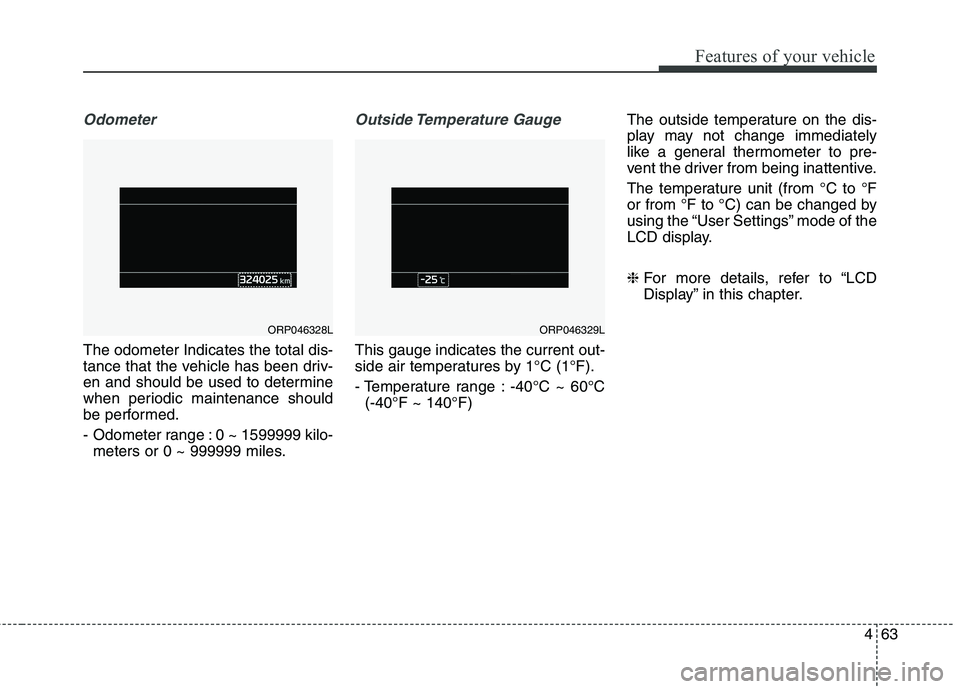
Odometer
The odometer Indicates the total dis-
tance that the vehicle has been driv-
en and should be used to determine
when periodic maintenance should
be performed.
- Odometer range : 0 ~ 1599999 kilo-meters or 0 ~ 999999 miles.
Outside Temperature Gauge
This gauge indicates the current out-
side air temperatures by 1°C (1°F).
- Temperature range : -40°C ~ 60°C (-40°F ~ 140°F) The outside temperature on the dis-
play may not change immediately
like a general thermometer to pre-
vent the driver from being inattentive.
The temperature unit (from °C to °F
or from °F to °C) can be changed by
using the “User Settings” mode of the
LCD display. ❈
For more details, refer to “LCD
Display” in this chapter.
ORP046328LORP046329L
Page 160 of 723
Features of your vehicle
64
4
Transaxle Shift Indicator
Automatic Transaxle Shift
Indicator (if equipped)
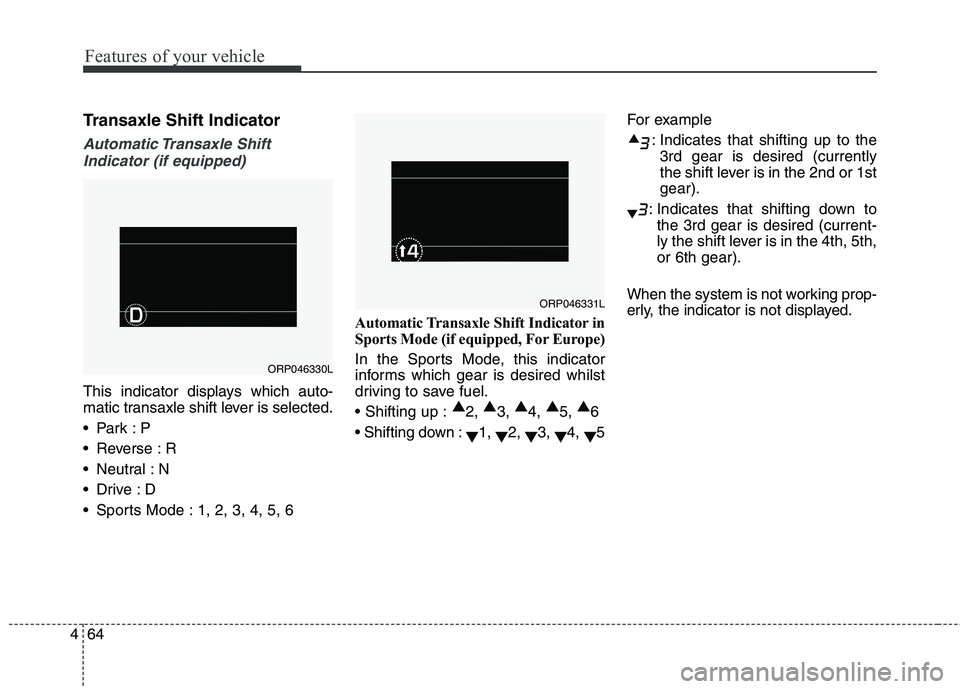
This indicator displays which auto-
matic transaxle shift lever is selected.
Reverse : R
Neutral : N
Sports Mode : 1, 2, 3, 4, 5, 6 Automatic Transaxle Shift Indicator in
Sports Mode (if equipped, For Europe)
In the Sports Mode, this indicator
informs which gear is desired whilst
driving to save fuel.
▲
2, ▲
3, ▲
4, ▲
5, ▲
6
▼1,
▼2,
▼3,
▼4,
▼5 For example
: Indicates that shifting up to the3rd gear is desired (currently
the shift lever is in the 2nd or 1stgear).
: Indicates that shifting down to the 3rd gear is desired (current-
ly the shift lever is in the 4th, 5th,or 6th gear).
When the system is not working prop-
erly, the indicator is not displayed.
ORP046330L
ORP046331L