bonnet KIA CEED 2015 Owners Manual
[x] Cancel search | Manufacturer: KIA, Model Year: 2015, Model line: CEED, Model: KIA CEED 2015Pages: 1210, PDF Size: 35.92 MB
Page 614 of 1210
Your vehicle at a glance
2
2
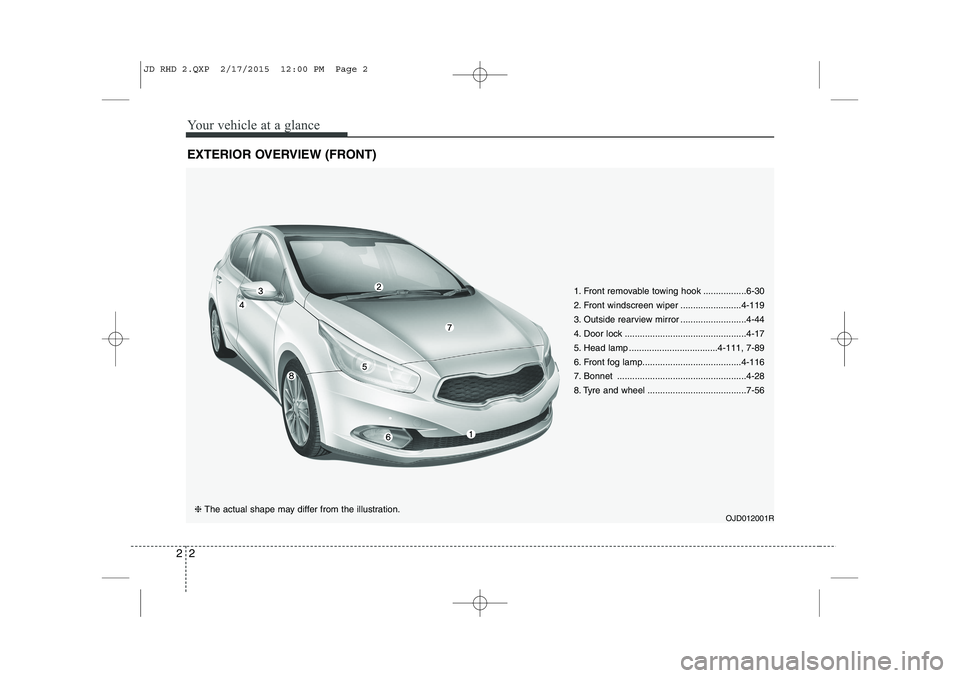
EXTERIOR OVERVIEW (FRONT)
1. Front removable towing hook .................6-30
2. Front windscreen wiper ........................4-119
3. Outside rearview mirror ..........................4-44
4. Door lock ................................................4-17
5. Head lamp ...................................4-111, 7-89
6. Front fog lamp.......................................4-116
7. Bonnet ...................................................4-28
8. Tyre and wheel .......................................7-56
OJD012001R
❈ The actual shape may differ from the illustration.
JD RHD 2.QXP 2/17/2015 12:00 PM Page 2
Page 616 of 1210

Your vehicle at a glance
4
2
INTERIOR OVERVIEW
1. Seat..........................................................3-2
2. Inside door handle ................................4-18
3. Power window switch ............................4-24
4. Power window lock switch......................4-26
5. Bonnet release lever ..............................4-28
6. Outside rearview mirror folding ..............4-45
7. Outside rearview mirror control..............4-44
8. Headlight levelling device ....................4-117
9. Instrument panel illumination control
system ..........................................4-47, 4-61
10. Idle Stop and Go (ISG) OFF button ....5-15
11. Active ECO button ..............................5-32
12. Lane departure warning system button ..5-59
13. Heated steering wheel button ..............4-38
14. Light control/Turn signals ..................4-112
15. Steering wheel ....................................4-37
16. Wiper/Washer ....................................4-119
17. Transaxle shift lever ....................5-20, 5-23
18. Tilt and telescopic steering control lever..........................................4-38
19. Fuse box ..............................................7-68
OJD012003R
❈ The actual shape may differ from the illustration. ■
Type A
■ Type B
JD RHD 2.QXP 2/17/2015 12:00 PM Page 4
Page 686 of 1210
Features of your vehicle
Keys . . . . . . . . . . . . . . . . . . . . . . . . . . . . . . . . . . . . . 4-4• Record your key number . . . . . . . . . . . . . . . . . . . . . 4-4
• Key operations . . . . . . . . . . . . . . . . . . . . . . . . . . . . . . 4-4
• Immobiliser system . . . . . . . . . . . . . . . . . . . . . . . . . . 4-4
Remote keyless entry . . . . . . . . . . . . . . . . . . . . . . . 4-6 • Remote keyless entry system operations . . . . . . . . . 4-6
• Transmitter precautions . . . . . . . . . . . . . . . . . . . . . . 4-8
• Battery replacement . . . . . . . . . . . . . . . . . . . . . . . . . 4-9
Smart key . . . . . . . . . . . . . . . . . . . . . . . . . . . . . . . . 4-11 • Smart key function . . . . . . . . . . . . . . . . . . . . . . . . . . 4-11
• Smart key precautions. . . . . . . . . . . . . . . . . . . . . . . . 4-13
• Door lock/unlock in an emergency situation . . . . . . 4-13
Theft-alarm system . . . . . . . . . . . . . . . . . . . . . . . . 4-14 • Armed stage . . . . . . . . . . . . . . . . . . . . . . . . . . . . . . . . 4-14
• Theft-alarm stage . . . . . . . . . . . . . . . . . . . . . . . . . . . . 4-15
• Disarmed stage . . . . . . . . . . . . . . . . . . . . . . . . . . . . . . 4-16
Door locks . . . . . . . . . . . . . . . . . . . . . . . . . . . . . . . . 4-17 • From outside. . . . . . . . . . . . . . . . . . . . . . . . . . . . . . . . 4-17
• From inside . . . . . . . . . . . . . . . . . . . . . . . . . . . . . . . . . 4-18
• Deadlocks . . . . . . . . . . . . . . . . . . . . . . . . . . . . . . . . . . 4-20
• Door lock/unlock features . . . . . . . . . . . . . . . . . . . . . 4-20
• Child-protector rear door lock . . . . . . . . . . . . . . . . . 4-21
Tailgate . . . . . . . . . . . . . . . . . . . . . . . . . . . . . . . . . . 4-22 • Opening the tailgate. . . . . . . . . . . . . . . . . . . . . . . . . . 4-22
• Closing the tailgate . . . . . . . . . . . . . . . . . . . . . . . . . . 4-22
• Emergency tailgate safety release . . . . . . . . . . . . . . 4-23
Windows . . . . . . . . . . . . . . . . . . . . . . . . . . . . . . . . . 4-24 • Power windows. . . . . . . . . . . . . . . . . . . . . . . . . . . . . . 4-25
• Manual windows . . . . . . . . . . . . . . . . . . . . . . . . . . . . 4-27 Bonnet . . . . . . . . . . . . . . . . . . . . . . . . . . . . . . . . . . . 4-28
• Opening the bonnet . . . . . . . . . . . . . . . . . . . . . . . . . . 4-28
• Closing the bonnet . . . . . . . . . . . . . . . . . . . . . . . . . . . 4-29
Fuel filler lid . . . . . . . . . . . . . . . . . . . . . . . . . . . . . . 4-30 • Opening the fuel filler lid . . . . . . . . . . . . . . . . . . . . . 4-30
• Closing the fuel filler lid . . . . . . . . . . . . . . . . . . . . . . 4-30
Panorama sunroof . . . . . . . . . . . . . . . . . . . . . . . . . 4-33 • Sunroof open warning . . . . . . . . . . . . . . . . . . . . . . . . 4-33
• Sunshade . . . . . . . . . . . . . . . . . . . . . . . . . . . . . . . . . . . 4-34
• Sliding the sunroof . . . . . . . . . . . . . . . . . . . . . . . . . . . 4-34
• Tilting the sunroof . . . . . . . . . . . . . . . . . . . . . . . . . . . 4-34
• Closing the sunroof . . . . . . . . . . . . . . . . . . . . . . . . . . 4-35
• Resetting the sunroof . . . . . . . . . . . . . . . . . . . . . . . . . 4-36
Steering wheel . . . . . . . . . . . . . . . . . . . . . . . . . . . . 4-37 • Electronic power steering . . . . . . . . . . . . . . . . . . . . . 4-37
• Tilt & telescopic steering . . . . . . . . . . . . . . . . . . . . . . 4-38
• Heated steering wheel . . . . . . . . . . . . . . . . . . . . . . . . 4-38
• Horn . . . . . . . . . . . . . . . . . . . . . . . . . . . . . . . . . . . . . . 4-39
• Flex steering wheel. . . . . . . . . . . . . . . . . . . . . . . . . . . 4-40
Mirrors . . . . . . . . . . . . . . . . . . . . . . . . . . . . . . . . . . 4-42 • Inside rearview mirror . . . . . . . . . . . . . . . . . . . . . . . 4-42
• Outside rearview mirror . . . . . . . . . . . . . . . . . . . . . . 4-43
Instrument cluster (Normal vision) . . . . . . . . . . . 4-46 • Instrument panel illumination . . . . . . . . . . . . . . . . . 4-47
• Gauges . . . . . . . . . . . . . . . . . . . . . . . . . . . . . . . . . . . . . 4-47
• Manual transaxle shift indicator . . . . . . . . . . . . . . . 4-49
• Automatic transaxle shift position indicator . . . . . . 4-49
• Double clutch transmission shift indicator . . . . . . . 4-50
• Speed limiter indicator . . . . . . . . . . . . . . . . . . . . . . . 4-51
4
JD RHD 4a(~171).QXP 4/14/2015 6:55 PM Page 1
Page 692 of 1210
47
Features of your vehicle
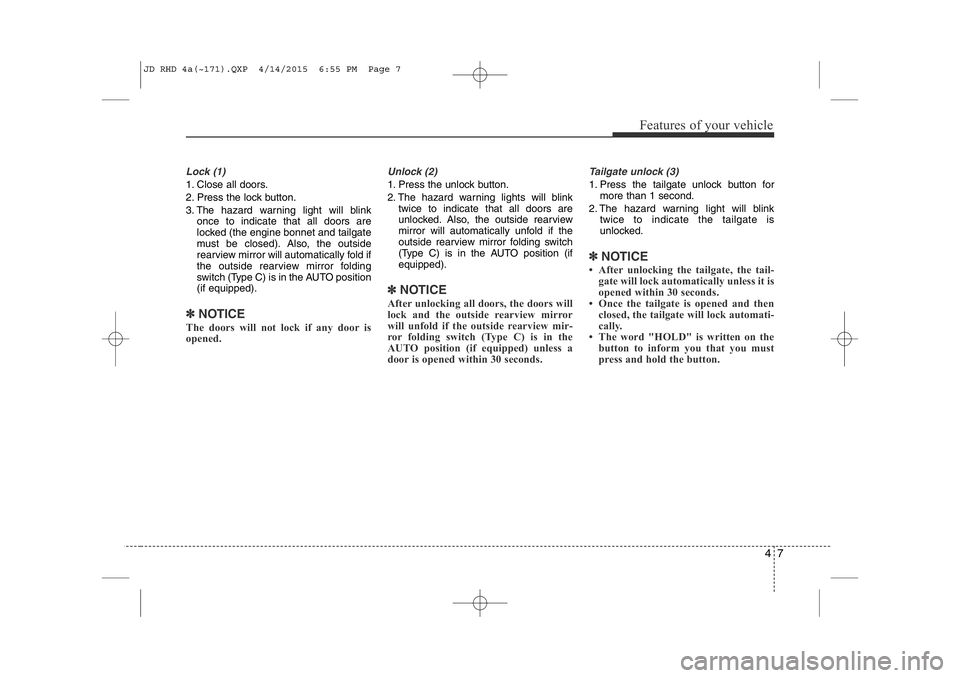
Lock (1)
1. Close all doors.
2. Press the lock button.
3. The hazard warning light will blinkonce to indicate that all doors are
locked (the engine bonnet and tailgate
must be closed). Also, the outside
rearview mirror will automatically fold if
the outside rearview mirror folding
switch (Type C) is in the AUTO position(if equipped).
✽NOTICE
The doors will not lock if any door is
opened.
Unlock (2)
1. Press the unlock button.
2. The hazard warning lights will blink twice to indicate that all doors are
unlocked. Also, the outside rearview
mirror will automatically unfold if the
outside rearview mirror folding switch
(Type C) is in the AUTO position (ifequipped).
✽NOTICE
After unlocking all doors, the doors will
lock and the outside rearview mirror
will unfold if the outside rearview mir-
ror folding switch (Type C) is in the
AUTO position (if equipped) unless a
door is opened within 30 seconds.
Tailgate unlock (3)
1. Press the tailgate unlock button for more than 1 second.
2. The hazard warning light will blink twice to indicate the tailgate is
unlocked.
✽NOTICE
• After unlocking the tailgate, the tail- gate will lock automatically unless it is
opened within 30 seconds.
• Once the tailgate is opened and then closed, the tailgate will lock automati-
cally.
• The word "HOLD" is written on the button to inform you that you must
press and hold the button.
JD RHD 4a(~171).QXP 4/14/2015 6:55 PM Page 7
Page 696 of 1210
411
Features of your vehicle
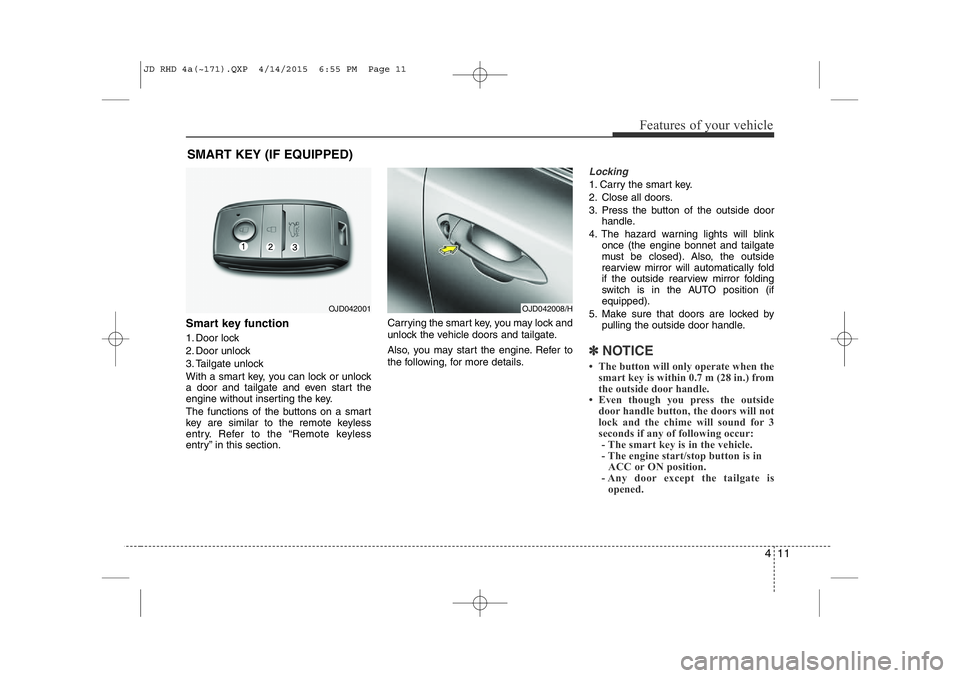
SMART KEY (IF EQUIPPED)
Smart key function
1. Door lock
2. Door unlock
3. Tailgate unlock
With a smart key, you can lock or unlock
a door and tailgate and even start the
engine without inserting the key.
The functions of the buttons on a smart
key are similar to the remote keyless
entry. Refer to the “Remote keyless
entry” in this section. Carrying the smart key, you may lock and
unlock the vehicle doors and tailgate.
Also, you may start the engine. Refer to
the following, for more details.
Locking
1. Carry the smart key.
2. Close all doors.
3. Press the button of the outside door
handle.
4. The hazard warning lights will blink once (the engine bonnet and tailgate
must be closed). Also, the outside
rearview mirror will automatically fold
if the outside rearview mirror folding
switch is in the AUTO position (if equipped).
5. Make sure that doors are locked by pulling the outside door handle.
✽NOTICE
• The button will only operate when the smart key is within 0.7 m (28 in.) from
the outside door handle.
• Even though you press the outside
door handle button, the doors will not
lock and the chime will sound for 3
seconds if any of following occur:- The smart key is in the vehicle.
- The engine start/stop button is in ACC or ON position.
- Any door except the tailgate is opened.
OJD042001OJD042008/H
JD RHD 4a(~171).QXP 4/14/2015 6:55 PM Page 11
Page 699 of 1210
Features of your vehicle
14
4
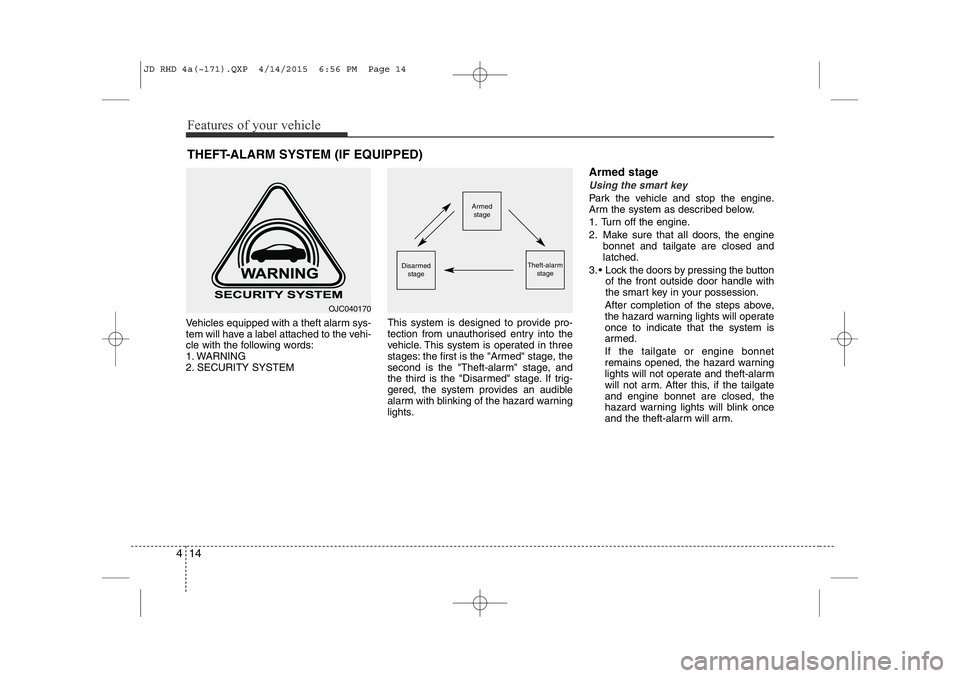
Vehicles equipped with a theft alarm sys-
tem will have a label attached to the vehi-
cle with the following words:
1. WARNING
2. SECURITY SYSTEM This system is designed to provide pro-
tection from unauthorised entry into the
vehicle. This system is operated in three
stages: the first is the "Armed" stage, the
second is the "Theft-alarm" stage, and
the third is the "Disarmed" stage. If trig-
gered, the system provides an audible
alarm with blinking of the hazard warning
lights.Armed stage
Using the smart key
Park the vehicle and stop the engine.
Arm the system as described below.
1. Turn off the engine.
2. Make sure that all doors, the engine
bonnet and tailgate are closed and latched.
3. • Lock the doors by pressing the button of the front outside door handle with
the smart key in your possession.
After completion of the steps above,
the hazard warning lights will operateonce to indicate that the system is
armed. If the tailgate or engine bonnet
remains opened, the hazard warning
lights will not operate and theft-alarm
will not arm. After this, if the tailgateand engine bonnet are closed, the
hazard warning lights will blink once
and the theft-alarm will arm.
THEFT-ALARM SYSTEM (IF EQUIPPED)Armed
stage
Theft-alarm stageDisarmed
stage
OJC040170
JD RHD 4a(~171).QXP 4/14/2015 6:56 PM Page 14
Page 700 of 1210
415
Features of your vehicle
• Lock the doors by pressing the lockbutton on the smart key.
After completion of the steps above,
the hazard warning lights will operate once to indicate that the system is
armed. If the tailgate or engine bonnet
remains opened, the hazard warning
lights will not operate and theft-alarm
will not arm. After this, if the tailgateand engine bonnet are closed, the
hazard warning lights will blink once
and the theft-alarm will arm.Using the transmitter
Park the vehicle and stop the engine.
Arm the system as described below.
1. Turn off the engine and remove the ignition key from the ignition switch.
2. Make sure that all doors, the engine bonnet and tailgate are closed andlatched.
3. Lock the doors by pressing the lock button on the transmitter.
After completion of the steps above,
the hazard warning lights will blink once to indicate that the system is
armed.
If the tailgate or engine bonnet remains opened, the hazard warning lights will
not operate and theft-alarm will not
arm. After this, if the tailgate andengine bonnet are closed, the hazard
warning lights will blink once and the
theft-alarm will arm.
• Do not arm the system until all pas- sengers have left the vehicle. If thesystem is armed whilst a passen-
ger(s) remains in the vehicle, the
alarm may be activated when the
remaining passenger(s) leave the
vehicle. If any door, tailgate orengine bonnet is opened within 30seconds after entering the armed
stage, the system is disarmed to
prevent unnecessary alarm. Theft-alarm stage
The alarm will be activated if any of the
following occurs whilst the system is
armed.
• A front or rear door is opened without
using transmitter or smart key.
• The tailgate is opened without using transmitter or smart key.
• The engine bonnet is opened.The siren will sound and the hazard
warning lights will blink continuously for
27 seconds, unless the system is dis-
armed. To turn off the system, unlock the
doors with the transmitter or smart key.
JD RHD 4a(~171).QXP 4/14/2015 6:56 PM Page 15
Page 713 of 1210

Features of your vehicle
28
4
Opening the bonnet
1. Pull the release lever to unlatch the
bonnet. The bonnet should pop open
slightly. 2. Go to the front of the vehicle, raise the
bonnet slightly, push the secondarylatch inside of the bonnet centre andlift the bonnet. 3. Pull out the support rod.
4. Hold the bonnet opened with the sup-
port rod.
BONNET
OJD042022R
WARNING
Open the bonnet after turning off
the engine on a flat surface, shift-
ing the shift lever to the P(Park)
position for automatic transaxle
and to the 1(First) gear or
R(Reverse) for manual transaxle,
and setting the parking brake.
WARNING - Hot parts
Be very careful not to touch the
support rod when the engine and
parts are hot. You could get burned
or get seriously injured.
OJD042023OJD042024
JD RHD 4a(~171).QXP 4/14/2015 6:57 PM Page 28
Page 714 of 1210
429
Features of your vehicle
Closing the bonnet
1. Before closing the bonnet, check thefollowing:
• All filler caps in engine compartment must be correctly installed.
• Gloves, rags or any other com- bustible material must be removed
from the engine compartment.
2. Return the support rod to its clip to prevent it from rattling.
3. Lower the bonnet until it is about 30 cm (1 ft.) above the closed position
and let it drop. Make sure that it locks
into place.
WARNING - Bonnet
• Before closing the bonnet, ensure that all obstructions are
removed from the bonnet open-
ing. Closing the bonnet with anobstruction present in the bonnet
opening may result in property
damage or severe personal
injury.
• Do not leave gloves, rags or any other combustible material in the
engine compartment. Doing so
may cause a heat-induced fire.WARNING
• Always double check to be sure that the bonnet is firmly latched
before driving away. If it is not
latched, the bonnet could fly
open whilst the vehicle is being
driven, causing a total loss of vis-
ibility, which might result in an accident.
• The support rod must be inserted completely into the hole whenev-
er you inspect the engine com-
partment. This will prevent the
bonnet from falling and possibly
injuring you.
• Do not move the vehicle with the bonnet raised. The view will be
blocked and the bonnet could fall
or be damaged.
JD RHD 4a(~171).QXP 4/14/2015 6:57 PM Page 29
Page 819 of 1210
Features of your vehicle
134
4
Operation Tips
• To keep dust or unpleasant fumes from
entering the vehicle through the venti-
lation system, temporarily set the air
intake control to the recirculated air
position. Be sure to return the control
to the fresh air position when the irrita-
tion has passed to keep fresh air in the
vehicle. This will help keep the driver
alert and comfortable.
• Air for the heating/cooling system is drawn in through the grilles just ahead
of the windscreen. Care should be
taken that these are not blocked by
leaves, snow, ice or other obstructions.
• To prevent interior fog on the wind- screen, set the air intake control to the
fresh air position and fan speed to the
desired position, turn on the air condi- tioning system, and adjust the temper-
ature control to desired temperature.Air conditioning (if equipped)
Kia Air Conditioning Systems are filled
with environmentally friendly refrigerant*.
1. Start the engine. Push the air condi- tioning button.
2. Set the mode to the position.
3. Set the air intake control to the outside air or recirculated air position.
4. Adjust the fan speed control and tem- perature control to maintain maximum
comfort.
*: Your vehicle is filled with R-134a or R- 1234yf according to the regulation in
your country at the time of producing.
You can find out which air conditioning
refrigerant is applied to your vehicle at
the label inside of bonnet. Refer to sec-
tion 8 for more detail location of air
conditioning refrigerant label.CAUTION
• The refrigerant system should
only be serviced by trained andcertified technicians to insureproper and safe operation.
• The refrigerant system should be serviced in a well-ventilatedplace.
• The air conditioning evaporator (cooling coil) shall never berepaired or replaced with one
removed from a used or salvagedvehicle and new replacement MAC evaporators shall be certi-fied (and labeled) as meeting SAE
Standard J2842.
JD RHD 4a(~171).QXP 4/14/2015 7:04 PM Page 134