engine KIA CERATO 2005 User Guide
[x] Cancel search | Manufacturer: KIA, Model Year: 2005, Model line: CERATO, Model: KIA CERATO 2005Pages: 318, PDF Size: 58.49 MB
Page 91 of 318
Knowing your vehicle
80
3
1 23456789
WARNING
Automotive fuels are flamma-
ble/explosive materials. When
refueling, please note the fol-
lowing guidelines carefully.
Failure to follow these guide-
lines may result in severe per-
sonal injury, severe burns or
death by fire or explosion.
Before refueling always note the location of the Emergency
Gasoline Shut-Off, if available,
at the gas station facility.
Before touching the fuel noz- zle or fuel filler cap, you
should eliminate potentially
dangerous static electricity
discharge by touching anoth-
er metal part of the front of the
vehicle, a safe distance away
from the fuel filler neck, noz-
zle, or other gas source.
(Continued)(Continued)
Do not get back into a vehicleonce you have begun refuel-
ing. Do not touch, rub or slide
against any item or fabric
(polyester, satin, nylon, etc.)
capable of producing static
electricity. Static electricity
discharge can ignite fuel
vapors resulting in explosion.
If you must re-enter the vehi-
cle, you should once again
eliminate potentially danger-ous static electricity dis-
charge by touching a metal
part of the vehicle, away from
the fuel filler neck, nozzle or
other gasoline source.
When using a portable fuel container be sure to place the
container on the ground prior
to refueling. Static electricity
discharge from the container
can ignite fuel vapors causing
a fire. Once refueling has
begun, contact with the vehi-
cle should be maintained until
the filling is complete.
(Continued)(Continued)
Use only portable fuel con-
tainers designed to carry and
store gasoline.
Do not use cellular phones around a gas station or while
refueling any vehicle. Electric
current and/or electronic
interference from cellular
phones can potentially ignite
fuel vapors causing a fire. If
you must use your cellular
phone use it in a place away
from the gas station.
When refueling always shut the engine off. Sparks pro-
duced by electrical compo-nents related to the engine
can ignite fuel vapors causing
a fire. Always insure that the
engine is OFF before and dur-
ing refueling. Once refueling
is complete, check to makesure the fuel filler cap and
door are securely closed,
before starting the engine.
(Continued)
Page 96 of 318
385
1 23456789
Knowing your vehicle
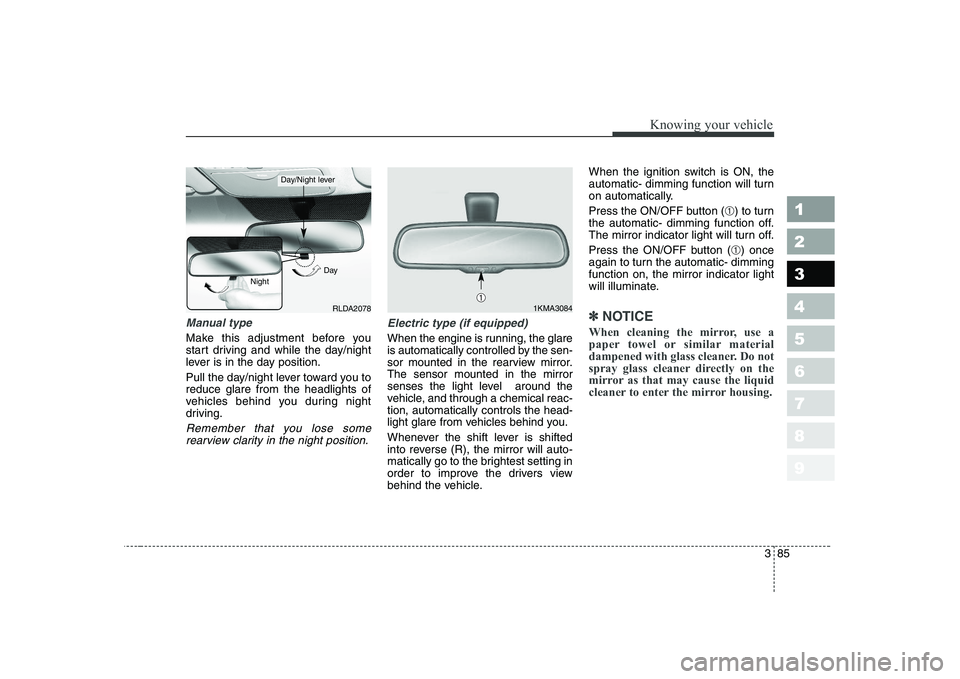
Manual type
Make this adjustment before you
start driving and while the day/night
lever is in the day position.
Pull the day/night lever toward you to reduce glare from the headlights of
vehicles behind you during night
driving.
Remember that you lose somerearview clarity in the night position.
Electric type (if equipped)
When the engine is running, the glare
is automatically controlled by the sen-
sor mounted in the rearview mirror.The sensor mounted in the mirror
senses the light level around the
vehicle, and through a chemical reac-tion, automatically controls the head-
light glare from vehicles behind you.
Whenever the shift lever is shifted
into reverse (R), the mirror will auto-
matically go to the brightest setting in
order to improve the drivers view
behind the vehicle. When the ignition switch is ON, the
automatic- dimming function will turn
on automatically.
Press the ON/OFF button (
➀) to turn
the automatic- dimming function off.
The mirror indicator light will turn off.
Press the ON/OFF button ( ➀) once
again to turn the automatic- dimming function on, the mirror indicator light
will illuminate.
✽✽ NOTICE
When cleaning the mirror, use a
paper towel or similar material
dampened with glass cleaner. Do not
spray glass cleaner directly on the
mirror as that may cause the liquid
cleaner to enter the mirror housing.RLDA2078
Day
Night
Day/Night lever
1KMA3084➀
Page 102 of 318
391
1 23456789
Knowing your vehicle
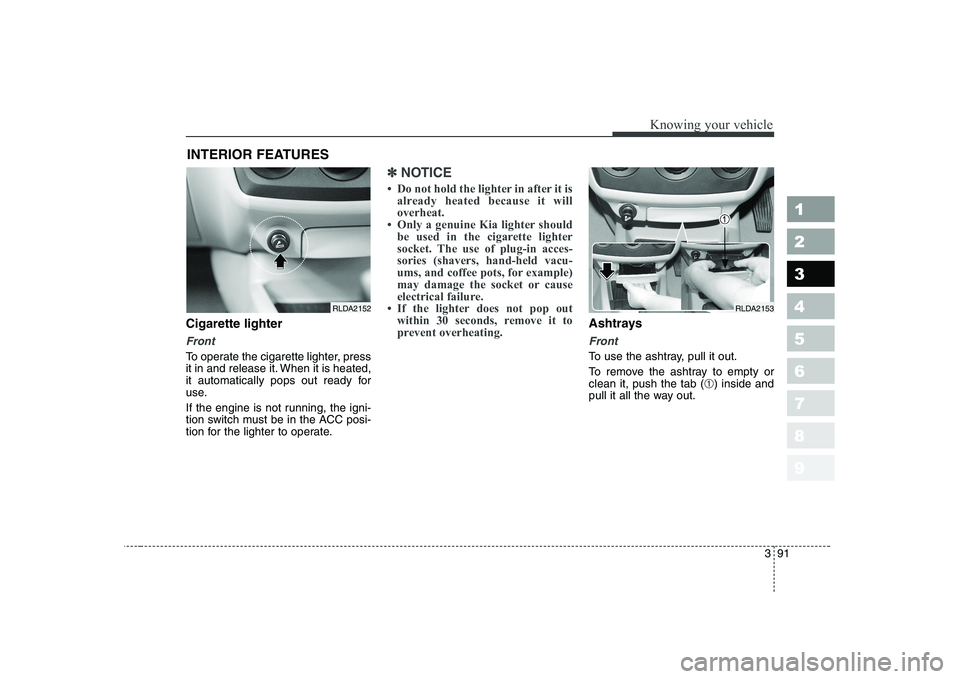
Cigarette lighter
Front
To operate the cigarette lighter, press
it in and release it. When it is heated,
it automatically pops out ready for
use.
If the engine is not running, the igni-
tion switch must be in the ACC posi-
tion for the lighter to operate.
✽✽NOTICE
Page 105 of 318
Knowing your vehicle
94
3
1 23456789
✽✽
NOTICE
Close the vanity mirror cover
securely and return the sunvisor to
its original position after use.
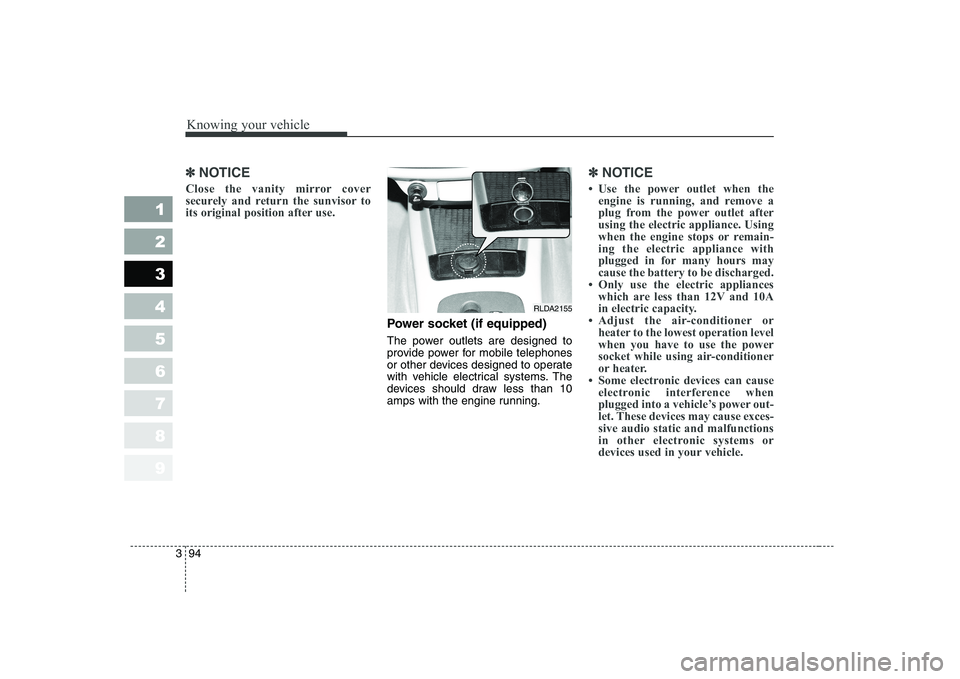
Power socket (if equipped)
The power outlets are designed to
provide power for mobile telephones
or other devices designed to operate
with vehicle electrical systems. The
devices should draw less than 10
amps with the engine running.
✽✽ NOTICE
Page 113 of 318
1 23456789Ignition switch / 4-2
Starting the engine / 4-4Manual transaxle / 4-7Automatic transaxle / 4-8Brake system / 4-15
Steering wheel / 4-22
Cruise control system / 4-25
Traction control system / 4-30
Instrument cluster / 4-33Gauges / 4-34
Warnings and indicators / 4-38Lighting / 4-46
Wipers and washers / 4-52
Defroster / 4-55
Hazard warning flasher / 4-56
Manual climate control system / 4-57
Automatic climate control system / 4-66
Windshield defrosting and defogging / 4-79Theft-alarm system / 4-84
Driving your vehicle
Page 114 of 318
Driving your vehicle
2
4
1 23456789
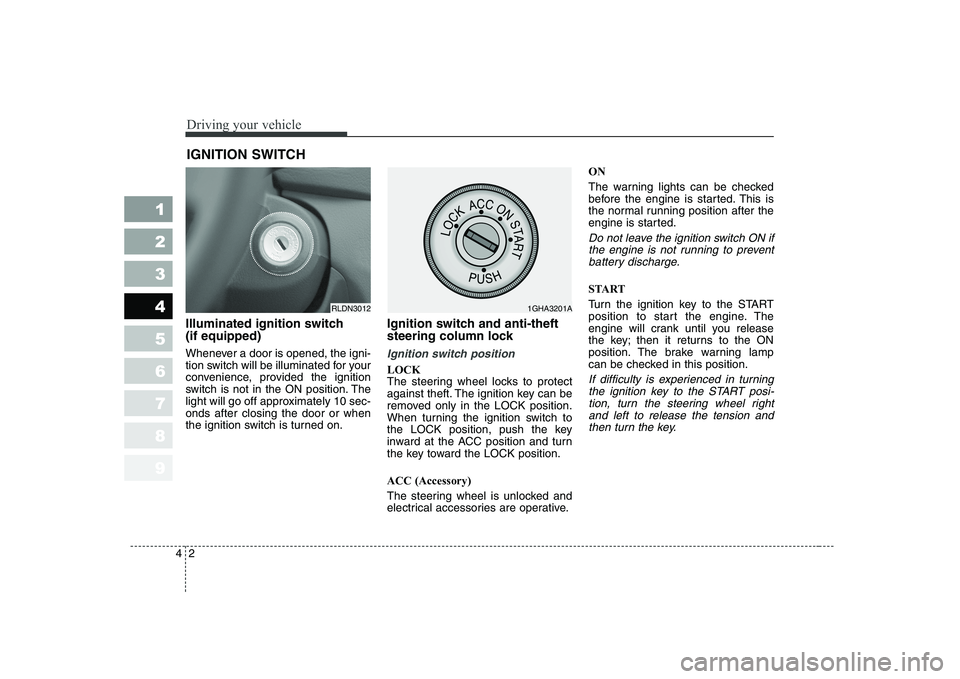
Illuminated ignition switch (if equipped)
Whenever a door is opened, the igni-
tion switch will be illuminated for your
convenience, provided the ignition
switch is not in the ON position. The
light will go off approximately 10 sec-onds after closing the door or when
the ignition switch is turned on. Ignition switch and anti-theft
steering column lock
Ignition switch position
LOCK
The steering wheel locks to protect
against theft. The ignition key can be
removed only in the LOCK position.
When turning the ignition switch to
the LOCK position, push the key
inward at the ACC position and turn
the key toward the LOCK position. ACC (Accessory)
The steering wheel is unlocked and
electrical accessories are operative.ON
The warning lights can be checked
before the engine is started. This is
the normal running position after the
engine is started.
Do not leave the ignition switch ON if
the engine is not running to preventbattery discharge.
START
Turn the ignition key to the START
position to start the engine. The
engine will crank until you release
the key; then it returns to the ON
position. The brake warning lamp
can be checked in this position.
If difficulty is experienced in turning the ignition key to the START posi-tion, turn the steering wheel rightand left to release the tension and then turn the key.
IGNITION SWITCH
RLDN30121GHA3201A
Page 115 of 318
43
1 23456789
Driving your vehicle
WARNING - Ignition key
• Never turn the ignition switch to LOCK or ACC while the
vehicle is moving. This wouldresult in loss of directional
control and braking function,
which could cause an immedi-ate accident.
The anti-theft steering column lock is not a substitute for the
parking brake. Before leaving
the driver’s seat, always make
sure the shift lever is engagedin 1 st
gear for manual transaxle
or P (Park) for automatic
transaxle, set the parking
brake fully and shut the
engine off. Unexpected and
sudden vehicle movement
may occur if these precau-tions are not taken.
(Continued)(Continued)
Never reach for the ignitionswitch, or any other controls
through the steering wheel
while the vehicle is in motion.
The presence of your hand orarm in this area could cause a
loss of vehicle control, an
accident and serious bodily
injury or death.
Do not place any movable objects around the driver’s
seat as they may move while
driving, interfere with the driv-er and lead to an accident.
Page 116 of 318
Driving your vehicle
4
4
1 23456789
Starting the gasoline engine
1. Make sure the parking brake is
applied.
2. Manual Transaxle - Depress the
clutch pedal fully and shift the
transaxle into Neutral. Keep the
clutch pedal depressed while turn-
ing the ignition switch to the startposition.
Automatic Transaxle - Place the
transaxle shift lever in P (Park).
Depress the brake pedal fully.
You can also start the engine
when the shift lever is in the N(Neutral) position.
3. Turn the ignition switch to START and hold it there until the engine
starts (a maximum of 10 seconds),
then release the key.
4. In extremely cold weather (below -18°C / 0°F) or after the vehicle
has not been operated for several
days, let the engine warm up with-
out depressing the accelerator.
Whether the engine is cold or warm,
it should be started without
depressing the accelerator.
✽✽
NOTICE
Do not engage the starter for more than 10 seconds. If the engine stalls
or fails to start, wait 5 to 10 seconds
before re-engaging the starter.
Improper use of the starter maydamage it.
STARTING THE ENGINE
CAUTION
If the engine stalls while you are in motion, do not attempt tomove the shift lever to the P(Park) position. If traffic and road conditions permit, you mayput the shift lever in the N(Neutral) position while thevehicle is still moving and turn the ignition switch to the STARTposition in an attempt to restartthe engine.
Page 117 of 318
45
1 23456789
Driving your vehicle
Starting the diesel engine
To start the diesel engine when the engine is cold, it has to be pre-heat-
ed before starting the engine and
then have to be warmed up before
starting the driving.
1. Make sure the parking brake isapplied.
2. Manual Transaxle - Depress the
clutch pedal fully and shift the
Transaxle into the Neutral. Keepthe clutch pedal depressed while
cranking the engine.
Automatic Transaxle - Place the
Transaxle shift lever in P(park).
Depress the brake pedal fully.
You can also start the engine when
the shift lever is in the N(neutral) position.
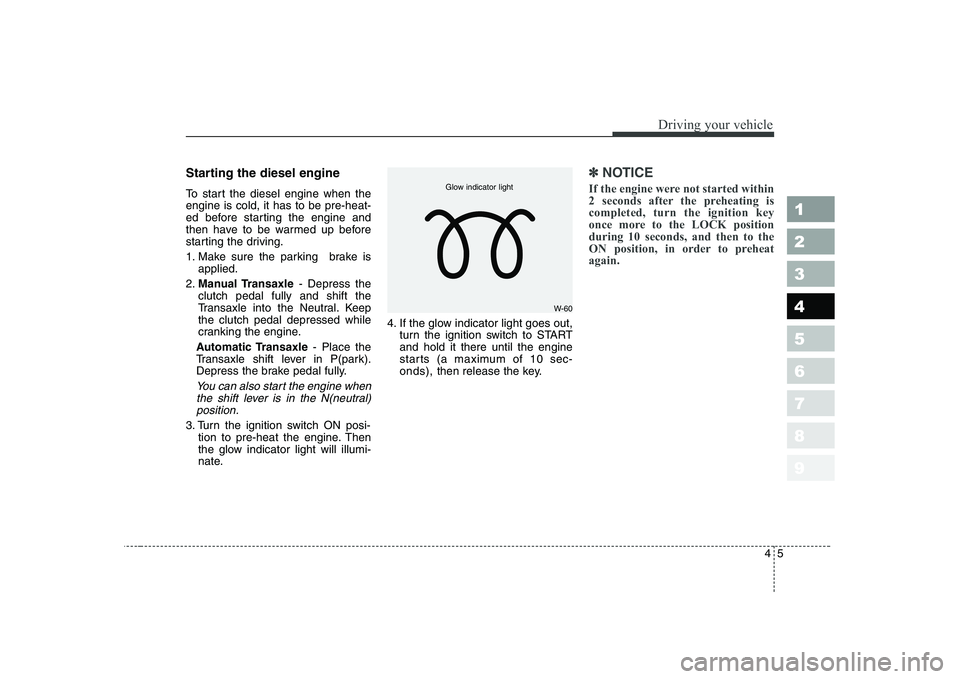
3. Turn the ignition switch ON posi- tion to pre-heat the engine. Then
the glow indicator light will illumi-
nate. 4. If the glow indicator light goes out,
turn the ignition switch to STARTand hold it there until the engine
starts (a maximum of 10 sec-onds), then release the key.
✽✽
NOTICE
If the engine were not started within
2 seconds after the preheating iscompleted, turn the ignition key
once more to the LOCK positionduring 10 seconds, and then to the
ON position, in order to preheatagain.
W-60
Glow indicator light
Page 118 of 318
Driving your vehicle
6
4
1 23456789
Starting and stopping the
engine for turbo charger
intercooler
1. Do not race or accelerate the
engine immediately after starting.
If the engine is cold, allow the
engine to idle for several seconds
before it is driven to ensure suffi-
cient lubrication of the turbocharger unit.
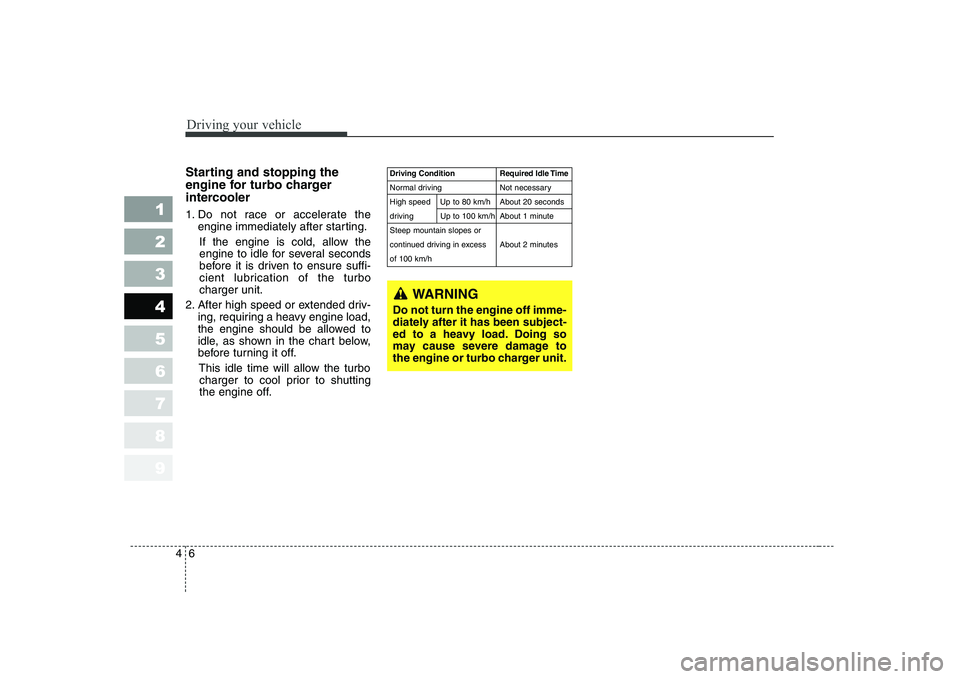
2. After high speed or extended driv- ing, requiring a heavy engine load,
the engine should be allowed to
idle, as shown in the chart below,
before turning it off.
This idle time will allow the turbocharger to cool prior to shutting
the engine off.
WARNING
Do not turn the engine off imme-
diately after it has been subject-
ed to a heavy load. Doing so
may cause severe damage to
the engine or turbo charger unit.
Driving Condition Required Idle Time
Normal driving Not necessary
High speed Up to 80 km/h About 20 seconds
driving Up to 100 km/h About 1 minuteSteep mountain slopes or
continued driving in excess About 2 minutesof 100 km/h