KIA CERATO 2008 Owner's Manual
Manufacturer: KIA, Model Year: 2008, Model line: CERATO, Model: KIA CERATO 2008Pages: 327, PDF Size: 42.19 MB
Page 21 of 327
311
1 23456789
Knowing your vehicle
1. Open the rear door.
2. Push the child safety lock locatedon the rear edge of the door to the
“lock” position. When the child
safety lock is in the “lock ( )”position, rear door will not openwhen the inner door handle is
pulled inside the vehicle.
3. Close the rear door.
4. To open the rear door, pull the out- side door handle.
Even though the doors may be
unlocked, the rear door will not open
by pulling the inner door handle ( 1)
until rear door child safety lock is
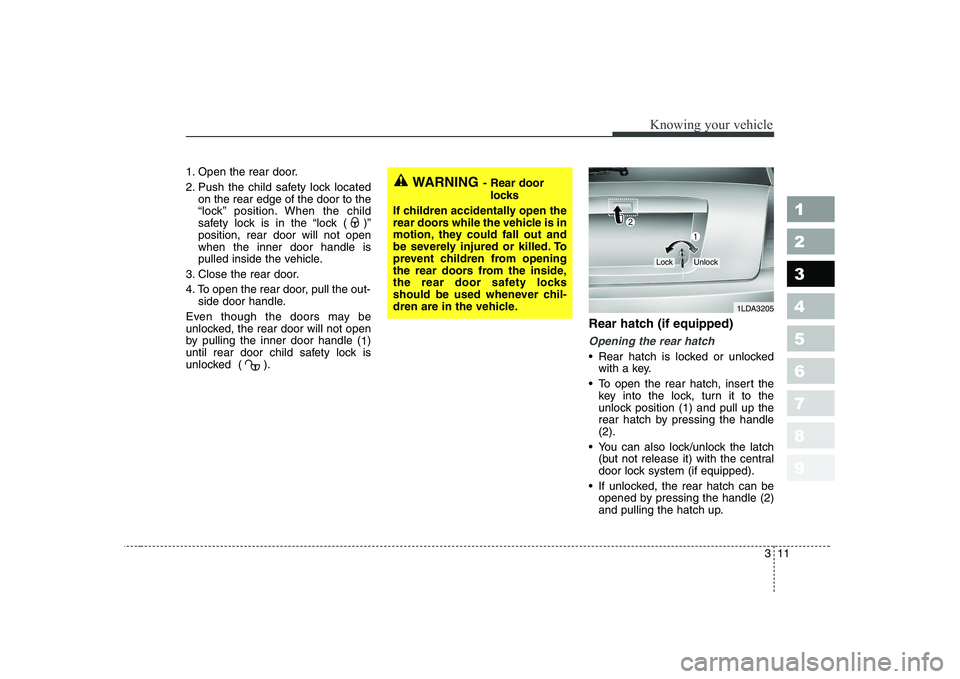
unlocked ( ). Rear hatch (if equipped)
Opening the rear hatch
Rear hatch is locked or unlocked
with a key.
To open the rear hatch, insert the key into the lock, turn it to the
unlock position (1) and pull up the
rear hatch by pressing the handle(2).
You can also lock/unlock the latch (but not release it) with the central
door lock system (if equipped).
If unlocked, the rear hatch can be opened by pressing the handle (2)
and pulling the hatch up.
WARNING - Rear door
locks
If children accidentally open the
rear doors while the vehicle is in
motion, they could fall out and
be severely injured or killed. To
prevent children from opening
the rear doors from the inside,
the rear door safety locks
should be used whenever chil-
dren are in the vehicle.
1LDA3205
LockUnlock
Page 22 of 327
Knowing your vehicle
12
3
1 23456789
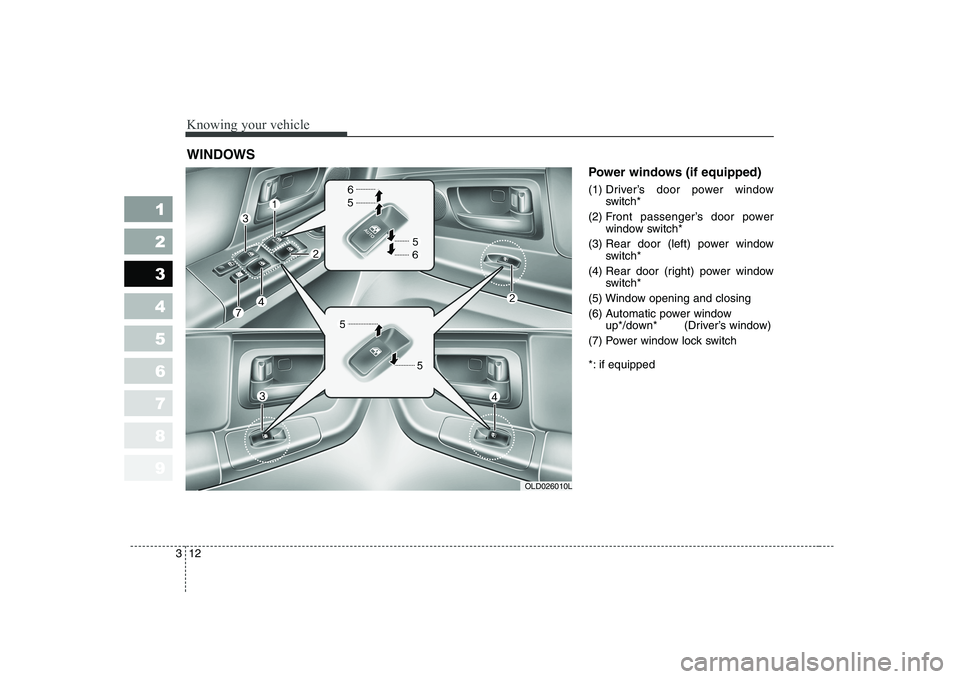
Power windows (if equipped)
(1) Driver’s door power window
switch*
(2) F ront passenger’s door power
window switch*
(3) Rear door (left) power window switch*
(4) Rear door (right) power window switch*
(5) Window opening and closing
(6) Automatic power window up*/down* (Driver’s window)
(7) Power window lock switch
*: if equipped
WINDOWS
OLD026010L
Page 23 of 327
313
1 23456789
Knowing your vehicle
Power windows
The ignition switch must be in the ON
position for power windows to oper-
ate. Each door has a power window
switch that controls the door’s win-
dow. However, the driver has a power
window lock switch which can block
the operation of passenger windows.
The power windows can be operated
for approximately 30 seconds after
the ignition key is removed or turned
to the ACC or LOCK position.
However, if the front doors are
opened, the power windows cannot
be operated even within the 30 sec-
onds after the ignition key removal.
While driving, if you notice buffeting
and pulsation (wind shock) with
either side window open, you should
open the opposite window slightly toreduce the condition.
Window opening and closing
The driver’s door has a master power
window switch that controls all the
windows in the vehicle.
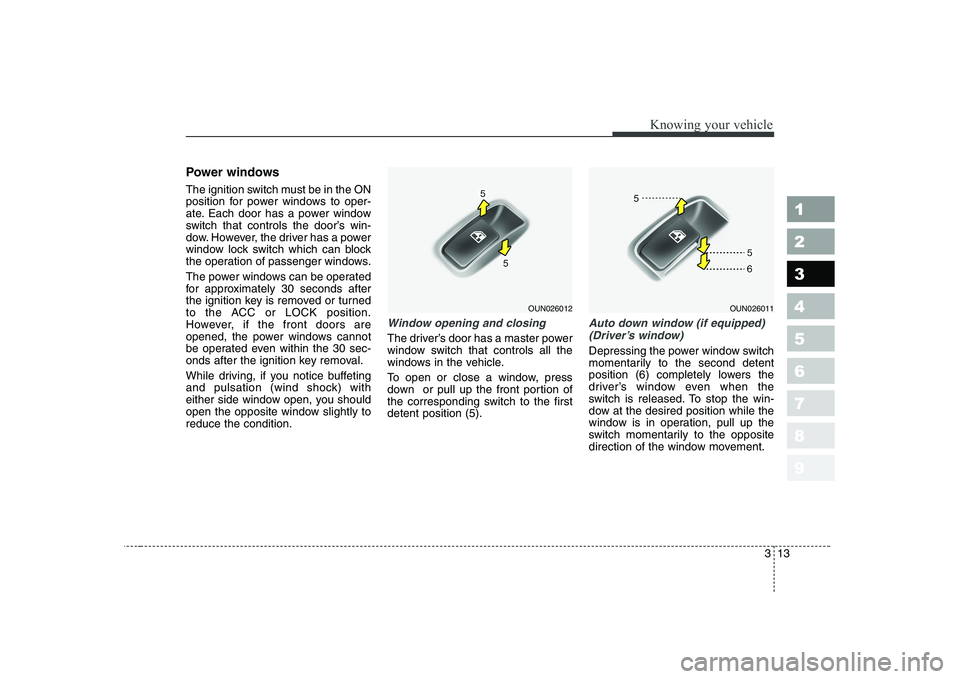
To open or close a window, press
down or pull up the front portion of
the corresponding switch to the firstdetent position (5).
Auto down window (if equipped) (Driver’s window)
Depressing the power window switch
momentarily to the second detent
position (6) completely lowers the
driver’s window even when the
switch is released. To stop the win-
dow at the desired position while the
window is in operation, pull up the
switch momentarily to the opposite
direction of the window movement.
OUN026011OUN026012
Page 24 of 327
Knowing your vehicle
14
3
1 23456789
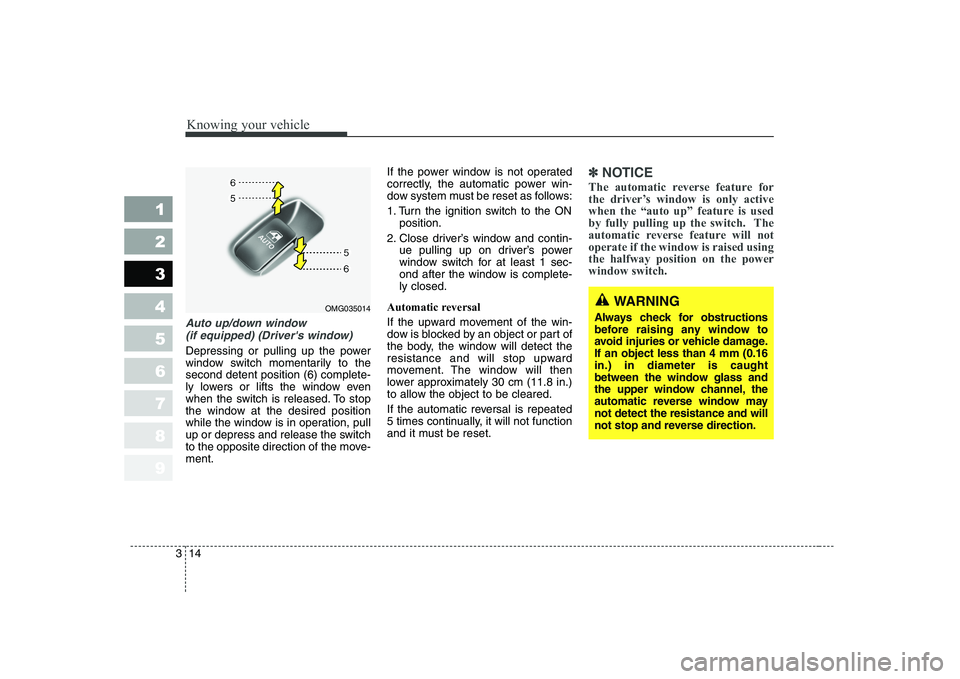
Auto up/down window
(if equipped) (Driver's window)
Depressing or pulling up the power
window switch momentarily to thesecond detent position (6) complete-
ly lowers or lifts the window even
when the switch is released. To stop
the window at the desired position
while the window is in operation, pull
up or depress and release the switch
to the opposite direction of the move-ment. If the power window is not operated
correctly, the automatic power win-
dow system must be reset as follows:
1. Turn the ignition switch to the ON
position.
2. Close driver’s window and contin- ue pulling up on driver’s power
window switch for at least 1 sec-
ond after the window is complete-ly closed.
Automatic reversal
If the upward movement of the win-
dow is blocked by an object or part of
the body, the window will detect the
resistance and will stop upward
movement. The window will then
lower approximately 30 cm (11.8 in.)
to allow the object to be cleared.
If the automatic reversal is repeated
5 times continually, it will not function
and it must be reset.
✽✽ NOTICE
The automatic reverse feature for
the driver’s window is only active
when the “auto up” feature is used
by fully pulling up the switch. The
automatic reverse feature will notoperate if the window is raised usingthe halfway position on the powerwindow switch.
WARNING
Always check for obstructions
before raising any window to
avoid injuries or vehicle damage.If an object less than 4 mm (0.16in.) in diameter is caught
between the window glass and
the upper window channel, the
automatic reverse window maynot detect the resistance and will
not stop and reverse direction.OMG035014
Page 25 of 327
315
1 23456789
Knowing your vehicle
CAUTION
To prevent the power windowsystem from the possibility of damage, do not open or closetwo windows at the same time.This will also ensure the longevity of the fuse.
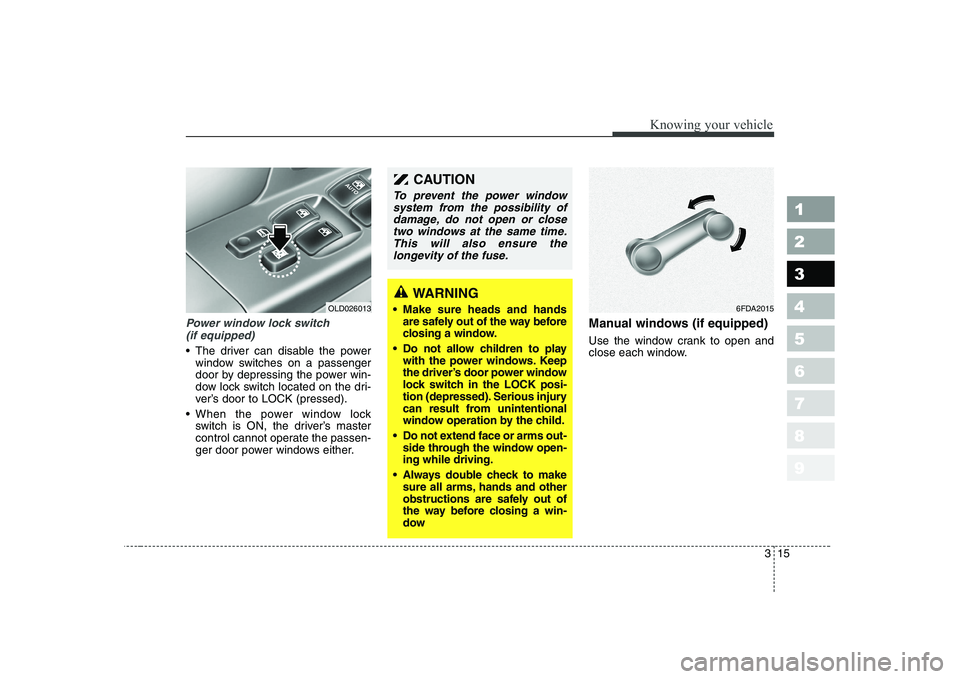
Power window lock switch
(if equipped)
The driver can disable the power window switches on a passenger
door by depressing the power win-
dow lock switch located on the dri-
ver’s door to LOCK (pressed).
When the power window lock switch is ON, the driver’s master
control cannot operate the passen-
ger door power windows either. Manual windows (if equipped)
Use the window crank to open and
close each window.
OLD026013
WARNING
Make sure heads and hands are safely out of the way before
closing a window.
Do not allow children to play with the power windows. Keep
the driver’s door power window
lock switch in the LOCK posi-
tion (depressed). Serious injury
can result from unintentional
window operation by the child.
Do not extend face or arms out- side through the window open-ing while driving.
Always double check to make sure all arms, hands and other
obstructions are safely out of
the way before closing a win-
dow
6FDA2015
Page 26 of 327
Knowing your vehicle
16
3
1 23456789
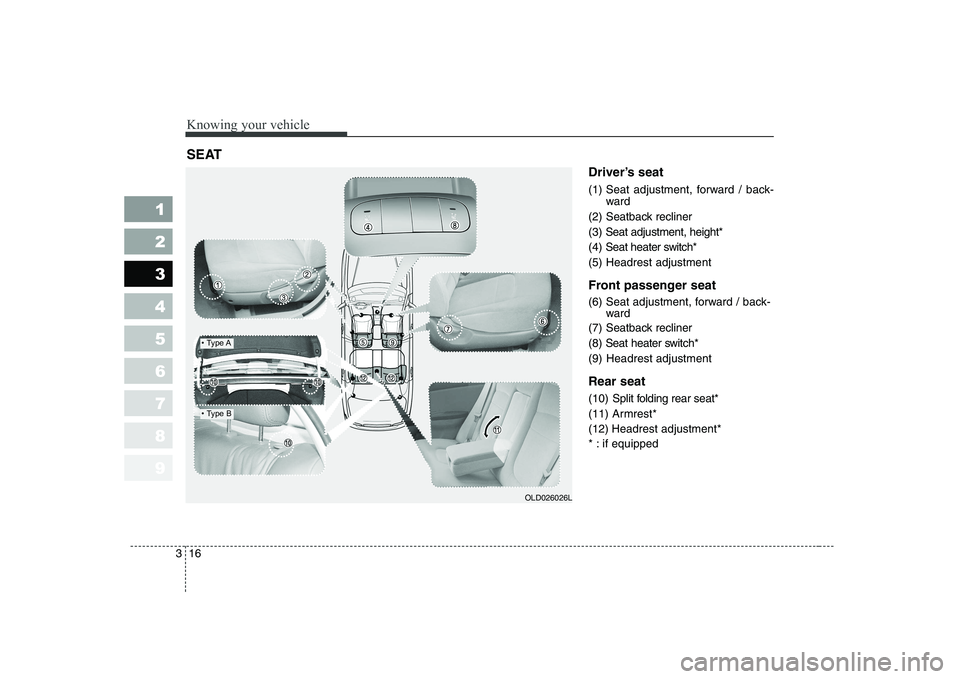
Driver’s seat
(1) Seat adjustment, forward / back-
ward
(2) Seatback recliner
(3) Seat adjustment, height*
(4) Seat heater switch*(5) Headrest adjustment
Front passenger seat
(6) Seat adjustment, forward / back- ward
(7) Seatback recliner (8)
Seat heater switch*
(9) Headrest adjustment Rear seat (10) Split folding rear seat*
(11) Armrest*
(12) Headrest adjustment*
* : if equipped
SEAT
OLD026026L
Page 27 of 327
317
1 23456789
Knowing your vehicle
(Continued)
your seatback upright and the
lap portion of the safety belt,
or lap belt, snug and low
across the hips. This position
puts your safety belts in the
best position to protect you incase of an accident.
In order to avoid unnecessary airbag injuries including the
possibility of severe injury or
death, always sit as far back
as possible from the steering
wheel so that your chest is
away at least 250 mm (10 inch-
es) away from the steeringwheel.WARNING
Loose objects in the driver’s foot area could interfere with
the operation of the foot ped-
als, possibly causing an acci-
dent. Loose objects might
interfere with the seat slide
mechanism. Do not place any-
thing under the front seats.
Children should never be left unattended in the car.WARNING - Driver’s seat
Never attempt to adjust seat while the vehicle is moving. This could result in loss of
control, and an accident caus-
ing death, serious injury, or
property damage.
fere with the normal position
of the seatback. Storing items
against a seatback or in any
other way interfering with
proper locking of a seatbackcould result in serious or fatal
injury in a sudden stop or col-lision.
(Continued)
Page 28 of 327
Knowing your vehicle
18
3
1 23456789
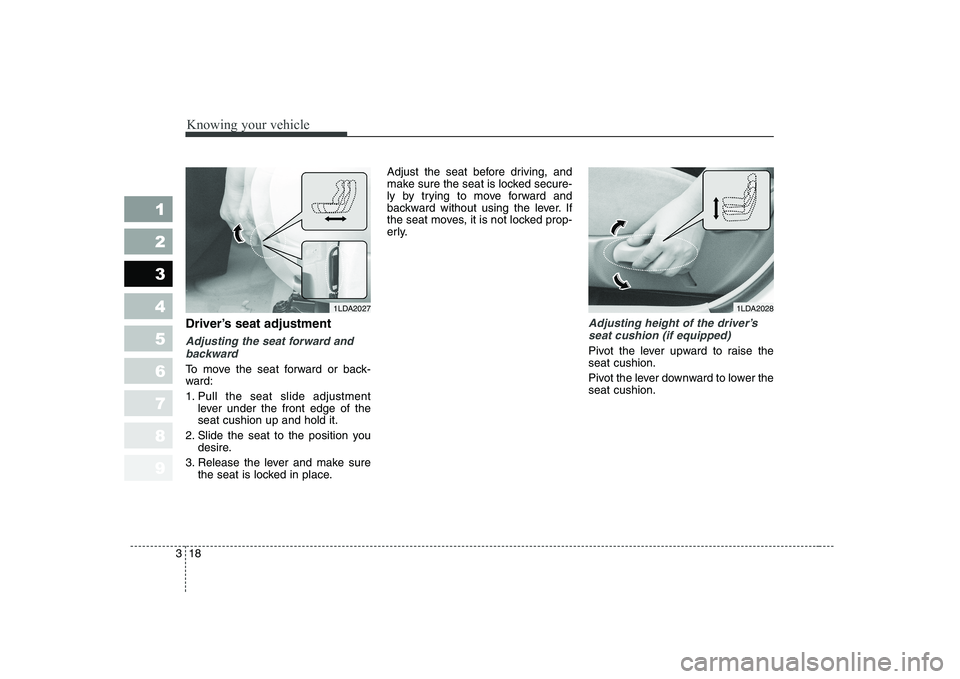
Driver’s seat adjustment
Adjusting the seat forward and
backward
To move the seat forward or back-
ward:
1. Pull the seat slide adjustment lever under the front edge of the seat cushion up and hold it.
2. Slide the seat to the position you desire.
3. Release the lever and make sure the seat is locked in place. Adjust the seat before driving, and
make sure the seat is locked secure-
ly by trying to move forward and
backward without using the lever. If
the seat moves, it is not locked prop-
erly.
Adjusting height of the driver’s
seat cushion (if equipped)
Pivot the lever upward to raise the seat cushion.
Pivot the lever downward to lower the seat cushion.
1LDA20271LDA2028
Page 29 of 327
319
1 23456789
Knowing your vehicle
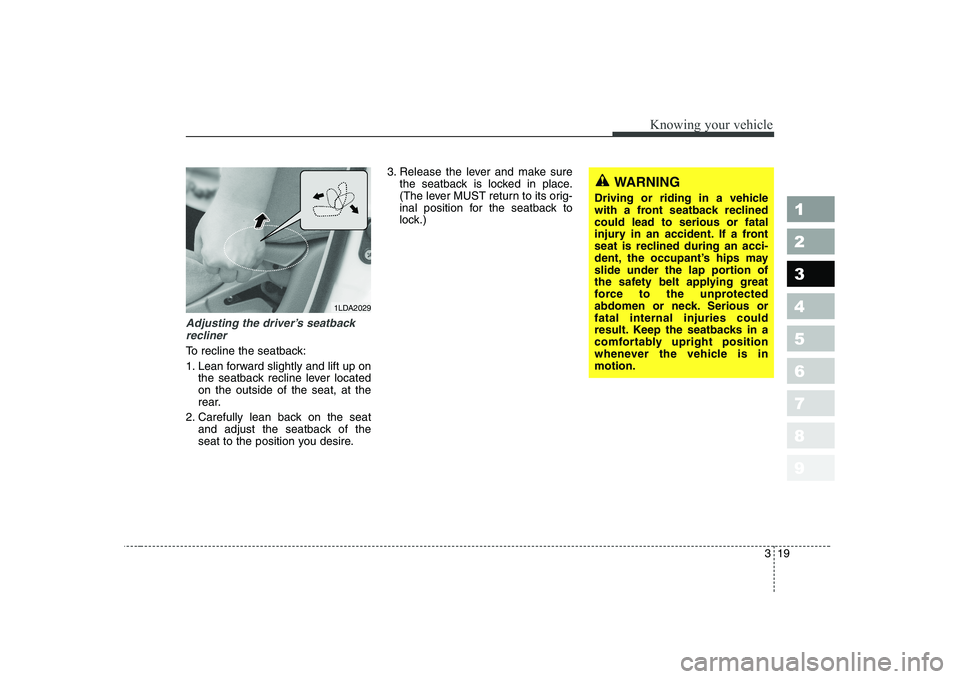
Adjusting the driver’s seatbackrecliner
To recline the seatback:
1. Lean forward slightly and lift up on the seatback recline lever located on the outside of the seat, at the
rear.
2. Carefully lean back on the seat and adjust the seatback of the
seat to the position you desire. 3. Release the lever and make sure
the seatback is locked in place.
(The lever MUST return to its orig-
inal position for the seatback to
lock.)
1LDA2029
WARNING
Driving or riding in a vehicle
with a front seatback reclinedcould lead to serious or fatal
injury in an accident. If a front
seat is reclined during an acci-
dent, the occupant’s hips may
slide under the lap portion of
the safety belt applying great
force to the unprotected
abdomen or neck. Serious orfatal internal injuries could
result. Keep the seatbacks in a
comfortably upright position
whenever the vehicle is inmotion.
Page 30 of 327
Knowing your vehicle
20
3
1 23456789
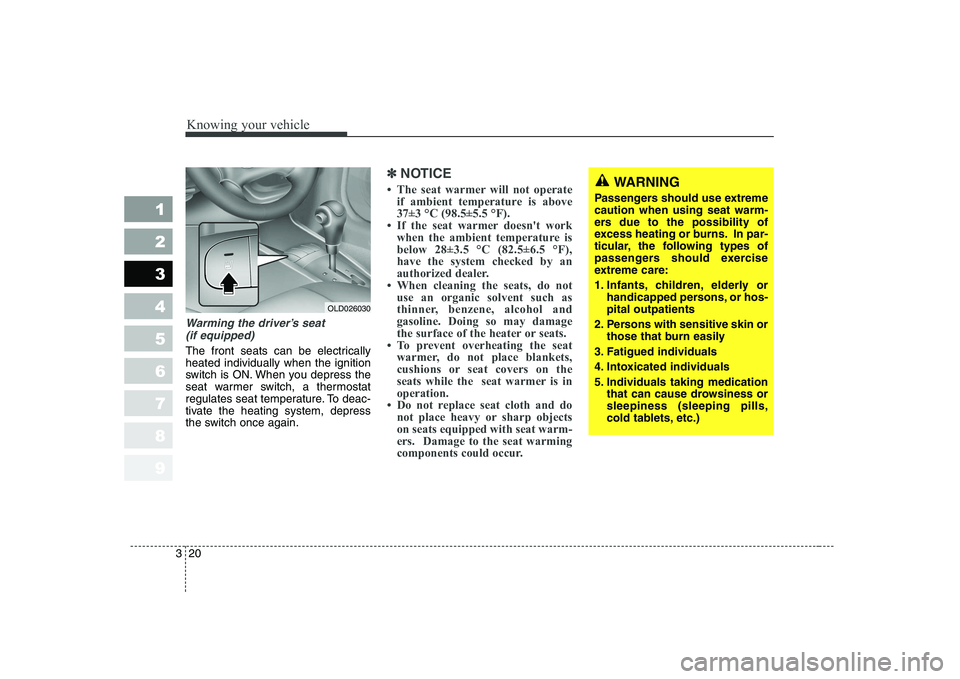
Warming the driver’s seat
(if equipped)
The front seats can be electrically heated individually when the ignition
switch is ON. When you depress the
seat warmer switch, a thermostat
regulates seat temperature. To deac-
tivate the heating system, depress
the switch once again.
✽✽ NOTICE