KIA Cerato 2015 2.G Owner's Manual
Manufacturer: KIA, Model Year: 2015, Model line: Cerato, Model: KIA Cerato 2015 2.GPages: 452, PDF Size: 7.85 MB
Page 121 of 452
Features of your vehicle
50
4
Erasing programmed Homelink®
buttons
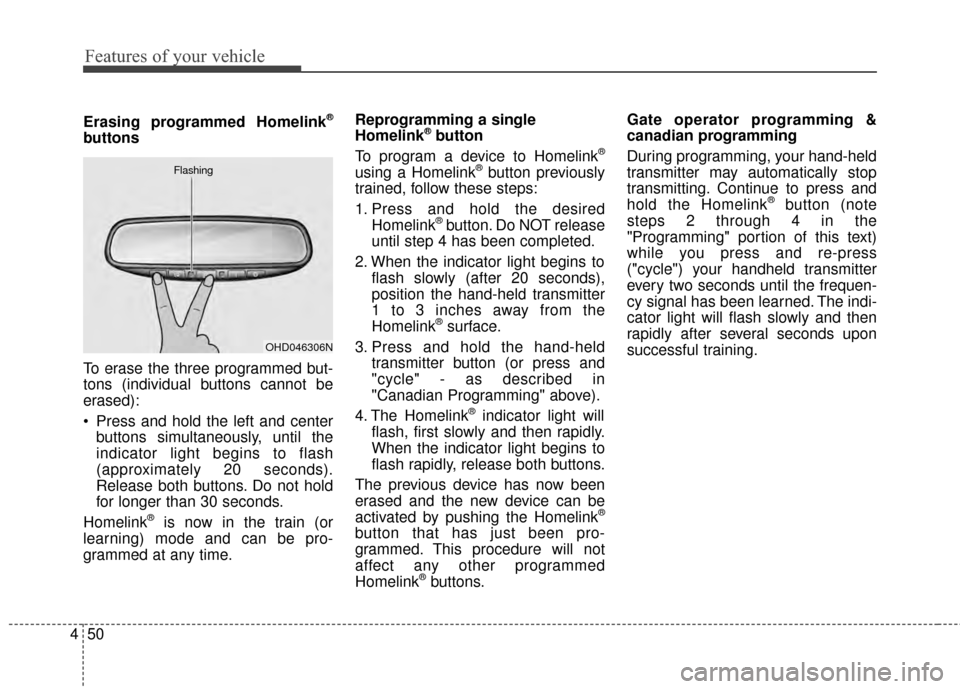
To erase the three programmed but-
tons (individual buttons cannot be
erased):
Press and hold the left and center
buttons simultaneously, until the
indicator light begins to flash
(approximately 20 seconds).
Release both buttons. Do not hold
for longer than 30 seconds.
Homelink
®is now in the train (or
learning) mode and can be pro-
grammed at any time. Reprogramming a single
Homelink
®button
To program a device to Homelink®
using a Homelink®button previously
trained, follow these steps:
1. Press and hold the desired Homelink
®button. Do NOT release
until step 4 has been completed.
2. When the indicator light begins to flash slowly (after 20 seconds),
position the hand-held transmitter
1 to 3 inches away from the
Homelink
®surface.
3. Press and hold the hand-held transmitter button (or press and
"cycle" - as described in
"Canadian Programming" above).
4. The Homelink
®indicator light will
flash, first slowly and then rapidly.
When the indicator light begins to
flash rapidly, release both buttons.
The previous device has now been
erased and the new device can be
activated by pushing the Homelink
®
button that has just been pro-
grammed. This procedure will not
affect any other programmed
Homelink
®buttons. Gate operator programming &
canadian programming
During programming, your hand-held
transmitter may automatically stop
transmitting. Continue to press and
hold the Homelink
®button (note
steps 2 through 4 in the
"Programming" portion of this text)
while you press and re-press
("cycle") your handheld transmitter
every two seconds until the frequen-
cy signal has been learned. The indi-
cator light will flash slowly and then
rapidly after several seconds upon
successful training.
OHD046306N
Flashing
Page 122 of 452
451
Features of your vehicle
Accessories
If you would like additional informa-
tion on the Homelink
®Wireless
Control System, Homelink®compati-
ble products, or to purchase other
accessories such as the HomeLink
®
Lighting Package, please contact
Homelink®at 1-800-355-3515 or on
the internet at www.homelink.com.
This device complies with Industry
Canada Standard RSS-210.
Operation is subject to the following
two conditions:
1. This device may not cause harm- ful interference, and
2. This device must accept any inter- ference received, including inter-
ference that may cause undesired
operation. The Homelink
®transmitter has been
tested and complies with FCC and
DOC/MDC rules. Changes or modifi-
cations not expressly approved by
the party responsible for compliance
could void the user’s authority to
operate the equipment.
IC: 4112104541A Gentex
MODEL/FCC ID: NZLSTDHL3Outside rearview mirror
Be sure to adjust mirror angles
before driving.
Your vehicle is equipped with both
left-hand and right-hand outside
rearview mirrors. The mirrors can be
adjusted remotely with the remote
switch (if equipped). The mirror heads
can be folded to prevent damage dur-
ing an automatic car wash or when
passing through a narrow street.
The right outside rearview mirror is
convex. Objects seen in the mirror
are closer than they appear.
Use your interior rearview mirror or
direct observation to determine the
actual distance of following vehicles
when changing lanes.
Page 123 of 452
Features of your vehicle
52
4
Remote control
Electric type
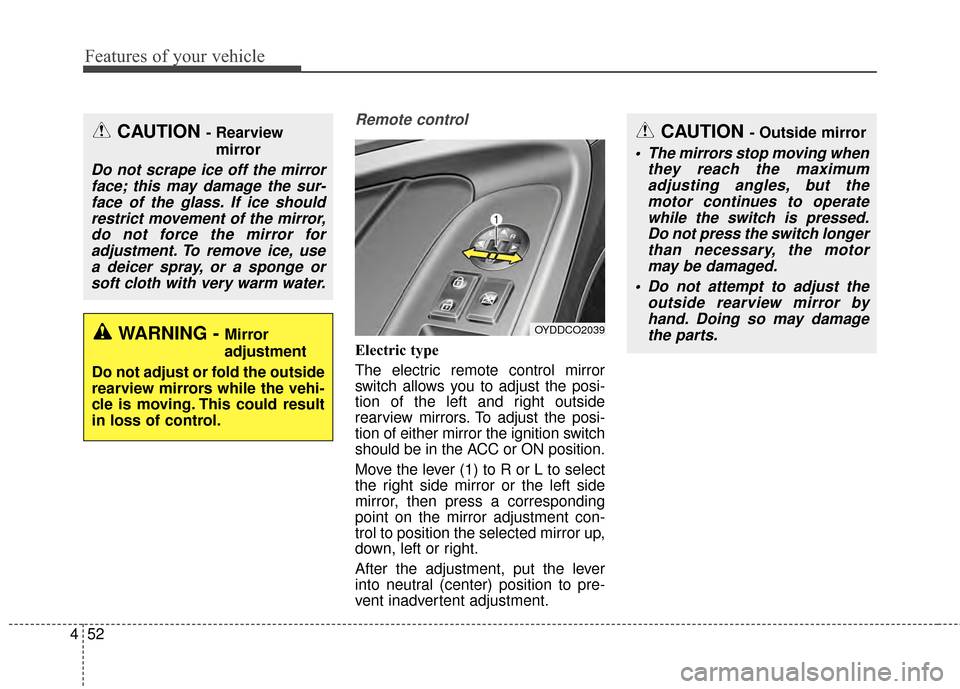
The electric remote control mirror
switch allows you to adjust the posi-
tion of the left and right outside
rearview mirrors. To adjust the posi-
tion of either mirror the ignition switch
should be in the ACC or ON position.
Move the lever (1) to R or L to select
the right side mirror or the left side
mirror, then press a corresponding
point on the mirror adjustment con-
trol to position the selected mirror up,
down, left or right.
After the adjustment, put the lever
into neutral (center) position to pre-
vent inadvertent adjustment.
CAUTION - Outside mirror
The mirrors stop moving when
they reach the maximumadjusting angles, but themotor continues to operatewhile the switch is pressed.Do not press the switch longerthan necessary, the motormay be damaged.
Do not attempt to adjust the outside rearview mirror byhand. Doing so may damagethe parts.
OYDDCO2039
CAUTION - Rearview
mirror
Do not scrape ice off the mirrorface; this may damage the sur-face of the glass. If ice shouldrestrict movement of the mirror,do not force the mirror foradjustment. To remove ice, usea deicer spray, or a sponge orsoft cloth with very warm water.
WARNING - Mirror
adjustment
Do not adjust or fold the outside
rearview mirrors while the vehi-
cle is moving. This could result
in loss of control.
Page 124 of 452
453
Features of your vehicle
Folding the outside rearview mirror
Electric type
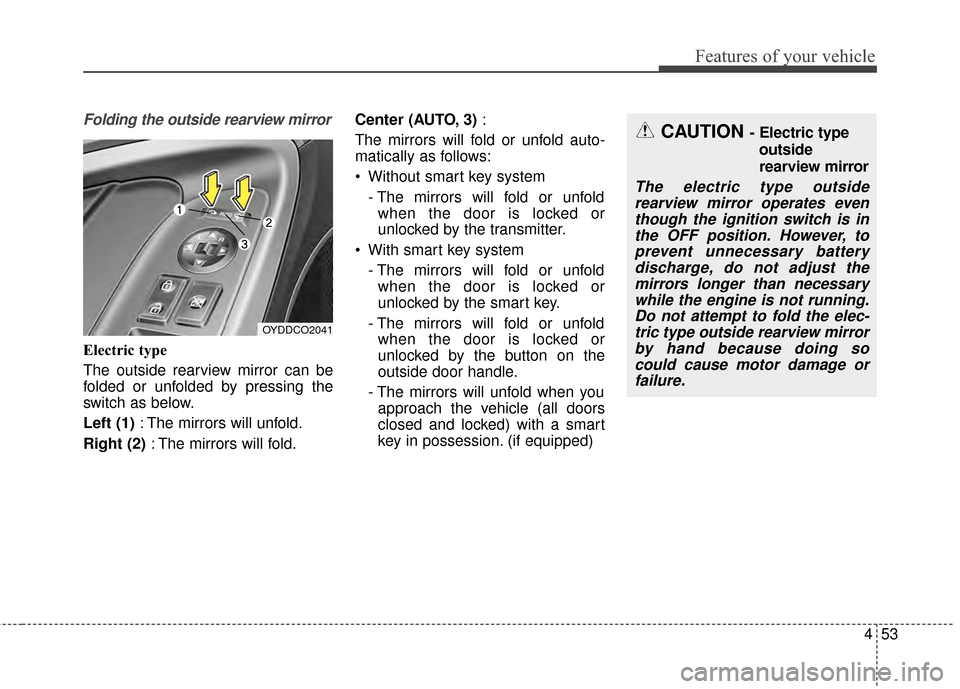
The outside rearview mirror can be
folded or unfolded by pressing the
switch as below.
Left (1): The mirrors will unfold.
Right (2) : The mirrors will fold. Center (AUTO, 3)
:
The mirrors will fold or unfold auto-
matically as follows:
Without smart key system - The mirrors will fold or unfoldwhen the door is locked or
unlocked by the transmitter.
With smart key system - The mirrors will fold or unfoldwhen the door is locked or
unlocked by the smart key.
- The mirrors will fold or unfold when the door is locked or
unlocked by the button on the
outside door handle.
- The mirrors will unfold when you approach the vehicle (all doors
closed and locked) with a smart
key in possession. (if equipped)
OYDDCO2041
CAUTION - Electric type
outside
rearview mirror
The electric type outsiderearview mirror operates eventhough the ignition switch is inthe OFF position. However, toprevent unnecessary batterydischarge, do not adjust themirrors longer than necessarywhile the engine is not running.Do not attempt to fold the elec-tric type outside rearview mirrorby hand because doing socould cause motor damage orfailure.
Page 125 of 452
Features of your vehicle
54
4
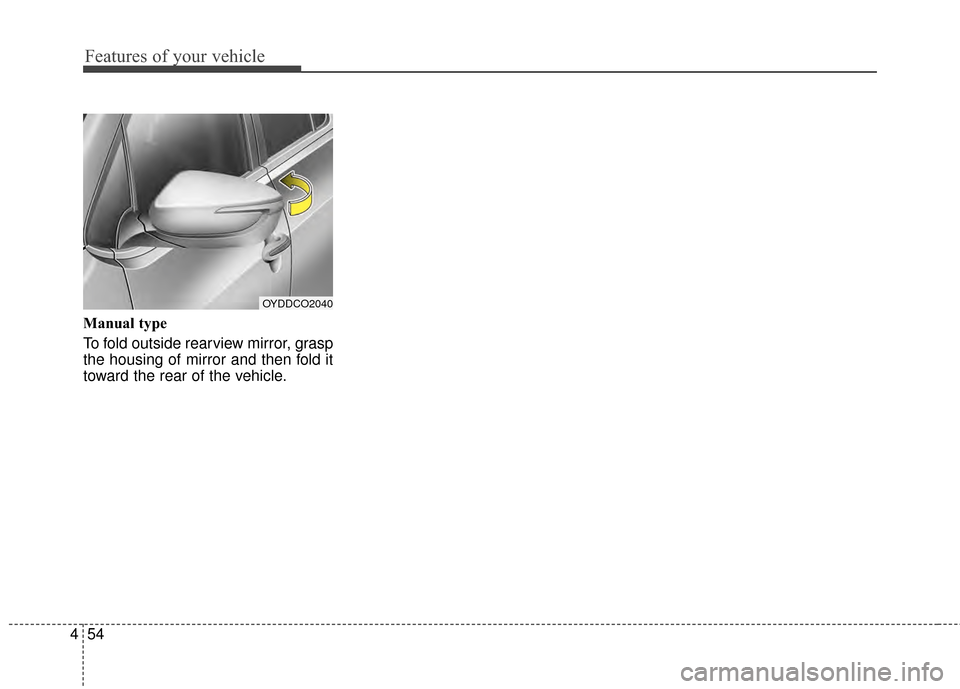
Manual type
To fold outside rearview mirror, grasp
the housing of mirror and then fold it
toward the rear of the vehicle.
OYDDCO2040
Page 126 of 452
455
Features of your vehicle
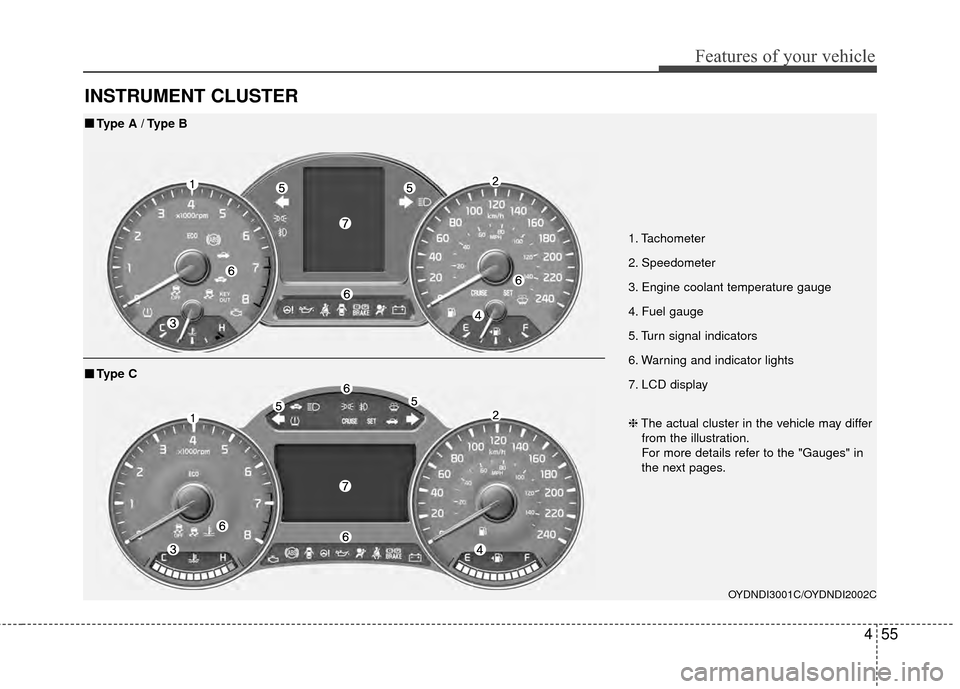
INSTRUMENT CLUSTER
1. Tachometer
2. Speedometer
3. Engine coolant temperature gauge
4. Fuel gauge
5. Turn signal indicators
6. Warning and indicator lights
7. LCD display
OYDNDI3001C/OYDNDI2002C
■
■Type A / Type B
❈The actual cluster in the vehicle may differ
from the illustration.
For more details refer to the "Gauges" in
the next pages.
■
■ Type C
Page 127 of 452
Features of your vehicle
56
4
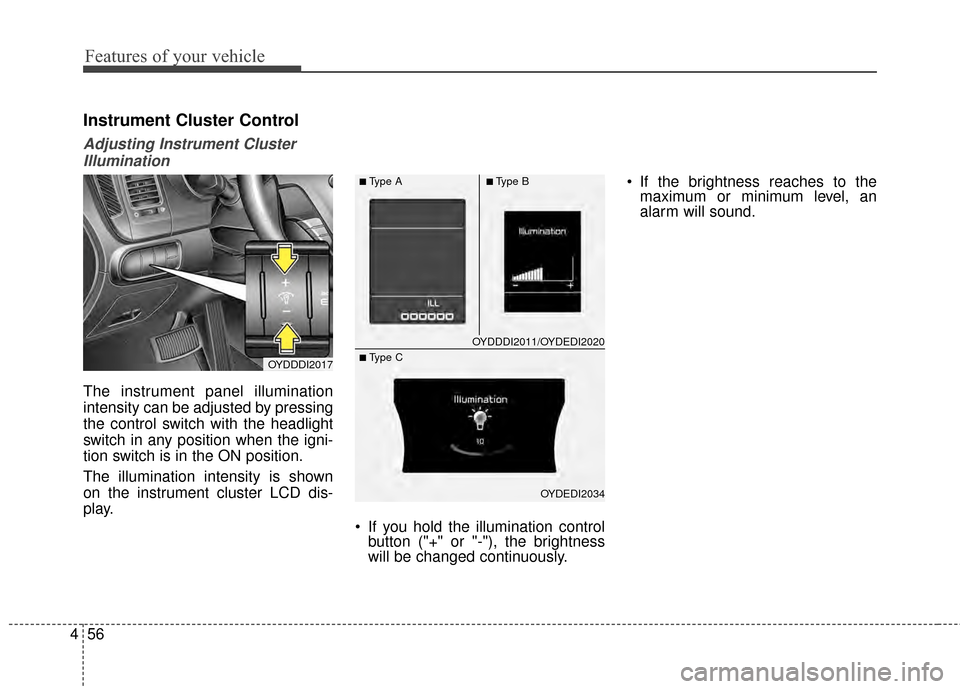
Instrument Cluster Control
Adjusting Instrument Cluster
Illumination
The instrument panel illumination
intensity can be adjusted by pressing
the control switch with the headlight
switch in any position when the igni-
tion switch is in the ON position.
The illumination intensity is shown
on the instrument cluster LCD dis-
play.
If you hold the illumination controlbutton ("+" or "-"), the brightness
will be changed continuously. If the brightness reaches to the
maximum or minimum level, an
alarm will sound.
OYDDDI2017
OYDDDI2011/OYDEDI2020
OYDEDI2034
■Type A■Type B
■ Type C
Page 128 of 452
![KIA Cerato 2015 2.G Owners Manual 457
Features of your vehicle
LCD Display Control
The LCD display modes can be
changed by using the control buttons
on the steering wheel.
[Type A]
(1) TRIP : TRIP button for changingtrip modes
(2) RES KIA Cerato 2015 2.G Owners Manual 457
Features of your vehicle
LCD Display Control
The LCD display modes can be
changed by using the control buttons
on the steering wheel.
[Type A]
(1) TRIP : TRIP button for changingtrip modes
(2) RES](/img/2/2961/w960_2961-127.png)
457
Features of your vehicle
LCD Display Control
The LCD display modes can be
changed by using the control buttons
on the steering wheel.
[Type A]
(1) TRIP : TRIP button for changingtrip modes
(2) RESET : RESET button for reset- ting items [Type B]
(1) : MODE button for changing
modes
(2) : MOVE button for changing items
(3) : SELECT/RESET button for setting or resetting the
selected item
❈ For the LCD modes, refer to "LCD
Display" in this chapter.
Gauges
Speedometer
The speedometer indicates the for-
ward speed of the vehicle.
The speedometer is calibrated in
kilometers per hour and/or miles per
hour.
OYDDDI2018OYDEDI2003L
OYDEDI2004L
■Type A, B
■ Type C
■Type A
■Type B
Page 129 of 452
Features of your vehicle
58
4
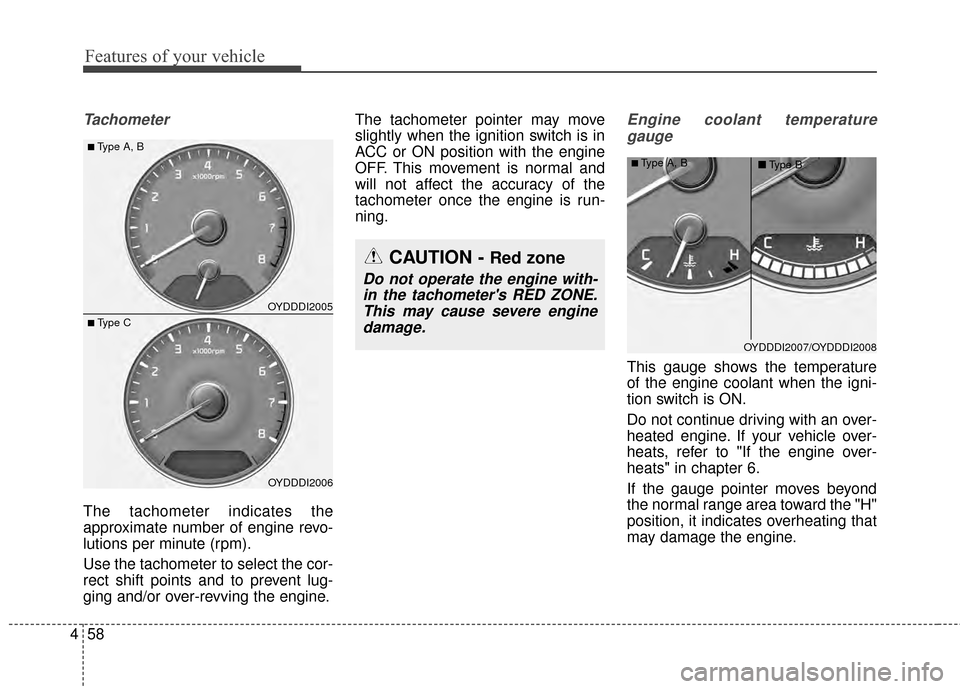
Tachometer
The tachometer indicates the
approximate number of engine revo-
lutions per minute (rpm).
Use the tachometer to select the cor-
rect shift points and to prevent lug-
ging and/or over-revving the engine. The tachometer pointer may move
slightly when the ignition switch is in
ACC or ON position with the engine
OFF. This movement is normal and
will not affect the accuracy of the
tachometer once the engine is run-
ning.
Engine coolant temperature
gauge
This gauge shows the temperature
of the engine coolant when the igni-
tion switch is ON.
Do not continue driving with an over-
heated engine. If your vehicle over-
heats, refer to "If the engine over-
heats" in chapter 6.
If the gauge pointer moves beyond
the normal range area toward the "H"
position, it indicates overheating that
may damage the engine.
OYDDDI2005
OYDDDI2006
■Type A, B
■ Type C
CAUTION - Red zone
Do not operate the engine with-in the tachometer's RED ZONE.This may cause severe enginedamage.
OYDDDI2007/OYDDDI2008
■Type A, B ■Type B
Page 130 of 452
459
Features of your vehicle
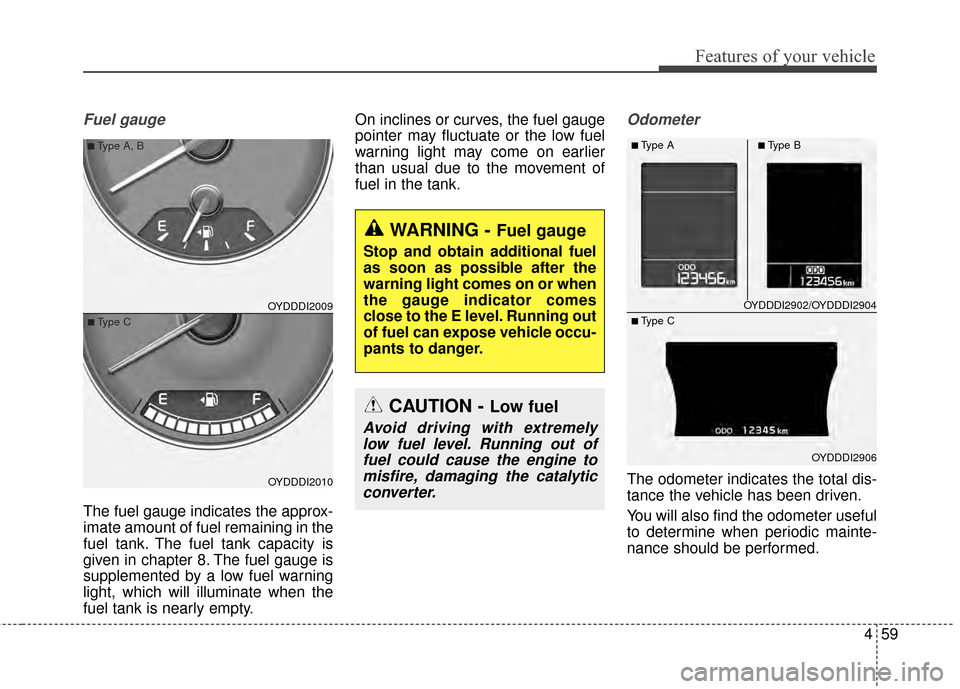
Fuel gauge
The fuel gauge indicates the approx-
imate amount of fuel remaining in the
fuel tank. The fuel tank capacity is
given in chapter 8. The fuel gauge is
supplemented by a low fuel warning
light, which will illuminate when the
fuel tank is nearly empty.On inclines or curves, the fuel gauge
pointer may fluctuate or the low fuel
warning light may come on earlier
than usual due to the movement of
fuel in the tank.
Odometer
The odometer indicates the total dis-
tance the vehicle has been driven.
You will also find the odometer useful
to determine when periodic mainte-
nance should be performed.
OYDDDI2009
OYDDDI2010
■Type A, B
■Type C
WARNING - Fuel gauge
Stop and obtain additional fuel
as soon as possible after the
warning light comes on or when
the gauge indicator comes
close to the E level. Running out
of fuel can expose vehicle occu-
pants to danger.
CAUTION - Low fuel
Avoid driving with extremely
low fuel level. Running out offuel could cause the engine tomisfire, damaging the catalyticconverter.
OYDDDI2902/OYDDDI2904
OYDDDI2906
■Type A■Type B
■ Type C