KIA Cerato 2015 2.G Owner's Manual
Manufacturer: KIA, Model Year: 2015, Model line: Cerato, Model: KIA Cerato 2015 2.GPages: 452, PDF Size: 7.85 MB
Page 291 of 452
Driving your vehicle
18
5
R (Reverse)
Use this position to drive the vehicle
backward.
N (Neutral)
The wheels and transaxle are not
engaged. The vehicle will roll freely
even on the slightest incline unless
the parking brake or service brakes
are applied. D (Drive)
This is the normal forward driving
position. The transaxle will automati-
cally shift through a 6-gear
sequence, providing the best fuel
economy and power.
For extra power when passing anoth-
er vehicle or climbing grades,
depress the accelerator fully, at
which time the transaxle will auto-
matically downshift to the next lower
gear.
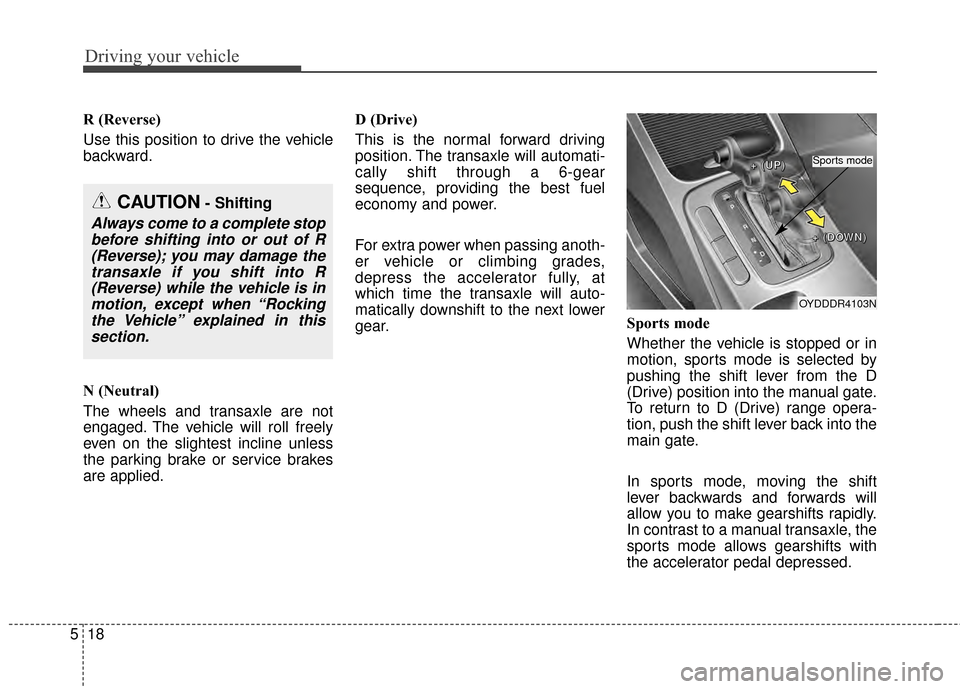
Sports mode
Whether the vehicle is stopped or in
motion, sports mode is selected by
pushing the shift lever from the D
(Drive) position into the manual gate.
To return to D (Drive) range opera-
tion, push the shift lever back into the
main gate.
In sports mode, moving the shift
lever backwards and forwards will
allow you to make gearshifts rapidly.
In contrast to a manual transaxle, the
sports mode allows gearshifts with
the accelerator pedal depressed.
CAUTION- Shifting
Always come to a complete stop
before shifting into or out of R(Reverse); you may damage thetransaxle if you shift into R(Reverse) while the vehicle is inmotion, except when “Rockingthe Vehicle” explained in thissection.
OYDDDR4103N
+
+
+
+
(
(
(
(
U
U
U
U
P
P
P
P
)
)
)
)
+
+
+
+
(
(
(
(
D
D
D
D
O
O
O
O
W
W
W
W
N
N
N
N
)
)
)
)
Sports mode
Page 292 of 452
519
Driving your vehicle
Up (+) : Push the lever forwardonce to shift up one gear.
Down (-) : Pull the lever backwards once to shift down one
gear.
In sports mode, the driver must execute upshifts in accordance
with road conditions, taking care to
keep the engine speed below the
red zone.
In sports mode, only the 6 forward gears can be selected. To reverse
or park the vehicle, move the shift
lever to the R (Reverse) or P (Park)
position as required.
In sports mode, downshifts are made automatically when the vehi-
cle slows down. When the vehicle
stops, 1st gear is automatically
selected.
In sports mode, when the engine rpm approaches the red zone shift
points are varied to upshift auto-
matically. To maintain the required levels of
vehicle performance and safety,
the system may not execute cer-
tain gearshifts when the shift lever
is operated.
When driving on a slippery road, push the shift lever forward into the
+(up) position. This causes the
transaxle to shift into the 2nd gear
which is better for smooth driving
on a slippery road. Push the shift
lever to the -(down) side to shift
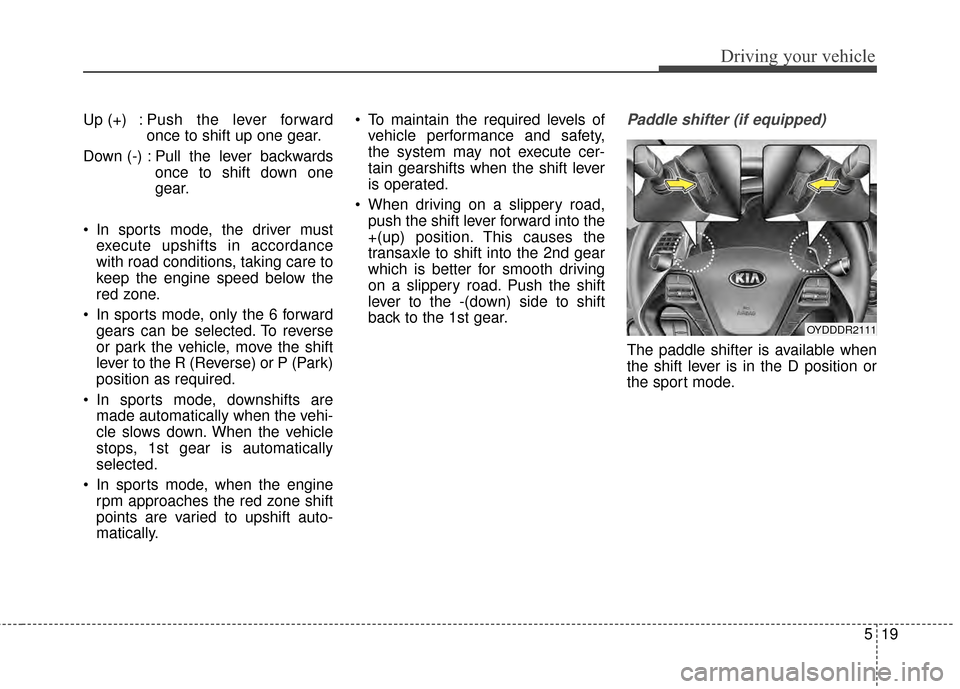
back to the 1st gear.Paddle shifter (if equipped)
The paddle shifter is available when
the shift lever is in the D position or
the sport mode.
OYDDDR2111
Page 293 of 452
![KIA Cerato 2015 2.G Owners Manual Driving your vehicle
20
5
With the shift lever in the D position
The paddle shifter can operate when
the vehicle speed is more than 6.2
mph.
Pull the [+] or [-] paddle shifter once
to shift up or dow KIA Cerato 2015 2.G Owners Manual Driving your vehicle
20
5
With the shift lever in the D position
The paddle shifter can operate when
the vehicle speed is more than 6.2
mph.
Pull the [+] or [-] paddle shifter once
to shift up or dow](/img/2/2961/w960_2961-292.png)
Driving your vehicle
20
5
With the shift lever in the D position
The paddle shifter can operate when
the vehicle speed is more than 6.2
mph.
Pull the [+] or [-] paddle shifter once
to shift up or down one gear and the
system changes from automatic
mode to manual mode.
If the vehicle speed is lower than 6.2
mph, if you depress the accelerator
pedal for more than 7 seconds or if
you shift the shift lever from D to
sports mode and shift it from sports
mode to D again, the system change
from manual mode to automatic
mode.
With the shift lever in the sports mode
Pull the [+] or [-] paddle shifter once
to shift up or down one gear.
If you pull the [+] and [-] paddle
shifters at the same time, you can't
shift the gear.Shift lock system (if equipped)
For your safety, the automatic
transaxle has a shift lock system
which prevents shifting the transaxle
out of P (Park) unless the brake
pedal is depressed.
To shift the transaxle from P (Park)
into R (Reverse):
1.Depress and hold the brake pedal.
2.Start the engine or turn the ignition
switch to the ON position.
3.Move the shift lever.
If the brake pedal is repeatedly
depressed and released with the
shift lever in the P (Park) position, a
chattering noise near the shift lever
may be heard. This is a normal con-
dition. Shift-lock override
(with smart key system)
If the shift lever cannot be moved
from the P (Park) position into the R
(Reverse) position with the brake
pedal depressed, continue depress-
ing the brake, then do the following:
1.Press the shift-lock release button.
2.Move the shift lever.
3.Have your vehicle inspected by an
authorized Kia dealer immediately.
WARNING - Shifting from
park
Always fully depress the brake
pedal before and while shifting
out of the P (Park) position into
another position to avoid inad-
vertent motion of the vehicle.
OYDDDR4104
Page 294 of 452
521
Driving your vehicle
Ignition key interlock system (if equipped)
The ignition key cannot be removed
unless the shift lever is in the P
(Park) position.
Good driving practices
Never move the shift lever from P (Park) or N (Neutral) to any other
position with the accelerator pedal
depressed.
Never move the shift lever into P (Park) when the vehicle is in
motion.
Slow down before shifting to a lower gear. Otherwise, the lower
gear may not be engaged.
Always use the parking brake. Do not depend on placing the
transaxle in P (Park) to keep the
vehicle from moving.
Optimum vehicle performance and economy is obtained by smoothly
depressing and releasing the
accelerator pedal.
Moving up a steep grade from a
standing start
To move up a steep grade from a
standing start, depress the brake
pedal, shift the shift lever to D
(Drive). Select the appropriate gear
depending on load weight and steep-
ness of the grade, and release the
parking brake. Depress the accelera-
tor gradually while releasing the
service brakes.
Page 295 of 452
Driving your vehicle
22
5
Power brakes
Your vehicle has power-assisted
brakes that adjust automatically
through normal usage.
In the event that the power-assisted
brakes lose power because of a
stalled engine or some other reason,
you can still stop your vehicle by
applying greater force to the brake
pedal than you normally would. The
stopping distance, however, will be
longer.
When the engine is not running, the
reserve brake power is partially
depleted each time the brake pedal
is applied. Do not pump the brake
pedal when the power assist has
been interrupted.
Pump the brake pedal only when
necessary to maintain steering con-
trol on slippery surfaces.
Wet brakes may impair the vehicle’s
ability to safely slow down; the vehi-
cle may also pull to one side when
the brakes are applied. Applying the
brakes lightly will indicate whether
they have been affected in this way.To dry the brakes, apply them lightly
while maintaining a safe forward
speed until brake performance
returns to normal.
In the event of brake failure
If service brakes fail to operate while
the vehicle is in motion, you can
make an emergency stop with the
parking brake. The stopping dis-
tance, however, will be much greater
than normal.
BRAKE SYSTEM
WARNING- Parking brake
Avoid applying the parking
brake to stop the vehicle while it
is moving except in an emer-
gency situation. Applying the
parking brake while the vehicle
is moving at normal speeds can
cause a sudden loss of control
of the vehicle. If you must use
the parking brake to stop the
vehicle, use great caution in
applying the brake.
WARNING- Steep hill braking
Avoid continuous application of
the brakes when descending a
long or steep hill by shifting to a
lower gear. Continuous brake
application will cause the
brakes to overheat and could
result in a temporary loss of
braking performance.
CAUTION- Brake pedal
Do not drive with your foot rest- ing on the brake pedal. This willcreate abnormally high braketemperatures which can causeexcessive brake lining and padwear.
Page 296 of 452
523
Driving your vehicle
Disc brakes wear indicator
When your brake pads are worn and
new pads are required, you will hear
a high-pitched warning sound from
your front brakes or rear brakes (if
equipped). You may hear this sound
come and go or it may occur when-
ever you depress the brake pedal.
Please remember that some driving
conditions or climates may cause a
brake squeal when you first apply (or
lightly apply) the brakes. This is nor-
mal and does not indicate a problem
with your brakes.
Always replace the front or rear
brake pads as pairs.
Parking brake
Applying the parking brake
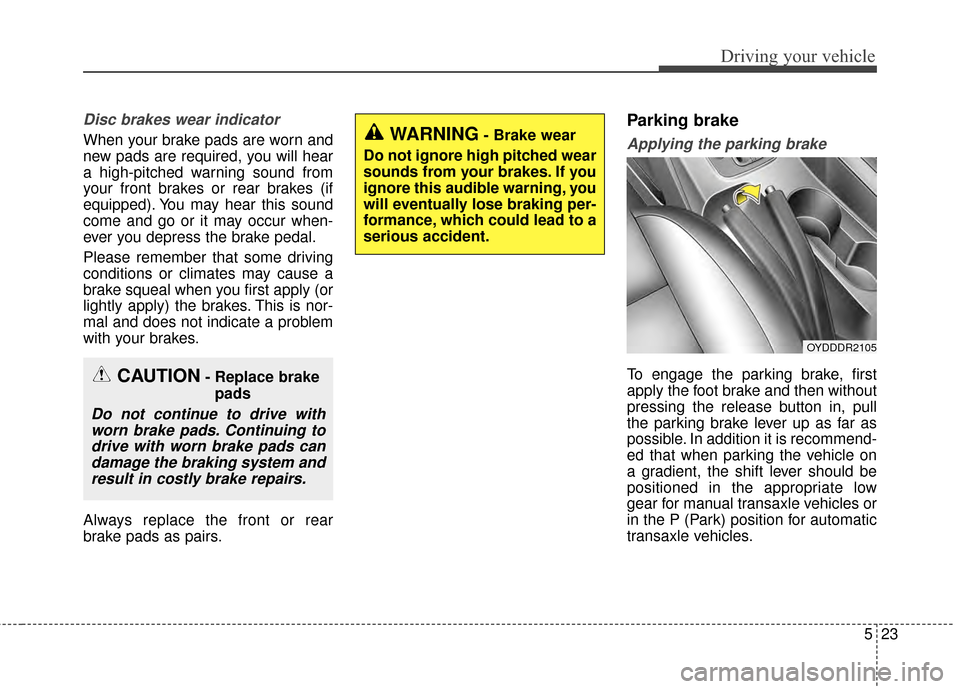
To engage the parking brake, first
apply the foot brake and then without
pressing the release button in, pull
the parking brake lever up as far as
possible. In addition it is recommend-
ed that when parking the vehicle on
a gradient, the shift lever should be
positioned in the appropriate low
gear for manual transaxle vehicles or
in the P (Park) position for automatic
transaxle vehicles.CAUTION- Replace brakepads
Do not continue to drive withworn brake pads. Continuing todrive with worn brake pads candamage the braking system andresult in costly brake repairs.
WARNING- Brake wear
Do not ignore high pitched wear
sounds from your brakes. If you
ignore this audible warning, you
will eventually lose braking per-
formance, which could lead to a
serious accident.
OYDDDR2105
Page 297 of 452
Driving your vehicle
24
5
Releasing the parking brake
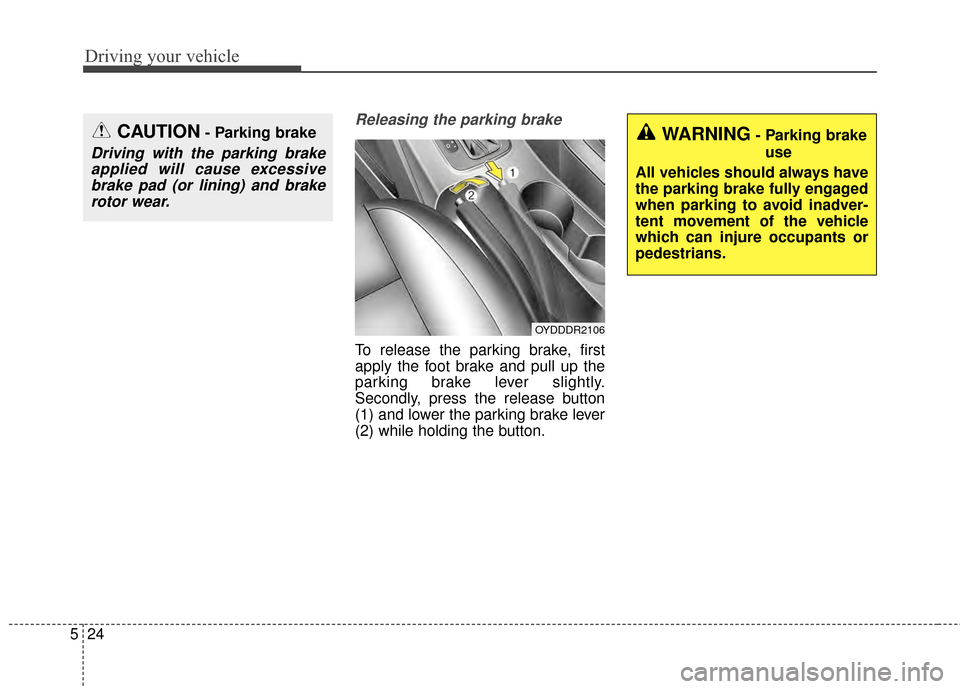
To release the parking brake, first
apply the foot brake and pull up the
parking brake lever slightly.
Secondly, press the release button
(1) and lower the parking brake lever
(2) while holding the button.
CAUTION- Parking brake
Driving with the parking brake
applied will cause excessivebrake pad (or lining) and brakerotor wear.
OYDDDR2106
WARNING- Parking brake
use
All vehicles should always have
the parking brake fully engaged
when parking to avoid inadver-
tent movement of the vehicle
which can injure occupants or
pedestrians.
Page 298 of 452
525
Driving your vehicle
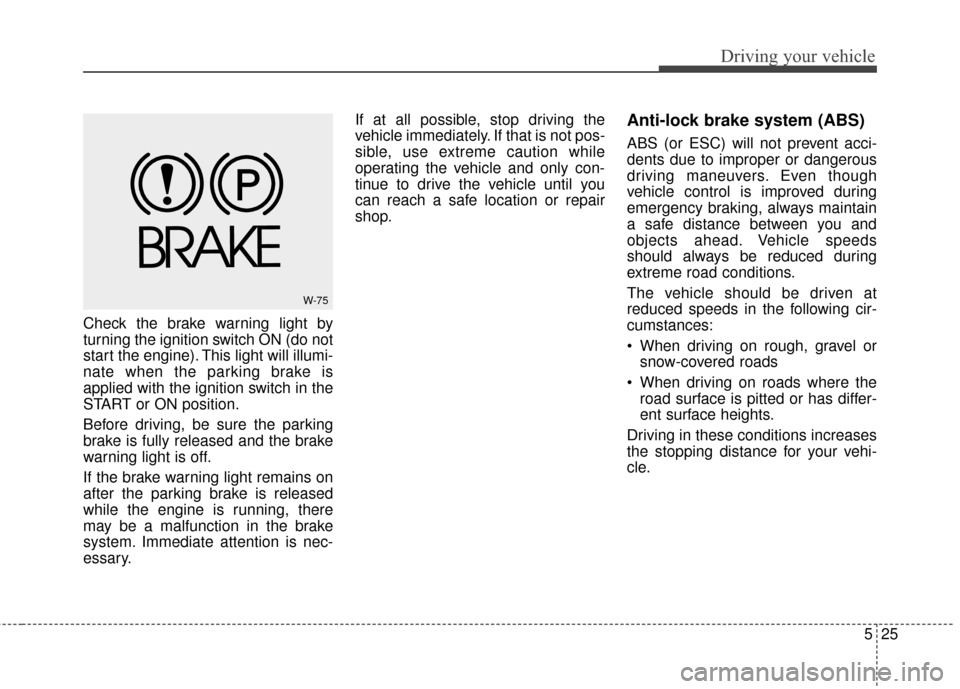
Check the brake warning light by
turning the ignition switch ON (do not
start the engine). This light will illumi-
nate when the parking brake is
applied with the ignition switch in the
START or ON position.
Before driving, be sure the parking
brake is fully released and the brake
warning light is off.
If the brake warning light remains on
after the parking brake is released
while the engine is running, there
may be a malfunction in the brake
system. Immediate attention is nec-
essary.If at all possible, stop driving the
vehicle immediately. If that is not pos-
sible, use extreme caution while
operating the vehicle and only con-
tinue to drive the vehicle until you
can reach a safe location or repair
shop.
Anti-lock brake system (ABS)
ABS (or ESC) will not prevent acci-
dents due to improper or dangerous
driving maneuvers. Even though
vehicle control is improved during
emergency braking, always maintain
a safe distance between you and
objects ahead. Vehicle speeds
should always be reduced during
extreme road conditions.
The vehicle should be driven at
reduced speeds in the following cir-
cumstances:
When driving on rough, gravel or
snow-covered roads
When driving on roads where the road surface is pitted or has differ-
ent surface heights.
Driving in these conditions increases
the stopping distance for your vehi-
cle.
W-75
Page 299 of 452
Driving your vehicle
26
5
The ABS continuously senses the
speed of the wheels. If the wheels
are going to lock, the ABS system
repeatedly modulates the hydraulic
brake pressure to the wheels.
When you apply your brakes under
conditions which may lock the
wheels, you may hear a “tik-tik’’
sound from the brakes, or feel a cor-
responding sensation in the brake
pedal. This is normal and it means
your ABS is active.
In order to obtain the maximum ben-
efit from your ABS in an emergency
situation, do not attempt to modulate
your brake pressure and do not try to
pump your brakes. Press your brake
pedal as hard as possible or as hard
as the situation allows the ABS to
control the force being delivered to
the brakes.✽ ✽
NOTICE
A click sound may be heard in the
engine compartment when the vehi-
cle begins to move after the engine is
started. These conditions are normal
and indicate that the anti-lock brake
system is functioning properly.
Even with the anti-lock brake sys-
tem, your vehicle still requires suf-
ficient stopping distance. Always
maintain a safe distance from the
vehicle in front of you.
Always slow down when cornering. The anti-lock brake system cannot
prevent accidents resulting from
excessive speeds.
On loose or uneven road surfaces, operation of the anti-lock brake
system may result in a longer stop-
ping distance than for vehicles
equipped with a conventional
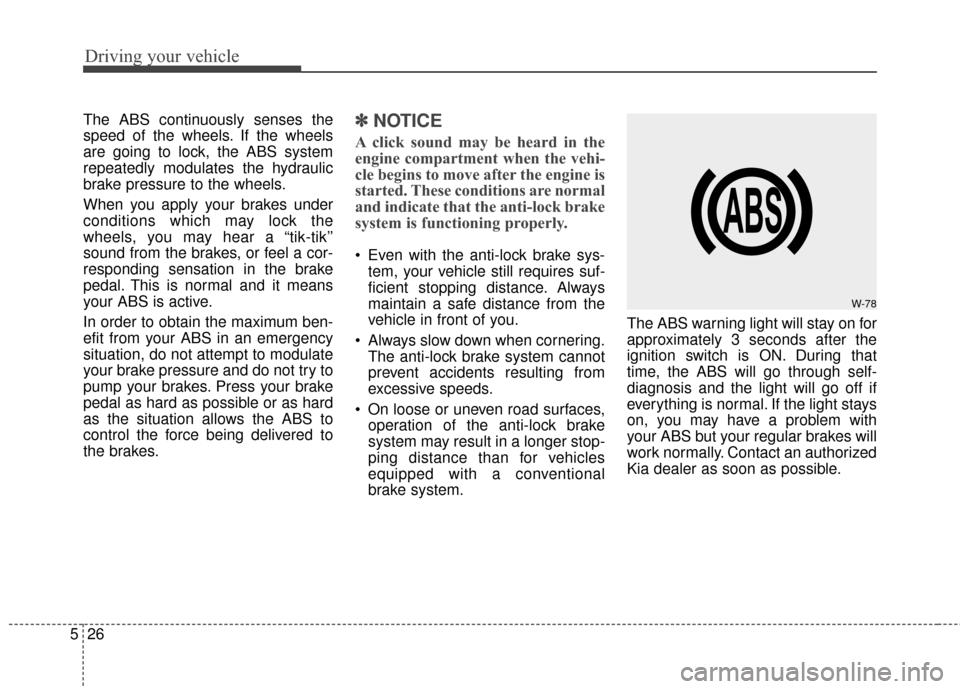
brake system. The ABS warning light will stay on for
approximately 3 seconds after the
ignition switch is ON. During that
time, the ABS will go through self-
diagnosis and the light will go off if
everything is normal. If the light stays
on, you may have a problem with
your ABS but your regular brakes will
work normally. Contact an authorized
Kia dealer as soon as possible.
W-78
Page 300 of 452
527
Driving your vehicle
When you drive on a road withpoor traction, such as an icy road,
and operated your brakes continu-
ously, the ABS will be active con-
tinuously and the ABS warning
light may illuminate. Pull your vehi-
cle over to a safe place and stop
the engine.
Restart the engine. If the ABS warning light is off, then your ABS
is normal. Otherwise, you may
have a problem with the ABS.
Contact an authorized Kia dealer
as soon as possible.
✽ ✽ NOTICE
When you jump start your vehicle
because of a drained battery, the
engine may not run as smoothly and
the ABS warning light may turn on
at the same time. This happens
because of the low battery voltage. It
does not mean your ABS has mal-
functioned.
• Do not pump your brakes!
• Have the battery recharged before
driving the vehicle.
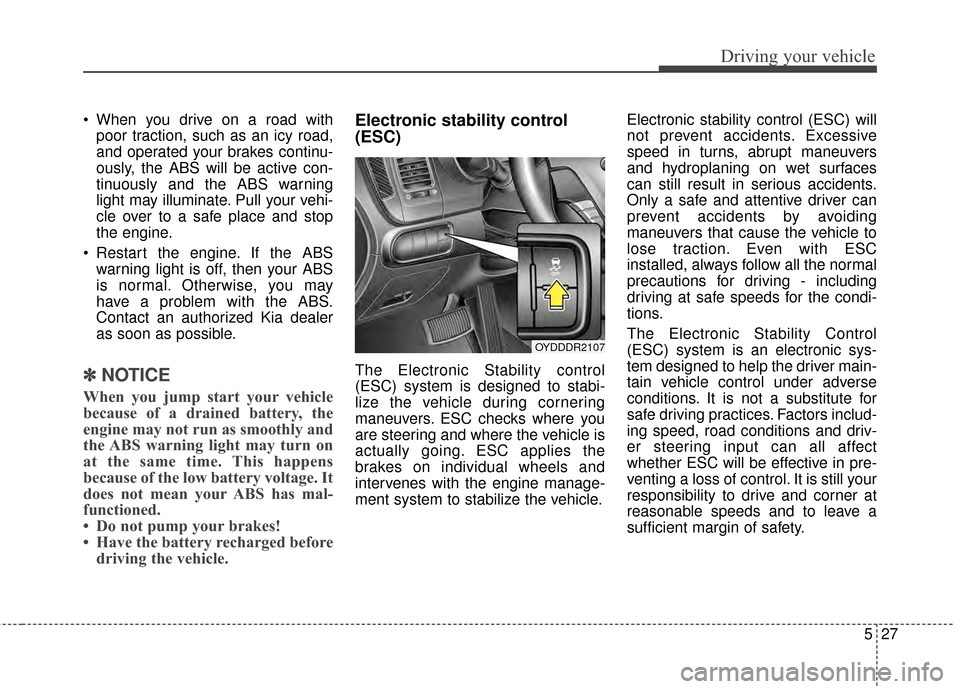
Electronic stability control
(ESC)
The Electronic Stability control
(ESC) system is designed to stabi-
lize the vehicle during cornering
maneuvers. ESC checks where you
are steering and where the vehicle is
actually going. ESC applies the
brakes on individual wheels and
intervenes with the engine manage-
ment system to stabilize the vehicle. Electronic stability control (ESC) will
not prevent accidents. Excessive
speed in turns, abrupt maneuvers
and hydroplaning on wet surfaces
can still result in serious accidents.
Only a safe and attentive driver can
prevent accidents by avoiding
maneuvers that cause the vehicle to
lose traction. Even with ESC
installed, always follow all the normal
precautions for driving - including
driving at safe speeds for the condi-
tions.
The Electronic Stability Control
(ESC) system is an electronic sys-
tem designed to help the driver main-
tain vehicle control under adverse
conditions. It is not a substitute for
safe driving practices. Factors includ-
ing speed, road conditions and driv-
er steering input can all affect
whether ESC will be effective in pre-
venting a loss of control. It is still your
responsibility to drive and corner at
reasonable speeds and to leave a
sufficient margin of safety.
OYDDDR2107