lock KIA Cerato 2015 2.G Repair Manual
[x] Cancel search | Manufacturer: KIA, Model Year: 2015, Model line: Cerato, Model: KIA Cerato 2015 2.GPages: 452, PDF Size: 7.85 MB
Page 179 of 452
Features of your vehicle
108
4
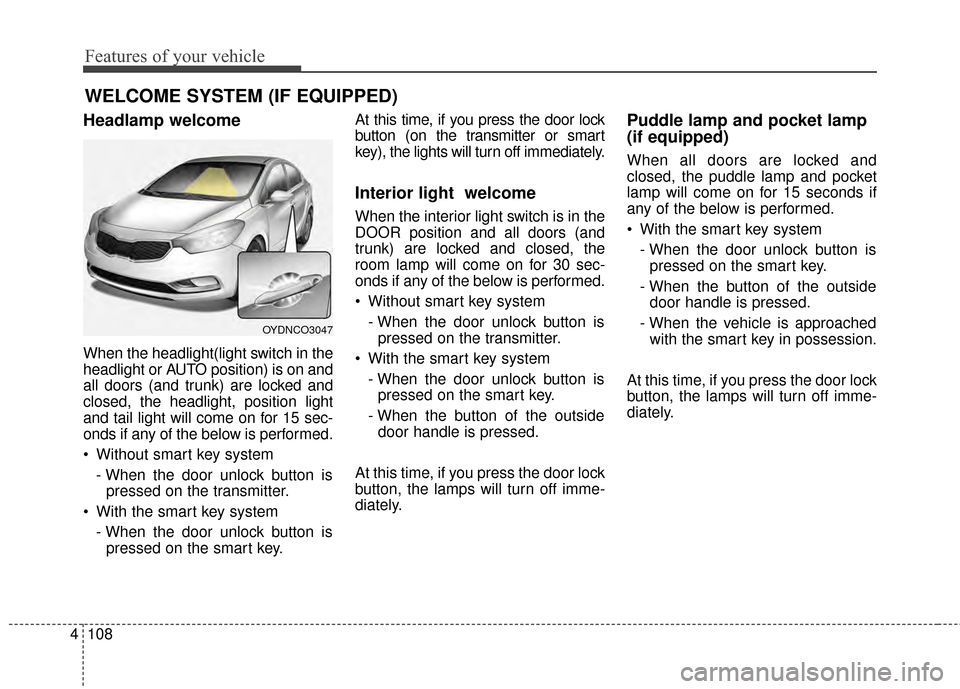
Headlamp welcome
When the headlight(light switch in the
headlight or AUTO position) is on and
all doors (and trunk) are locked and
closed, the headlight, position light
and tail light will come on for 15 sec-
onds if any of the below is performed.
Without smart key system
- When the door unlock button ispressed on the transmitter.
With the smart key system - When the door unlock button ispressed on the smart key. At this time, if you press the door lock
button (on the transmitter or smart
key), the lights will turn off immediately.
Interior light welcome
When the interior light switch is in the
DOOR position and all doors (and
trunk) are locked and closed, the
room lamp will come on for 30 sec-
onds if any of the below is performed.
Without smart key system
- When the door unlock button ispressed on the transmitter.
With the smart key system - When the door unlock button ispressed on the smart key.
- When the button of the outside door handle is pressed.
At this time, if you press the door lock
button, the lamps will turn off imme-
diately.
Puddle lamp and pocket lamp
(if equipped)
When all doors are locked and
closed, the puddle lamp and pocket
lamp will come on for 15 seconds if
any of the below is performed.
With the smart key system - When the door unlock button ispressed on the smart key.
- When the button of the outside door handle is pressed.
- When the vehicle is approached with the smart key in possession.
At this time, if you press the door lock
button, the lamps will turn off imme-
diately.
WELCOME SYSTEM (IF EQUIPPED)
OYDNCO3047
Page 187 of 452
Features of your vehicle
116
4
Air conditioning (if equipped)
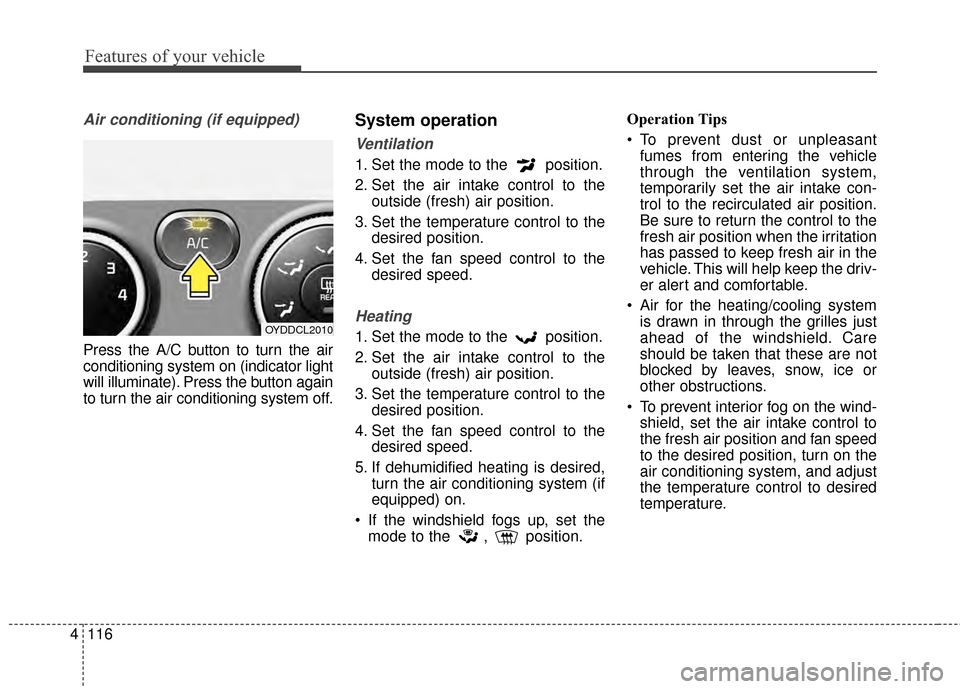
Press the A/C button to turn the air
conditioning system on (indicator light
will illuminate). Press the button again
to turn the air conditioning system off.
System operation
Ventilation
1. Set the mode to the position.
2. Set the air intake control to the
outside (fresh) air position.
3. Set the temperature control to the desired position.
4. Set the fan speed control to the desired speed.
Heating
1. Set the mode to the position.
2. Set the air intake control to theoutside (fresh) air position.
3. Set the temperature control to the desired position.
4. Set the fan speed control to the desired speed.
5. If dehumidified heating is desired, turn the air conditioning system (if
equipped) on.
If the windshield fogs up, set the mode to the , position. Operation Tips
To prevent dust or unpleasant
fumes from entering the vehicle
through the ventilation system,
temporarily set the air intake con-
trol to the recirculated air position.
Be sure to return the control to the
fresh air position when the irritation
has passed to keep fresh air in the
vehicle. This will help keep the driv-
er alert and comfortable.
Air for the heating/cooling system is drawn in through the grilles just
ahead of the windshield. Care
should be taken that these are not
blocked by leaves, snow, ice or
other obstructions.
To prevent interior fog on the wind- shield, set the air intake control to
the fresh air position and fan speed
to the desired position, turn on the
air conditioning system, and adjust
the temperature control to desired
temperature.OYDDCL2010
Page 199 of 452
Features of your vehicle
128
4
System operation
Ventilation
1. Set the mode to the position.
2. Set the air intake control to the
outside (fresh) air position.
3. Set the temperature control to the desired position.
4. Set the fan speed control to the desired speed.
Heating
1. Set the mode to the position.
2. Set the air intake control to theoutside (fresh) air position.
3. Set the temperature control to the desired position.
4. Set the fan speed control to the desired speed.
5. If dehumidified heating is desired, turn the air conditioning system (if
equipped) on.
If the windshield fogs up, set the mode to the or position. Operation Tips
To keep dust or unpleasant fumes
from entering the vehicle through
the ventilation system, temporarily
set the air intake control to the
recirculated air position. Be sure to
return the control to the fresh air
position when the irritation has
passed to keep fresh air in the
vehicle. This will help keep the driv-
er alert and comfortable.
Air for the heating/cooling system is drawn in through the grilles just
ahead of the windshield. Care
should be taken that these are not
blocked by leaves, snow, ice or
other obstructions.
To prevent interior fog on the wind- shield, set the air intake control to
the fresh air position and fan speed
to the desired position, turn on the
air conditioning system, and adjust
the temperature control to desired
temperature.
Air conditioning
Kia Air Conditioning Systems are
filled with R-134a refrigerant.
1. Start the engine. Press the air con- ditioning button.
2. Set the mode to the position.
3. Set the air intake control to the out- side air or recirculated air position.
4. Adjust the fan speed control and temperature control to maintain
maximum comfort.
When maximum cooling is desired, set the temperature control to the
extreme left position, then set the
fan speed control to the highest
speed.
Page 207 of 452
Features of your vehicle
136
4
Cool box (if equipped)
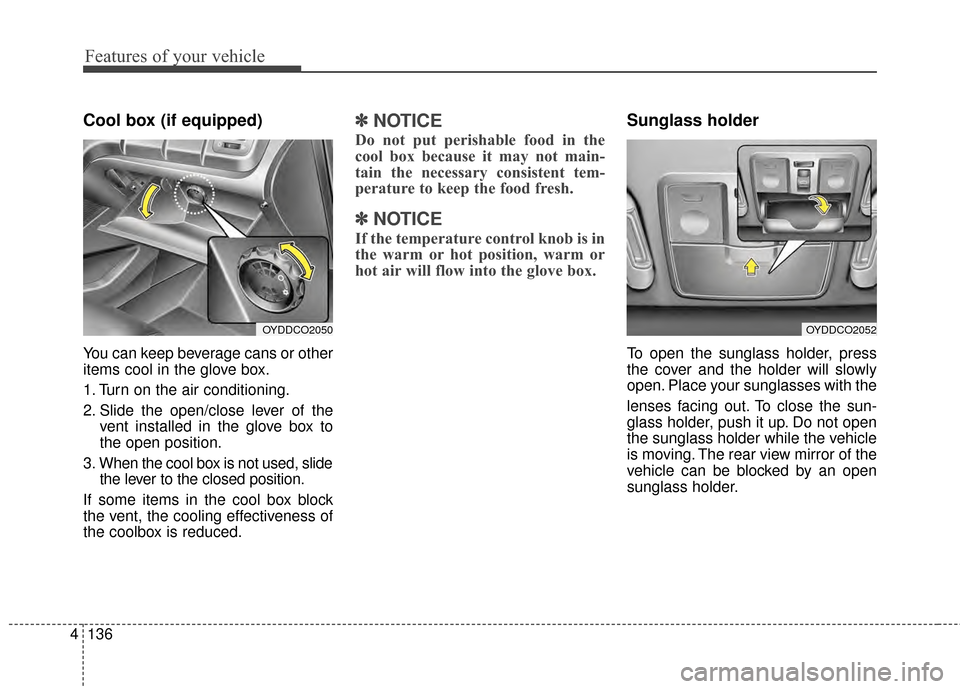
You can keep beverage cans or other
items cool in the glove box.
1. Turn on the air conditioning.
2. Slide the open/close lever of the
vent installed in the glove box to
the open position.
3. When the cool box is not used, slide the lever to the closed position.
If some items in the cool box block
the vent, the cooling effectiveness of
the coolbox is reduced.
✽ ✽ NOTICE
Do not put perishable food in the
cool box because it may not main-
tain the necessary consistent tem-
perature to keep the food fresh.
✽ ✽NOTICE
If the temperature control knob is in
the warm or hot position, warm or
hot air will flow into the glove box.
Sunglass holder
To open the sunglass holder, press
the cover and the holder will slowly
open. Place your sunglasses with the
lenses facing out. To close the sun-
glass holder, push it up. Do not open
the sunglass holder while the vehicle
is moving. The rear view mirror of the
vehicle can be blocked by an open
sunglass holder.
OYDDCO2050OYDDCO2052
Page 213 of 452
Features of your vehicle
142
4
Climate control seat
(if equipped)
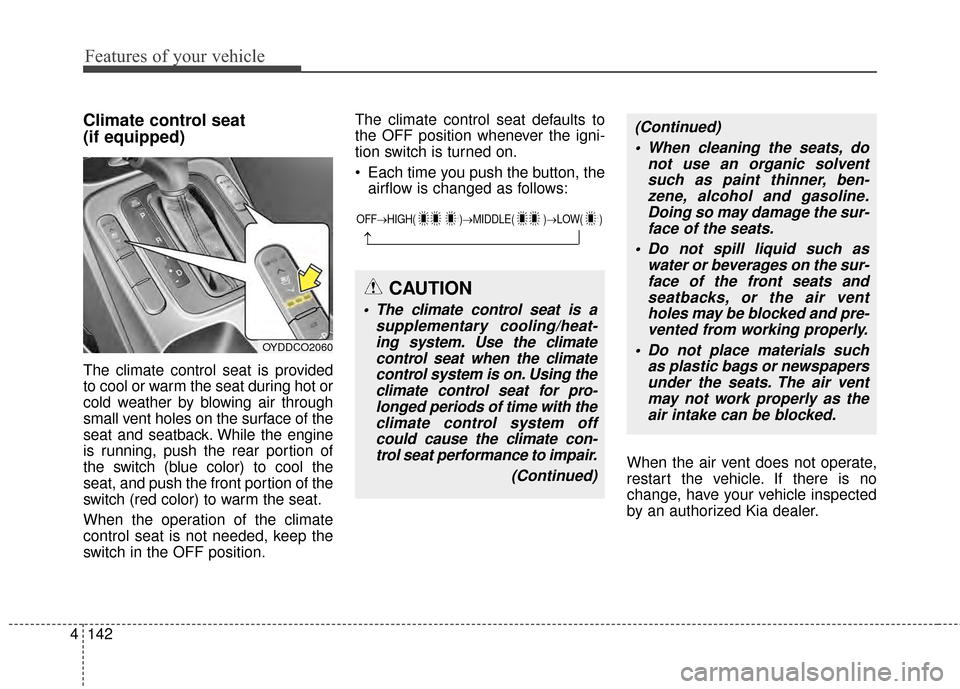
The climate control seat is provided
to cool or warm the seat during hot or
cold weather by blowing air through
small vent holes on the surface of the
seat and seatback. While the engine
is running, push the rear portion of
the switch (blue color) to cool the
seat, and push the front portion of the
switch (red color) to warm the seat.
When the operation of the climate
control seat is not needed, keep the
switch in the OFF position. The climate control seat defaults to
the OFF position whenever the igni-
tion switch is turned on.
Each time you push the button, the
airflow is changed as follows:
When the air vent does not operate,
restart the vehicle. If there is no
change, have your vehicle inspected
by an authorized Kia dealer.
OYDDCO2060
OFF→HIGH( )→ MIDDLE( )→LOW( )
→
CAUTION
The climate control seat is a
supplementary cooling/heat-ing system. Use the climatecontrol seat when the climatecontrol system is on. Using theclimate control seat for pro-longed periods of time with theclimate control system offcould cause the climate con-trol seat performance to impair.
(Continued)
(Continued) When cleaning the seats, do not use an organic solventsuch as paint thinner, ben-zene, alcohol and gasoline.Doing so may damage the sur-face of the seats.
Do not spill liquid such as water or beverages on the sur-face of the front seats andseatbacks, or the air ventholes may be blocked and pre-vented from working properly.
Do not place materials such as plastic bags or newspapersunder the seats. The air ventmay not work properly as theair intake can be blocked.
Page 215 of 452
Features of your vehicle
144
4
LCD monitor
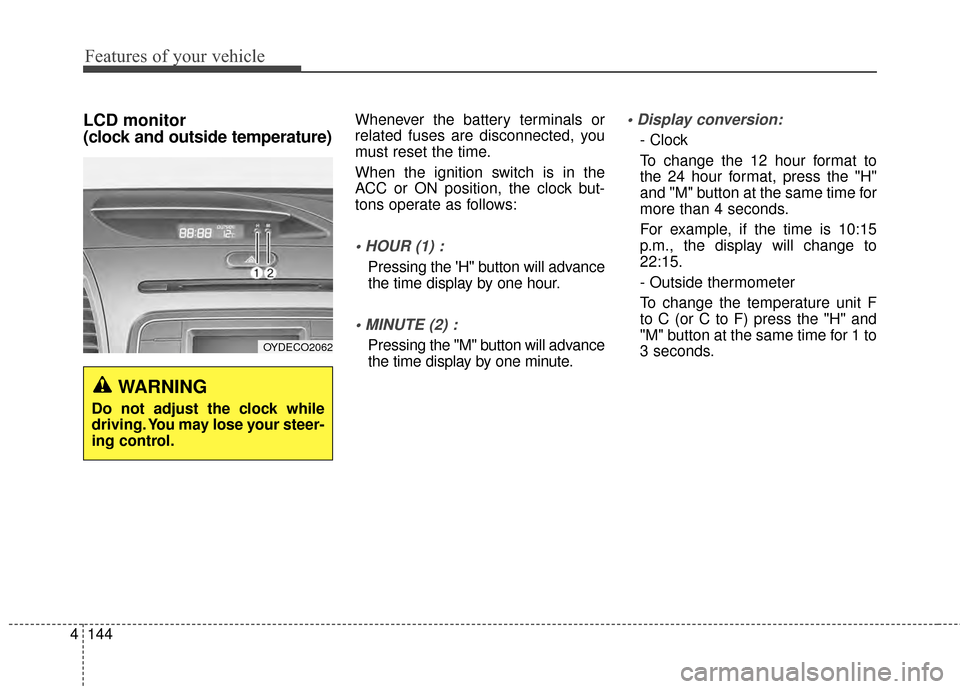
(clock and outside temperature)Whenever the battery terminals or
related fuses are disconnected, you
must reset the time.
When the ignition switch is in the
ACC or ON position, the clock but-
tons operate as follows:
Pressing the 'H" button will advance
the time display by one hour.
Pressing the "M" button will advance
the time display by one minute.
- Clock
To change the 12 hour format to
the 24 hour format, press the "H"
and "M" button at the same time for
more than 4 seconds.
For example, if the time is 10:15
p.m., the display will change to
22:15.
- Outside thermometer
To change the temperature unit F
to C (or C to F) press the "H" and
"M" button at the same time for 1 to
3 seconds.
WARNING
Do not adjust the clock while
driving. You may lose your steer-
ing control.
OYDECO2062
Page 222 of 452
4151
Features of your vehicle
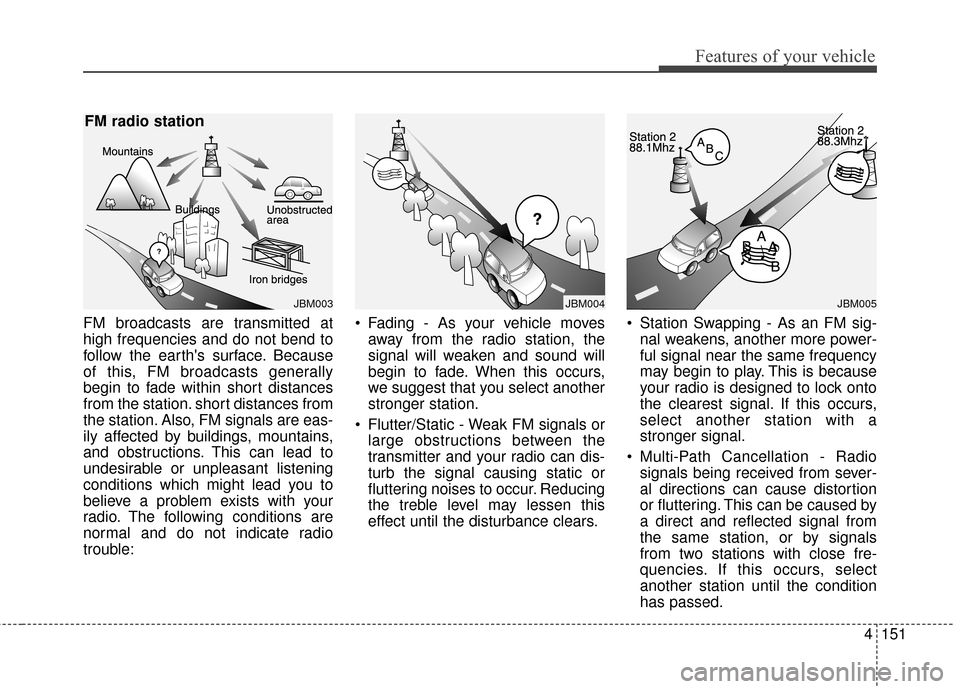
FM broadcasts are transmitted at
high frequencies and do not bend to
follow the earth's surface. Because
of this, FM broadcasts generally
begin to fade within short distances
from the station. short distances from
the station. Also, FM signals are eas-
ily affected by buildings, mountains,
and obstructions. This can lead to
undesirable or unpleasant listening
conditions which might lead you to
believe a problem exists with your
radio. The following conditions are
normal and do not indicate radio
trouble: Fading - As your vehicle moves
away from the radio station, the
signal will weaken and sound will
begin to fade. When this occurs,
we suggest that you select another
stronger station.
Flutter/Static - Weak FM signals or large obstructions between the
transmitter and your radio can dis-
turb the signal causing static or
fluttering noises to occur. Reducing
the treble level may lessen this
effect until the disturbance clears. Station Swapping - As an FM sig-
nal weakens, another more power-
ful signal near the same frequency
may begin to play. This is because
your radio is designed to lock onto
the clearest signal. If this occurs,
select another station with a
stronger signal.
Multi-Path Cancellation - Radio signals being received from sever-
al directions can cause distortion
or fluttering. This can be caused by
a direct and reflected signal from
the same station, or by signals
from two stations with close fre-
quencies. If this occurs, select
another station until the condition
has passed.
JBM003
FM radio station
JBM005
¢¢¢
JBM004
Page 276 of 452
Before entering vehicle
• Be sure that all windows, outsidemirror(s), and outside lights are
clean.
Check the condition of the tires.
Check under the vehicle for any sign of leaks.
Be sure there are no obstacles behind you if you intend to back up.
Necessary inspections
Fluid levels, such as engine oil,
engine coolant, brake fluid, and
washer fluid should be checked on a
regular basis, with the exact interval
depending on the fluid. Further
details are provided in Chapter 7,
“Maintenance”.
Before starting
Close and lock all doors.
Position the seat so that all con-trols are easily reached.
Buckle your seat belt.
Adjust the inside and outside rearview mirrors.
Be sure that all lights work.
Check all gauges.
Check the operation of warning lights when the ignition switch is
turned to the ON position.
Release the parking brake and make sure the brake warning light
goes off.
For safe operation, be sure you are
familiar with your vehicle and its
equipment.
BEFORE DRIVING
53
Driving your vehicle
WARNING- Distracted driving
Focus on the road while driving.
The driver's primary responsi-
bility is in the safe and legal
operation of the vehicle. Use of
any hand held devices, other
equipment or vehicle systems
that distract the driver should
not be used during vehicle
operation.
WARNING
- Check surrounding
Always check the surrounding
areas near your vehicle for peo-
ple, especially children, before
putting a vehicle into D (Drive)
or R (Reverse).
Page 278 of 452
55
Driving your vehicle
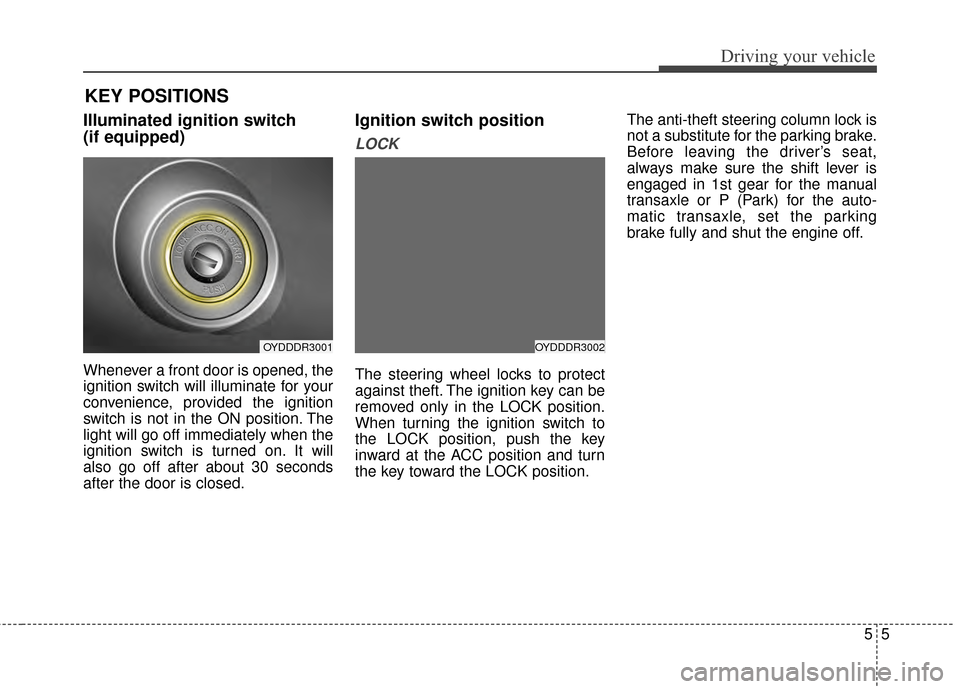
Illuminated ignition switch
(if equipped)
Whenever a front door is opened, the
ignition switch will illuminate for your
convenience, provided the ignition
switch is not in the ON position. The
light will go off immediately when the
ignition switch is turned on. It will
also go off after about 30 seconds
after the door is closed.
Ignition switch position
LOCK
The steering wheel locks to protect
against theft. The ignition key can be
removed only in the LOCK position.
When turning the ignition switch to
the LOCK position, push the key
inward at the ACC position and turn
the key toward the LOCK position.The anti-theft steering column lock is
not a substitute for the parking brake.
Before leaving the driver’s seat,
always make sure the shift lever is
engaged in 1st gear for the manual
transaxle or P (Park) for the auto-
matic transaxle, set the parking
brake fully and shut the engine off.
KEY POSITIONS
OYDDDR3001OYDDDR3002
Page 279 of 452
Driving your vehicle
65
ACC (Accessory)
The steering wheel is unlocked and
electrical accessories are operative.
If difficulty is experienced turning the
ignition switch to the ACC position,
turn the key while turning the steer-
ing wheel right and left to release the
tension.
ON
The warning lights can be checked
before the engine is started. This is
the normal running position after the
engine is started.
Do not leave the ignition switch ON ifthe engine is not running to preventbattery discharge. START
Turn the ignition switch to the START
position to start the engine. The
engine will crank until you release
the key; then it returns to the ON
position. The brake warning light can
be checked in this position.WARNING- Ignition
switch
Never turn the ignition switch to
LOCK or ACC while the vehicle
is moving. This would result in
loss of directional control and
braking function, which could
cause an accident.
WARNING - Steering wheel
Never reach for any controls
through the steering wheel
while the vehicle is in motion.
The presence of your hand or
arm in this area could cause a
loss of vehicle control.