ignition KIA Cerato 2016 2.G Owner's Guide
[x] Cancel search | Manufacturer: KIA, Model Year: 2016, Model line: Cerato, Model: KIA Cerato 2016 2.GPages: 501, PDF Size: 14.8 MB
Page 112 of 501
441
Features of your vehicle
Electric power steering (EPS)
Power steering uses the motor to
assist you in steering the vehicle. If
the engine is off or if the power steer-
ing system becomes inoperative, the
vehicle may still be steered, but it will
require increased steering effort.
The motor driven power steering is
controlled by the power steering con-
trol unit which senses the steering
wheel torque and vehicle speed to
command the motor.
The steering wheel becomes heavier
as the vehicle’s speed increases and
becomes lighter as the vehicle’s
speed decreases for better control of
the steering wheel.
Should you notice any change in the
effort required to steer during normal
vehicle operation, have the power
steering checked by an authorized
Kia dealer.
✽ ✽NOTICE
The following symptoms may occur
during normal vehicle operation:
• The steering effort is increased
immediately after turning the igni-
tion switch on. This happens as the
system performs the EPS system
diagnostics. When the diagnostics
are completed, the steering wheel
will return to its normal condition
• A click noise may be heard from the EPS relay after the ignition
switch is turned to the ON or
LOCK position.
• Motor noise may be heard when the vehicle is at a stop or at a low
driving speed.
• The steering effort increases if the steering wheel is rotated continu-
ously when the vehicle is not in
motion. However, after a few min-
utes, it will return to its normal
condition.
• When you operate the steering wheel in low temperature, noise
may occur. If the temperature
rises, the noise will likely disap-
pear. This is a normal condition. (Continued)(Continued)
• When the charging system warn-
ing light comes on or the battery
voltage is low (when the alternator
or battery does not operate nor-
mally), the steering wheel may get
heavy and become difficult to con-
trol operate abnormally.
If the Electric Power Steering System
does not operate normally, the warn-
ing light will illuminate on the instru-
ment cluster. The steering wheel may
require increased steering effort.
Take your vehicle to an authorized
Kia dealer and have the vehicle
checked as soon as possible.
STEERING WHEEL
Page 114 of 501
443
Features of your vehicle
Heated steering wheel
(if equipped)
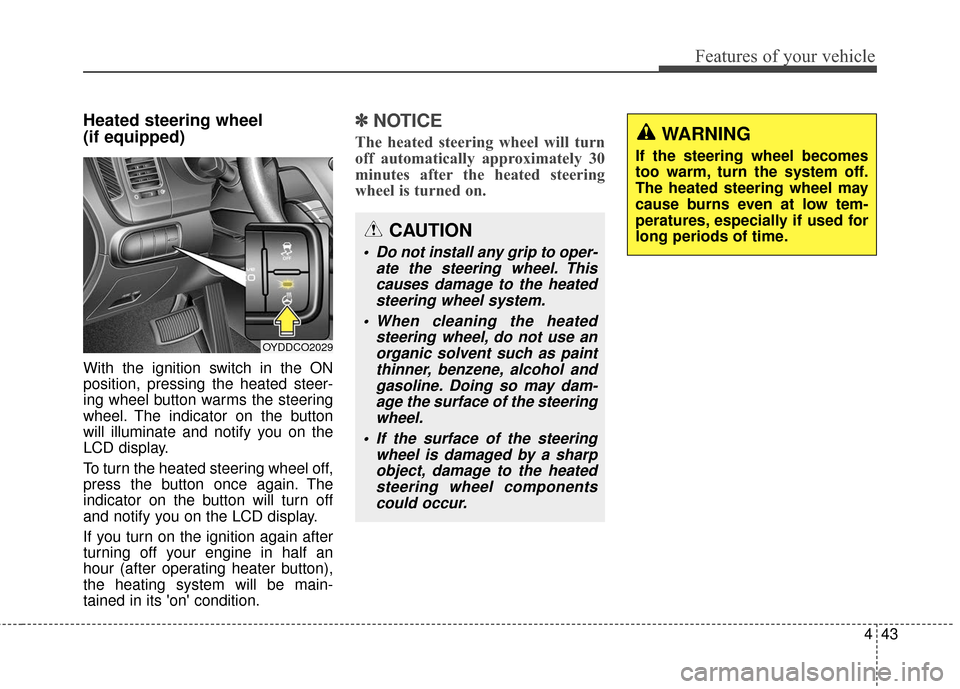
With the ignition switch in the ON
position, pressing the heated steer-
ing wheel button warms the steering
wheel. The indicator on the button
will illuminate and notify you on the
LCD display.
To turn the heated steering wheel off,
press the button once again. The
indicator on the button will turn off
and notify you on the LCD display.
If you turn on the ignition again after
turning off your engine in half an
hour (after operating heater button),
the heating system will be main-
tained in its 'on' condition.
✽ ✽NOTICE
The heated steering wheel will turn
off automatically approximately 30
minutes after the heated steering
wheel is turned on.
CAUTION
Do not install any grip to oper-
ate the steering wheel. Thiscauses damage to the heatedsteering wheel system.
When cleaning the heated steering wheel, do not use anorganic solvent such as paintthinner, benzene, alcohol andgasoline. Doing so may dam-age the surface of the steeringwheel.
If the surface of the steering wheel is damaged by a sharpobject, damage to the heatedsteering wheel componentscould occur.
OYDDCO2029
WARNING
If the steering wheel becomes
too warm, turn the system off.
The heated steering wheel may
cause burns even at low tem-
peratures, especially if used for
long periods of time.
Page 118 of 501
447
Features of your vehicle
HomeLink®* Wireless Control System
Your new mirror comes with an inte-
grated Homelink
®Universal
Transceiver, which allows you to pro-
gram the mirror to activate your
garage door(s), estate gate, home
lighting, etc. The mirror actually
learns the codes from your various
existing transmitters. Retain the original transmitter for
future programming procedures (i.e.,
new vehicle purchase). It is also sug-
gested that upon the sale of the vehi-
cle, the programmed Homelink
®but-
tons be erased for security purposes
(follow step 1 in the "Programming"
portion of this text).
Programming
Your vehicle may require the ignition
switch to be turned to the ACC posi-
tion for programming and/or opera-
tion of Homelink
®. It is also recom-
mended that a new battery be
replaced in the hand-held transmitter
of the device being programmed to
Homelink
®for quicker training and
accurate transmission of the radio-
frequency.
Follow these steps to train your
Homelink
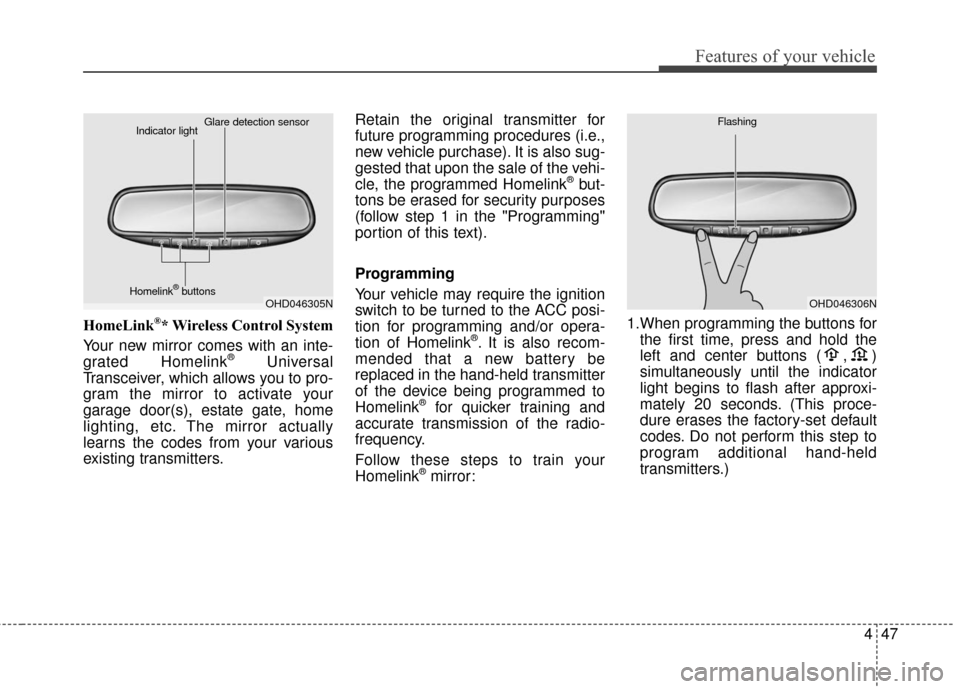
®mirror: 1.When programming the buttons for
the first time, press and hold the
left and center buttons ( , )
simultaneously until the indicator
light begins to flash after approxi-
mately 20 seconds. (This proce-
dure erases the factory-set default
codes. Do not perform this step to
program additional hand-held
transmitters.)
OHD046305N
Glare detection sensor
Indicator light
Homelink
®buttonsOHD046306N
Flashing
Page 123 of 501
Features of your vehicle
52
4
Remote control
Electric type
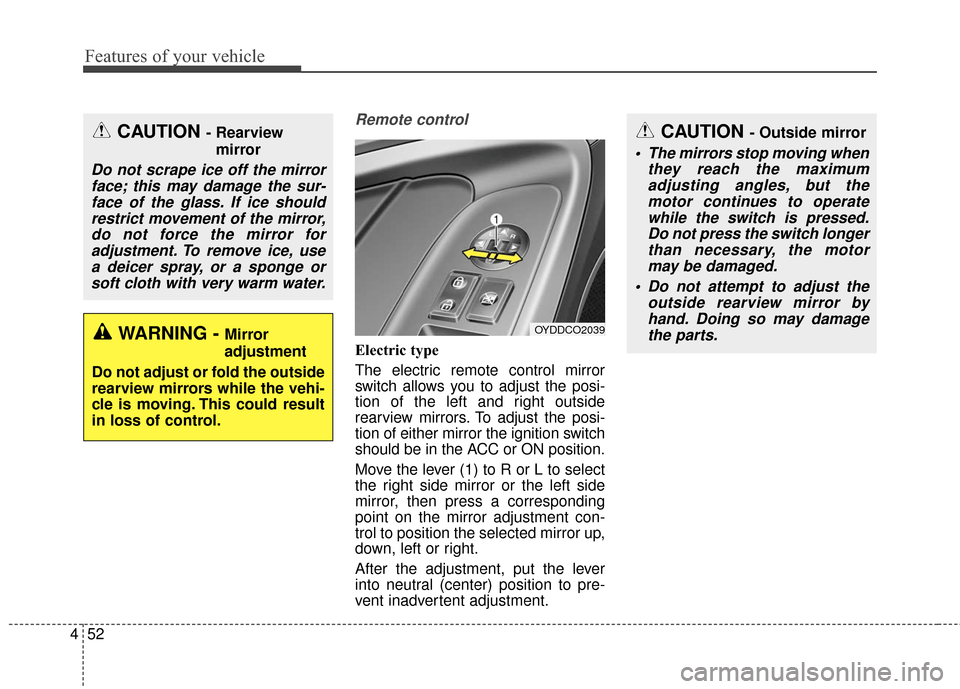
The electric remote control mirror
switch allows you to adjust the posi-
tion of the left and right outside
rearview mirrors. To adjust the posi-
tion of either mirror the ignition switch
should be in the ACC or ON position.
Move the lever (1) to R or L to select
the right side mirror or the left side
mirror, then press a corresponding
point on the mirror adjustment con-
trol to position the selected mirror up,
down, left or right.
After the adjustment, put the lever
into neutral (center) position to pre-
vent inadvertent adjustment.
CAUTION - Outside mirror
The mirrors stop moving when
they reach the maximumadjusting angles, but themotor continues to operatewhile the switch is pressed.Do not press the switch longerthan necessary, the motormay be damaged.
Do not attempt to adjust the outside rearview mirror byhand. Doing so may damagethe parts.
OYDDCO2039
CAUTION - Rearview
mirror
Do not scrape ice off the mirrorface; this may damage the sur-face of the glass. If ice shouldrestrict movement of the mirror,do not force the mirror foradjustment. To remove ice, usea deicer spray, or a sponge orsoft cloth with very warm water.
WARNING - Mirror
adjustment
Do not adjust or fold the outside
rearview mirrors while the vehi-
cle is moving. This could result
in loss of control.
Page 124 of 501
453
Features of your vehicle
Folding the outside rearview mirror
Electric type
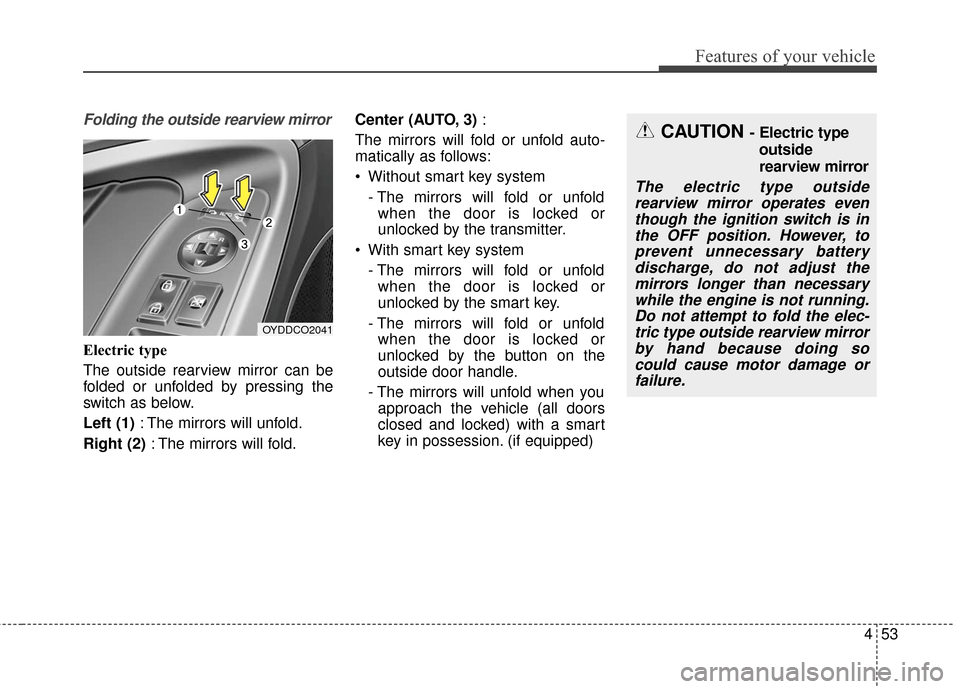
The outside rearview mirror can be
folded or unfolded by pressing the
switch as below.
Left (1): The mirrors will unfold.
Right (2) : The mirrors will fold. Center (AUTO, 3)
:
The mirrors will fold or unfold auto-
matically as follows:
Without smart key system - The mirrors will fold or unfoldwhen the door is locked or
unlocked by the transmitter.
With smart key system - The mirrors will fold or unfoldwhen the door is locked or
unlocked by the smart key.
- The mirrors will fold or unfold when the door is locked or
unlocked by the button on the
outside door handle.
- The mirrors will unfold when you approach the vehicle (all doors
closed and locked) with a smart
key in possession. (if equipped)
OYDDCO2041
CAUTION - Electric type
outside
rearview mirror
The electric type outsiderearview mirror operates eventhough the ignition switch is inthe OFF position. However, toprevent unnecessary batterydischarge, do not adjust themirrors longer than necessarywhile the engine is not running.Do not attempt to fold the elec-tric type outside rearview mirrorby hand because doing socould cause motor damage orfailure.
Page 129 of 501
Features of your vehicle
58
4
Tachometer
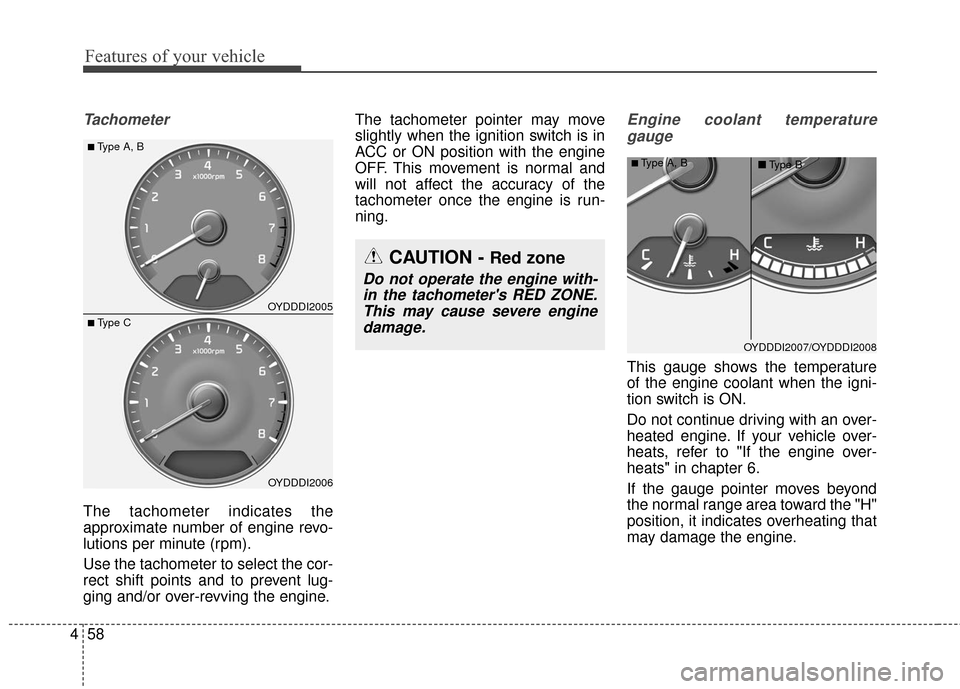
The tachometer indicates the
approximate number of engine revo-
lutions per minute (rpm).
Use the tachometer to select the cor-
rect shift points and to prevent lug-
ging and/or over-revving the engine. The tachometer pointer may move
slightly when the ignition switch is in
ACC or ON position with the engine
OFF. This movement is normal and
will not affect the accuracy of the
tachometer once the engine is run-
ning.
Engine coolant temperature
gauge
This gauge shows the temperature
of the engine coolant when the igni-
tion switch is ON.
Do not continue driving with an over-
heated engine. If your vehicle over-
heats, refer to "If the engine over-
heats" in chapter 6.
If the gauge pointer moves beyond
the normal range area toward the "H"
position, it indicates overheating that
may damage the engine.
OYDDDI2005
OYDDDI2006
■Type A, B
■ Type C
CAUTION - Red zone
Do not operate the engine with-in the tachometer's RED ZONE.This may cause severe enginedamage.
OYDDDI2007/OYDDDI2008
■Type A, B ■Type B
Page 133 of 501
Features of your vehicle
62
4
Service Mode
Service Interval
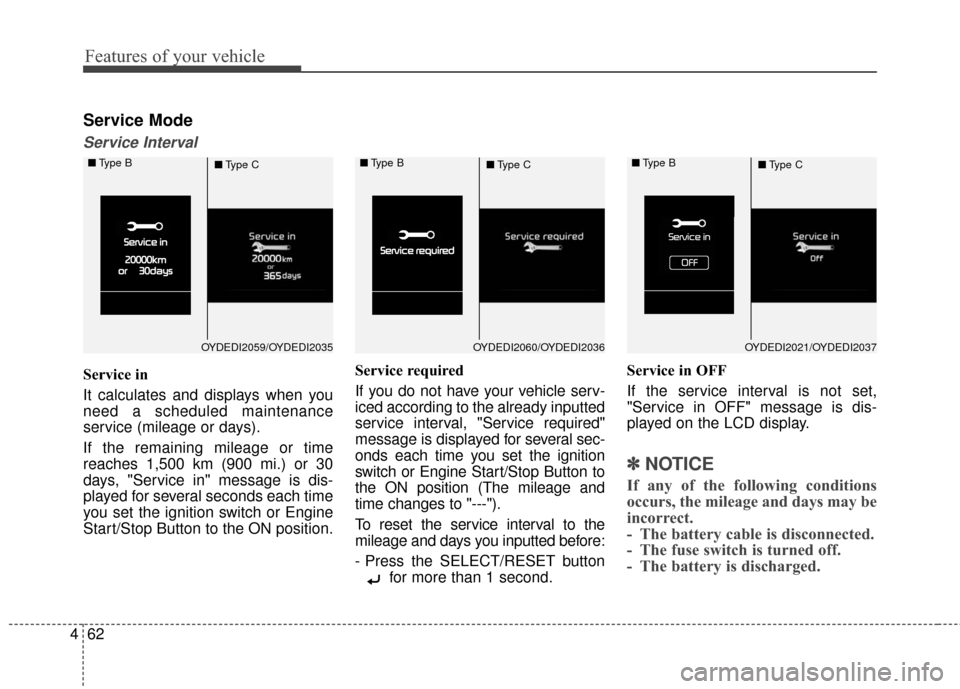
Service in
It calculates and displays when you
need a scheduled maintenance
service (mileage or days).
If the remaining mileage or time
reaches 1,500 km (900 mi.) or 30
days, "Service in" message is dis-
played for several seconds each time
you set the ignition switch or Engine
Start/Stop Button to the ON position. Service required
If you do not have your vehicle serv-
iced according to the already inputted
service interval, "Service required"
message is displayed for several sec-
onds each time you set the ignition
switch or Engine Start/Stop Button to
the ON position (The mileage and
time changes to "---").
To reset the service interval to the
mileage and days you inputted before:
- Press the SELECT/RESET button
for more than 1 second. Service in OFF
If the service interval is not set,
"Service in OFF" message is dis-
played on the LCD display.
✽ ✽
NOTICE
If any of the following conditions
occurs, the mileage and days may be
incorrect.
- The battery cable is disconnected.
- The fuse switch is turned off.
- The battery is discharged.
OYDEDI2059/OYDEDI2035
■
Type B
■Type COYDEDI2060/OYDEDI2036
■
Type B
■Type COYDEDI2021/OYDEDI2037
■
Type B
■Type C
Page 134 of 501
463
Features of your vehicle
User Settings Mode
Description
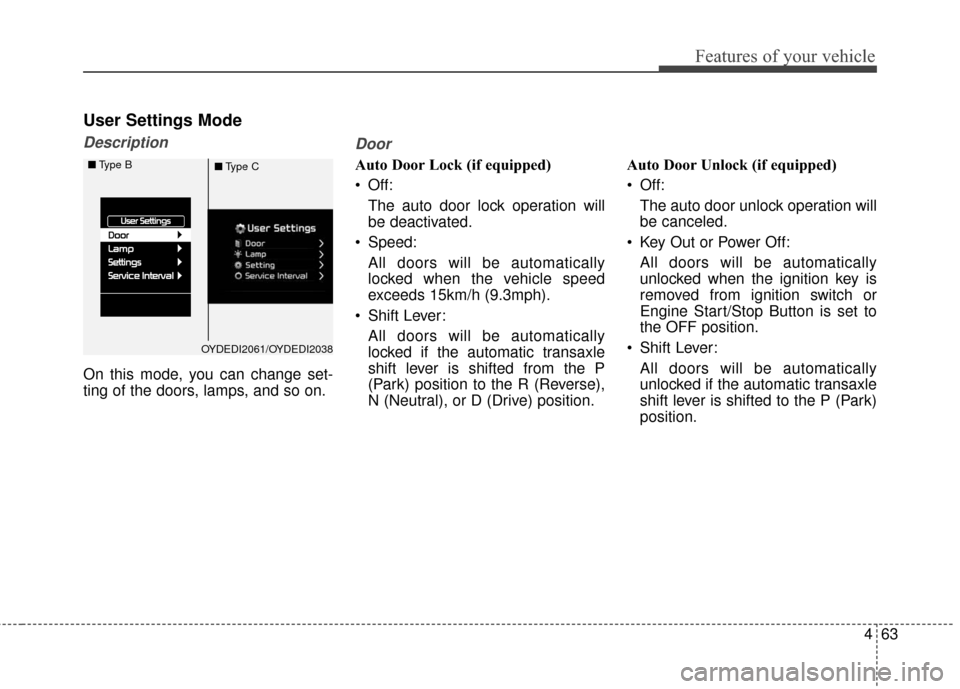
On this mode, you can change set-
ting of the doors, lamps, and so on.
Door
Auto Door Lock (if equipped)
Off:The auto door lock operation will
be deactivated.
Speed: All doors will be automatically
locked when the vehicle speed
exceeds 15km/h (9.3mph).
Shift Lever: All doors will be automatically
locked if the automatic transaxle
shift lever is shifted from the P
(Park) position to the R (Reverse),
N (Neutral), or D (Drive) position. Auto Door Unlock (if equipped)
Off:
The auto door unlock operation will
be canceled.
Key Out or Power Off: All doors will be automatically
unlocked when the ignition key is
removed from ignition switch or
Engine Start/Stop Button is set to
the OFF position.
Shift Lever: All doors will be automatically
unlocked if the automatic transaxle
shift lever is shifted to the P (Park)
position.
OYDEDI2061/OYDEDI2038
■
Type B
■Type C
Page 147 of 501
Features of your vehicle
76
4
Automatic reset
To make the average fuel economy
be reset automatically whenever refu-
eling, select the "Auto Reset" mode in
User Setting menu of the LCD display
(Refer to "LCD Display").
Under "Auto Reset" mode, the aver-
age fuel economy will be cleared to
zero (---) when the vehicle speed
exceeds 1 km/h after refueling more
than 6 liters (1.6 gallons).
✽ ✽
NOTICE
The average fuel economy is not dis-
played for more accurate calculation
if the vehicle does not drive more
than 10 seconds or 50 meters (0.03
miles) since the ignition switch or
Engine Start/Stop button is turned
to ON.
Instant Fuel Economy (3)
This mode displays the instant fuel
economy during the last few sec-
onds when the vehicle speed is
more than 10 km/h (6.2 MPH).
- Fuel economy range: 0 ~ 30L/100km or 0 ~ 50 MPG
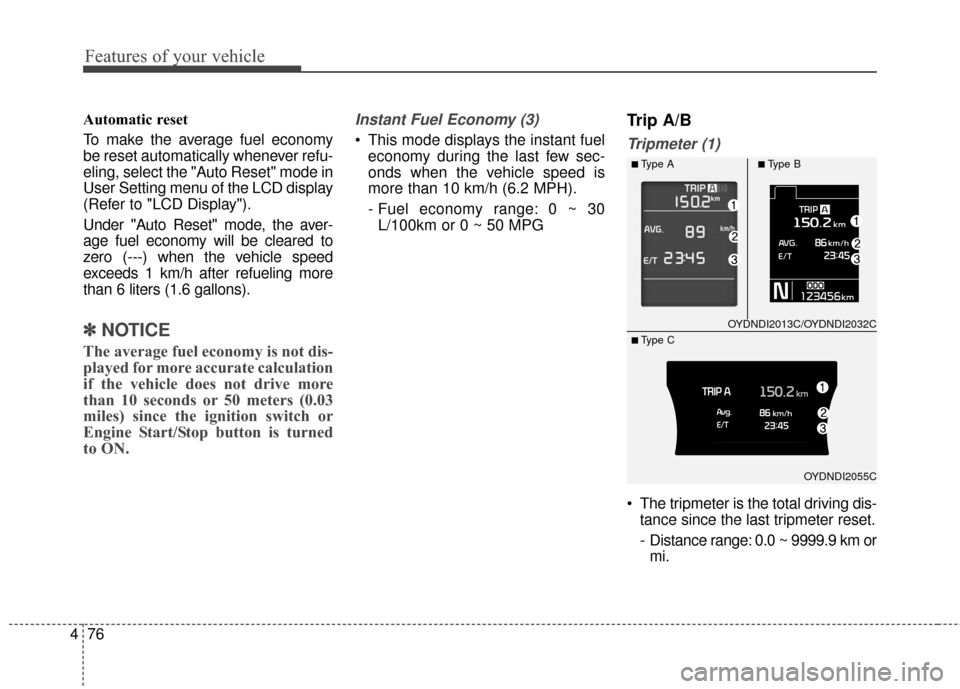
Trip A/B
Tripmeter (1)
The tripmeter is the total driving dis- tance since the last tripmeter reset.
- Distance range: 0.0 ~ 9999.9 km ormi.
OYDNDI2013C/OYDNDI2032C
OYDNDI2055C
■Type A■Type B
■ Type C
Page 148 of 501
477
Features of your vehicle
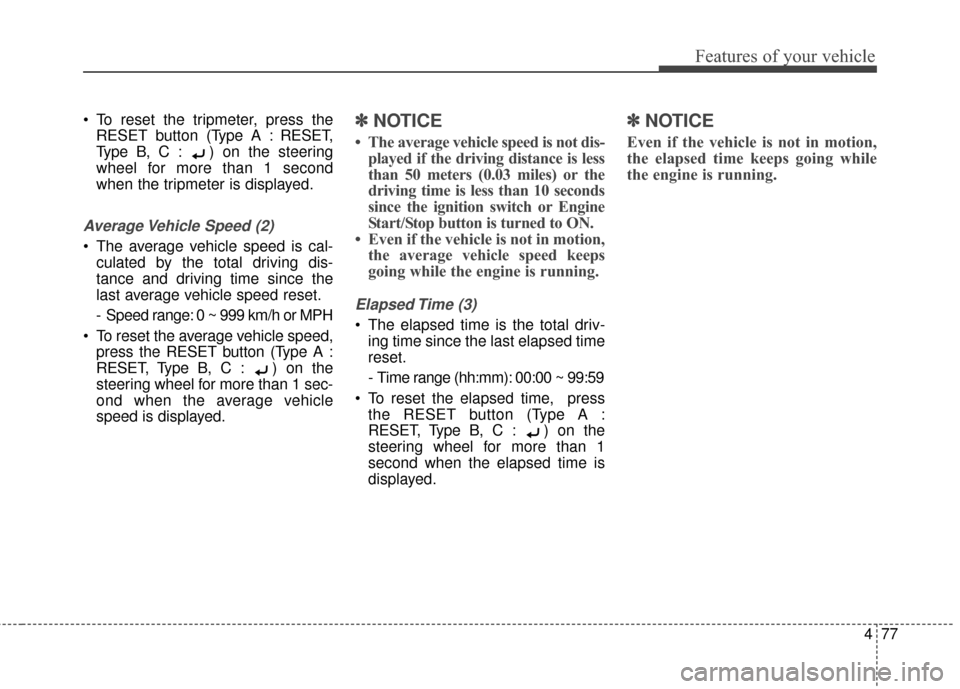
To reset the tripmeter, press theRESET button (T ype A : RESET,
Type B, C : ) on the steering
wheel for more than 1 second
when the tripmeter is displayed.
Average Vehicle Speed (2)
The average vehicle speed is cal- culated by the total driving dis-
tance and driving time since the
last average vehicle speed reset.
- Speed range: 0 ~ 999 km/h or MPH
To reset the average vehicle speed, press the RESET button (Type A :
RESET, Type B, C : ) on the
steering wheel for more than 1 sec-
ond when the average vehicle
speed is displayed.
✽ ✽ NOTICE
• The average vehicle speed is not dis-
played if the driving distance is less
than 50 meters (0.03 miles) or the
driving time is less than 10 seconds
since the ignition switch or Engine
Start/Stop button is turned to ON.
• Even if the vehicle is not in motion, the average vehicle speed keeps
going while the engine is running.
Elapsed Time (3)
The elapsed time is the total driv-
ing time since the last elapsed time
reset.
- Time range (hh:mm): 00:00 ~ 99:59
To reset the elapsed time, press the RESET button (T ype A :
RESET, Type B, C : ) on the
steering wheel for more than 1
second when the elapsed time is
displayed.
✽ ✽ NOTICE
Even if the vehicle is not in motion,
the elapsed time keeps going while
the engine is running.