rear KIA Cerato 2016 2.G Service Manual
[x] Cancel search | Manufacturer: KIA, Model Year: 2016, Model line: Cerato, Model: KIA Cerato 2016 2.GPages: 501, PDF Size: 14.8 MB
Page 98 of 501
427
Features of your vehicle
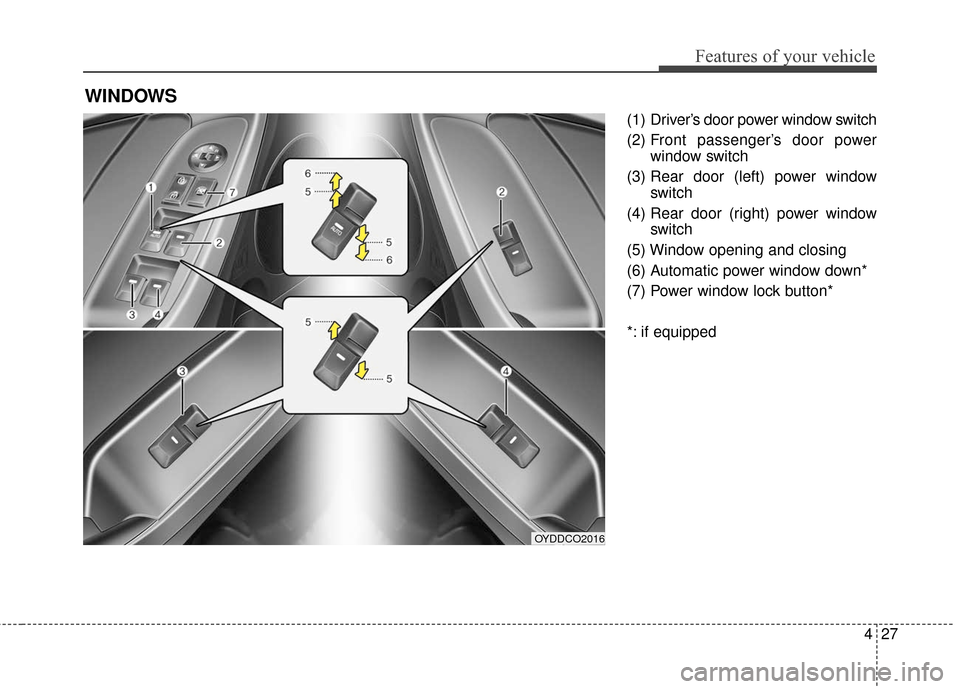
(1) Driver’s door power window switch
(2) Front passenger’s door powerwindow switch
(3) Rear door (left) power window switch
(4) Rear door (right) power window switch
(5) Window opening and closing
(6) Automatic power window down*
(7) Power window lock button*
*: if equipped
WINDOWS
OYDDCO2016
Page 99 of 501
Features of your vehicle
28
4
In cold and wet climates, power win-
dows may not work properly due to
freezing conditions.
Power windows
The ignition switch must be in the ON
position for power windows to oper-
ate. Each door has a power window
switch that controls the door’s win-
dow. The driver has a power window
lock switch which can block the oper-
ation of passenger windows.
The power windows can be operated
for approximately 30 seconds after the
ignition key is removed or turned to the
ACC or LOCK position. However, if the
front doors are opened, the power
windows cannot be operated even
within the 30 second period.
✽ ✽
NOTICE
While driving with the rear windows
down or with the sunroof (if
equipped) in an open (or partially
open) position, your vehicle may
demonstrate a wind buffeting or
pulsation noise. This noise is a nor-
mal occurrence and can be reduced
or eliminated by taking the follow-
ing actions. If the noise occurs with
one or both of the rear windows
down, partially lower both front
windows approximately one inch. If
you experience the noise with the
sunroof open, slightly reduce the
size of the sunroof opening.
Window opening and closing
(if equipped)
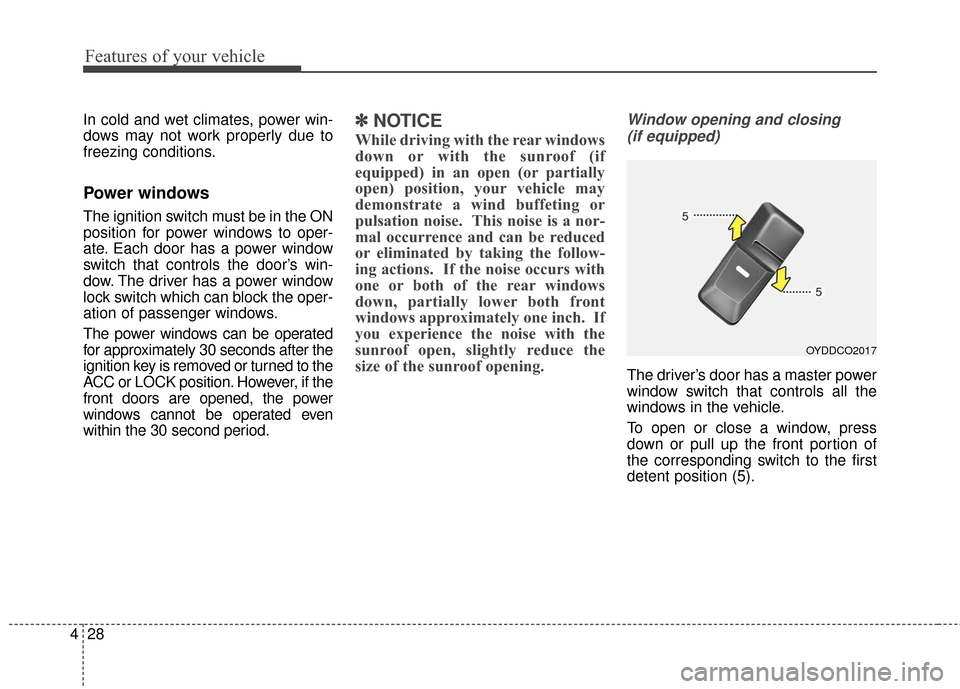
The driver’s door has a master power
window switch that controls all the
windows in the vehicle.
To open or close a window, press
down or pull up the front portion of
the corresponding switch to the first
detent position (5).
OYDDCO2017
Page 102 of 501
431
Features of your vehicle
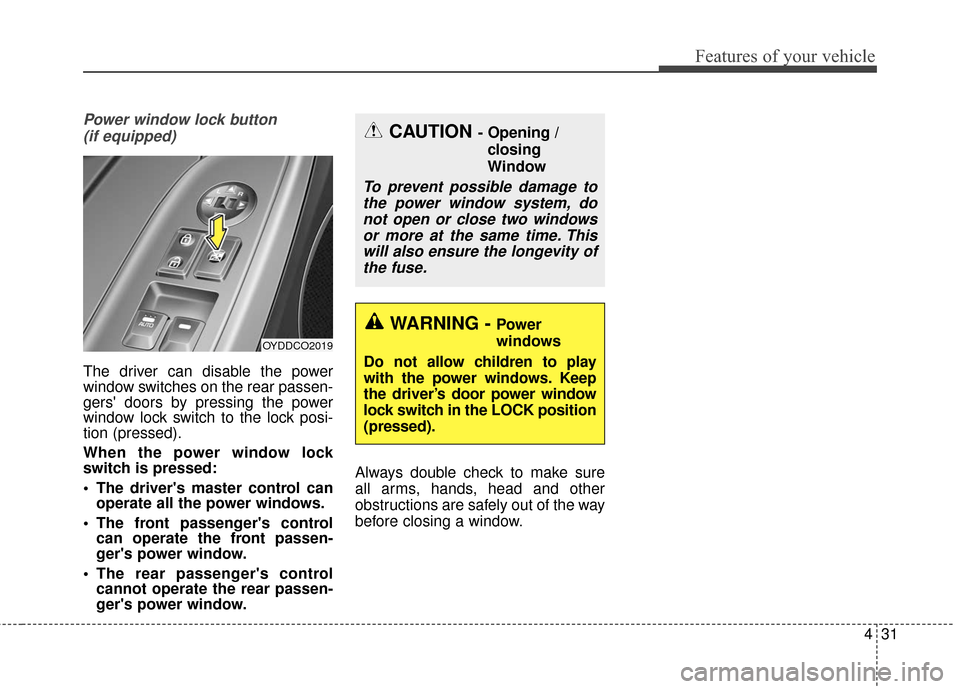
Power window lock button (if equipped)
The driver can disable the power
window switches on the rear passen-
gers' doors by pressing the power
window lock switch to the lock posi-
tion (pressed).
When the power window lock
switch is pressed:
The driver's master control can operate all the power windows.
The front passenger's control can operate the front passen-
ger's power window.
The rear passenger's control cannot operate the rear passen-
ger's power window. Always double check to make sure
all arms, hands, head and other
obstructions are safely out of the way
before closing a window.
CAUTION - Opening /
closing
Window
To prevent possible damage tothe power window system, donot open or close two windowsor more at the same time. Thiswill also ensure the longevity ofthe fuse.
WARNING - Power
windows
Do not allow children to play
with the power windows. Keep
the driver’s door power window
lock switch in the LOCK position
(pressed).
OYDDCO2019
Page 109 of 501
Features of your vehicle
38
4
If the driver removes the ignition key
(smart key: turns off the engine) and
opens the driver-side door when the
sunroof is not fully closed, the warning
chime will sound for a few seconds
and a warning image will appear on
the LCD display.
Close the sunroof securely when
leaving your vehicle.Sliding the sunroof
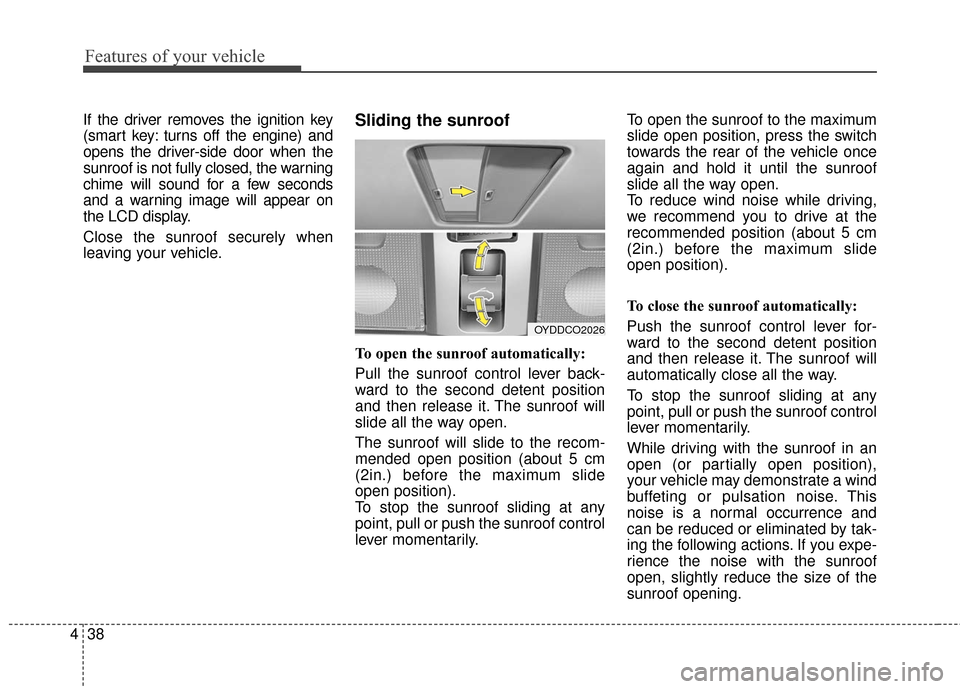
To open the sunroof automatically:
Pull the sunroof control lever back-
ward to the second detent position
and then release it. The sunroof will
slide all the way open.
The sunroof will slide to the recom-
mended open position (about 5 cm
(2in.) before the maximum slide
open position).
To stop the sunroof sliding at any
point, pull or push the sunroof control
lever momentarily. To open the sunroof to the maximum
slide open position, press the switch
towards the rear of the vehicle once
again and hold it until the sunroof
slide all the way open.
To reduce wind noise while driving,
we recommend you to drive at the
recommended position (about 5 cm
(2in.) before the maximum slide
open position).
To close the sunroof automatically:
Push the sunroof control lever for-
ward to the second detent position
and then release it. The sunroof will
automatically close all the way.
To stop the sunroof sliding at any
point, pull or push the sunroof control
lever momentarily.
While driving with the sunroof in an
open (or partially open position),
your vehicle may demonstrate a wind
buffeting or pulsation noise. This
noise is a normal occurrence and
can be reduced or eliminated by tak-
ing the following actions. If you expe-
rience the noise with the sunroof
open, slightly reduce the size of the
sunroof opening.
OYDDCO2026
Page 117 of 501
Features of your vehicle
46
4
Inside rearview mirror
Adjust the rearview mirror so that the
center view through the rear window
is seen. Make this adjustment before
you start driving.
Do not place objects in the rear seat
which would interfere with your vision
through the rear window.
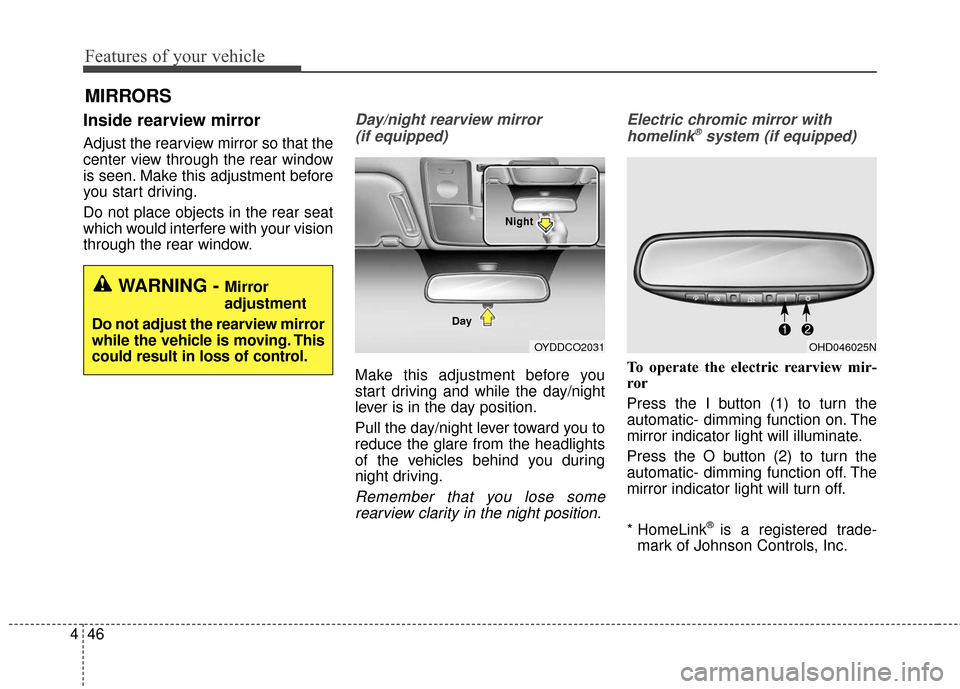
Day/night rearview mirror
(if equipped)
Make this adjustment before you
start driving and while the day/night
lever is in the day position.
Pull the day/night lever toward you to
reduce the glare from the headlights
of the vehicles behind you during
night driving.
Remember that you lose somerearview clarity in the night position. Electric chromic mirror with
homelink
®system (if equipped)
To operate the electric rearview mir-
ror
Press the I button (1) to turn the
automatic- dimming function on. The
mirror indicator light will illuminate.
Press the O button (2) to turn the
automatic- dimming function off. The
mirror indicator light will turn off.
* HomeLink
®is a registered trade-
mark of Johnson Controls, Inc.
MIRRORS
WARNING - Mirror
adjustment
Do not adjust the rearview mirror
while the vehicle is moving. This
could result in loss of control.
OYDDCO2031
Day NightOHD046025N
Page 122 of 501
451
Features of your vehicle
Accessories
If you would like additional informa-
tion on the Homelink
®Wireless
Control System, Homelink®compati-
ble products, or to purchase other
accessories such as the HomeLink
®
Lighting Package, please contact
Homelink®at 1-800-355-3515 or on
the internet at www.homelink.com.
This device complies with Industry
Canada Standard RSS-210.
Operation is subject to the following
two conditions:
1. This device may not cause harm- ful interference, and
2. This device must accept any inter- ference received, including inter-
ference that may cause undesired
operation. The Homelink
®transmitter has been
tested and complies with FCC and
DOC/MDC rules. Changes or modifi-
cations not expressly approved by
the party responsible for compliance
could void the user’s authority to
operate the equipment.
IC: 4112104541A Gentex
MODEL/FCC ID: NZLSTDHL3Outside rearview mirror
Be sure to adjust mirror angles
before driving.
Your vehicle is equipped with both
left-hand and right-hand outside
rearview mirrors. The mirrors can be
adjusted remotely with the remote
switch (if equipped). The mirror heads
can be folded to prevent damage dur-
ing an automatic car wash or when
passing through a narrow street.
The right outside rearview mirror is
convex. Objects seen in the mirror
are closer than they appear.
Use your interior rearview mirror or
direct observation to determine the
actual distance of following vehicles
when changing lanes.
Page 123 of 501
Features of your vehicle
52
4
Remote control
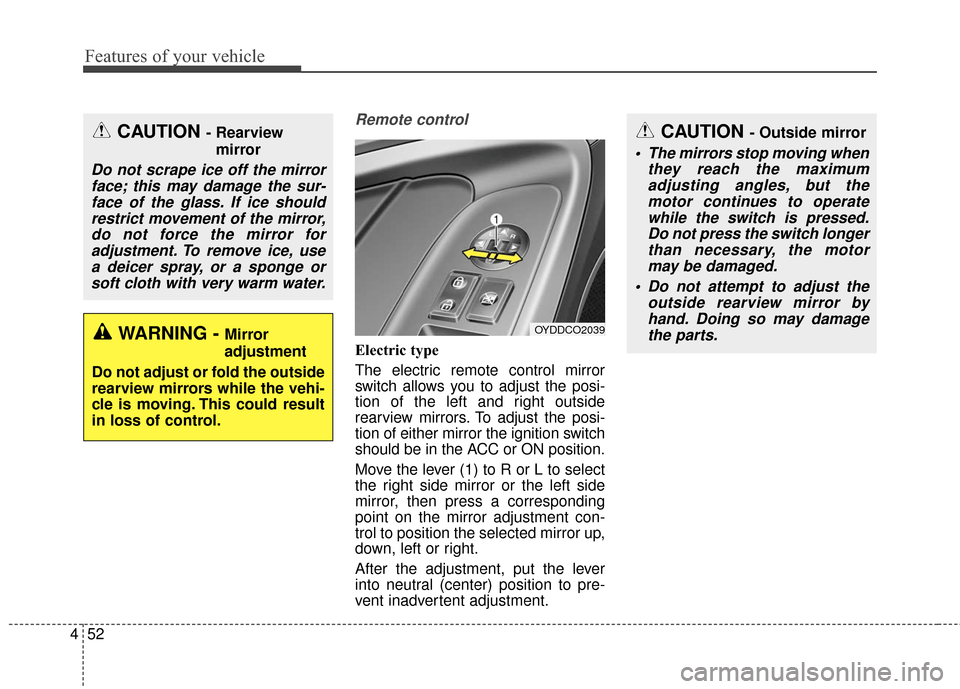
Electric type
The electric remote control mirror
switch allows you to adjust the posi-
tion of the left and right outside
rearview mirrors. To adjust the posi-
tion of either mirror the ignition switch
should be in the ACC or ON position.
Move the lever (1) to R or L to select
the right side mirror or the left side
mirror, then press a corresponding
point on the mirror adjustment con-
trol to position the selected mirror up,
down, left or right.
After the adjustment, put the lever
into neutral (center) position to pre-
vent inadvertent adjustment.
CAUTION - Outside mirror
The mirrors stop moving when
they reach the maximumadjusting angles, but themotor continues to operatewhile the switch is pressed.Do not press the switch longerthan necessary, the motormay be damaged.
Do not attempt to adjust the outside rearview mirror byhand. Doing so may damagethe parts.
OYDDCO2039
CAUTION - Rearview
mirror
Do not scrape ice off the mirrorface; this may damage the sur-face of the glass. If ice shouldrestrict movement of the mirror,do not force the mirror foradjustment. To remove ice, usea deicer spray, or a sponge orsoft cloth with very warm water.
WARNING - Mirror
adjustment
Do not adjust or fold the outside
rearview mirrors while the vehi-
cle is moving. This could result
in loss of control.
Page 124 of 501
453
Features of your vehicle
Folding the outside rearview mirror
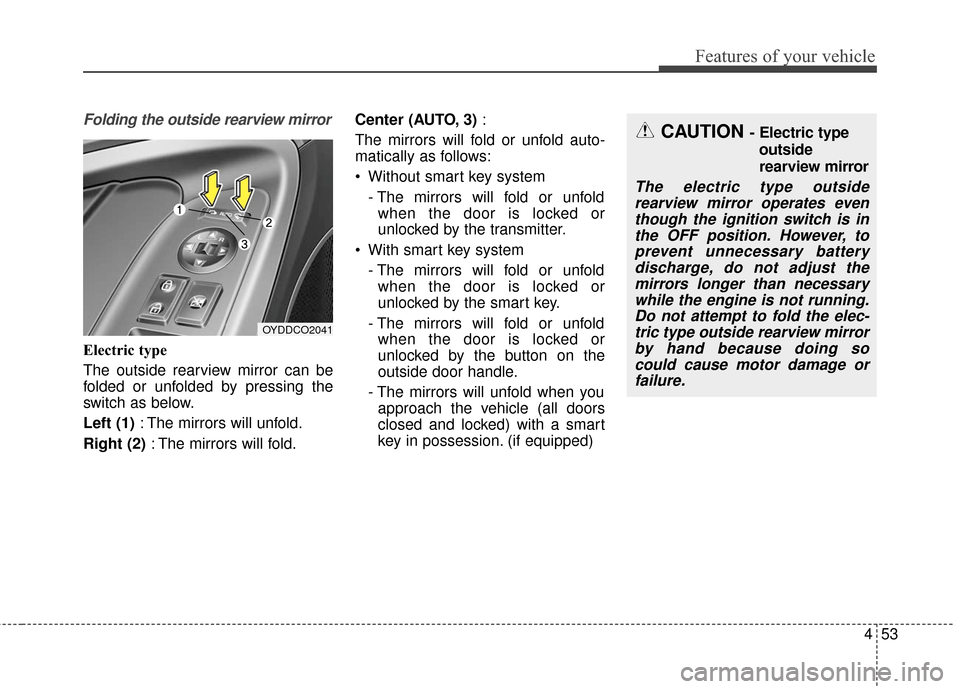
Electric type
The outside rearview mirror can be
folded or unfolded by pressing the
switch as below.
Left (1): The mirrors will unfold.
Right (2) : The mirrors will fold. Center (AUTO, 3)
:
The mirrors will fold or unfold auto-
matically as follows:
Without smart key system - The mirrors will fold or unfoldwhen the door is locked or
unlocked by the transmitter.
With smart key system - The mirrors will fold or unfoldwhen the door is locked or
unlocked by the smart key.
- The mirrors will fold or unfold when the door is locked or
unlocked by the button on the
outside door handle.
- The mirrors will unfold when you approach the vehicle (all doors
closed and locked) with a smart
key in possession. (if equipped)
OYDDCO2041
CAUTION - Electric type
outside
rearview mirror
The electric type outsiderearview mirror operates eventhough the ignition switch is inthe OFF position. However, toprevent unnecessary batterydischarge, do not adjust themirrors longer than necessarywhile the engine is not running.Do not attempt to fold the elec-tric type outside rearview mirrorby hand because doing socould cause motor damage orfailure.
Page 125 of 501
Features of your vehicle
54
4
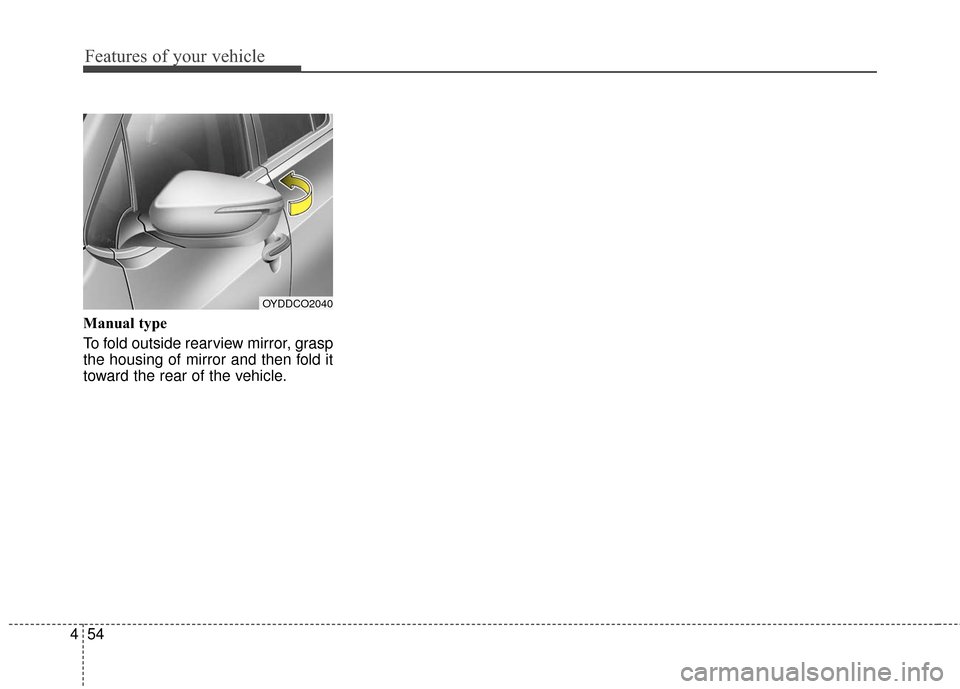
Manual type
To fold outside rearview mirror, grasp
the housing of mirror and then fold it
toward the rear of the vehicle.
OYDDCO2040
Page 135 of 501
Features of your vehicle
64
4
Two Press Unlock (if equipped)
Off:
The two press unlock function will
be deactivated. Therefore, all doors
will unlock if the door is unlocked.
On: The driver’s door will unlock if the
door is unlocked. When the door is
unlocked again within 4 seconds,
all doors will unlock.
Horn Feedback (if equipped)
Off: The Horn feedback operation will
be deactivated.
On: After locking the door by pressing
the lock button on the transmitter, if
you press the lock button again
within 4 seconds, the warning
sound will operate once to indicate
that all doors are locked.Lamp
Head Lamp Delay (if equipped)
If this item is checked, the headlamp
delay and headlamp welcome func-
tion will be activated.
Welcome Light (if equipped)
If this item is checked, the welcome
light function of the puddle lamp will
be activated.
One Touch Turn Lamp (if equipped)
If this item is checked, the lane
change signals will blink 3, 5 or 7
times when the turn signal lever is
moved slightly.
Settings
Welcome Sound
If this item is checked, the welcome
sound function will be activated.
Shift Indicator (if equipped)
If this item is checked, the shift indi-
cator function will be activated.
For more details, refer to "Instrument
Cluster" in this chapter.
Seat Easy Access (if equipped)
If this item is checked, the driver’s
seat will automatically move forward
or rearward for the driver to enter or
exit the vehicle comfortably.