front position light KIA FORTE 2017 User Guide
[x] Cancel search | Manufacturer: KIA, Model Year: 2017, Model line: FORTE, Model: KIA FORTE 2017Pages: 595, PDF Size: 11.5 MB
Page 88 of 595
Features of your vehicle
16 4
Theft-alarm stage
The alarm will be activated if any of
the following occurs while the system
is armed.
• A front or rear door is opened without
using the mechanical key or trans-
mitter (or smart key).
• The trunk/liftgate is opened without
using the mechanical key or trans-
mitter (or smart key).
• The engine hood is opened.
The horn will sound and the hazard
warning lights will blink continuously
for approximately 27 seconds
(2times). To turn off the system,
unlock the doors with the transmitter
(or smart key).
Disarmed stage
The system will be disarmed when:
Transmitter
- The door unlock button is pressed.
- The engine is started. (within 3
seconds)
- The ignition switch is in the “ON”
position for 30 seconds or more.
Smart key
- The door unlock button is pressed.
- The button of the front outside door
is pressed while carrying the smart
key.
- The engine is started. (within 3
seconds)
After the doors are unlocked, the
hazard warning lights will blink twice
to indicate that the system is dis-
armed.
After pressing the unlock button, if
any door (or trunk/liftgate) is not
opened within 30 seconds, the sys-
tem will be rearmed.• Avoid trying to start the engine
while the alarm is activated. The
vehicle starting motor is disabled
during the theft-alarm stage.
If the system is not disarmed with
the transmitter, insert the key into
the ignition switch, turn the ignition
switch to the ON position and wait
for 30 seconds. Then the system
will be disarmed.
• If you lose your keys, consult your
authorized Kia dealer.
• If the system is not disarmed with
the transmitter, insert the key into
the ignition switch and start the
engine. Then the system will be
disarmed.
• If you lose your keys, consult your
authorized Kia dealer.
Page 95 of 595
423
Features of your vehicle
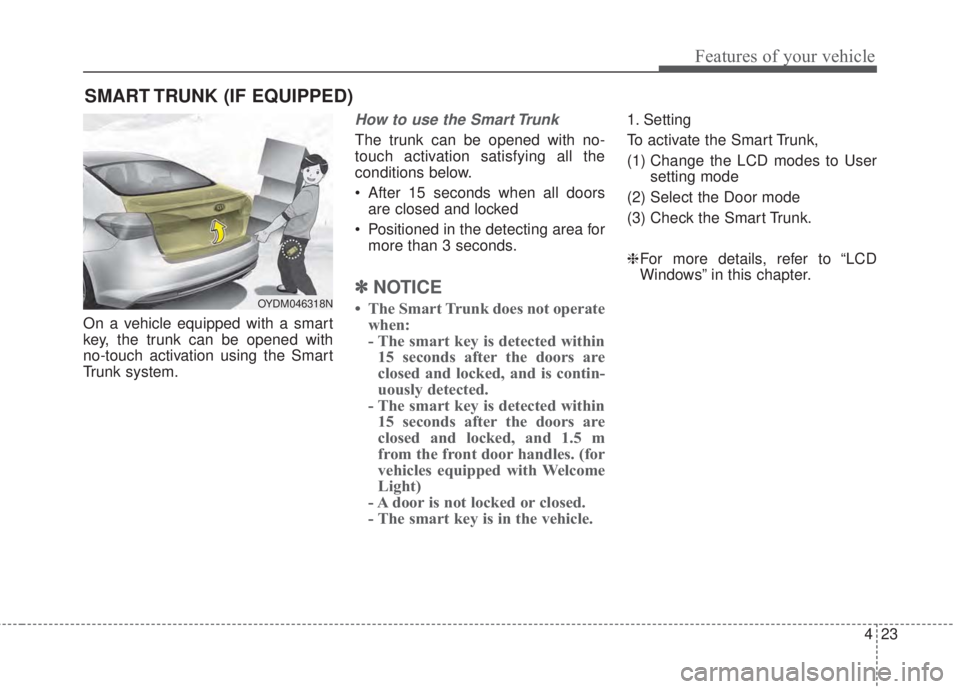
On a vehicle equipped with a smart
key, the trunk can be opened with
no-touch activation using the Smart
Trunk system.
How to use the Smart Trunk
The trunk can be opened with no-
touch activation satisfying all the
conditions below.
• After 15 seconds when all doors
are closed and locked
• Positioned in the detecting area for
more than 3 seconds.
✽NOTICE
• The Smart Trunk does not operate
when:
- The smart key is detected within
15 seconds after the doors are
closed and locked, and is contin-
uously detected.
- The smart key is detected within
15 seconds after the doors are
closed and locked, and 1.5 m
from the front door handles. (for
vehicles equipped with Welcome
Light)
- A door is not locked or closed.
- The smart key is in the vehicle.
1. Setting
To activate the Smart Trunk,
(1) Change the LCD modes to User
setting mode
(2) Select the Door mode
(3) Check the Smart Trunk.
❈For more details, refer to “LCD
Windows” in this chapter.
SMART TRUNK (IF EQUIPPED)
OYDM046318N
Page 103 of 595
431
Features of your vehicle
Power windows (if equipped)
The ignition switch must be in the ON
position for power windows to oper-
ate. Each door has a power window
switch that controls the door’s win-
dow. The driver has a power window
lock switch which can block the oper-
ation of passenger windows.
The power windows can be operated
for approximately 30 seconds after
the ignition key is removed or turned
to the ACC or LOCK position.
However, if the front doors are
opened, the power windows cannot
be operated even within the 30 sec-
ond period.
✽NOTICE
While driving with the rear windows
down or with the sunroof (if
equipped) in an open (or partially
open) position, your vehicle may
demonstrate a wind buffeting or pul-
sation noise. This noise is a normal
occurrence and can be reduced or
eliminated by taking the following
actions. If the noise occurs with one
or both of the rear windows down,
partially lower both front windows
approximately 2.5 cm (1 inch). If you
experience the noise with the sunroof
open, slightly reduce the size of the
sunroof opening.
Window opening and closing
(if equipped)
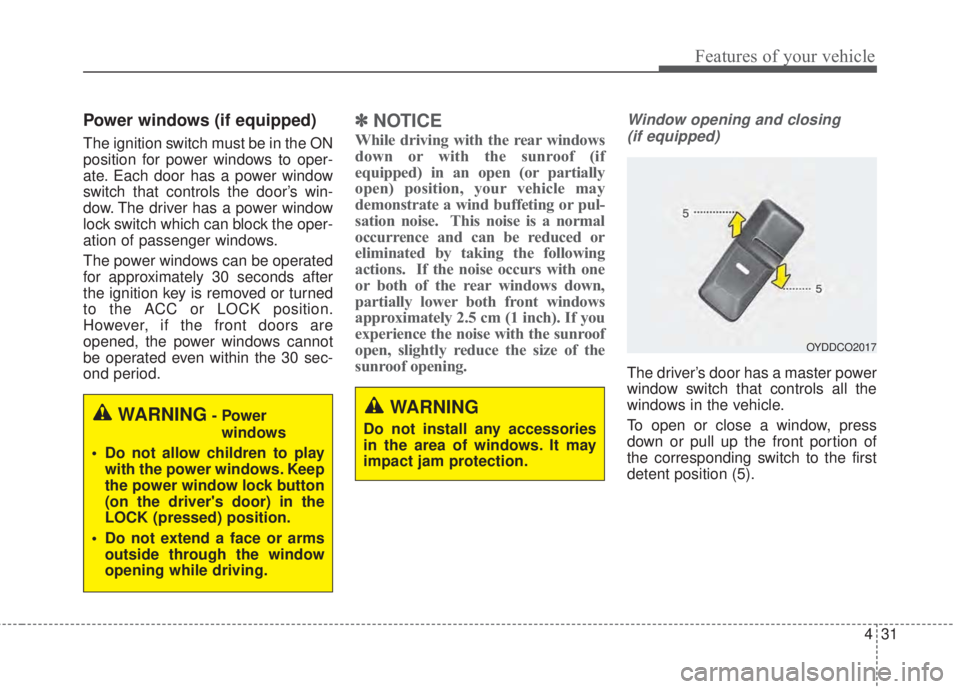
The driver’s door has a master power
window switch that controls all the
windows in the vehicle.
To open or close a window, press
down or pull up the front portion of
the corresponding switch to the first
detent position (5).
OYDDCO2017
WARNING
Do not install any accessories
in the area of windows. It may
impact jam protection.WARNING- Power
windows
• Do not allow children to play
with the power windows. Keep
the power window lock button
(on the driver's door) in the
LOCK (pressed) position.
• Do not extend a face or arms
outside through the window
opening while driving.
Page 107 of 595
435
Features of your vehicle
Short drop (for 2Door)
When you open the front door(s), if
the front window(s) fully closed, the
front windows will drop down about
10 mm (0.4 in.) automatically. And
then if you close the door(s), the win-
dow(s) will automatically fully closed.
This function prevents damage to the
windows. This is not a malfunction.
This is a normal condition.
If the windows does not drop down
automatically because ice has
formed around it, tap lightly the win-
dows to break the ice. Do not pry on
the windows. If necessary, move the
vehicle to a warm place and allow
the ice to melt.
Opening the hood
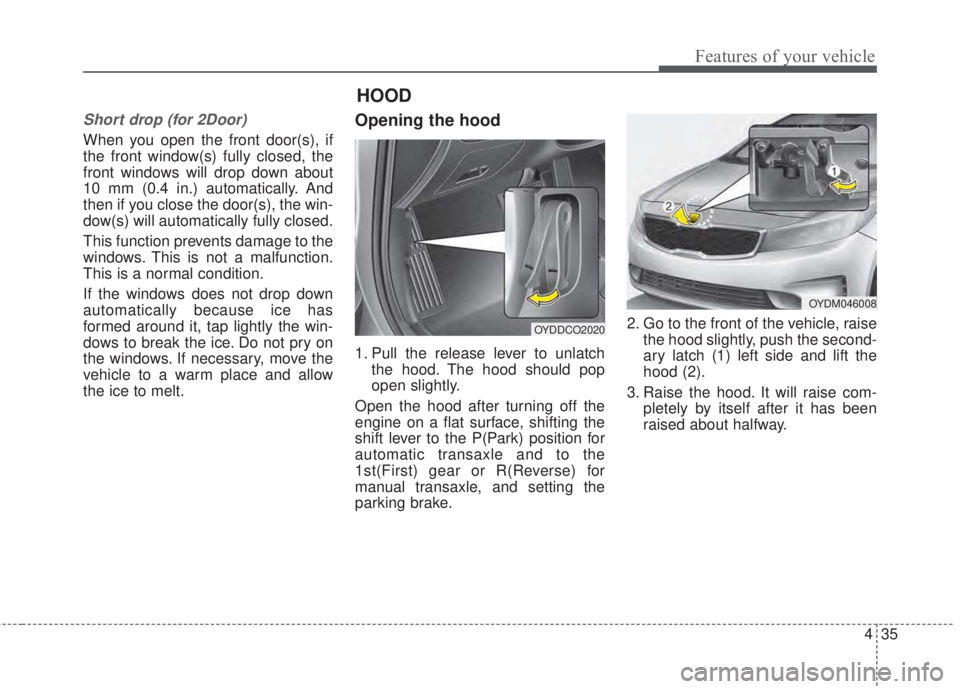
1. Pull the release lever to unlatch
the hood. The hood should pop
open slightly.
Open the hood after turning off the
engine on a flat surface, shifting the
shift lever to the P(Park) position for
automatic transaxle and to the
1st(First) gear or R(Reverse) for
manual transaxle, and setting the
parking brake.2. Go to the front of the vehicle, raise
the hood slightly, push the second-
ary latch (1) left side and lift the
hood (2).
3. Raise the hood. It will raise com-
pletely by itself after it has been
raised about halfway.
OYDDCO2020
OYDM046008
HOOD
Page 162 of 595
Features of your vehicle
90 4
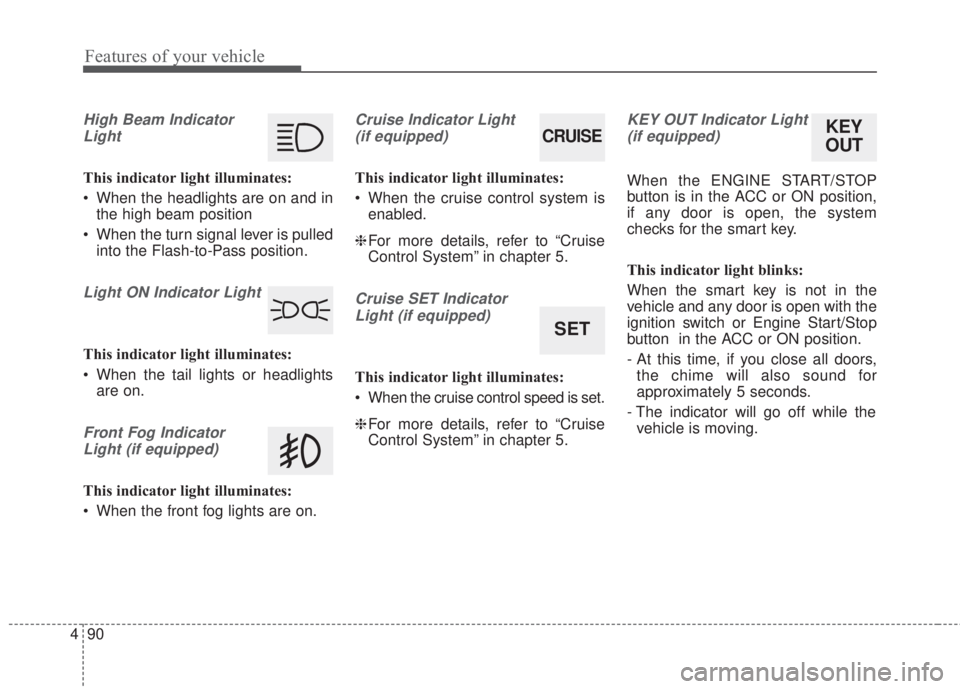
High Beam Indicator
Light
This indicator light illuminates:
• When the headlights are on and in
the high beam position
• When the turn signal lever is pulled
into the Flash-to-Pass position.
Light ON Indicator Light
This indicator light illuminates:
• When the tail lights or headlights
are on.
Front Fog Indicator
Light (if equipped)
This indicator light illuminates:
• When the front fog lights are on.
Cruise Indicator Light
(if equipped)
This indicator light illuminates:
• When the cruise control system is
enabled.
❈For more details, refer to “Cruise
Control System” in chapter 5.
Cruise SET Indicator
Light (if equipped)
This indicator light illuminates:
• When the cruise control speed is set.
❈For more details, refer to “Cruise
Control System” in chapter 5.
KEY OUT Indicator Light
(if equipped)
When the ENGINE START/STOP
button is in the ACC or ON position,
if any door is open, the system
checks for the smart key.
This indicator light blinks:
When the smart key is not in the
vehicle and any door is open with the
ignition switch or Engine Start/Stop
button in the ACC or ON position.
- At this time, if you close all doors,
the chime will also sound for
approximately 5 seconds.
- The indicator will go off while the
vehicle is moving.
CRUISE
SET
KEY
OUT
Page 173 of 595
4 101
Features of your vehicle
Auto light position (if equipped)
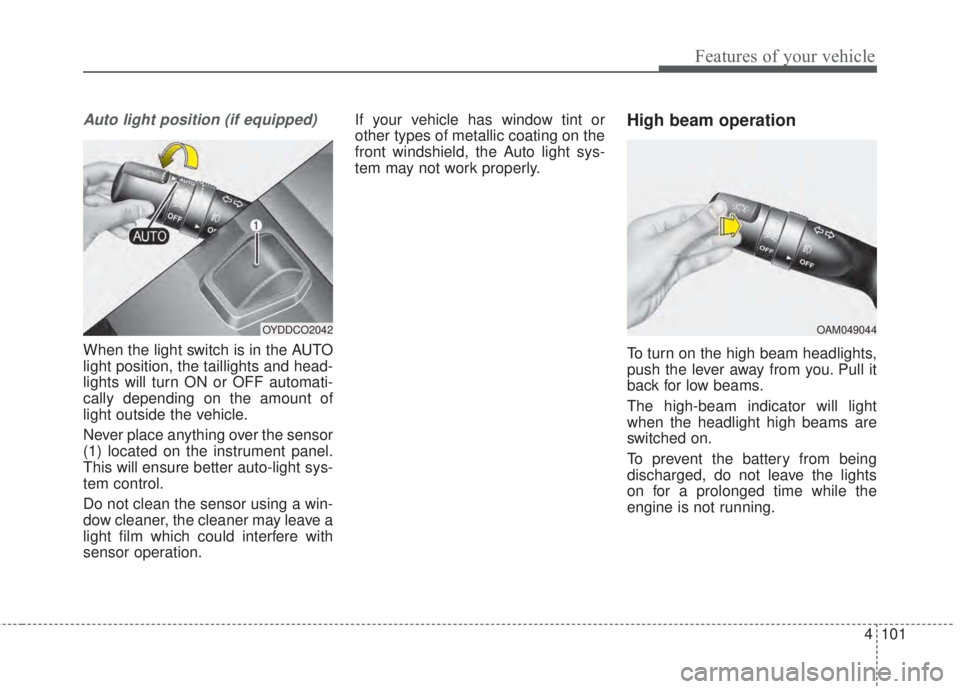
When the light switch is in the AUTO
light position, the taillights and head-
lights will turn ON or OFF automati-
cally depending on the amount of
light outside the vehicle.
Never place anything over the sensor
(1) located on the instrument panel.
This will ensure better auto-light sys-
tem control.
Do not clean the sensor using a win-
dow cleaner, the cleaner may leave a
light film which could interfere with
sensor operation.If your vehicle has window tint or
other types of metallic coating on the
front windshield, the Auto light sys-
tem may not work properly.
High beam operation
To turn on the high beam headlights,
push the lever away from you. Pull it
back for low beams.
The high-beam indicator will light
when the headlight high beams are
switched on.
To prevent the battery from being
discharged, do not leave the lights
on for a prolonged time while the
engine is not running.
OYDDCO2042OAM049044
Page 175 of 595
4 103
Features of your vehicle
If an indicator stays on and does not
flash or if it flashes abnormally, one of
the turn signal bulbs may be burned
out and will require replacement.
If an indicator flash is abnormally
quick or slow, a bulb may be burned
out or have a poor electrical connec-
tion in the circuit.One-touch lane change function
To activate an one-touch lane
change function, move the turn sig-
nal lever slightly and then release it.
The lane change signals will blink 3,
5 or 7 times.
You can choose one-touch lane
change blinking function in “One
touch turn lamp” of “User setting”.
Refer to “User setting” in chapter 4.
✽NOTICE
If an indicator flash is abnormally
quick or slow, the bulb may be
burned out or have a poor electrical
connection in the circuit.
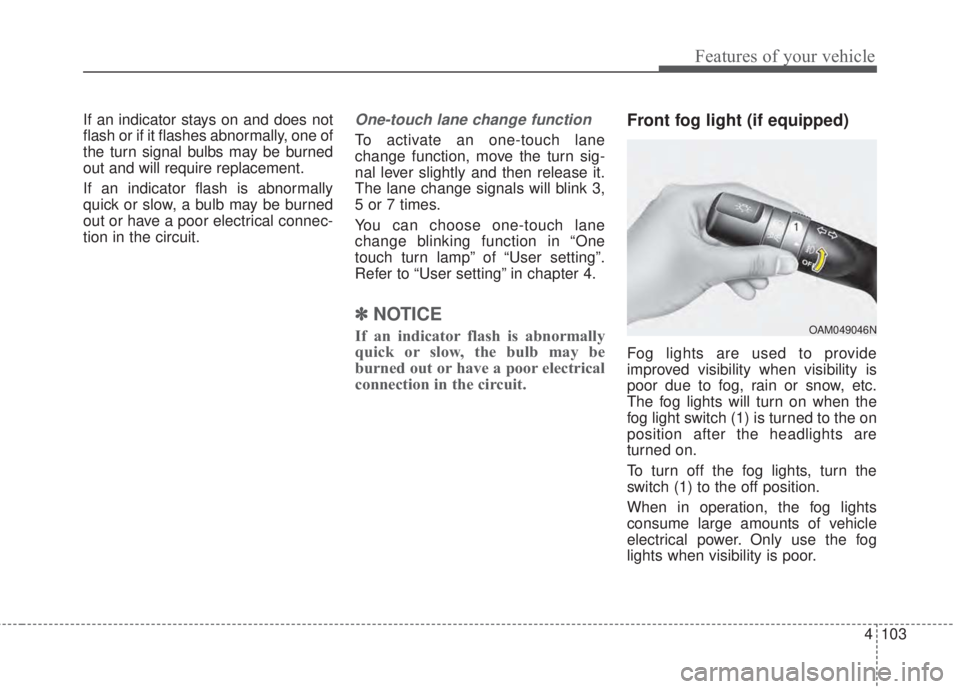
Front fog light (if equipped)
Fog lights are used to provide
improved visibility when visibility is
poor due to fog, rain or snow, etc.
The fog lights will turn on when the
fog light switch (1) is turned to the on
position after the headlights are
turned on.
To turn off the fog lights, turn the
switch (1) to the off position.
When in operation, the fog lights
consume large amounts of vehicle
electrical power. Only use the fog
lights when visibility is poor.
OAM049046N
Page 176 of 595
Features of your vehicle
104 4
AFLS (Adaptive Front Lighting
System) (if equipped)
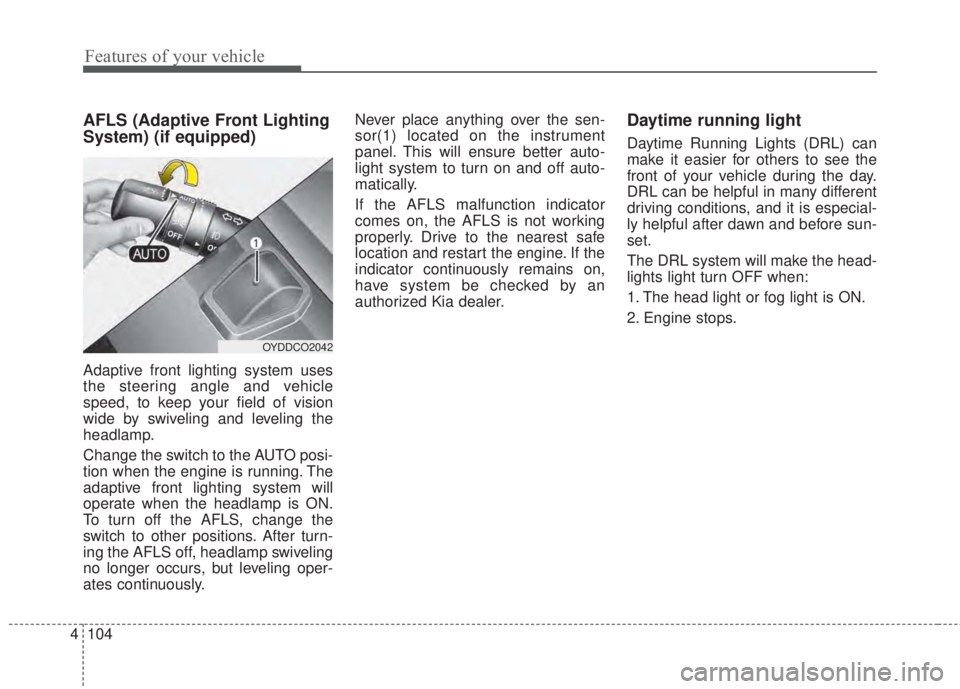
Adaptive front lighting system uses
the steering angle and vehicle
speed, to keep your field of vision
wide by swiveling and leveling the
headlamp.
Change the switch to the AUTO posi-
tion when the engine is running. The
adaptive front lighting system will
operate when the headlamp is ON.
To turn off the AFLS, change the
switch to other positions. After turn-
ing the AFLS off, headlamp swiveling
no longer occurs, but leveling oper-
ates continuously.Never place anything over the sen-
sor(1) located on the instrument
panel. This will ensure better auto-
light system to turn on and off auto-
matically.
If the AFLS malfunction indicator
comes on, the AFLS is not working
properly. Drive to the nearest safe
location and restart the engine. If the
indicator continuously remains on,
have system be checked by an
authorized Kia dealer.
Daytime running light
Daytime Running Lights (DRL) can
make it easier for others to see the
front of your vehicle during the day.
DRL can be helpful in many different
driving conditions, and it is especial-
ly helpful after dawn and before sun-
set.
The DRL system will make the head-
lights light turn OFF when:
1. The head light or fog light is ON.
2. Engine stops.
OYDDCO2042
Page 177 of 595
4 105
Features of your vehicle
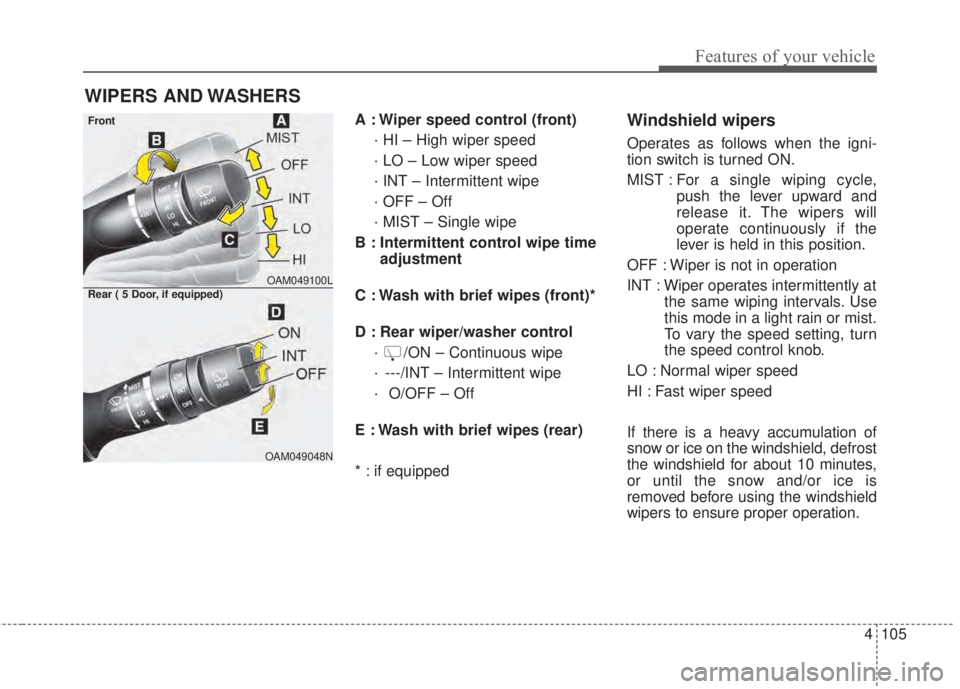
A : Wiper speed control (front)
· HI – High wiper speed
· LO – Low wiper speed
· INT – Intermittent wipe
· OFF – Off
· MIST – Single wipe
B : Intermittent control wipe time
adjustment
C : Wash with brief wipes (front)*
D : Rear wiper/washer control
· /ON – Continuous wipe
· ---/INT – Intermittent wipe
· O/OFF – Off
E : Wash with brief wipes (rear)
* : if equippedWindshield wipers
Operates as follows when the igni-
tion switch is turned ON.
MIST : For a single wiping cycle,
push the lever upward and
release it. The wipers will
operate continuously if the
lever is held in this position.
OFF : Wiper is not in operation
INT : Wiper operates intermittently at
the same wiping intervals. Use
this mode in a light rain or mist.
To vary the speed setting, turn
the speed control knob.
LO : Normal wiper speed
HI : Fast wiper speed
If there is a heavy accumulation of
snow or ice on the windshield, defrost
the windshield for about 10 minutes,
or until the snow and/or ice is
removed before using the windshield
wipers to ensure proper operation.
WIPERS AND WASHERS
OAM049100L
OAM049048N
Front
Rear ( 5 Door, if equipped)
Page 215 of 595
4 143
Features of your vehicle
Sunvisor
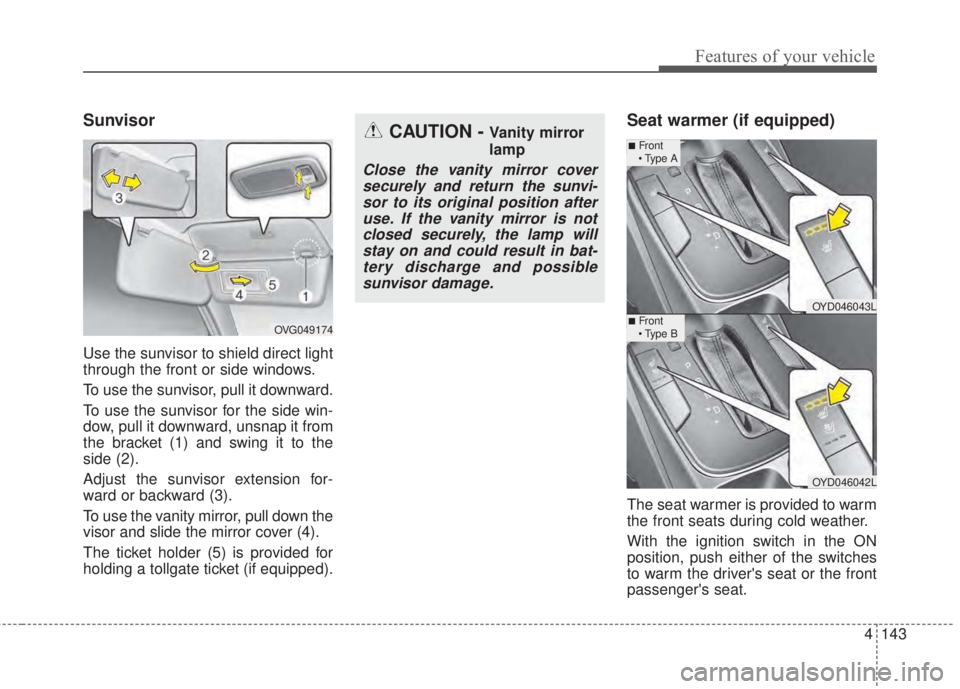
Use the sunvisor to shield direct light
through the front or side windows.
To use the sunvisor, pull it downward.
To use the sunvisor for the side win-
dow, pull it downward, unsnap it from
the bracket (1) and swing it to the
side (2).
Adjust the sunvisor extension for-
ward or backward (3).
To use the vanity mirror, pull down the
visor and slide the mirror cover (4).
The ticket holder (5) is provided for
holding a tollgate ticket (if equipped).
Seat warmer (if equipped)
The seat warmer is provided to warm
the front seats during cold weather.
With the ignition switch in the ON
position, push either of the switches
to warm the driver's seat or the front
passenger's seat.
CAUTION - Vanity mirror
lamp
Close the vanity mirror cover
securely and return the sunvi-
sor to its original position after
use. If the vanity mirror is not
closed securely, the lamp will
stay on and could result in bat-
tery discharge and possible
sunvisor damage.
OVG049174
OYD046043L
OYD046042L
■Front
• Type A
■Front
• Type B