seats KIA K900 2015 1.G User Guide
[x] Cancel search | Manufacturer: KIA, Model Year: 2015, Model line: K900, Model: KIA K900 2015 1.GPages: 522, PDF Size: 7.92 MB
Page 51 of 522
3-34
Seat and safety features of your vehicle
✽NOTICE
If the vehicle headrest prevents
proper installation of a child seat (as
described in the child seat system
manual), the headrest of the respec-
tive seating position shall be read-
justed or entirely removed.
Placing a passenger seat belt
into the auto lock mode
The auto lock mode will help prevent
the normal movement of the child in
the vehicle from causing the seat belt
to loosen and compromise the child
restraint system. To secure a child
restraint system, use the following
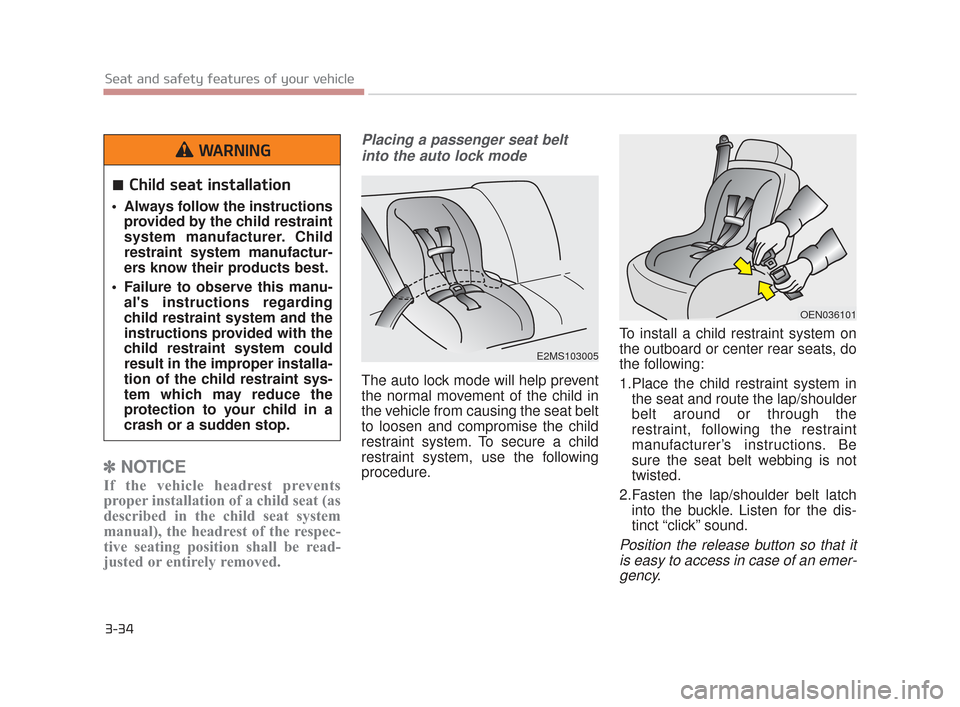
procedure. To install a child restraint system on
the outboard or center rear seats, do
the following:
1.Place the child restraint system in
the seat and route the lap/shoulder
belt around or through the
restraint, following the restraint
manufacturer’s instructions. Be
sure the seat belt webbing is not
twisted.
2.Fasten the lap/shoulder belt latch into the buckle. Listen for the dis-
tinct “click” sound.
Position the release button so that itis easy to access in case of an emer-gency.
E2MS103005
OEN036101
Child seat installation
Always follow the instructions provided by the child restraint
system manufacturer. Child
restraint system manufactur-
ers know their products best.
Failure to observe this manu- al's instructions regarding
child restraint system and the
instructions provided with the
child restraint system could
result in the improper installa-
tion of the child restraint sys-
tem which may reduce the
protection to your child in a
crash or a sudden stop.
WARNING
KH CAN (ENG) 3:2015 3/26/2015 6:08 AM Page 34
Page 54 of 522

Seat and safety features of your vehicle
3
3-37
2.Connect the tether strap hook tothe appropriate child restraint hook
holder and tighten to secure the
child restraint seat.
Check that the child restraint system
is secure by pushing and pulling it in
different directions. Incorrectly fitted
child restraints may swing, twist, tip
or separate causing death or serious
injury.Securing a child restraint seat with child seat lower anchor system
Some child seat manufacturers
make child restraint seats that are
labeled as LATCH or LATCH-com-
patible child restraint seats. LATCH
stands for "Lower Anchors and
Tethers for Children". These seats
include two rigid or webbing mount-
ed attachments that connect to two
LATCH anchors at specific seating
positions in your vehicle. This type of
child restraint seat eliminates the
need to use seat belts to attach the
child seat in the rear seats. Child restraint symbols are located
on the left and right rear seat backs
to indicate the position of the lower
anchors for child restraints.
OKH033118N
OKH033051N
Lower Anchor
Lower Anchor
Position Indicator
Tether strap
Never mount more than one
child restraint to a single tether
or to a single lower anchorage
point. The increased load
caused by multiple seats may
cause the tethers or anchorage
points to break.
WARNING
Unused rear seatbelts
Always fasten the seatbelts
behind the child restraint seat
when they are not used to
secure the child seat. Failure to
do so may result in child stran-
gulation.
WARNING
KH CAN (ENG) 3:2015 3/26/2015 6:08 AM Page 37
Page 55 of 522
3-38
Seat and safety features of your vehicle
LATCH anchors have been provided
in your vehicle. The LATCH anchors
are located in the left and right out-
board rear seating positions. Their
locations are shown in the illustra-
tion. There is no LATCH anchor pro-
vided for the center rear seating
position.
The LATCH anchors are located
between the seatback and the seat
cushion of the rear seat left and right
outboard seating positions.
When you install your child's restraint
system using the LATCH anchors
buckle the shoulder lap belt, then
lock the retractor and pull the belt to
remove the slack in the belt so it lies
flat against the vehicle seat.
Follow the child seat manufacturer’s
instructions to properly install child
restraint seats with LATCH or
LATCH-compatible attachments.
Once you have installed the LATCH
child restraint, assure that the seat is
properly attached to the LATCH and
tether anchors.Also, test the child restraint seat
before you place the child in it. Tilt
the seat from side to side. Also try to
tug the seat forward. Check to see if
the anchors hold the seat in place.✽
NOTICE - Weight for LATCH
system
The recommended weight for the
LATCH system is under 65lb.
How to calculate the child restraint
weight :
Child restraint weight =
65lb - Child weight
LATCH lower anchors
Never attempt to attach a
LATCH equipped seat in the
center seating position. LATCH
lower anchors are only to be
used with the left and right rear
outboard seating positions. You
may damage the anchors or the
anchors may fail and break in a
collision.
WARNING
KH CAN (ENG) 3:2015 3/26/2015 6:08 AM Page 38
Page 59 of 522

3-42
Seat and safety features of your vehicle
Air bag warning light
The purpose of the air bag warning
light in your instrument panel is to
alert you of a potential problem with
your air bag - Supplemental
Restraint System (SRS).
When the Engine Start/Stop button
is turned ON, the indicator light
should illuminate for approximately 6
seconds, then go off.
Have the system checked by an
authorized Kia Premium dealer if:
The light does not turn on brieflywhen you turn the Engine
Start/Stop button to the ON posi-
tion. The light stays on after illuminating
for approximately 6 seconds.
The light comes on while the vehi- cle is in motion.
WKH-006
Air bag deployment
When children are seated in the
rear outboard seats of a vehicle
equipped with side and/or cur-
tain air bags, install the child
restraint system as far away
from the door side as possible.
Inflation of the side and/or cur-
tain air bags could impact the
child.
WARNING
KH CAN (ENG) 3:2015 3/26/2015 6:08 AM Page 42
Page 72 of 522

Seat and safety features of your vehicle
3
3-55
Curtain air bag
❈The actual air bags in the vehicle may differ
from the illustration.
Curtain air bags are located along
both sides of the roof rails above the
front and rear doors. They are designed to help protect
the heads of the front seat occupants
and the rear outboard seat occu-
pants in certain side impact colli-
sions.
The curtain air bags are designed to
deploy only during certain side
impact collisions, depending on the
crash severity, angle, speed and
impact.
For vehicles equipped with a rollover
sensor the side and curtain air bags
on both sides of the vehicle may
deploy if a rollover or possible
rollover is detected.
The curtain air bags are not
designed to deploy in all side impact
or rollover situations.
Do not allow the passengers to lean
their heads or bodies onto doors, put
their arms on the doors, stretch their
arms out of the window, or place
objects between the doors and pas-
sengers when they are seated on
seats equipped with side and/or cur-
tain air bags.
✽
NOTICE
Never try to open or repair any com-
ponents of the side curtain air bag
system. This should only be done by
an authorized Kia Premium dealer.
OKH033082N
OKH033090N
KH CAN (ENG) 3:2015 3/26/2015 6:09 AM Page 55
Page 243 of 522
The seat warmer is provided to warm
the seats during cold weather. With
the engine start/stop button in the
ON position, push the switch to warm
the seat.
During mild weather or under condi-
tions where the operation of the seat
warmer is not needed, keep the
switches in the OFF position.
With the seat warmer switch in the
ON position, the heating system in
the seat turns off or on automatically
depending on the seat temperature.
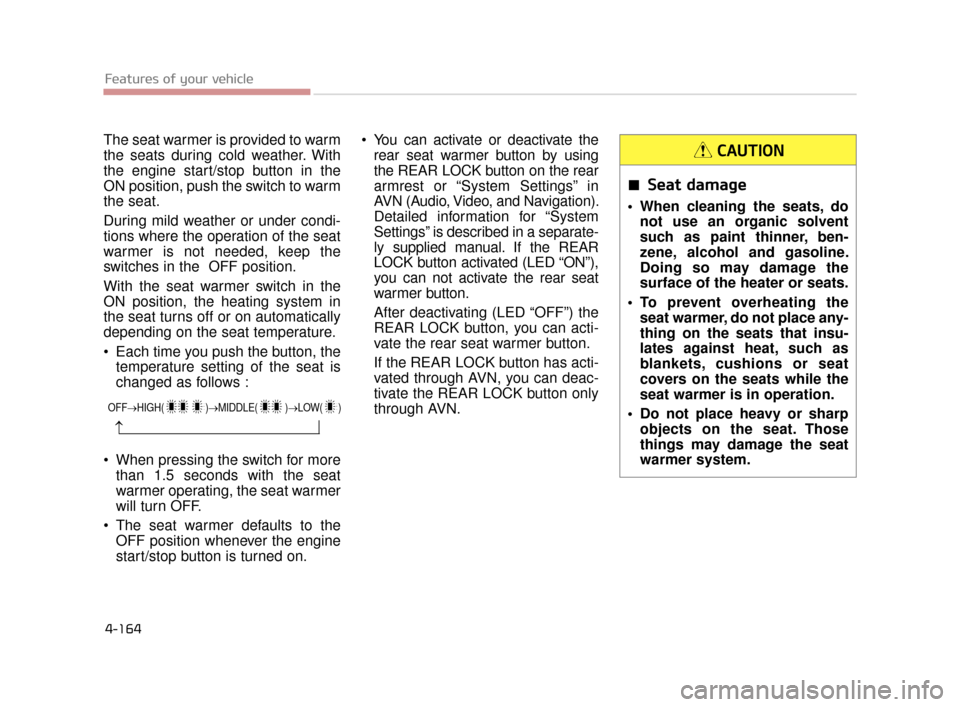
Each time you push the button, thetemperature setting of the seat is
changed as follows :
When pressing the switch for more than 1.5 seconds with the seat
warmer operating, the seat warmer
will turn OFF.
The seat warmer defaults to the OFF position whenever the engine
start/stop button is turned on. You can activate or deactivate the
rear seat warmer button by using
the REAR LOCK button on the rear
armrest or “System Settings” in
AVN (Audio, Video, and Navigation).
Detailed information for “System
Settings” is described in a separate-
ly supplied manual. If the REAR
LOCK button activated (LED “ON”),
you can not activate the rear seat
warmer button.
After deactivating (LED “OFF”) the
REAR LOCK button, you can acti-
vate the rear seat warmer button.
If the REAR LOCK button has acti-
vated through AVN, you can deac-
tivate the REAR LOCK button only
through AVN.
Features of your vehicle
4-164
OFF→ HIGH( )→ MIDDLE( )→LOW( )
→
Seat damage
When cleaning the seats, do
not use an organic solvent
such as paint thinner, ben-
zene, alcohol and gasoline.
Doing so may damage the
surface of the heater or seats.
To prevent overheating the seat warmer, do not place any-
thing on the seats that insu-
lates against heat, such as
blankets, cushions or seat
covers on the seats while the
seat warmer is in operation.
Do not place heavy or sharp objects on the seat. Those
things may damage the seat
warmer system.
CAUTION
KH CAN (ENG) 4:2015 3/26/2015 10:47 AM Page 164
Page 244 of 522
Features of your vehicle
4
4-165
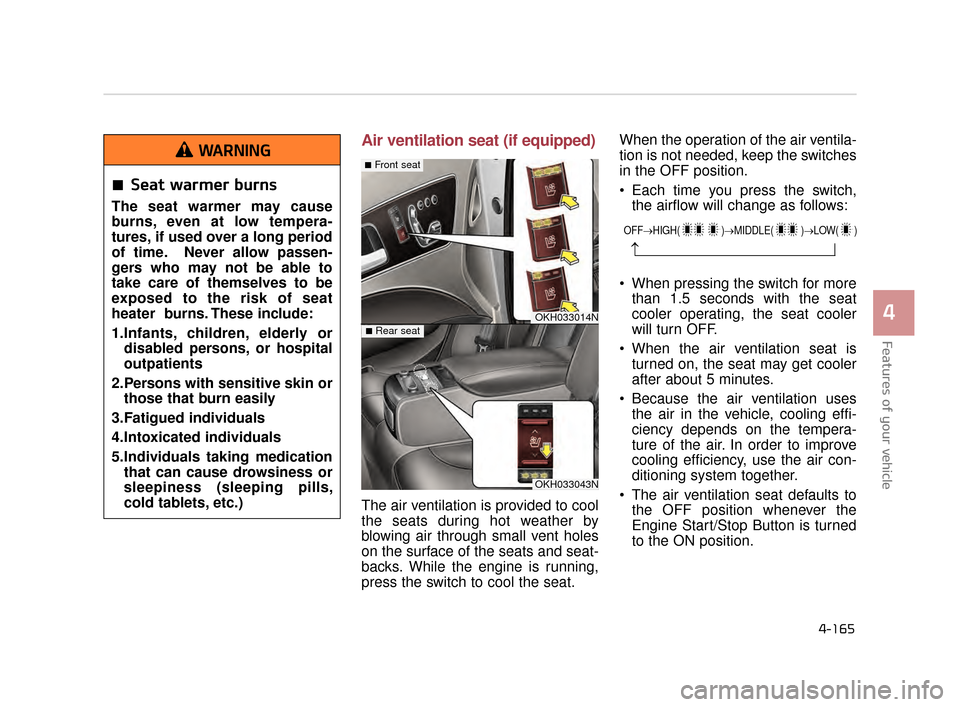
Air ventilation seat (if equipped)
The air ventilation is provided to cool
the seats during hot weather by
blowing air through small vent holes
on the surface of the seats and seat-
backs. While the engine is running,
press the switch to cool the seat. When the operation of the air ventila-
tion is not needed, keep the switches
in the OFF position.
Each time you press the switch,
the airflow will change as follows:
When pressing the switch for more than 1.5 seconds with the seat
cooler operating, the seat cooler
will turn OFF.
When the air ventilation seat is turned on, the seat may get cooler
after about 5 minutes.
Because the air ventilation uses the air in the vehicle, cooling effi-
ciency depends on the tempera-
ture of the air. In order to improve
cooling efficiency, use the air con-
ditioning system together.
The air ventilation seat defaults to the OFF position whenever the
Engine Start/Stop Button is turned
to the ON position.
Seat warmer burns
The seat warmer may cause
burns, even at low tempera-
tures, if used over a long period
of time. Never allow passen-
gers who may not be able to
take care of themselves to be
exposed to the risk of seat
heater burns. These include:
1.Infants, children, elderly ordisabled persons, or hospital
outpatients
2.Persons with sensitive skin or those that burn easily
3.Fatigued individuals
4.Intoxicated individuals
5.Individuals taking medication that can cause drowsiness or
sleepiness (sleeping pills,
cold tablets, etc.)
WARNING
OKH033014N
OKH033043N
■Front seat
■Rear seat
OFF→ HIGH( )→ MIDDLE( )→LOW( )
→
KH CAN (ENG) 4:2015 3/26/2015 10:47 AM Page 165
Page 245 of 522
Features of your vehicle
4-166
You can activate or deactivate therear air ventilation button by using
the REAR LOCK button on the rear
armrest or “System Settings” in
AVN (Audio, Video, and
Navigation). Detailed information
for “System Settings” is described
in a separately supplied manual. If
the REAR LOCK button activated
(LED “ON”), you can not activate
the rear air ventilation button.
After deactivating (LED “OFF”) the
REAR LOCK button, you can acti-
vate the rear air ventilation button.
If the REAR LOCK button has acti-
vated through AVN, you can deacti-
vate the REAR LOCK button only
through AVN.
The air ventilation seat is a supple- mentary cooling/heating system.
Use the air ventilation seat when
the climate control system is on.
Using the air ventilation seat for
prolonged periods of time with the
climate control system off could
cause the air ventilation seat per-
formance to impair. Do not place materials such as
plastic bags or newspapers under
the seats. The air vent may not
work properly as the air intake can
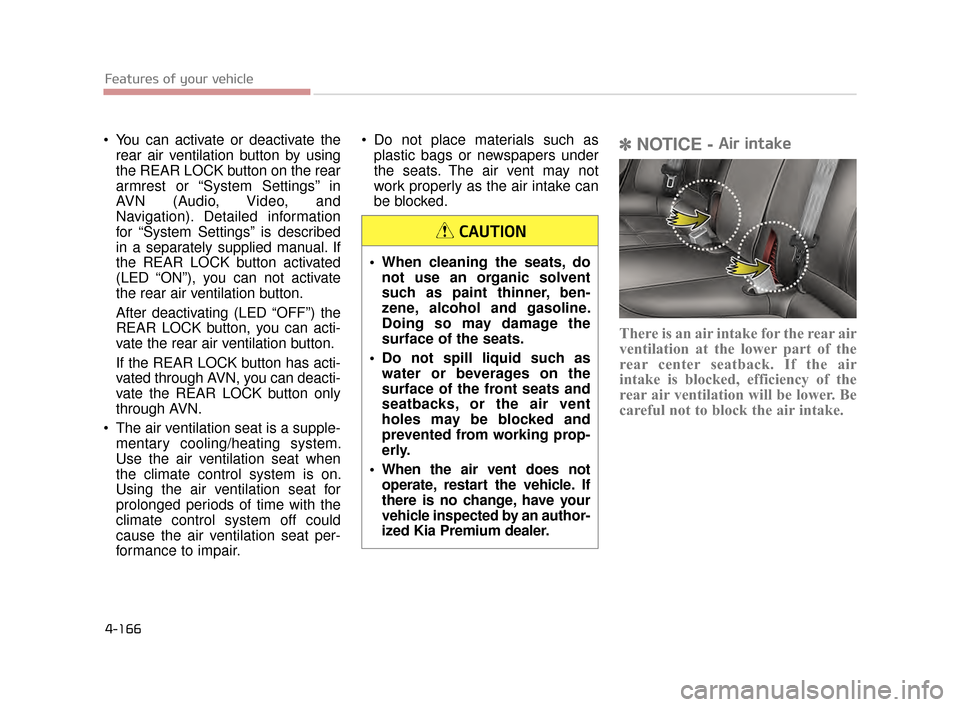
be blocked.✽ NOTICE - Air intake
There is an air intake for the rear air
ventilation at the lower part of the
rear center seatback. If the air
intake is blocked, efficiency of the
rear air ventilation will be lower. Be
careful not to block the air intake.
When cleaning the seats, do
not use an organic solvent
such as paint thinner, ben-
zene, alcohol and gasoline.
Doing so may damage the
surface of the seats.
Do not spill liquid such as water or beverages on the
surface of the front seats and
seatbacks, or the air vent
holes may be blocked and
prevented from working prop-
erly.
When the air vent does not operate, restart the vehicle. If
there is no change, have your
vehicle inspected by an author-
ized Kia Premium dealer.
CAUTION
KH CAN (ENG) 4:2015 3/26/2015 10:47 AM Page 166
Page 362 of 522

Driving your vehicle
5
5-107
✽NOTICE
Overloading your vehicle may cause
damage. Repairs would not be cov-
ered by your warranty. Do not over-
load your vehicle.
Over loading
Do not overload your vehicle.
Overloading your vehicle can
cause heat buildup in your vehi-
cle's tires and possible tire fail-
ure, increased stopping dis-
tances and poor vehicle han-
dling--all of which may result in
a crash.
WARNING
Loose cargo
Do not travel with unsecured
blunt objects in the passenger
compartment of your vehicle
(e.g. suit cases or unsecured
child seats). These items may
strike occupant during a sud-
den stop or crash.
WARNING
KH CAN (ENG) 5:2015 3/25/2015 10:55 AM Page 107
Page 461 of 522

Maintenance
7
7-65
It is not easy to recognize the tiredamage with your own eyes. But if
there is the slightest hint of tire
damage, even though you cannot
see the tire damage with your own
eyes, have the tire checked or
replaced because the tire damage
may cause air leakage from the
tire.
If the tire is damaged by driving on a rough road, off road, pothole,
manhole, or curb stone, it will not
be covered by the warranty.
You can find out the tire information on the tire sidewall.Tire terminology and defini-
tions
Air Pressure: The amount of air
inside the tire pressing outward on
the tire. Air pressure is expressed in
kilopascal (kPa) or pounds per
square inch (psi).
Accessory Weight: This means the
combined weight of optional acces-
sories. Some examples of optional
accessories are, automatic transmis-
sion, power seats, and air condition-
ing.
Aspect Ratio: The relationship of a
tire's height to its width.
Belt: A rubber coated layer of cords
that is located between the plies and
the tread. Cords may be made from
steel or other reinforcing materials.
Bead: The tire bead contains steel
wires wrapped by steel cords that
hold the tire onto the rim.
Bias Ply Tire: A pneumatic tire in
which the plies are laid at alternate
angles less than 90 degrees to the
centerline of the tread. Cold Tire Pressure:
The amount of
air pressure in a tire, measured in
kilopascals (kPa) or pounds per
square inch (psi) before a tire has
built up heat from driving.
Curb Weight: This means the weight
of a motor vehicle with standard and
optional equipment including the
maximum capacity of fuel, oil and
coolant, but without passengers and
cargo.
DOT Markings: The DOT code
includes the Tire Identification
Number (TIN), an alphanumeric des-
ignator which can also identify the
tire manufacturer, production plant,
brand and date of production.
GVWR: Gross Vehicle Weight Rating
GAWR FRT: Gross Axle Weight
Rating for the Front Axle.
GAWR RR: Gross Axle Weight
Rating for the Rear axle.
KH CAN (ENG) 7:2015 3/26/2015 6:41 AM Page 65