instrument cluster KIA K900 2019 Owners Manual
[x] Cancel search | Manufacturer: KIA, Model Year: 2019, Model line: K900, Model: KIA K900 2019Pages: 580, PDF Size: 15.11 MB
Page 16 of 580
25
Your vehicle at a glance
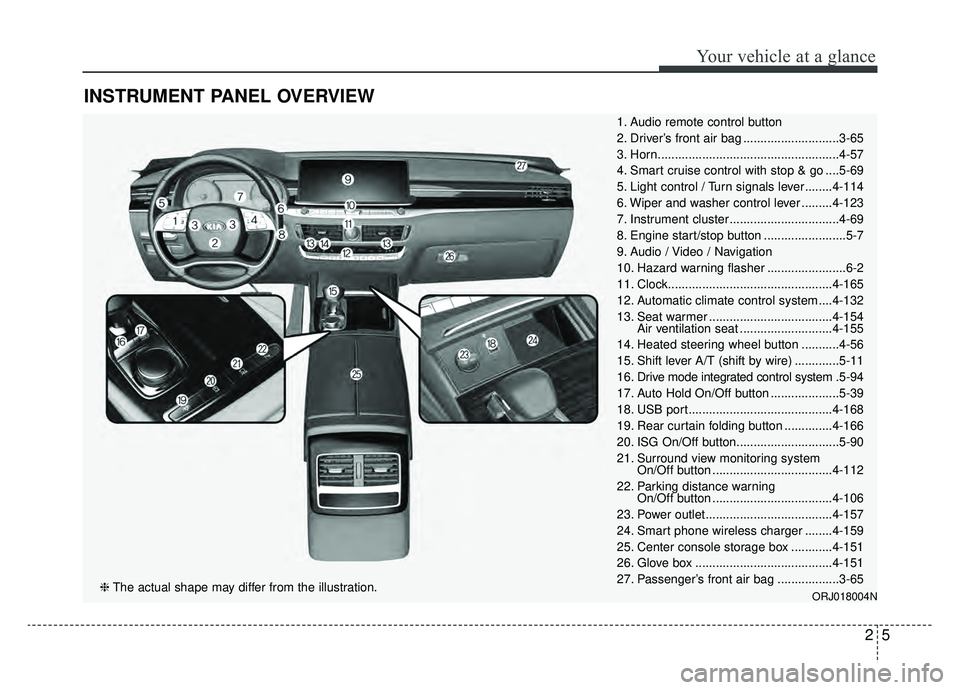
INSTRUMENT PANEL OVERVIEW
1. Audio remote control button
2. Driver’s front air bag ............................3-65
3. Horn.....................................................4-57
4. Smart cruise control with stop & go ....5-69
5. Light control / Turn signals lever ........4-114
6. Wiper and washer control lever .........4-123
7. Instrument cluster ................................4-69
8. Engine start/stop button ........................5-7
9. Audio / Video / Navigation
10. Hazard warning flasher .......................6-2
11. Clock................................................4-165
12. Automatic climate control system ....4-132
13. Seat warmer ....................................4-154Air ventilation seat ...........................4-155
14. Heated steering wheel button ...........4-56
15. Shift lever A/T (shift by wire) .............5-11
16. Drive mode integrated control system .5-94
17. Auto Hold On/Off button ....................5-39
18. USB port..........................................4-168
19. Rear curtain folding button ..............4-166
20. ISG On/Off button..............................5-90
21. Surround view monitoring system On/Off button ...................................4-112
22. Parking distance warning On/Off button ...................................4-106
23. Power outlet.....................................4-157
24. Smart phone wireless charger ........4-159
25. Center console storage box ............4-151
26. Glove box ........................................4-151
27. Passenger’s front air bag ..................3-65
ORJ018004N❈ The actual shape may differ from the illustration.
Page 31 of 580
Safety features of your vehicle
14
3
Storing positions into memory
using the buttons on the door
Storing the seat positions
1. Place the shift lever in P (Park) with the ignition ON.
2. Adjust driver seat, outside rearview mirror, head up display
comfortable for the driver and
adjust front passenger seat.
3. Press SET button on the control panel. The system will beep once.
Press one of the memory buttons
(1 ,2 or 3) within 4 seconds after
pressing the SET button. The sys-
tem will beep twice when memory
has been successfully stored.
4. The message "Driver 1 ,2 or 3 set- tings saved" is displayed on the
instrument cluster display.
The number of settings that can be
saved in the system is up to 3. To set
and save the driving position setting,
press the 1 ,2 or 3 button within 4
seconds after the SET button is
pressed. Recalling positions from memory
1. Place the shift lever in P (Park)
with the ignition ON.
2. To recall the position in the memo- ry, press the desired memory but-
ton (1 ,2 or 3). The system will
beep once, then the driver’s seat
will automatically adjust to the
stored position.
3. The message "Driver 1 ,2 or 3 set- tings applied" is displayed on the
instrument cluster display.
If you press the SET button or num-
ber 1 button with the number 1 set-
ting in operation, the setting will tem-
porarily deactivate. If you press the
number 2 button, the number 2 set-
ting will activate.
If you press the number 2 button or
SET button with the number 2 button
in operation, the number 2 setting
will temporarily deactivate. Press the
number 1 button, the number 1 set-
ting will activate. If you operate the adjustment switch
of seats or exterior mirrors with the
position memory system activated,
the pre-set settings will become inef-
fective.
WARNING
Use caution when recalling the
adjustment memory while sit-
ting in the vehicle. Push the seat
position control switch to the
desired position immediately if
the seat moves too far in any
direction.
Page 94 of 580
Features of your vehicle
Smart key . . . . . . . . . . . . . . . . . . . . . . . . . . . . . . . . . 4-4
• Record your key number . . . . . . . . . . . . . . . . . . . . . . . 4-4
• Smart key functions . . . . . . . . . . . . . . . . . . . . . . . . . . . 4-4
• Remote keyless entry system operations . . . . . . . . . . . 4-7
• Transmitter precautions . . . . . . . . . . . . . . . . . . . . . . . . 4-9
• Battery replacement . . . . . . . . . . . . . . . . . . . . . . . . . . 4-10
• Mechanical key operations . . . . . . . . . . . . . . . . . . . . . 4-11
• Immobilizer system . . . . . . . . . . . . . . . . . . . . . . . . . . . 4-12
Theft-alarm system . . . . . . . . . . . . . . . . . . . . . . . . 4-14
• Armed stage . . . . . . . . . . . . . . . . . . . . . . . . . . . . . . . . . 4-14
• Theft-alarm stage . . . . . . . . . . . . . . . . . . . . . . . . . . . . 4-15
• Disarmed stage. . . . . . . . . . . . . . . . . . . . . . . . . . . . . . . 4-15
Door locks . . . . . . . . . . . . . . . . . . . . . . . . . . . . . . . . 4-17
• Operating door locks from outside the vehicle. . . . . 4-17
• Operating door locks from inside the vehicle . . . . . . 4-18
• Door lock/unlock features. . . . . . . . . . . . . . . . . . . . . . 4-20
• Auto door lock/unlock feature . . . . . . . . . . . . . . . . . . 4-20
• Child-protector rear door lock. . . . . . . . . . . . . . . . . . 4-21
Trunk . . . . . . . . . . . . . . . . . . . . . . . . . . . . . . . . . . . . \
4-23
• Non-power trunk . . . . . . . . . . . . . . . . . . . . . . . . . . . . . 4-23
• Power trunk . . . . . . . . . . . . . . . . . . . . . . . . . . . . . . . . . 4-25
Smart trunk . . . . . . . . . . . . . . . . . . . . . . . . . . . . . . 4-32
• Emergency trunk safety release . . . . . . . . . . . . . . . . . 4-36
Windows . . . . . . . . . . . . . . . . . . . . . . . . . . . . . . . . . 4-37
• Power windows . . . . . . . . . . . . . . . . . . . . . . . . . . . . . . 4-38
Hood. . . . . . . . . . . . . . . . . . . . . . . . . . . . . . . . . . . . \
. 4-42
• Opening the hood . . . . . . . . . . . . . . . . . . . . . . . . . . . . 4-42
• Closing the hood . . . . . . . . . . . . . . . . . . . . . . . . . . . . . 4-43
Fuel filler lid . . . . . . . . . . . . . . . . . . . . . . . . . . . . . . 4-44
• Opening the fuel filler lid . . . . . . . . . . . . . . . . . . . . . . 4-44
• Closing the fuel filler lid . . . . . . . . . . . . . . . . . . . . . . . 4-44
• Emergency fuel filler lid release . . . . . . . . . . . . . . . . 4-45
Sunroof . . . . . . . . . . . . . . . . . . . . . . . . . . . . . . . . . . 4-48\
• Sunroof open warning. . . . . . . . . . . . . . . . . . . . . . . . . 4-49
• Sunshade. . . . . . . . . . . . . . . . . . . . . . . . . . . . . . . . \
. . . . 4-50
• Sliding the sunroof . . . . . . . . . . . . . . . . . . . . . . . . . . . 4-50
• Tilting the sunroof . . . . . . . . . . . . . . . . . . . . . . . . . . . . 4-52
• Resetting the sunroof . . . . . . . . . . . . . . . . . . . . . . . . . 4-52
Steering wheel . . . . . . . . . . . . . . . . . . . . . . . . . . . . . 4-54
• Electric Power Steering (EPS) . . . . . . . . . . . . . . . . . . 4-54
• Tilt and telescopic steering . . . . . . . . . . . . . . . . . . . . . 4-55
• Heated steering wheel . . . . . . . . . . . . . . . . . . . . . . . . . 4-56
• Horn . . . . . . . . . . . . . . . . . . . . . . . . . . . . . . . . . . . . \
. . . 4-57
Mirrors . . . . . . . . . . . . . . . . . . . . . . . . . . . . . . . . . . 4-58\
• Inside rearview mirror . . . . . . . . . . . . . . . . . . . . . . . . 4-58
• Outside rearview mirror. . . . . . . . . . . . . . . . . . . . . . . 4-66
Instrument cluster . . . . . . . . . . . . . . . . . . . . . . . . . 4-69
• Instrument cluster control . . . . . . . . . . . . . . . . . . . . . 4-70
• LCD window control . . . . . . . . . . . . . . . . . . . . . . . . . . 4-70
4
Page 147 of 580
Features of your vehicle
54
4
Electric power steering (EPS)
The power steering uses a motor to
assist you in steering the vehicle. If
the engine is off or if the power steer-
ing system becomes inoperative, the
vehicle may still be steered, but it will
require increased steering effort.
The EPS is controlled by a power
steering control unit which senses
the steering wheel torque and vehi-
cle speed to command the motor.
The steering becomes heavier as the
vehicle’s speed increases and
becomes lighter as the vehicle’s
speed decreases for optimum steer-
ing control.
Should you notice any change in the
effort required to steer during normal
vehicle operation, have the power
steering checked by an authorized
K900 Kia dealer. When you operate the steering
wheel in low temperature, noise
may occur. If temperature rises, the
noise will likely disappear. This is a
normal condition.
When the vehicle is stationary, and the steering wheel is turned all the
way to the left or right continuous-
ly, the steering wheel becomes
harder to turn. The power assist is
limited to protect the motor from
overheating.
As time passes, the steering wheel
will return to its normal condition.
✽ ✽ NOTICE
The following symptoms may occur
during normal vehicle operation:
• The EPS warning light does not
illuminate.
• The steering gets heavy immedi- ately after turning the ignition
switch on. This happens as the sys-
tem performs the EPS system
diagnostics. When the diagnostics
are completed, the steering wheel
will return to its normal condition.
• A click noise may be heard from the EPS relay after the Engine
Start/Stop button is turned to the
ON or OFF position.
• A motor noise may be heard when the vehicle is at a stop or at a low
driving speed.
• If the Electric Power Steering System does not operate normally,
the warning light will illuminate on
the instrument cluster. The power
steering system will not operate
and steering effort can increase.
Take your vehicle to an authorized
K900 Kia dealer and have the vehi-
cle checked as soon as possible. (Continued)
STEERING WHEEL
Page 162 of 580
469
Features of your vehicle
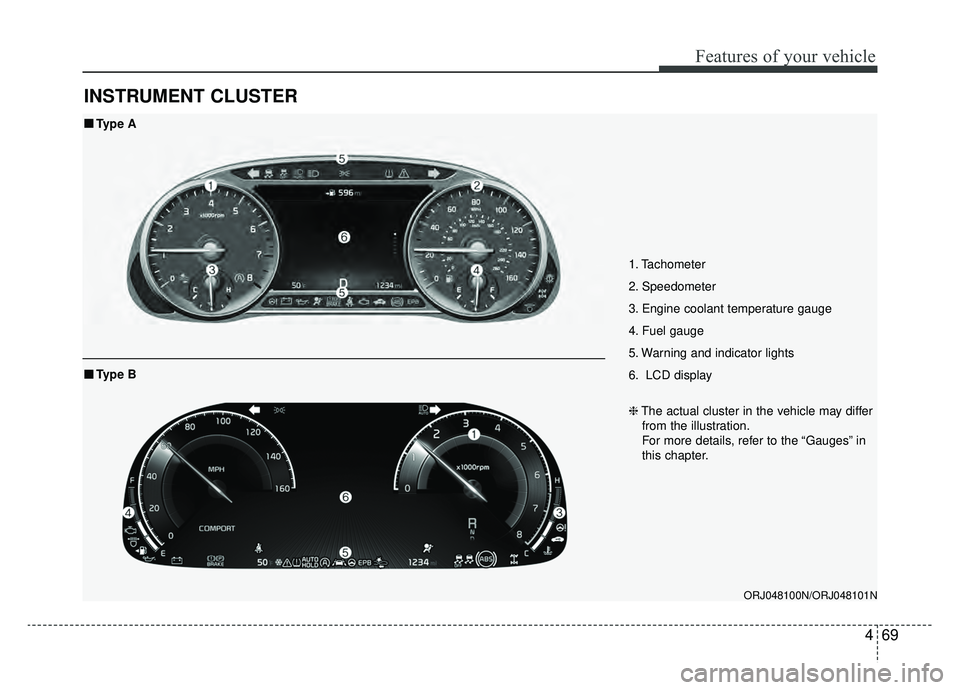
INSTRUMENT CLUSTER
1. Tachometer
2. Speedometer
3. Engine coolant temperature gauge
4. Fuel gauge
5. Warning and indicator lights
6. LCD display
ORJ048100N/ORJ048101N
■ ■Type A
❈The actual cluster in the vehicle may differ
from the illustration.
For more details, refer to the “Gauges” in
this chapter.
■ ■ Type B
Page 163 of 580
Features of your vehicle
70
4
Instrument Cluster Control
Adjusting Instrument Cluster
Illumination
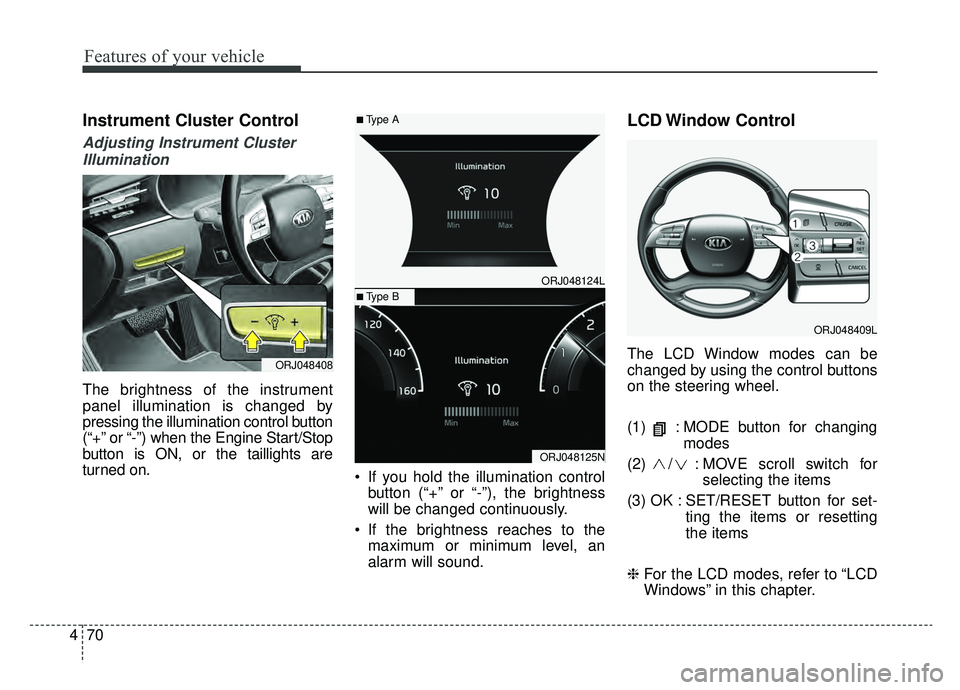
The brightness of the instrument
panel illumination is changed by
pressing the illumination control button
(“+” or “-”) when the Engine Start/Stop
button is ON, or the taillights are
turned on. If you hold the illumination control
button (“+” or “-”), the brightness
will be changed continuously.
If the brightness reaches to the maximum or minimum level, an
alarm will sound.
LCD Window Control
The LCD Window modes can be
changed by using the control buttons
on the steering wheel.
(1) : MODE button for changing modes
(2) / : MO VE scroll switch for
selecting the items
(3) OK : SET/RESET button for set- ting the items or resetting
the items
❈ For the LCD modes, refer to “LCD
Windows” in this chapter.ORJ048408
ORJ048409L
ORJ048124L
ORJ048125N
■Type A
■Type B
Page 197 of 580
Features of your vehicle
104
4
Description
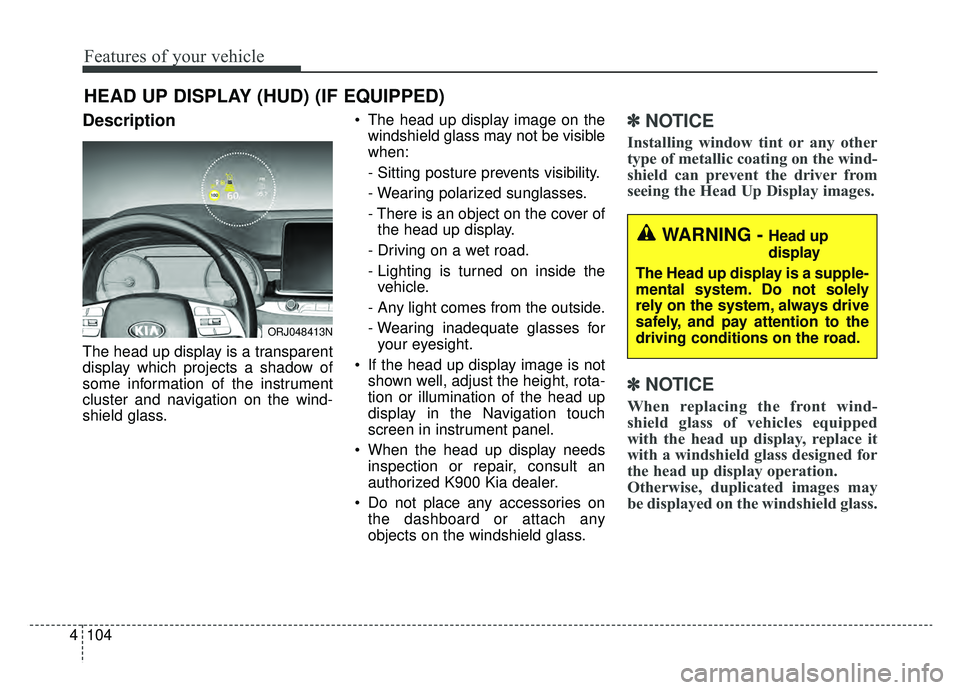
The head up display is a transparent
display which projects a shadow of
some information of the instrument
cluster and navigation on the wind-
shield glass. The head up display image on the
windshield glass may not be visible
when:
- Sitting posture prevents visibility.
- Wearing polarized sunglasses.
- There is an object on the cover ofthe head up display.
- Driving on a wet road.
- Lighting is turned on inside the vehicle.
- Any light comes from the outside.
- Wearing inadequate glasses for your eyesight.
If the head up display image is not shown well, adjust the height, rota-
tion or illumination of the head up
display in the Navigation touch
screen in instrument panel.
When the head up display needs inspection or repair, consult an
authorized K900 Kia dealer.
Do not place any accessories on the dashboard or attach any
objects on the windshield glass.
✽ ✽ NOTICE
Installing window tint or any other
type of metallic coating on the wind-
shield can prevent the driver from
seeing the Head Up Display images.
✽ ✽NOTICE
When replacing the front wind-
shield glass of vehicles equipped
with the head up display, replace it
with a windshield glass designed for
the head up display operation.
Otherwise, duplicated images may
be displayed on the windshield glass.
HEAD UP DISPLAY (HUD) (IF EQUIPPED)
ORJ048413N
WARNING - Head up
display
The Head up display is a supple-
mental system. Do not solely
rely on the system, always drive
safely, and pay attention to the
driving conditions on the road.
Page 277 of 580
Driving your vehicle
12
5
Transmission ranges
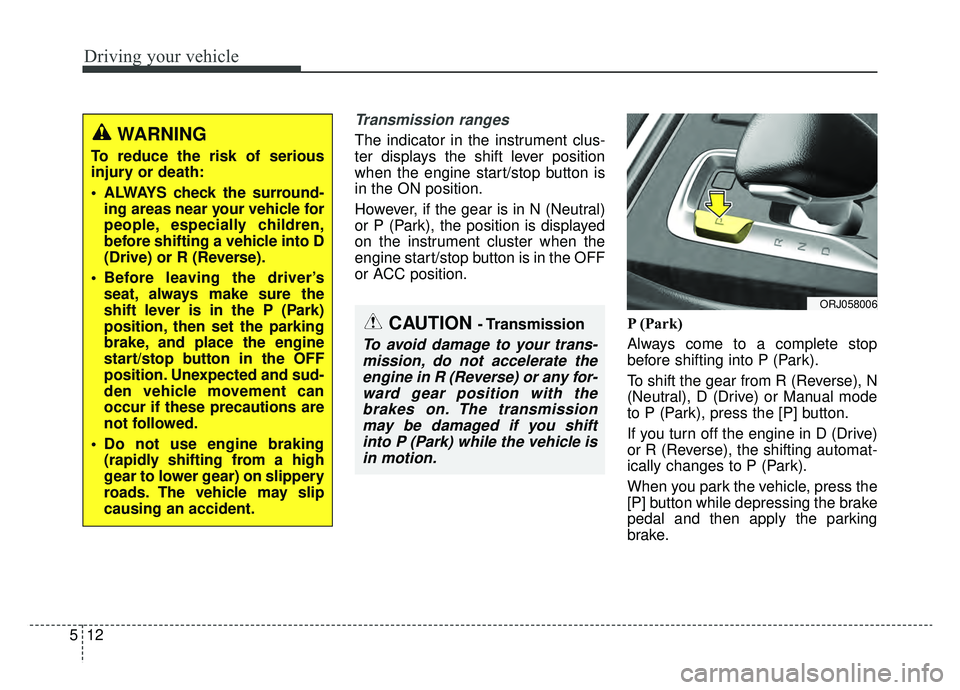
The indicator in the instrument clus-
ter displays the shift lever position
when the engine start/stop button is
in the ON position.
However, if the gear is in N (Neutral)
or P (Park), the position is displayed
on the instrument cluster when the
engine start/stop button is in the OFF
or ACC position.
P (Park)
Always come to a complete stop
before shifting into P (Park).
To shift the gear from R (Reverse), N
(Neutral), D (Drive) or Manual mode
to P (Park), press the [P] button.
If you turn off the engine in D (Drive)
or R (Reverse), the shifting automat-
ically changes to P (Park).
When you park the vehicle, press the
[P] button while depressing the brake
pedal and then apply the parking
brake.WARNING
To reduce the risk of serious
injury or death:
ALWAYS check the surround-ing areas near your vehicle for
people, especially children,
before shifting a vehicle into D
(Drive) or R (Reverse).
Before leaving the driver’s seat, always make sure the
shift lever is in the P (Park)
position, then set the parking
brake, and place the engine
start/stop button in the OFF
position. Unexpected and sud-
den vehicle movement can
occur if these precautions are
not followed.
Do not use engine braking (rapidly shifting from a high
gear to lower gear) on slippery
roads. The vehicle may slip
causing an accident.
ORJ058006
CAUTION - Transmission
To avoid damage to your trans-mission, do not accelerate theengine in R (Reverse) or any for-ward gear position with thebrakes on. The transmissionmay be damaged if you shiftinto P (Park) while the vehicle isin motion.
Page 291 of 580
Driving your vehicle
26
5
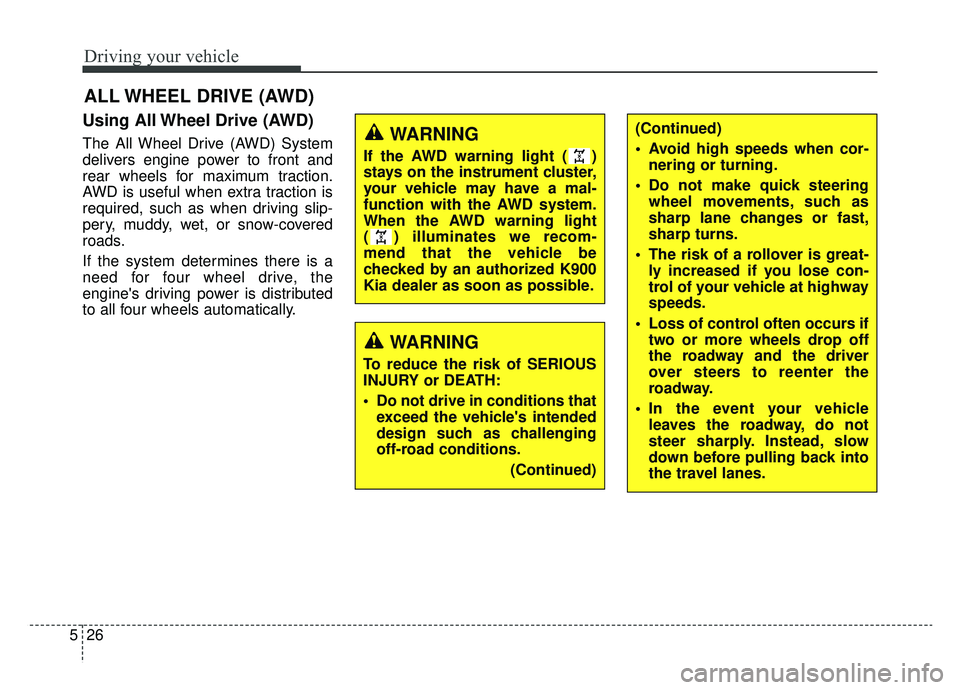
Using All Wheel Drive (AWD)
The All Wheel Drive (AWD) System
delivers engine power to front and
rear wheels for maximum traction.
AWD is useful when extra traction is
required, such as when driving slip-
pery, muddy, wet, or snow-covered
roads.
If the system determines there is a
need for four wheel drive, the
engine's driving power is distributed
to all four wheels automatically.
ALL WHEEL DRIVE (AWD)
WARNING
If the AWD warning light ( )
stays on the instrument cluster,
your vehicle may have a mal-
function with the AWD system.
When the AWD warning light
( ) illuminates we recom-
mend that the vehicle be
checked by an authorized K900
Kia dealer as soon as possible.
WARNING
To reduce the risk of SERIOUS
INJURY or DEATH:
Do not drive in conditions that
exceed the vehicle's intended
design such as challenging
off-road conditions.
(Continued)
(Continued)
Avoid high speeds when cor-nering or turning.
Do not make quick steering wheel movements, such as
sharp lane changes or fast,
sharp turns.
The risk of a rollover is great- ly increased if you lose con-
trol of your vehicle at highway
speeds.
Loss of control often occurs if two or more wheels drop off
the roadway and the driver
over steers to reenter the
roadway.
In the event your vehicle leaves the roadway, do not
steer sharply. Instead, slow
down before pulling back into
the travel lanes.
Page 314 of 580
549
Driving your vehicle
✽ ✽NOTICE
• When operating the vehicle on a
dynamometer, ensure that the
ESC is turned off (ESC OFF light
illuminated). If the ESC is left on,
it may prevent the vehicle speed
from increasing, and result in false
diagnosis.
• Turning the ESC off does not affect ABS or brake system operation.
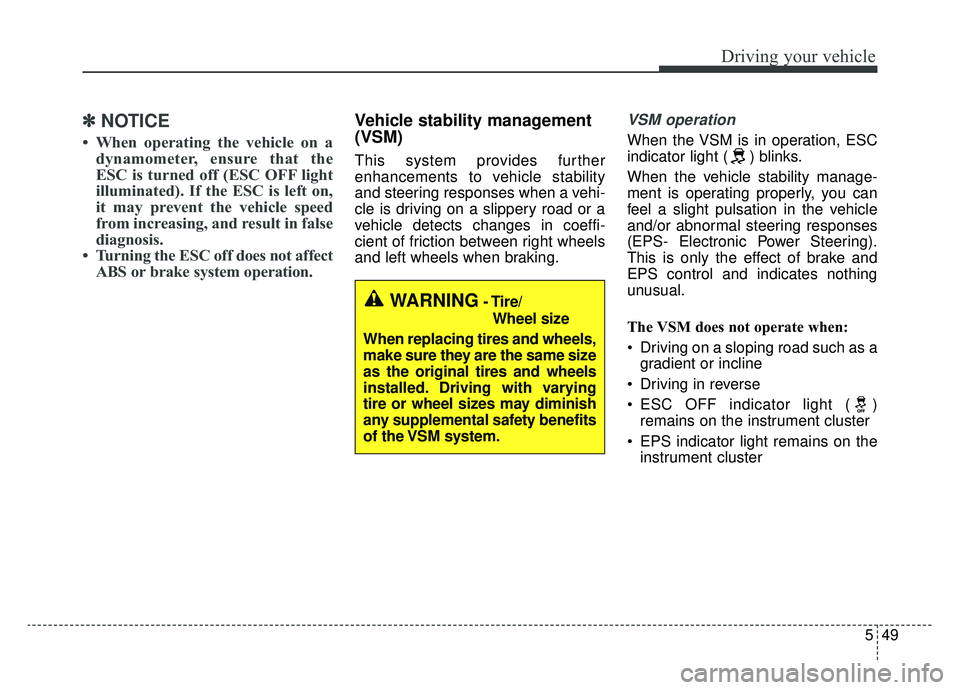
Vehicle stability management
(VSM)
This system provides further
enhancements to vehicle stability
and steering responses when a vehi-
cle is driving on a slippery road or a
vehicle detects changes in coeffi-
cient of friction between right wheels
and left wheels when braking.
VSM operation
When the VSM is in operation, ESC
indicator light ( ) blinks.
When the vehicle stability manage-
ment is operating properly, you can
feel a slight pulsation in the vehicle
and/or abnormal steering responses
(EPS- Electronic Power Steering).
This is only the effect of brake and
EPS control and indicates nothing
unusual.
The VSM does not operate when:
Driving on a sloping road such as a
gradient or incline
Driving in reverse
ESC OFF indicator light ( ) remains on the instrument cluster
EPS indicator light remains on the instrument cluster
WARNING- Tire/
Wheel size
When replacing tires and wheels,
make sure they are the same size
as the original tires and wheels
installed. Driving with varying
tire or wheel sizes may diminish
any supplemental safety benefits
of the VSM system.