tow KIA Optima 2006 2.G Owner's Manual
[x] Cancel search | Manufacturer: KIA, Model Year: 2006, Model line: Optima, Model: KIA Optima 2006 2.GPages: 225, PDF Size: 3.77 MB
Page 17 of 225
This device complies with Industry
Canada Standard RSS-210.Operation
is subject to the following two
conditions:
1. This device may not cause
interference, and
2. This device must accept any
interference, including interference
that may cause undesired operation of
the device.
LIMP HOME (OVERRIDE)
PROCEDUREWhen you turn the ignition key to the
ON position, if the IMMO indicator
remains on continuously after blinking 6
times, your transponder equipped in the
ignition key is out of order. You cannot
start the engine without the lime home
procedure. To start the engine, you have
to input your password by using the
ignition switch.
The following procedure is how to input
your password of “2345” as an example.
1. Turn the ignition key to the ON
position. The IMMO indicator ( )
will blink 6 times and remain on
indicating the beginning of the limp
home procedure.
2. Turn the ignition key to the ACC
position.
3. To enter the first digit (in this example
“2”), turn the ignition key to the ON
and ACC position twice. Perform the
same procedure for the next digits
between 3 seconds and 10 seconds
(for example, for “3”, turn the ignition
ON and ACC 3 times).4. If all of the digits have been input
successfully, you have to start the
engine within 10 seconds. If you
attempt to start the engine after 10
seconds, the engine will not start and
you will have to input your password
again.
After performing the limp home
procedure, you have to see an authorized
Kia dealer immediately to inspect and
repair your ignition key or immobilizer
system.
KNOWING YOUR VEHICLE
3-8
CAUTION
If you cannot start your engine in
spite of limp home procedure, have
your vehicle towed by an
authorized Kia dealer for
inspection and necessary repairs.
WARNING
Changes or modifications not
expressly approved by the
party responsible for
compliance could void the
user's authority to operate the
equipment.
MS-CNA-Eng 3.QXD 7/25/2005 5:17 PM Page 8
Page 19 of 225
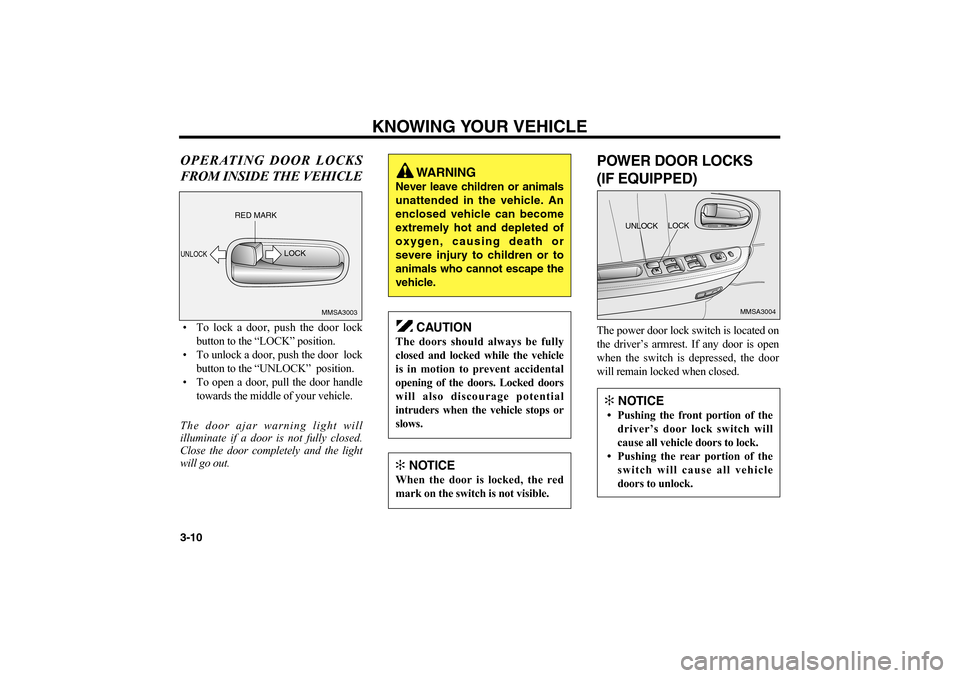
OPERATING DOOR LOCKS
FROM INSIDE THE VEHICLE• To lock a door, push the door lock
button to the “LOCK” position.
• To unlock a door, push the door lock
button to the “UNLOCK” position.
• To open a door, pull the door handle
towards the middle of your vehicle.
The door ajar warning light will
illuminate if a door is not fully closed.
Close the door completely and the light
will go out.
POWER DOOR LOCKS
(IF EQUIPPED)The power door lock switch is located on
the driver’s armrest. If any door is open
when the switch is depressed, the door
will remain locked when closed.
KNOWING YOUR VEHICLE
3-10
MMSA3004
UNLOCKLOCK
MMSA3003
UNLOCK
RED MARK
LOCK
WARNING
Never leave children or animals
unattended in the vehicle. An
enclosed vehicle can become
extremely hot and depleted of
oxygen, causing death or
severe injury to children or to
animals who cannot escape the
vehicle.
CAUTION
The doors should always be fully
closed and locked while the vehicle
is in motion to prevent accidental
opening of the doors. Locked doors
will also discourage potential
intruders when the vehicle stops or
slows.✻
NOTICE
When the door is locked, the red
mark on the switch is not visible.
✻
NOTICE• Pushing the front portion of the
driver’s door lock switch will
cause all vehicle doors to lock.
• Pushing the rear portion of the
switch will cause all vehicle
doors to unlock.
MS-CNA-Eng 3.QXD 7/25/2005 5:17 PM Page 10
Page 24 of 225
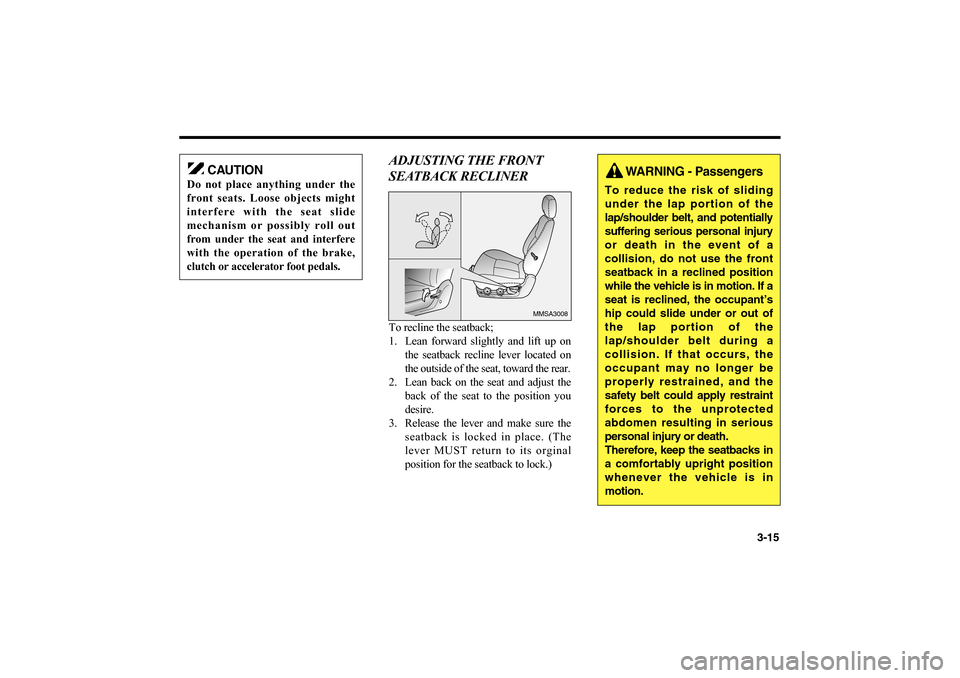
ADJUSTING THE FRONT
SEATBACK RECLINERTo recline the seatback;
1. Lean forward slightly and lift up on
the seatback recline lever located on
the outside of the seat, toward the rear.
2. Lean back on the seat and adjust the
back of the seat to the position you
desire.
3. Release the lever and make sure the
seatback is locked in place. (The
lever MUST return to its orginal
position for the seatback to lock.)
3-15
MMSA3008
CAUTION
Do not place anything under the
front seats. Loose objects might
interfere with the seat slide
mechanism or possibly roll out
from under the seat and interfere
with the operation of the brake,
clutch or accelerator foot pedals.
WARNING - Passengers
To reduce the risk of sliding
under the lap portion of the
lap/shoulder belt, and potentially
suffering serious personal injury
or death in the event of a
collision, do not use the front
seatback in a reclined position
while the vehicle is in motion. If a
seat is reclined, the occupant’s
hip could slide under or out of
the lap portion of the
lap/shoulder belt during a
collision. If that occurs, the
occupant may no longer be
properly restrained, and the
safety belt could apply restraint
forces to the unprotected
abdomen resulting in serious
personal injury or death.
Therefore, keep the seatbacks in
a comfortably upright position
whenever the vehicle is in
motion.
MS-CNA-Eng 3.QXD 7/25/2005 5:17 PM Page 15
Page 25 of 225
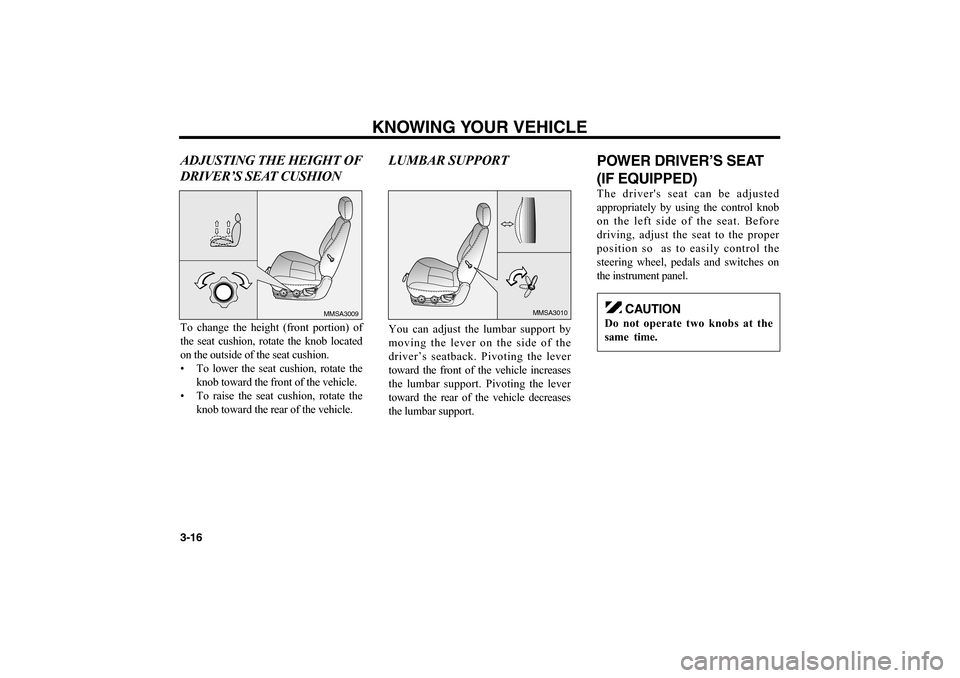
ADJUSTING THE HEIGHT OF
DRIVER’S SEAT CUSHION To change the height (front portion) of
the seat cushion, rotate the knob located
on the outside of the seat cushion.
• To lower the seat cushion, rotate the
knob toward the front of the vehicle.
• To raise the seat cushion, rotate the
knob toward the rear of the vehicle.
LUMBAR SUPPORTYou can adjust the lumbar support by
moving the lever on the side of the
driver’s seatback. Pivoting the lever
toward the front of the vehicle increases
the lumbar support. Pivoting the lever
toward the rear of the vehicle decreases
the lumbar support.
POWER DRIVER’S SEAT
(IF EQUIPPED)The driver's seat can be adjusted
appropriately by using the control knob
on the left side of the seat. Before
driving, adjust the seat to the proper
position so as to easily control the
steering wheel, pedals and switches on
the instrument panel.
KNOWING YOUR VEHICLE
3-16
MMSA3010
CAUTION
Do not operate two knobs at the
same time.
MMSA3009
MS-CNA-Eng 3.QXD 7/25/2005 5:17 PM Page 16
Page 30 of 225
3-21
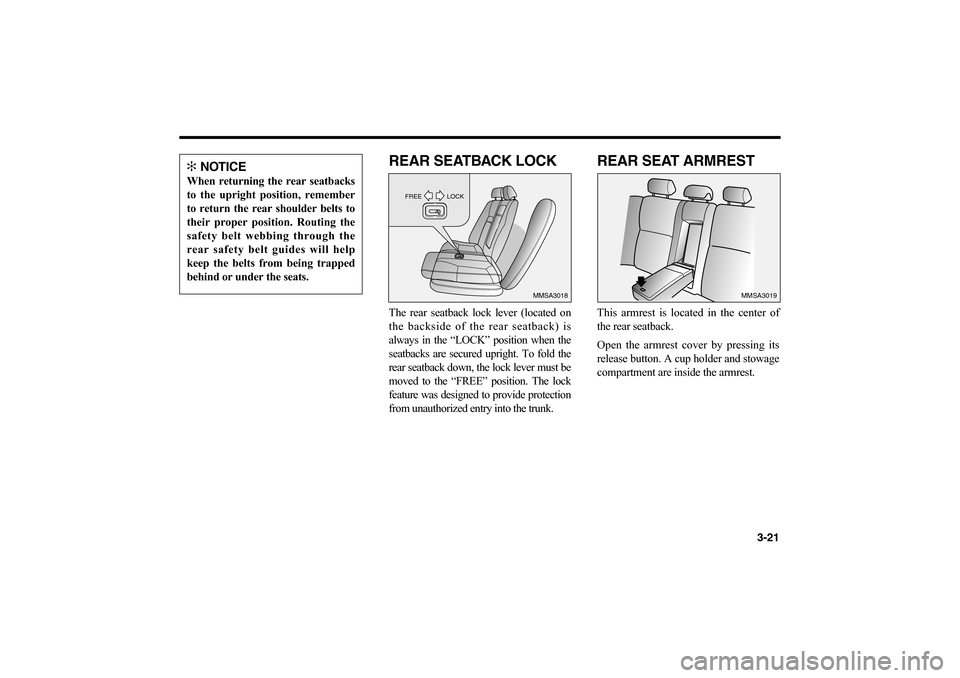
REAR SEATBACK LOCKThe rear seatback lock lever (located on
the backside of the rear seatback) is
always in the “LOCK” position when the
seatbacks are secured upright. To fold the
rear seatback down, the lock lever must be
moved to the “FREE” position. The lock
feature was designed to provide protection
from unauthorized entry into the trunk.
REAR SEAT ARMRESTThis armrest is located in the center of
the rear seatback.
Open the armrest cover by pressing its
release button. A cup holder and stowage
compartment are inside the armrest.
FREE LOCK
MMSA3018
MMSA3019
✻
NOTICE
When returning the rear seatbacks
to the upright position, remember
to return the rear shoulder belts to
their proper position. Routing the
safety belt webbing through the
rear safety belt guides will help
keep the belts from being trapped
behind or under the seats.
MS-CNA-Eng 3.QXD 7/25/2005 5:17 PM Page 21
Page 41 of 225
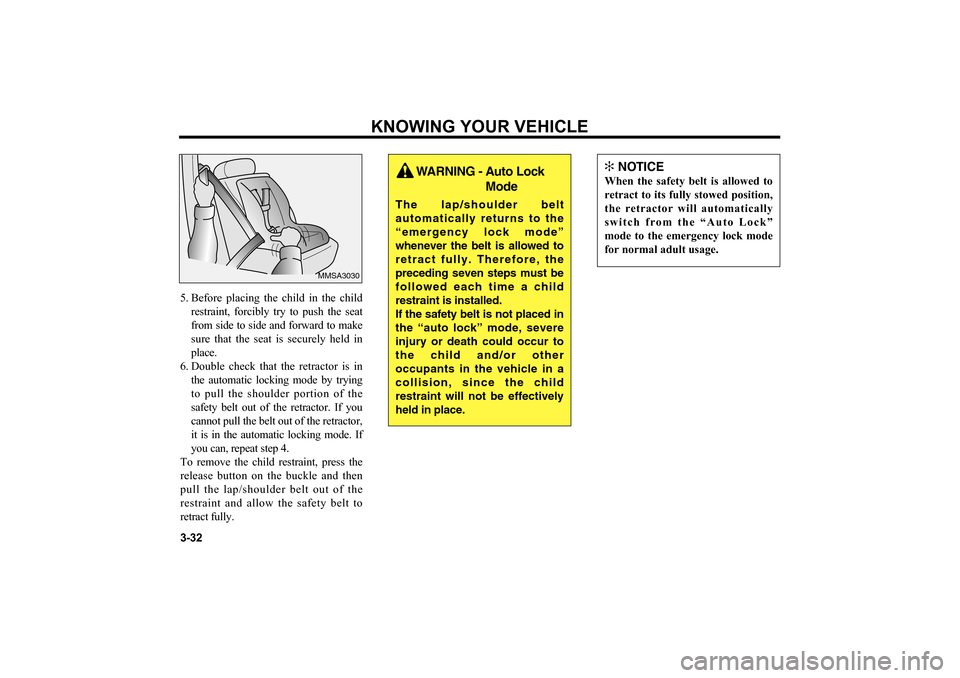
5. Before placing the child in the child
restraint, forcibly try to push the seat
from side to side and forward to make
sure that the seat is securely held in
place.
6. Double check that the retractor is in
the automatic locking mode by trying
to pull the shoulder portion of the
safety belt out of the retractor. If you
cannot pull the belt out of the retractor,
it is in the automatic locking mode. If
you can, repeat step 4.
To remove the child restraint, press the
release button on the buckle and then
pull the lap/shoulder belt out of the
restraint and allow the safety belt to
retract fully.
KNOWING YOUR VEHICLE
3-32
MMSA3030
✻
NOTICE
When the safety belt is allowed to
retract to its fully stowed position,
the retractor will automatically
switch from the “Auto Lock”
mode to the emergency lock mode
for normal adult usage.
WARNING - Auto Lock
Mode
The lap/shoulder belt
automatically returns to the
“emergency lock mode”
whenever the belt is allowed to
retract fully. Therefore, the
preceding seven steps must be
followed each time a child
restraint is installed.
If the safety belt is not placed in
the “auto lock” mode, severe
injury or death could occur to
the child and/or other
occupants in the vehicle in a
collision, since the child
restraint will not be effectively
held in place.
MS-CNA-Eng 3.QXD 7/25/2005 5:17 PM Page 32
Page 50 of 225
3-41
PROPER USE AND CARE
OF THE SAFETY BELT
SYSTEMTo ensure that the safety belts provide
the maximum protection, please follow
these instructions:
• Use the belts at all times - even on
short trips.
• If the safety belt is twisted, straighten
it prior to use.
• Keep sharp edges and damaging
objects away from the belts.
• Periodically inspect belt webbing,
anchors, buckles, and all other parts
for signs of wear and damage.
Replace damaged, excessively worn
or questionable parts immediately.• To clean the belt webbing, use any
mild soap solution recommended for
cleaning upholstery or carpets.
Follow the instructions provided with
the soap.
Do not bleach or dye the webbing
because this may weaken the
webbing fibers and allow them to fail
when loaded in a collision.
• Do not make modifications or
additions to the safety belt.
• After wearing a safety belt, make
sure it fully retracts to the stowed
position. Do not allow the belt to get
caught in the door when you close it.
MS-CNA-Eng 3.QXD 7/25/2005 5:17 PM Page 41
Page 52 of 225
3-43
THE IMPORTANCE OF
USING SAFETY BELTSThere are four very important reasons to
use safety belts even with an air bag
system, they:
• Help keep you in the proper position
(away from the air bag) when it
inflates.
• Reduce the risk of harm in rollover,
side or rear impact collisions,
because an air bag is not designed to
inflate in such situations.
• Reduce the risk of harm in frontal
collisions that are not severe enough
to activate the supplemental restraint
system.
• Reduce the risk of being thrown from
your vehicle.
WARNING - Air Bags &
Safety Belts
Even in vehicles with air bags,
you and your passengers
must always wear the safety
belts provided in order to
minimize the risk and severity
of injury in the event of a
collision or rollover.
Always wear your safety belt.
It can help keep you away
from the air bags during
heavy braking just before a
collision.
Air bags are designed to
inflate only in severe frontal
collisions and will generally
not provide protection in side
or rear impacts, rollovers or
less severe frontal collisions.
They will also not provide
protection from later impacts
in a multi-impact collision.
If your vehicle has been
subjected to flood conditions
(e.g. soaked carpeting/
standing water on the floor of
the vehicle, etc.) or if your
vehicle has become flood
damaged in any way, do not
attempt to start the vehicle or
put the key in the ignition
before disconnecting the
battery. This may cause air
bag deployment, which could
result in serious personal
injury or death. Have the
vehicle towed to an
Authorized Kia Dealer for
inspection and necessary
repairs.
MS-CNA-Eng 3.QXD 7/25/2005 5:17 PM Page 43
Page 56 of 225
3-47
THE IMPORTANCE OF THE
PASSENGER BEING
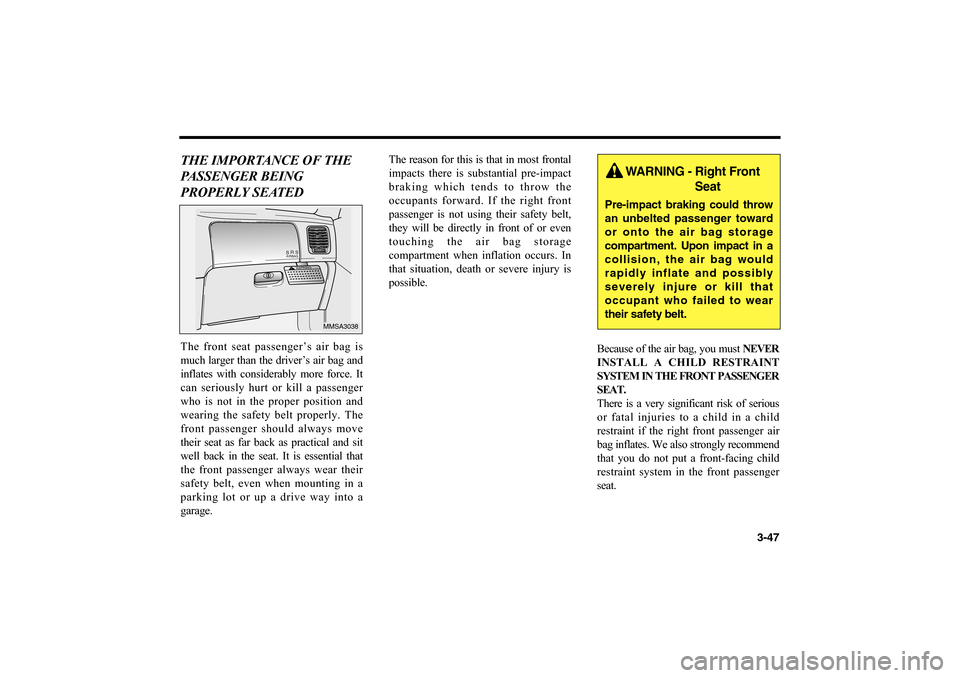
PROPERLY SEATEDThe front seat passenger’s air bag is
much larger than the driver’s air bag and
inflates with considerably more force. It
can seriously hurt or kill a passenger
who is not in the proper position and
wearing the safety belt properly. The
front passenger should always move
their seat as far back as practical and sit
well back in the seat. It is essential that
the front passenger always wear their
safety belt, even when mounting in a
parking lot or up a drive way into a
garage.The reason for this is that in most frontal
impacts there is substantial pre-impact
braking which tends to throw the
occupants forward. If the right front
passenger is not using their safety belt,
they will be directly in front of or even
touching the air bag storage
compartment when inflation occurs. In
that situation, death or severe injury is
possible.
Because of the air bag, you must NEVER
INSTALL A CHILD RESTRAINT
SYSTEM IN THE FRONT PASSENGER
SEAT.
There is a very significant risk of serious
or fatal injuries to a child in a child
restraint if the right front passenger air
bag inflates. We also strongly recommend
that you do not put a front-facing child
restraint system in the front passenger
seat.
S R SAIRBAGWARNING
MMSA3038
WARNING - Right Front
Seat
Pre-impact braking could throw
an unbelted passenger toward
or onto the air bag storage
compartment. Upon impact in a
collision, the air bag would
rapidly inflate and possibly
severely injure or kill that
occupant who failed to wear
their safety belt.
MS-CNA-Eng 3.QXD 7/25/2005 5:17 PM Page 47
Page 62 of 225

3-53
EMERGENCY TRUNK
SAFETY RELEASE
(IF EQUIPPED)Your vehicle is equipped with an
emergency trunk release cable located
inside the trunk. When pulled, this cable
will release the trunk latch mechanism
and open the trunk.
REMOTE TRUNK LID
RELEASETo open the trunk, pull the release switch
towards the middle of the vehicle.
MMSA3044A Pull to open the
trunk
MMSA3045
WARNING
No one should be allowed to
occupy the trunk of the vehicle
at any time. If the trunk is
partially or totally closed and
the person is unable to get out,
severe injury or death could
occur due to lack of ventilation,
fumes and rapid heat build-up,
or because of exposure due to
cold weather conditions. The
trunk is also a highly
dangerous location in the event
of a crash because it is not a
protected occupant space. In
fact, it is part of the vehicle’s
crush zone.
MS-CNA-Eng 3.QXD 7/25/2005 5:17 PM Page 53