ignition KIA Optima 2012 3.G Owner's Guide
[x] Cancel search | Manufacturer: KIA, Model Year: 2012, Model line: Optima, Model: KIA Optima 2012 3.GPages: 382, PDF Size: 8.75 MB
Page 109 of 382
Features of your vehicle
22
4
Power windows
The ignition switch must be in the ON
position for power windows to operate.
Each door has a power window switch
that controls the door's window. The driv-
er has a power window lock switch which
can block the operation of passenger
windows. The power windows can be
operated for approximately 30 seconds
after the ignition key is removed or turned
to the ACC or LOCK position. However, if
the front doors open, the power windows
cannot be operated within the 30 second
period.
✽ ✽
NOTICE
While driving with the rear windows
down or with the sunroof (if equipped)
in an open (or partially open position),
your vehicle may demonstrate a wind
buffeting or pulsation noise. This noise
is a normal occurrence and can be
reduced or eliminated by taking the fol-
lowing actions. If the noise occurs with
one or both of the rear windows down,
partially lower both front windows
approximately one inch. If you experi-
ence the noise with the sunroof open,
slightly reduce the size of the sunroof
opening.
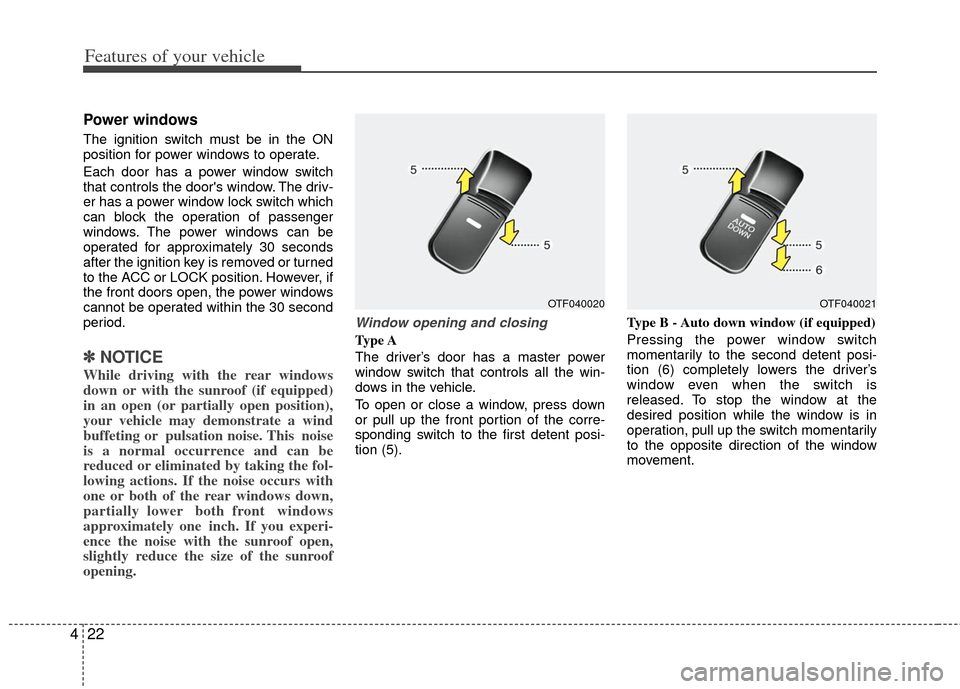
Window opening and closing
Type A
The driver’s door has a master power
window switch that controls all the win-
dows in the vehicle.
To open or close a window, press down
or pull up the front portion of the corre-
sponding switch to the first detent posi-
tion (5). Type B - Auto down window (if equipped)
Pressing the power window switch
momentarily to the second detent posi-
tion (6) completely lowers the driver’s
window even when the switch is
released. To stop the window at the
desired position while the window is in
operation, pull up the switch momentarily
to the opposite direction of the window
movement.
OTF040020OTF040021
Page 110 of 382
423
Features of your vehicle
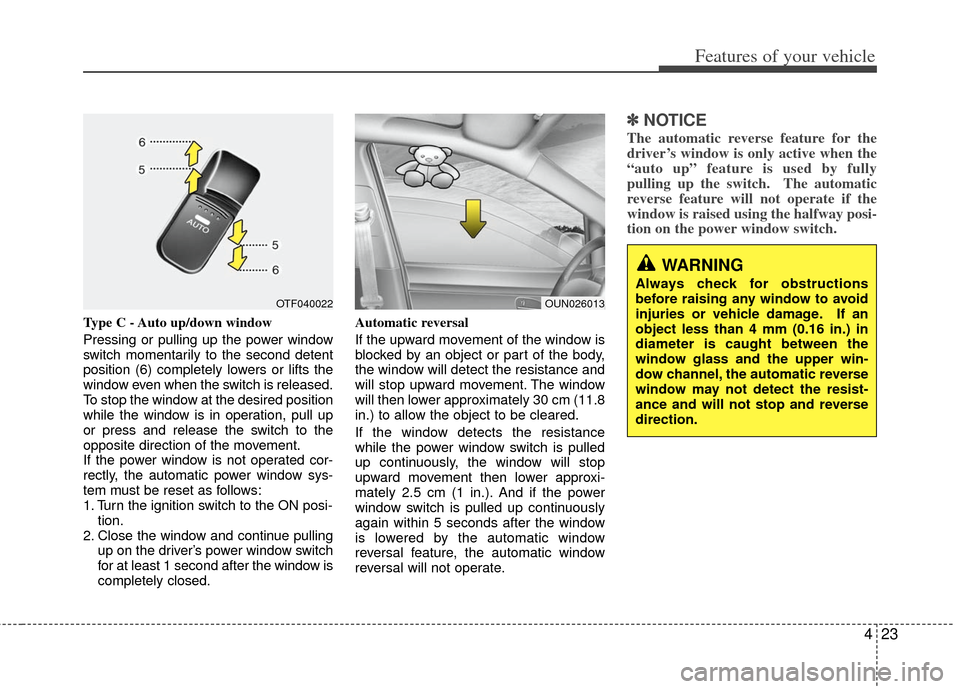
Type C - Auto up/down window
Pressing or pulling up the power window
switch momentarily to the second detent
position (6) completely lowers or lifts the
window even when the switch is released.
To stop the window at the desired position
while the window is in operation, pull up
or press and release the switch to the
opposite direction of the movement.
If the power window is not operated cor-
rectly, the automatic power window sys-
tem must be reset as follows:
1. Turn the ignition switch to the ON posi-tion.
2. Close the window and continue pulling up on the driver’s power window switch
for at least 1 second after the window is
completely closed. Automatic reversal
If the upward movement of the window is
blocked by an object or part of the body,
the window will detect the resistance and
will stop upward movement. The window
will then lower approximately 30 cm (11.8
in.) to allow the object to be cleared.
If the window detects the resistance
while the power window switch is pulled
up continuously, the window will stop
upward movement then lower approxi-
mately 2.5 cm (1 in.). And if the power
window switch is pulled up continuously
again within 5 seconds after the window
is lowered by the automatic window
reversal feature, the automatic window
reversal will not operate.
✽ ✽
NOTICE
The automatic reverse feature for the
driver’s window is only active when the
“auto up” feature is used by fully
pulling up the switch. The automatic
reverse feature will not operate if the
window is raised using the halfway posi-
tion on the power window switch.
OTF040022
WARNING
Always check for obstructions
before raising any window to avoid
injuries or vehicle damage. If an
object less than 4 mm (0.16 in.) in
diameter is caught between the
window glass and the upper win-
dow channel, the automatic reverse
window may not detect the resist-
ance and will not stop and reverse
direction.
OUN026013
Page 111 of 382
Features of your vehicle
24
4
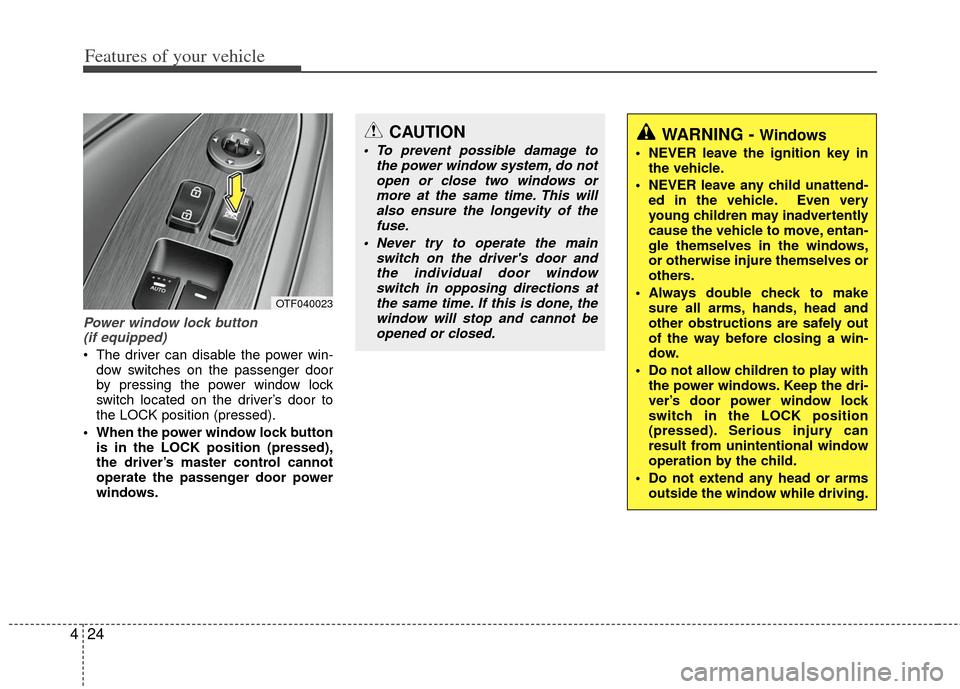
Power window lock button
(if equipped)
The driver can disable the power win-
dow switches on the passenger door
by pressing the power window lock
switch located on the driver’s door to
the LOCK position (pressed).
When the power window lock button is in the LOCK position (pressed),
the driver’s master control cannot
operate the passenger door power
windows.
OTF040023
CAUTION
To prevent possible damage to the power window system, do notopen or close two windows ormore at the same time. This willalso ensure the longevity of the fuse.
Never try to operate the main switch on the driver's door andthe individual door windowswitch in opposing directions atthe same time. If this is done, thewindow will stop and cannot beopened or closed.WARNING - Windows
NEVER leave the ignition key in the vehicle.
NEVER leave any child unattend- ed in the vehicle. Even very
young children may inadvertently
cause the vehicle to move, entan-
gle themselves in the windows,
or otherwise injure themselves or
others.
Always double check to make sure all arms, hands, head and
other obstructions are safely out
of the way before closing a win-
dow.
Do not allow children to play with the power windows. Keep the dri-
ver’s door power window lock
switch in the LOCK position
(pressed). Serious injury can
result from unintentional window
operation by the child.
Do not extend any head or arms outside the window while driving.
Page 117 of 382
Features of your vehicle
30
4
If your vehicle is equipped with a sunroof,
you can slide or tilt your sunroof with the
sunroof control lever located on the over-
head console.
The sunroof can only be opened, closed,
or tilted when the ignition switch is in the
ON position.
✽ ✽
NOTICE
• In cold and wet climates, the sunroof
may not work properly due to freez-
ing conditions.
• After washing the car or after there is rain, be sure to wipe off any water
that is on the sunroof before operating
it.
✽ ✽ NOTICE
The sunroof cannot slide when it is in
the tilt position nor can it be tilted while
in an open or slide position.
PANORAMA SUNROOF (IF EQUIPPED)
OVG049031
CAUTION
Do not continue to move the sun-
roof control lever after the sunroofis in the fully open, closed, or tiltposition(s). Damage to the motor orsystem components could occur.
WARNING
Never adjust the sunroof or sun-
shade while driving. This could
result in loss of control and an acci-
dent that may cause death, serious
injury, or property damage.
Page 120 of 382
433
Features of your vehicle
Resetting the sunroof
Whenever the vehicle battery is discon-
nected or discharged, or related fuse is
blown, you must reset your sunroof sys-
tem as follows:
1. Turn the ignition switch to the ON posi-tion and close the sunroof glass and
sunshade completely.
2. Release the control lever.
3. Push the sunroof control lever forward in the direction of close (about 10 sec-
onds) until the sunroof is moved a little.
Then, release the lever.
4. Push the sunroof control lever forward in the direction of close until the sun-
roof operates as follows;
SUNSHADE OPEN → TILT OPEN →
SLIDE OPEN → SLIDE CLOSE →
SUNSHADE CLOSE
Then, release the control lever.
When this is complete, the sunroof
system is reset.
❈ For more detailed information, contact
an authorized Kia dealer.
Page 121 of 382
Features of your vehicle
34
4
A driver position memory system is pro-
vided to store and recall the driver seat
position with a simple button operation.
By saving the desired position into the
system memory, different drivers can
reposition the driver seat based upon
their driving preference. If the battery is
disconnected, the position memory will
be lost and the driving position should be
restored in the system.
Storing positions into memory
using the buttons on the door
Storing driver’s seat positions
1. Shift the shift lever into P while the
ignition switch is ON.
2. Adjust the driver seat to position com- fortable for the driver.
3. Press SET button on the control panel. The system will beep once.
4. Press one of the memory buttons (1 or 2) within 5 seconds after pressing the
SET button. The system will beep
twice when memory has been suc-
cessfully stored.
DRIVER POSITION MEMORY SYSTEM (IF EQUIPPED)
OTF040035
WARNING
Never attempt to operate the driver
position memory system while the
vehicle is moving.
This could result in loss of control,
and an accident causing death,
serious injury, or property damage.
Page 122 of 382
435
Features of your vehicle
Recalling positions from memory
1. Shift the shift lever into P while theignition switch is ON.
2. To recall the position in memory, press the desired memory button (1 or 2).
The system will beep once, then the
driver seat will automatically adjust to
the stored positions.
Adjusting the control switch for the driver
seat while the system is recalling the
stored position will cause the movement
to stop and move in the direction that the
control switch is moved.
Easy access function
(if equipped)
With the shift lever in the P position, the
system will move the driver's seat auto-
matically as follows.
Without smart key system - It will move the driver’s seat rearwardwhen the ignition key is removed.
- It will move the driver’s seat forward when the ignition key is inserted.
With smart key system - It will move the driver’s seat rearwardwhen the engine start/stop button is
turned to the OFF position or the
smart key is removed from the smart
key holder.
- It will move the driver’s seat forward when the engine start/stop button is
turned to the ACC or START position
or the smart key is inserted into the
smart key holder.
WARNING
Use caution when recalling adjust-
ment memory while sitting in the
vehicle. Push the seat position con-
trol knob to the desired position
immediately if the seat moves too
far in any direction.
Page 123 of 382
Features of your vehicle
36
4
Electric power steering
Power steering uses the motor to assist
you in steering the vehicle. If the engine
is off or if the power steering system
becomes inoperative, the vehicle may
still be steered, but it will require
increased steering effort.
The motor driven power steering is con-
trolled by the power steering control unit
which senses the steering wheel torque
and vehicle speed to command the
motor.
The steering wheel becomes heavier as
the vehicle’s speed increases and
becomes lighter as the vehicle’s speed
decreases for better control of the steer-
ing wheel.
Should you notice any change in the
effort required to steer during normal
vehicle operation, have the power steer-
ing checked by an authorized Kia dealer.
✽ ✽
NOTICE
The following symptoms may occur dur-
ing normal vehicle operation:
• The EPS warning light does not illumi-
nate.
• The steering effort is high immediately after turning the ignition switch on.
This happens as the system performs
the EPS system diagnostics. When the
diagnostics is completed, the steering
wheel will return to its normal condi-
tion.
• A click noise may be heard from the EPS relay after the ignition switch is
turned to the ON or LOCK position.
• Motor noise may be heard when the vehicle is at a stop or at a low driving
speed.
• If the Electric Power Steering System does not operate normally, the warn-
ing light will illuminate on the instru-
ment cluster. The steering wheel may
become difficult to control or operate
abnormally. Take your vehicle to an
authorized Kia dealer and have the
vehicle checked as soon as possible.
• The steering effort increases if the steering wheel is rotated continuously
when the vehicle is not in motion.
However, after a few minutes, it will
return to its normal conditions. • When you operate the steering wheel
in low temperature, abnormal noise
could occur. If temperature rises, the
noise will disappear. This is a normal
condition.
STEERING WHEEL
Page 125 of 382
Features of your vehicle
38
4
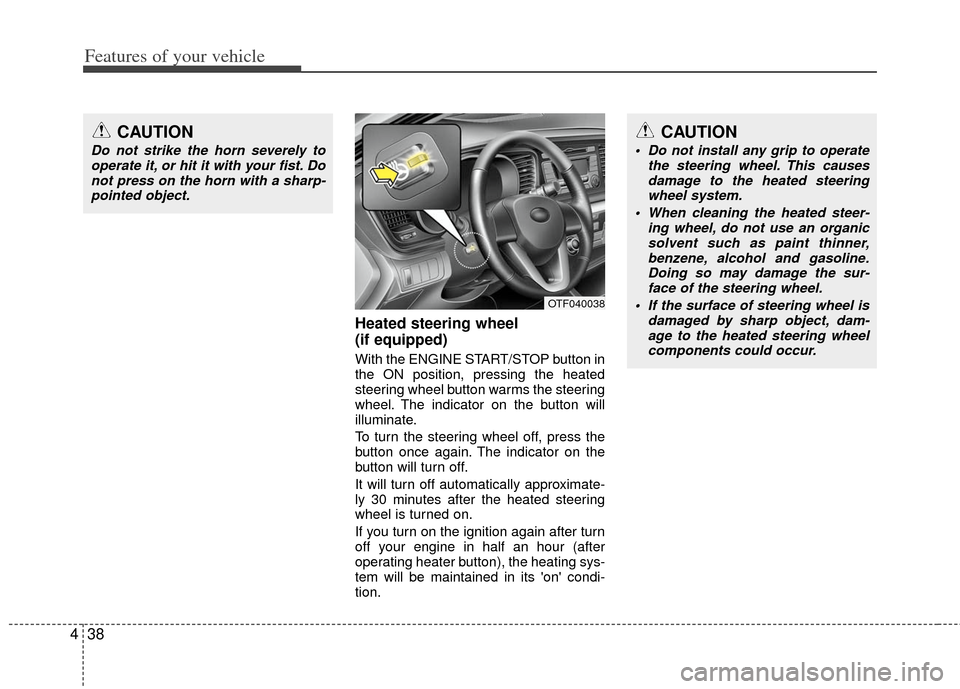
Heated steering wheel
(if equipped)
With the ENGINE START/STOP button in
the ON position, pressing the heated
steering wheel button warms the steering
wheel. The indicator on the button will
illuminate.
To turn the steering wheel off, press the
button once again. The indicator on the
button will turn off.
It will turn off automatically approximate-
ly 30 minutes after the heated steering
wheel is turned on.
If you turn on the ignition again after turn
off your engine in half an hour (after
operating heater button), the heating sys-
tem will be maintained in its 'on' condi-
tion.
CAUTION
Do not strike the horn severely to
operate it, or hit it with your fist. Donot press on the horn with a sharp-pointed object.
CAUTION
Do not install any grip to operate the steering wheel. This causesdamage to the heated steering wheel system.
When cleaning the heated steer- ing wheel, do not use an organicsolvent such as paint thinner, benzene, alcohol and gasoline.Doing so may damage the sur- face of the steering wheel.
If the surface of steering wheel is damaged by sharp object, dam-age to the heated steering wheelcomponents could occur.
OTF040038
Page 128 of 382
441
Features of your vehicle
Z-Nav™ Compass Display
The NVS™ Mirror in your vehicle is also
equipped with a Z-Nav™ Compass that
shows the vehicle Compass heading in
the Display Window using the 8 basic
cardinal headings (N, NE, E, SE, etc.).
Compass function
The Compass can be turned ON and
OFF and will remember the last state
when the ignition is cycled. To turn the
display feature ON/OFF:
1. Press and release the button toturn the display feature OFF.
2. Press and release the button again to turn the display back ON.
Additional options can be set with press
and hold sequences of the button and
are detailed below.
There is a difference between magnetic
north and true north. The compass in the
mirror can compensate for this difference
when it knows the Magnetic Zone in
which it is operating. This is set either by
the dealer or by the user. The operating
Zone Numbers for North America are
shown in the figure on the following sec-
tion.
B520C05NF