tow KIA Optima 2016 4.G Owner's Manual
[x] Cancel search | Manufacturer: KIA, Model Year: 2016, Model line: Optima, Model: KIA Optima 2016 4.GPages: 623, PDF Size: 15.4 MB
Page 8 of 623
15
Introduction
Fuel Additives
Kia recommends that you use good
quality gasolines treated with deter-
gent additives such as TOP TIER
Detergent Gasoline, which help pre-
vent deposit formation in the engine.
These gasolines will help the engine
run cleaner and enhance performance
of the Emission Control System. For
more information on TOP TIER
Detergent Gasoline, please go to the
website (www.toptiergas.com).
For customers who do not use TOP
TIER Detergent Gasoline regularly,
and have problems starting or the
engine does not run smoothly, addi-
tives that that can be purchased sep-
arately may be added to the gasoline.
If TOP TIER Detergent Gasoline is not
available, one bottle of additive should
be added to the fuel tank at every
12,000km (7,500miles) or every
engine oil change is recommended.
Additives are available from your
authorized Kia dealer along with infor-
mation on how to use them. Do not
mix other additives.
Operation in foreign countries
If you are going to drive your vehicle
in another country, be sure to:
Observe all regulations regardingregistration and insurance.
Determine that acceptable fuel is available. No special break-in period is need-
ed. By following a few simple precau-
tions for the first 1,000 km (600
miles) you may add to the perform-
ance, economy and life of your vehi-
cle.
Do not race the engine.
While driving, keep your engine
speed (rpm, or revolutions per
minute) between 2,000 rpm and
4,000 rpm.
Do not maintain a single speed for long periods of time, either fast or
slow. Varying engine speed is
needed to properly break-in the
engine.
Avoid hard stops, except in emer- gencies, to allow the brakes to seat
properly.
Don't tow a trailer during the first 2,000 km (1,200 miles) of opera-
tion.
VEHICLE BREAK-IN
PROCESS
JF CAN (ENG) 1.qxp 9/22/2015 6:50 PM Page 5
Page 30 of 623
Safety features of your vehicle
14
3
Adjusting the height up and down
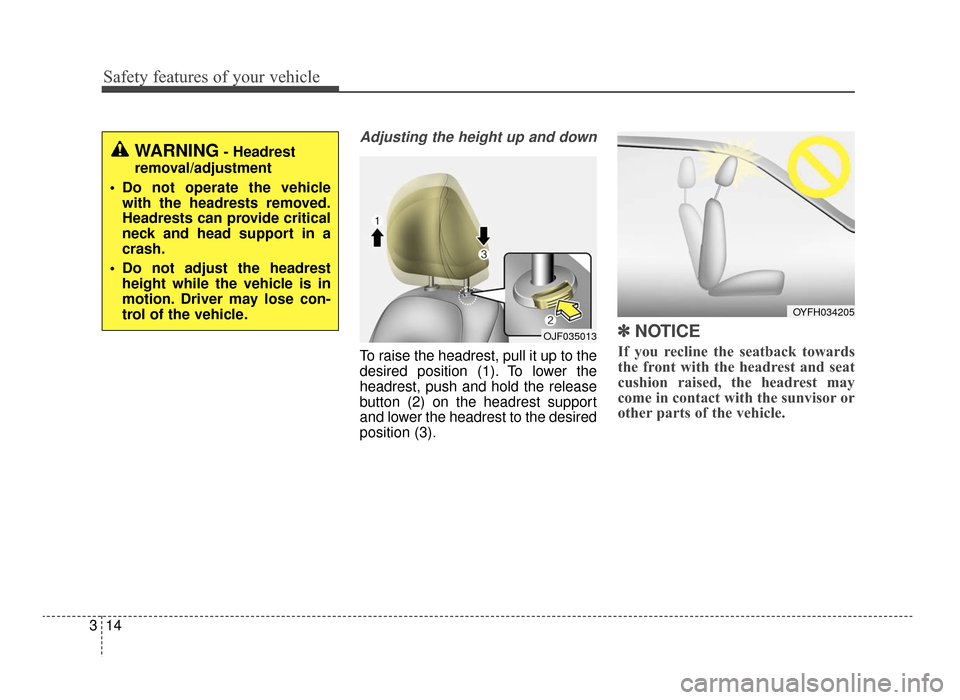
To raise the headrest, pull it up to the
desired position (1). To lower the
headrest, push and hold the release
button (2) on the headrest support
and lower the headrest to the desired
position (3).
✽ ✽
NOTICE
If you recline the seatback towards
the front with the headrest and seat
cushion raised, the headrest may
come in contact with the sunvisor or
other parts of the vehicle.
OJF035013
OYFH034205
WARNING- Headrest
removal/adjustment
Do not operate the vehicle with the headrests removed.
Headrests can provide critical
neck and head support in a
crash.
Do not adjust the headrest height while the vehicle is in
motion. Driver may lose con-
trol of the vehicle.
JF CAN (ENG) 3.qxp 9/22/2015 7:05 PM Page 14
Page 35 of 623
319
Safety features of your vehicle
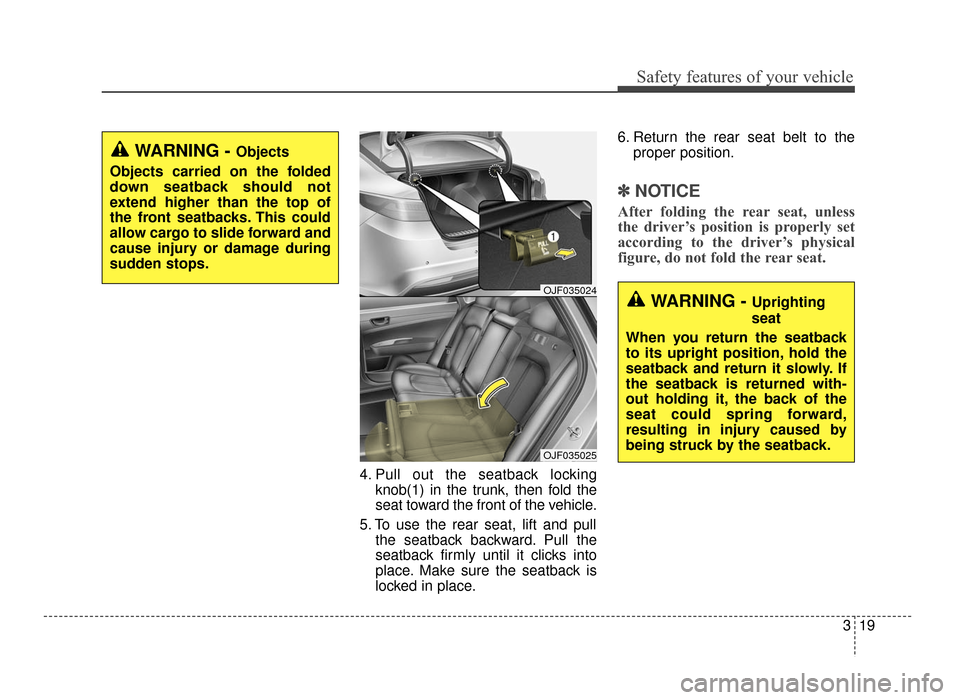
4. Pull out the seatback lockingknob(1) in the trunk, then fold the
seat toward the front of the vehicle.
5. To use the rear seat, lift and pull the seatback backward. Pull the
seatback firmly until it clicks into
place. Make sure the seatback is
locked in place. 6. Return the rear seat belt to the
proper position.
✽ ✽
NOTICE
After folding the rear seat, unless
the driver’s position is properly set
according to the driver’s physical
figure, do not fold the rear seat.
OJF035025
WARNING - Objects
Objects carried on the folded
down seatback should not
extend higher than the top of
the front seatbacks. This could
allow cargo to slide forward and
cause injury or damage during
sudden stops.
WARNING - Uprighting
seat
When you return the seatback
to its upright position, hold the
seatback and return it slowly. If
the seatback is returned with-
out holding it, the back of the
seat could spring forward,
resulting in injury caused by
being struck by the seatback.OJF035024
JF CAN (ENG) 3.qxp 9/22/2015 7:05 PM Page 19
Page 58 of 623

Safety features of your vehicle
42
3
5. Remove as much slack from the
belt as possible by pushing down
on the child restraint system while
feeding the shoulder belt back into
the retractor.
6. Push and pull on the child restraint system to confirm that the seat
belt is holding it firmly in place. If it
is not, release the seat belt and
repeat steps 2 through 6.
7. Double check that the retractor is in the "Automatic Locking" mode
by attempting to pull more of the
seat belt out of the retractor. If you
cannot, the retractor is in the
"Automatic Locking" mode.
If your CRS manufacturer instructs or
recommends you to use a tether
anchor with the lap/shoulder belt,
refer to the previous pages for more
information.✽ ✽ NOTICE
When the seat belt is allowed to
retract to its fully stowed position,
the retractor will automatically
switch from the "Automatic
Locking" mode to the emergency
lock mode for normal adult usage.
To remove the child restraint, press
the release button on the buckle and
then pull the lap/shoulder belt out of
the restraint and allow the seat belt
to retract fully.
WARNING
If the retractor is not in the
"Automatic Locking" mode, the
child restraint can move when
your vehicle turns or stops sud-
denly. A child can be seriously
injured or killed if the child
restraint is not properly anchored
in the car, including manually
pulling the seat belt all the way
out to shift the rectractor to the
"Automatic Locking" mode.
JF CAN (ENG) 3.qxp 9/22/2015 7:05 PM Page 42
Page 67 of 623
351
Safety features of your vehicle
Main components of the occu-pant detection system
An detection device located within the front passenger seat cushion.
An electronic system which deter- mines whether the passenger air
bag systems should be activated
or deactivated.
An indicator light located on the instrument panel which illuminates
the words PASSENGER AIR BAG
“OFF” indicates the front passen-
ger air bag system is deactivated.
The instrument panel air bag warn- ing light is interconnected with the
occupant detection system. If the front passenger seat is occu-
pied by a person that the system
determines to be of appropriate size,
and he/she sits properly (sitting
upright with the seatback in an
upright position, centered on the
seat cushion with their seat belt on,
legs comfortably extended and their
feet on the floor), the PASSENGER
AIR BAG “OFF” indicator will turn off
and the front passenger's air bag will
be able to inflate, if necessary, in
frontal crashes.
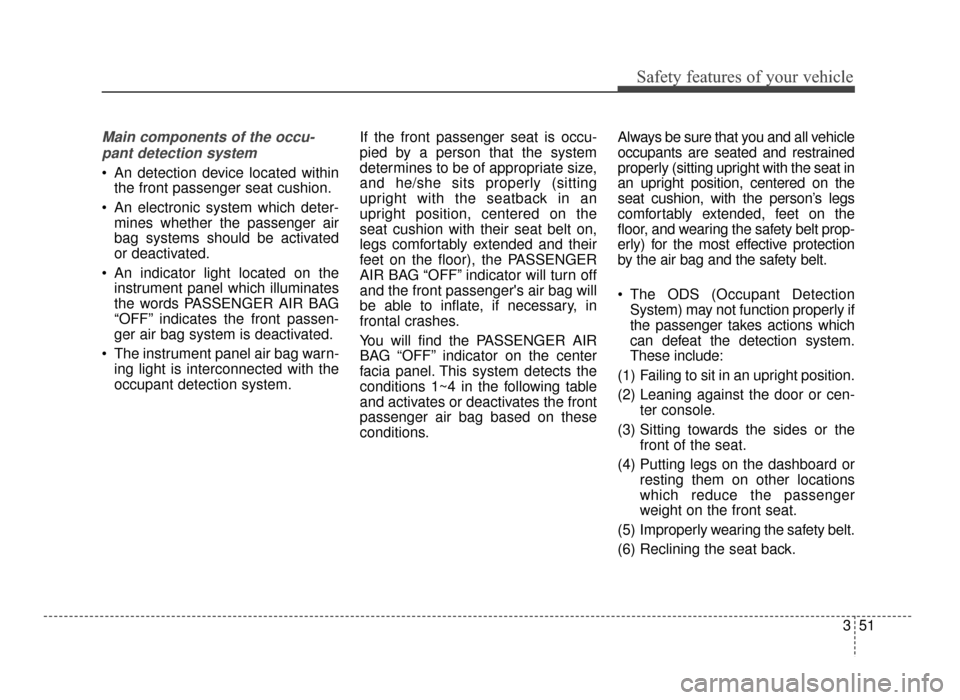
You will find the PASSENGER AIR
BAG “OFF” indicator on the center
facia panel. This system detects the
conditions 1~4 in the following table
and activates or deactivates the front
passenger air bag based on these
conditions. Always be sure that you and all vehicle
occupants are seated and restrained
properly (sitting upright with the seat in
an upright position, centered on the
seat cushion, with the person’s legs
comfortably extended, feet on the
floor, and wearing the safety belt prop-
erly) for the most effective protection
by the air bag and the safety belt.
The ODS (Occupant Detection
System) may not function properly if
the passenger takes actions which
can defeat the detection system.
These include:
(1) Failing to sit in an upright position.
(2) Leaning against the door or cen- ter console.
(3) Sitting towards the sides or the front of the seat.
(4) Putting legs on the dashboard or resting them on other locations
which reduce the passenger
weight on the front seat.
(5) Improperly wearing the safety belt.
(6) Reclining the seat back.
JF CAN (ENG) 3.qxp 9/22/2015 7:05 PM Page 51
Page 70 of 623
Safety features of your vehicle
54
3
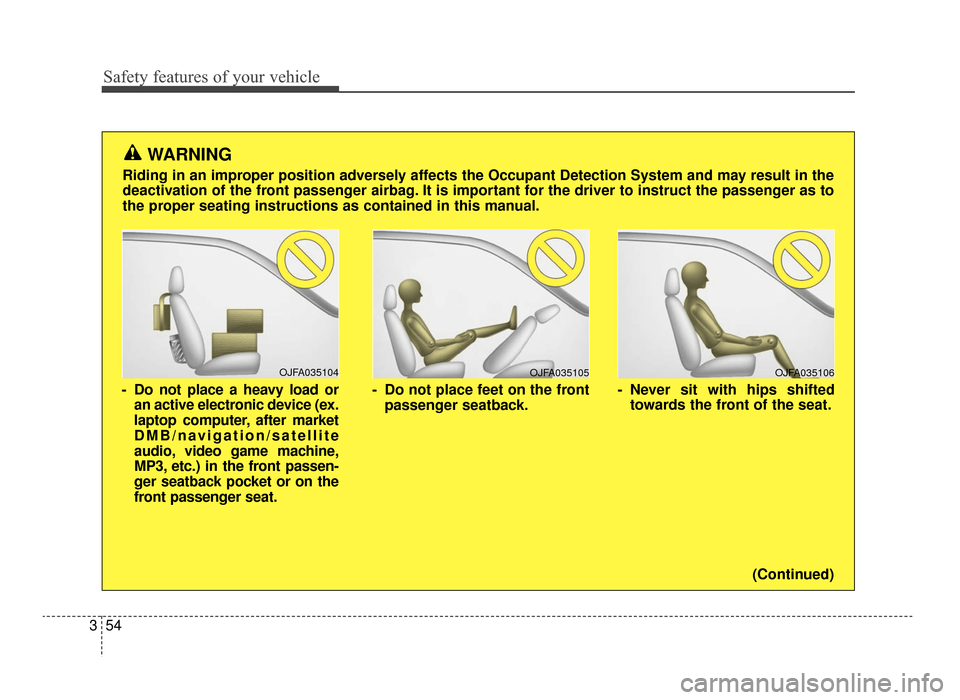
OJFA035106
- Never sit with hips shifted
towards the front of the seat.
OJFA035104
- Do not place a heavy load oran active electronic device (ex.
laptop computer, after market
DMB/navigation/satellite
audio, video game machine,
MP3, etc.) in the front passen-
ger seatback pocket or on the
front passenger seat.
OJFA035105
- Do not place feet on the frontpassenger seatback.
WARNING
Riding in an improper position adversely affects the Occupant Detection System and may result in the
deactivation of the front passenger airbag. It is important for the driver to instruct the passenger as to
the proper seating instructions as contained in this manual.
(Continued)
JF CAN (ENG) 3.qxp 9/22/2015 7:05 PM Page 54
Page 82 of 623
Safety features of your vehicle
66
3
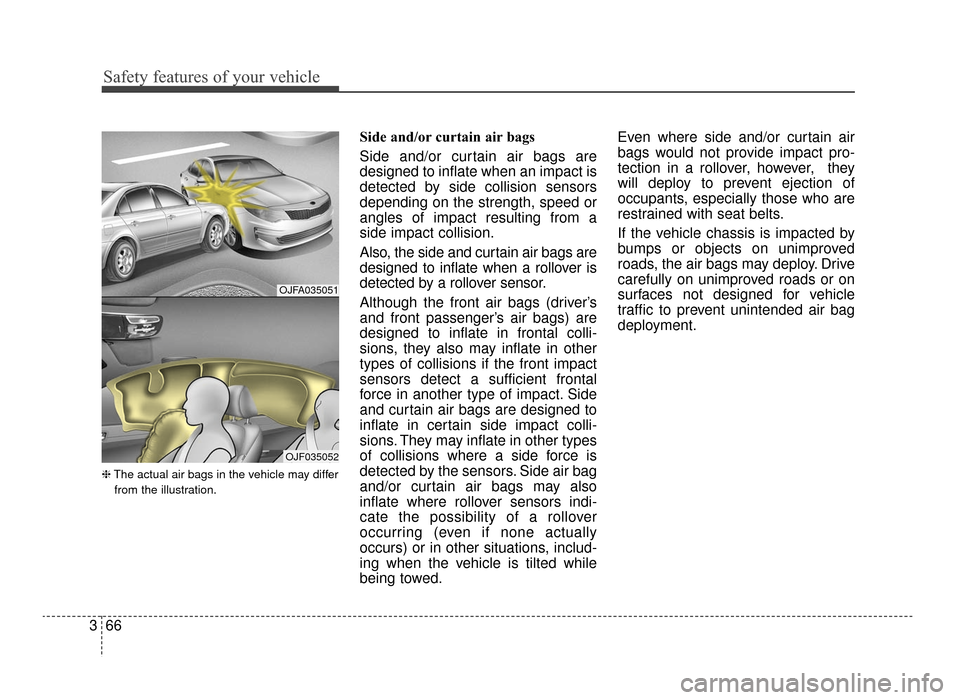
❈ The actual air bags in the vehicle may differ
from the illustration.
Side and/or curtain air bags
Side and/or curtain air bags are
designed to inflate when an impact is
detected by side collision sensors
depending on the strength, speed or
angles of impact resulting from a
side impact collision.
Also, the side and curtain air bags are
designed to inflate when a rollover is
detected by a rollover sensor.
Although the front air bags (driver’s
and front passenger’s air bags) are
designed to inflate in frontal colli-
sions, they also may inflate in other
types of collisions if the front impact
sensors detect a sufficient frontal
force in another type of impact. Side
and curtain air bags are designed to
inflate in certain side impact colli-
sions. They may inflate in other types
of collisions where a side force is
detected by the sensors. Side air bag
and/or curtain air bags may also
inflate where rollover sensors indi-
cate the possibility of a rollover
occurring (even if none actually
occurs) or in other situations, includ-
ing when the vehicle is tilted while
being towed. Even where side and/or curtain air
bags would not provide impact pro-
tection in a rollover, however, they
will deploy to prevent ejection of
occupants, especially those who are
restrained with seat belts.
If the vehicle chassis is impacted by
bumps or objects on unimproved
roads, the air bags may deploy. Drive
carefully on unimproved roads or on
surfaces not designed for vehicle
traffic to prevent unintended air bag
deployment.
OJFA035051
OJF035052
JF CAN (ENG) 3.qxp 9/22/2015 7:06 PM Page 66
Page 86 of 623
Safety features of your vehicle
70
3
Adding equipment to or modi-
fying your air bag-equipped
vehicle
If you modify your vehicle by chang-
ing your vehicle's frame, bumper sys-
tem, front end or side sheet metal or
ride height, this may affect the opera-
tion of your vehicle's air bag system.
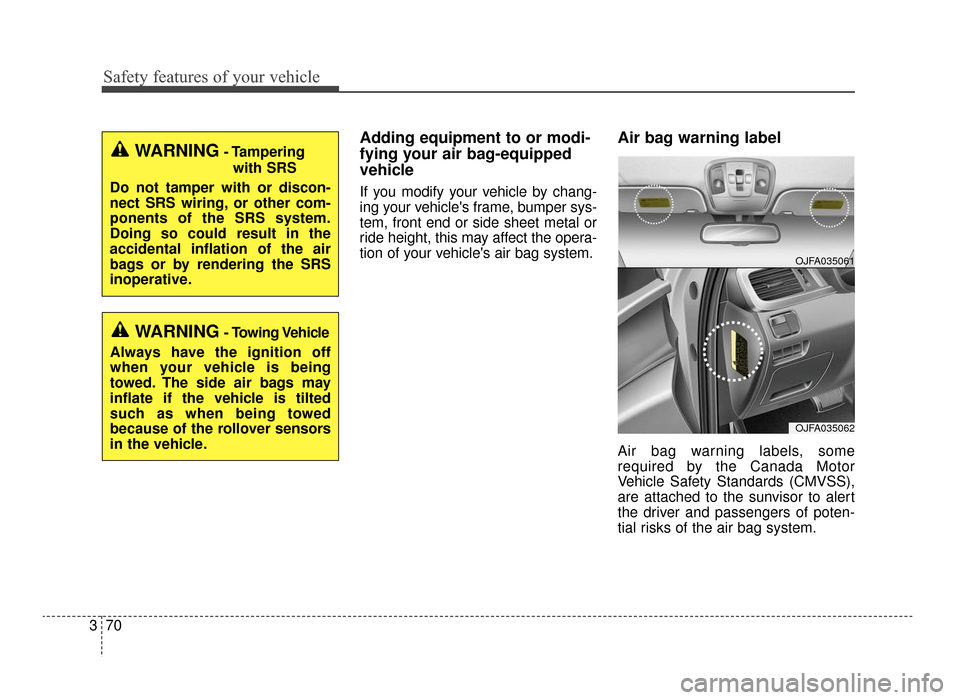
Air bag warning label
Air bag warning labels, some
required by the Canada Motor
Vehicle Safety Standards (CMVSS),
are attached to the sunvisor to alert
the driver and passengers of poten-
tial risks of the air bag system.
WARNING- Tampering
with SRS
Do not tamper with or discon-
nect SRS wiring, or other com-
ponents of the SRS system.
Doing so could result in the
accidental inflation of the air
bags or by rendering the SRS
inoperative.
WARNING- Towing Vehicle
Always have the ignition off
when your vehicle is being
towed. The side air bags may
inflate if the vehicle is tilted
such as when being towed
because of the rollover sensors
in the vehicle.
OJFA035061
OJFA035062
JF CAN (ENG) 3.qxp 9/22/2015 7:06 PM Page 70
Page 100 of 623
Features of your vehicle
14
4
Trunk unlocking
If you are within 0.7 ~ 1 m (28 ~ 40 in)
from the outside trunk handle, with
your smart key in possession, the
trunk will unlock and open when you
press the trunk handle switch.
The hazard warning lights will blink
twice to indicate that the trunk is
unlocked.
Panic
1. Press the panic button (4) for more
than 1 second.
2. The horn sounds and hazard warning light flash for about 27
seconds.
✽ ✽NOTICE
To stop the horn and lights, press
any button on the smart key.
Start-up
You can start the engine without
inserting the key. For detailed infor-
mation refer to the “Engine start/stop
button” in chapter 6.
Loss of the smart key
A maximum of 2 smart keys can be
registered to a single vehicle.
If you happen to lose your smart key,
you will not be able to start the
engine. You should immediately take
the vehicle and remaining key to your
authorized Kia dealer (tow the vehi-
cle, if necessary) to protect it from
potential theft.
JF CAN (ENG) 4.qxp 11/5/2015 3:50 PM Page 14
Page 137 of 623
451
Features of your vehicle
MIRRORS
Inside rearview mirror
Adjust the rearview mirror so that the
center view through the rear window
is seen. Make this adjustment before
you start driving.
Do not place objects in the rear seat
or cargo area which would interfere
with your vision through the rear win-
dow.
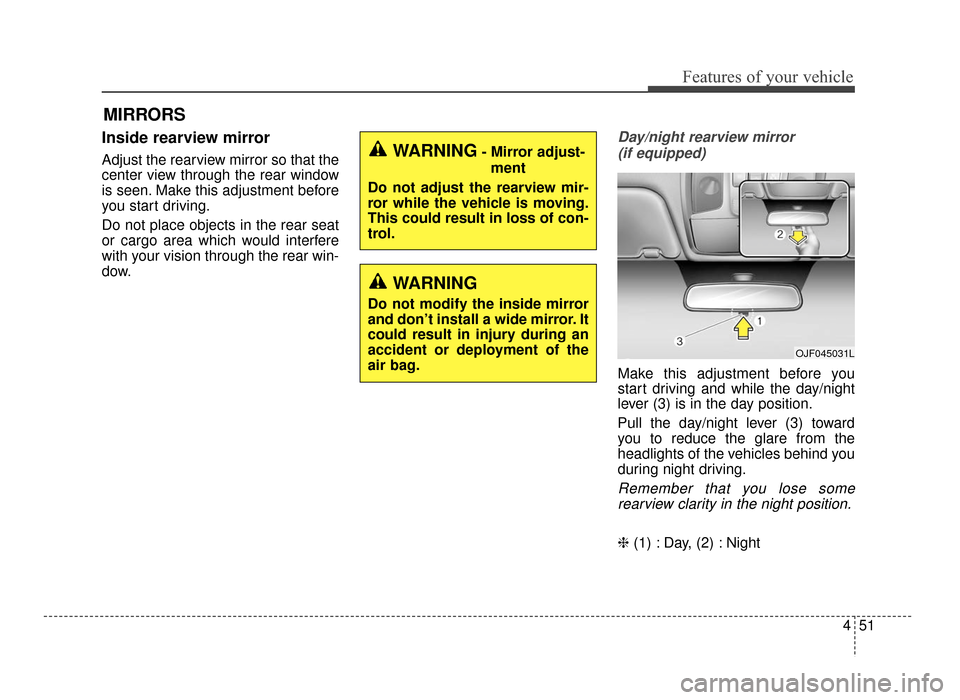
Day/night rearview mirror (if equipped)
Make this adjustment before you
start driving and while the day/night
lever (3) is in the day position.
Pull the day/night lever (3) toward
you to reduce the glare from the
headlights of the vehicles behind you
during night driving.
Remember that you lose somerearview clarity in the night position.
❈ (1) : Day, (2) : Night
WARNING- Mirror adjust-
ment
Do not adjust the rearview mir-
ror while the vehicle is moving.
This could result in loss of con-
trol.
WARNING
Do not modify the inside mirror
and don’t install a wide mirror. It
could result in injury during an
accident or deployment of the
air bag.
OJF045031L
JF CAN (ENG) 4.qxp 11/5/2015 3:50 PM Page 51