seats KIA OPTIMA 2020 Features and Functions Guide
[x] Cancel search | Manufacturer: KIA, Model Year: 2020, Model line: OPTIMA, Model: KIA OPTIMA 2020Pages: 591, PDF Size: 14.1 MB
Page 55 of 591

337
Safety features of your vehicle
Convertible and 3-in-1 child seats
typically have higher height and
weight limits for the rear-facing posi-
tion, allowing you to keep your child
rear-facing for a longer period of time.
Continue to use a rear-facing child
seat for as long as your child will fit
within the height and weight limits
allowed by the child seat manufactur-
er. It’s the best way to keep them
safe. Once your child has outgrown
the rear-facing child restraint, your
child is ready for a forward-facing
child restraint with a harness.Forward-facing child restraints
A forward-facing child seat provides
restraint for the child’s body with a
harness. Keep children in a forward-
facing child seat with a harness until
they reach the top height or weight
limit allowed by your child restraint’s
manufacturer.
Once your child outgrows the for-
ward-facing child restraint, your child
is ready for a booster seat.Booster seats
A booster seat is a restraint designed
to improve the fit of the vehicle’s seat
belt system. A booster seat positions
the seat belt so that it fits properly
over the lap of your child.
Keep your child in a booster seat
until they are big enough to sit in the
seat without a booster and still have
the seat belt fit properly. For a seat
belt to fit properly, the lap belt must
lie snugly across the upper thighs,
not the stomach. The shoulder belt
should lie snug across the shoulder
and chest and not across the neck or
face. Children under age 13 must
always ride in the rear seats and
must always be properly restrained
to minimize the risk of injury.
OJF035032
JFa PE USA 3.QXP 5/17/2019 4:50 PM Page 37
Page 56 of 591

Safety features of your vehicle
38
3
Installing a Child Restraint
System (CRS)
After selecting a proper child seat for
your child, check to make sure it fits
properly in your vehicle. Follow the
instructions provided by the manu-
facturer when installing the child
seat. Note these general steps when
installing the seat to your vehicle:
Properly secure the child
restraint to the vehicle. All child
restraints must be secured to the
vehicle with the lap part of a
lap/shoulder belt or with the
LATCH system.
Make sure the child restraint is
firmly secured. After installing a
child restraint to the vehicle, push
and pull the seat forward and from
side-to-side to verify that it is
securely attached to the seat. A
child restraint secured with a seat
belt should be installed as firmly as
possible. However, some side-to-
side movement can be expected.
Secure the child in the child
restraint. Make sure the child is
properly strapped in the child
restraint according to the manufac-
turer instructions.
Lower Anchors and Tether for
Children (LATCH) System
The LATCH system holds a child
restraint during driving and in an
accident. This system is designed to
make installation of the child restraint
easier and reduce the possibility of
improperly installing your child
restraint. The LATCH system uses
anchors in the vehicle and attach-
ments on the child restraint. The
LATCH system eliminates the need
to use seat belts to secure the child
restraint to the rear seats.
Lower anchors are metal bars built
into the vehicle. There are two lower
anchors for each LATCH seating
position that will accommodate a
child restraint with lower attach-
ments.
To use the LATCH system in your
vehicle, you must have a child
restraint with LATCH attachments.
The child seat manufacturer will pro-
vide you with instructions on how to
use the child seat with its attach-
ments for the LATCH lower anchors.
JFa PE USA 3.QXP 5/17/2019 4:50 PM Page 38
Page 59 of 591

341
Safety features of your vehicle
✽ ✽NOTICE
The recommended maximum
weight for the LATCH system is 65
lbs. (30 kg). When selecting a proper
child restraint, consider that the
maximum total weight of the child
plus the child restraint should be
less than 65 lbs (30 kg).
As a guide, the MAX child restraint
weight should be determined by the
following calculation:
Child Restraint Weight =
65 - (child's total weight in lbs.)
Securing a child restraint seat
with "Tether Anchor" system
First secure the child restraint with
the LATCH lower anchors or the seat
belt. If the child restraint manufactur-
er recommends that the top tether
strap be attached, attach and tighten
the top tether strap to the top tether
strap anchor.
Child restraint hook holders are
located on the shelf behind the rear
seats.
OJFA035095
WARNING
Take the following precautions
when installing the tether strap:
Read and follow all installation instructions provided with
your child restraint system.
NEVER attach more than one child restraint to a single teth-
er anchor. This could cause
the anchor or attachment to
come loose or break.
Do not attach the tether strap to anything other than the cor-
rect tether anchor. It may not
work properly if attached to
something else.
Do not use the tether anchors for adult seat belts or harness-
es, or for attaching other items
or equipment to the vehicle.
Always fasten the seatbelts behind the child restraint seat
when they are not used to
secure the child seat. Failure
to do so may result in child
strangulation.
JFa PE USA 3.QXP 5/17/2019 4:50 PM Page 41
Page 61 of 591

343
Safety features of your vehicle
To install a child restraint system on
the rear seats, do the following:
1.Place the child restraint system ona rear seat and route the lap/ shoul-
der belt around or through the child
restraint, following the restraint
manufacturer’s instructions.
Be sure the seat belt webbing is
not twisted.
2. Fasten the lap/shoulder belt latchinto the buckle. Listen for the dis-
tinct "click" sound.
Position the release button so that
it is easy to access in case of an
emergency. 3. Pull the shoulder portion of the
seat belt all the way out. When the
shoulder portion of the seat belt is
fully extended, it will shift the
retractor to the "Automatic
Locking" (child restraint) mode.
OEN036101OEN036102
JFa PE USA 3.QXP 5/17/2019 4:50 PM Page 43
Page 66 of 591

Safety features of your vehicle
48
3
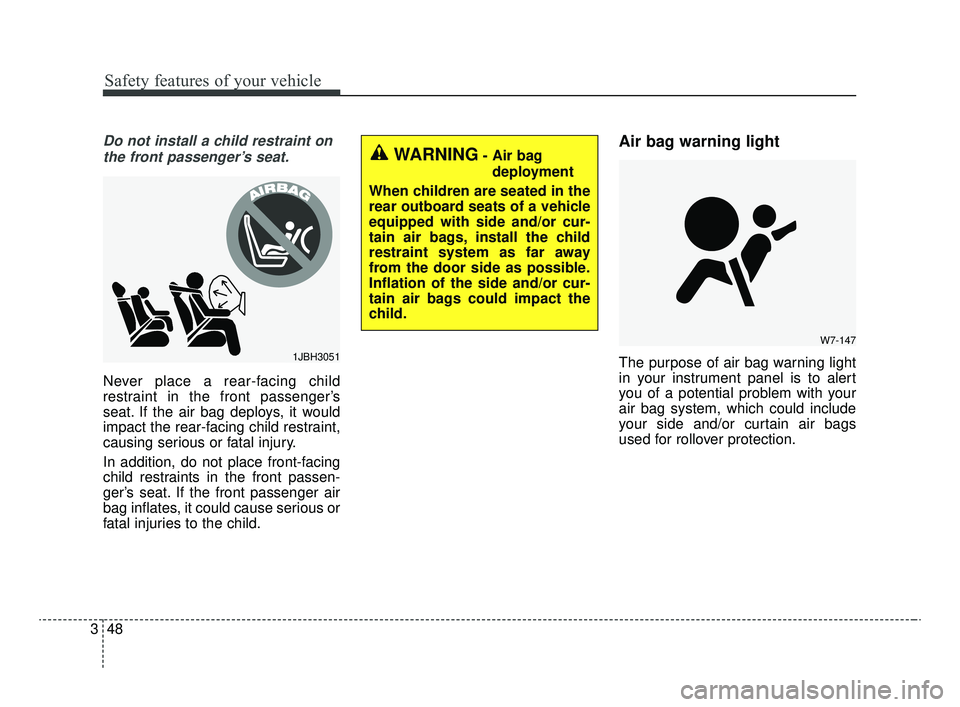
Do not install a child restraint on
the front passenger’s seat.
Never place a rear-facing child
restraint in the front passenger’s
seat. If the air bag deploys, it would
impact the rear-facing child restraint,
causing serious or fatal injury.
In addition, do not place front-facing
child restraints in the front passen-
ger’s seat. If the front passenger air
bag inflates, it could cause serious or
fatal injuries to the child.
Air bag warning light
The purpose of air bag warning light
in your instrument panel is to alert
you of a potential problem with your
air bag system, which could include
your side and/or curtain air bags
used for rollover protection.1JBH3051
W7-147
WARNING- Air bag deployment
When children are seated in the
rear outboard seats of a vehicle
equipped with side and/or cur-
tain air bags, install the child
restraint system as far away
from the door side as possible.
Inflation of the side and/or cur-
tain air bags could impact the
child.
JFa PE USA 3.QXP 5/17/2019 4:50 PM Page 48
Page 82 of 591

Safety features of your vehicle
64
3
The side air bag is supplemental to
the driver's and the passenger's
seat belt systems and is not a sub-
stitute for them. Therefore your
seat belts must be worn at all times
while the vehicle is in operation.
For best protection from the side air bag system and to avoid being
injured by the deploying side air
bag, both front seat occupants
should sit in an upright position
with the seat belt properly fas-
tened. The driver's hands should
be placed on the steering wheel at
the 9:00 and 3:00 positions. The
passenger's arms and hands
should be placed on their laps. If seat or seat cover is damaged,
have the vehicle checked and
repaired by an authorized Kia deal-
er. Inform the dealer that your vehi-
cle is equipped with side air bags
and an occupant detection system.
WARNING- Flying objects
Do not place any objects (an
umbrella, bag, etc.) between the
front door and the front seat.
Such objects may become dan-
gerous projectiles if the side
airbag inflates.
WARNING- Deployment
Do not install any accessories
including seat covers, on the
side or near the side air bag as
this may affect the deployment
of the side air bags.WARNING- Unexpected deployment
Avoid impact to the side impact
airbag sensor when the ignition
switch is ON to prevent unex-
pected deployment of the side
air bag.WARNING- No attaching objects
Do not place any objects over the air bag or between the air
bag and yourself. Also, do not
attach any objects around the
area the air bag inflates such
as the door, side door glass,
front and rear pillar.
Do not place any objects between the door and the
seat. They may become dan-
gerous projectiles if the side
air bag inflates.
Never place or insert any object into any small opening
near side airbag labels
attached to the vehicle seats.
When the air bag deploys, the
object may affect the deploy-
ment and result in unexpected
accident or bodily harm.
Do not install any accessories on the side or near the side air
bags.
JFa PE USA 3.QXP 5/17/2019 4:51 PM Page 64
Page 83 of 591

365
Safety features of your vehicle
Curtain air bag
❈The actual air bags in the vehicle may differ
from the illustration.
Curtain air bags are located along
both sides of the roof rails above the
front and rear doors.
They are designed to help protect
occupants in certain side impacts
and to help prevent them from eject-
ing out of the vehicle as a result of a
rollover, especially when the seat-
belts are also in use.
The curtain air bags are designed to deploy during certain side impact
collisions, depending on the crash
severity, angle, speed and point of
impact. However, when side deploy-
ment threshold is satisfied at front-
impact, side air bags may deploy.
The curtain air bags may deploy on the side of the impact or on both
sides.
Also, the curtain air bags on both sides of the vehicle will deploy in
certain rollover situations.
The curtain air bags are not designed to deploy in all side
impact or rollover situations. Do not allow the passengers to lean
their heads or bodies against the
doors, put their arms on the doors,
stretch their arms out of the window
or place objects between the doors
and passengers when they are seat-
ed on seats equipped with side
impact and/or curtain air bags.
✽ ✽
NOTICE
Never try to open or repair any com-
ponents of the side and curtain air
bag system. This should only be
done by an authorized Kia dealer.OJF035042
OJF035043
WARNING- No attaching
objects
Do not place any objects over the air bag. Also, do not attach
any objects around the area
the air bag inflates such as the
door, side door glass, front
and rear pillar, roof side rail.
Do not hang hard or breakable objects on the coat hook.
Do not hang heavy items on the coat hooks for safety rea-
sons.
JFa PE USA 3.QXP 5/17/2019 4:51 PM Page 65
Page 89 of 591

371
Safety features of your vehicle
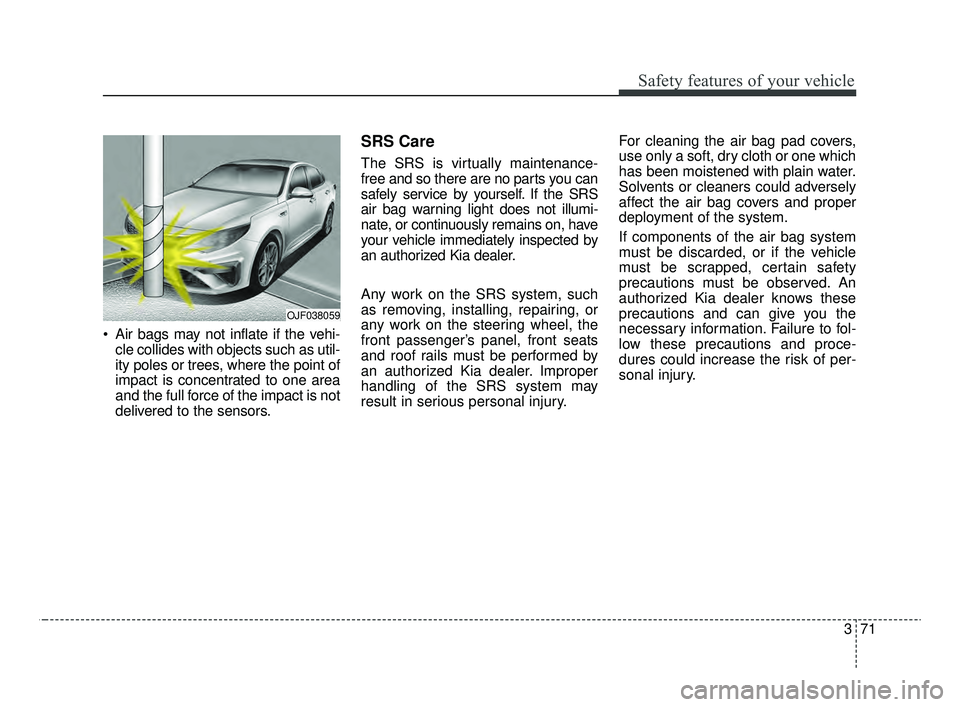
Air bags may not inflate if the vehi-cle collides with objects such as util-
ity poles or trees, where the point of
impact is concentrated to one area
and the full force of the impact is not
delivered to the sensors.
SRS Care
The SRS is virtually maintenance-
free and so there are no parts you can
safely service by yourself. If the SRS
air bag warning light does not illumi-
nate, or continuously remains on, have
your vehicle immediately inspected by
an authorized Kia dealer.
Any work on the SRS system, such
as removing, installing, repairing, or
any work on the steering wheel, the
front passenger’s panel, front seats
and roof rails must be performed by
an authorized Kia dealer. Improper
handling of the SRS system may
result in serious personal injury. For cleaning the air bag pad covers,
use only a soft, dry cloth or one which
has been moistened with plain water.
Solvents or cleaners could adversely
affect the air bag covers and proper
deployment of the system.
If components of the air bag system
must be discarded, or if the vehicle
must be scrapped, certain safety
precautions must be observed. An
authorized Kia dealer knows these
precautions and can give you the
necessary information. Failure to fol-
low these precautions and proce-
dures could increase the risk of per-
sonal injury.
OJF038059
JFa PE USA 3.QXP 5/17/2019 4:52 PM Page 71
Page 241 of 591

4151
Features of your vehicle
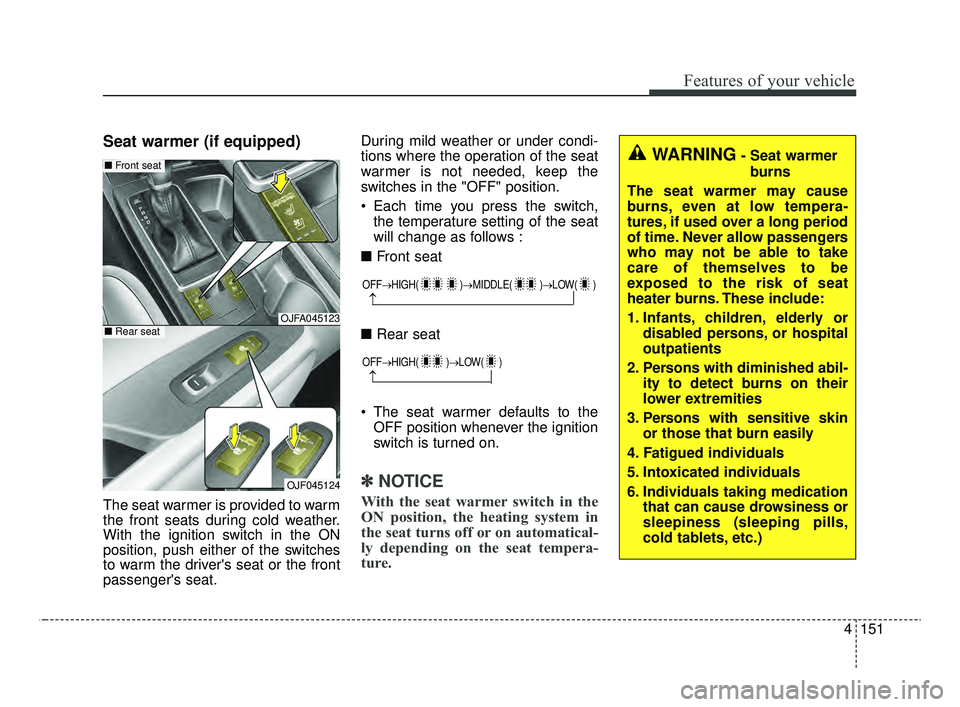
Seat warmer (if equipped)
The seat warmer is provided to warm
the front seats during cold weather.
With the ignition switch in the ON
position, push either of the switches
to warm the driver's seat or the front
passenger's seat.During mild weather or under condi-
tions where the operation of the seat
warmer is not needed, keep the
switches in the "OFF" position.
Each time you press the switch,
the temperature setting of the seat
will change as follows :
■ Front seat
■ Rear seat
The seat warmer defaults to the OFF position whenever the ignition
switch is turned on.
✽ ✽ NOTICE
With the seat warmer switch in the
ON position, the heating system in
the seat turns off or on automatical-
ly depending on the seat tempera-
ture.
OJFA045123
OJF045124
■ Front seat
■Rear seat
OFF→ HIGH( )→ MIDDLE( )→LOW( )
→
OFF→HIGH( )→ LOW( )
→
WARNING- Seat warmer
burns
The seat warmer may cause
burns, even at low tempera-
tures, if used over a long period
of time. Never allow passengers
who may not be able to take
care of themselves to be
exposed to the risk of seat
heater burns. These include:
1. Infants, children, elderly or disabled persons, or hospital
outpatients
2. Persons with diminished abil- ity to detect burns on their
lower extremities
3. Persons with sensitive skin or those that burn easily
4. Fatigued individuals
5. Intoxicated individuals
6. Individuals taking medication that can cause drowsiness or
sleepiness (sleeping pills,
cold tablets, etc.)
JFa PE USA 4.qxp 5/15/2019 3:24 PM Page 151
Page 242 of 591

Features of your vehicle
152
4
Air ventilation seat (if equipped)
The temperature setting of the seat
changes according to the switch
position.
If you want to ventilate your seat
cushion, press the switch (blue
color).
Each time you press the button, the airflow will change as follows: The seat warmer (with air ventila-
tion) defaults to the OFF position
whenever the ignition switch is
turned on.
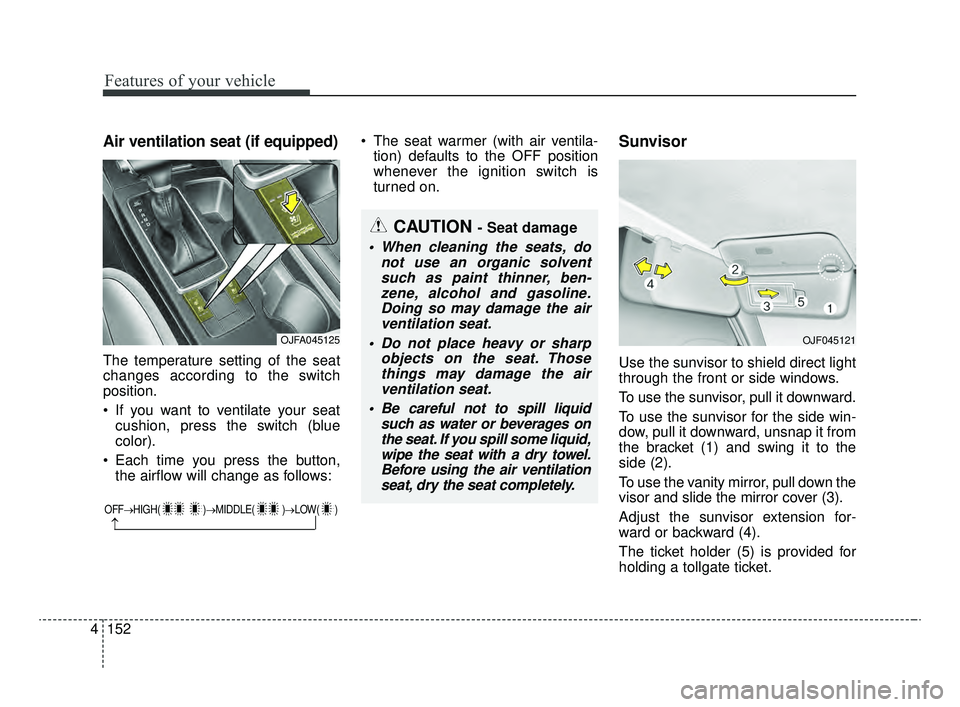
Sunvisor
Use the sunvisor to shield direct light
through the front or side windows.
To use the sunvisor, pull it downward.
To use the sunvisor for the side win-
dow, pull it downward, unsnap it from
the bracket (1) and swing it to the
side (2).
To use the vanity mirror, pull down the
visor and slide the mirror cover (3).
Adjust the sunvisor extension for-
ward or backward (4).
The ticket holder (5) is provided for
holding a tollgate ticket.
OFF→ HIGH( )→ MIDDLE( )→LOW( )
→
CAUTION - Seat damage
When cleaning the seats, do
not use an organic solventsuch as paint thinner, ben-zene, alcohol and gasoline.Doing so may damage the airventilation seat.
Do not place heavy or sharp objects on the seat. Thosethings may damage the airventilation seat.
Be careful not to spill liquid such as water or beverages onthe seat. If you spill some liquid,wipe the seat with a dry towel.Before using the air ventilationseat, dry the seat completely.
OJFA045125OJF045121
JFa PE USA 4.qxp 5/15/2019 3:24 PM Page 152