tires KIA OPTIMA 2020 Features and Functions Guide
[x] Cancel search | Manufacturer: KIA, Model Year: 2020, Model line: OPTIMA, Model: KIA OPTIMA 2020Pages: 591, PDF Size: 14.1 MB
Page 435 of 591

What to do in an emergency
16
6
Changing tires (if equipped)
1. Park on a level surface and apply
the parking brake firmly.
2. Place the transmission shift lever in P (Park) with automatic trans-
mission / dual clutch transmission.
3. Activate the hazard warning flash- ers. 4. Remove the wheel lug nut wrench,
jack and spare tire from the vehi-
cle.
5. Block both the front and rear of the wheel that is diagonally opposite
from the jack position.
1JBA6504
OED066033
WARNING- Jack location
To reduce the possibility of
injury, be sure to use only the
jack provided with the vehicle in
the correct jack position; never
use any other part of the vehicle
for jack support.
WARNING- Changing a tire
• To prevent vehicle movement while changing a tire, always
set the parking brake fully,
and always block the wheel
diagonally opposite the wheel
being changed.
We recommend that the wheels of the vehicle be
blocked, and that no person
remain in a vehicle that is
being jacked.
JFa PE USA 6.qxp 5/15/2019 3:18 PM Page 16
Page 439 of 591

What to do in an emergency
20
6
To prevent the jack, wheel lug nut
wrench and spare tire from rattling
while the vehicle is in motion, store
them properly.
Check the inflation pressures as
soon as possible after installing the
spare tire. Adjust it to the specified
pressure, if necessary. Refer to
“Tires and wheels” in section 8.
Important - use of compact spare
tire
Your vehicle is equipped with a com-
pact spare tire. This compact spare
tire takes up less space than a regu-
lar-size tire. This tire is smaller than a
conventional tire and is designed for
temporary use only.
You should drive carefully when the compact spare is in use. The
compact spare should be replaced
by the proper conventional tire and
rim at the first opportunity.
The operation of this vehicle is not recommended with more than one
compact spare tire in use at the
same time. The compact spare should be inflat-
ed to 60 psi (420 kPa).
✽ ✽
NOTICE
Check the inflation pressure after
installing the spare tire. Adjust it to
the specified pressure, as necessary.
WARNING- Spare tire
The compact spare tire is for
emergency use only. Do not
operate your vehicle on this
compact spare at speeds over
50 mph (80 km/h). The original
tire should be repaired or
replaced as soon as possible to
avoid failure of the spare possi-
bly leading to personal injury or
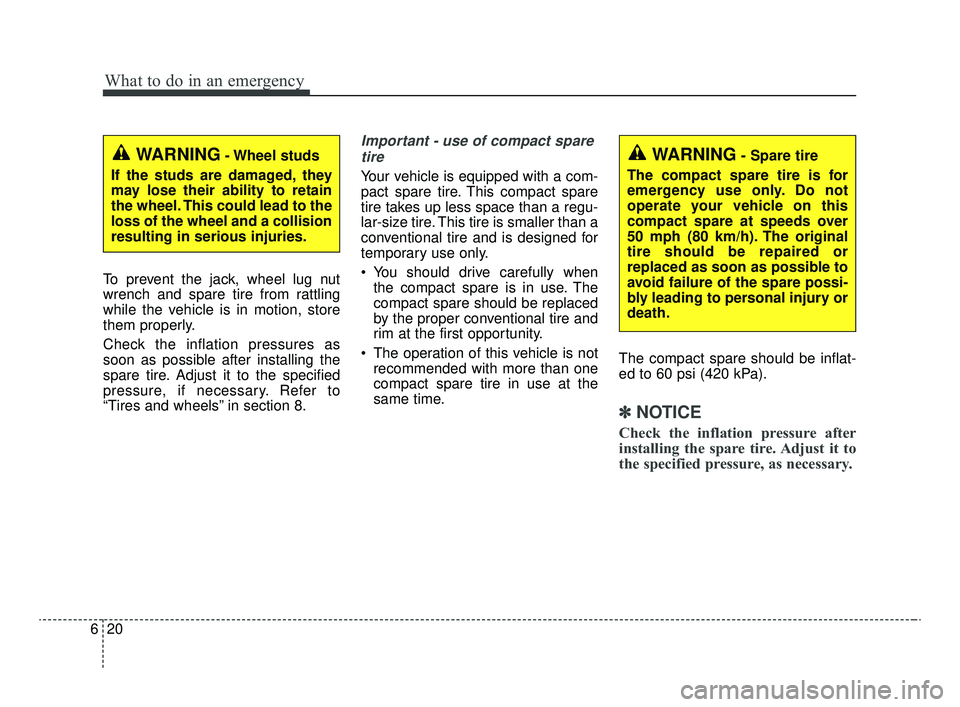
death.WARNING- Wheel studs
If the studs are damaged, they
may lose their ability to retain
the wheel. This could lead to the
loss of the wheel and a collision
resulting in serious injuries.
JFa PE USA 6.qxp 5/15/2019 3:18 PM Page 20
Page 440 of 591

621
What to do in an emergency
When using a compact spare tire,
observe the following precautions:
Under no circumstances shouldyou exceed 50 mph (80 km/h); a
higher speed could damage the
tire.
Ensure that you drive slowly enough for the road conditions to
avoid all hazards. Any road hazard,
such as a pothole or debris, could
seriously damage the compact
spare.
Any continuous road use of this tire could result in tire failure, loss of
vehicle control, and possible per-
sonal injury.
Do not exceed the vehicle’s maxi- mum load rating or the load-carry-
ing capacity shown on the sidewall
of the compact spare tire.
Avoid driving over obstacles. The compact spare tire diameter is
smaller than the diameter of a con-
ventional tire and reduces the
ground clearance approximately 1
inch (25 mm), which could result in
damage to the vehicle. Do not take this vehicle through an
automatic vehicle wash while the
compact spare tire is installed.
Do not use tire chains on the com- pact spare tire. Because of the
smaller size, a tire chain will not fit
properly. This could damage the
vehicle and result in loss of the
chain.
Do not use the compact spare tire on any other vehicle because this
tire has been designed especially
for your vehicle.
The compact spare tire’s tread life is shorter than a regular tire.
Inspect your compact spare tire
regularly and replace worn com-
pact spare tires with the same size
and design, mounted on the same
wheel.
The compact spare tire should not be used on any other wheels, nor
should standard tires, snow tires,
wheel covers or trim rings be used
with the compact spare wheel. If
such use is attempted, damage to
these items or other vehicle com-
ponents may occur. Do not use more than one compact
spare tire at a time.
Do not tow a trailer while the com- pact spare tire is installed.
JFa PE USA 6.qxp 5/15/2019 3:18 PM Page 21
Page 442 of 591

623
What to do in an emergency
IF YOU HAVE A FLAT TIRE (WITH TIRE MOBILITY KIT, IF EQUIPPED)
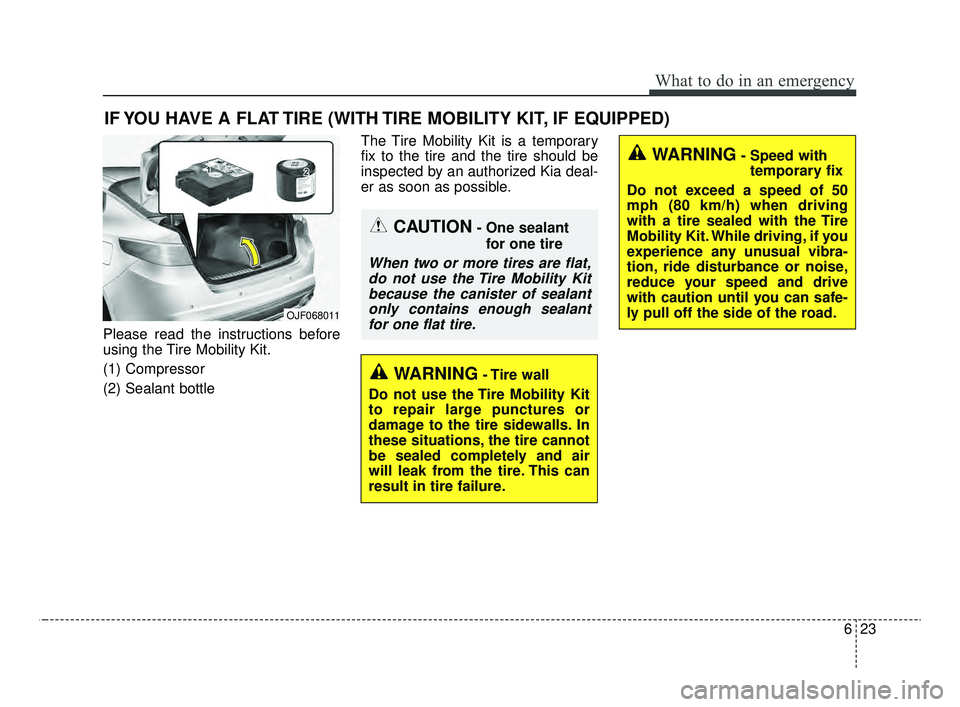
Please read the instructions before
using the Tire Mobility Kit.
(1) Compressor
(2) Sealant bottleThe Tire Mobility Kit is a temporary
fix to the tire and the tire should be
inspected by an authorized Kia deal-
er as soon as possible.
OJF068011
WARNING- Tire wall
Do not use the Tire Mobility Kit
to repair large punctures or
damage to the tire sidewalls. In
these situations, the tire cannot
be sealed completely and air
will leak from the tire. This can
result in tire failure.
WARNING- Speed with temporary fix
Do not exceed a speed of 50
mph (80 km/h) when driving
with a tire sealed with the Tire
Mobility Kit. While driving, if you
experience any unusual vibra-
tion, ride disturbance or noise,
reduce your speed and drive
with caution until you can safe-
ly pull off the side of the road.
CAUTION- One sealant for one tire
When two or more tires are flat,do not use the Tire Mobility Kitbecause the canister of sealantonly contains enough sealantfor one flat tire.
JFa PE USA 6.qxp 5/15/2019 3:18 PM Page 23
Page 444 of 591

625
What to do in an emergency
It is possible that some tires, espe-
cially with larger punctures or dam-
age to the sidewall, cannot be sealed
completely.
Air pressure loss in the tire may
adversely affect tire performance.
For this reason, you should avoid
abrupt steering or other driving
maneuvers, especially if the vehicle is
heavily loaded or if a trailer is in use.
The Tire Mobility Kit is not designed
or intended as a permanent tire
repair method and is to be used for
one tire only.
This instruction shows you step by
step how to temporarily seal the
puncture.
Read the section "Notes on the safe
use of the Tire Mobility Kit".Notes on the safe use of the
Tire Mobility Kit
Park your car at the side of theroad so that you can work with the
Tire Mobility Kit away from moving
traffic.
To be sure your vehicle will not move, even when you're on fairly
level ground, always set your park-
ing brake.
Only use the Tire Mobility Kit for sealing/inflation passenger car
tires. Only punctured areas located
within the tread region of the tire
can be sealed using the Tire
Mobility Kit.
Do not use on motorcycles, bicy- cles or any other type of tires.
When the tire and wheel are dam- aged, do not use Tire Mobility Kit
for your safety. Use of the Tire Mobility Kit may not
be effective for tire damage larger
than approximately 0.24 in (6 mm).
Please contact the nearest Kia
dealership if the tire cannot be
made roadworthy with the Tire
Mobility Kit.
Do not remove any foreign objects such as nails or screws that have
penetrated the tire.
Provided the car is outdoors, leave the engine running. Otherwise
operating the compressor may
eventually drain the car battery.
Never leave the Tire Mobility Kit unattended while it is being used.
Do not leave the compressor run- ning for more than 10 min. at a time
or it may overheat.
Do not use the Tire Mobility Kit if the ambient temperature is below -22°F
(-30°C).
JFa PE USA 6.qxp 5/15/2019 3:18 PM Page 25
Page 449 of 591

What to do in an emergency
30
6
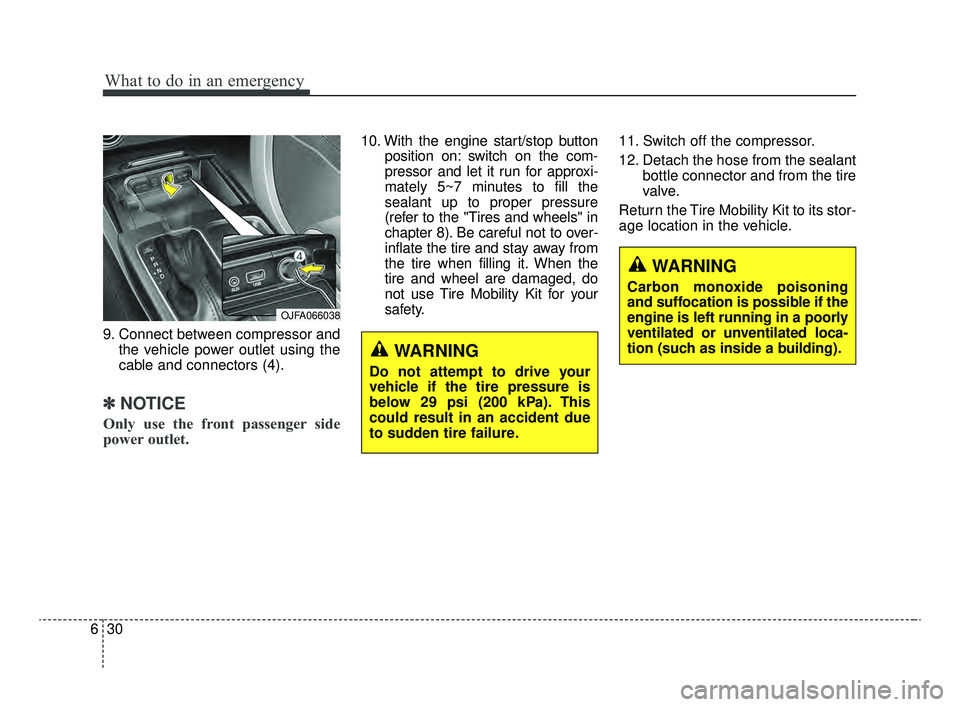
9. Connect between compressor and
the vehicle power outlet using the
cable and connectors (4).
✽ ✽NOTICE
Only use the front passenger side
power outlet.
10. With the engine start/stop button
position on: switch on the com-
pressor and let it run for approxi-
mately 5~7 minutes to fill the
sealant up to proper pressure
(refer to the "Tires and wheels" in
chapter 8). Be careful not to over-
inflate the tire and stay away from
the tire when filling it. When the
tire and wheel are damaged, do
not use Tire Mobility Kit for your
safety. 11. Switch off the compressor.
12. Detach the hose from the sealant
bottle connector and from the tire
valve.
Return the Tire Mobility Kit to its stor-
age location in the vehicle.
OJFA066038
WARNING
Do not attempt to drive your
vehicle if the tire pressure is
below 29 psi (200 kPa). This
could result in an accident due
to sudden tire failure.
WARNING
Carbon monoxide poisoning
and suffocation is possible if the
engine is left running in a poorly
ventilated or unventilated loca-
tion (such as inside a building).
JFa PE USA 6.qxp 5/15/2019 3:18 PM Page 30
Page 455 of 591

Climate control air filter . . . . . . . . . . . . . . . . . . . . 7-36
• Filter inspection . . . . . . . . . . . . . . . . . . . . . . . . . . . . . . 7-36
Wiper blades . . . . . . . . . . . . . . . . . . . . . . . . . . . . . . 7-38
• Blade inspection . . . . . . . . . . . . . . . . . . . . . . . . . . . . . . 7-38
• Blade replacement . . . . . . . . . . . . . . . . . . . . . . . . . . . . 7-38
Battery . . . . . . . . . . . . . . . . . . . . . . . . . . . . . . . . . . . 7-\
42
• For best battery service . . . . . . . . . . . . . . . . . . . . . . . 7-42
• Recharging the battery . . . . . . . . . . . . . . . . . . . . . . . . 7-43
• Reset items . . . . . . . . . . . . . . . . . . . . . . . . . . . . . . . . . . 7-44\
Tires and wheels . . . . . . . . . . . . . . . . . . . . . . . . . . . 7-45
• Tire care . . . . . . . . . . . . . . . . . . . . . . . . . . . . . . . . . . . . \
7-45
• Recommended cold tire inflation pressures . . . . . . . 7-45
• Tire pressure . . . . . . . . . . . . . . . . . . . . . . . . . . . . . . . . 7-46
• Checking tire inflation pressure. . . . . . . . . . . . . . . . . 7-46
• Tire rotation . . . . . . . . . . . . . . . . . . . . . . . . . . . . . . . . . 7-47
• Wheel alignment and tire balance . . . . . . . . . . . . . . . 7-48
• Tire replacement . . . . . . . . . . . . . . . . . . . . . . . . . . . . . 7-49
• Wheel replacement . . . . . . . . . . . . . . . . . . . . . . . . . . . 7-50
• Tire traction . . . . . . . . . . . . . . . . . . . . . . . . . . . . . . . . . 7-50
• Tire maintenance . . . . . . . . . . . . . . . . . . . . . . . . . . . . . 7-50
• Tire sidewall labeling . . . . . . . . . . . . . . . . . . . . . . . . . 7-50
• All season tires . . . . . . . . . . . . . . . . . . . . . . . . . . . . . . . 7-57
• Summer tires . . . . . . . . . . . . . . . . . . . . . . . . . . . . . . . . 7-57
• Snow tires . . . . . . . . . . . . . . . . . . . . . . . . . . . . . . . . . . . 7-\
57
• Tire chains . . . . . . . . . . . . . . . . . . . . . . . . . . . . . . . . . . 7-58\
• Radial-ply tires . . . . . . . . . . . . . . . . . . . . . . . . . . . . . . 7-58
• Low aspect ratio tire . . . . . . . . . . . . . . . . . . . . . . . . . . 7-59
Fuses . . . . . . . . . . . . . . . . . . . . . . . . . . . . . . . . . . . . \
7-60
• Inner panel fuse replacement . . . . . . . . . . . . . . . . . . . 7-62
• Engine compartment fuse replacement. . . . . . . . . . . 7-64
• Fuse/relay panel description. . . . . . . . . . . . . . . . . . . . 7-66
Light bulbs . . . . . . . . . . . . . . . . . . . . . . . . . . . . . . . 7-76
• Bulb replacement precaution . . . . . . . . . . . . . . . . . . . 7-76
• Light bulb position (Front). . . . . . . . . . . . . . . . . . . . . 7-78
• Light bulb position (Rear) . . . . . . . . . . . . . . . . . . . . . 7-79
• Light bulb position (Side) . . . . . . . . . . . . . . . . . . . . . . 7-80
• Headlamp (Low beam) bulb replacement
(Headlamp Type A) . . . . . . . . . . . . . . . . . . . . . . . . . . 7-80
• Headlamp (High beam) bulb replacement (Headlamp Type A) . . . . . . . . . . . . . . . . . . . . . . . . . . 7-81
• Front turn signal lamp bulb replacement (Headlamp Type A) . . . . . . . . . . . . . . . . . . . . . . . . . . 7-82
• Headlamp (Low/High beam) (LED type) bulb replacement (Headlamp Type B) . . . . . . . . . . 7-82
• Position lamp / Day time running lamp (LED type) replacement (Headlamp Type A, B) . . . . . . . . . . . . 7-83
• Front fog lamp bulb replacement . . . . . . . . . . . . . . . 7-83
• Side repeater lamp (LED type) bulb replacement . . 7-84
• Rear turn signal lamp bulb replacement . . . . . . . . . 7-84
• Stop and tail lamp bulb replacement . . . . . . . . . . . . 7-85
7
JFa PE USA 7.qxp 5/15/2019 3:12 PM Page 2
Page 461 of 591

Maintenance
87
OWNER MAINTENANCE
The following lists are vehicle checks
and inspections that should be per-
formed by the owner or an author-
ized Kia dealer at the frequencies
indicated to help ensure safe,
dependable operation of your vehi-
cle.
Any adverse conditions should be
brought to the attention of your deal-
er as soon as possible.
These Owner Maintenance Checks
are generally not covered by war-
ranties and you may be charged for
labor, parts and lubricants used.Owner maintenance schedule
When you stop for fuel:
Check the engine oil level.
Check the coolant level in coolantreservoir.
Check the windshield washer fluid level.
Look for low or under-inflated tires.
While operating your vehicle:
Note any changes in the sound of the exhaust or any smell of
exhaust fumes in the vehicle.
Check for vibrations in the steering wheel. Notice any increased steer-
ing effort or looseness in the steer-
ing wheel, or change in its straight-
ahead position.
Notice if your vehicle constantly turns slightly or “pulls” to one side
when traveling on smooth, level
road.
When stopping, listen and check for unusual sounds, pulling to one
side, increased brake pedal travel
or “hard-to-push” brake pedal.
If any slipping or changes in the operation of your transmission
occurs, check the transmission
fluid level.
Check the automatic transmis- sion/dual clutch transmission P
(Park) function.
Check the parking brake.
Check for fluid leaks under your vehicle (water dripping from the air
conditioning system during or after
use is normal).
WARNING- Hot coolant
Be careful when checking your
engine coolant level when the
engine is hot. Scalding hot
coolant and steam may blow
out under pressure.
JFa PE USA 7.qxp 5/15/2019 3:12 PM Page 8
Page 462 of 591

79
Maintenance
At least monthly:
Check the coolant level in theengine coolant reservoir.
Check the operation of all exterior lights, including the stoplights, turn
signals and hazard warning flash-
ers.
Check the cold inflation pressures of all tires including the spare.
At least twice a year
(i.e., every Spring and Fall) :
Check the radiator, heater and air conditioning hoses for leaks or
damage.
Check the windshield washer spray and wiper operation. Clean
the wiper blades with clean cloth
dampened with washer fluid.
Check the headlight alignment.
Check the muffler, exhaust pipes, shields and clamps.
Check the lap/shoulder belts for wear and function.
Check for worn tires and loose wheel lug nuts.
At least once a year :
Clean the body and door drainholes.
Lubricate the door hinges and check the hood hinges.
Lubricate the door and hood locks and latches.
Lubricate the door rubber weather- strips.
Check the air conditioning system.
Inspect and lubricate automatic transmission linkage and controls.
Clean the battery and terminals.
Check the brake fluid level.
JFa PE USA 7.qxp 5/15/2019 3:12 PM Page 9
Page 465 of 591

Maintenance
12
7
Number of months or driving distance, whichever comes first
Months1224364860728496108120132144156168180
Miles×1,0007.51522.530 37.5 45 52.5 60 67.5 75 82.5 90 97.5 105 112.5
Km×1,00012 24 36 48 60 72 84 96 108 120 132 144 156 168 180
Rotate tiresRotate every 7,500 miles (12,000 km)
Climate control air filterRRRRRRRRRRRRRRR
Vacuum hoseIIIIIIIIIIIIIII
Coolant (Engine)At first, replace at 120,000 miles (192,000 km) or 10 years,
after that, replace every 30,000 miles (48,000 km) or 24 months
Battery conditionIIIIIIIIIIIIIII
Brake lines, hoses and connectionsIIIIIIIIIIIIIII
Brake discs and padsIIIIIIIIIIIIIII
Steering gear rack, linkage and bootsIIIIIIIIIIIIIII
Drive shaft and boots-I-I-I-I-I-I-I-
Suspension ball joints and mounting
boltsIIIIIIIIIIIIIII
Air conditioner compressor/refrigerantIIIIIIIIIIIIIII
Exhaust systemIIIIIIIIIIIIIII
MAINTENANCE INTERVALS
MAINTENANCE
ITEM
Normal Maintenance Schedule - Non Turbo Models(CONT.)
I : Inspect and if necessary, adjust, correct, clean or replace.
R : Replace or change.
JFa PE USA 7.qxp 5/15/2019 3:12 PM Page 12