tow KIA OPTIMA 2020 Owner's Manual
[x] Cancel search | Manufacturer: KIA, Model Year: 2020, Model line: OPTIMA, Model: KIA OPTIMA 2020Pages: 589, PDF Size: 11.37 MB
Page 249 of 589
Features of your vehicle
114
4
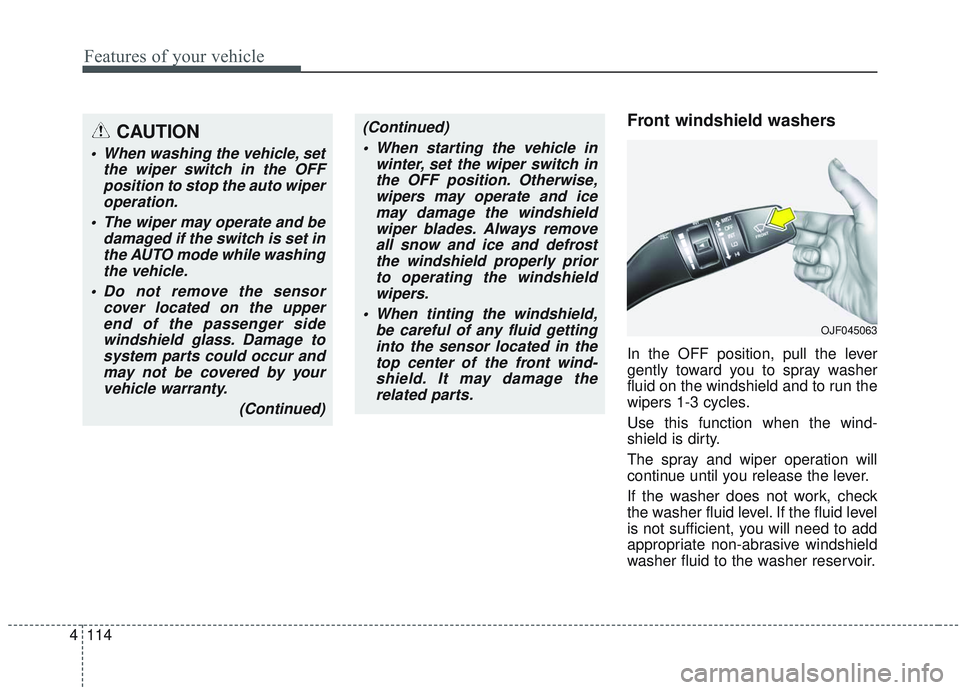
Front windshield washers
In the OFF position, pull the lever
gently toward you to spray washer
fluid on the windshield and to run the
wipers 1-3 cycles.
Use this function when the wind-
shield is dirty.
The spray and wiper operation will
continue until you release the lever.
If the washer does not work, check
the washer fluid level. If the fluid level
is not sufficient, you will need to add
appropriate non-abrasive windshield
washer fluid to the washer reservoir.
(Continued)
When starting the vehicle in winter, set the wiper switch inthe OFF position. Otherwise,wipers may operate and icemay damage the windshieldwiper blades. Always removeall snow and ice and defrostthe windshield properly priorto operating the windshieldwipers.
When tinting the windshield, be careful of any fluid gettinginto the sensor located in thetop center of the front wind-shield. It may damage therelated parts.CAUTION
When washing the vehicle, set the wiper switch in the OFFposition to stop the auto wiperoperation.
The wiper may operate and be damaged if the switch is set inthe AUTO mode while washingthe vehicle.
Do not remove the sensor cover located on the upperend of the passenger sidewindshield glass. Damage tosystem parts could occur andmay not be covered by yourvehicle warranty.
(Continued)
OJF045063
Page 260 of 589
4125
Features of your vehicle
Face-Level (B, D)
Air flow is directed toward the upper
body and face. Additionally, each
outlet can be controlled to direct the
air discharged from the outlet.
Bi-Level (B, C, D, E, F)
Air flow is directed towards the face
and the floor.
Floor-Level (A, C, D, E, F)
Most of the air flow is directed to the
floor, with a small amount of the air
being directed to the windshield and
side window defrosters. Floor/Defrost-Level
(A, C, D, E, F)
Most of the air flow is directed to the
floor and the windshield with a small
amount directed to the side window
defrosters.
✽ ✽ NOTICE - 2nd row outlet
vents (E,F)
• The air flow of the 2nd row outlet vents is controlled by the front cli-
mate control system and delivered
through the inside air duct of the
floor (E, F).
• The air flow of the 2nd row outlet vents (E, F) may be weaker than
the instrument panel vents for the
long air duct.
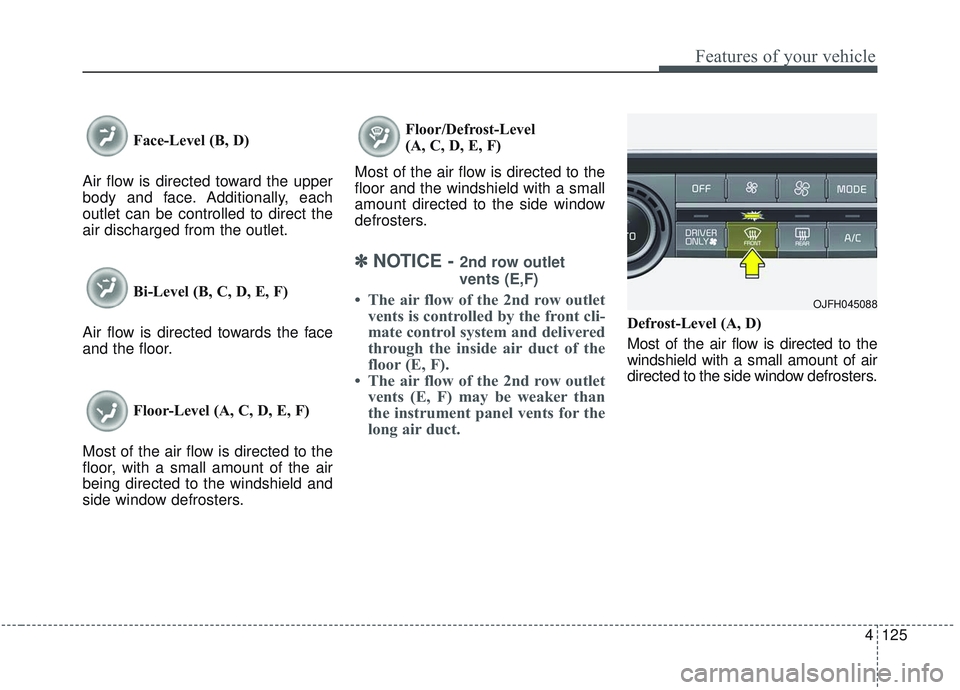
Defrost-Level (A, D)
Most of the air flow is directed to the
windshield with a small amount of air
directed to the side window defrosters.
OJFH045088
Page 273 of 589
Features of your vehicle
138
4
Automatic climate control system
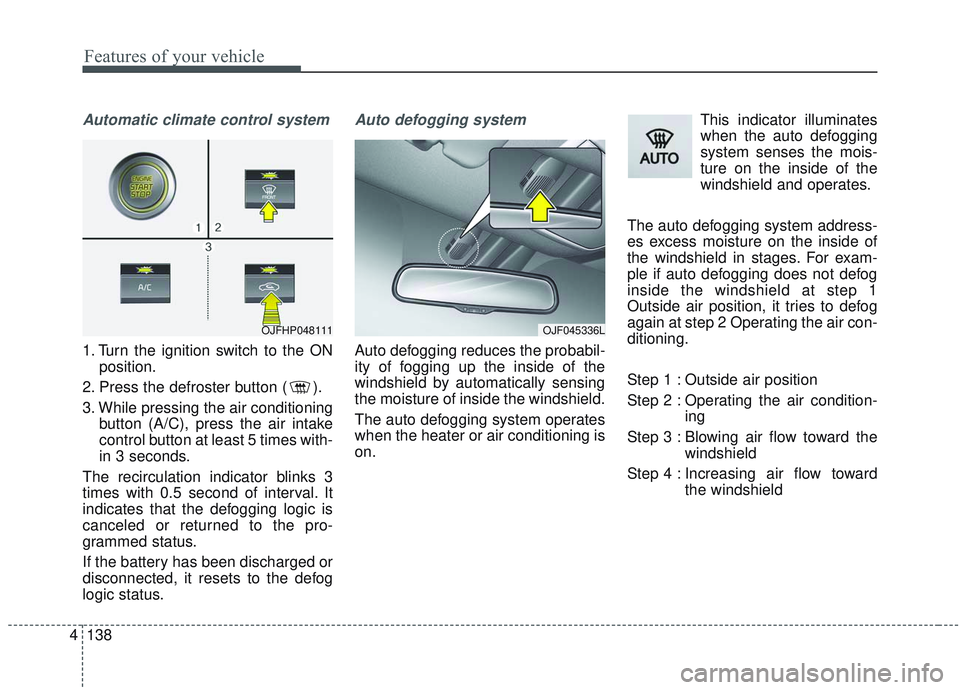
1. Turn the ignition switch to the ON
position.
2. Press the defroster button ( ).
3. While pressing the air conditioning button (A/C), press the air intake
control button at least 5 times with-
in 3 seconds.
The recirculation indicator blinks 3
times with 0.5 second of interval. It
indicates that the defogging logic is
canceled or returned to the pro-
grammed status.
If the battery has been discharged or
disconnected, it resets to the defog
logic status.
Auto defogging system
Auto defogging reduces the probabil-
ity of fogging up the inside of the
windshield by automatically sensing
the moisture of inside the windshield.
The auto defogging system operates
when the heater or air conditioning is
on. This indicator illuminates
when the auto defogging
system senses the mois-
ture on the inside of the
windshield and operates.
The auto defogging system address-
es excess moisture on the inside of
the windshield in stages. For exam-
ple if auto defogging does not defog
inside the windshield at step 1
Outside air position, it tries to defog
again at step 2 Operating the air con-
ditioning.
Step 1 : Outside air position
Step 2 : Operating the air condition- ing
Step 3 : Blowing air flow toward the windshield
Step 4 : Increasing air flow toward the windshield
OJF045336LOJFHP048111
Page 280 of 589
4145
Features of your vehicle
Air ventilation seat (if equipped)
The temperature setting of the seat
changes according to the switch
position.
If you want to ventilate your seatcushion, press the switch (blue
color).
Each time you press the button, the airflow will change as follows: The seat warmer (with air ventila-
tion) defaults to the OFF position
whenever the ignition switch is
turned on.
Sunvisor
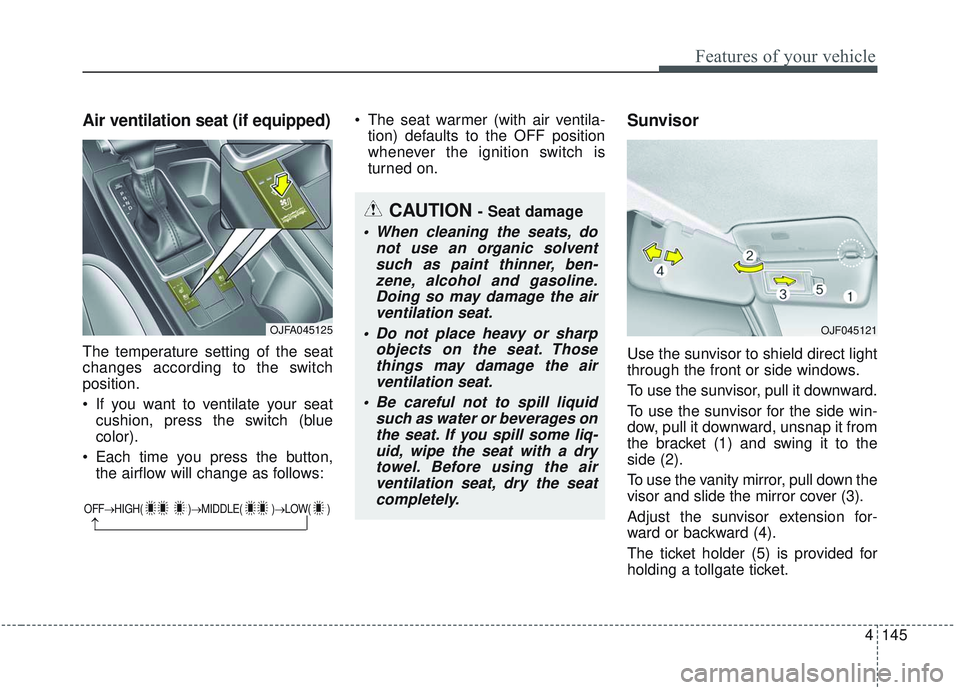
Use the sunvisor to shield direct light
through the front or side windows.
To use the sunvisor, pull it downward.
To use the sunvisor for the side win-
dow, pull it downward, unsnap it from
the bracket (1) and swing it to the
side (2).
To use the vanity mirror, pull down the
visor and slide the mirror cover (3).
Adjust the sunvisor extension for-
ward or backward (4).
The ticket holder (5) is provided for
holding a tollgate ticket.
OFF→ HIGH( )→ MIDDLE( )→LOW( )
→
CAUTION - Seat damage
When cleaning the seats, do
not use an organic solventsuch as paint thinner, ben-zene, alcohol and gasoline.Doing so may damage the airventilation seat.
Do not place heavy or sharp objects on the seat. Thosethings may damage the airventilation seat.
Be careful not to spill liquid such as water or beverages onthe seat. If you spill some liq-uid, wipe the seat with a drytowel. Before using the airventilation seat, dry the seatcompletely.
OJFA045125OJF045121
Page 288 of 589
4153
Features of your vehicle
Side curtain (if equipped)
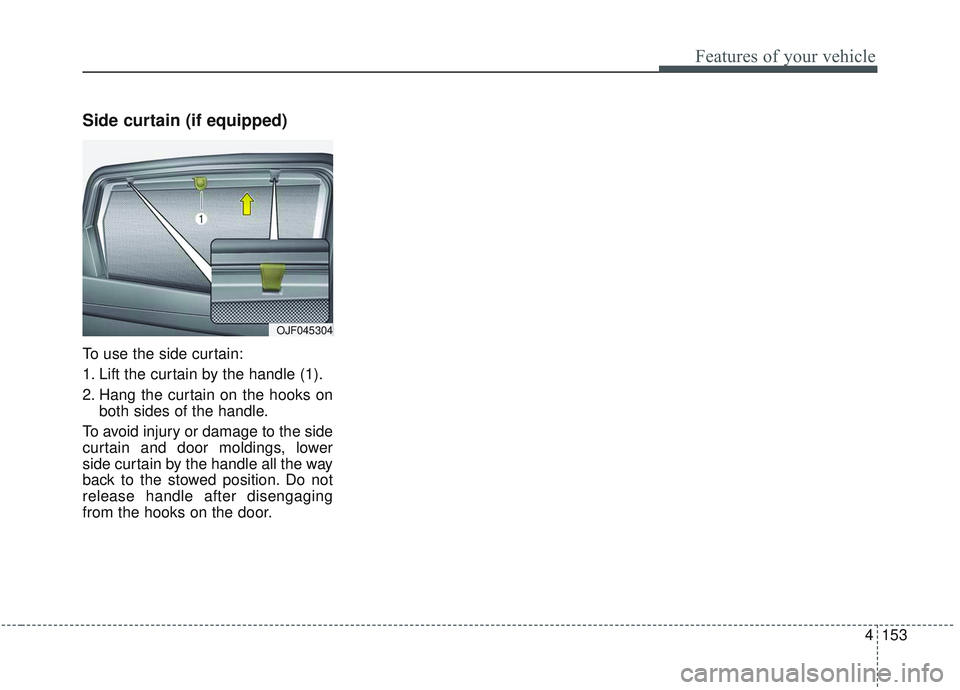
To use the side curtain:
1. Lift the curtain by the handle (1).
2. Hang the curtain on the hooks onboth sides of the handle.
To avoid injury or damage to the side
curtain and door moldings, lower
side curtain by the handle all the way
back to the stowed position. Do not
release handle after disengaging
from the hooks on the door.
OJF045304
Page 290 of 589
4155
Features of your vehicle
✽ ✽NOTICE
Tinted rear window may affect the
proper functioning of the antenna.
How vehicle radio works
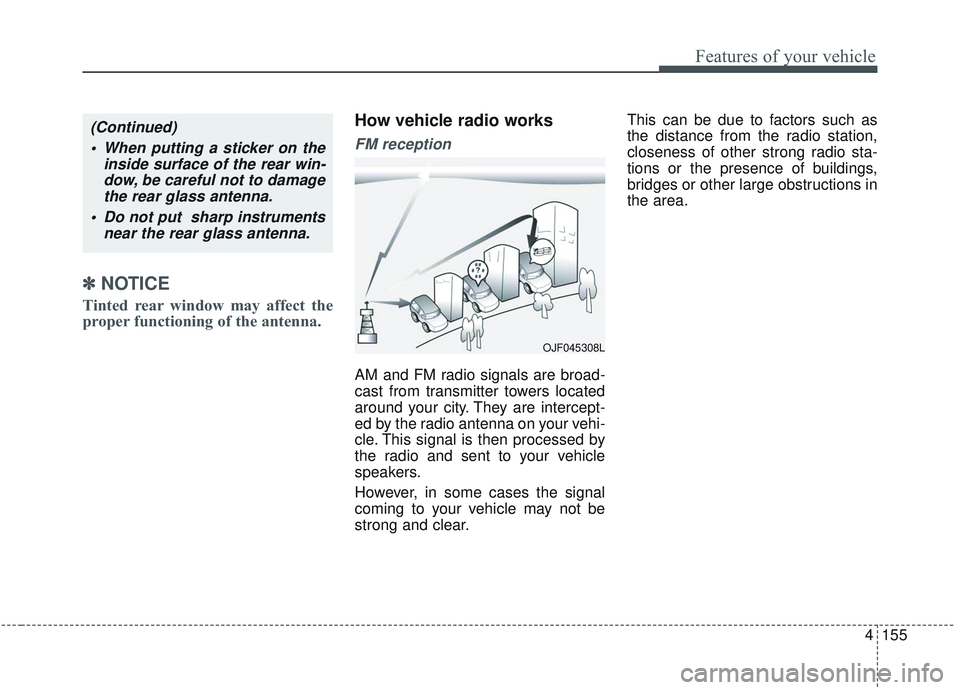
FM reception
AM and FM radio signals are broad-
cast from transmitter towers located
around your city. They are intercept-
ed by the radio antenna on your vehi-
cle. This signal is then processed by
the radio and sent to your vehicle
speakers.
However, in some cases the signal
coming to your vehicle may not be
strong and clear. This can be due to factors such as
the distance from the radio station,
closeness of other strong radio sta-
tions or the presence of buildings,
bridges or other large obstructions in
the area.
(Continued)
When putting a sticker on the inside surface of the rear win-dow, be careful not to damagethe rear glass antenna.
Do not put sharp instruments near the rear glass antenna.
OJF045308L
Page 296 of 589
. . . . . . 5-137
. . . . . . . . . . . . . . . . . . . 5-138
system . . . . . . . . . . . . . . . . . . . . . . . . . . . . . . . . . . . . \
5-138
. . . . . . . . . . . . 5-138
. . . 5-138
. . . . . . . . . . . . . . . . . . 5-138
Trailer Towing . . . . . . . . . . . . . . . . . . . . . . . . . . . 5-139
Vehicle load limit . . . . . . . . . . . . . . . . . . . . . . . . . 5-140
. . . . . . . . . . . . . 5-140
. . . . . . . . . . . . . . . . . . . . . . . . . . . 5-143
Vehicle weight . . . . . . . . . . . . . . . . . . . . . . . . . . . . 5-144
. . . . . . . . . . . . . . . . . . . . . . . . . . . . 5-144
. . . . . . . . . . . . . . . . . . . . . . . . . . 5-144
. . . . . . . . . . . . . . . . . . . . . . . . . . . . . . . 5-144
. . . . . . . . . . . . . . . . . . . . 5-144
. . . . . . . . . . . . 5-144
. . . . . . . . . . . . . . . . . . 5-144
. . . . . . . . . . 5-1445
Page 303 of 589
Driving your vehicle
10
5
✽ ✽
NOTICE
To prevent damage to the vehicle:
• If the " " indicator turns off
while you are in motion, do not
attempt to move the shift lever to
the P (Park) position.
If traffic and road conditions per-
mit, you may put the shift lever in
the N (Neutral) position while the
vehicle is still moving and press
the Engine Start/Stop button in an
attempt to restart the hybrid sys-
tem.
• Do not push or tow your vehicle to start the hybrid system.
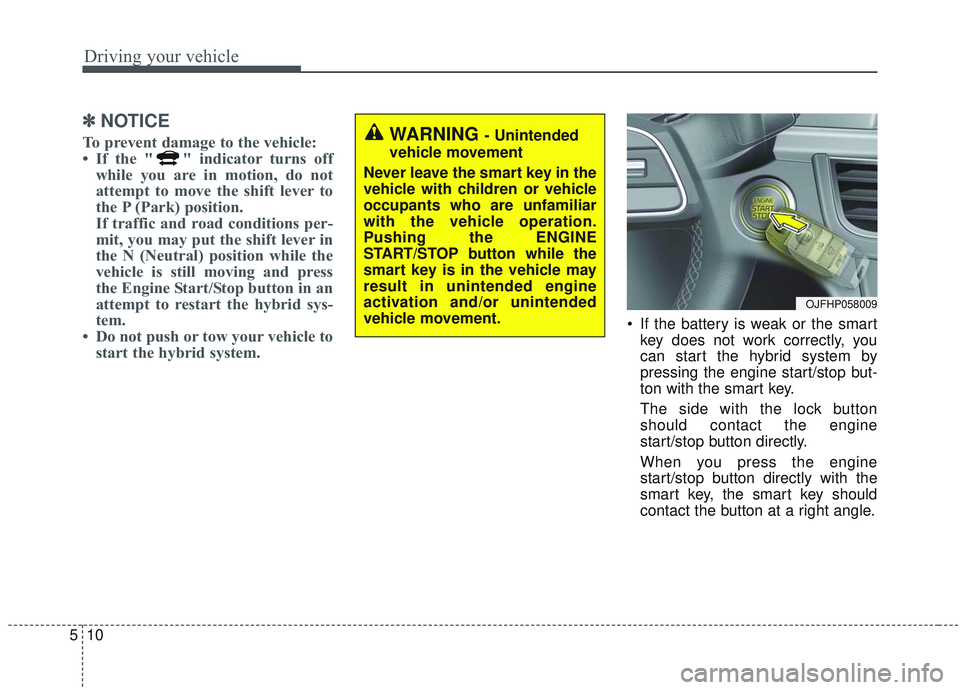
If the battery is weak or the smart
key does not work correctly, you
can start the hybrid system by
pressing the engine start/stop but-
ton with the smart key.
The side with the lock button
should contact the engine
start/stop button directly.
When you press the engine
start/stop button directly with the
smart key, the smart key should
contact the button at a right angle.
WARNING - Unintended
vehicle movement
Never leave the smart key in the
vehicle with children or vehicle
occupants who are unfamiliar
with the vehicle operation.
Pushing the ENGINE
START/STOP button while the
smart key is in the vehicle may
result in unintended engine
activation and/or unintended
vehicle movement.
OJFHP058009
Page 321 of 589
Driving your vehicle
28
5
Emergency braking
If there is a problem with the brake
pedal while driving, emergency brak-
ing is possible by pulling up and
holding the EPB switch. Braking is
possible only while you are holding
the EPB switch.
✽ ✽
NOTICE
During emergency braking by the
EPB, the parking brake warning
light will illuminate to indicate that
the system is operating.
If you notice a continuous noise or
burning smell when the EPB is used
for emergency braking, have your
vehicle checked by an authorized Kia
dealer.
When the EPB (electronic parking
brake) is not released
If the EPB does not release normal-
ly, take your vehicle to an authorized
Kia dealer by loading the vehicle on
a flatbed tow truck and have the sys-
tem checked.
WARNING
Do not operate the electronic
parking brake while the vehicle is
moving except in an emergency
situation. Applying the electronic
parking brake while the vehicle is
moving at normal speeds can
cause a sudden loss of control of
the vehicle. If you must use the
electronic parking brake to stop
the vehicle, use great caution in
applying the brake.
Page 345 of 589
Driving your vehicle
52
5
The shadow is on the road by a
median strip, trees, etc.
The vehicle drives through a toll- gate.
The rear part of the vehicle in front is not fully visible.
The vehicle in front is moving verti- cally to the driving direction
The vehicle in front is stopped ver- tically
The vehicle in front is driving towards your vehicle or reversing
You are on a roundabout and the vehicle in front circles - Driving on a curve
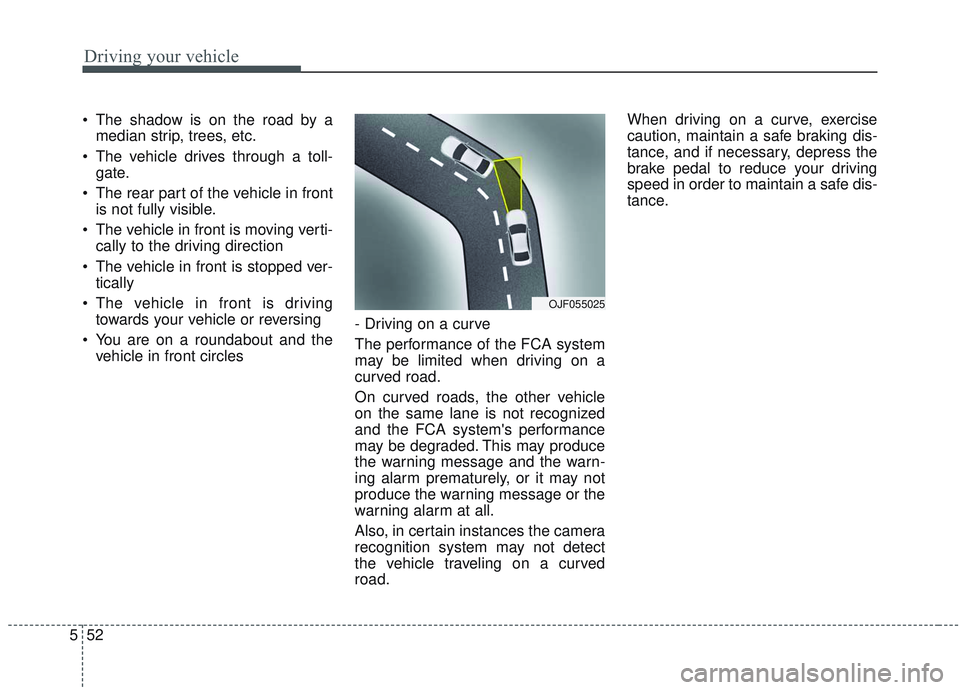
The performance of the FCA system
may be limited when driving on a
curved road.
On curved roads, the other vehicle
on the same lane is not recognized
and the FCA system's performance
may be degraded. This may produce
the warning message and the warn-
ing alarm prematurely, or it may not
produce the warning message or the
warning alarm at all.
Also, in certain instances the camera
recognition system may not detect
the vehicle traveling on a curved
road. When driving on a curve, exercise
caution, maintain a safe braking dis-
tance, and if necessary, depress the
brake pedal to reduce your driving
speed in order to maintain a safe dis-
tance.
OJF055025